Hi! I’d love for you to follow me on Pinterest Her Tool Belt and if you love instagram, you can keep up with me there too! It’s time for the monthly power tool challenge, this month’s theme is Home Improvement. Make sure to check out everyone’s cool projects at the bottom of the post!

I don’t remember much from my High School home design class, but I do remember that the fireplace is suppose to be the focal point of the living room. With that being said, it’s time to liven up this boring wall.
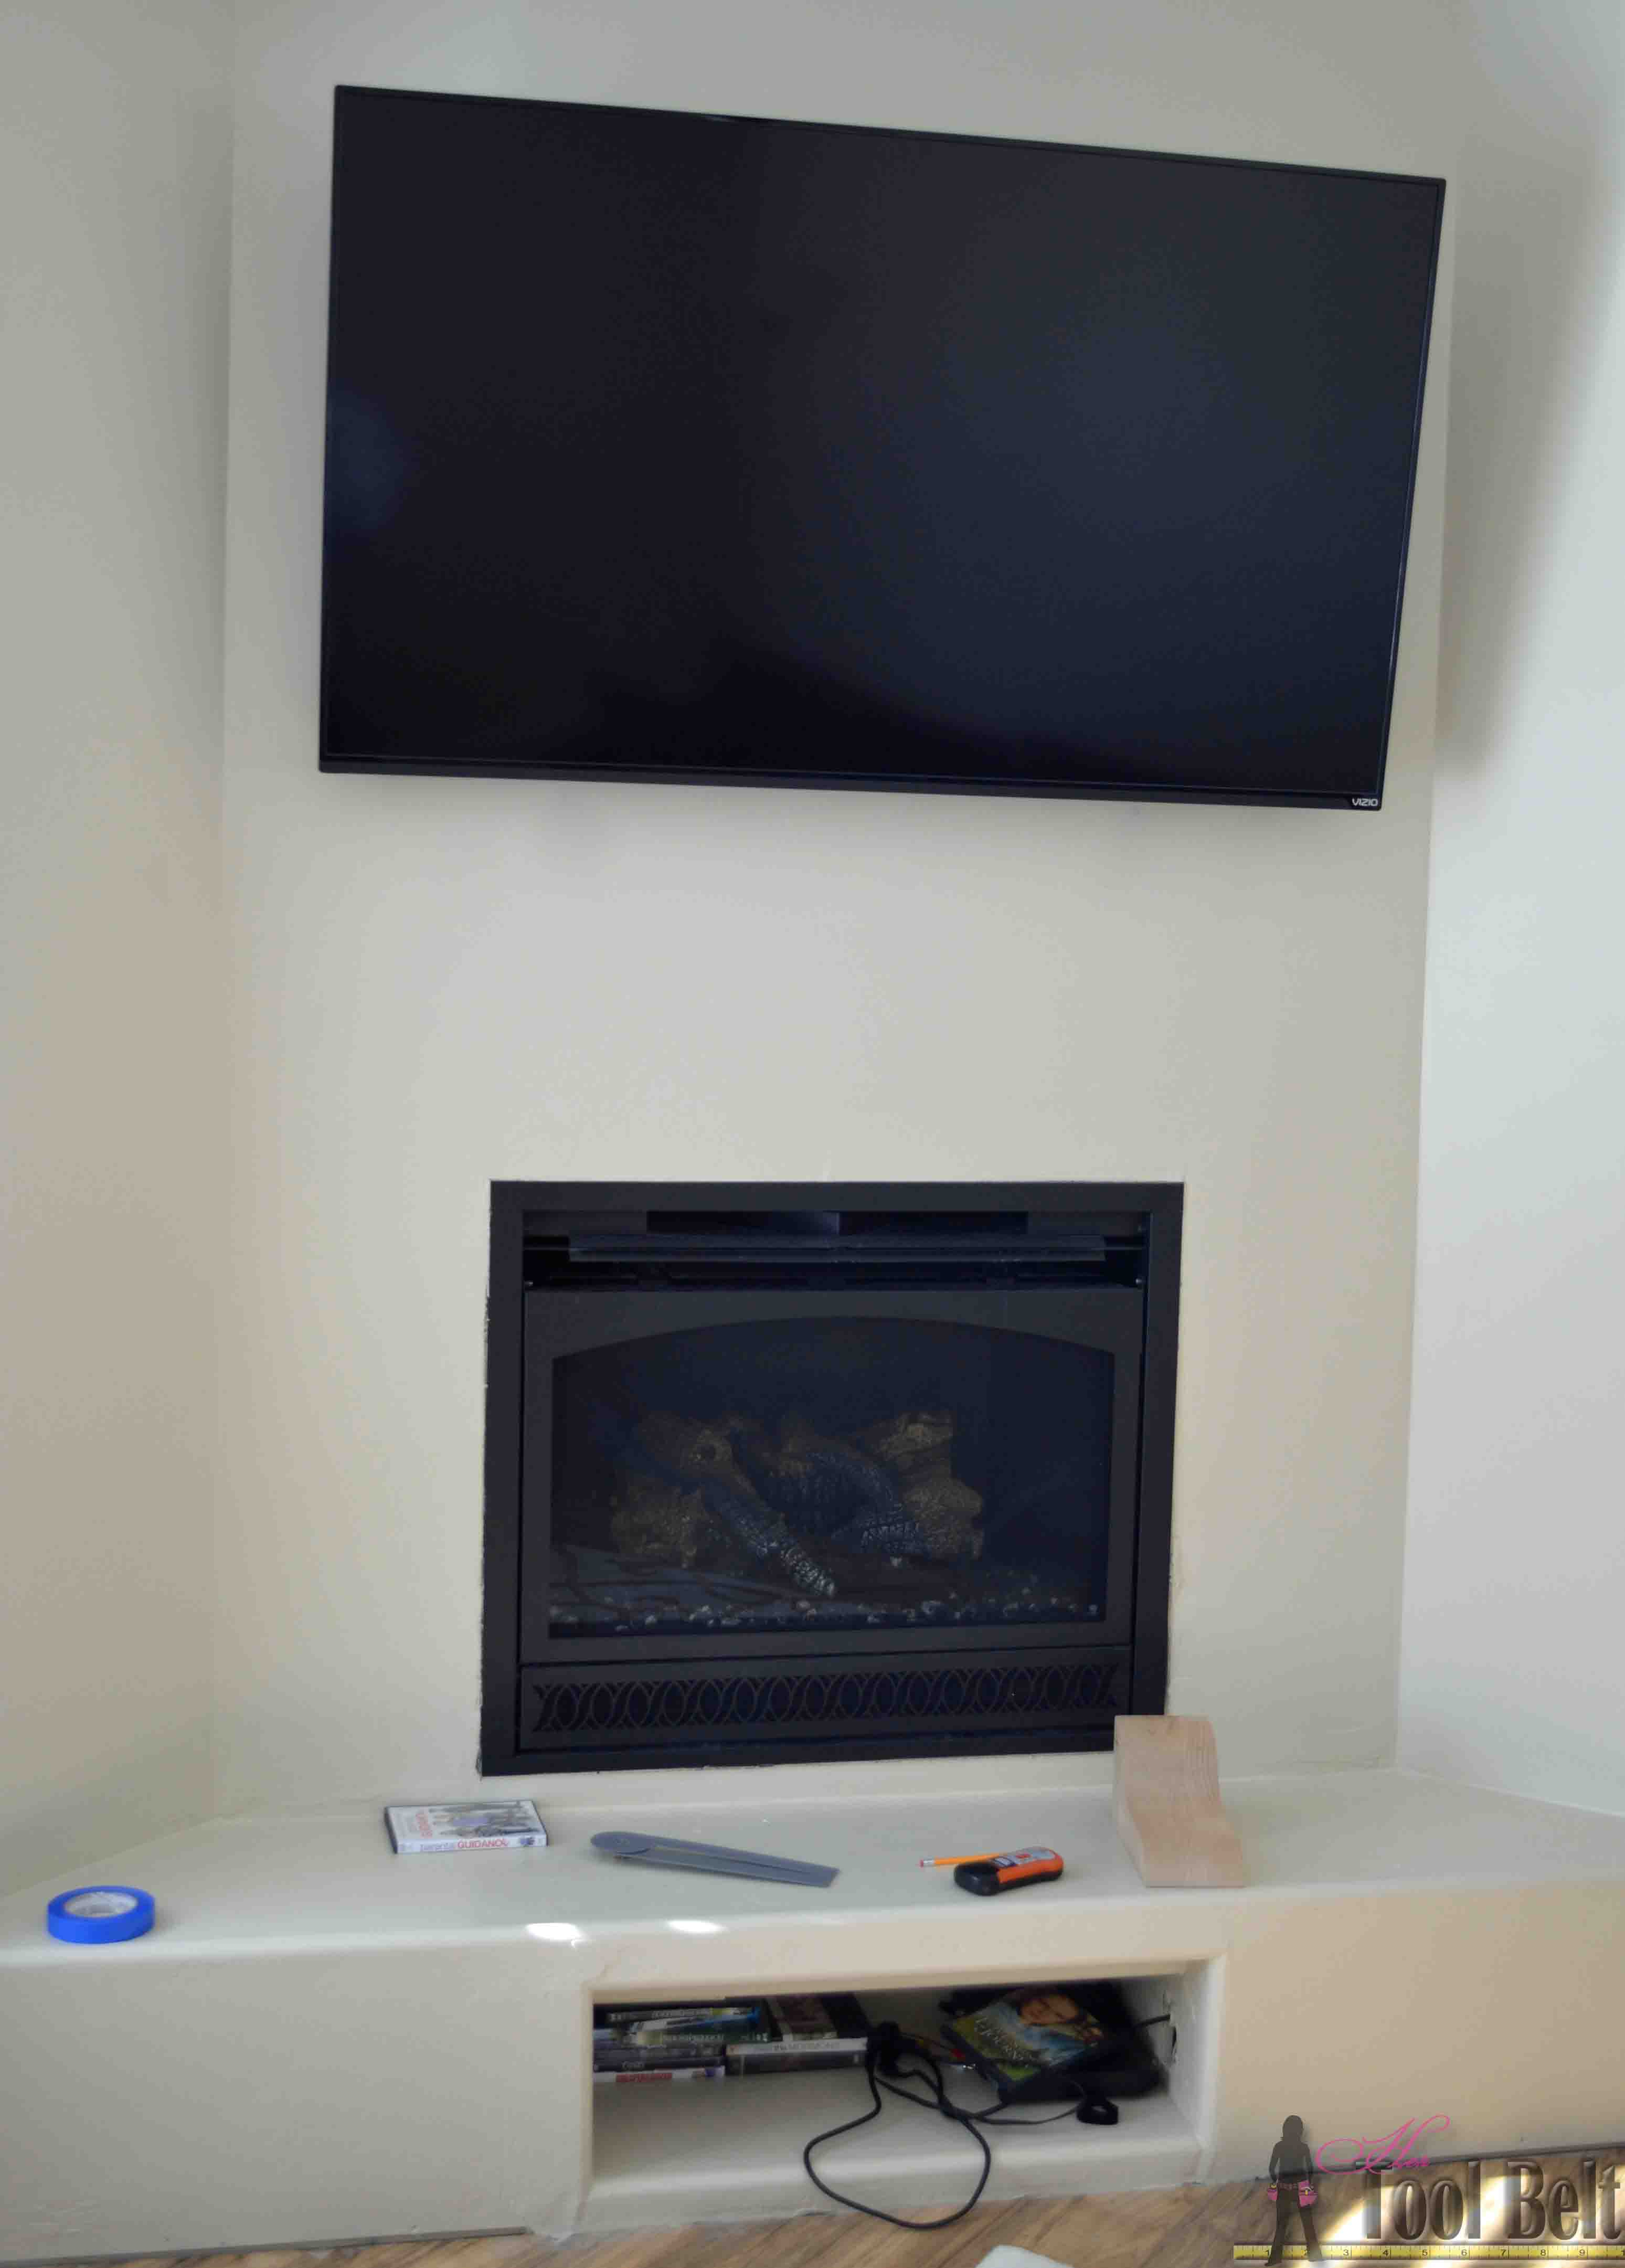
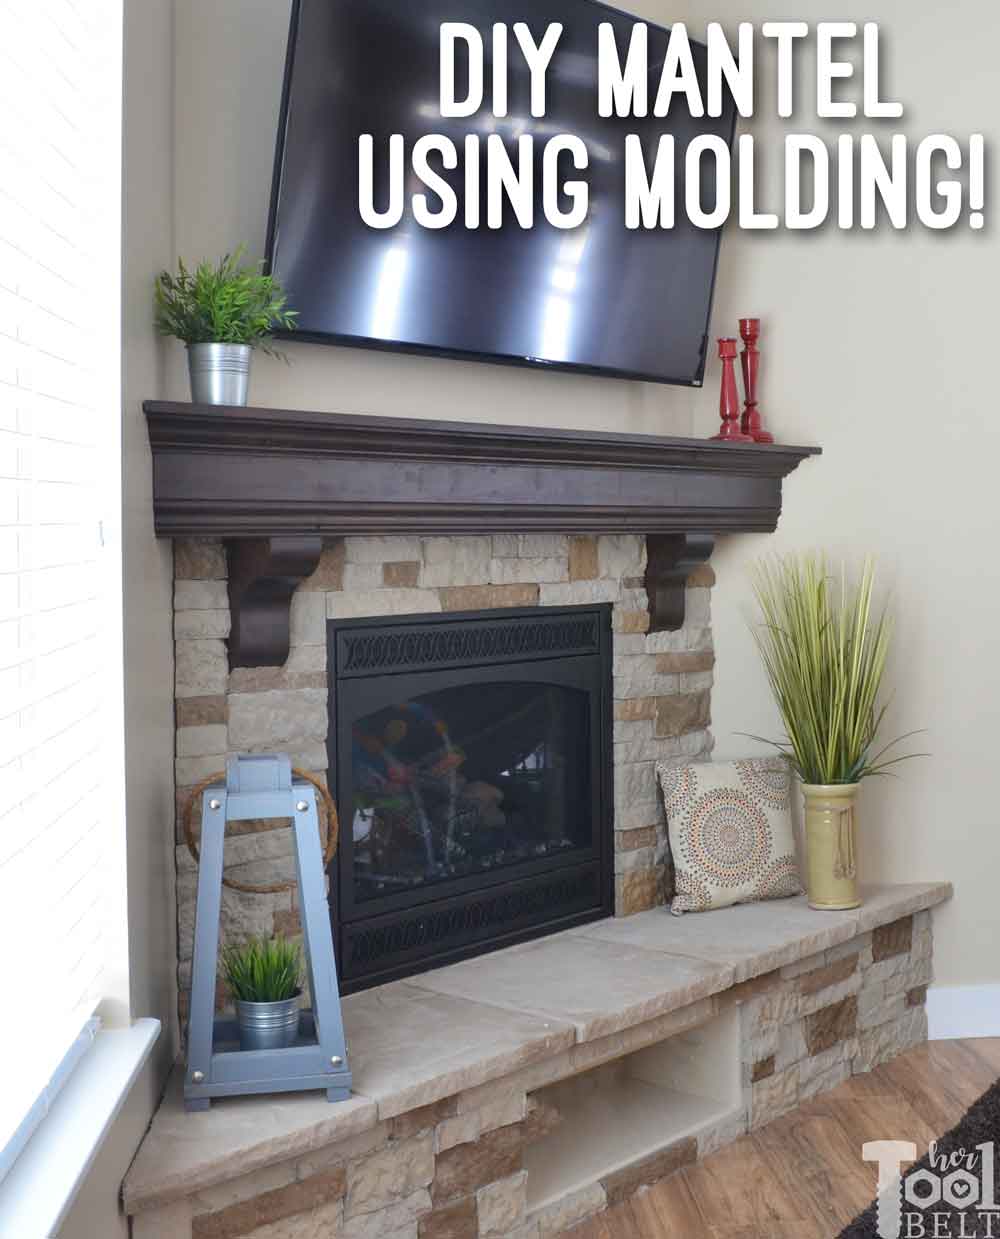
I used Sketch-Up to draw up an idea. First a nice chunky mantel will be installed, then add stone to the wall. That will really help create a focal wall.
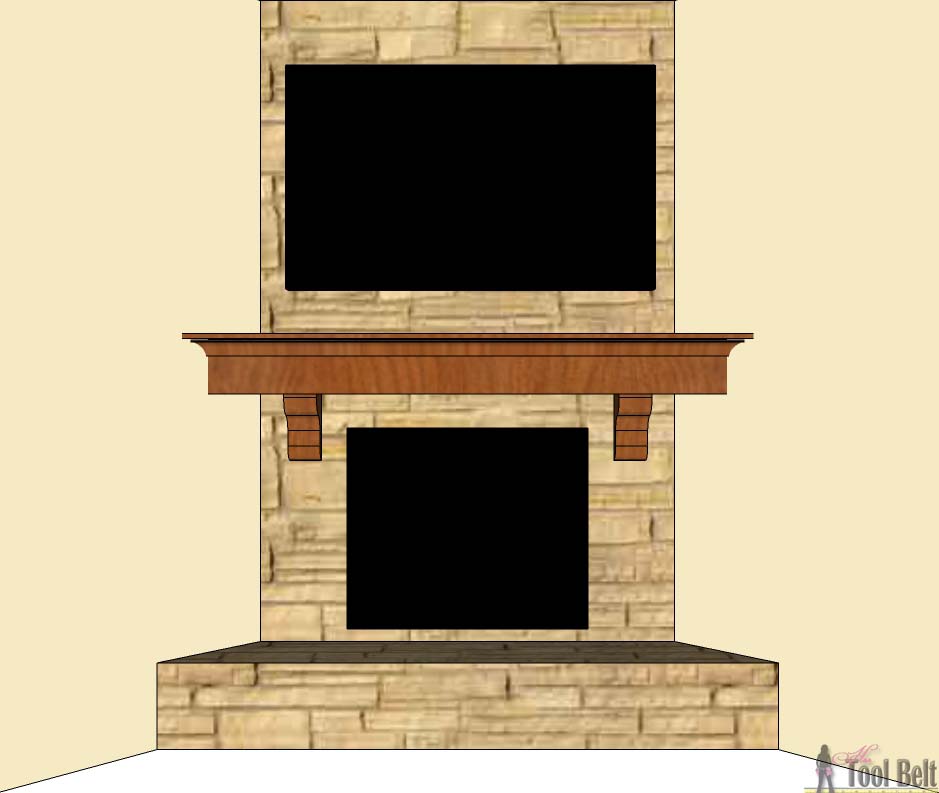
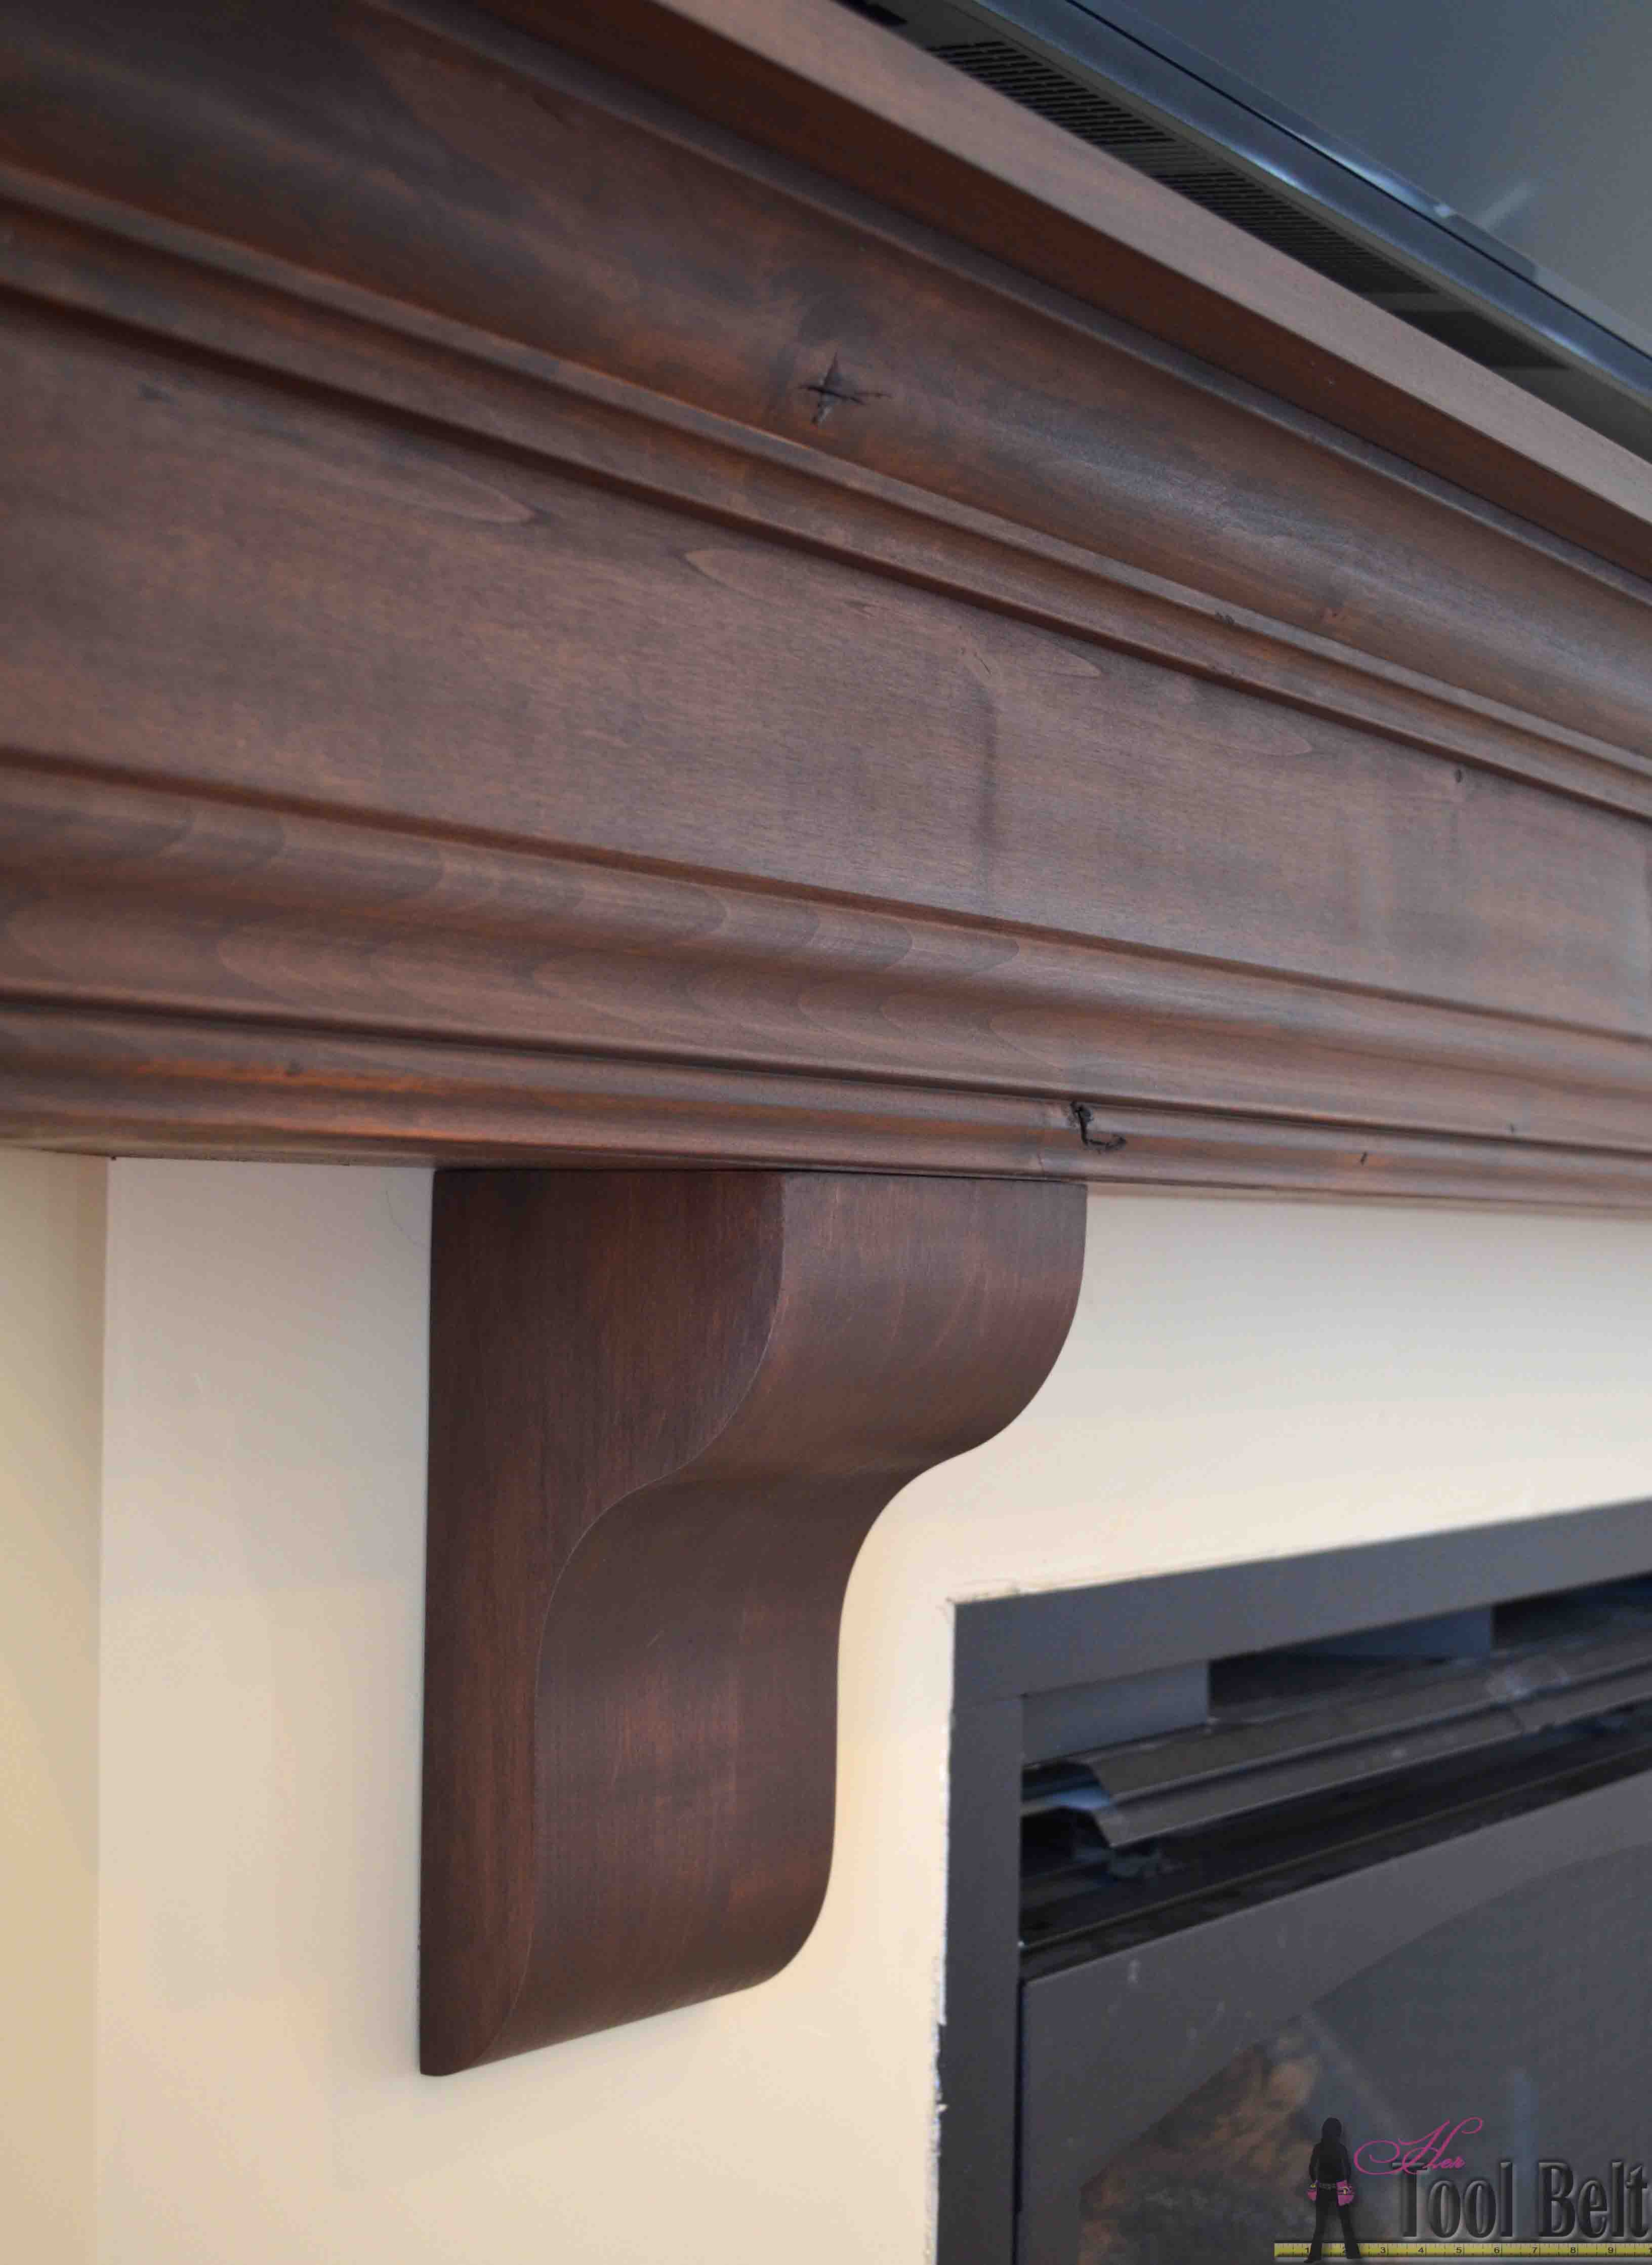
This mantel is made from knotty alder to match the cabinetry and railings in the house. These awesome chunky corbels (providence contemporary bracket) are from Osbone Wood Products in alder.
This post contains affliliate links noted by *.
Materials
- 2 – corbels (providence contemporary bracket – Osborne Wood)
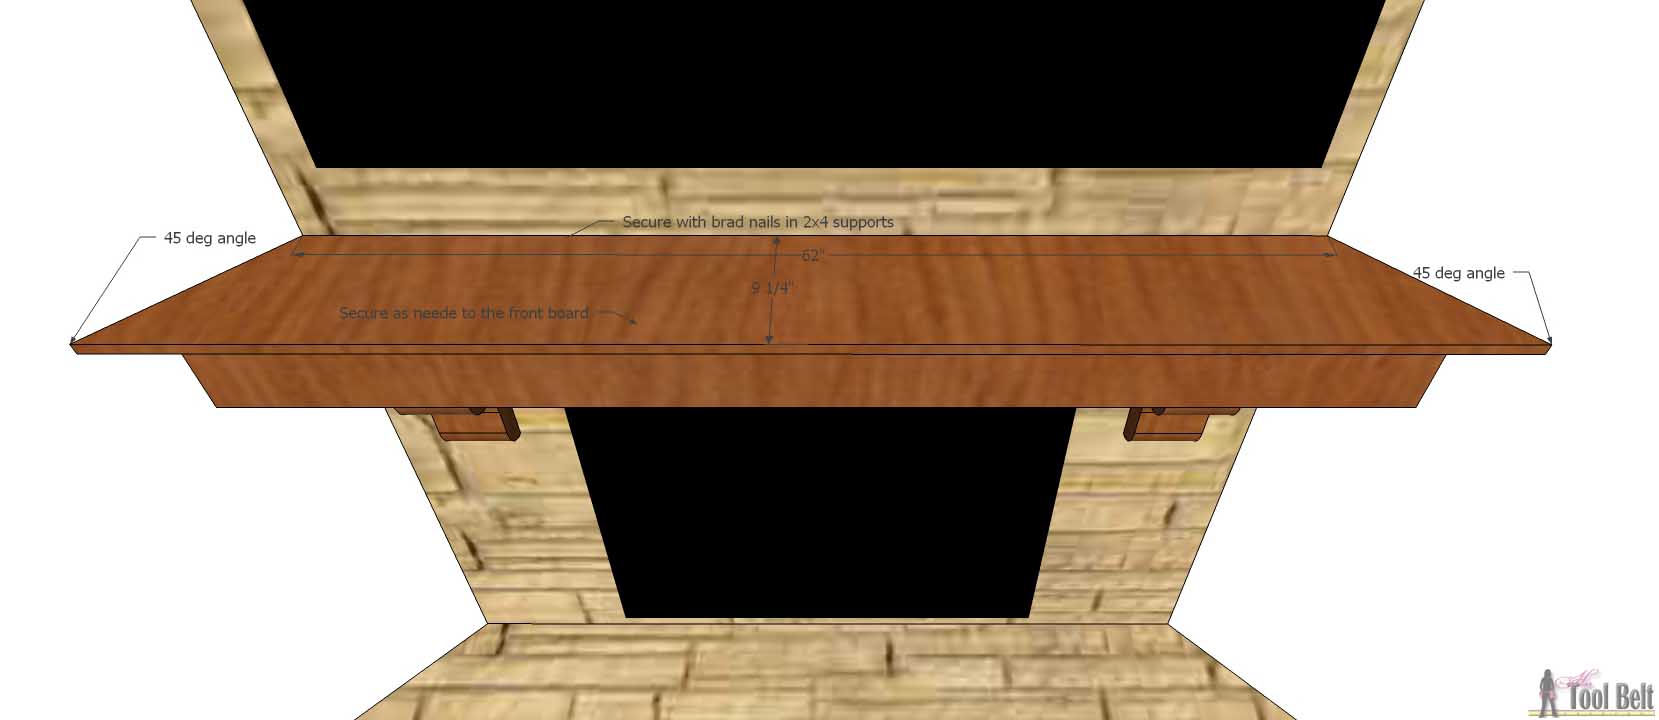
- 1 – 1″ x 10″ x 8′ knotty alder board (actual 3/4″ x 9 1/4″)
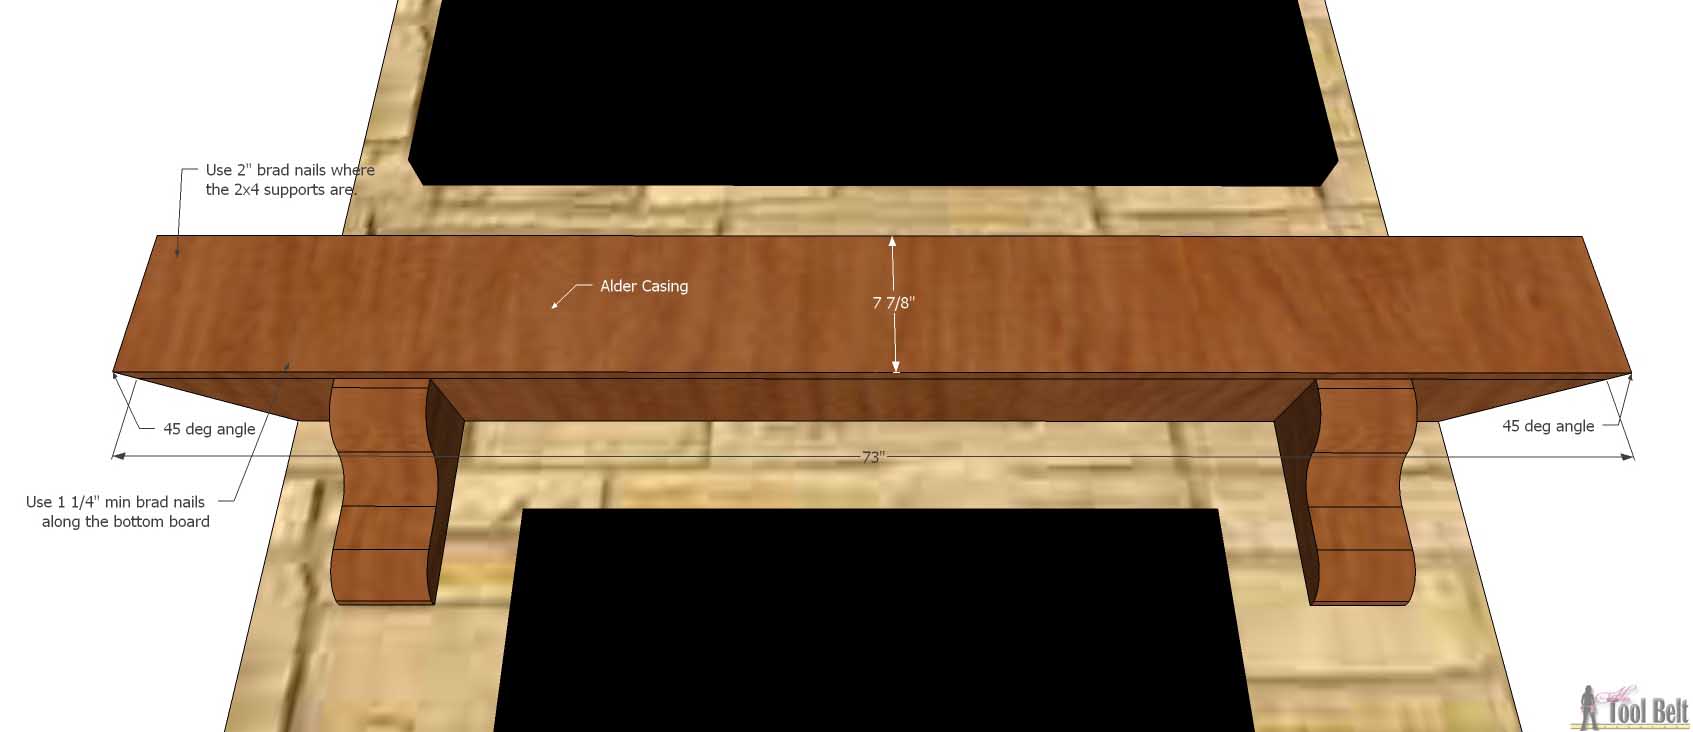
- 1 – 8″ knotty alder casing
- 1 – 1″ x 6″ x 8′ knotty alder board (actual 3/4″ x 5 1/2″)
- 1 – knotty alder crown molding
- 1 – 2″ x 4″ x 8′ board (actual 1 1/2″ x 3 1/2″)
- 4 – drywall anchors – optional
- 1 1/4″ brad nails
- 2″ brad nails
- 1 1/4″ screws
- 3″ screws
- 4″ screws
- sandpaper
- wood glue
- pre-stain conditioner
- stain
- polyurethane
- Estimated cost of the wood and corbels is $210.
Tools
- Miter Saw
- Brad Nailer
- Sander
- Drill
- Crown Pro* – optional
Please Subscribe! <— Thanks 🙂
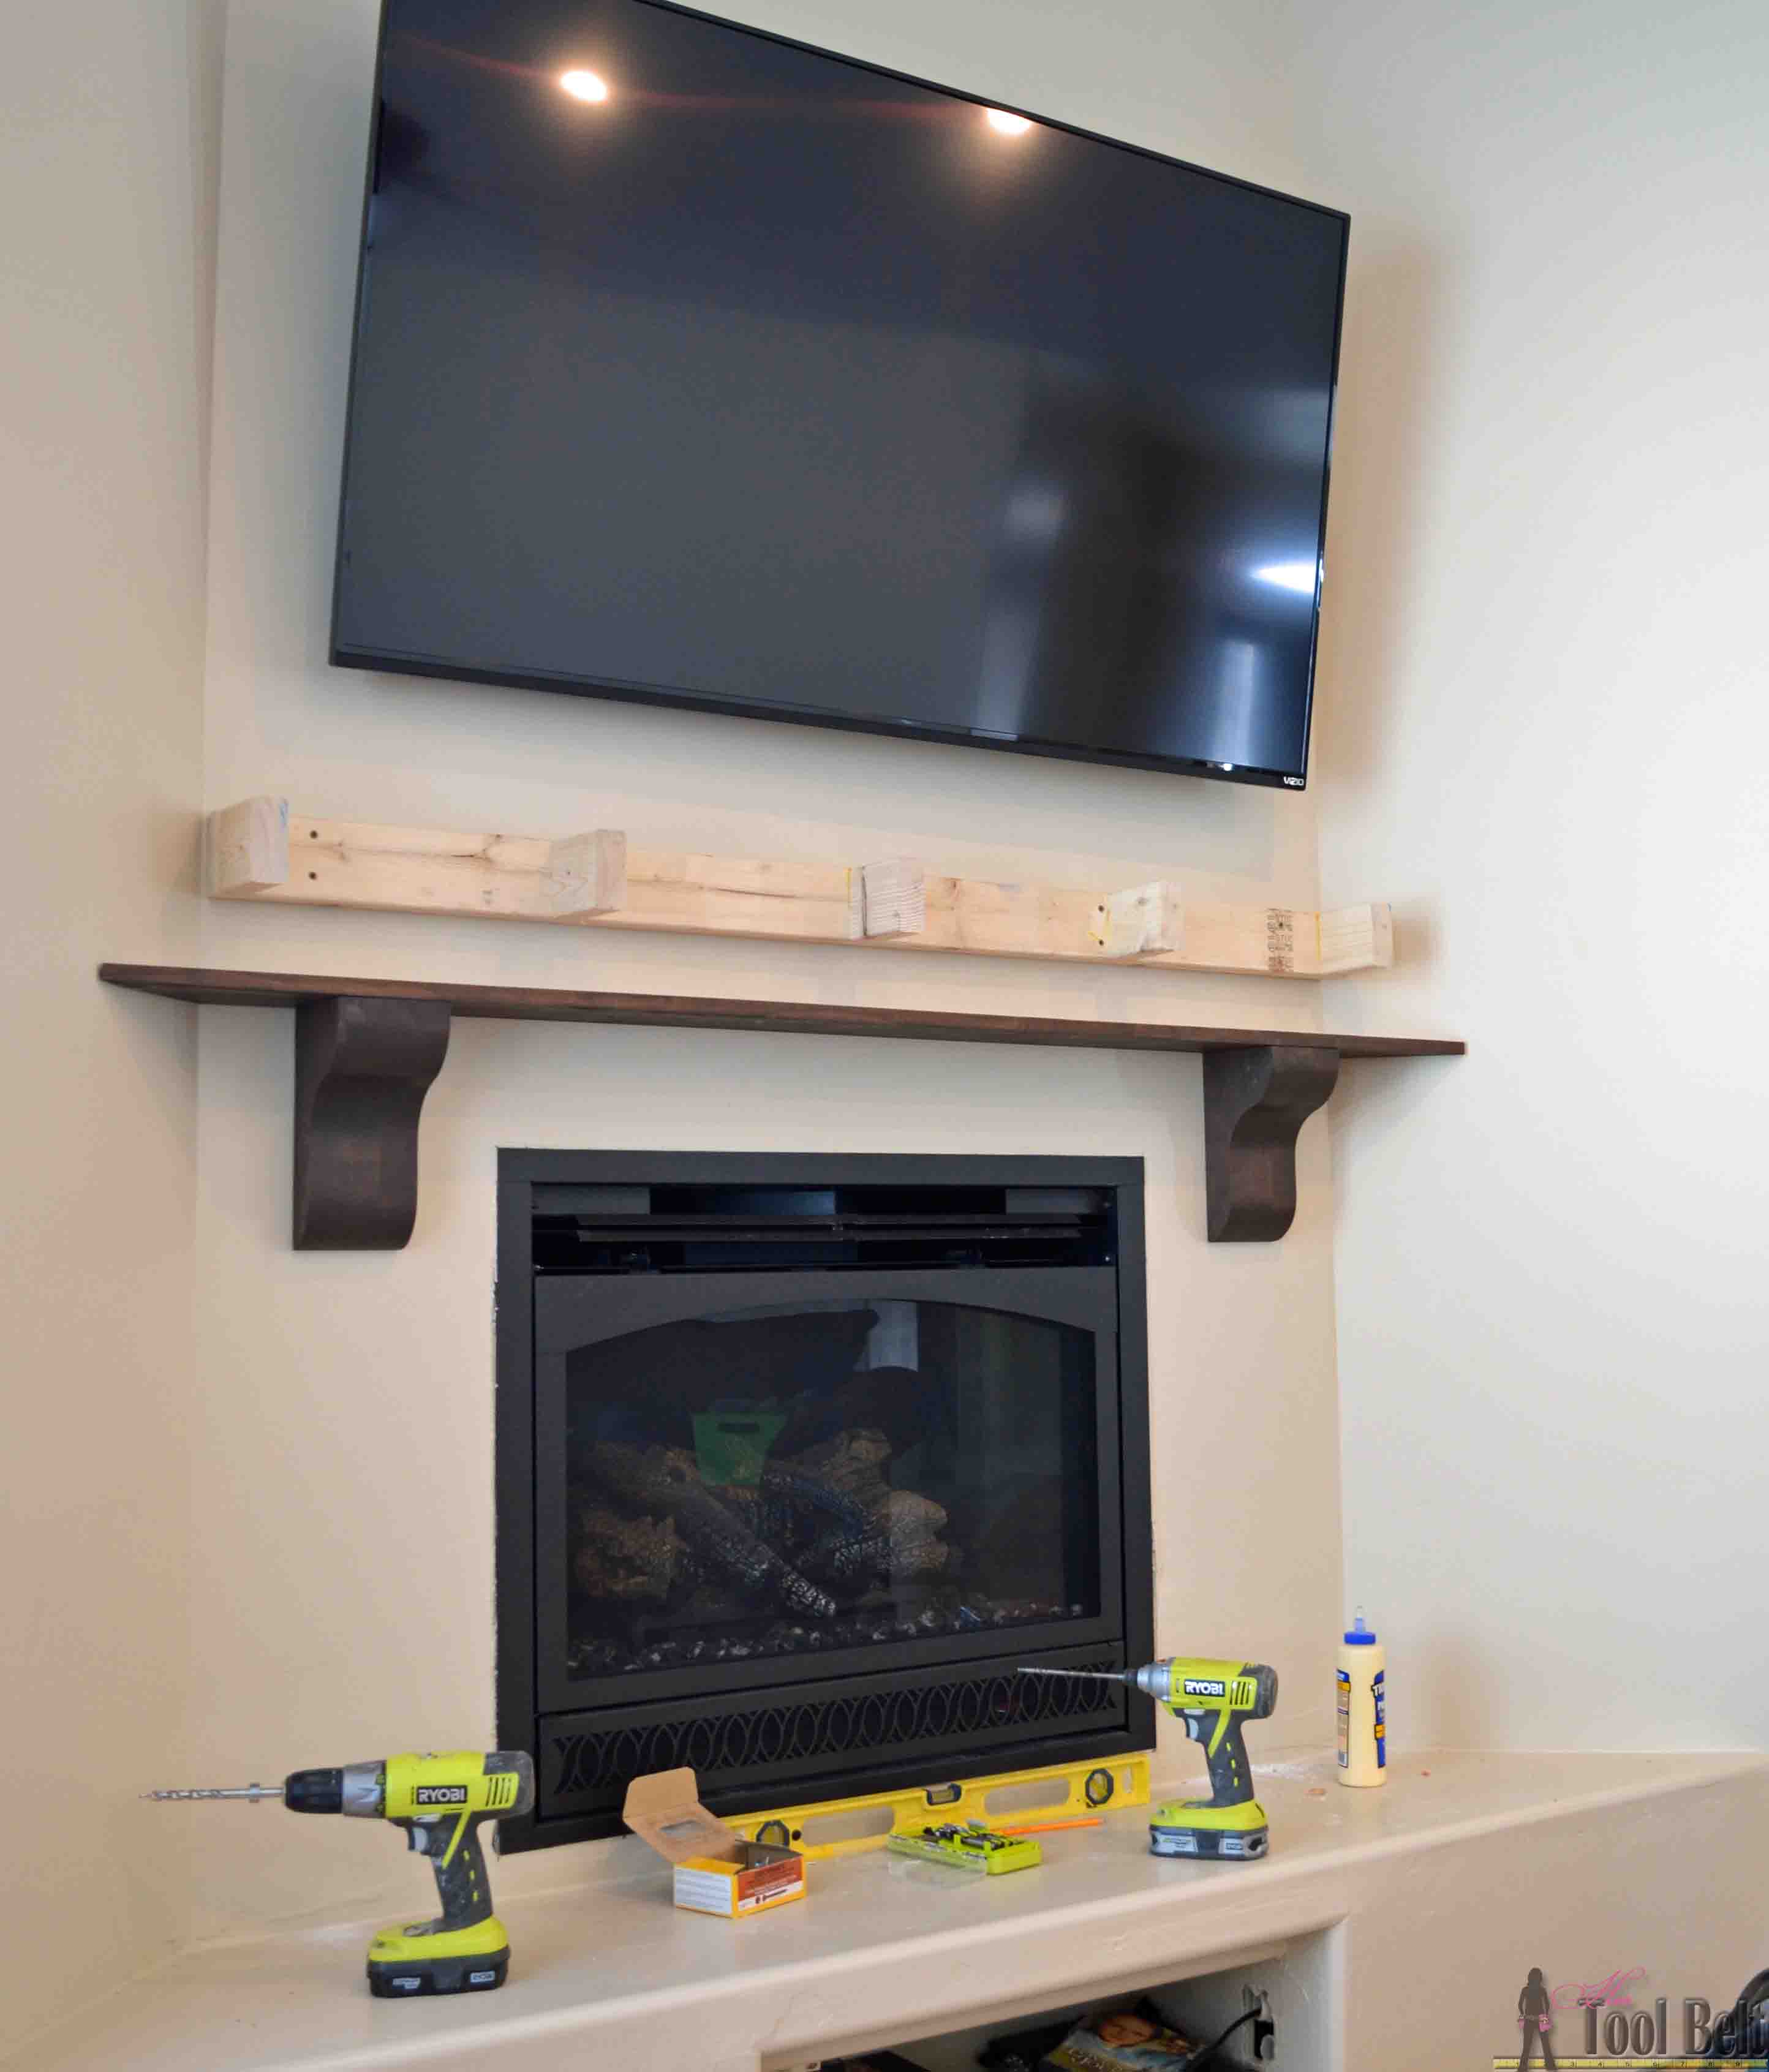
First I measured everything out and drew up the sketch, to make sure everything would end up symmetrical and even. The 2×4 will be the main support for the mantel.
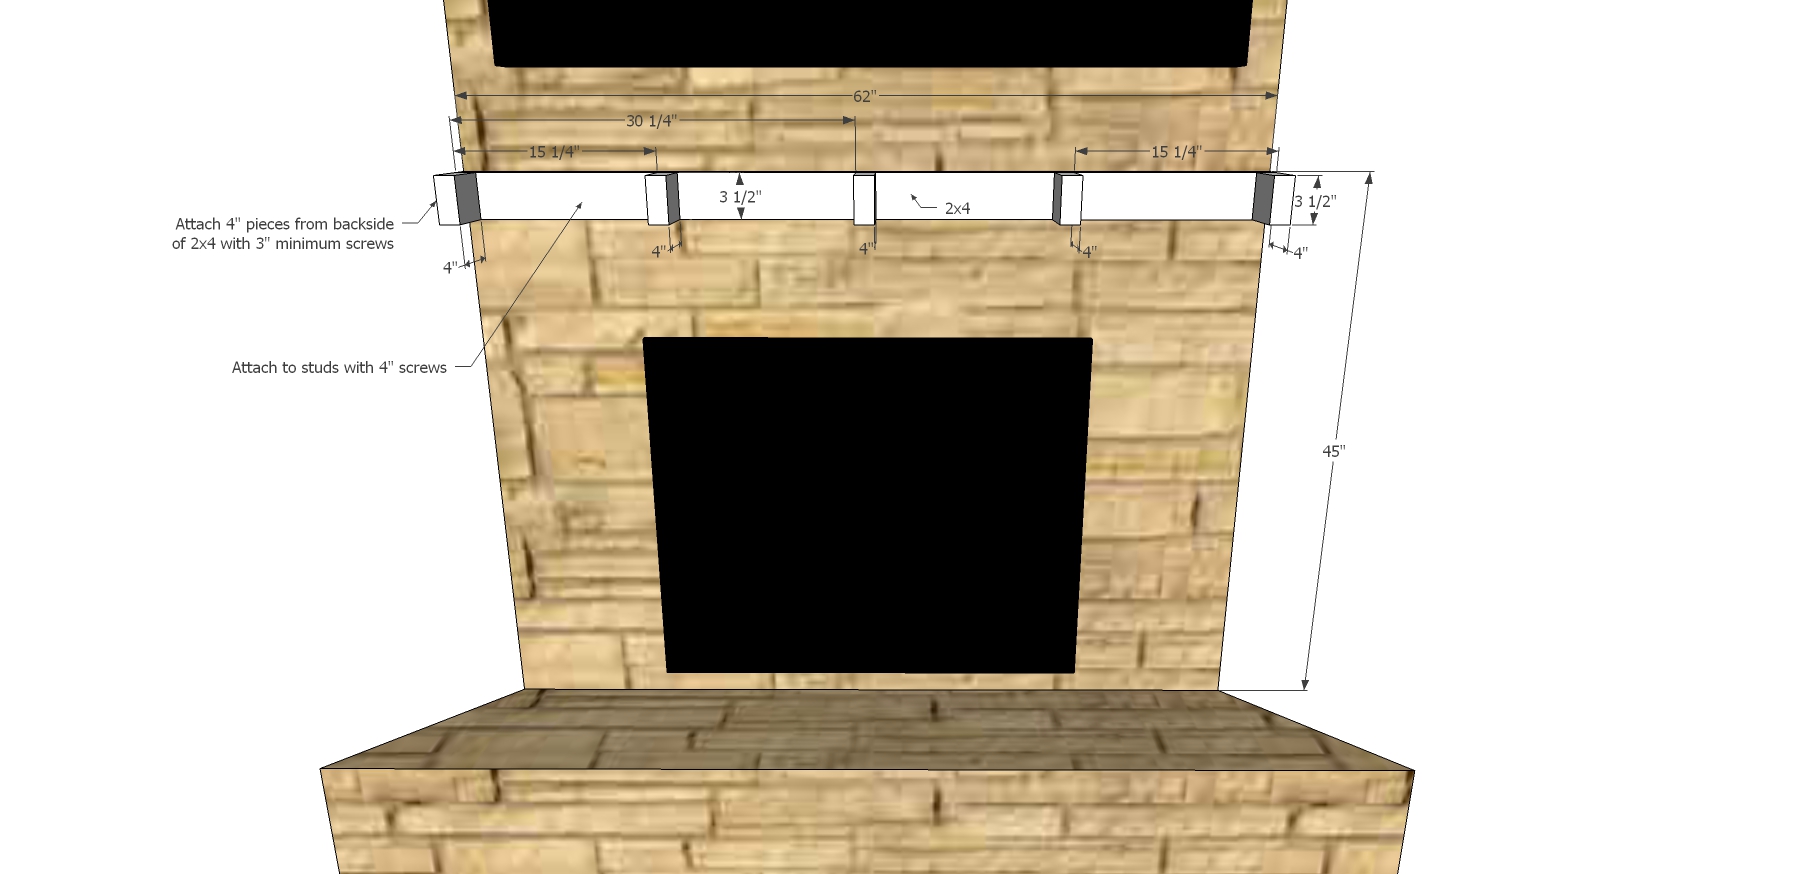
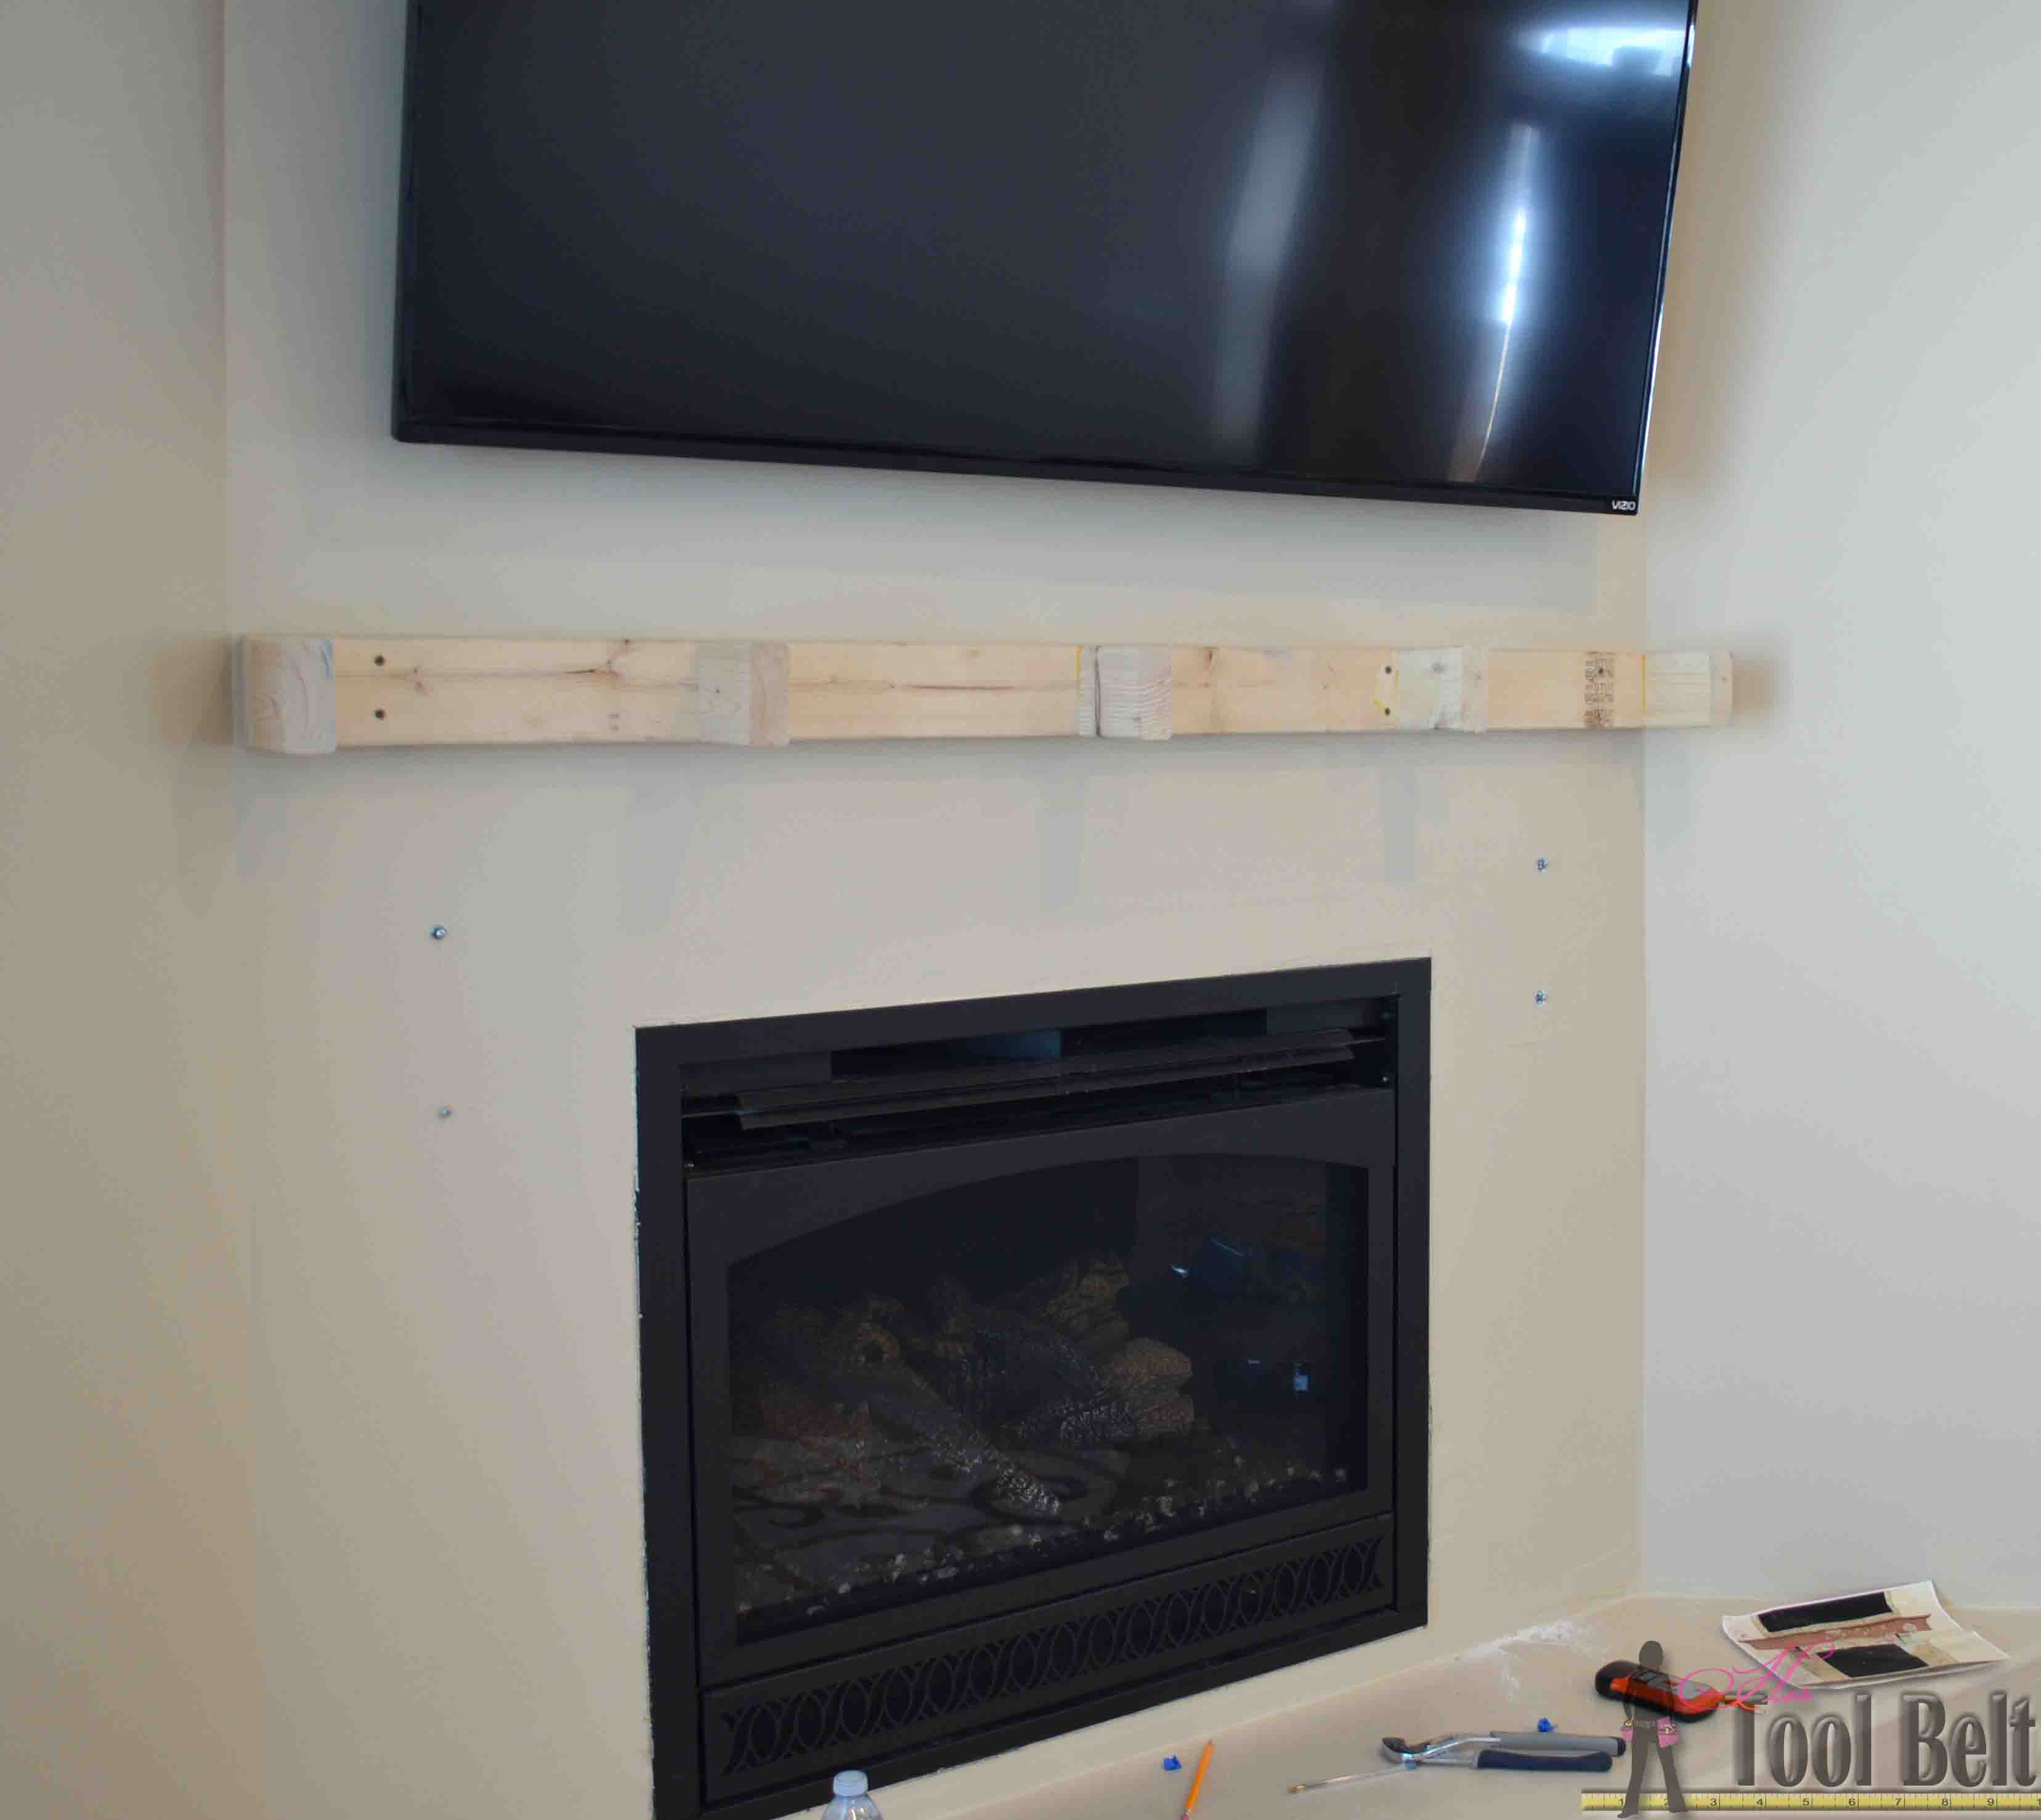
I cut a piece of 2×4 to 62″ and cut 5 pieces that are 4″ long. Spread the 4″ pieces evenly along the 2×4, and secure from the back of the 2×4 with 3″ screws (make sure they are countersunk or sucked into the wood). Mark the studs in the fireplace wall, level and attach the mantel support into the studs with 4″ screws. (I attached it at 45″ from the step)
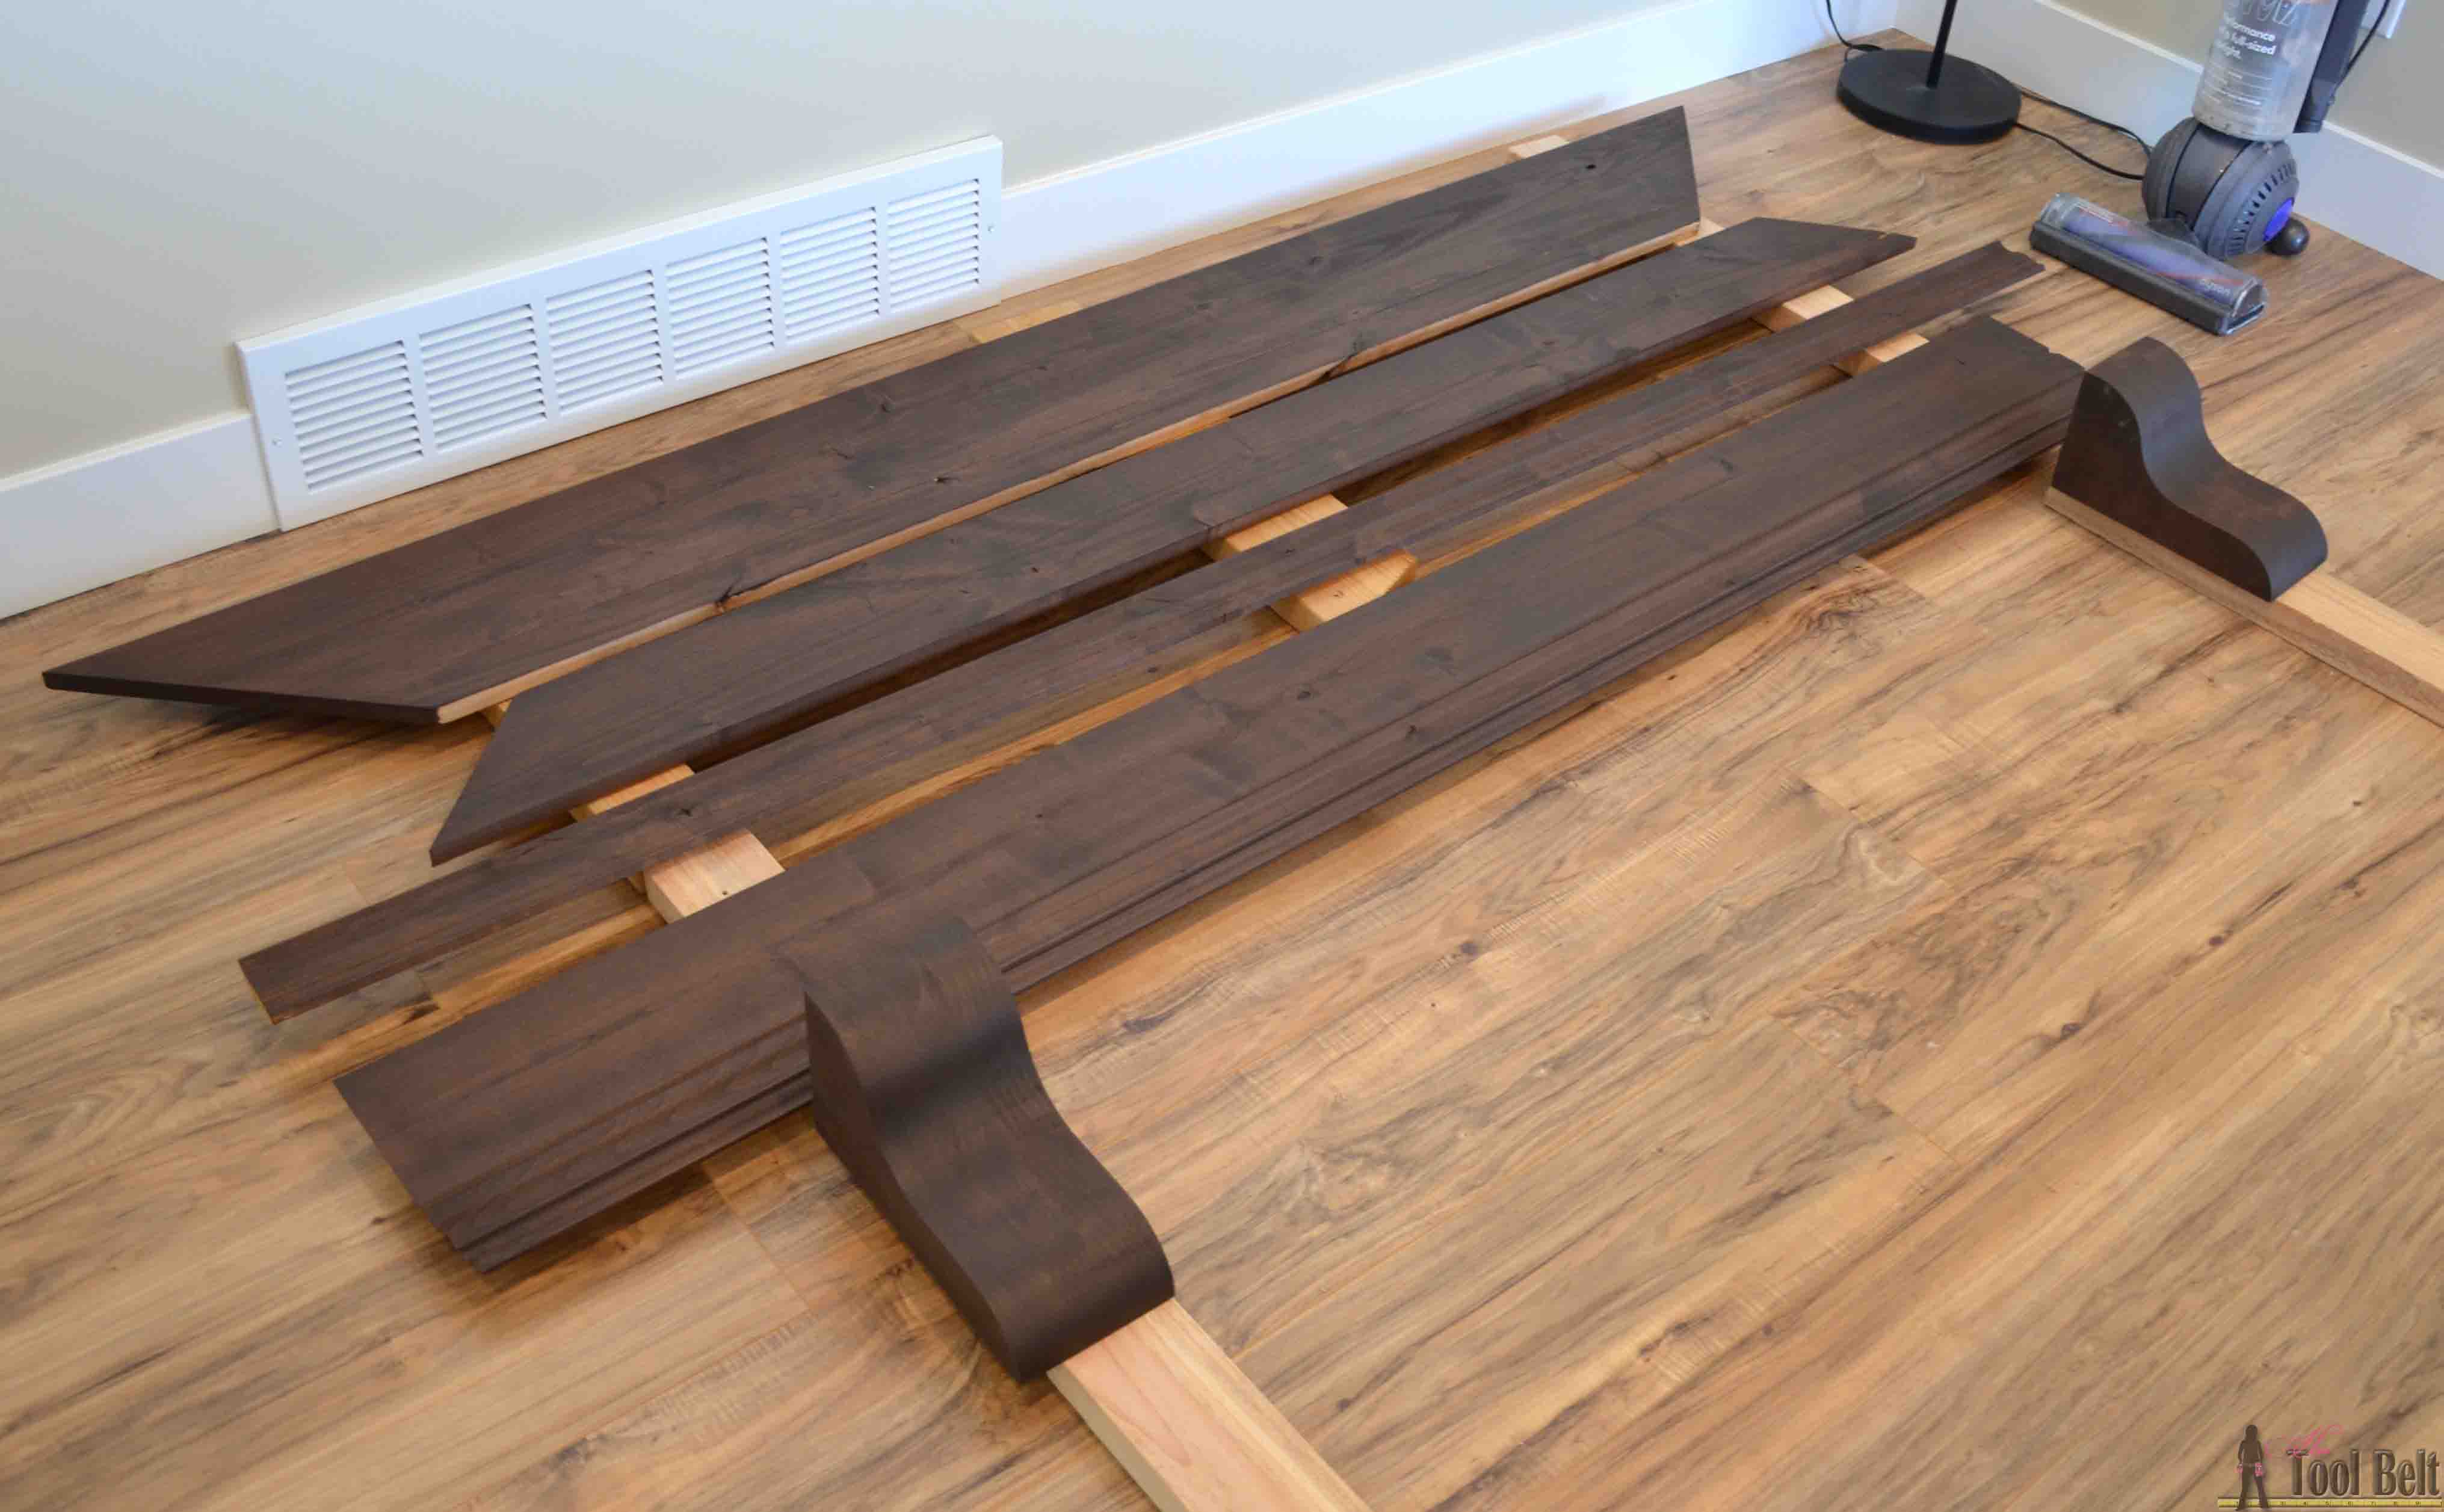
To reduce the risk of making a major mess while staining the wood, I decided to stain all of the boards before the final cuts. The boards were all pre-planed and looked pretty good. I sanded each one in the direction of the grain. I applied pre-stain conditioner to the boards, then stained them with Wisconsin Oak EZstain (the same as the cabinets) and let it dry overnight.
I was not lucky enough to have studs where I wanted to place the corbels, so I installed drywall anchors*.
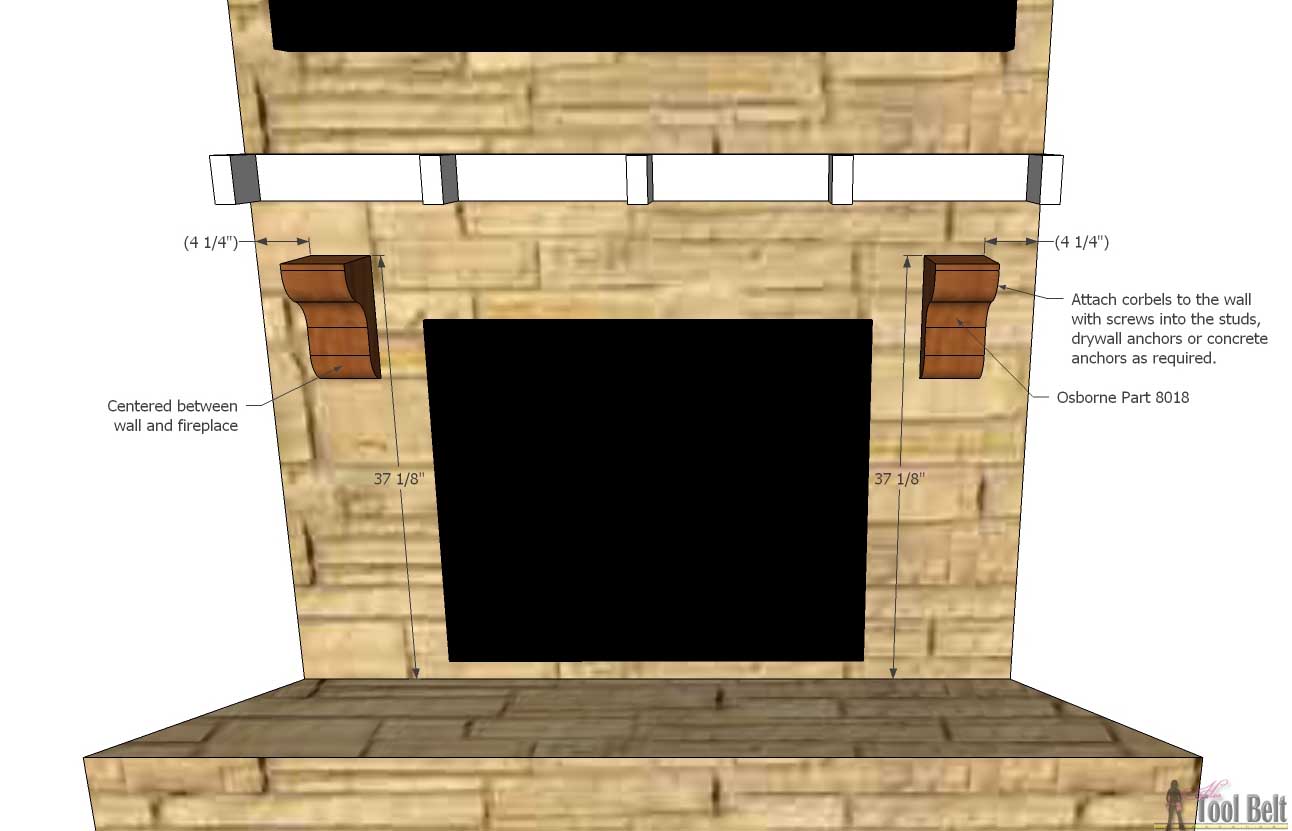
I cut the bottom board to fit nicely against the wall (both ends have a 45 deg cut.) Then I glued and secured the bottom board to the corbels with 1 1/4″ self tapping screws.
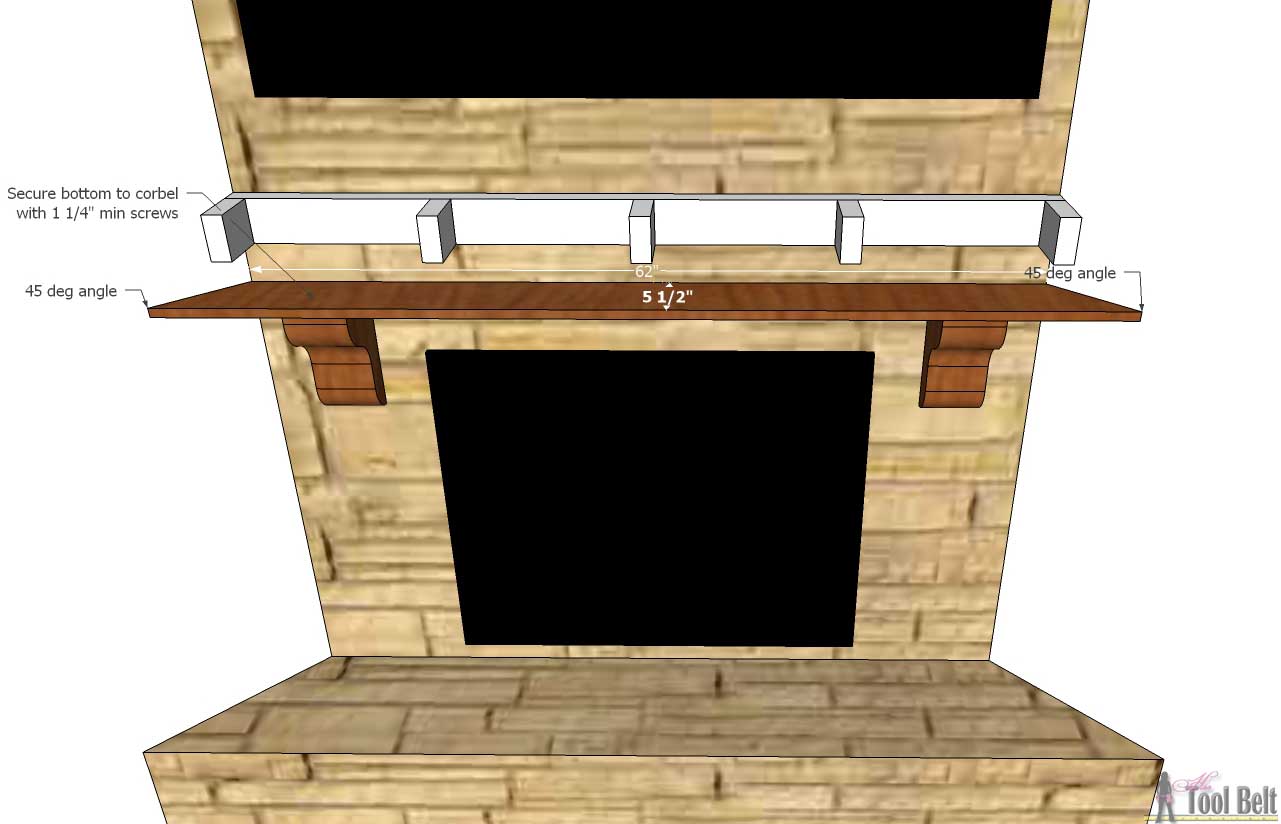
I cut the front board (casing) to fit snug along the bottom board and with a 45 against the walls. I put the routed edge of the casing down, to add a little more detail to the mantel. I nailed the front to the bottom near the bottom edge with 1 1/4″ brad nails. I tried to limit the number of nail holes, since they’ll show (probably about 4-5). Then I nailed the front to the mantel support 4″ 2×4’s near the top. If you keep them with 2″ or so of the top, then the crown molding will cover these nail holes.
I cut a 45 deg angle on each end of the top board to fit snug against the wall. I used 1 1/4″ brad nails to attach the top to the 2×4 supports and to the front board.
I used a Kreg Crown Pro* to assist in cutting the crown molding. It was my first time using it, and it was really handy and made it easy to cut the real wood molding right the first time. 🙂
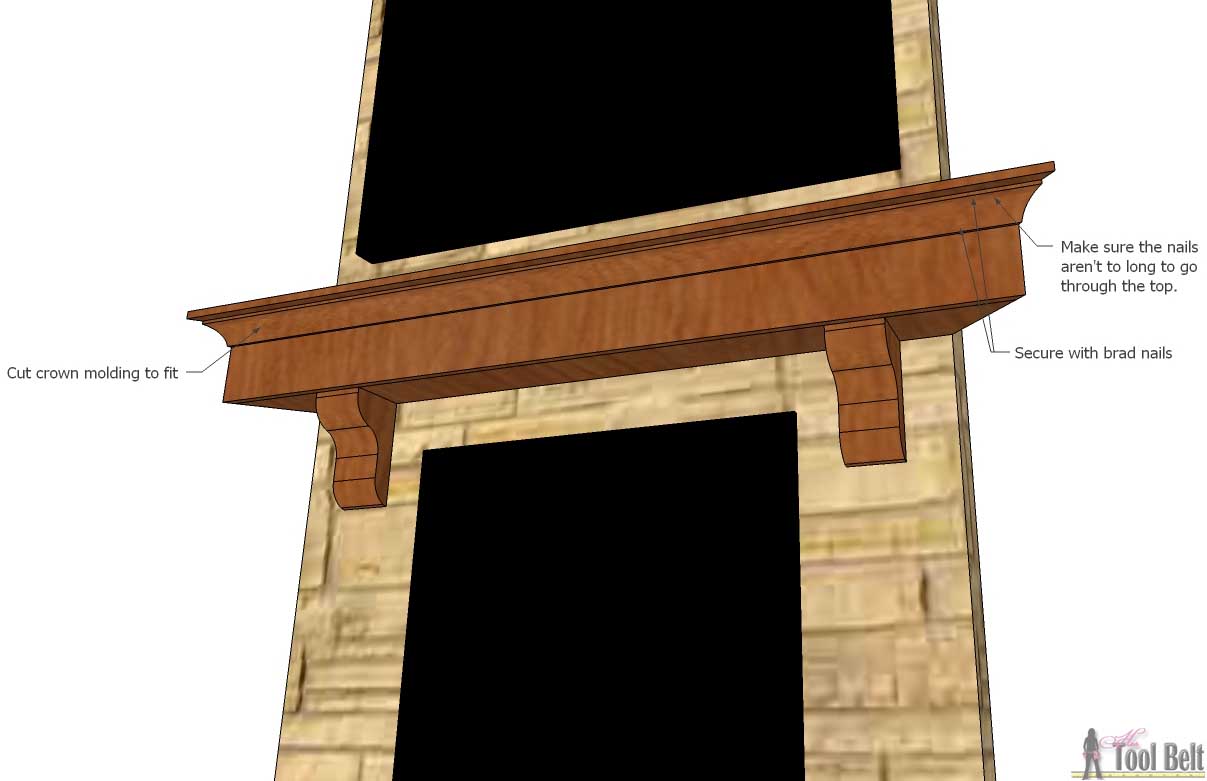 I nailed the crown in place, with as minimum nails as possible.
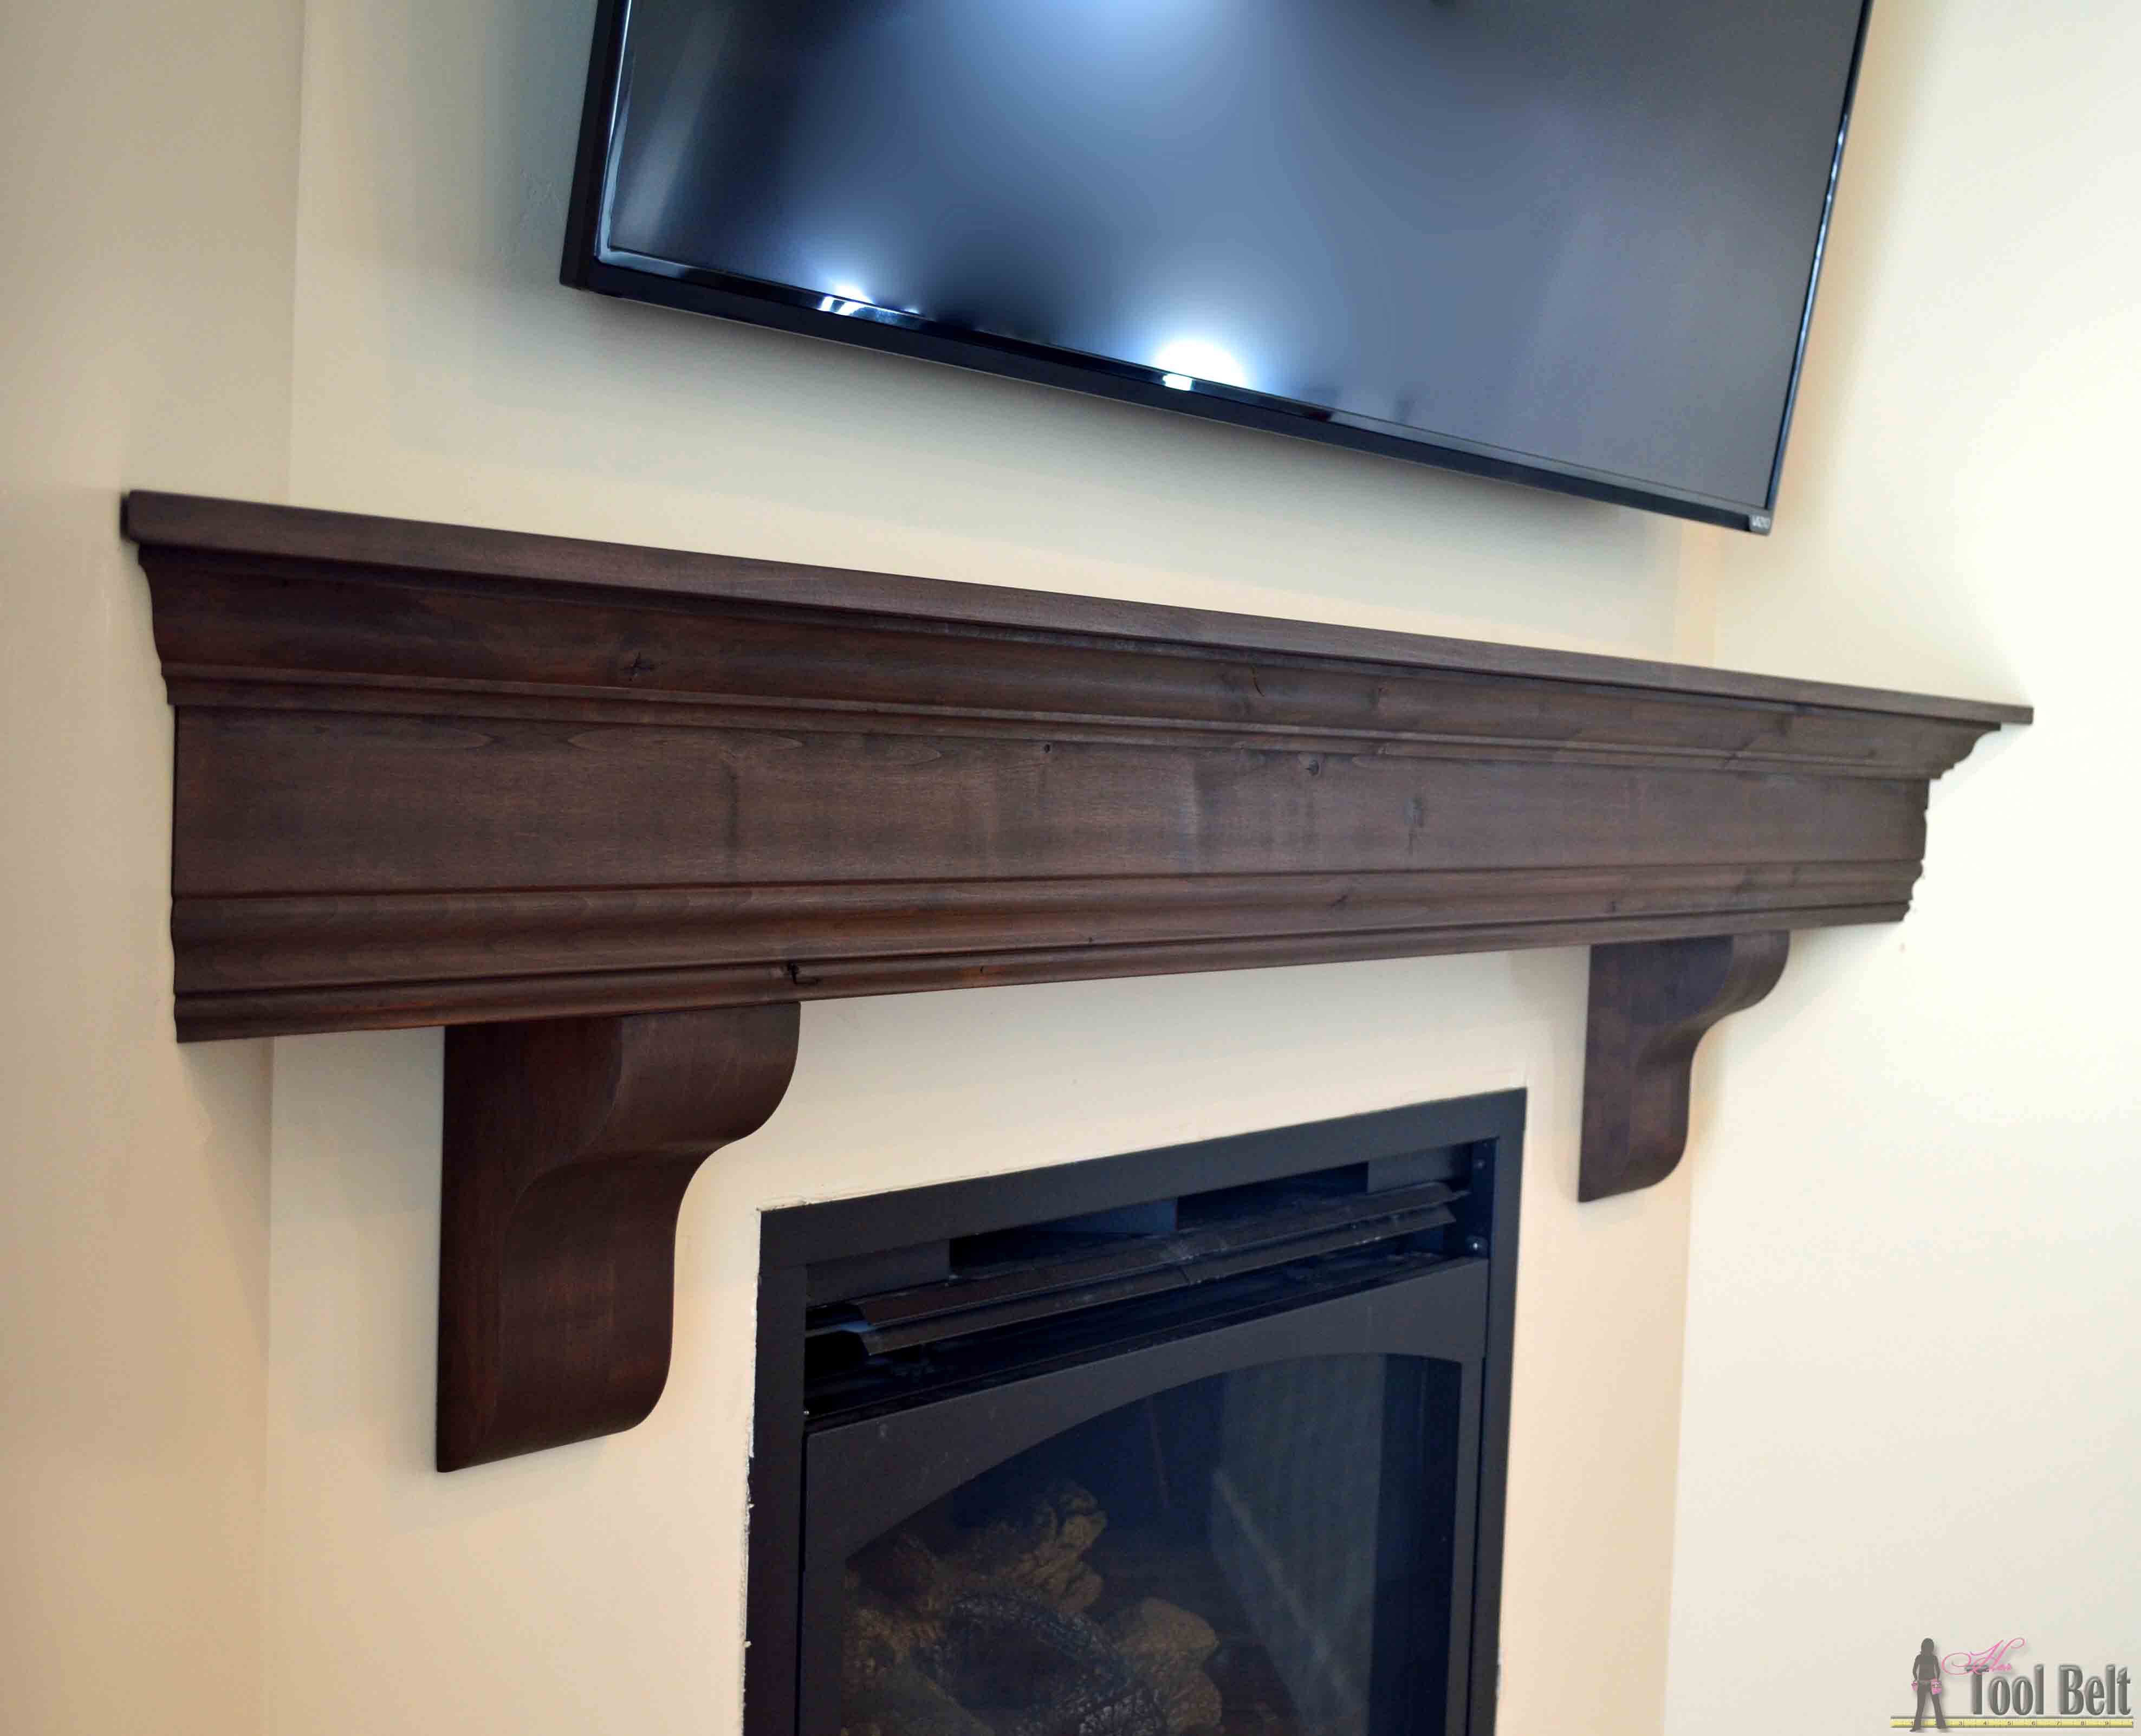
Don’t you think that looks great?!?
I used a Q-tip to touch up any areas that needed stain. I love those corbels.
Apply polyurethane to protect the surface.
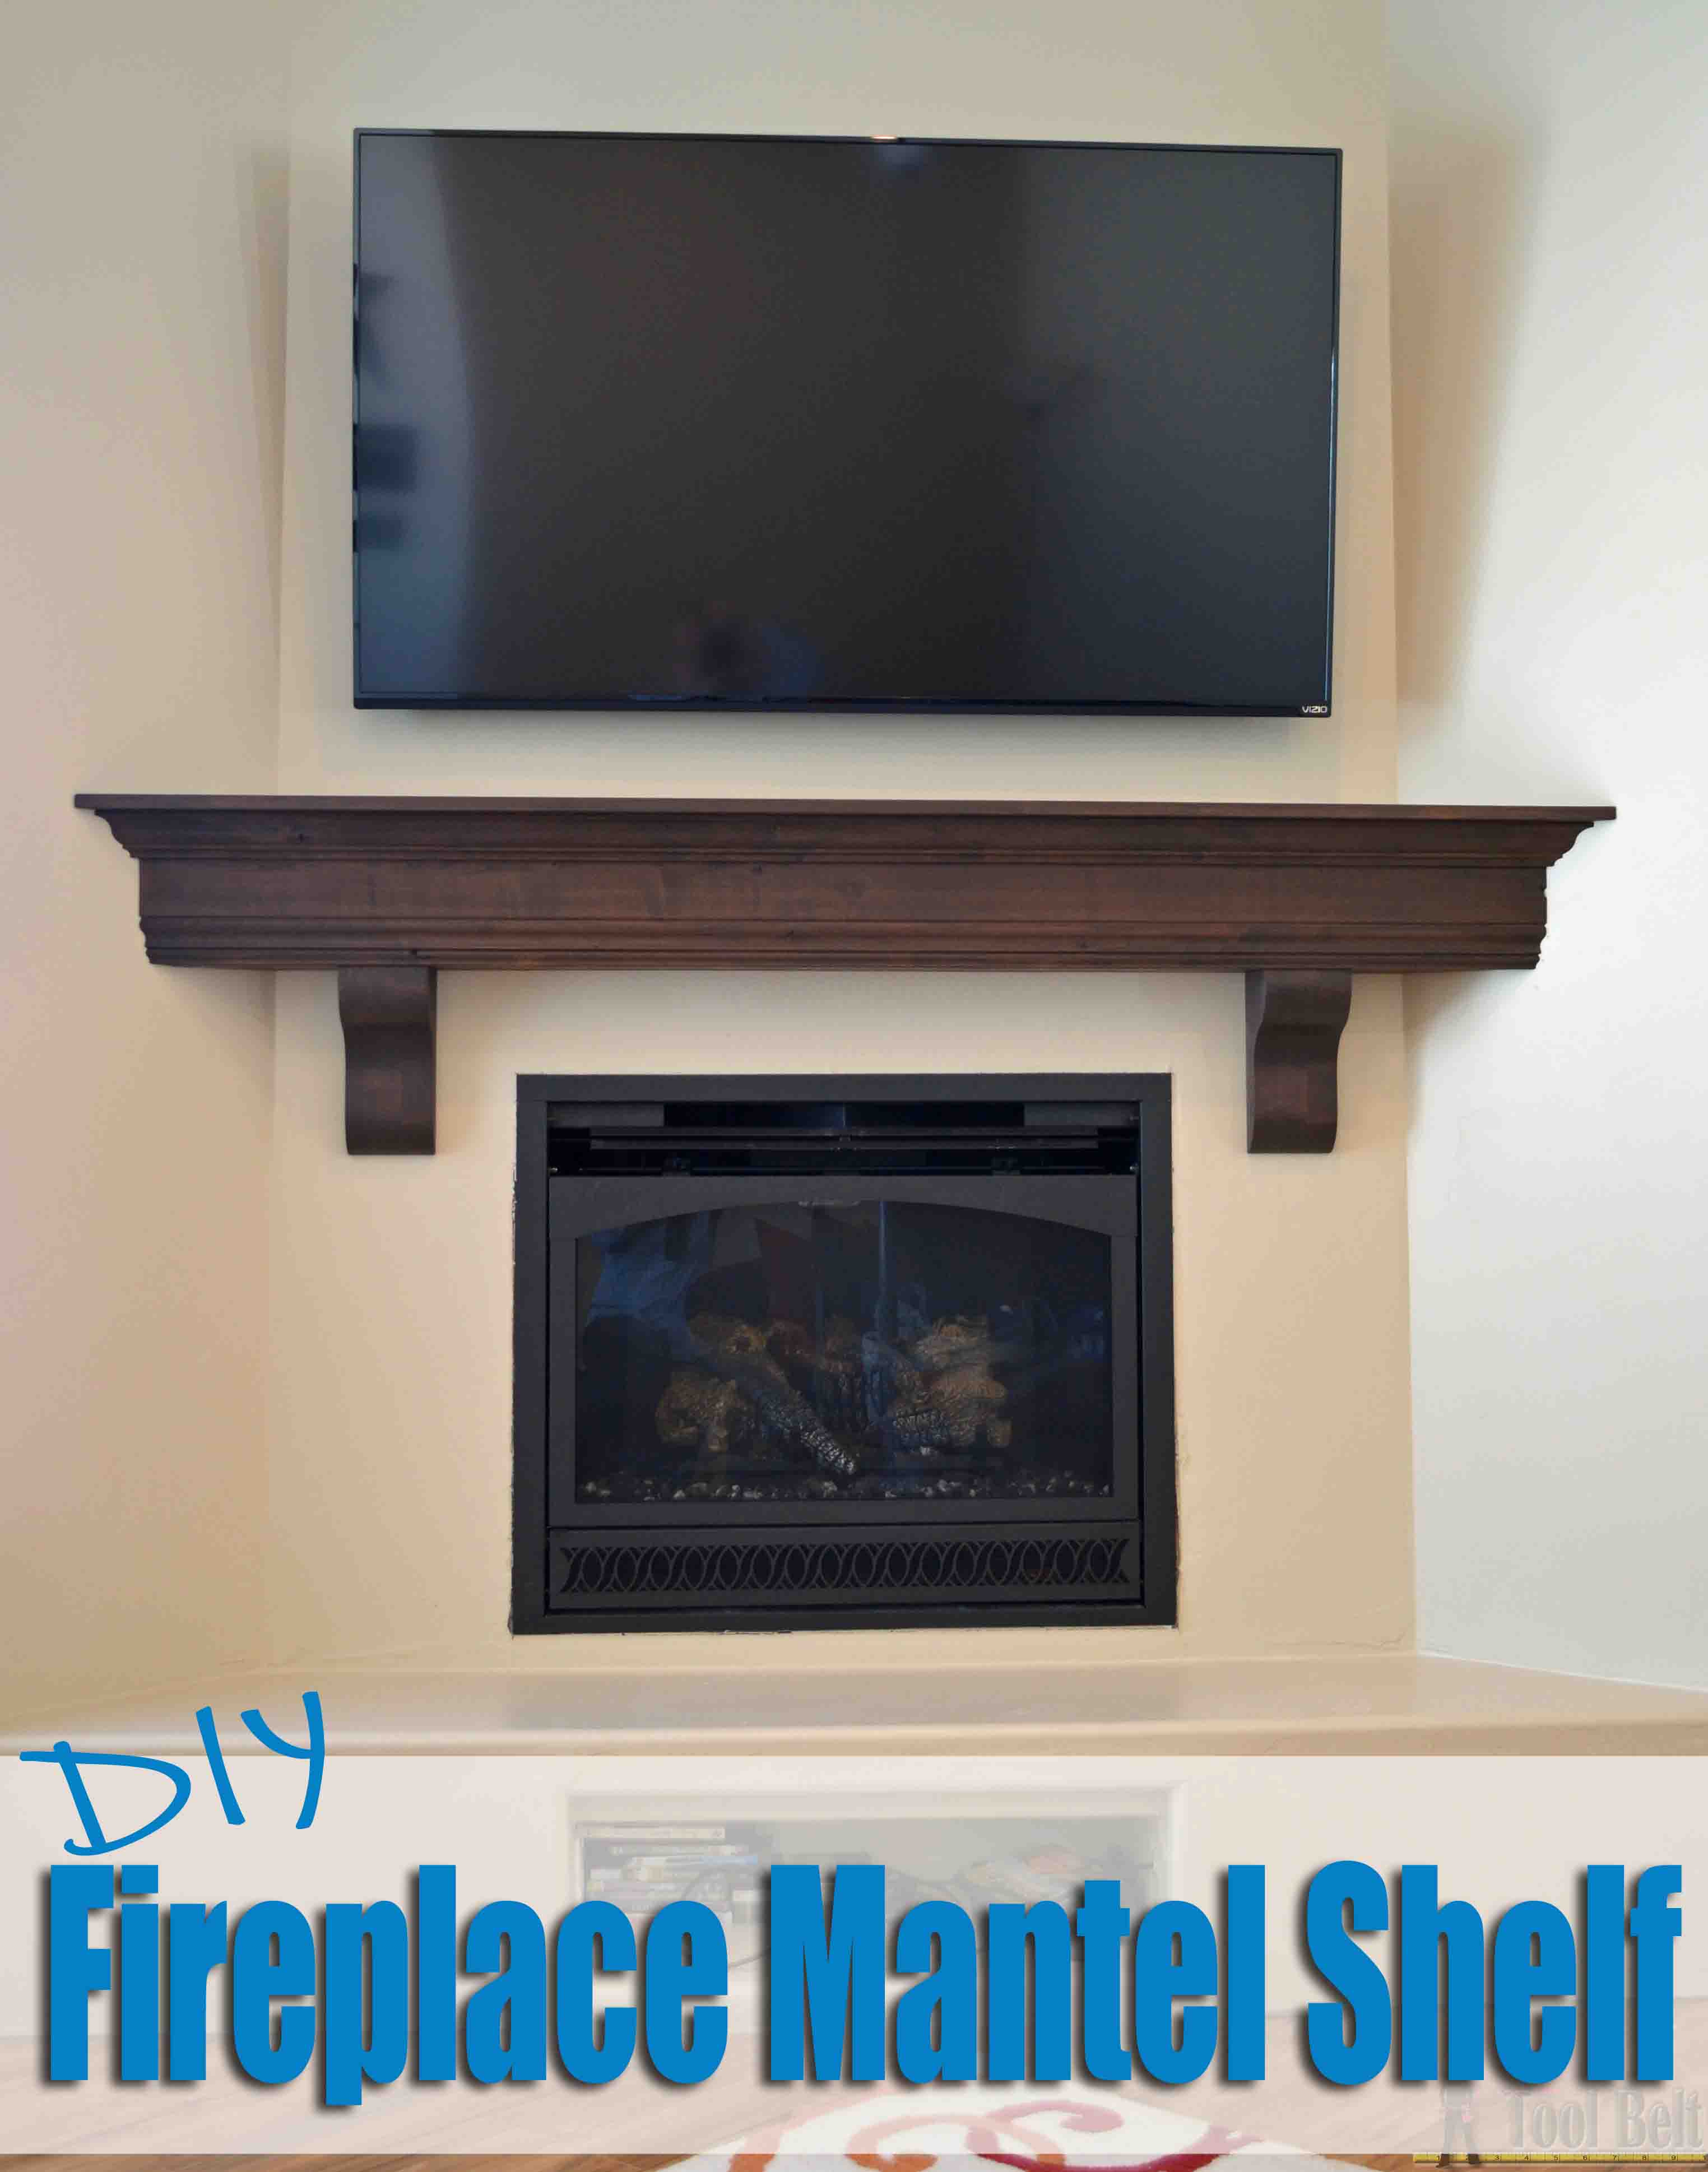
I wish the pictures did this fireplace mantel justice. It looks so beautiful in real life. Now onto the stone!
Download the fireplace mantel plans
DIY Fireplace Mantel plans
Check out the other projects in the Home Improvement Power Tool Challenge:

DIY Shutters Create And Babble
DIY Fireplace Mantel Shelf Her Tool Belt
Industrial Paper Towel Holder by Virginia Seweet Pea
Blanket Ladder by Refresh Restyle
Cedar Hose Planter by Kim Six Fix
DIY Vanity Sliding Drawer by Interior Frugalista
How To Patch A Hole In Drywall by Designs By Studio C
Wall Mount Staghorn Fern by A Piece Of Rainbow
DIY Painted Stairs Makeover by Thrift Diving
DIY Modern Rustic Mirror by H2OBungalow
The corbels were provided by Osborne Wood Products for this plan, I definitely recommend their products.
Linked to link parties, Savvy Southern Style, Remodelaholic
Wow!! LOVE your vision for this wall. I’ve wanted to build a faux fireplace and matle for a while. Yours is the first tutorial I’ve seen to DIY the mantel. Those chunky corbels make the project too:)
I love the chunky look of this mantel shelf. You’re right – it does look great, especially with those chunky corbels!
This looks great, Amy! And I love that you’ve got a YouTube channel going on there, girl. 😉 Videos are all the rage. I just subscribed to you. The wood looks rich and pretty! I’ve got a brick fireplace so this wouldn’t work for me because my whole fireplace wall is brick with extended brick (well, I guess it could, with the right bits and perseverance!). This is pretty cool!
Wow.. It looks so much more formal now. And really.. what is a fireplace without a mantel shelf? Since how do you decorate for the holidays without one! 🙂 I love the dark color too.. can’t wait to see it with stone.
Wow! The mantel is amazing and I really love the color of the stain! The corbels are fabulous… As a side note, I think you and I have the same flooring! 🙂
Oh my goodness! Gorgeous! You had me at beefy corbels 😉
Debbie
What a difference that gorgeous mantel shelf makes to your fireplace. Definitely the focal point now! Great video tutorial too BTW
Amy,
I love your new mantel! It looks fabulous. Thanks for such a great tutorial.
gail
Wow your mantel is stunning! Very nicely done! XO
Your mantel is perfection! I love the design, stain color, and especially the corbels.
I can’t believe the difference already. I can’t wait to see the stone. You are going to have so much fun decorating the new mantel 🙂
I believe you have a misprint on this part. First you say cut 4″ section of the 2″x4″ then you say attached the 4″ sections. “I cut a piece of 2×4 to 62″ and cut 5 pieces that are 5″ long. Spread the 4″ pieces evenly along the 2×4,” Also your diagram have them as 4″ sections when actually they should be 5″. I’ll have to re-cut mine.
You’re right, I do have a misprint. But I think they should be 4″ long. 4″ long and attached to a 2×4 will make them stand out 5 1/2″. That lower board that goes on the corbels is 5 1/2″ wide, so that would give an even plane to attach the front alder casing to.
Thank you for catching that!!!