This wood bench plan is sponsored by The Home Depot. I have been compensated for my time and provided with product. All ideas and opinions are my own. This post contains some affiliate links for your convenience. Click here to read my full disclosure policy.
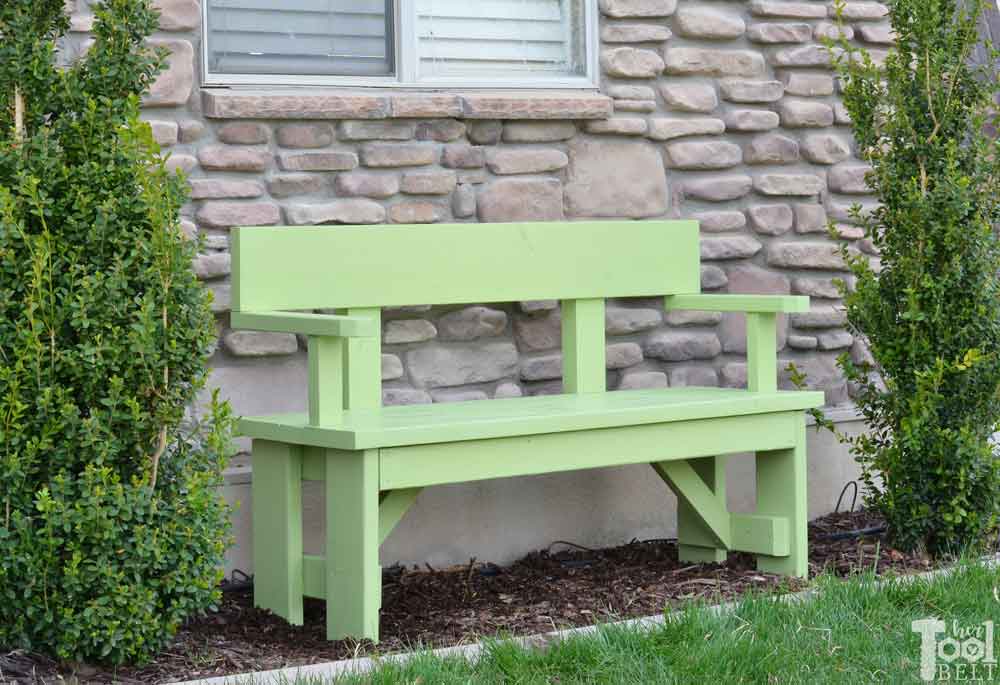
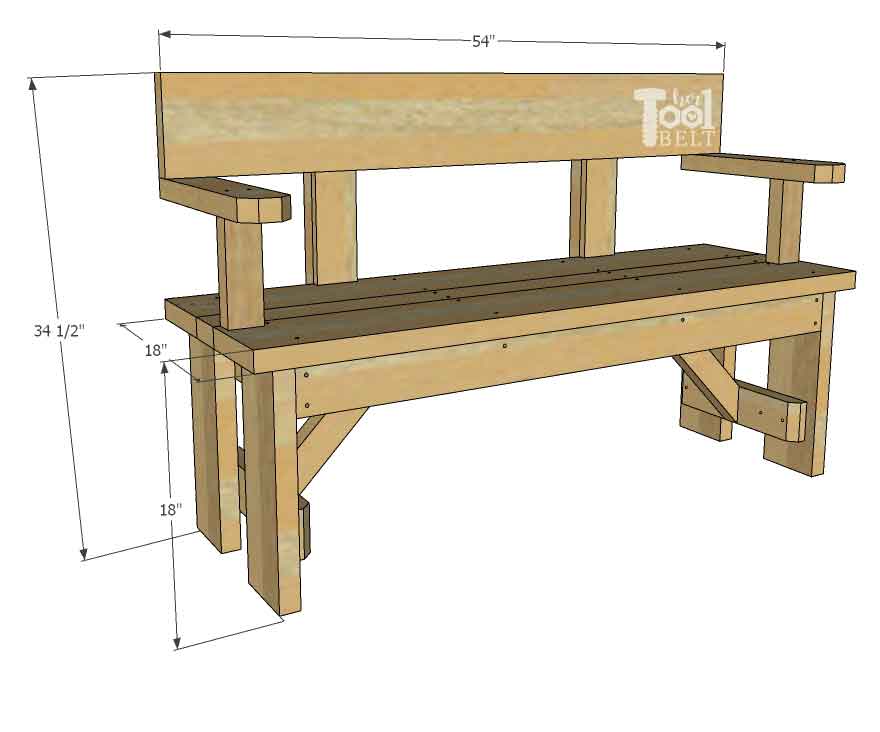
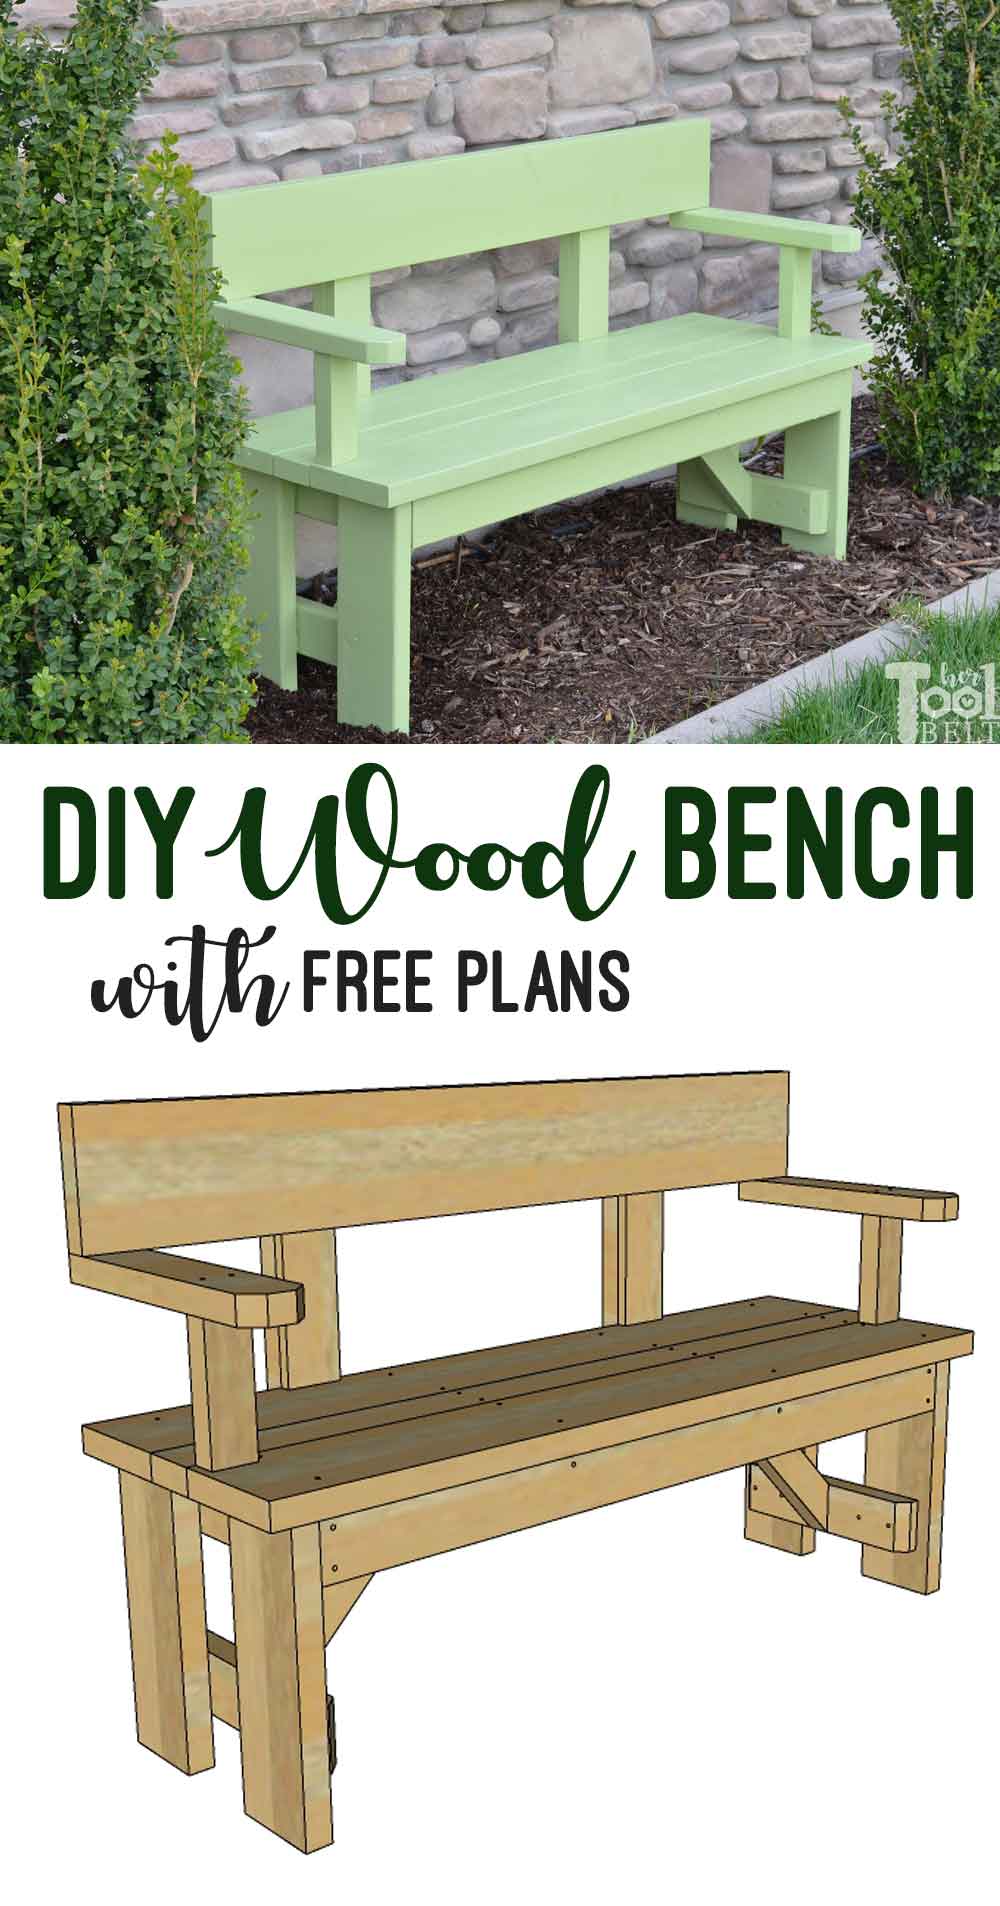
My neighbor saw a cute wood bench at a local restaurant and wanted one for her house. She snapped a few pics for me, and this is my interpretation of the bench. This wood bench is nice, because it has a back support and arm rest, perfect for relaxing and enjoying the outdoors. She wanted the bench 4 1/2′ (54″), but you can easily alter the bench length for your space.
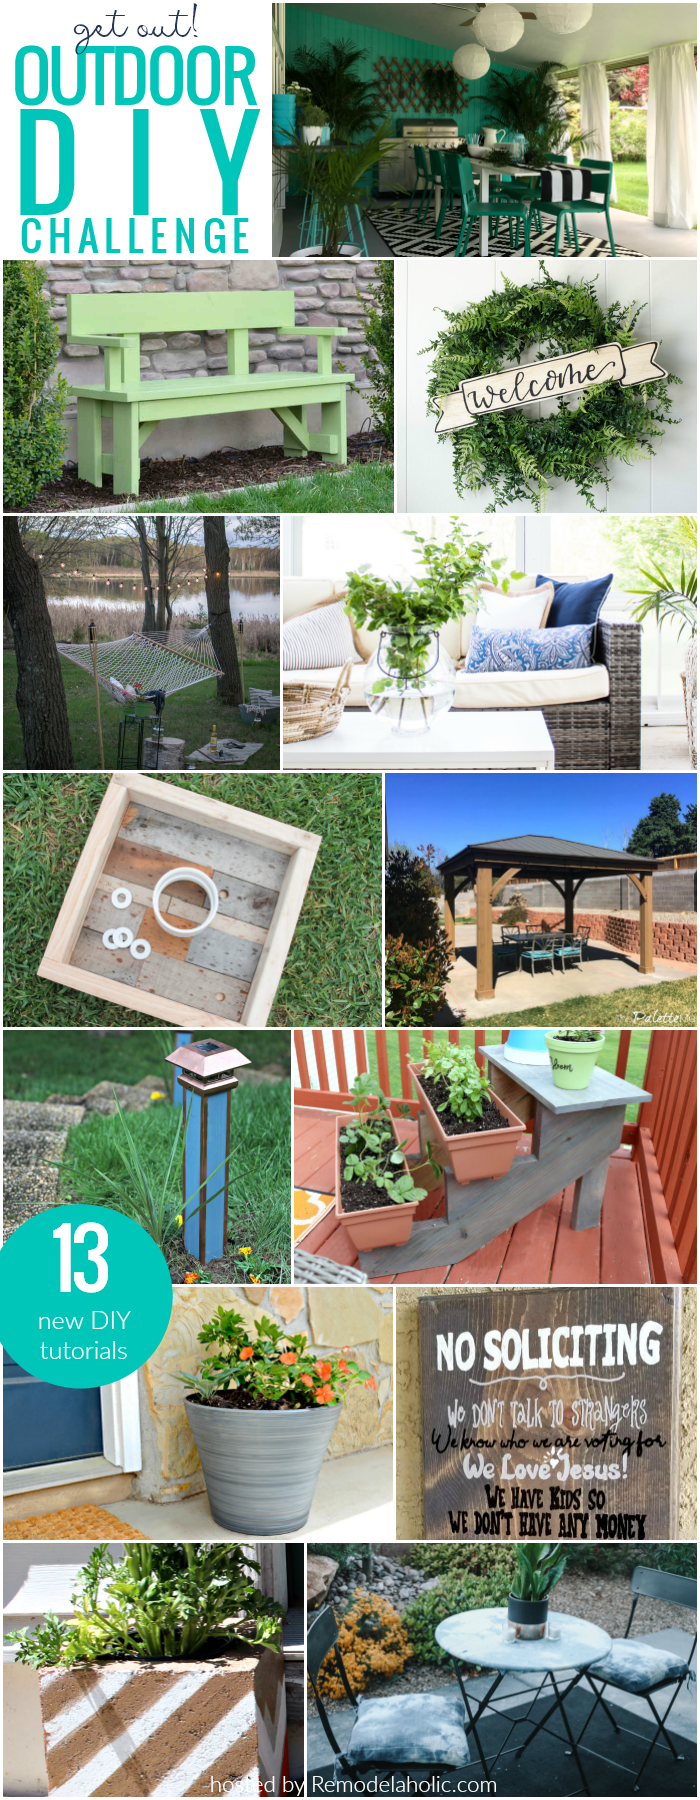
I’m also participating in Remodelaholics Get Out! Outdoor Challenge. There are links to lots of fun outdoor DIY projects at the bottom of the post!

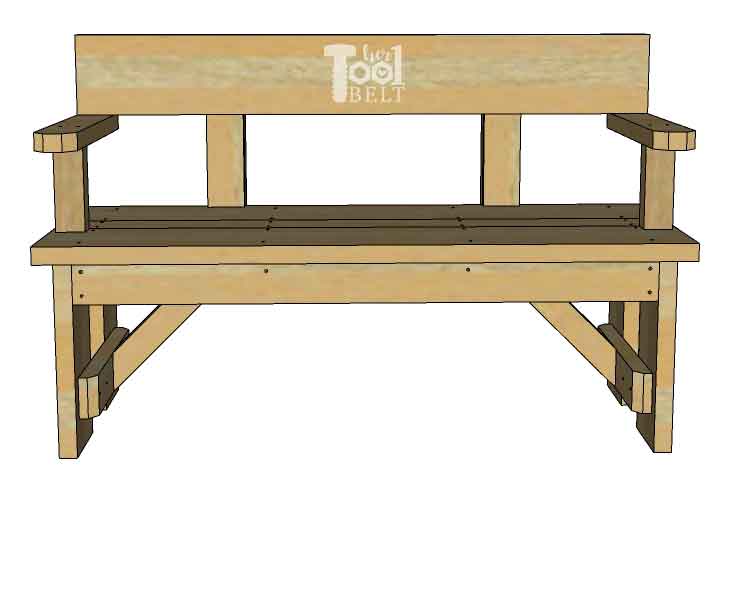
How to Build a Wood Bench with Back Support and Arm Rests
Bench Materials for a 54″ long bench
- 1 – 2″ x 8″ x 16′ board (or a 2x8x10′ and a 2x8x8′)
- 1 – 2″ x 6″ x 8′ board
- 3 – 2″ x 4″ x 8′ boards
- 1 – 2″ x 4″ x 8′
- 1 – 1″ x 4″ x 8′ board (really only need about 26″)
- wood glue
- sandpaper
- paint
- paint brush
- 2 1/2″ screws
- 2″ brad nails – optional
Tools Used
- Circular Saw or miter saw
- Drill and Impact Driver
- Drill Bit
- Countersink Bit
- Speed Square
- Measuring Tape
- Clamps
- Brad Nailer – optional
*Note as part of the #THDprospective program I am reviewing the Ryobi brushless circular saw, DeWALT Drill and Driver combo and Makita Gold power bit as part of this wood bench build.
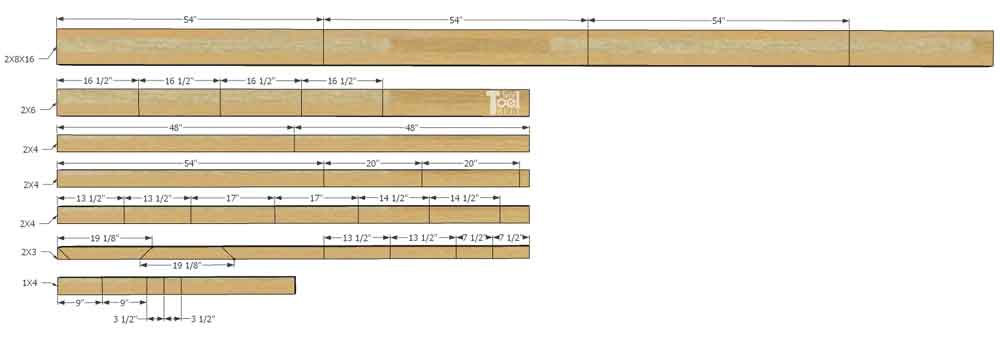
Bench Cut List
- 3 – 1 1/2″ x 7 1/4″ x 54″ Seat and Back (2×8)
- 4 – 1 1/2″ x 5 1/2″ x 16 1/2″ Legs (2×6)
- 2 – 1 1/2″ x 3 1/2″ x 48″ Long Skirt (2×4)
- 1 – 1 1/2″ x 3 1/2″ x 54″ Seat (2×4)
- 2 – 1 1/2″ x 3 1/2″ x 20″ Back Support (2×4)
- 2 – 1 1/2″ x 3 1/2″ x 13 1/2″ Short Skirt (2×4)
- 2 – 1 1/2″ x 3 1/2″ x 14 1/2″ Leg Support (2×4)
- 2 – 1 1/2″ x 3 1/2″ x 17″ Arm Rest (2×4)
- 2 – 1 1/2″ x 2 1/2″ x 19 1/8″ with 45 deg miter on both ends Diagonal Support (2×3)
- 2 – 1 1/2″ x 2 1/2″ x 13 1/2″ Seat Support (2×3)
- 2 – 1 1/2″ x 2 1/2″ x 7 1/2″ Arm Support (2×3)
- 2 – 3/4″ x 3 1/2″ x 3 1/2″ Small Spacer (1×4)
- 2 – 3/4″ x 3 1/2″ x 9″ Back Spacer (1×4)
Wood Bench Cut Diagram
Step 1 – Make Cuts and Pre-drill Holes
Make the cuts for the bench according to the cut list and diagram. I am using a circular saw and speed square to make the cuts, but if you have a miter saw that works great too.
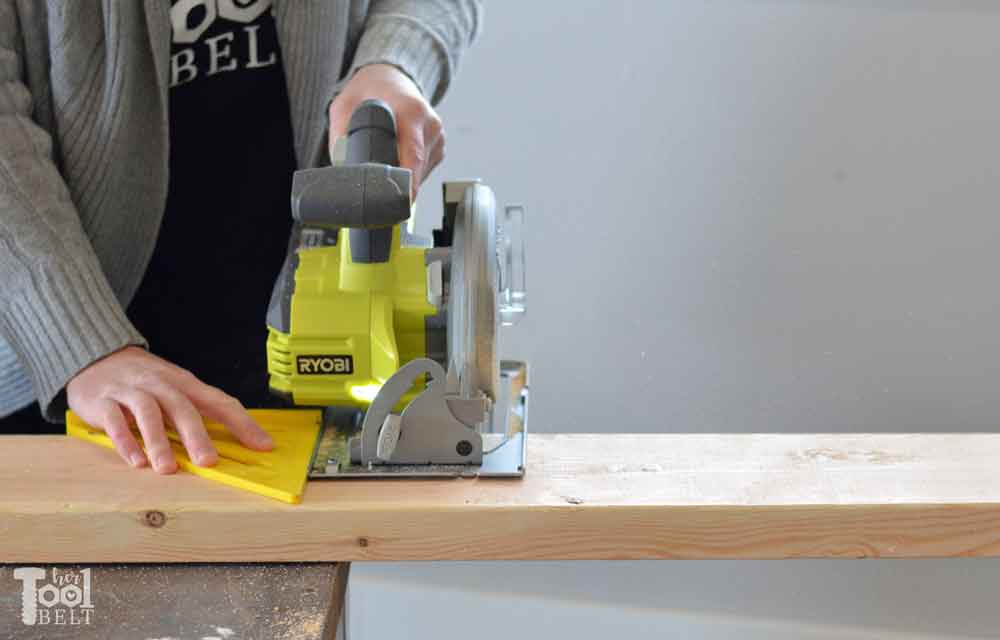
The Ryobi Brushless circular saw is a great entry level saw. The new brushless motor lets you get more cuts per battery charge, and it has no problem getting thru 2x material.
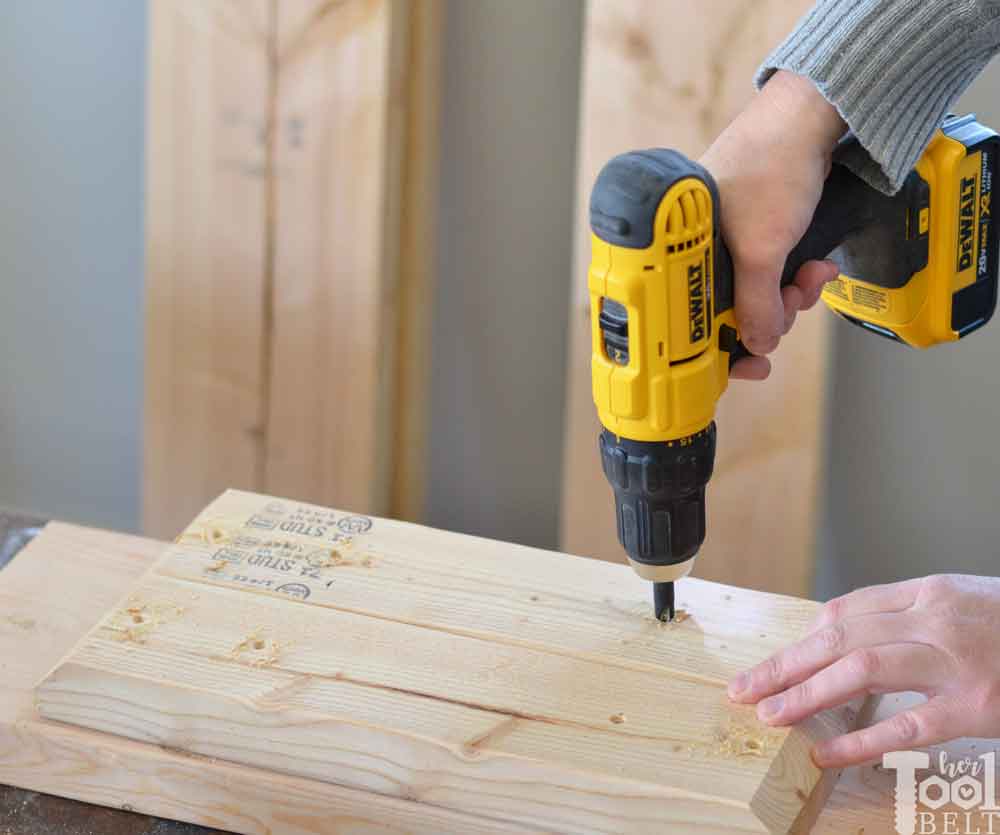
Step 2 – Pre-drill and Countersink the Holes
To make assembling the wood bench easier, I decided to pre-drill all of the holes for the screws. This will also help reduce split boards.
Here are the dimensions for all of the holes to countersink for the bench. *Note the X2 means there are 2 boards to pre-drill.
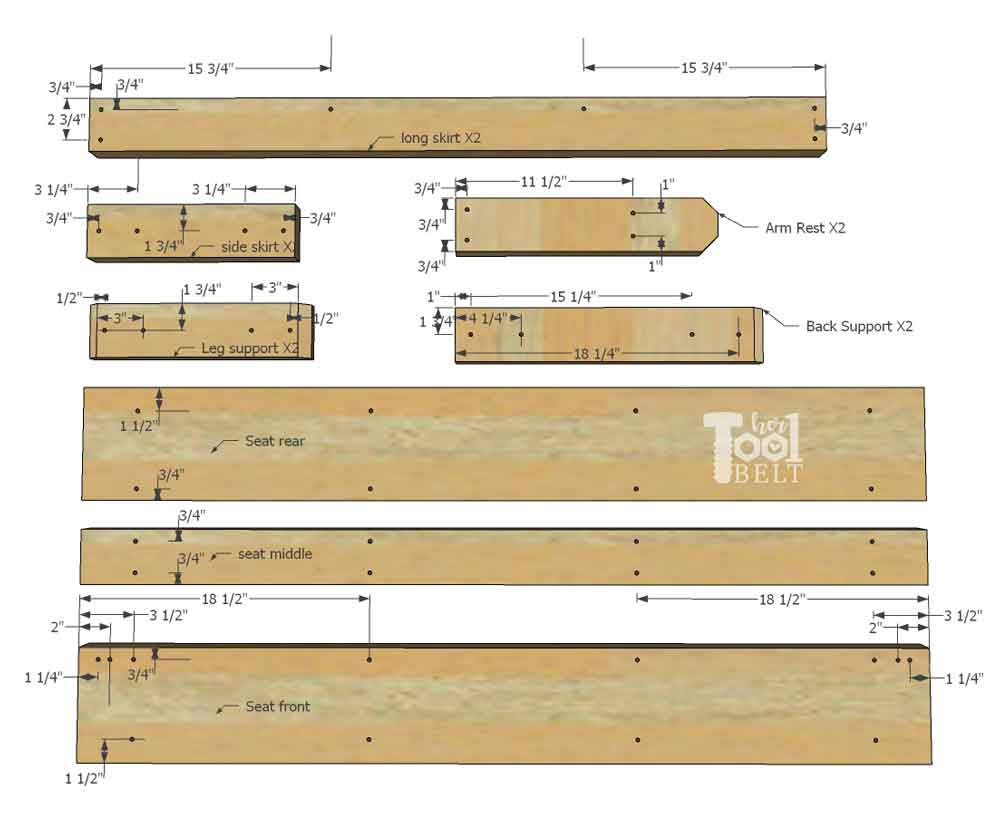
After making all of the cuts and drilling the holes, I went ahead and sanded all of the boards now. It seems to be easier for me to sand the boards individually rather than when the bench is all assembled.
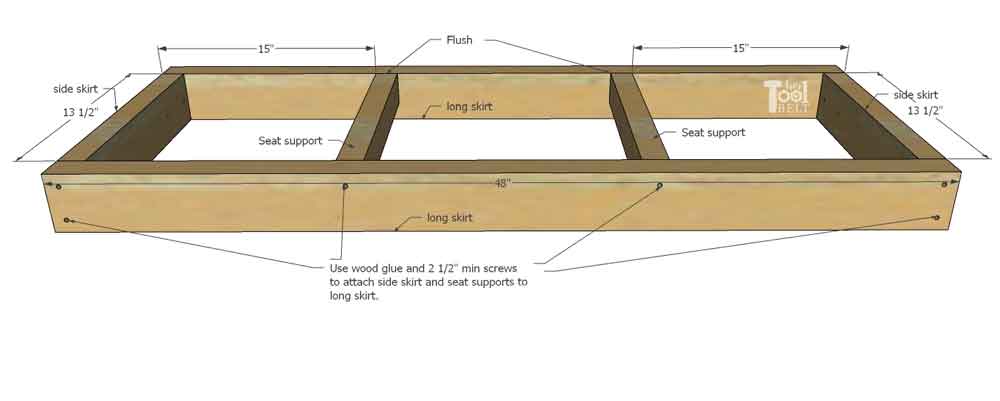
Step 3 – Wood Bench Seat Assembly
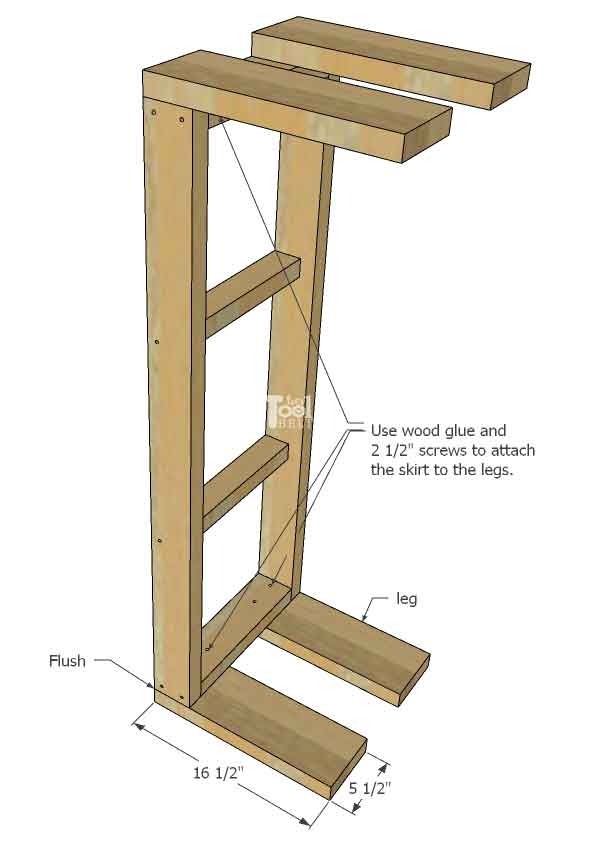
On the 48″ long skirt boards, measure and mark over 15″ from each end. Use wood glue and 2 1/2″ screws to attach the side skirt boards to each end and the seat support board at the 15″ marks. The seat supports are only 2×3’s so make sure they are flush with the top of the long skirt boards.
Attach the 2×6 x 16 1/2″ legs to the short skirt boards with wood glue and 2 1/2″ screws. Try and make the tops of the legs flush with the tops of the skirt boards.
Tips for dealing with crooked boards
*Often dimensional lumber will be somewhat crooked and can make your wood bench rock. I like to attach 3 legs to the skirt first. Then stand the bench on the 3 legs and place the 4th leg so the bench will have all 4 feet on the ground. Sometimes that means the 4th leg top isn’t flush with the skirt, but I’d rather have that then a rocking bench. 🙂
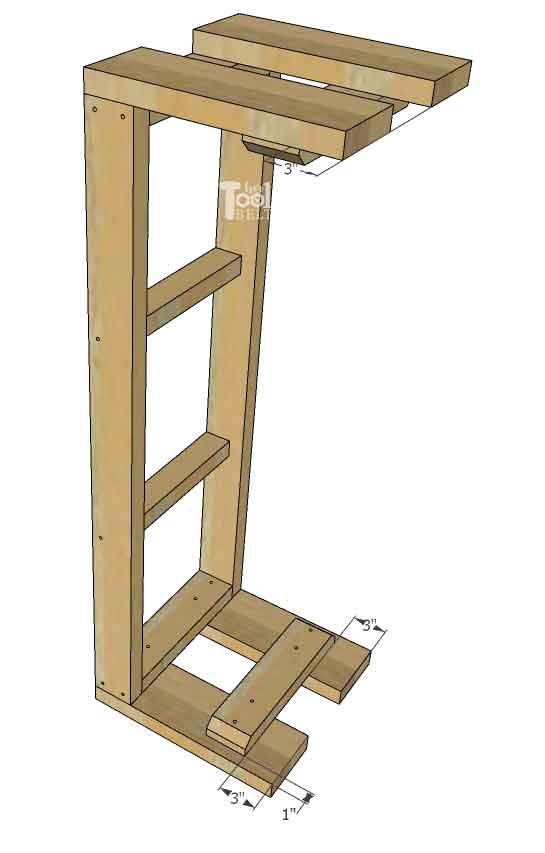
On the legs, measure and mark 3″ from the bottom and about 1″ from each side. Use wood glue and 2 1/2″ screws to secure the leg supports to each set of legs.
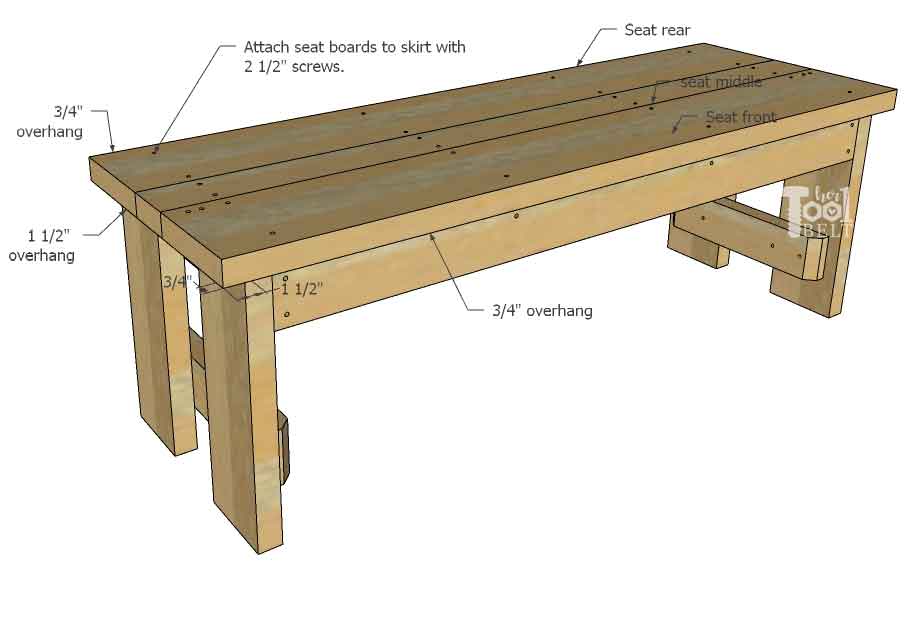
Step 4 – Bench Top Assembly
Decide which side will be the bench back. Place the rear seat board on the skirt and overhang in the back 3/4″ and about 1 1/2″ on each end. Use wood glue and 2 1/2″ screws to attach the rear seat board to the skirt. Next line up the seat middle (2×4) board and secure with wood glue and 2 1/2″ screws. Finally secure the front seat board with wood glue and 2 1/2″ screws. The front board should also overhang about 3/4″ in the front.
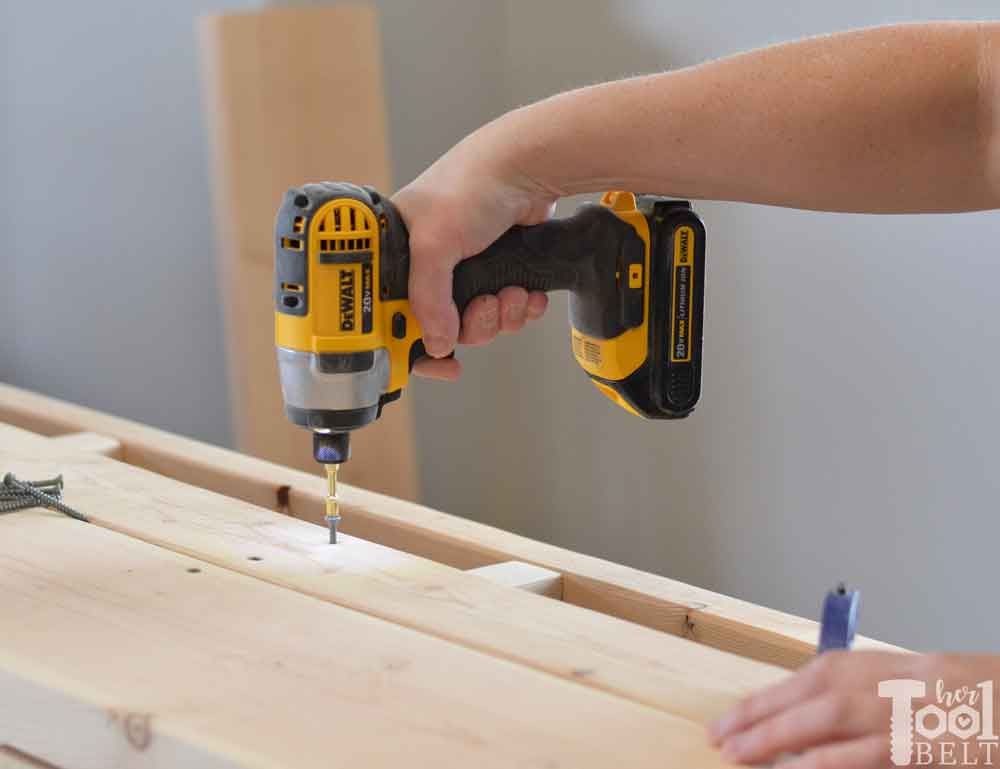
One of my favorite tools is the impact driver, it makes driving screws easier IMHO. But you need to make sure you are using ‘impact ready’ bits to be able to withstand the torque. I’ve been using the DeWALT 20V drill and impact driver combo on my last few projects and they are a solid set. This set isn’t brushless, so I did notice a funny smell when I started using them, but apparently that’s common and it went away after a while. Just needed a break in period!
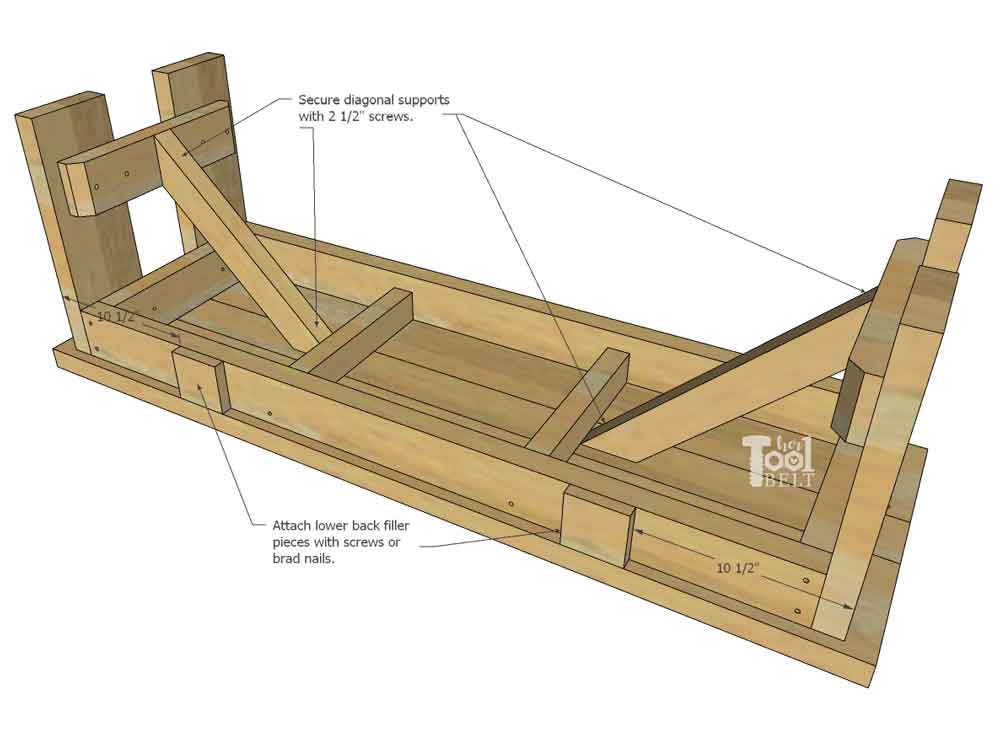
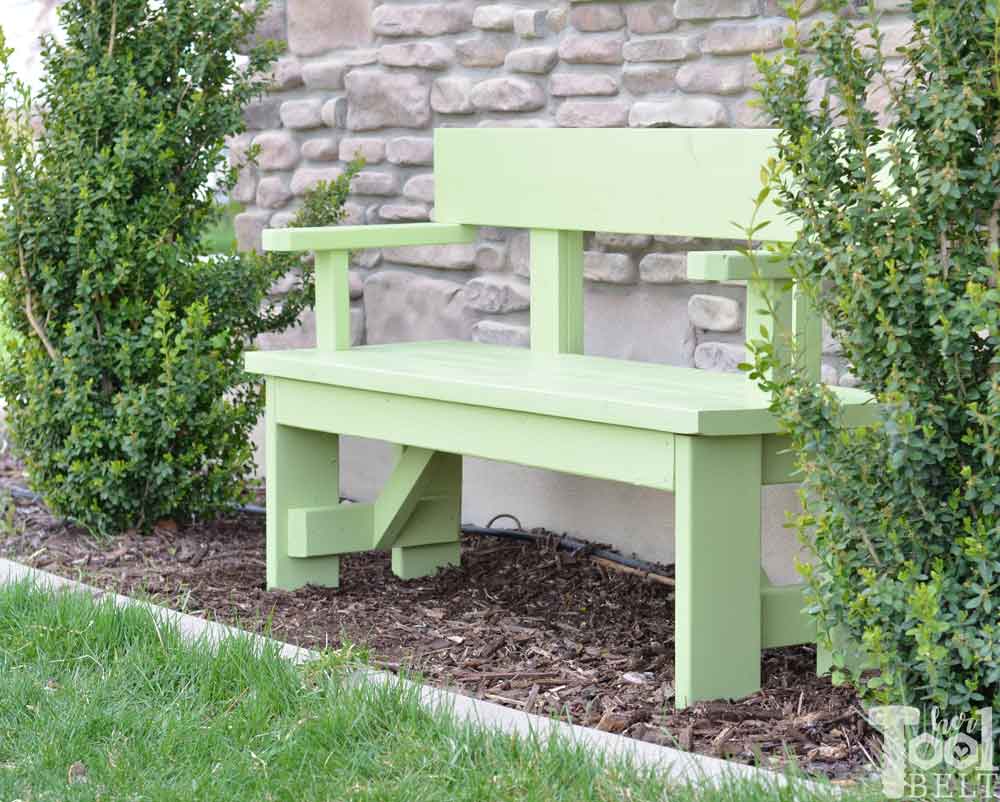
Turn the bench back over and find the center of the leg supports and seat supports. Center the diagonal supports on the center lines and use the drill to pre-drill a hole on each end, and secure with 2 1/2″ screws. Measure and mark 10 1/2″ from each end of the leg/skirt corner and attach the lower back filler blocks with either screws or a few brad nails.
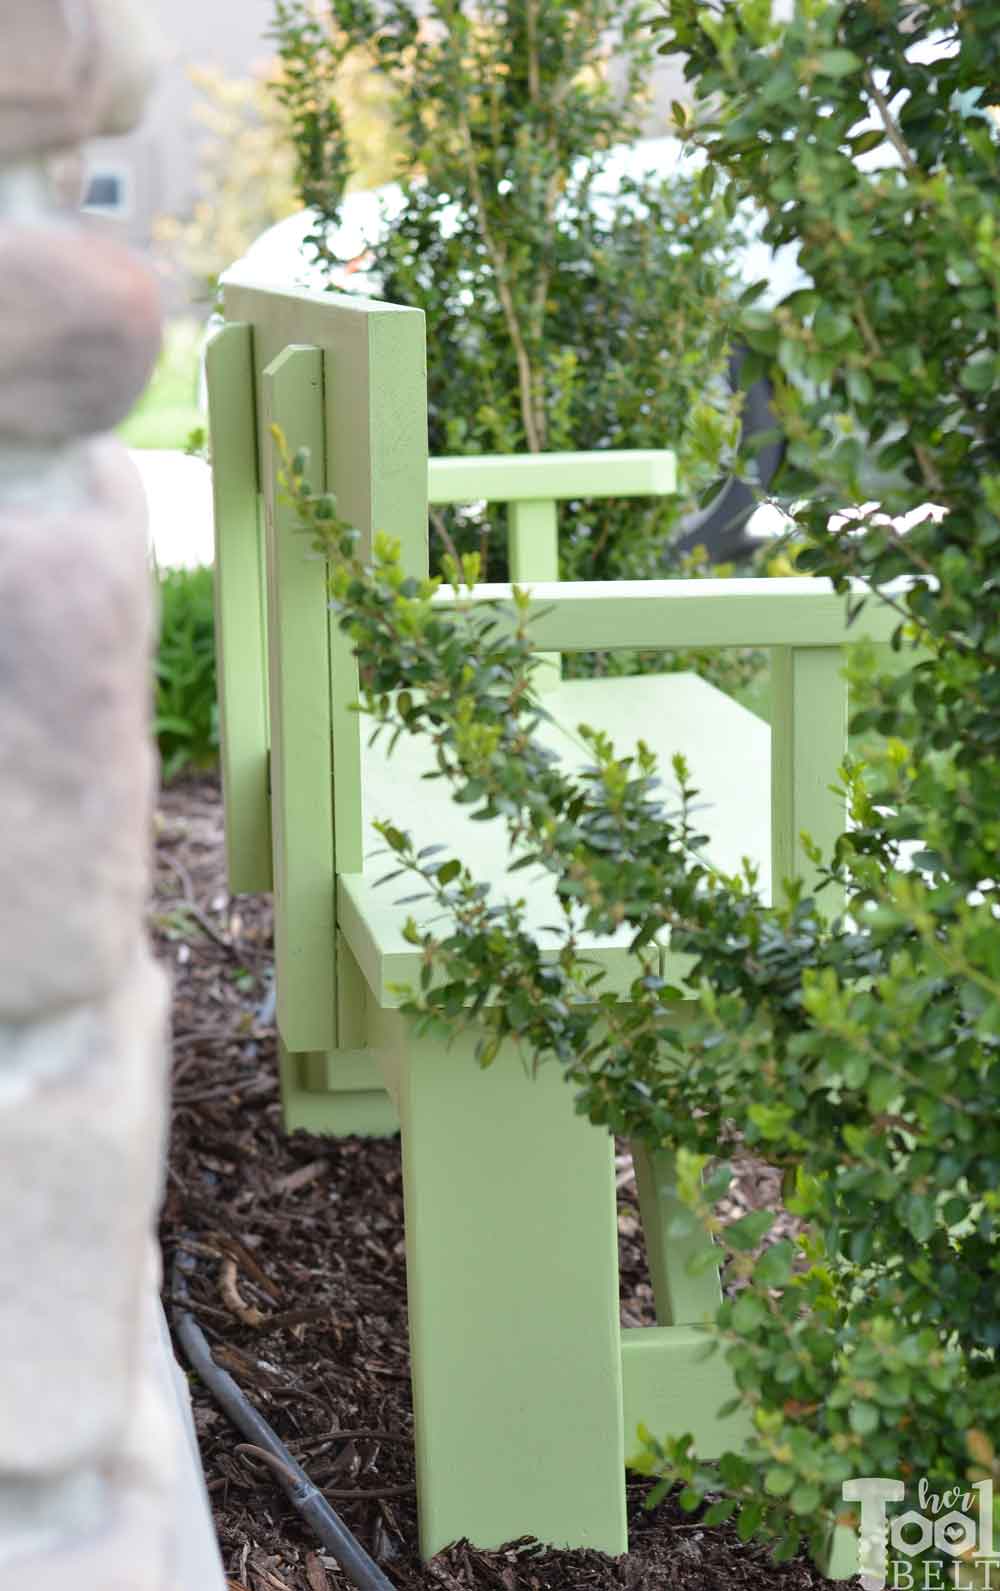
Step 5 – Arm Rest Assembly
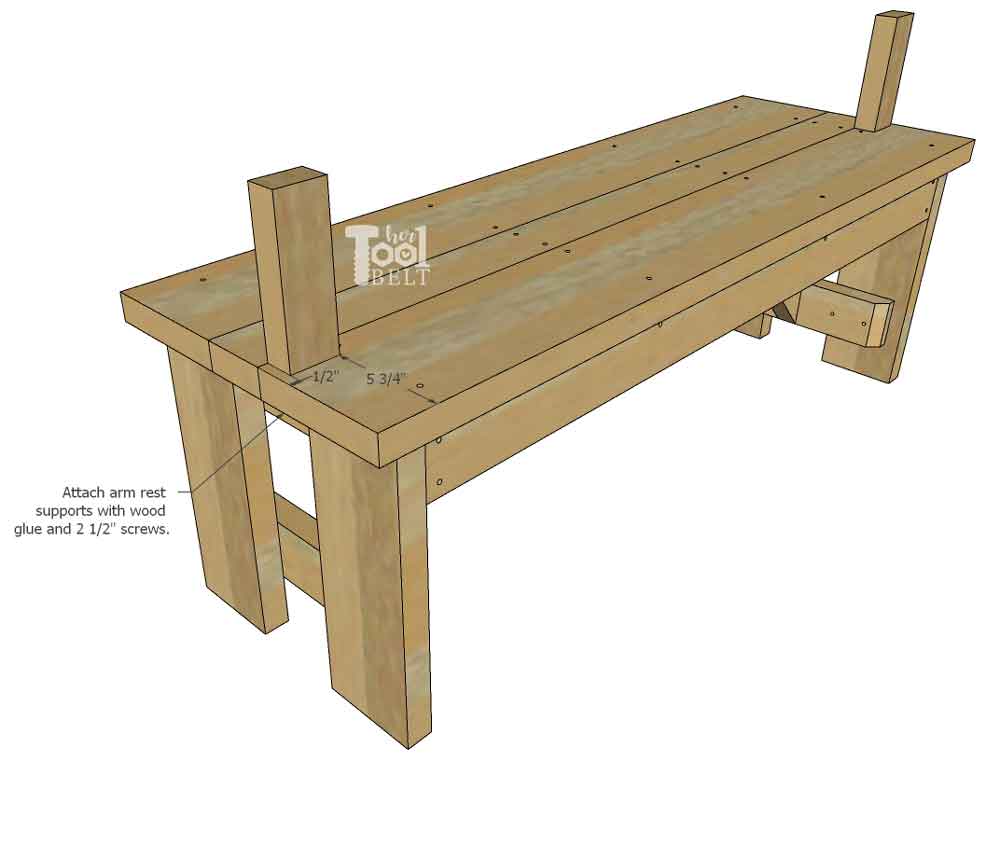
Measure over about 1/2″ from each end of the front seat board and about 5 3/4″ back. Attach the arm rest supports with wood glue and 2 1/2″ screws. I may have goofed a little here and things get a little tight to fit a drill in there. I had to use a hand held screwdriver to secure the supports to the seat.
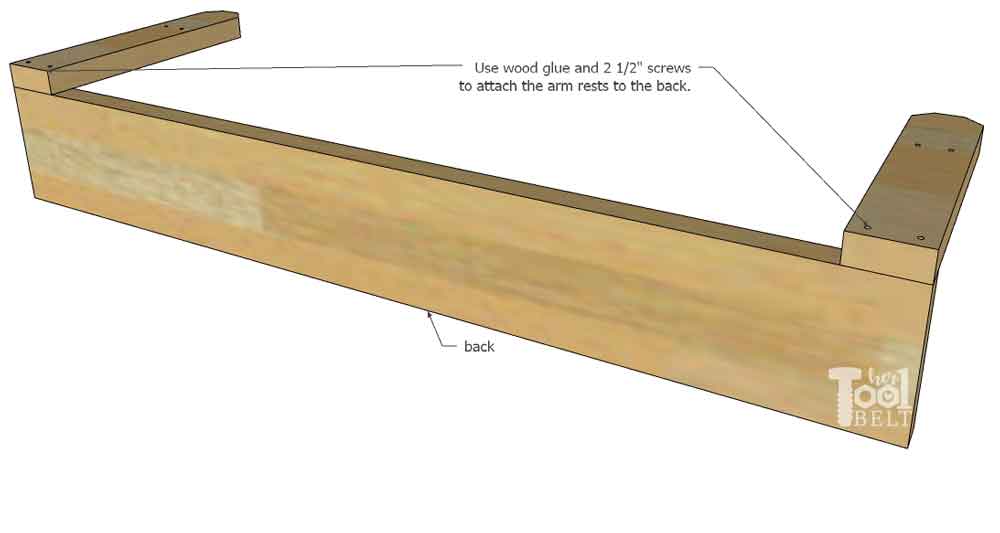
Next attach the arm rests to the bottom edge of the back board with wood glue and 2 1/2″ screws.
Step 6 – Attach the Wood Bench Back
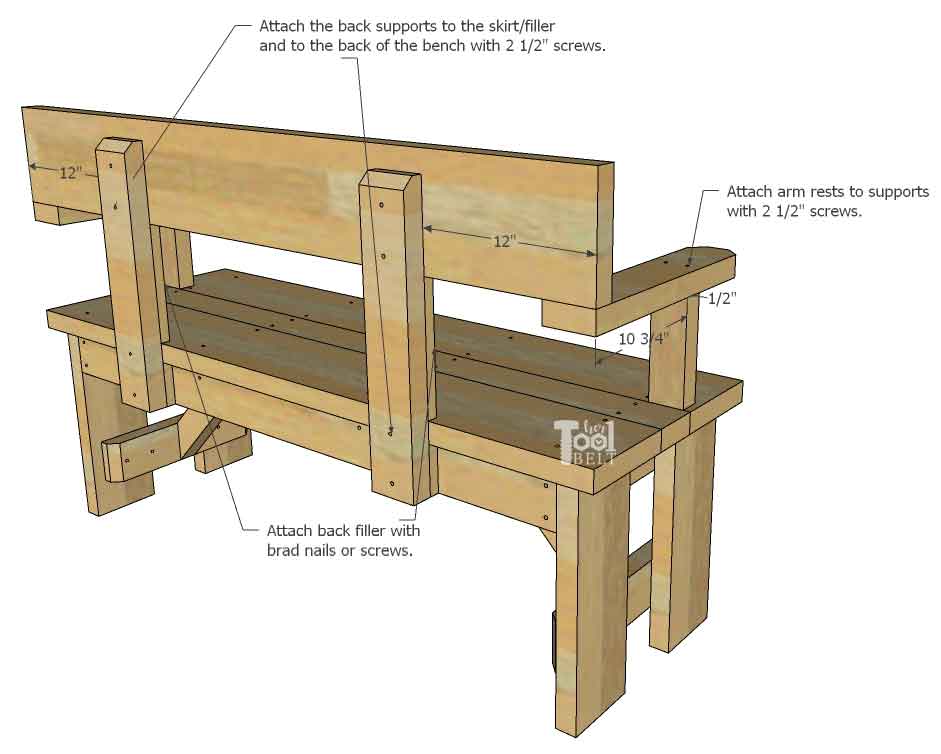
Grab the back support boards and attach them to the lower back filler pieces/rear seat with wood glue and 2 1/2″ screws. Add the back filler (1×4) to the back support with brad nails or screws. Place the back board onto the back filler, and center it between the back support boards. The back supports should be about 12″ from each end of the back board. Secure the bench back with wood glue and 2 1/2″ screws. Finally attach the arm rests to the supports with wood glue and 2 1/2″ screws.
Step 7 – Finish the Wood Bench
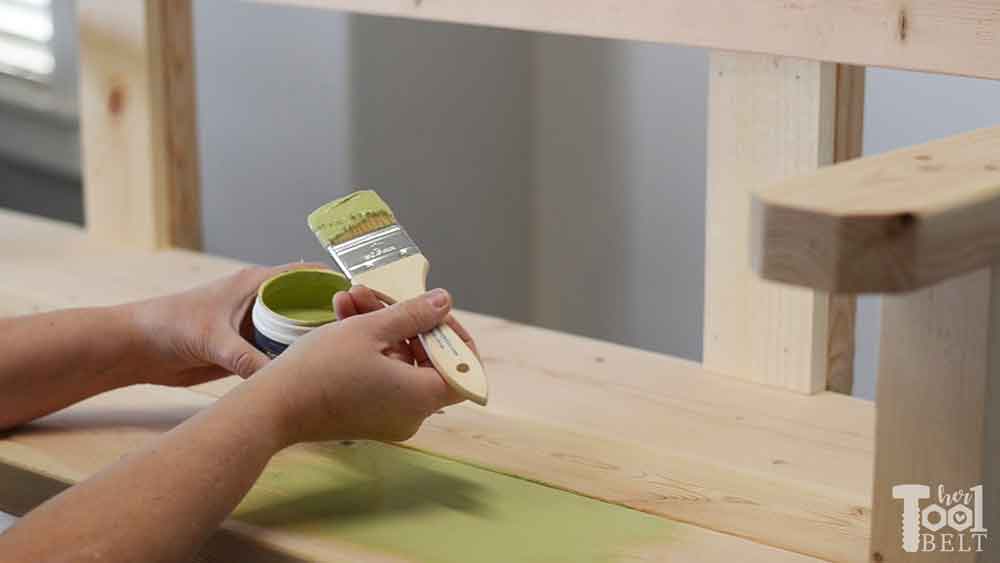
Remove any excess glue. Sand the wood bench as needed. If I’m painting, I’ll only sand with 80 grit. If I’m staining I’ll finish sanding with 120-150 grit sandpaper. Stain or paint as you like. I used 2 paint sample color containers (interior/exterior) to paint this whole bench, the color is fresh artichoke by Behr! Mmm
What do you think? Is this your next project?
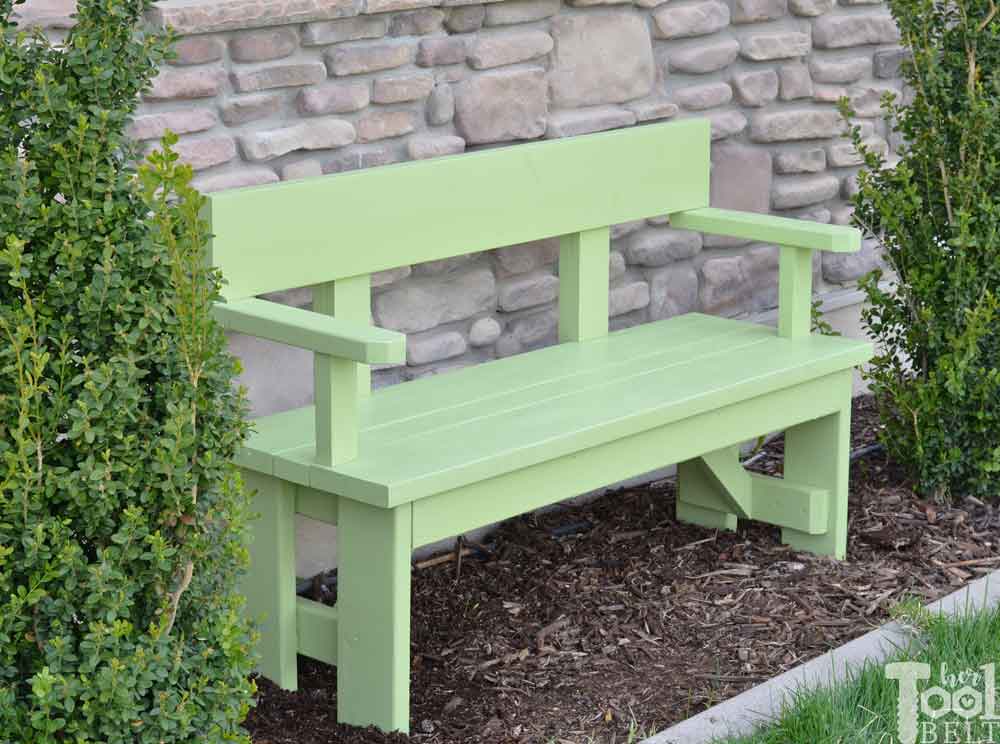
I can tell you one thing, this wood bench is very stout.
Thanks for pinning!
Get Out! Outdoor DIY Projects
Covered Patio Outdoor Dining Area | Remodelaholic
DIY Outdoor Bench | Hertoolbelt
Wooden Welcome Sign Wreath | Lemon Thistle
Backyard Hammock Area | North Country Nest
Sunroom Makeover | Lantern Lane Designs
DIY Washer Toss Game | Everyday Party Magazine
How to Build a Gazebo (from a Kit) | The Palette Muse
DIY Solar Walkway Lights | Toolbox Divas
Tiered Vertical Planter Garden | Creative Ramblings
Simple DIY Tricks for a Covered Porch | Ugly Duckling House
Funny DIY No Soliciting Sign | Leap of Faith Crafting
Easy Cinder Block Garden Planters | Our Crafty Mom
Bistro Set Makeover | Practical & Pretty
“I acknowledge that The Home Depot is partnering with me to participate in the Tool Review Program. As a part of the Program, I am receiving compensation in the form of products and services, for the purpose of promoting The Home Depot. All expressed opinions and experiences are my own words. My post complies with the Word Of Mouth Marketing Association (WOMMA) Ethics Code and applicable Federal Trade Commission guidelines.”
I love this bench! I’ve recently moved to a new home and well the garden is rather sparse, this is an ideal project to start bringing some life into my garden, plus it’ll make my wife happy. Thank you.
Can I ask what tool you used to create those plans? I’ve got an idea in mind and could do with a tool that will generate plans like you used above, at least that way I’ll know exactly how much lumber to purchase.
Thanks
Thank you so much for these plans. My son used them to make 2 benches for the local food pantry for his Eagle Scout Project for people to sit on while they wait to register.