• Home
  • Project Gallery
  • About me
    • Disclosure
    • Disclaimer
  • Blog

Her Tool Belt

DIY furniture plans, crafts, and home improvement tutorials to empower you!

  • Free Woodworking Plans
    • Bathroom Furniture
    • Bedroom Furniture
    • Entry
    • Family Room Furniture
    • Garage
    • Kitchen furniture
    • Laundry Room
    • Mudroom Furniture
    • Organization
    • Outdoor Furniture
  • Home Decor
    • Upcycle
  • Crafts
    • Holiday
  • Home Improvement
    • Cleaning
    • Fix IT
    • Paint
    • Tile
  • Tool Reviews
  • Tool Time Videos

Kid’s Step Stool

July 17, 2015 by Amy 38 Comments

Hi!  I’d love for you to follow me on Pinterest Her Tool Belt  and if you love instagram, you can keep up with me there too!

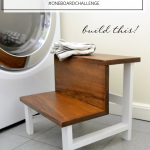
My friend Jen Woodhouse put out a challenge for a project built using only one board, a 1″ x 8″ x 8′ board.  At first I thought sweet, this will be a blast…

FINAL-one-board-challenge-graphic

Then as the time approaches builders block sets in and I start getting nervous.  What to build, what to build???  Of course I want to make it fun, awesome and so cool.

Nothing…no awesome ideas.

Well back to the to-do list.  This isn’t amazing, but it’s very functional if you are short or have kids.

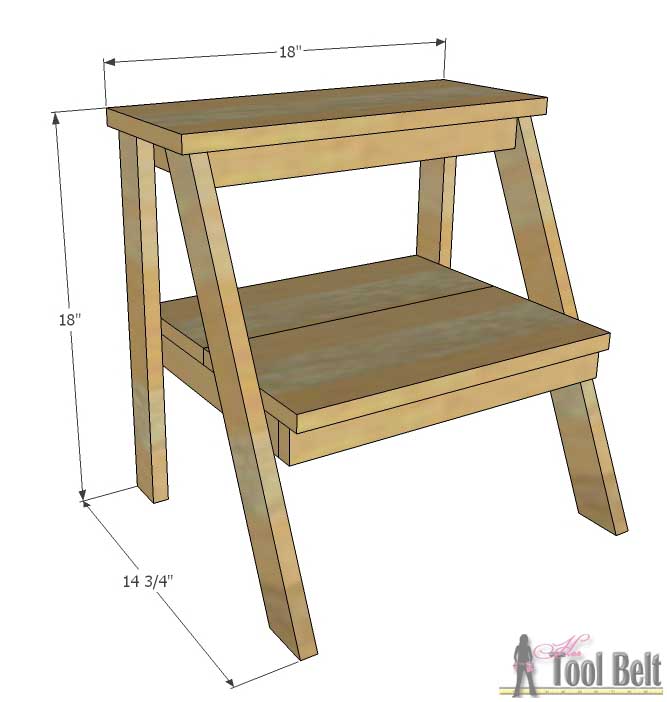
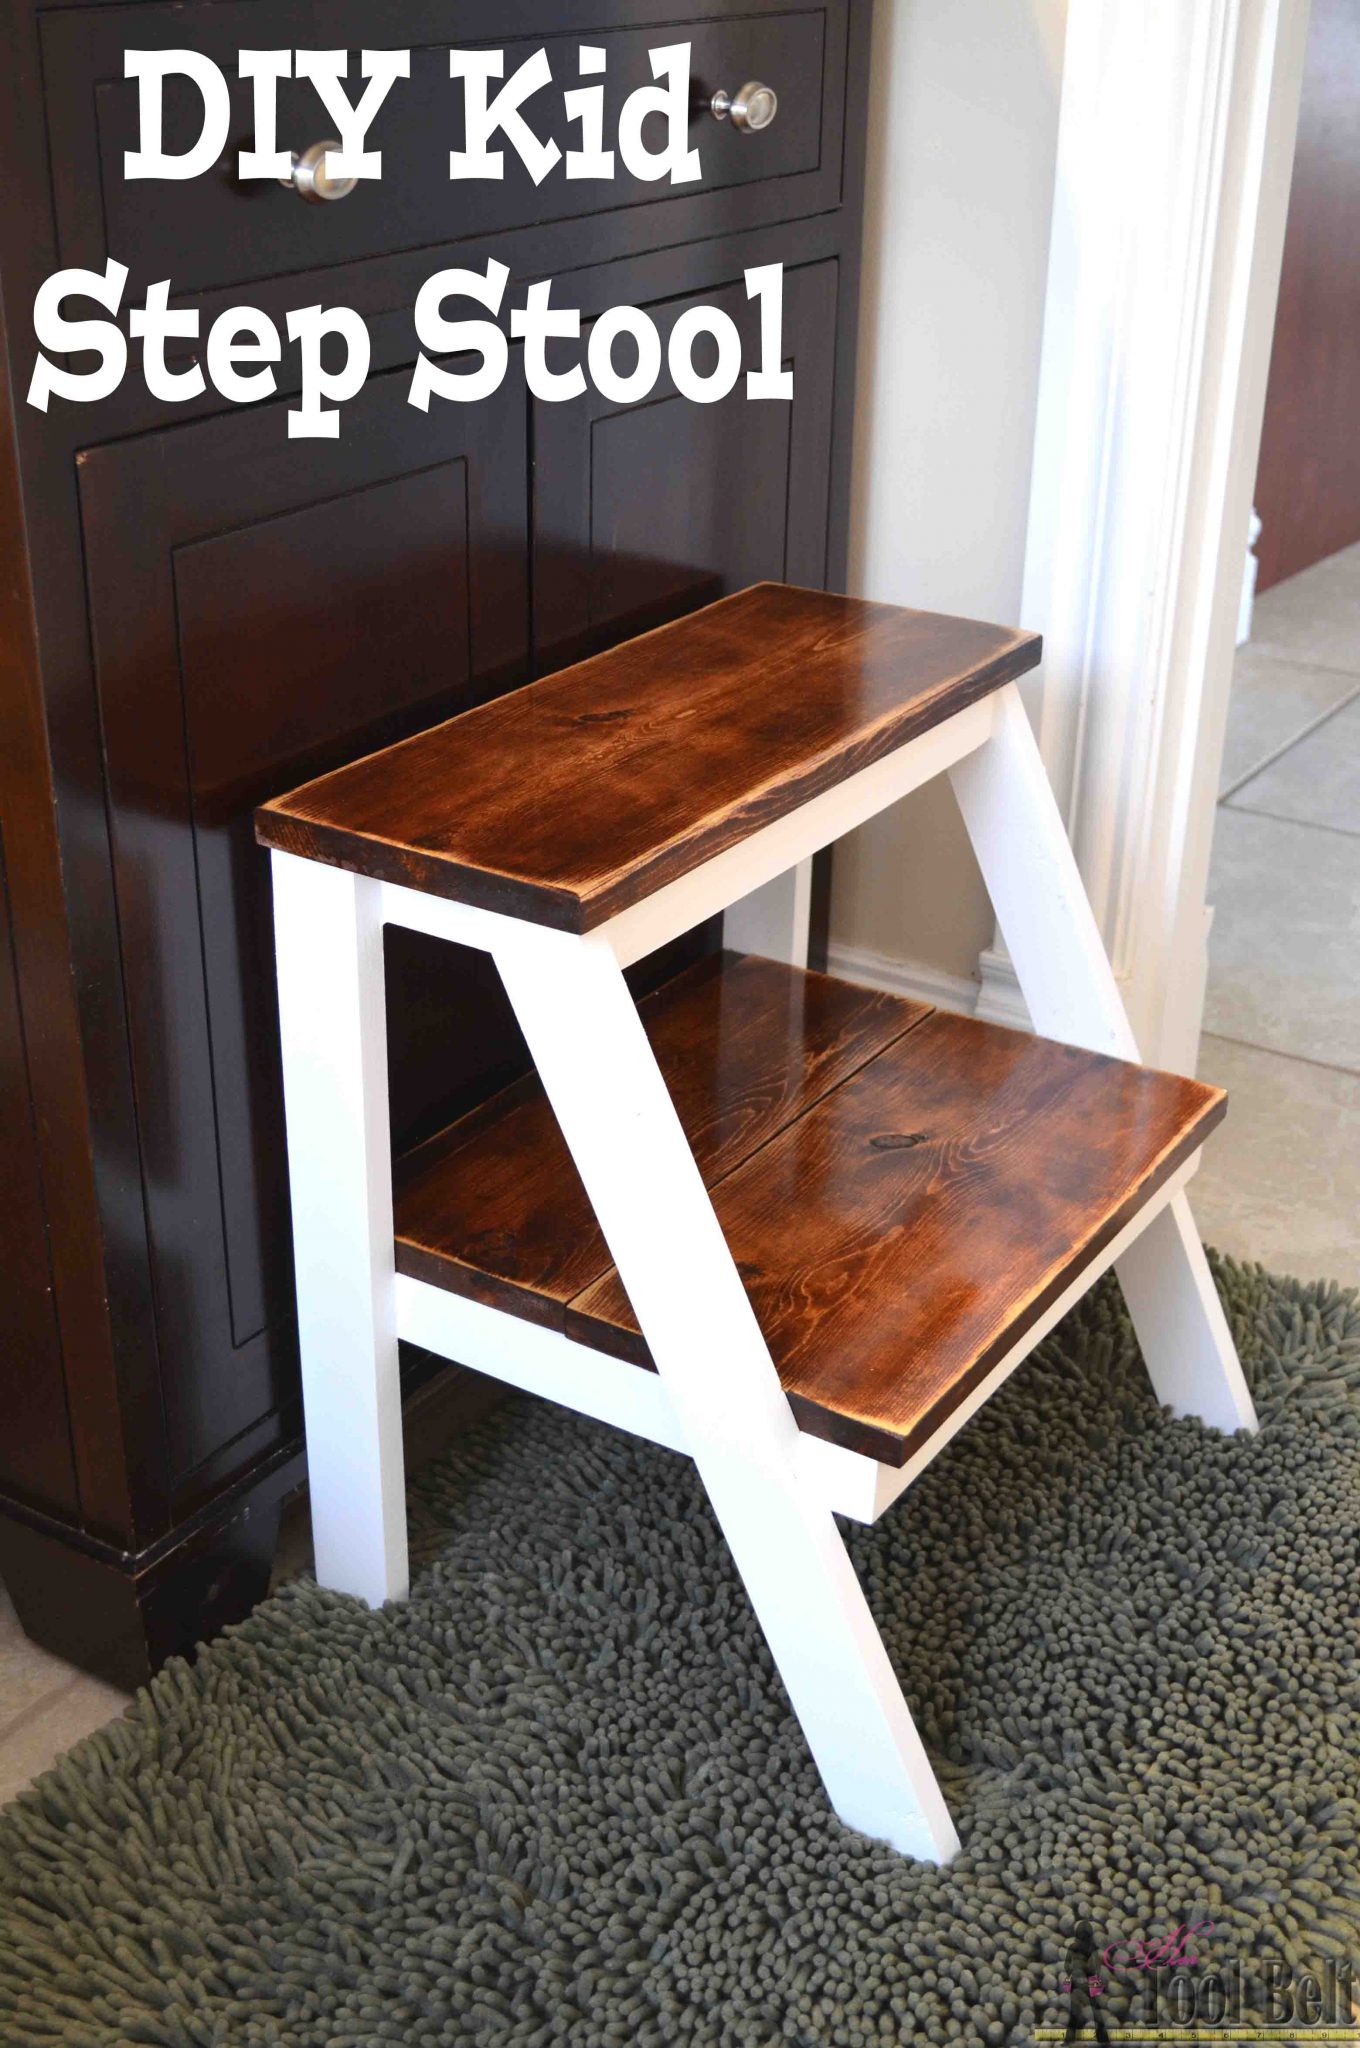
My kids have been using a 12″ plastic stool from IKEA to boost them high enough to wash their hands in the bathroom.  This stool works great for the 5 year old, but it’s too short for the 2 year old and she can’t reach the faucet.  I measured a good height for her, and made the new stool 18″ tall.  This is a great height for her, and the 5 year old can stand on the lower stair and reach comfortably.

Give yourself a boost! Build this simple DIY step stool for those hard to reach places. Perfect kid step stool to wash hands.

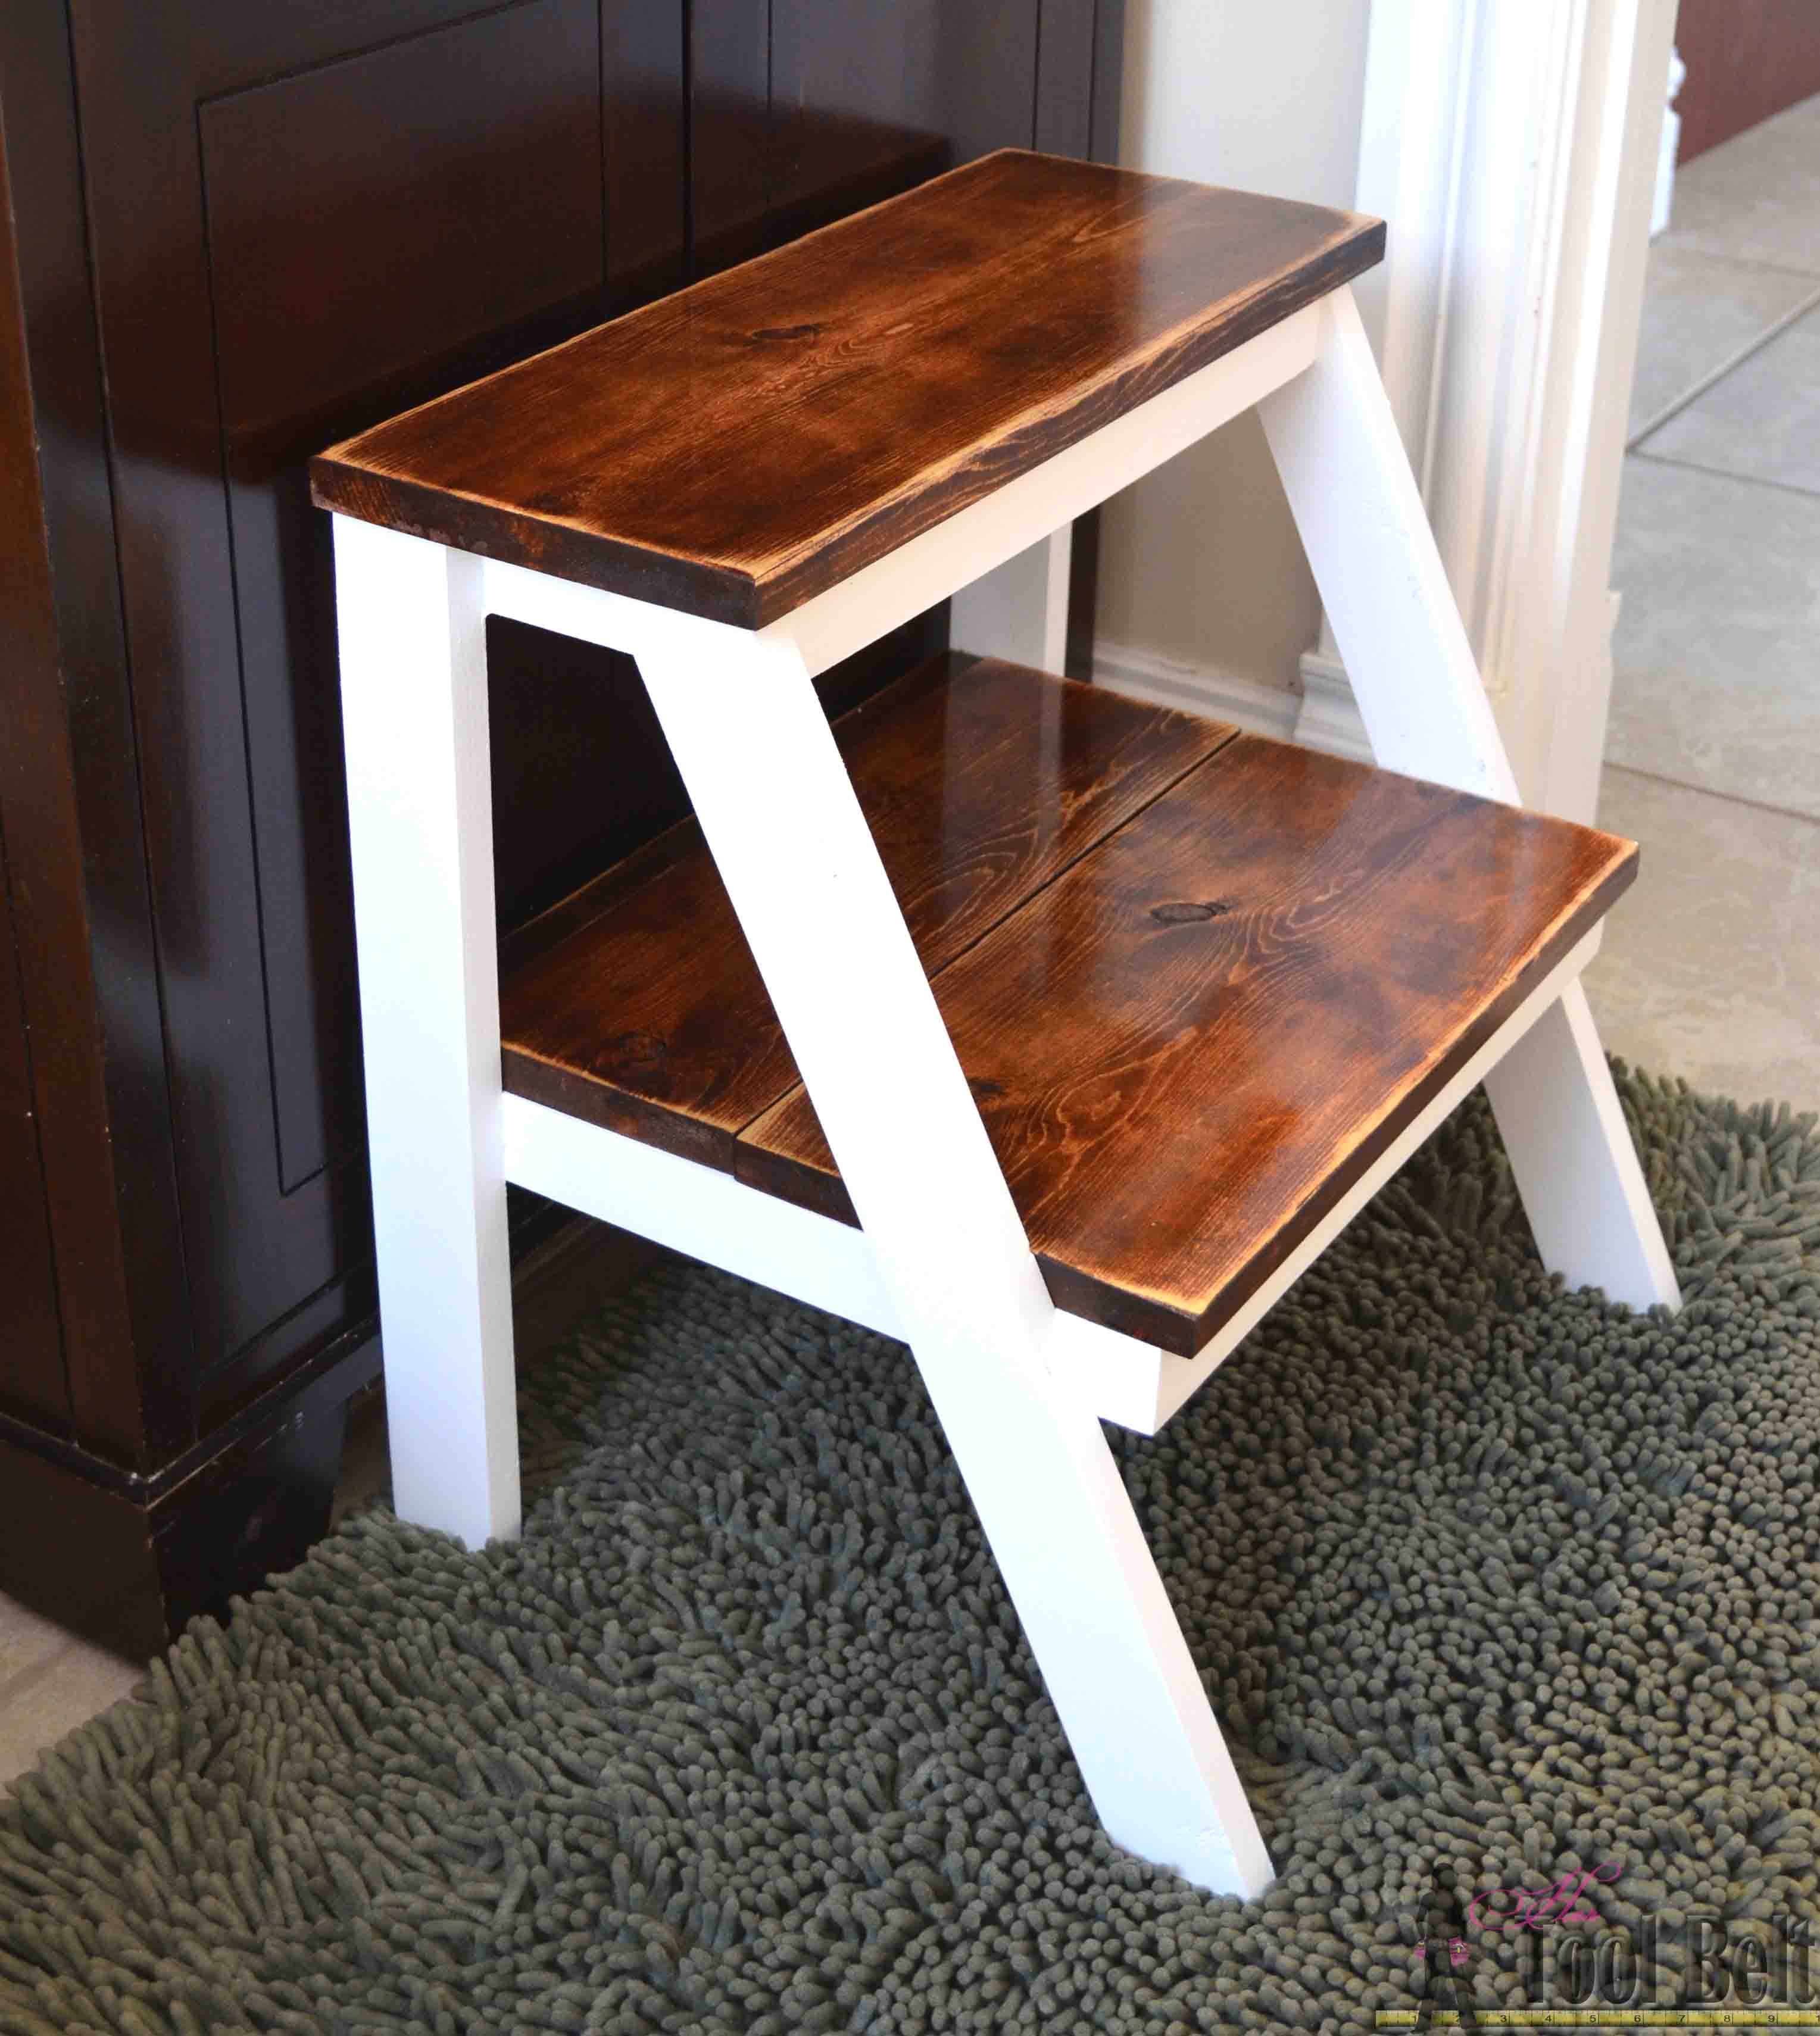
How to Build a DIY Kid’s Step Stool

I call it a kids, but it is plenty sturdy for big people too.

Give yourself a boost! Build this simple DIY step stool for those hard to reach places. Perfect kid step stool to wash hands.

Materials

  • 1″ x 8″ x 8′ board
  • 1 1/4″ pocket screws (Zinc Pocket-Hole Screws) affiliate
  • wood glue
  • sand paper
    • Approximate wood cost – $8.91

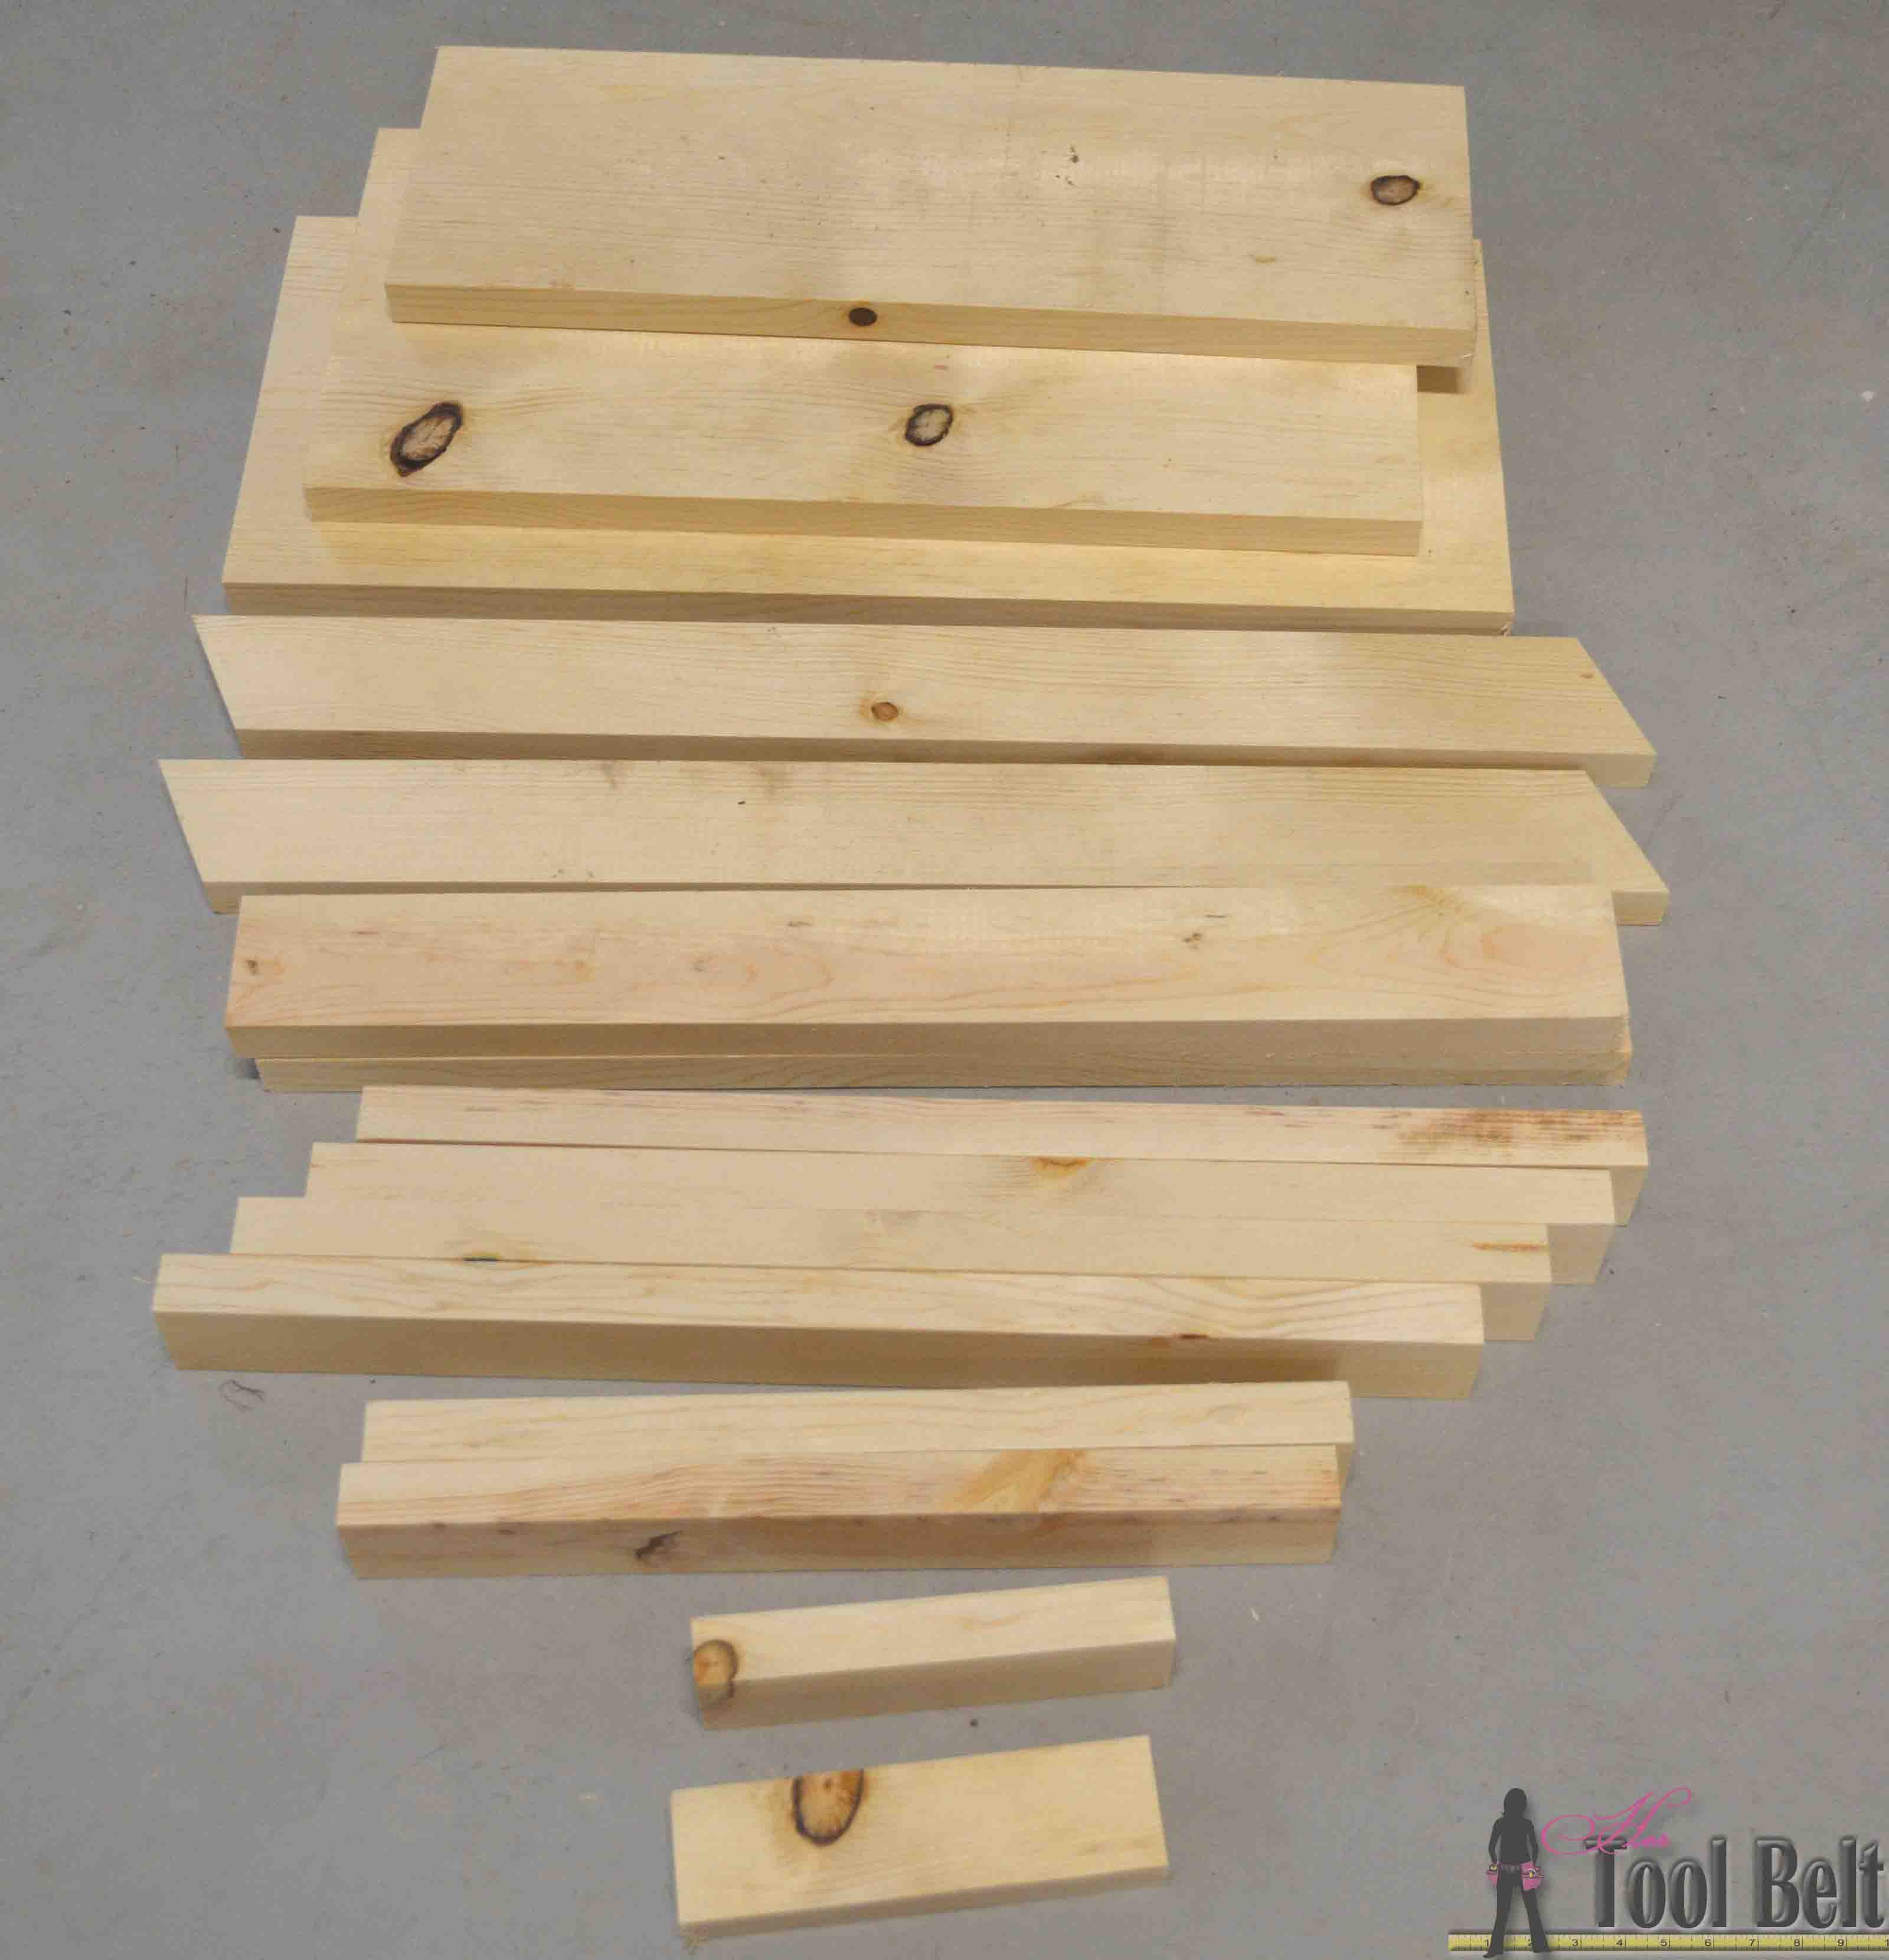
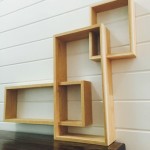
The stool starts out as this humble board.
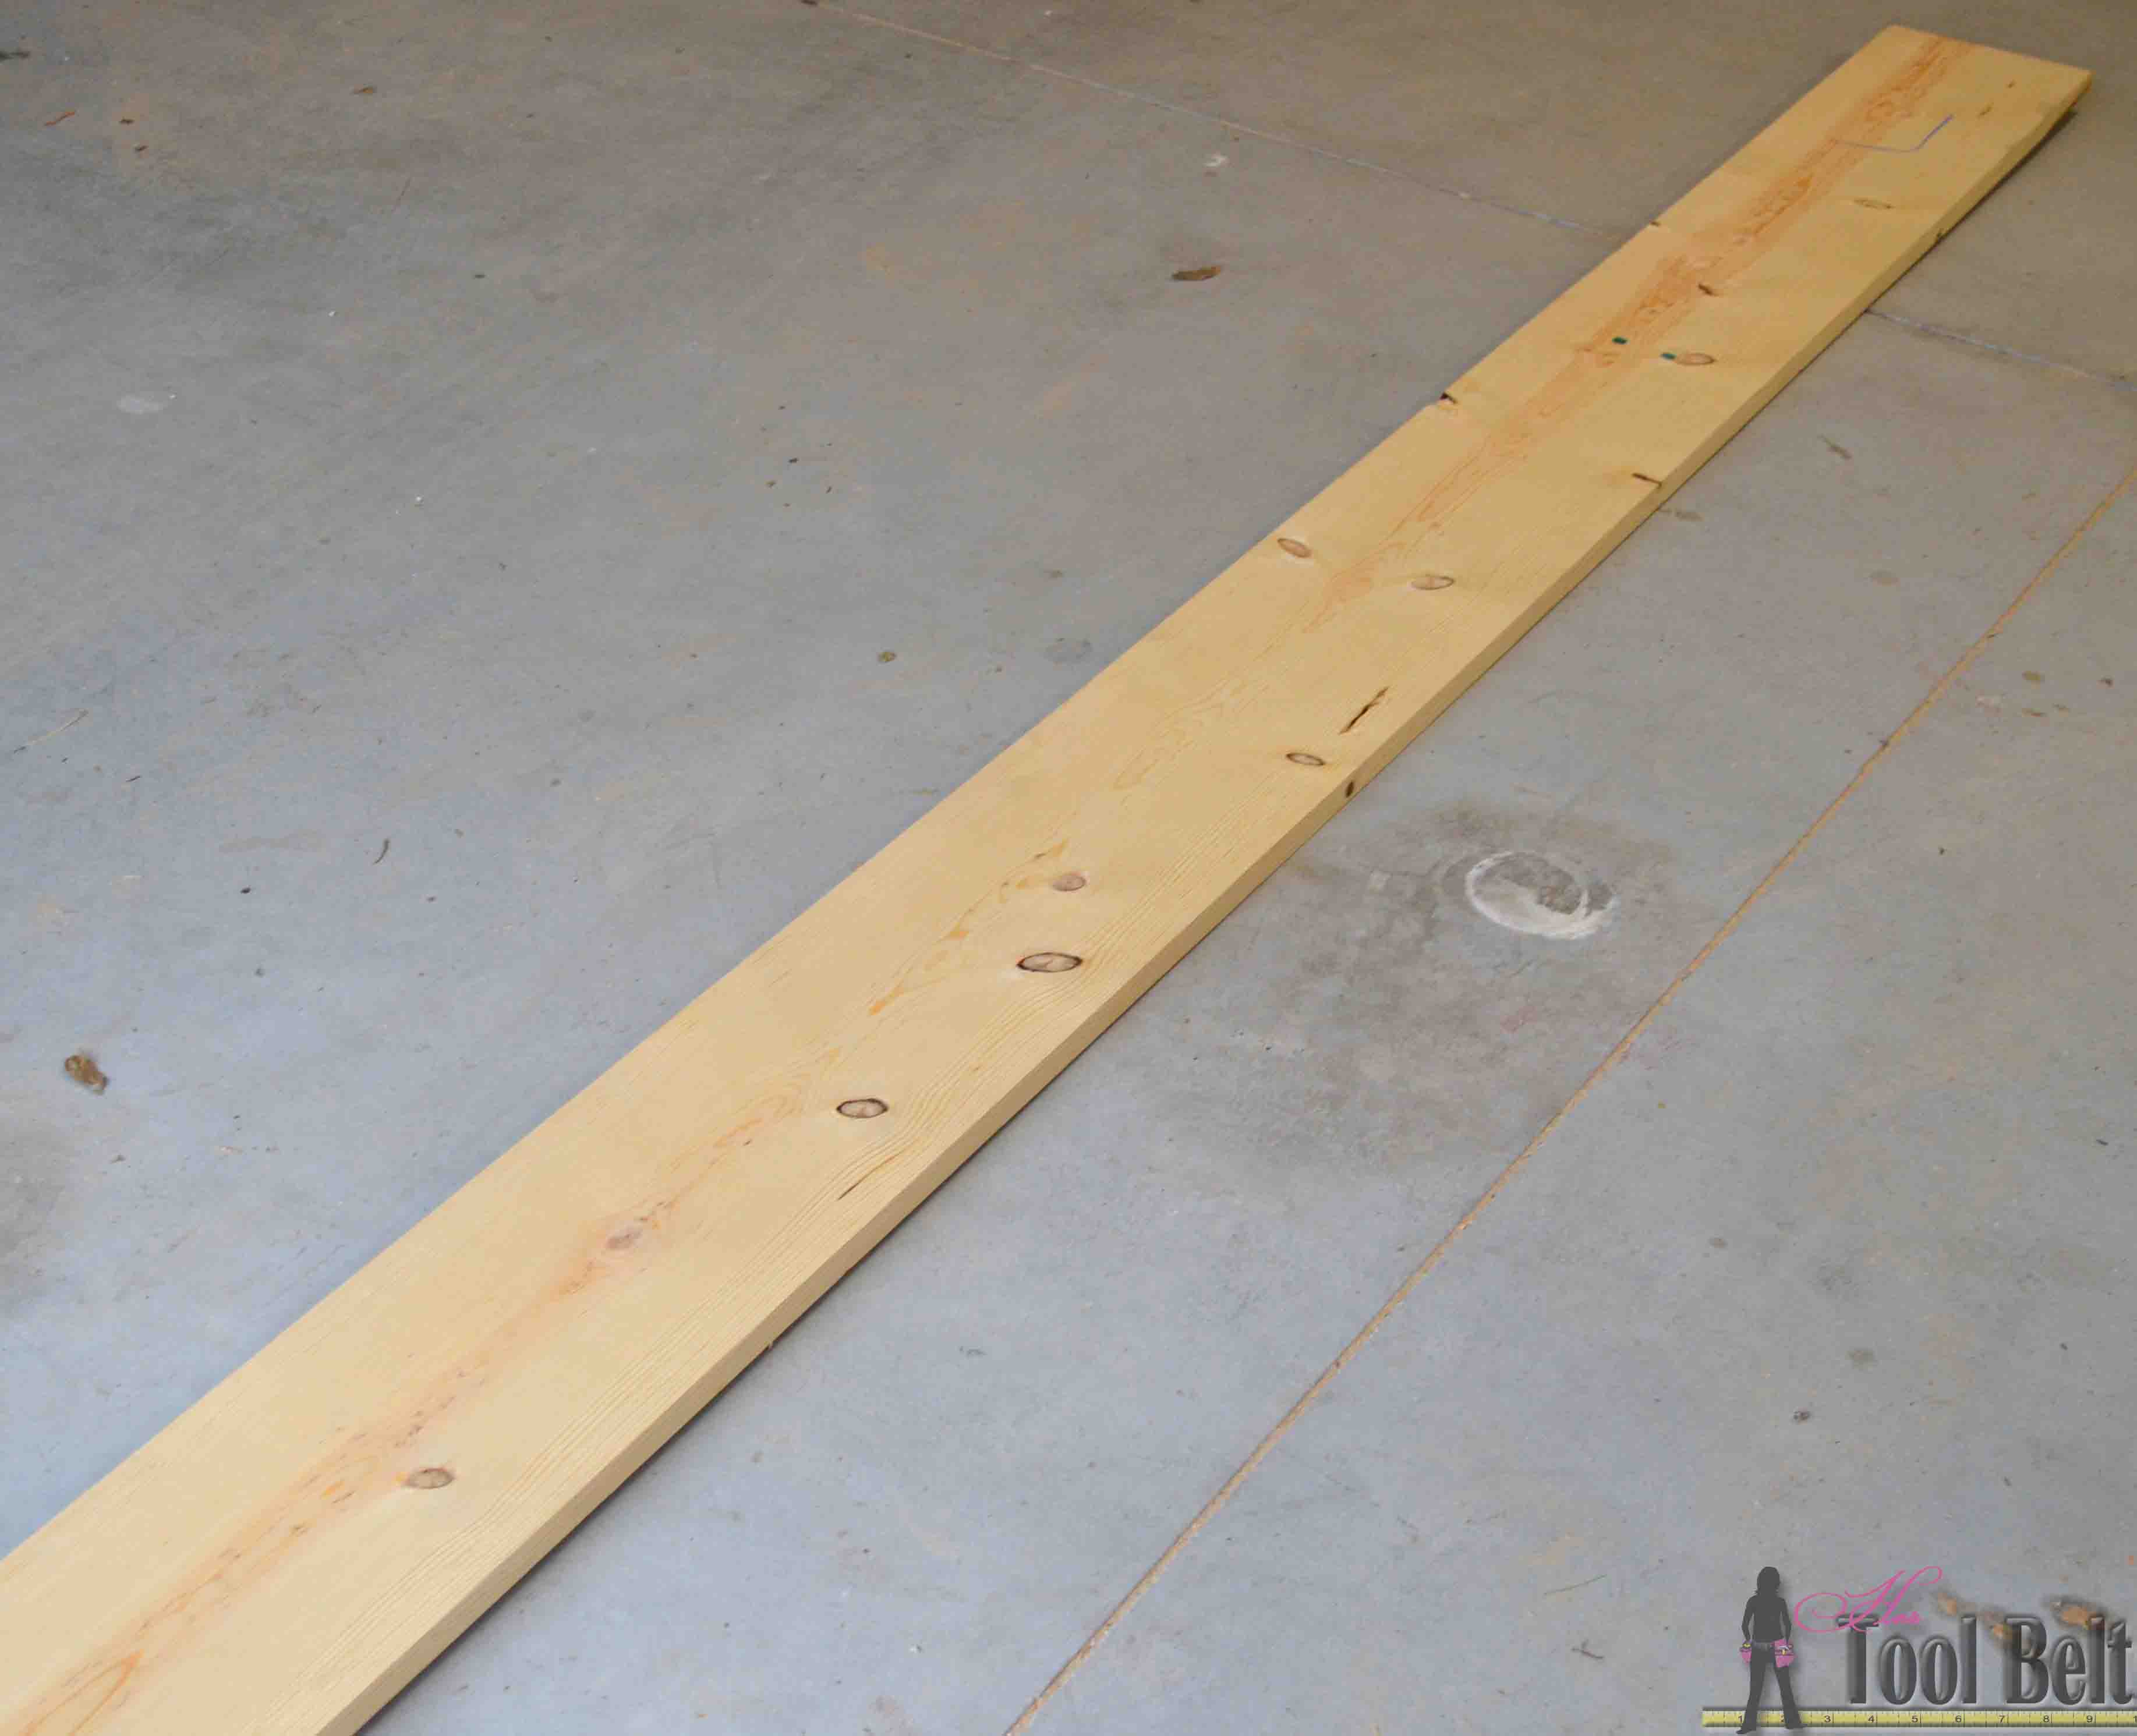
  Give yourself a boost! Build this simple DIY step stool for those hard to reach places. Perfect kid step stool to wash hands.

Cut Diagram

kid stool cut diagram

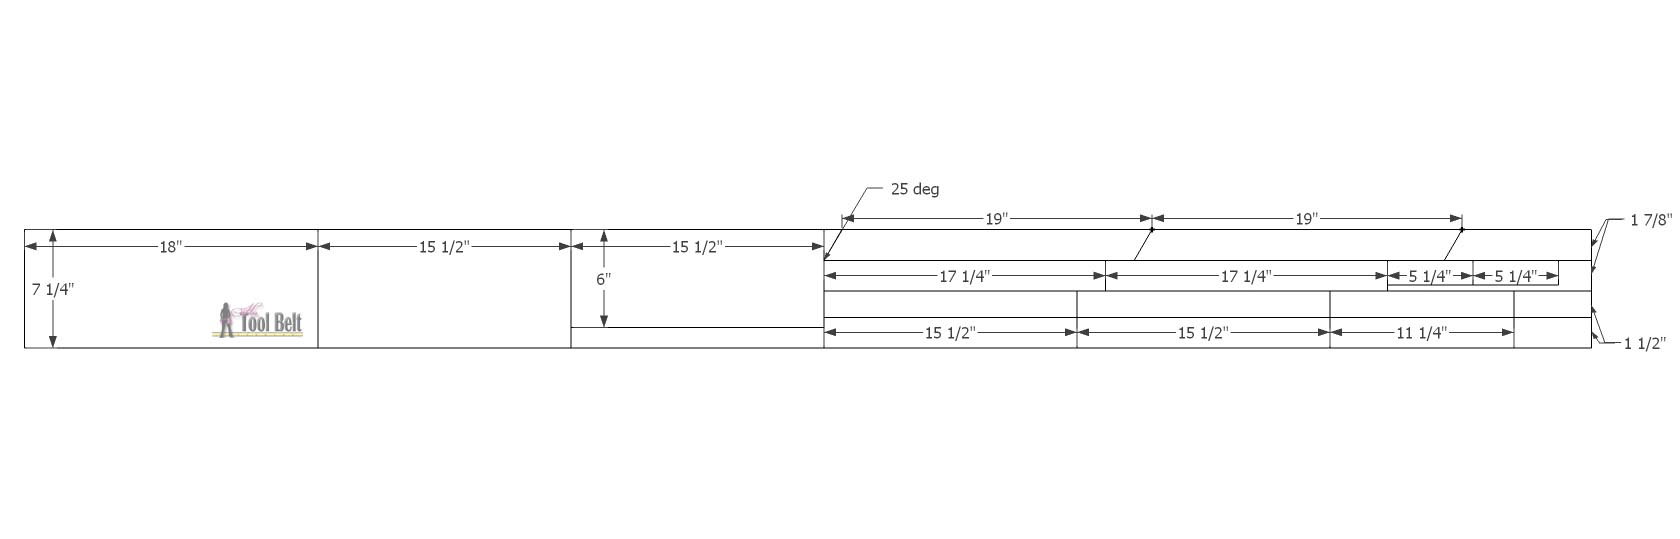
Cut the 18″, 15 1/2″ and 15 1/2″ pieces from the board.  Rip one of the 15 1/2″ pieces to 6″ wide.  Rip the remaining part of the 1×8 into 4 strips, 2 @ 1 7/8″ and 2 @ 1 1/2″.  Make the designated cuts according to the diagram.  The 19″ pieces have a 25 deg miter cut on both ends.  The 5 1/4″ pieces will need to be ripped to 1 1/2″.

Give yourself a boost! Build this simple DIY step stool for those hard to reach places. Perfect kid step stool to wash hands.

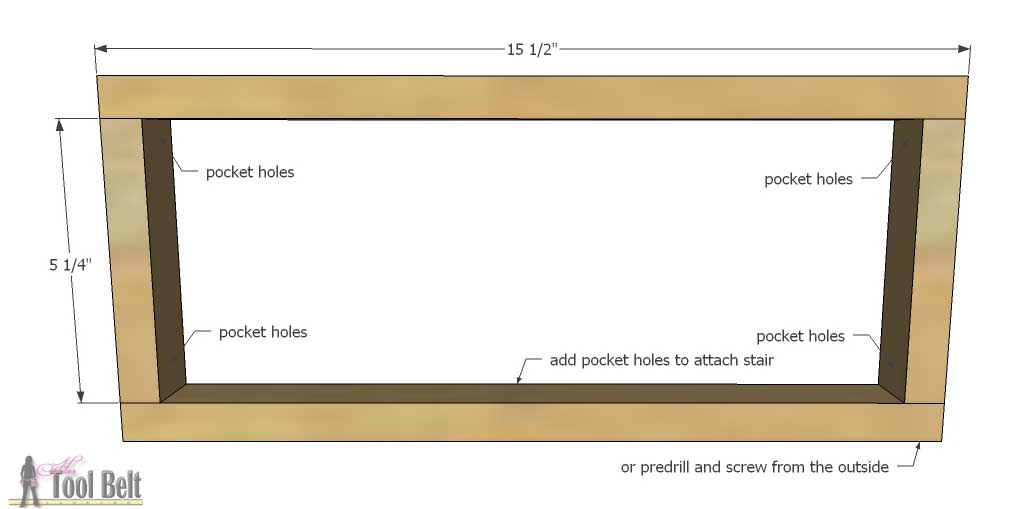
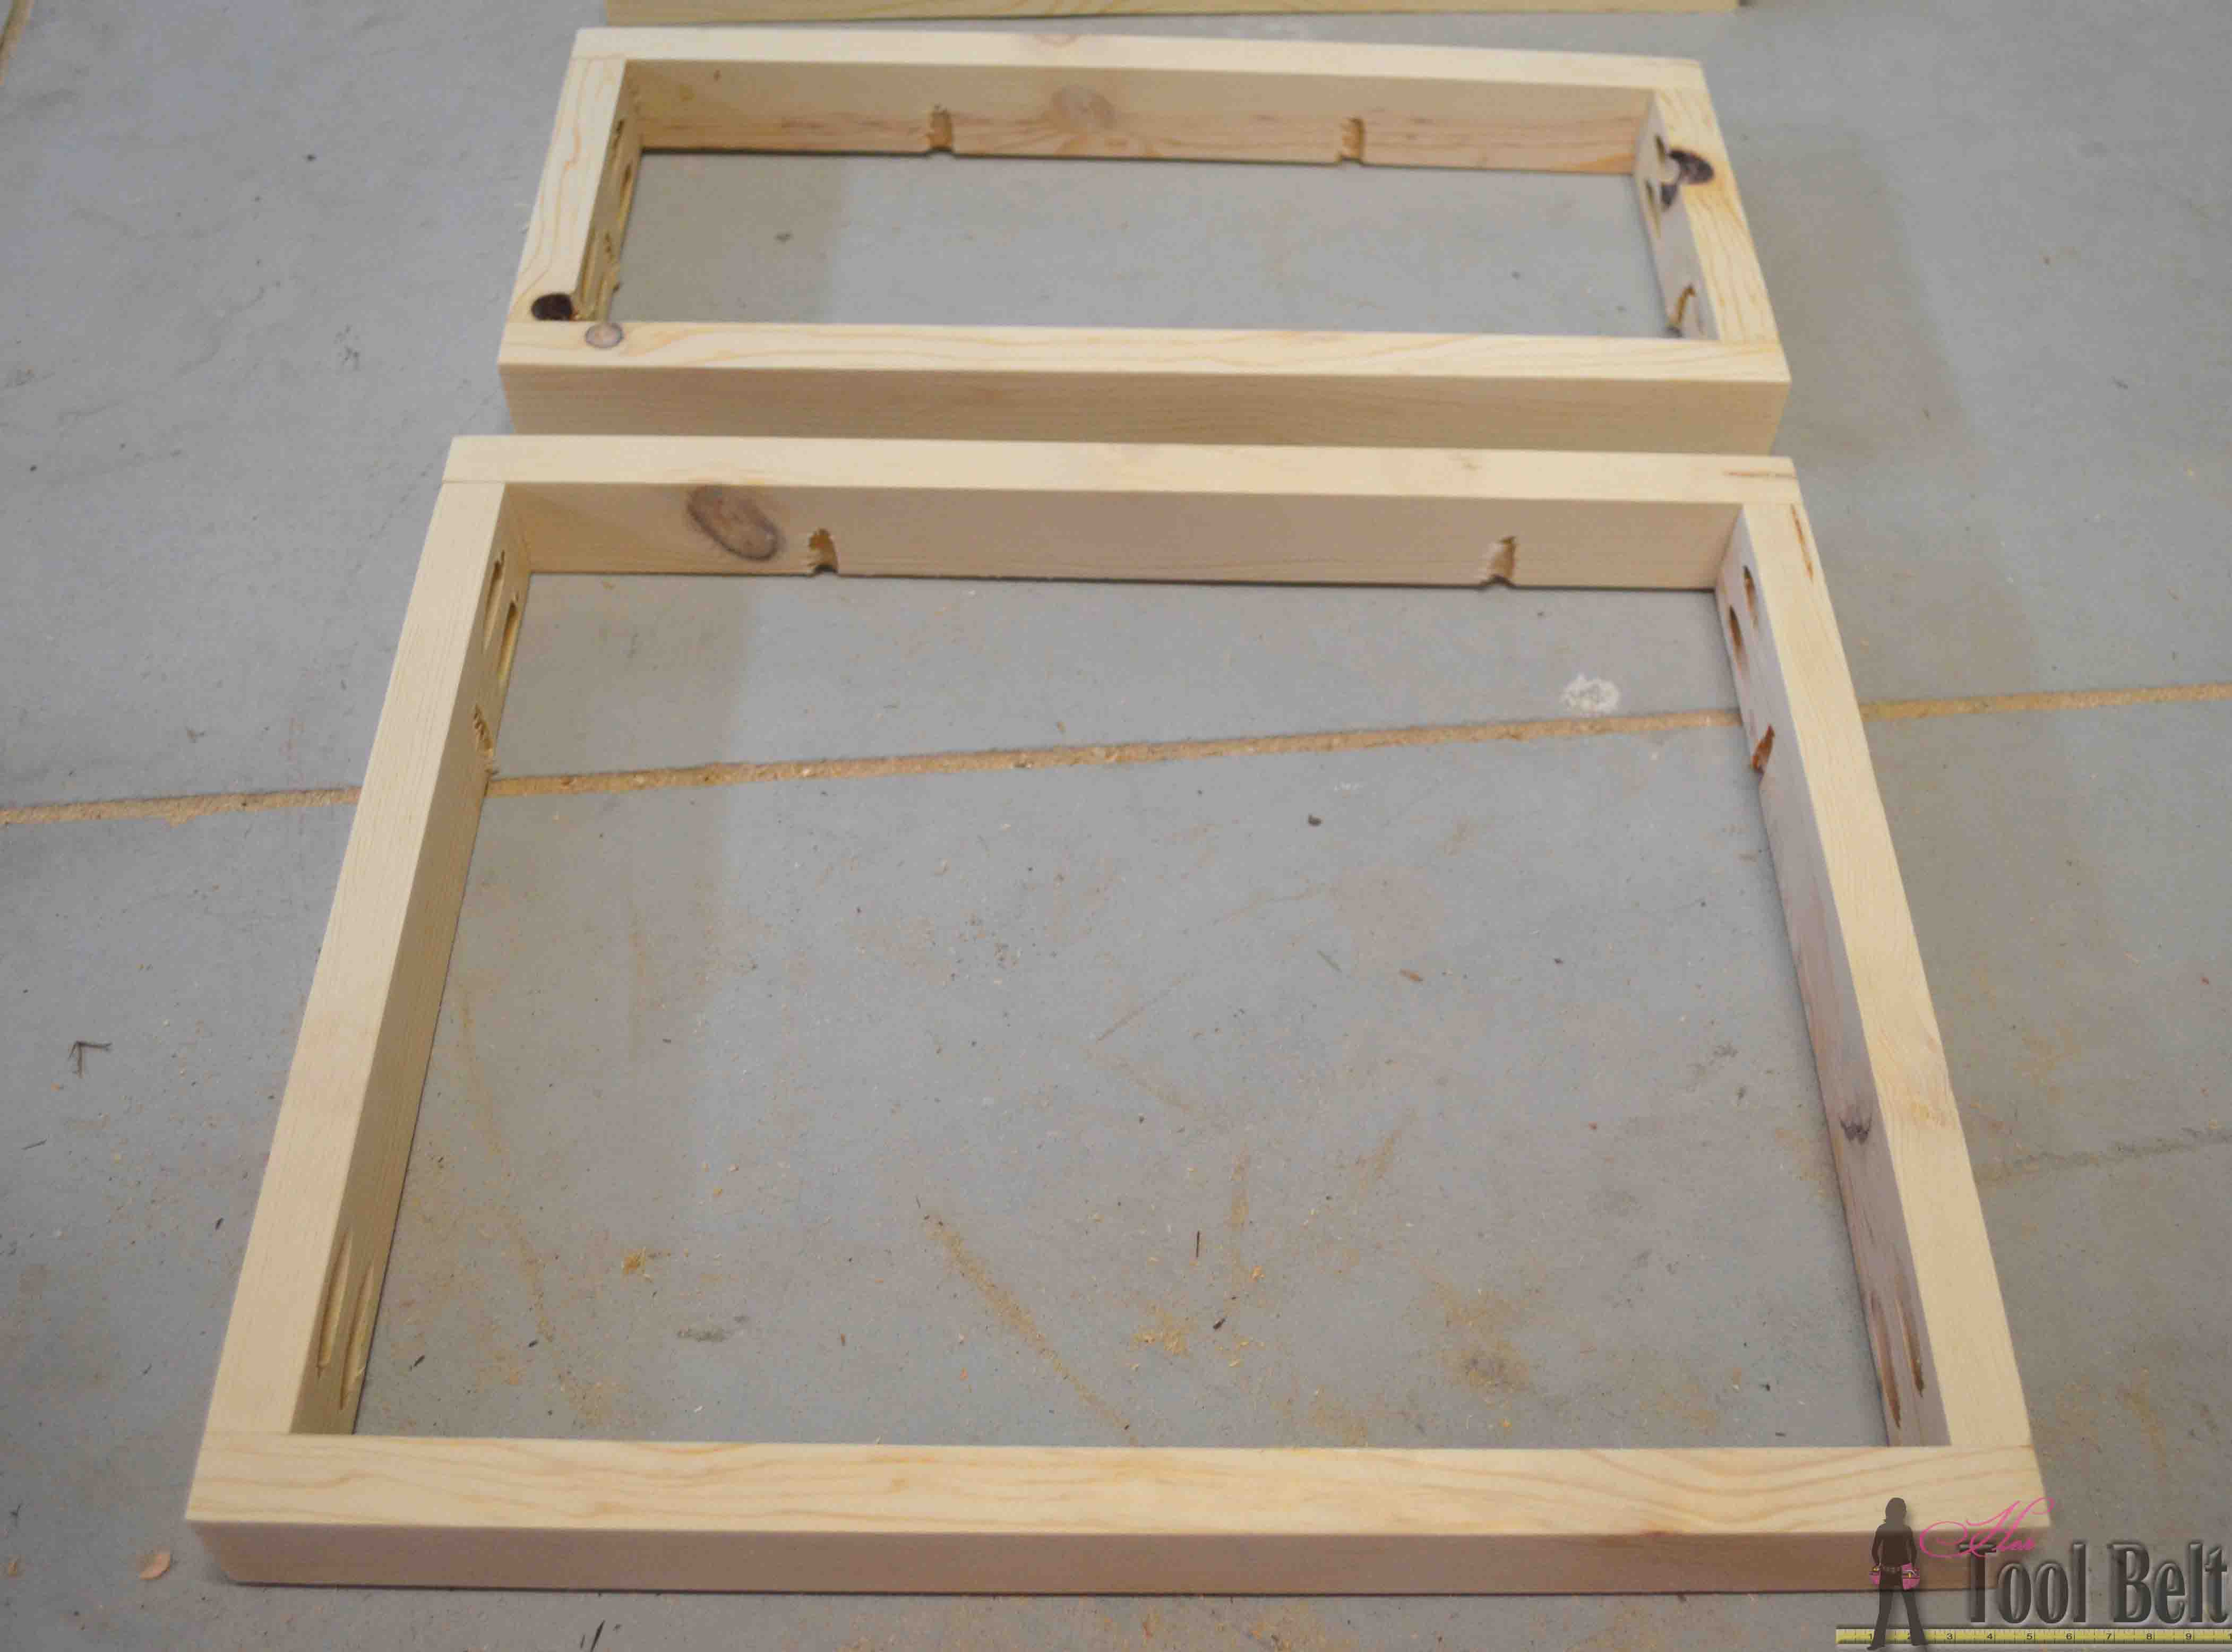
To assemble the stool, you can use pocket holes* to hide your screws or have the screws showing.  Drill pocket holes in both ends of the 5 1/4″ pieces.  Use wood glue and 1 1/4″ screws to assemble the top stair support.  Add pocket holes to attach the stair tread later.

kid step stool -top stair

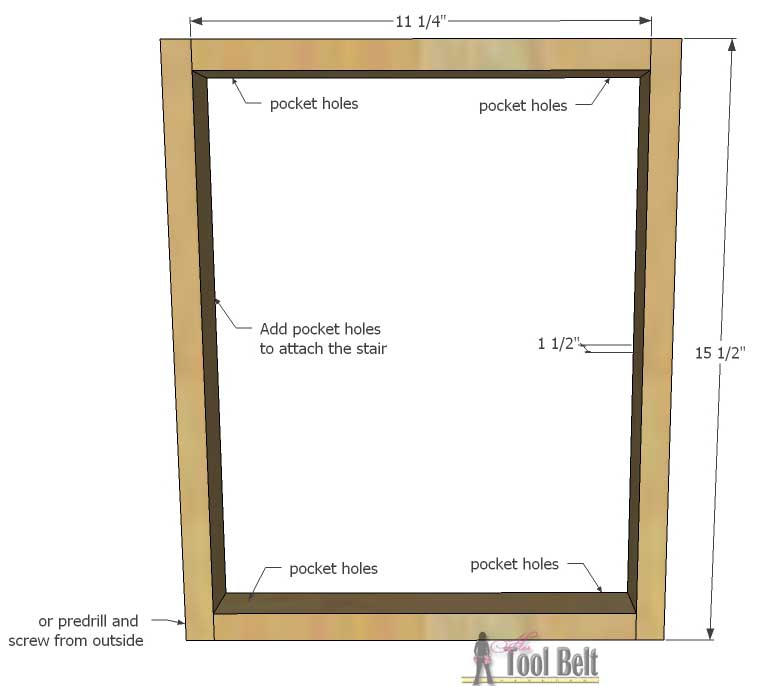
Drill pocket holes in both ends of the 11 1/4″ pieces.  Use wood glue and 1 1/4″ screws to assemble the lower stair support.  Add pocket holes to attach the stair tread later.

kid step stool -large stair

Give yourself a boost! Build this simple DIY step stool for those hard to reach places. Perfect kid step stool to wash hands.

Mark 6 3/4″ from the end of both 17 1/4″ pieces.  Line up the lower stair support with the 6 3/4″ mark, secure with 1 1/4″ screws.  Make the top stair support flush with the top of the 17 1/4″ pieces, secure with 1 1/4″ screws.  Give yourself a boost! Build this simple DIY step stool for those hard to reach places. Perfect kid step stool to wash hands.

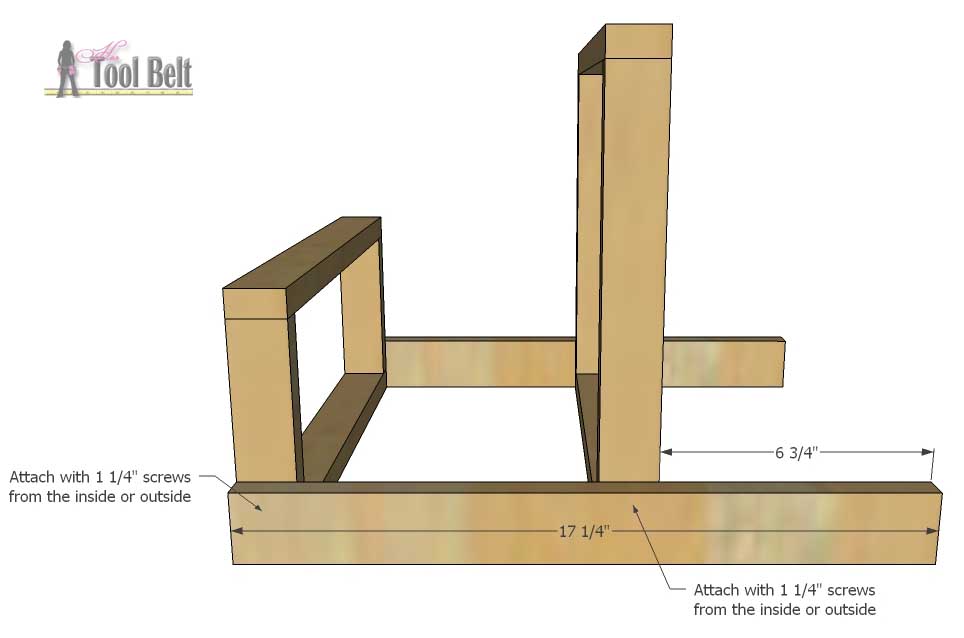
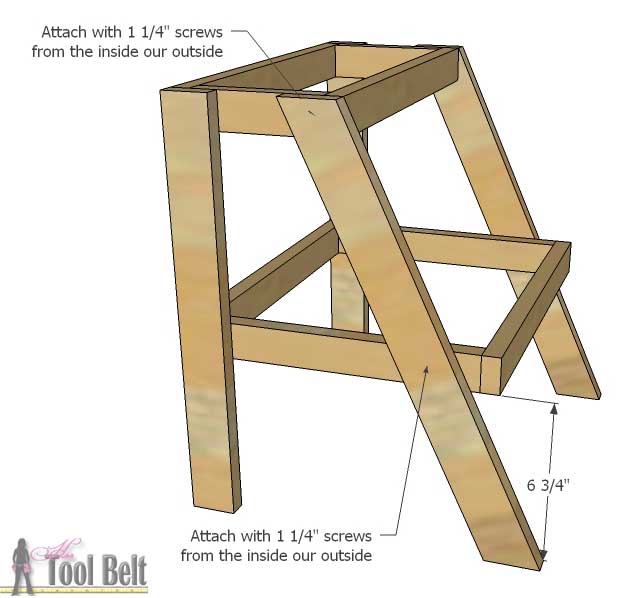
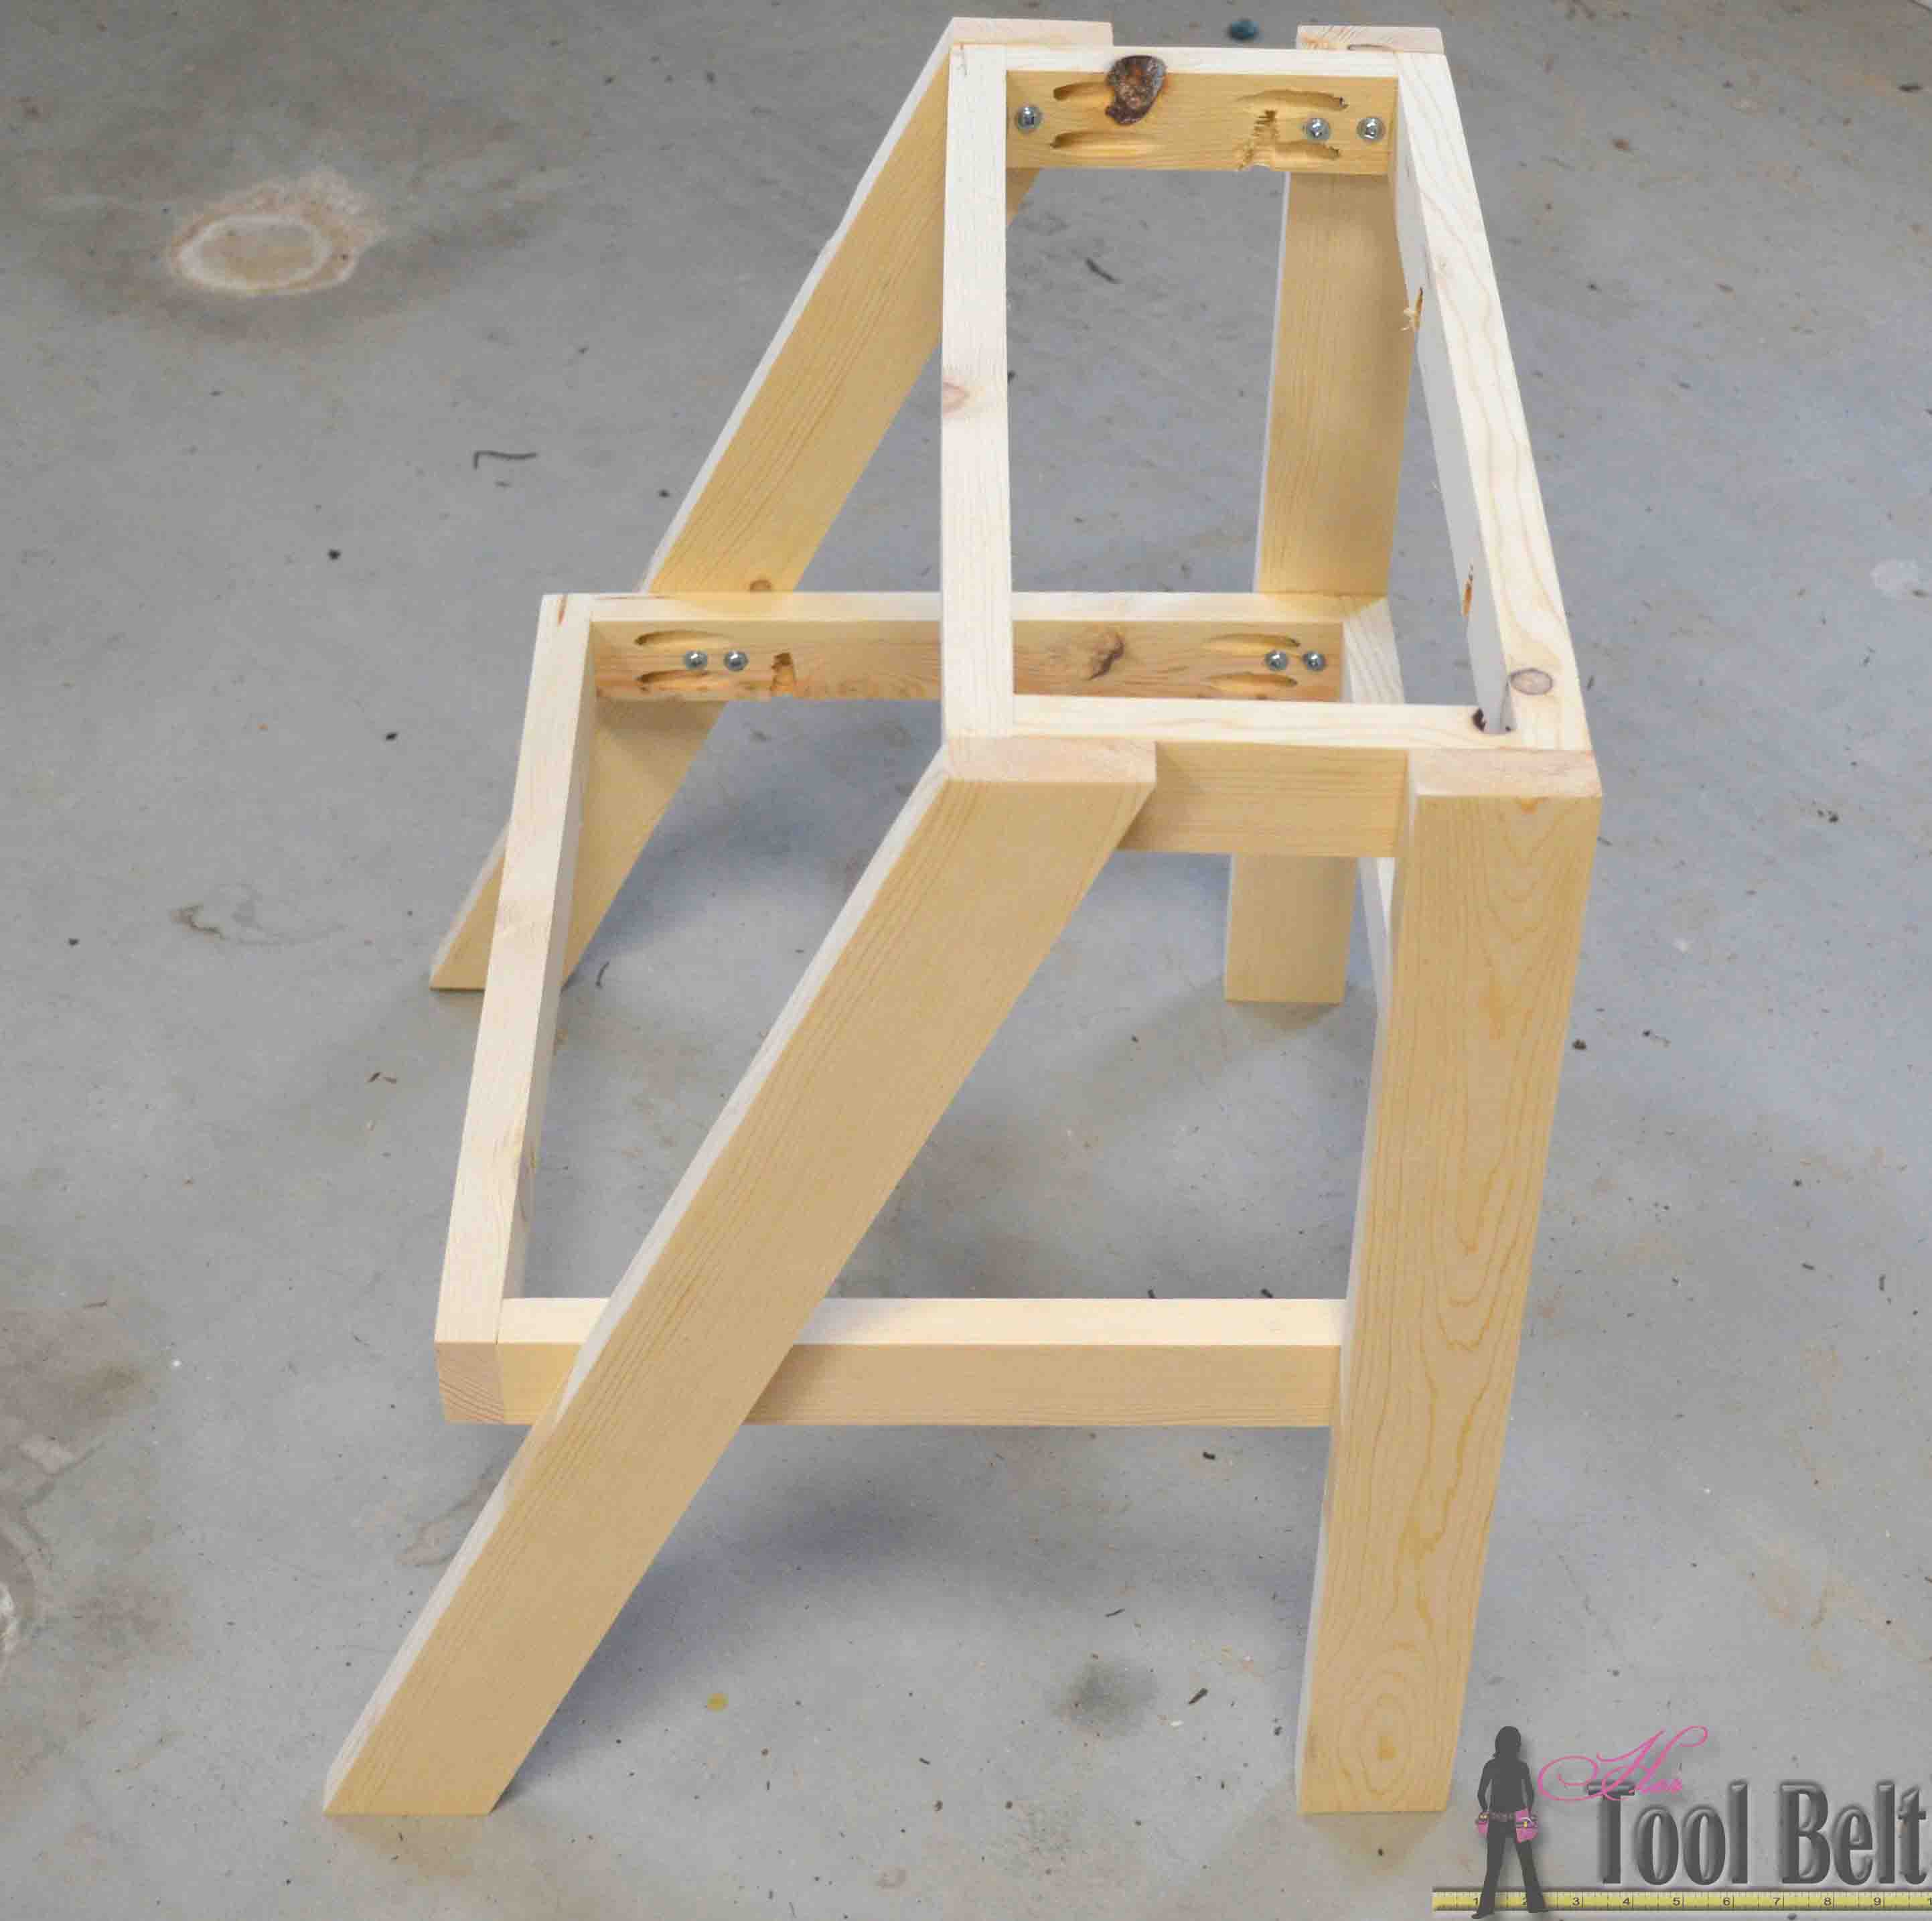
Line up the 19″ diagonal pieces with the outside corner of the top stair support, use a screw to secure.  Place the stool on a flat surface, mark on the 19″ diagonal pieces 6 3/4″ from the bottom.  Adjust the bottom stair support until it lines up with the marks, clamp into place then secure with screws.  Add additional screws to the top support as needed.

Give yourself a boost! Build this simple DIY step stool for those hard to reach places. Perfect kid step stool to wash hands.

Give yourself a boost! Perfect kid step stool to wash hands.


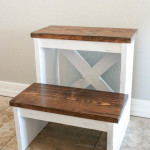
For the lower stair tread, you can leave the part of it open or fill it in the whole way.  I think both ways look nice.  Leaving the back open makes it look more ladder like.

Give yourself a boost! Build this simple DIY step stool for those hard to reach places. Perfect kid step stool to wash hands.

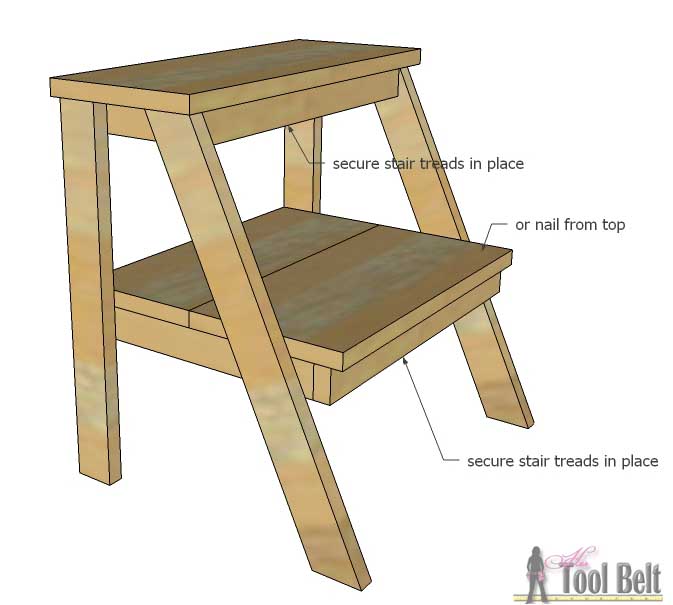
Secure the stair treads to the stool frame with either pocket screws or nail from the top into the frame.  The top stair tread is flush on the back and hangs over 1/2″ on the sides and front.  The lower stair tread is flush on the back and sides and hangs over 1/2″ in the front.

Give yourself a boost! Build this simple DIY step stool for those hard to reach places. Perfect kid step stool to wash hands.

Here’s a look at the partial lower stair tread. Give yourself a boost! Build this simple DIY step stool for those hard to reach places. Perfect kid step stool to wash hands. #oneboardchallenge

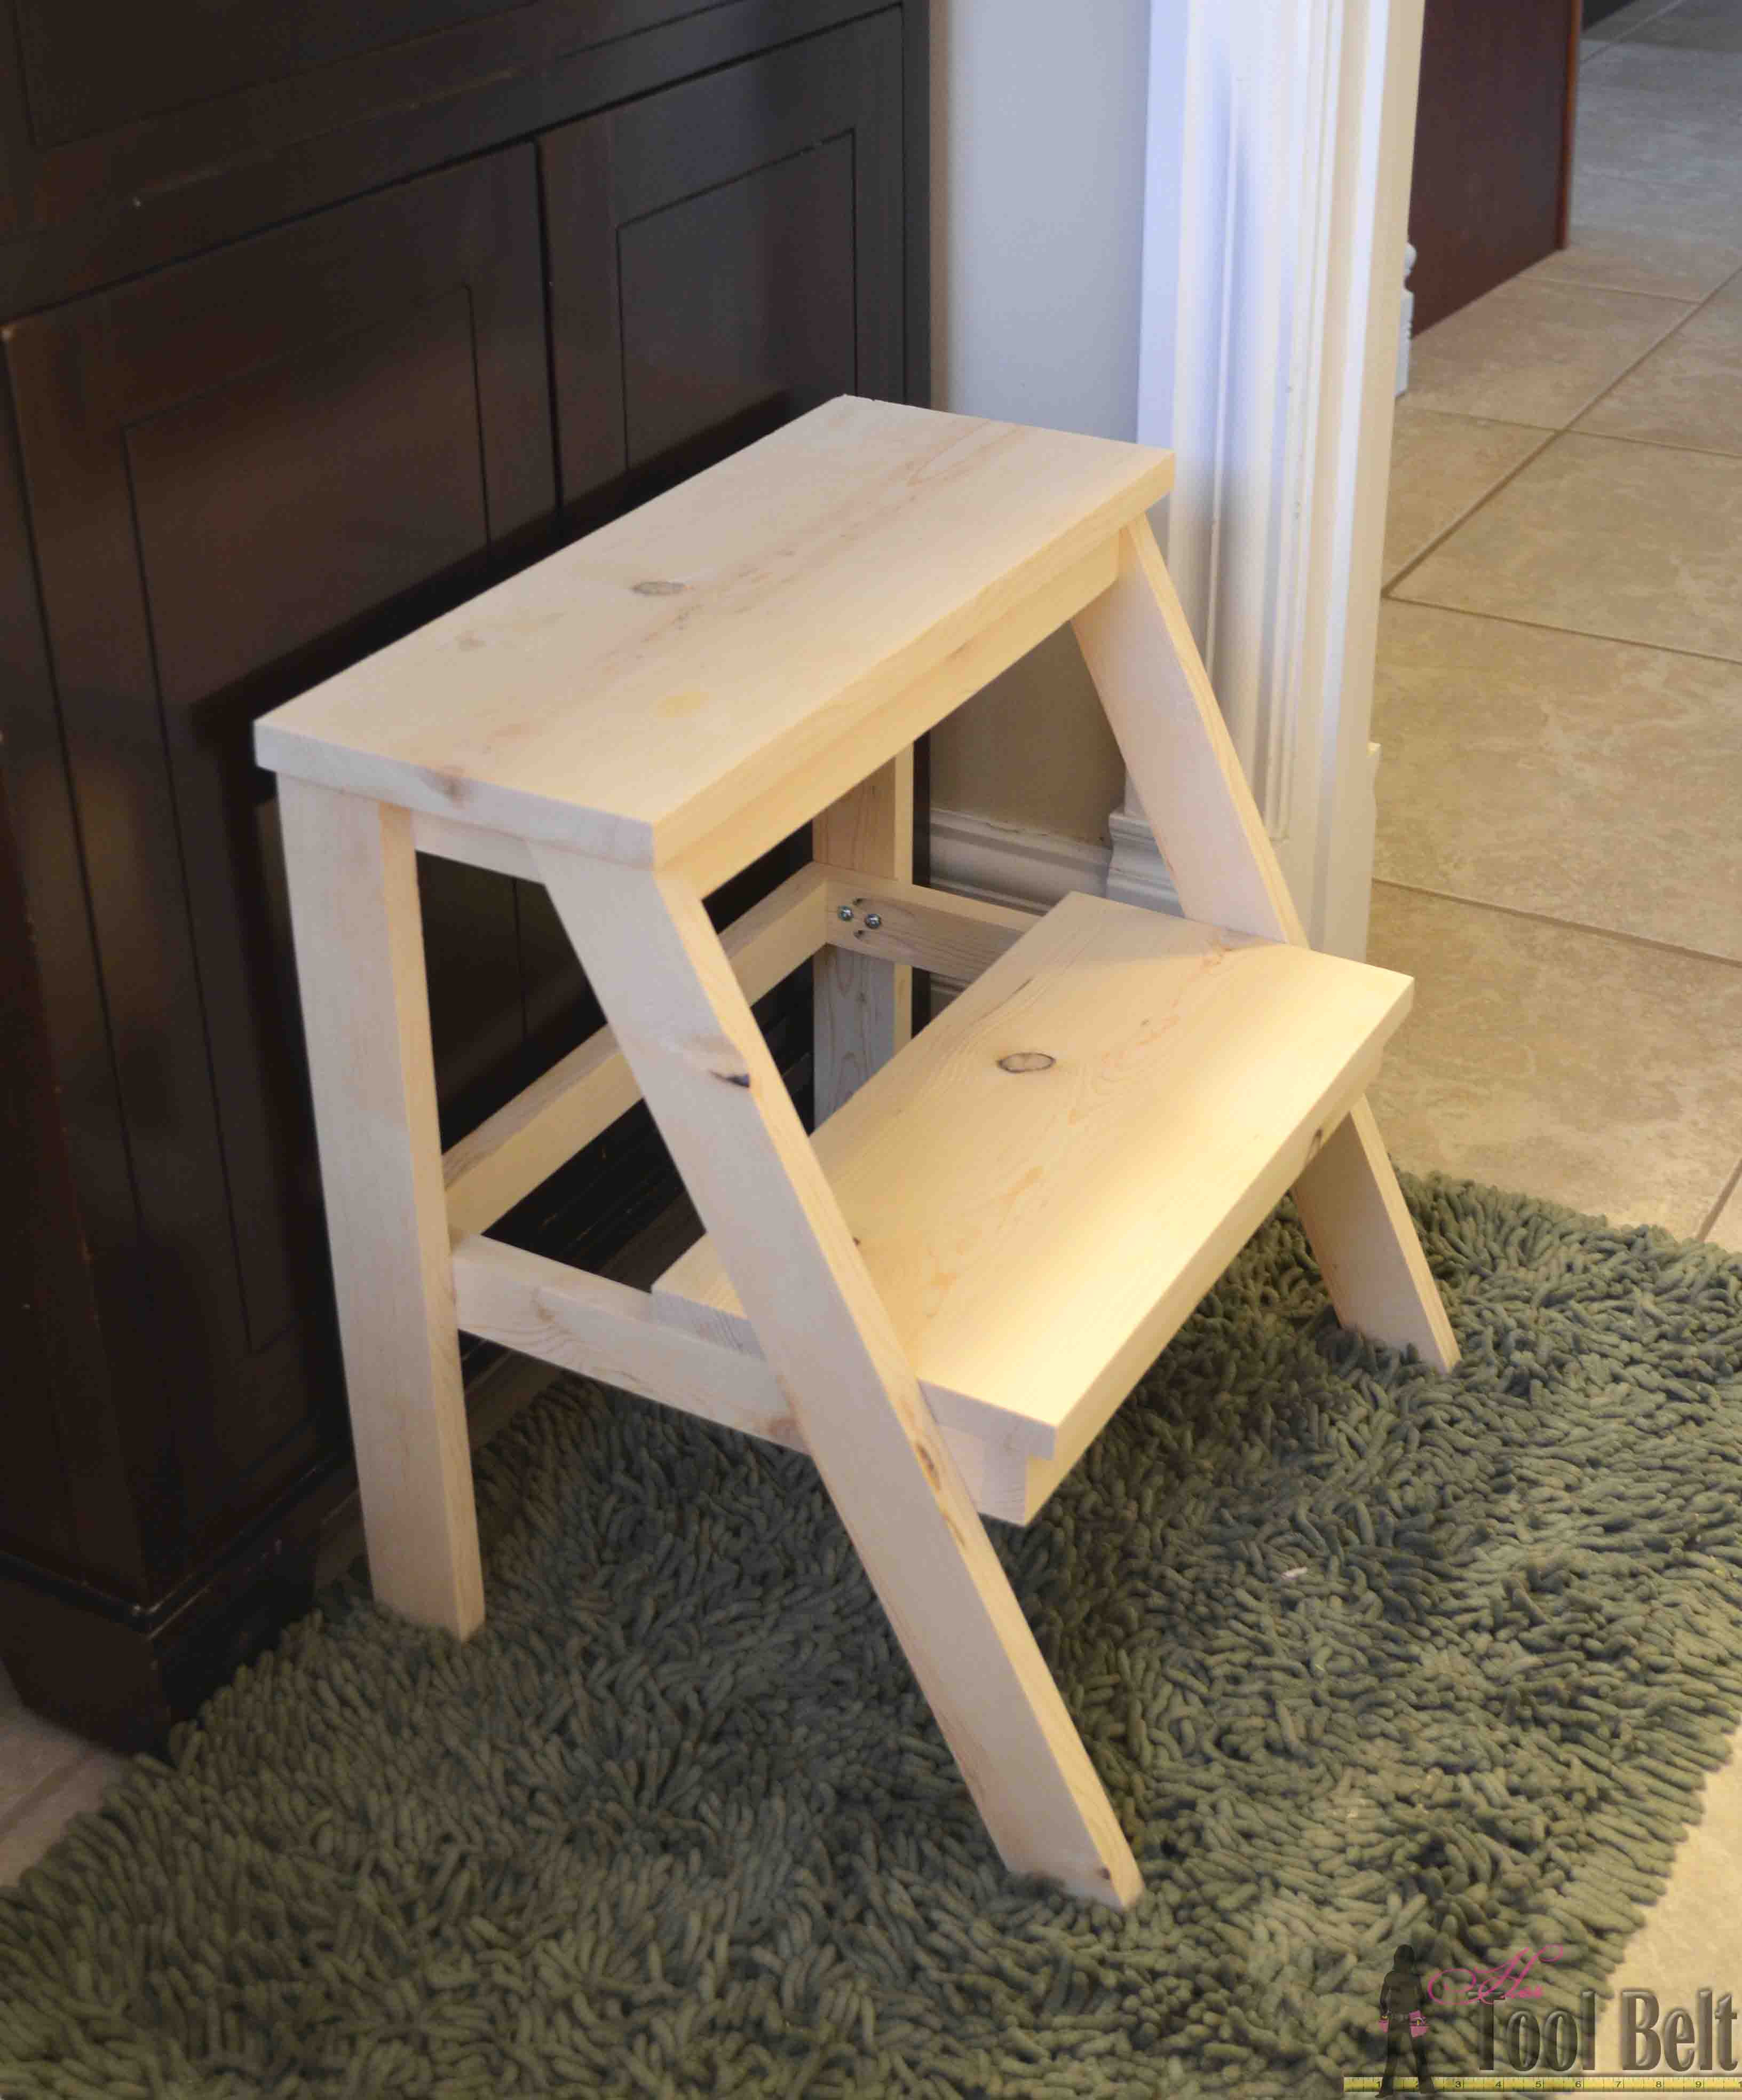
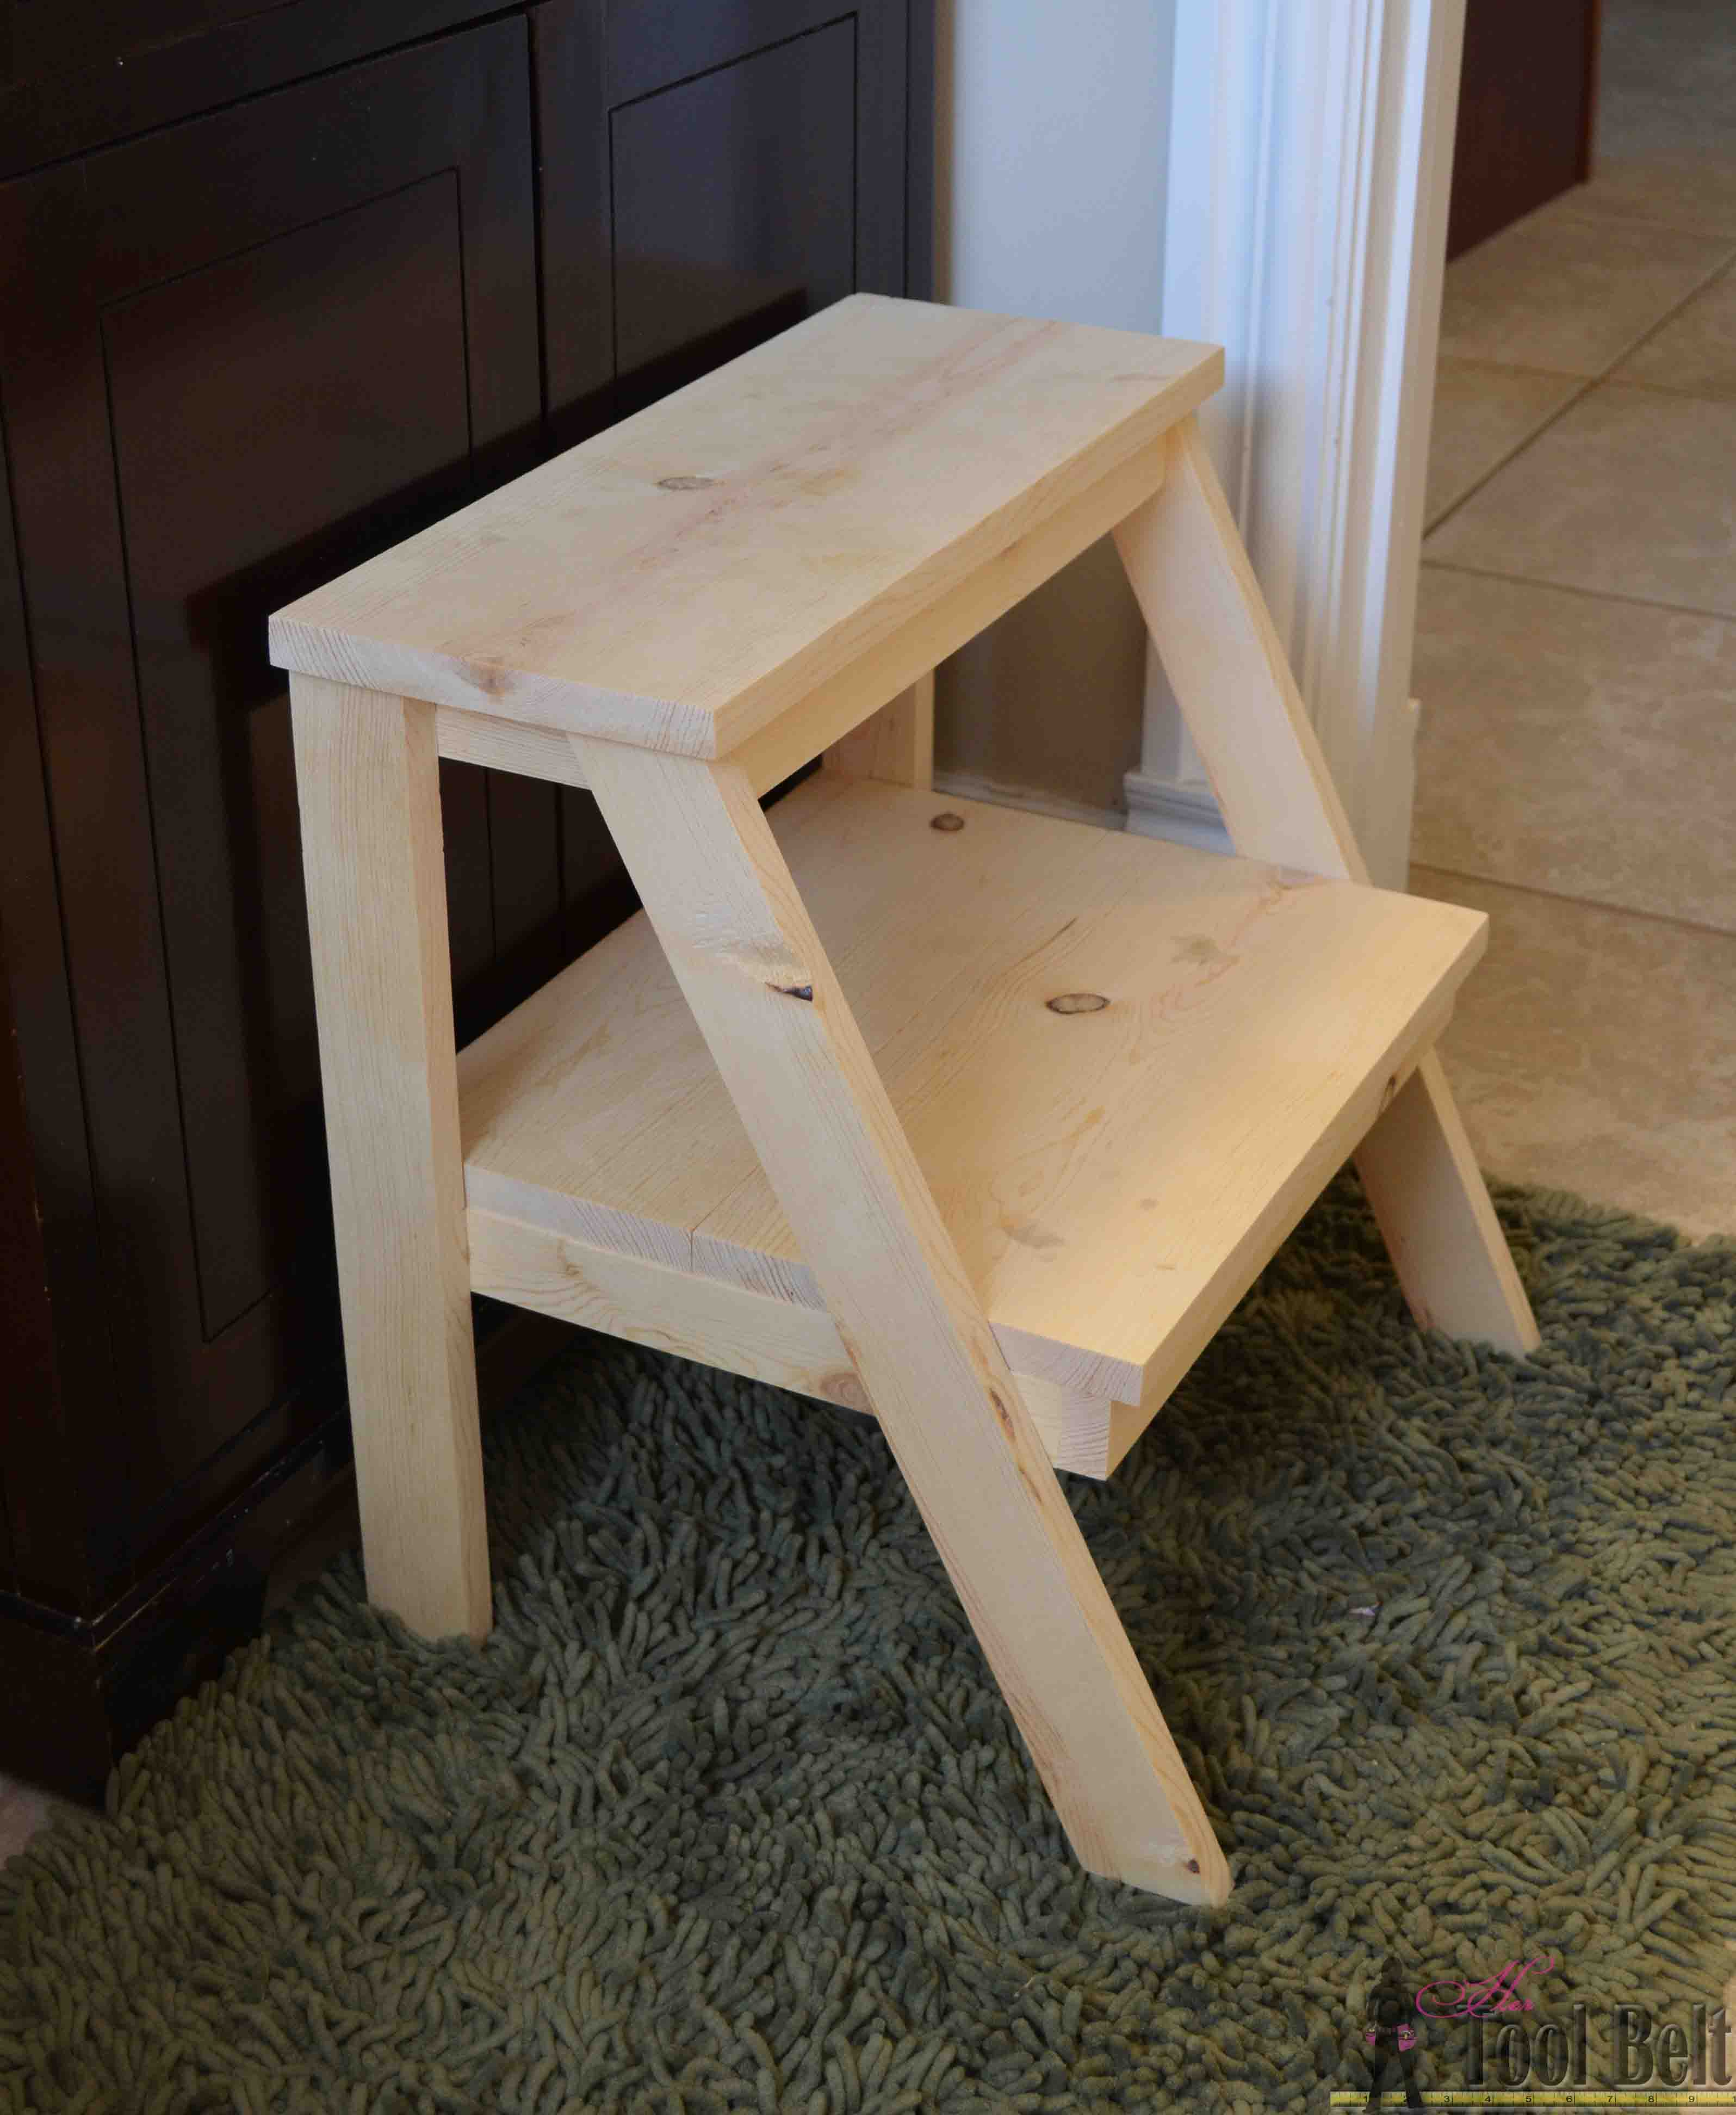
Or a with the full tread.  I like both looks, but the full tread covers up the screws and pocket holes so I left it like that.

Give yourself a boost! Build this simple DIY step stool for those hard to reach places. Perfect kid step stool to wash hands. #oneboardchallenge

To finish the step stool, I gave the wood a good sanding and finished with 120 grit sandpaper.  I decided to go with a two toned finish.  I removed the treads and primed and painted the frame white with the handy dandy HomeRight finish max pro finish sprayer* (I also really like this cheaper sprayer*).  This was my first time using the HomeRight finish sprayer and it was a breeze to use and the finish turned out nice and smooth.Give yourself a boost! Build this simple DIY step stool for those hard to reach places. Perfect kid step stool to wash hands. #oneboardchallenge

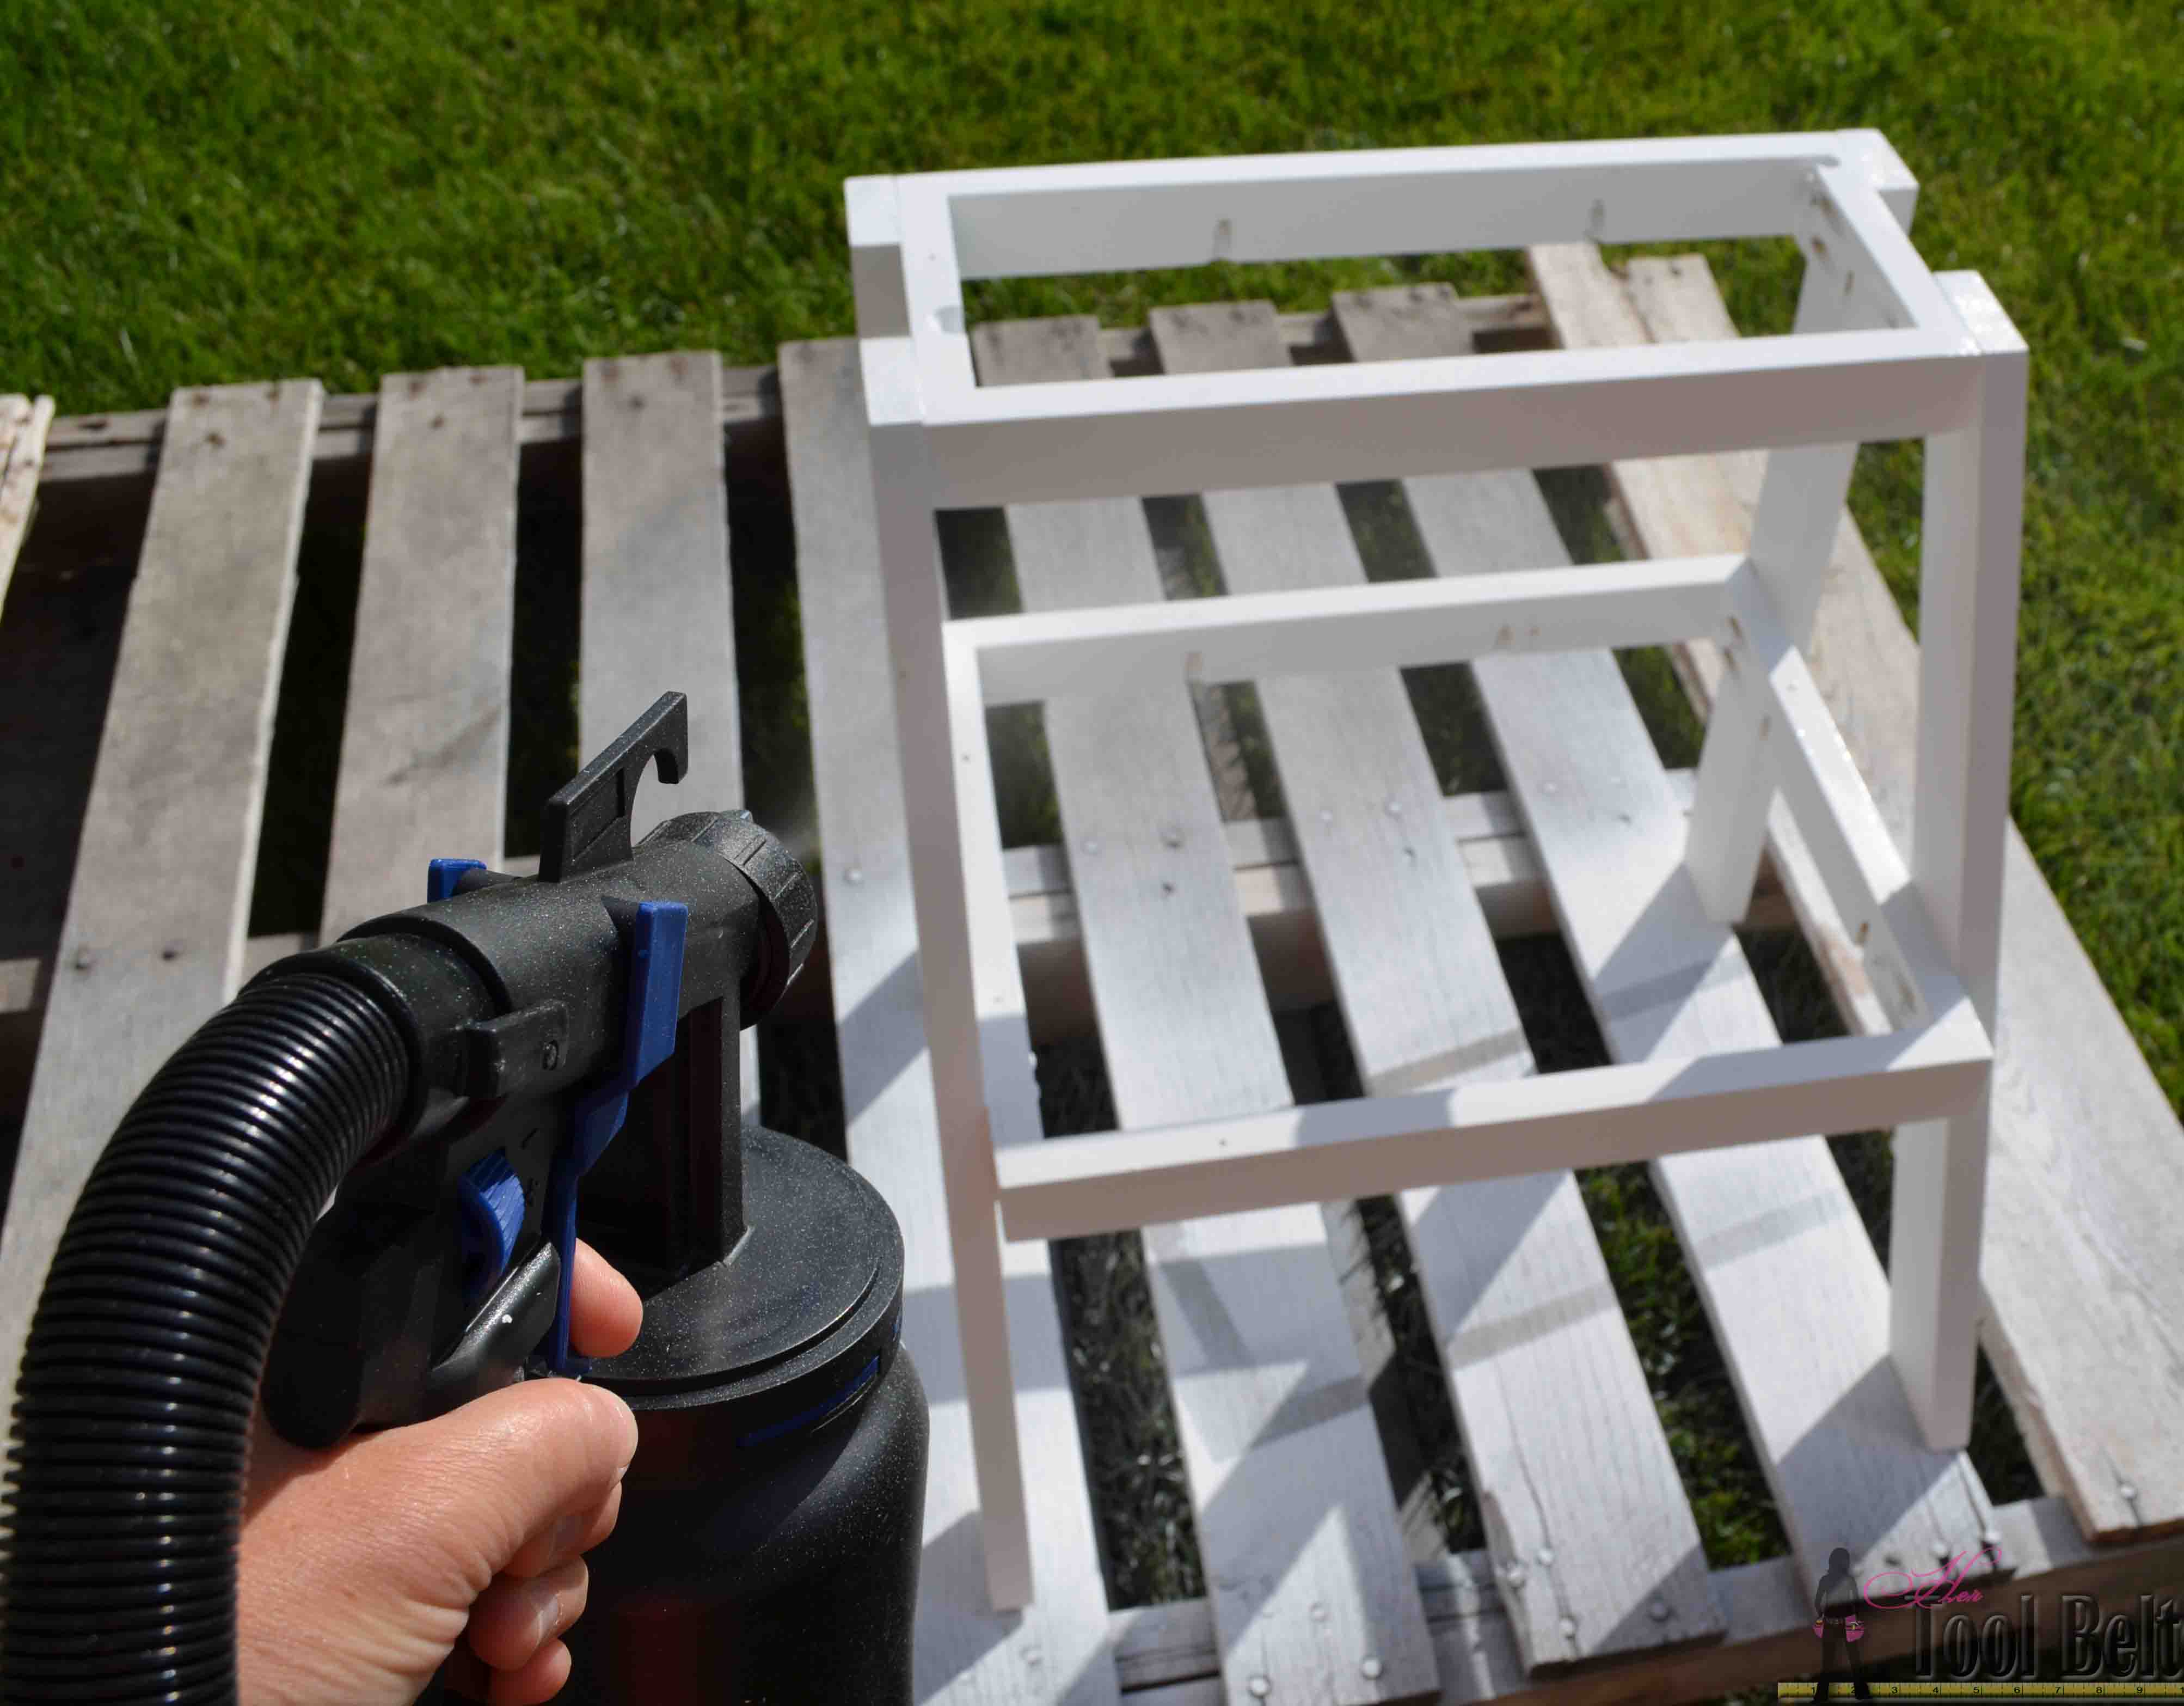
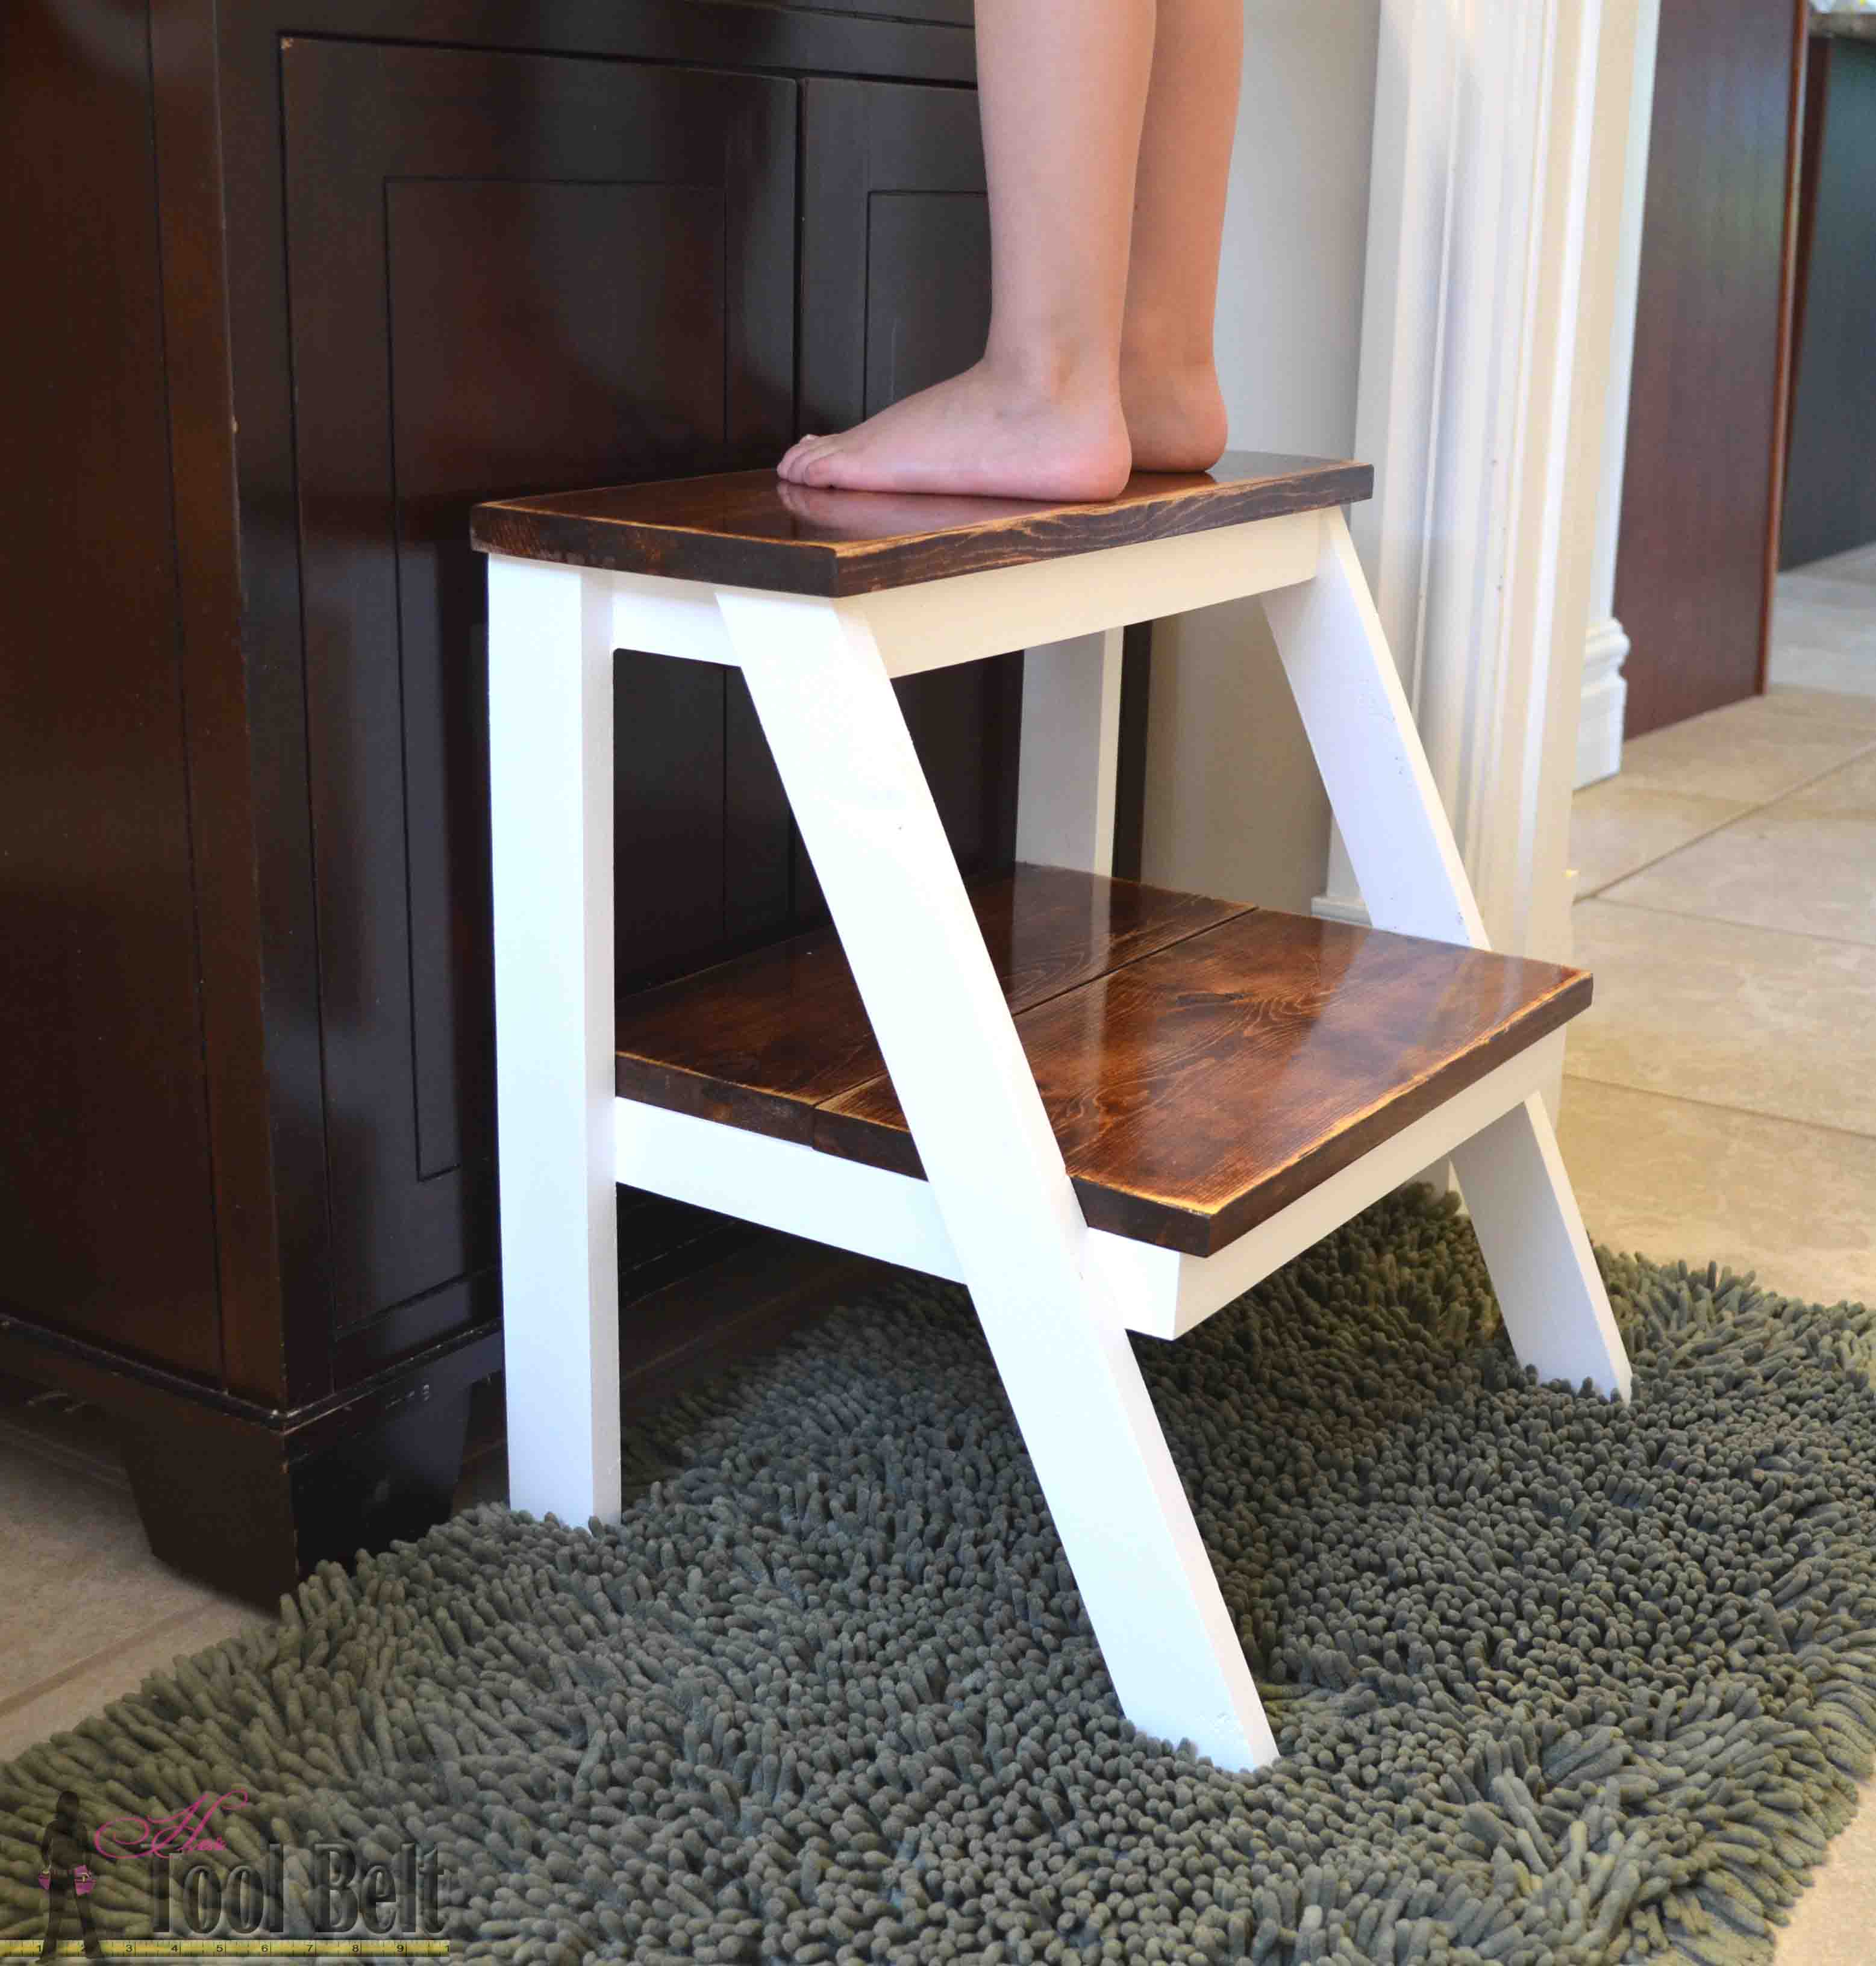
I stained the treads with General Finishes Nutmeg, but wanted to go a little darker so I stained them again with Rustoleum Carrington.  After the stain dried I roughed up the edges with sandpaper to give the treads a worn look.  I figure my kids will probably abuse this thing, so might as well start off weathered then I won’t feel so bad when they ‘distress’ it 🙂  I added a top coat of Minwax polyurethane to the treads only (polyurethane will turn white paint yellow.)  Once everything dried, I reattached the treads to the frame and the DIY kid step stool is ready to go.

Give yourself a boost! Perfect kid step stool to wash hands. #oneboardchallenge

Print the plans!

DIY Kid Step Stool Plans

Thanks for pinning!

Give yourself a boost! Build this simple DIY step stool for those hard to reach places. Perfect kid step stool to wash hands. #oneboardchallenge

Be sure to check out the other projects in the One Board Challenge!

  • Katie – Addicted 2 DIY addicted 2 diy
  • Jaime – That’s My Letter thats my letter
  • Brittany – Pretty Handy Girl pretty handy girl
  • Brad – Fix This Build That fix this build that
  • Jenn – Build-Basic Build Basic
  • Pauline – My Altered State my altered state
  • Bethany – Sawdust & Embryos Sawdust-and-Embryos
  • Kim – The Kim Six Fix kim six
  • Sarah – The Ugly Duckling House The-Ugly-Duckling-House
  • Karah – The Space Between the space between
  • Emily – Merrypad merry pad
  • Jen – The House of Wood jen woodhouse
  • Sandra – Sawdust Girl sawdust girl
  • Mindi – My Love 2 Create MyLove2Create
  • Elisha – Pneumatic Addict pneumatic addict
  • Jessica – Decor Adventures decor adventures

one board challenge pin

Linked to my favorite link parties, remodelaholic, savvy southern style, homestories AtoZ

Related

Filed Under: Bathroom Furniture, Built From Scratch, Free Woodworking Plans, Kitchen furniture Tagged With: challenge, kids, One Board Project

Attention: Any do-it-yourself project involves risk of some sort. Your tools, materials, and skills will vary, as will the conditions at your work site. Hertoolbelt LLC will not assume any responsibility or liability for damages or losses sustained or incurred in the course of your project or in the use of the item you create. Always follow the manufacturer's operating instructions in the use of tools, check and follow your local building codes, and observe all commonly accepted safety precautions.

Comments

  1. Lisa says

    July 17, 2015 at 6:42 pm

    This stool is perfect ! I love it…very functional and cute!

    Reply
  2. Sarah @ The Ugly Duckling House says

    July 19, 2015 at 9:12 am

    Nicely done!

    Reply
  3. Pauline says

    July 20, 2015 at 10:24 pm

    Awesome Amy! Pocket hole perfection, and that finish on the treads is gorgeous.

    Reply
  4. Brittany aka Pretty Handy Girl says

    July 21, 2015 at 7:08 pm

    Love love love your stool, Amy. It’s been so fun seeing all the different projects everyone made with one board.

    Reply
    • Amy says

      July 21, 2015 at 9:34 pm

      Thanks Brittany!

      Reply
  5. Mindi says

    July 21, 2015 at 9:19 pm

    Love it Amy! The angled legs are so pretty and you daughter can reach…yay! 🙂

    Reply
    • Amy says

      July 21, 2015 at 9:34 pm

      Thanks Mindi

      Reply
  6. Haren says

    August 26, 2016 at 10:05 pm

    Great tutorial. I finally went ahead and made it myself. It’s not nearly as clean cut as yours looks since I used a hand saw but it was still a great beginners projects. Here’s a picture: http://imgur.com/a/pr0jM

    Reply
    • Amy says

      August 27, 2016 at 9:04 pm

      Great job, that looks so good especially with a hand saw!!! Kudos to you.

      Reply
  7. Alexis says

    September 12, 2016 at 8:04 am

    This is great! Thank you! I just made one as a first project with my new miter saw. Can I trouble you with one question? How did you drill into the tight spaces? I had trouble putting the screws in the pocket holes when assembling the frames for the treads.

    Reply
    • Amy says

      September 12, 2016 at 10:14 am

      Hi Alexis, Way to go!
      Sometimes with tight spaces I can put the screws in at a little bit of an angle and that will work. Other times I’ll use the Kreg short driver http://amzn.to/2ca1x42 with my impact driver (which is smaller than the normal drill) to get the tight spaces.

      Reply
  8. Melissa Green says

    July 10, 2017 at 8:14 am

    Thank you for this! I was searching for something for my daughter to be able to reach the sink in the bathroom and I didn’t like anything I saw for sale. Your design fixed that problem. It took a bit of time, but I made it – even with less than ideal tools 😉
    I have been wondering what the weight limit would be on the bottom step particularly and when I came back here to look, I realized that it looks like you used 2 screws into each leg where I only used 1. When I built the stool, I didn’t use pockets or anything fancy – basically squint at your design and imagine the pieces going together in the most basic way possible. So… that said, with the lower frame held in place by 4 wood screws and wood glue, what kind of load capacity would it have? Should I go back and add some more screws?

    Reply
  9. Zach says

    May 25, 2019 at 1:36 pm

    Hi!

    Does the original 1x8x8 board need to be ripped to 7 and 1/4″ as the cut diagram indicates?

    Thanks!

    Reply
    • Amy says

      May 25, 2019 at 1:45 pm

      Hi Zach, I put 1×8 because that’s the common name at a lumber store (like Home Depot). But if you bought a 1×8 at home depot it actually is 3/4″ thick and 7 1/4″-7 1/2″ wide. Hope that helps.

      Reply
  10. Ram Homier says

    January 14, 2020 at 2:30 pm

    I made 2 of them for my kids and it was a great help to have your plans. The only concern I have is that it can only be used wen up against a wall or cabinet as it is very unstable to tip forward if used otherwise.

    Reply
  11. Melody says

    January 8, 2021 at 2:01 pm

    Thanks so much for these amazing plans! I was looking for a useful project to practice my first wedged through mortise and tenons before attempting a larger bench using the same method. This stool was the perfect solution! I just modified the top of the legs to go through the top step.
    I used walnut and ash boards, milled by my Great Grandpa 60 years ago, from trees on his farm. I’m pretty happy with how it turned out and it was very helpful to learn the new techniques I wanted to learn.
    And of course it comes in very handy for my little ones to reach the sink (yay for not having to do the one armed, football hold, hand washing dance anymore!)

    Reply
  12. Bill Newcum says

    March 2, 2021 at 10:44 am

    Thanks so much for the plans. I built your stool with a few minor changes for my granddaughter for Christmas. Instead of staining the steps dark brown, I used some rough-sawn walnut boards that I rescued from being made into pallets some 40+ years ago. It took more time than I expected, but it was worth it. You can see a photo of it on my OneDrive folder: https://1drv.ms/f/s!AlH_eiYXZ3–mh1GDMaDTuMvYxtz/

    Reply
    • Amy says

      March 5, 2021 at 3:15 pm

      Bill that tuned out fantastic, the walnut is so gorgeous!

      Reply

Trackbacks

  1. One Board Challenge - Rustic X Back Step Stool - Addicted 2 DIY says:
    July 17, 2015 at 5:00 am

    […] Pretty Handy Girl Fix This Build That Build Basic My Love 2 Create Her Toolbelt […]

    Reply
  2. One-Board Challenge ~ Geometric Art - Sawdust and Embryos says:
    July 17, 2015 at 5:09 am

    […] Amy @ Her Tool Belt […]

    Reply
  3. one board wood shelves + 17 one board ideas - the space between says:
    July 17, 2015 at 5:09 am

    […] My Letter, Pretty Handy Girl, Fix This Build That, Build-Basic, My Love 2 Create, Her Toolbelt, My Altered State, Sawdust & Embryos, The Kim Six Fix, The Ugly Duckling House, Pneumatic […]

    Reply
  4. How to Make A Floating Corner Shelf | merrypad says:
    July 17, 2015 at 6:00 am

    […] Her Toolbelt […]

    Reply
  5. One Board Challenge ‹ Build Basic says:
    July 17, 2015 at 6:14 am

    […] Amy from Her Toolbelt  […]

    Reply
  6. How to build a folding lap desk or breakfast tray says:
    July 20, 2015 at 8:16 am

    […] Round Mirror / Mindi, My Love 2 Create – Floating Nightstand / Amy, Her Toolbelt – Kids Step Stool / Pauline, My Altered State – Indoor Planter / Bethany, Sawdust & Embryos – […]

    Reply
  7. Indoor Wood Planter | One Board Challenge | My Altered State says:
    July 20, 2015 at 11:04 pm

    […] 2 DIY – Rustic Step Stool / Jaime, That’s My Letter – Bench Amy, Her Toolbelt – Kids Step Stool / Elisha, Pneumatic Addict Furniture – Modern 3-Leg End Table Sandra, Sawdust Girl […]

    Reply
  8. Friday Favorites + a Paleo Summer Recipe! | My Healthy Happy Home says:
    July 30, 2015 at 11:49 pm

    […] counter. So for now he kneels on a stool which isn’t really that safe or comfortable.  So this DIY stool looks like something The Hubby could whip […]

    Reply
  9. Great Ideas -- 19 DIY Wood Projects! says:
    August 2, 2015 at 1:01 am

    […] Kid’s Step Stool @ Her Tool Belt […]

    Reply
  10. Creativity Unleashed Week 81 - and a Giveaway from Vinyl Expressions! says:
    August 6, 2015 at 5:00 pm

    […] Kids Step Stool – Her Tool Belt […]

    Reply
  11. Creativity Unleashed No. 81 - Win A $50 Expressions Vinyl Gift Card! || Practically Functional says:
    August 6, 2015 at 5:56 pm

    […] Rustic Wood Wall – Sweet Parish Place Kids Step Stool – Her Tool Belt DIY Gold Arrow Pillows – Simply Designing Repurposed Desk into Beverage […]

    Reply
  12. DIY Wood Plant Stand » Decor Adventures says:
    August 18, 2015 at 10:34 am

    […] Letter | Sawdust Girl | Pretty Handy Girl | Fix This Build That | Build Basic | My Love 2 Create | Her Toolbelt | My Altered State | Sawdust & Embryos | The Kim Six Fix | The Ugly Duckling Girl | Pneumatic […]

    Reply
  13. One Board Challenge and Giveaway! - Sawdust and Embryos says:
    September 15, 2015 at 5:40 am

    […] Addicted 2 DIY – Rustic Step Stool / Jaime, That’s My Letter – Bench Amy, Her Toolbelt – Kids Step Stool / Elisha, Pneumatic Addict Furniture – Modern 3-Leg End Table Sandra, Sawdust Girl – Three […]

    Reply
  14. One Board Challenge and Giveaway! - The House of Wood says:
    September 15, 2015 at 7:25 am

    […] 2 DIY – Rustic Step Stool / Jaime, That’s My Letter – Bench Amy, Her Toolbelt – Kids Step Stool / Elisha, Pneumatic Addict Furniture – Modern 3-Leg End Table Sandra, Sawdust Girl – Three […]

    Reply
  15. One Board Contest and Tool Giveaway ‹ Build Basic says:
    September 15, 2015 at 7:34 am

    […] Amy from Her Toolbelt  […]

    Reply
  16. Reader | One Board Challenge Giveaway | My Altered State says:
    September 15, 2015 at 8:23 am

    […] Amy @ Her Toolbelt – kids step stool […]

    Reply
  17. One Board Challenge and Tool Giveaway ‹ Build Basic says:
    September 15, 2015 at 8:25 am

    […] Amy from Her Toolbelt  […]

    Reply
  18. One Board Challenge Giveaway » Decor Adventures says:
    September 16, 2015 at 8:51 pm

    […] Amy @ Her Toolbelt – kids step stool […]

    Reply
  19. The One Board Challenge: DIY hanging beam light | annabaileying says:
    October 15, 2015 at 10:38 am

    […] Toolbelt – Kids Step Stool / Elisha, Pneumatic Addict Furniture – Modern 3-Leg End Table Sandra, Sawdust Girl – Three […]

    Reply
  20. DIY Kids Step Stool Baby Shower Gift | theMARKERblog says:
    April 30, 2016 at 2:00 pm

    […] Last fall, one of my favorite builder/bloggers Jen Woodhouse put out a “One Board Challenge” to fellow bloggers. It was so amazing to see the wide variety of things that were built with one board! Check out all of the projects here. […]

    Reply

Leave a Reply Cancel reply

Your email address will not be published. Required fields are marked *

This site uses Akismet to reduce spam. Learn how your comment data is processed.

Search Her Tool Belt

Follow Me!

  • Bloglovin
  • Email
  • Facebook
  • Instagram
  • Pinterest
  • RSS
  • Twitter
  • YouTube

Top Posts & Pages

Left Offset Bathroom Vanity

Check out more projects

Copyright

Thank you for wanting to share my work! No need for my permission to pin my work or to feature 1 or 2 pictures with full watermarks intact that link back to the original project. Please do NOT copy tutorials.

Disclosure & Privacy Policy

Disclaimer

Copyright © 2025 · Magazine Pro Theme on Genesis Framework · WordPress · Log in

This website uses cookies to improve your experience. We'll assume you're ok with this, but you can opt-out if you wish.Accept Read More
Privacy & Cookies Policy

Privacy Overview

This website uses cookies to improve your experience while you navigate through the website. Out of these, the cookies that are categorized as necessary are stored on your browser as they are essential for the working of basic functionalities of the website. We also use third-party cookies that help us analyze and understand how you use this website. These cookies will be stored in your browser only with your consent. You also have the option to opt-out of these cookies. But opting out of some of these cookies may affect your browsing experience.
Necessary
Always Enabled
Necessary cookies are absolutely essential for the website to function properly. This category only includes cookies that ensures basic functionalities and security features of the website. These cookies do not store any personal information.
Non-necessary
Any cookies that may not be particularly necessary for the website to function and is used specifically to collect user personal data via analytics, ads, other embedded contents are termed as non-necessary cookies. It is mandatory to procure user consent prior to running these cookies on your website.
SAVE & ACCEPT