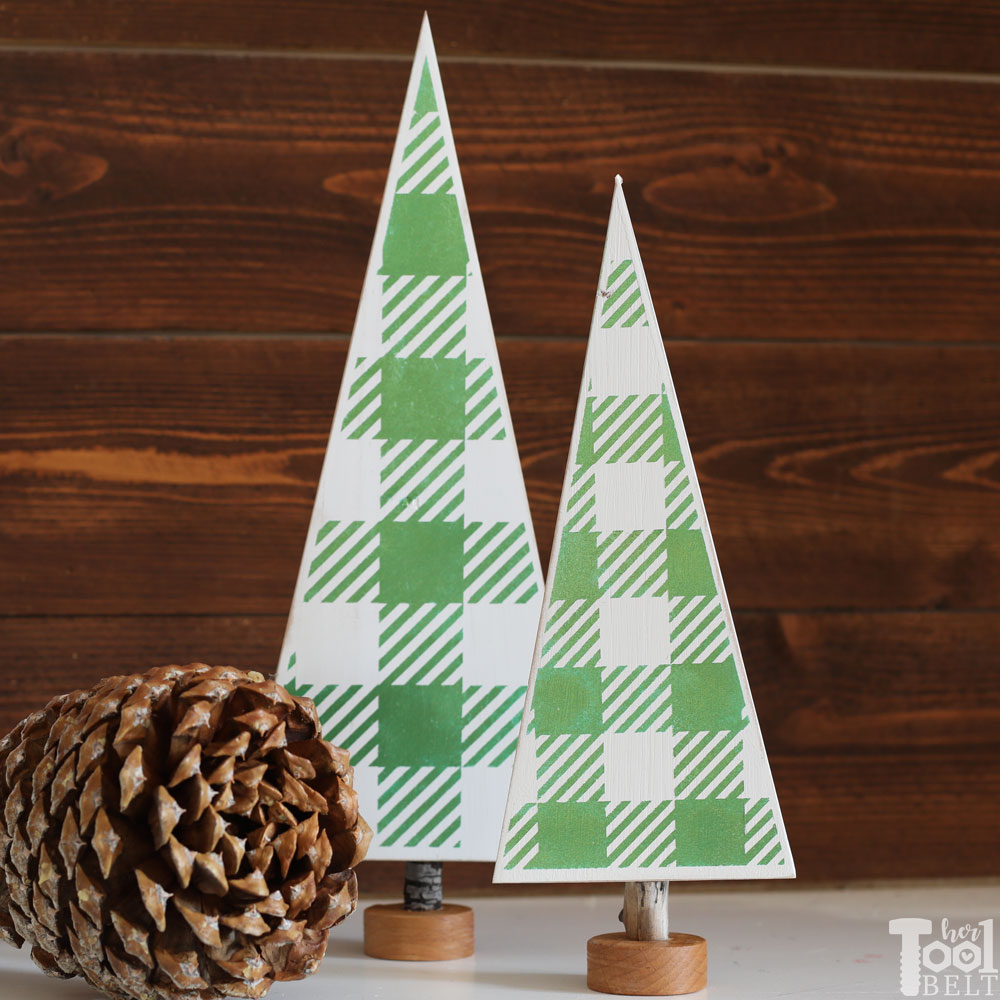
Gingham has been holding strong in Christmas decor for a few years now. The gingham has changed color combos a little, but I seem to see it everywhere. I thought it would be fun to use up some scrap wood and make a few table top gingham Christmas trees. As long as you paint these cute little trees with chalk paint (that dries quickly), then you can easily knock out a few of them in 2 hours!
I made a few trees in green and white.
And some in black and white:
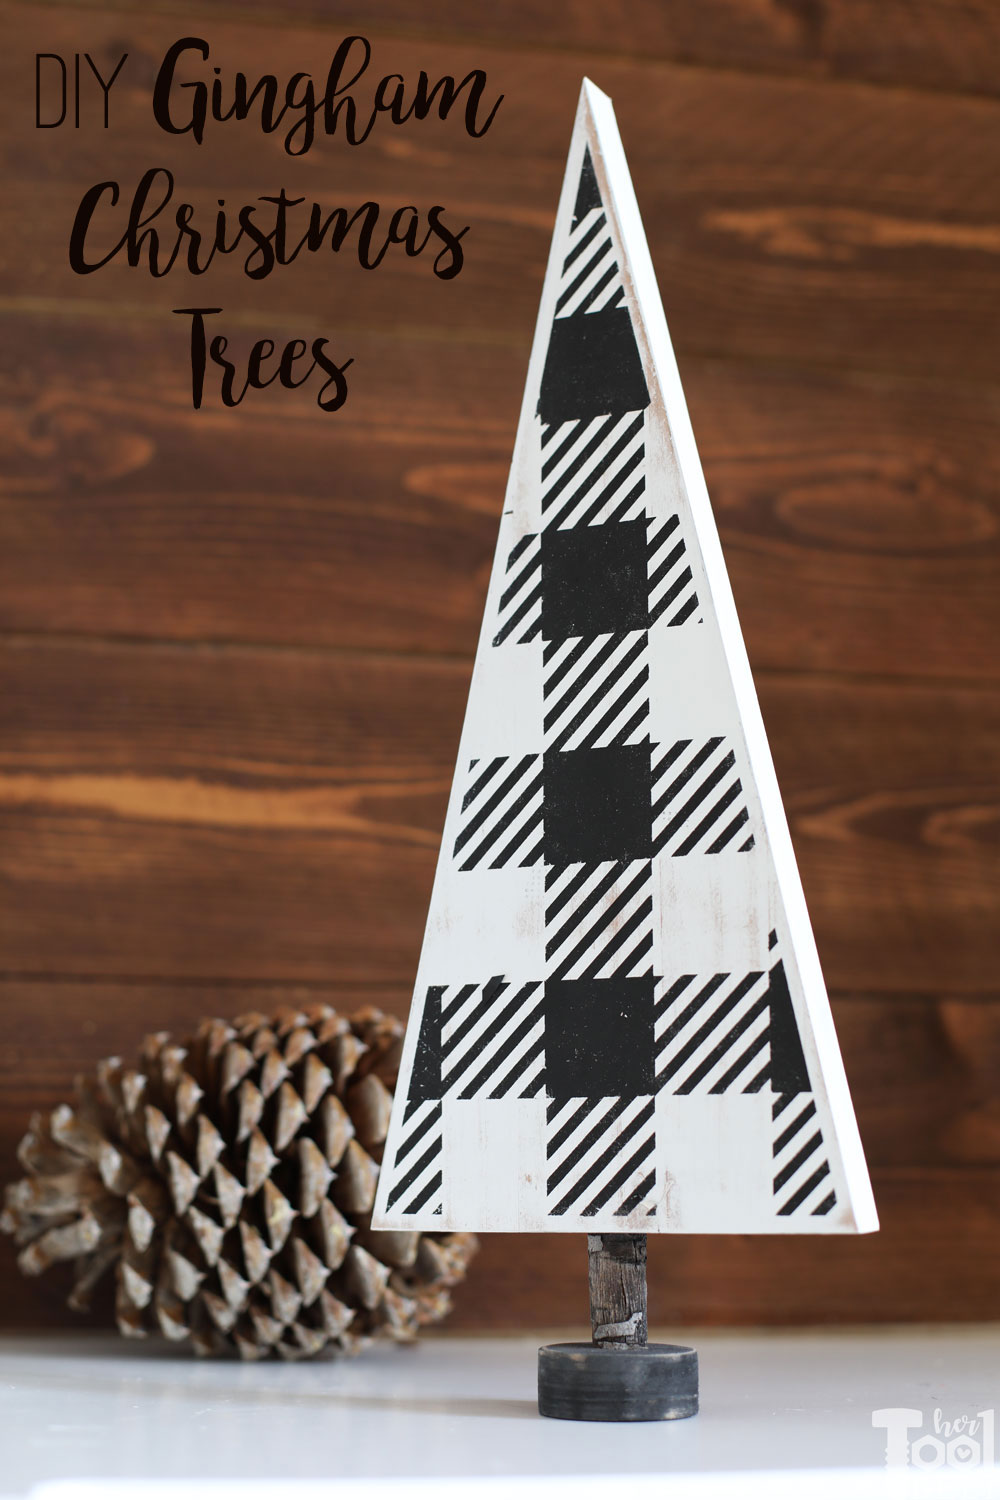
Both color combos turned out fun IMO. Do you have a favorite color combo?
How to Make Table Top Gingham Christmas Trees
This post contains some affiliate links for your convenience. Click here to read my full disclosure policy.
Materials
- scrap wood 3/4″ thick (tall tree: at least 6″ wide and 13 1/4″; small tree: at least 4 1/4″ x 9 3/4″)
- 1″ long piece of tree branch about 3/4″ diameter
- vinyl for the template (12″ x 24″)
- transfer tape for the vinyl
- paint (I used Rustoleum chalk paint linen white, black chalk paint, green stencil creme)
- I used a little polyurethane on the tree bases of the green trees
- 2 1/2″ screw for each tree
- sandpaper
- paint brushes
Gingham Christmas Tree cut file
Tools Used
- Silhouette machine with a 12×24″ mat
- drill
- saw with a cross cut sled
- You can use a variety of saws to cut the trees, jig saw, scroll saw, band saw, circular saw and possibly a sliding miter saw (at 12.25 deg angle)
- 2″ hole saw
- sander
To make the trees efficient we will:
- Cut out the vinyl to get the triangle template
- Trace the template on wood
- Cut out wood and paint
- Weed the vinyl while the paint dries
- Apply the vinyl stencil, paint the color onto the template
- Assemble the trees!
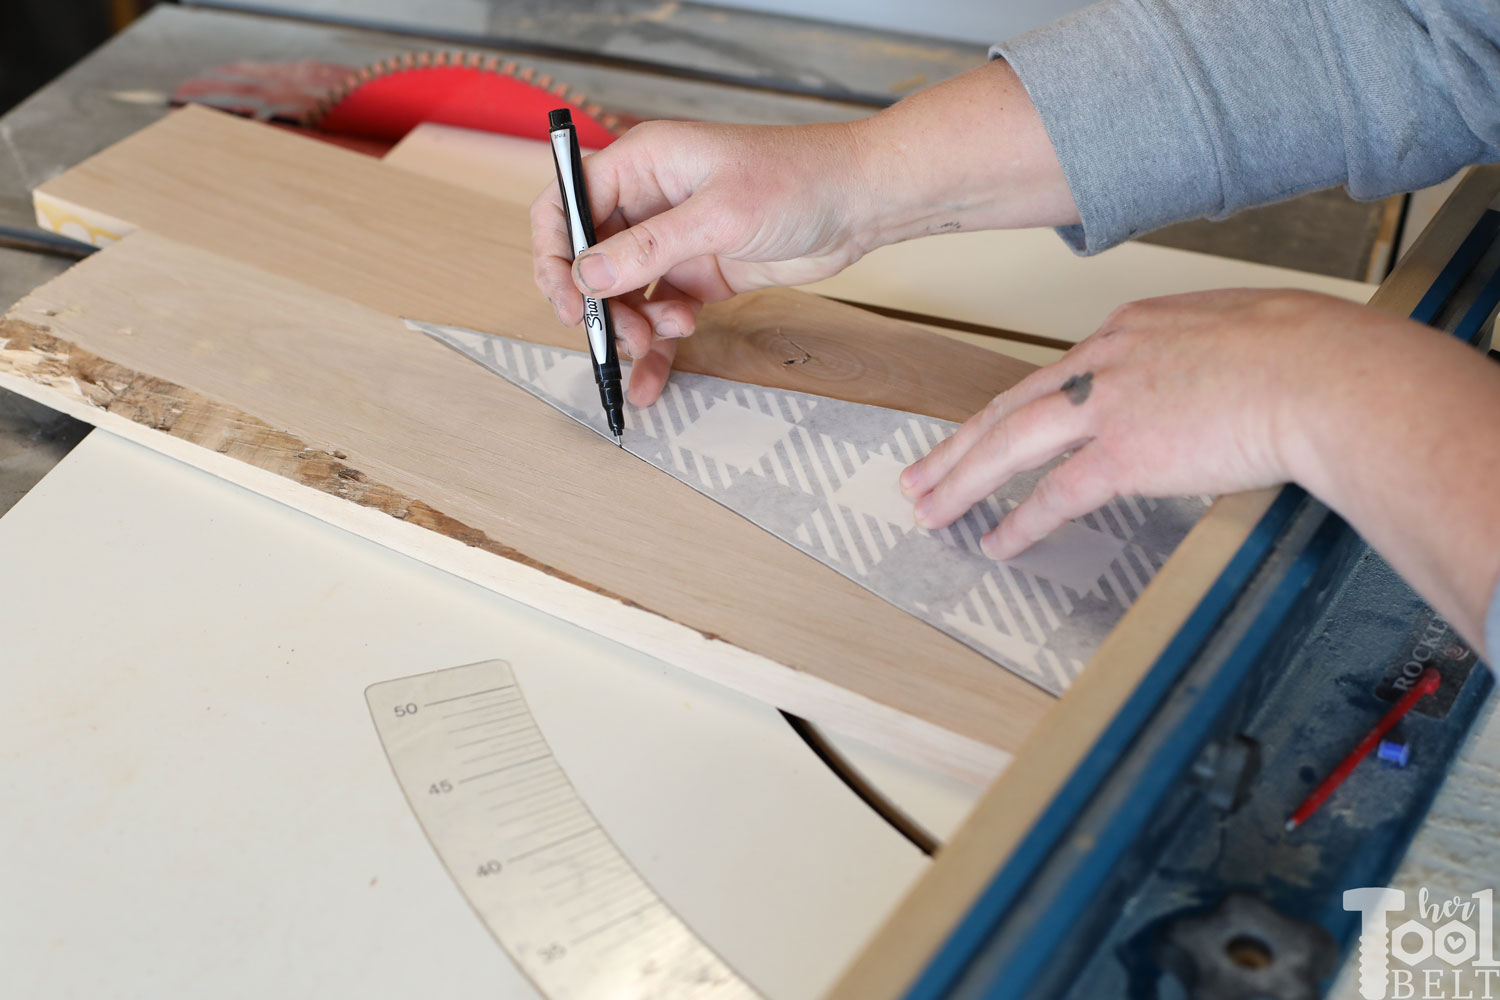
Step 1 – Cut the gingham template out of vinyl
I have cut file for the silhouette for small and large trees (I think I put 2 large and 3 small on the 12×24″ mat). Use a silhouette or cricut to cut out the Christmas Trees.

Then remove the vinyl from the mat and cut out the tree triangles. (We need the triangles for a template to cut the wood.)
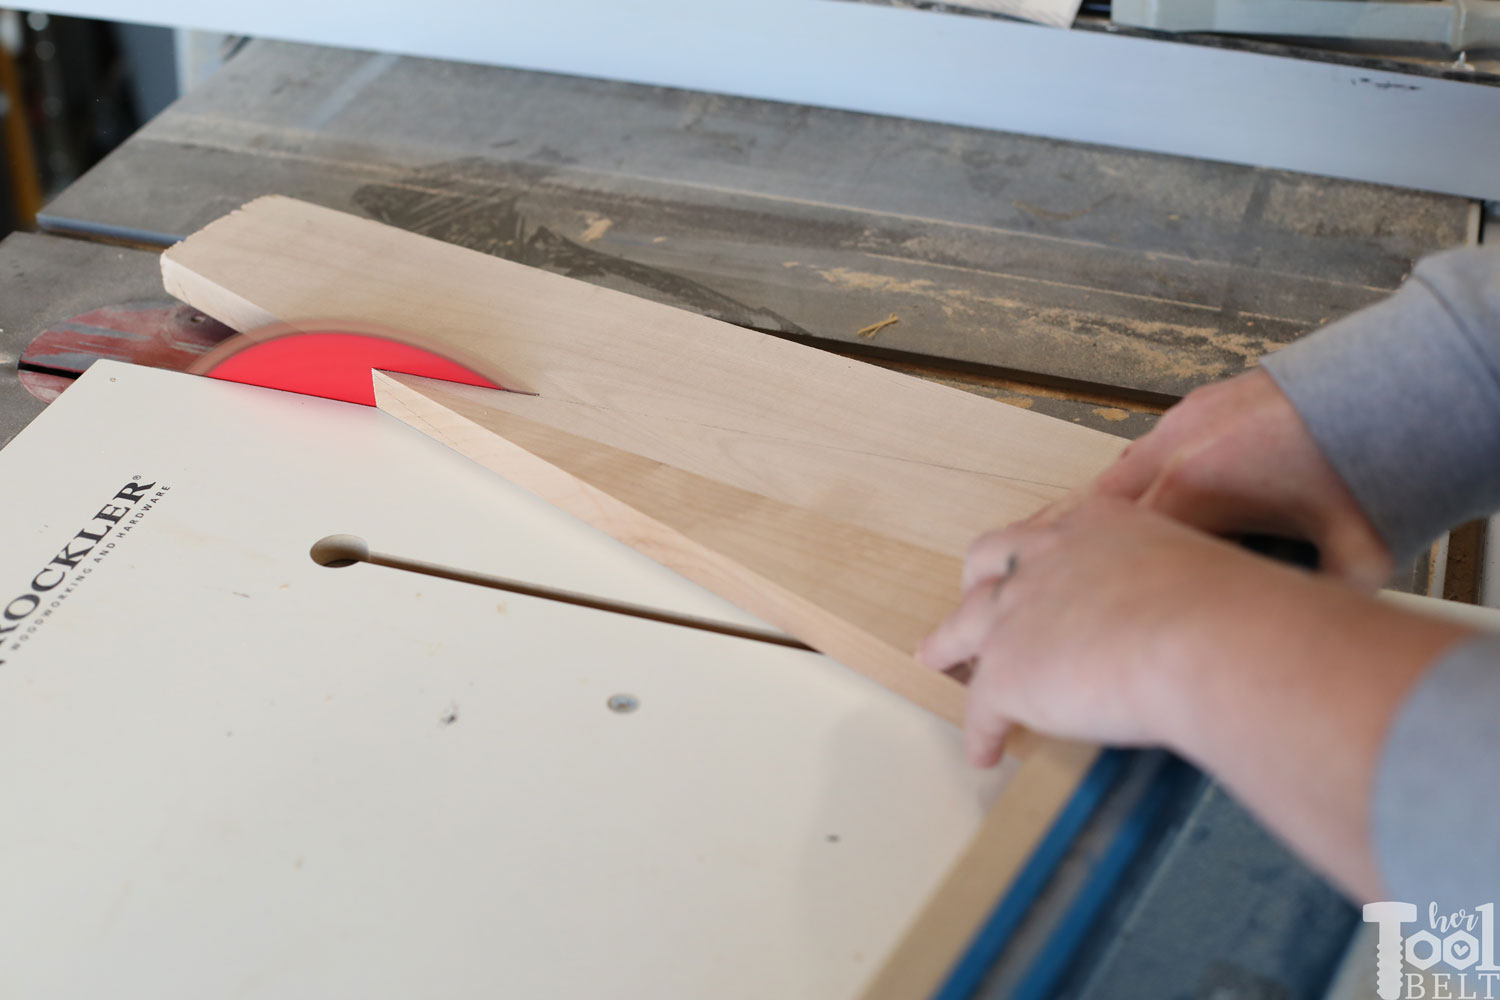
Step 2 – Cut out tree parts
Trace the Christmas tree triangle onto a piece of wood (I’m using 3/4″ thick wood.)
Then I used my Rockler cross cut sled, set at 12.25 deg to cut out the Christmas tree triangles. Now you can use any saw you want to cut these like a jig saw, scroll saw, band saw, circular saw and possibly a sliding miter saw (at 12.25 deg angle).
With the scrap wood, I used a 2″ hole saw to cut out a round base.
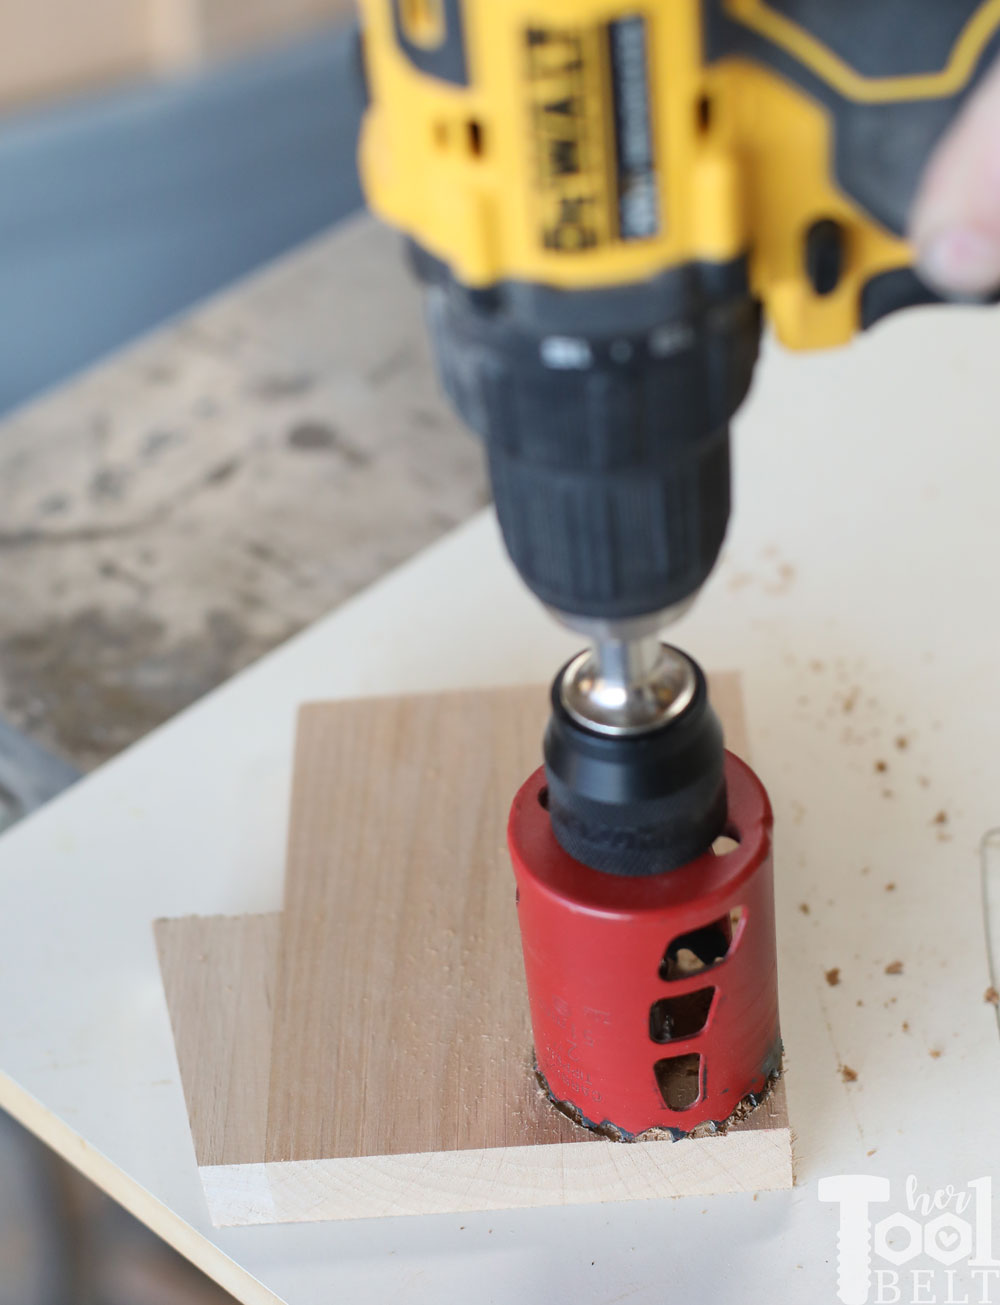
Then I found an old tree branch outside that was about 3/4″ diameter and cut a 1″ piece off. I then drilled hole through the center, that was just larger than the screw threads.

Now you have all the parts needed for the table top gingham Christmas trees

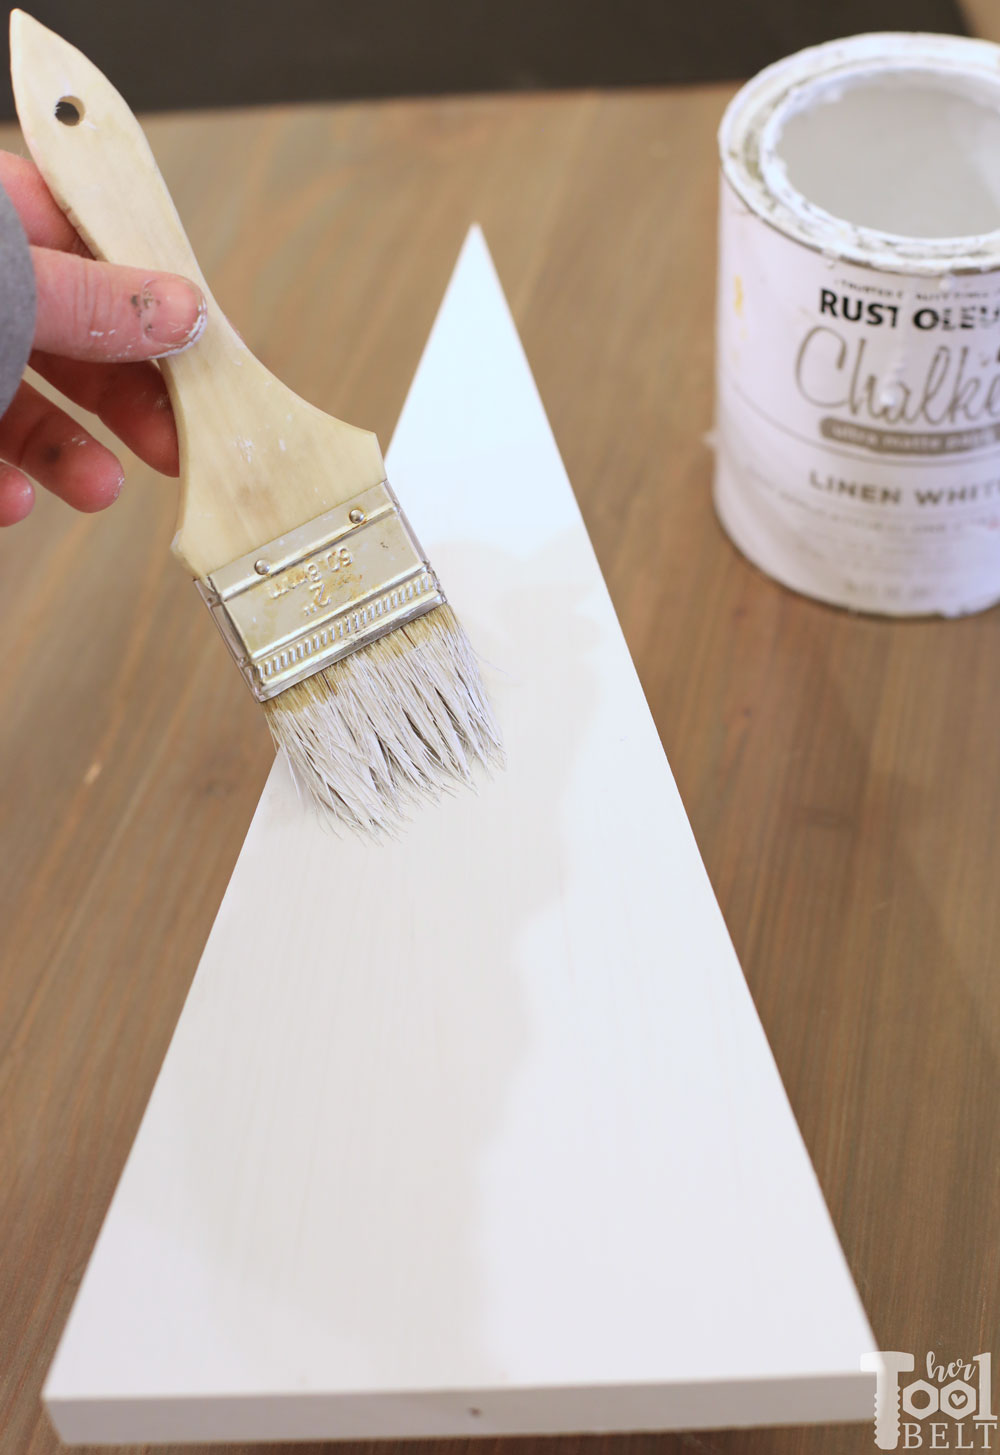
Step 3 – Paint the Tree Parts
I painted the trees white using Rustoleum chalk paint linen white, because it dries quickly. Then I painted the base for the black/white tree black. For the white/green trees, just applied a little polyurethane to the wood.
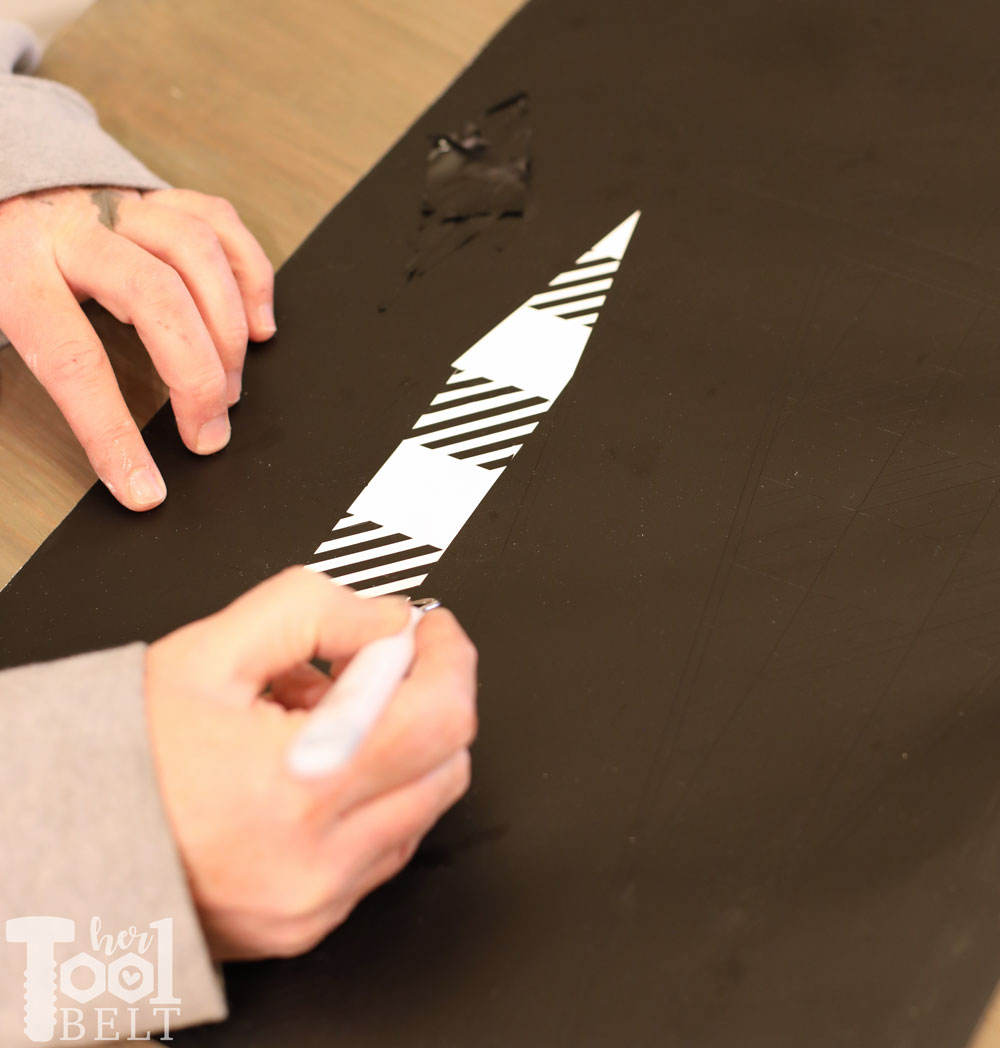
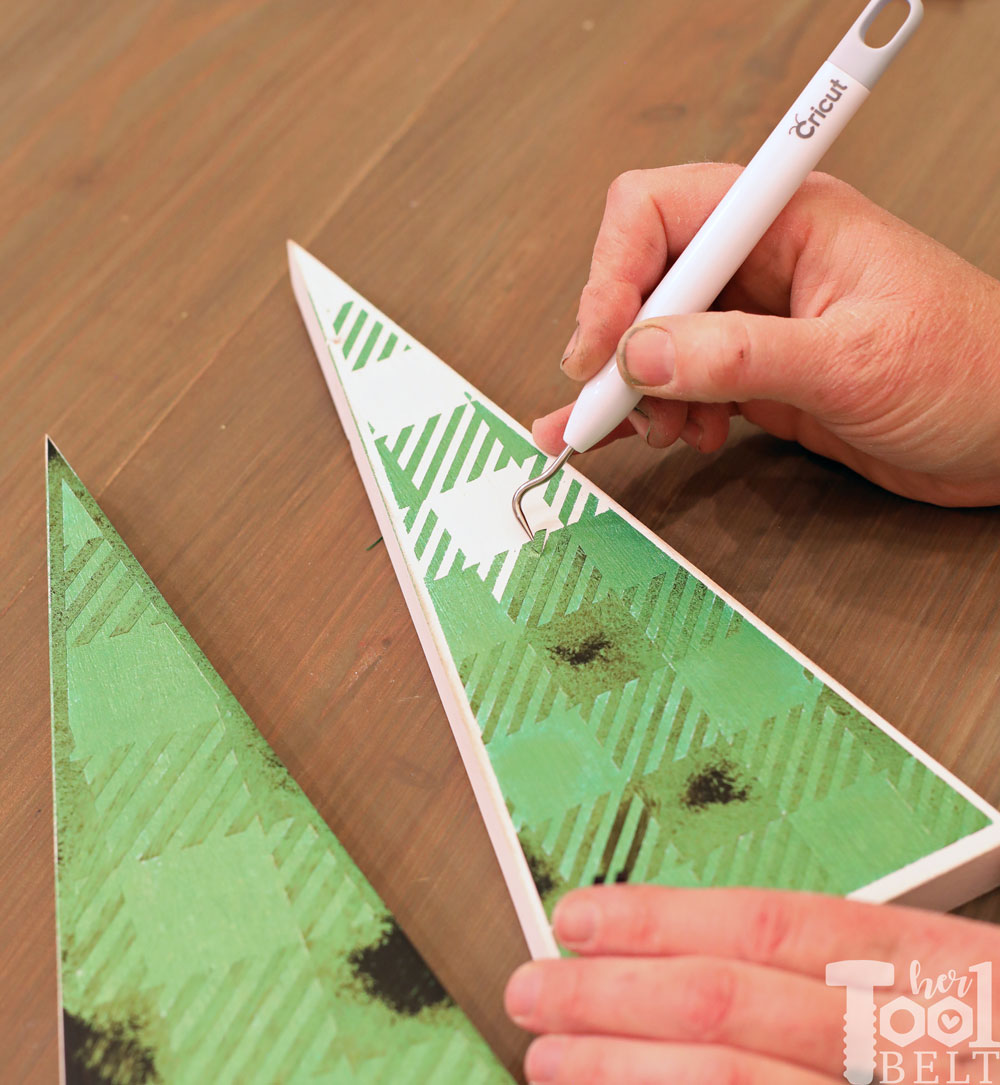
Step 4 – Weed the Vinyl!
While the paint dries, it’s a perfect time to weed the vinyl. There are a lot of little pieces. I would start at the top and work down. If you want the center column to be colored, remove all of the center squares. If you’d like the center column white, leave the squares there.
After the vinyl is weeded, then apply transfer tape to the front side (non sticky side) of the vinyl. Once the white paint on the triangles has dried, pull off the vinyl backing and place the vinyl template on the wood triangle.
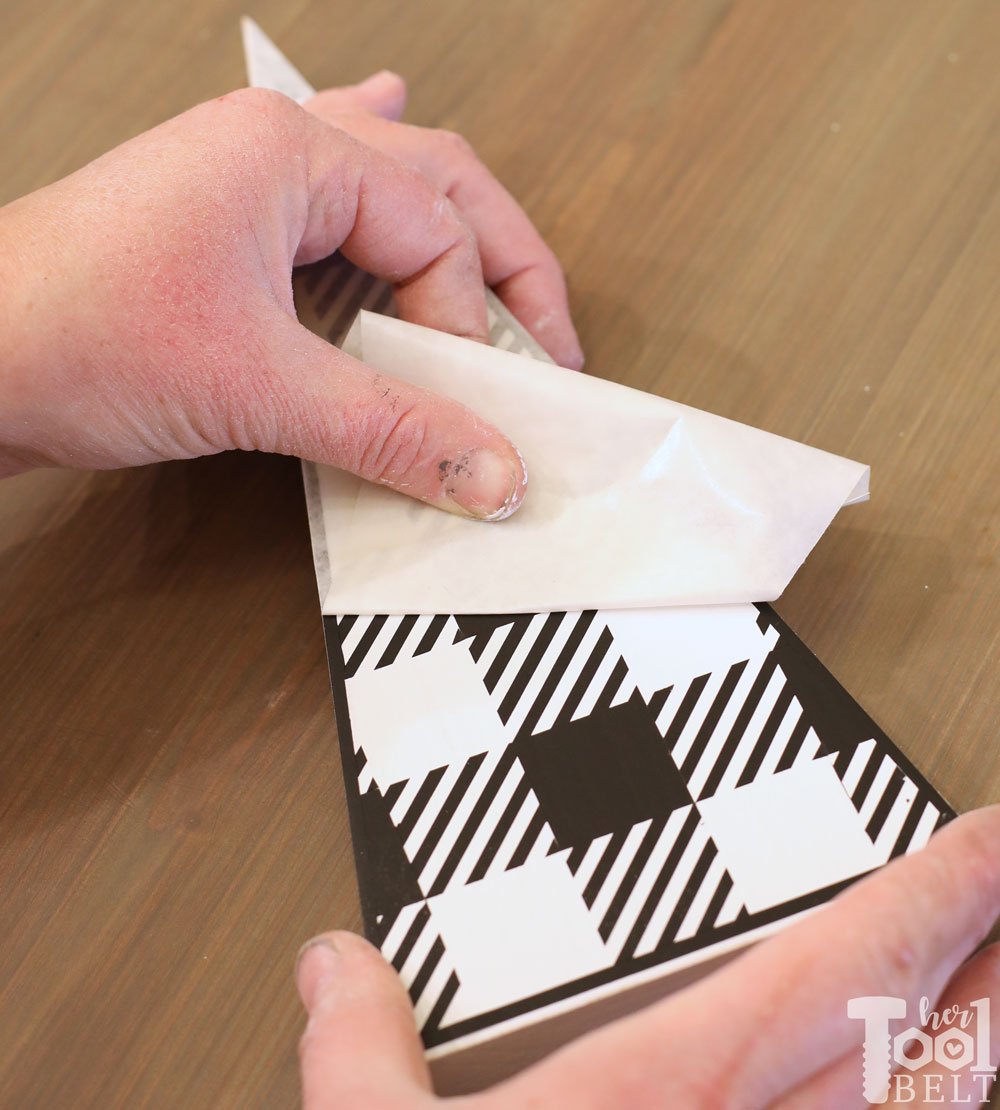
Press the vinyl down firmly on the wood. Then apply a very thin coat of paint or stencil creme. You can go back and apply a second layer of paint after the first dries. This will to reduce any paint leaking under the vinyl.
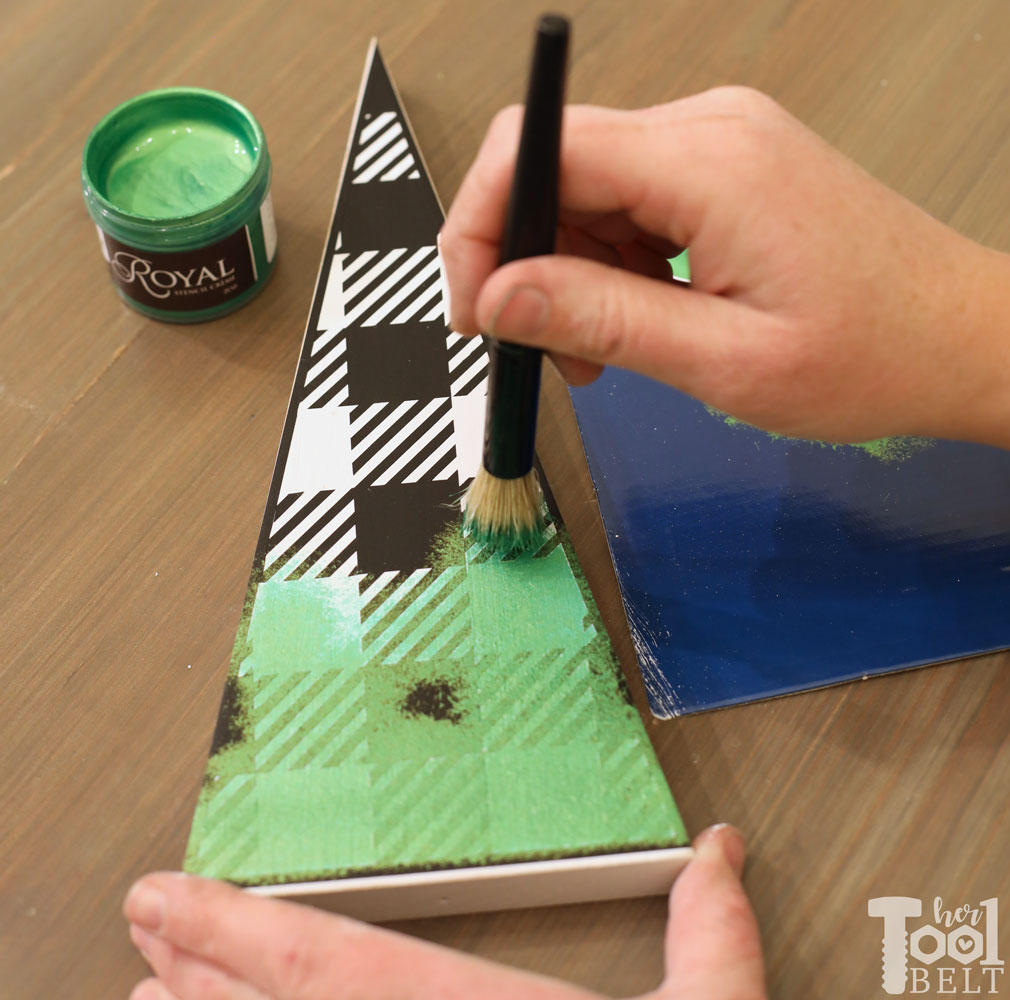
Once the colored paint is applied, pull off the vinyl template.
Place the 2 1/2″ screw through the base circle, tree branch, then screw into the center of the triangle bottom.
All done!
I’m participating in a fun 2 Hour Decor Project Challenge, click below to see all the great projects.


I’m a huge fan of the gingham and plaid for Christmas, I’m so happy it’s everywhere. These trees are so pretty. I realized I don’t have a lot of Christmas trees and I’ve been thinking of ways to add them to my Christmas decor. I’m adding this to my to do list too.
Amy these are brilliant! I love the shape and pattern. I need to fill my whole mantel with these beauties!!
Thanks Jaime. When I made these I thought to myself, I need a whole forest of these. Then I thought, I bet Jaime does have a forest of cute little trees!
Oh my goodness, those gingham trees are so pretty!! Great job!!!
Thanks so much Christine!
These are fabulous, I love the gingham look!!
I adore these!