 For the last 7 weeks, I’ve been helping my Dad at his Turkey Farm. They are building 2 new turkey sheds and got into a time crunch, desperate times call for desperate measures 🙂 so I went to help him install all of the systems in the shed. The systems includes A LOT of electrical wiring, feed lines, water lines and sprinklers, natural gas lines and heaters, fans, motors etc etc etc. Lots of work!
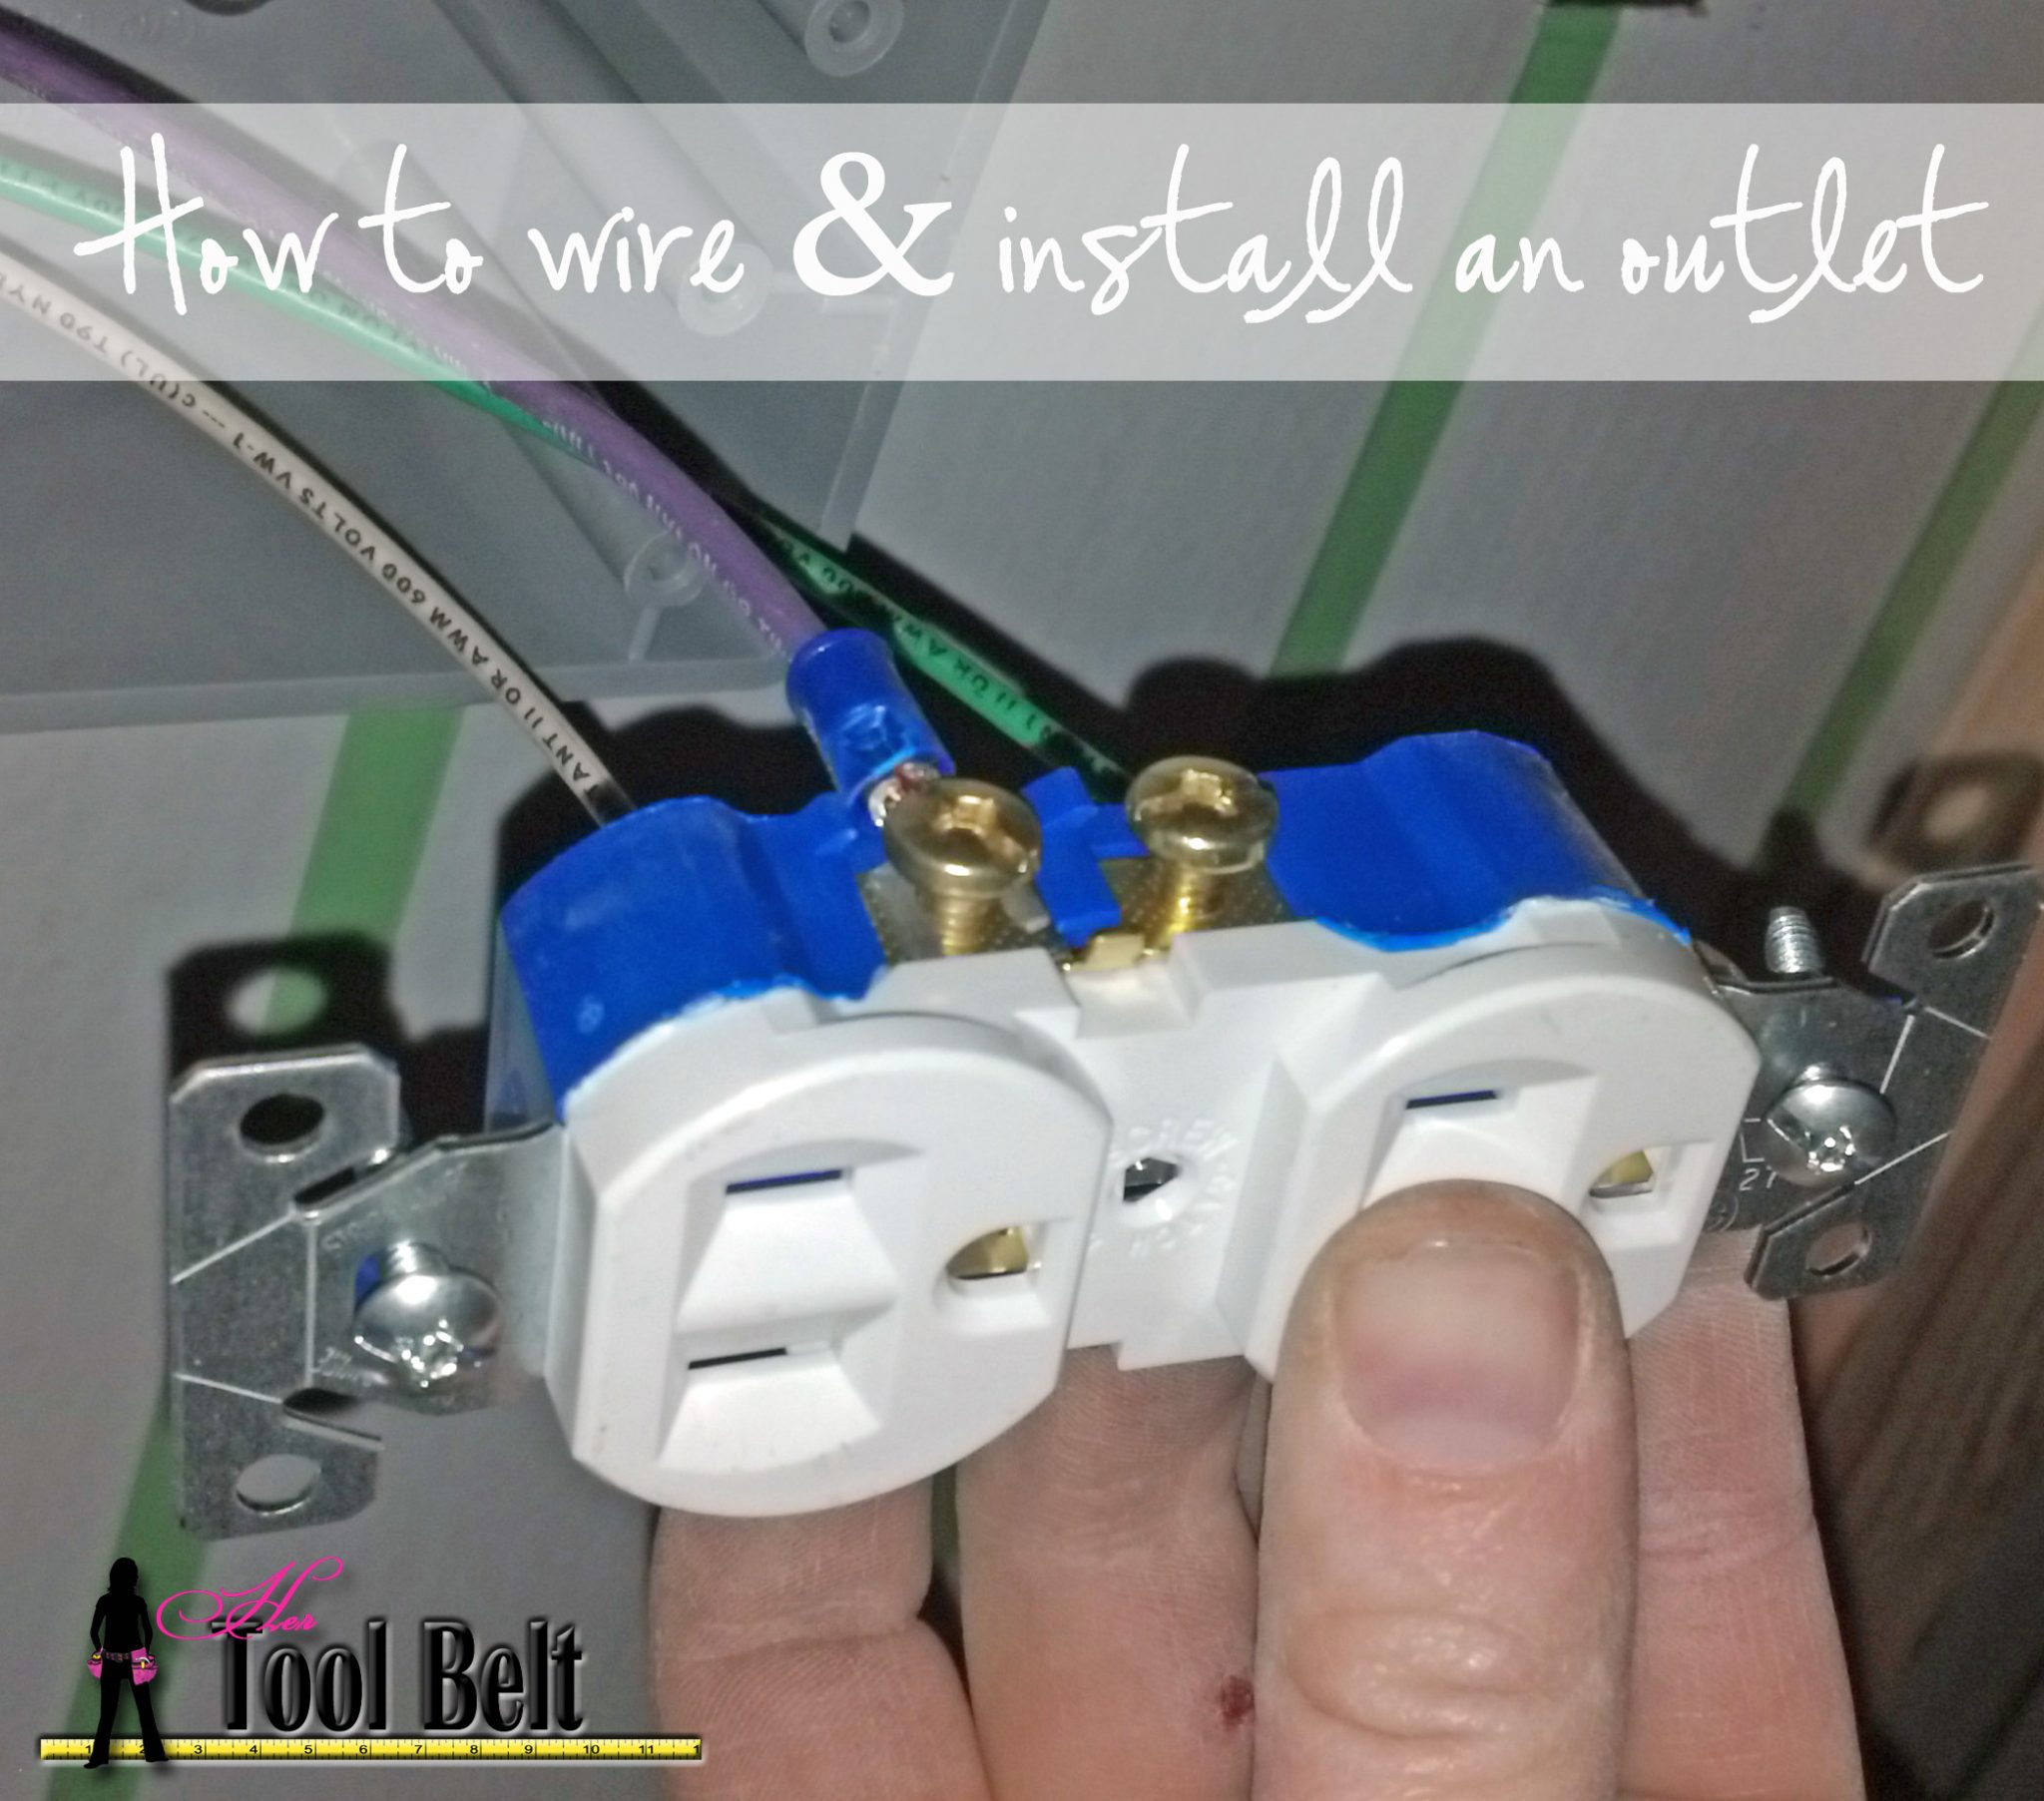
While wiring electrical outlet plugs, I thought I’d snap a few pics for a tutorial. The pictures are for an industrial setting, however the same techniques apply to home use. You can never have enough outlets, right! Sometimes you need to add one here and there in your house/garage.
Tools Needed:
- wire strippers/crimpers
- screw driver
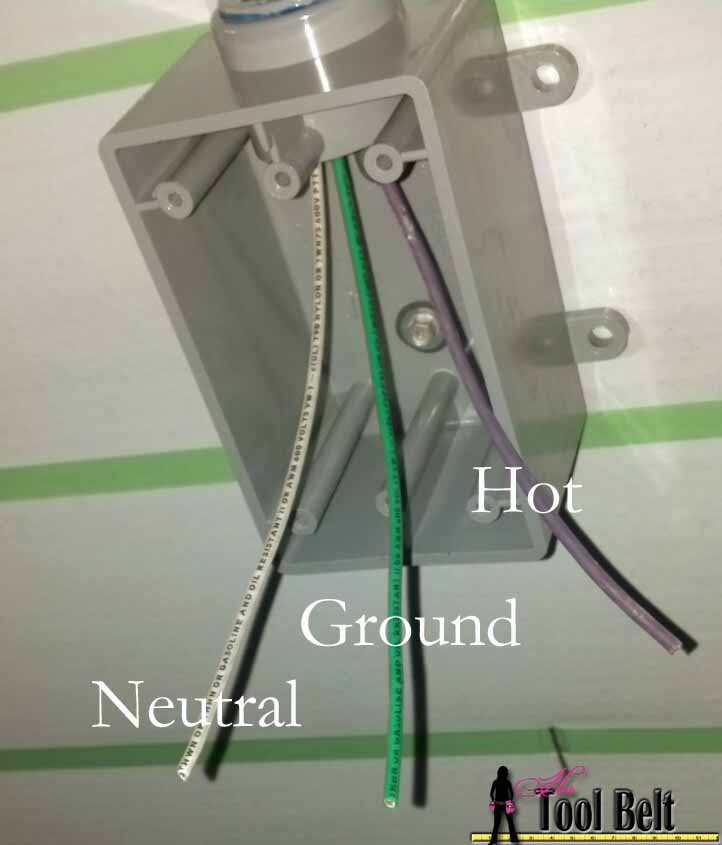
To wire a 110 volt/120 volt outlet, you need 3 wires, green or bare copper is the ground, white is neutral, and usually black or red is the hot (live) wire (in this case my Hot is the purple wire). In the home, you will usually use Romex wire that you can get at the hardware store. Generally you will get 14/2 which means the hot/neutral wire gauge is 14 awg and includes a bare ground. This type of wire is solid. The wire I used at the farm is 14 awg stranded, which means the wires are in a bundle of little wires. Stranded is easier to use in an industrial setting like the farm.
Make sure to turn the power off at the breaker panel in the area you are working. A surprise SHOCK is never fun 🙂
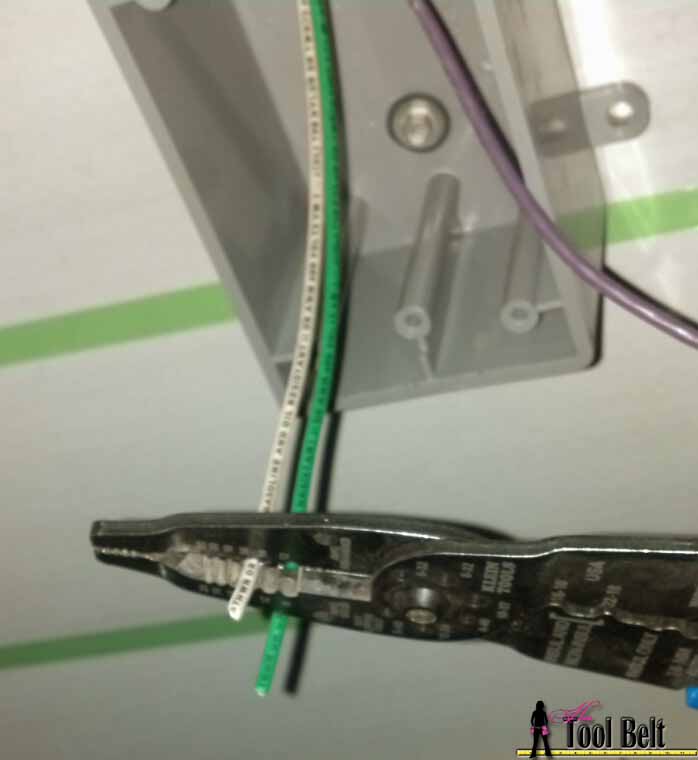 Using your electrical stripper, at the 14 awg mark, strip the insulation from the wire at about 1/2″ from the end. This will expose bare copper wire.
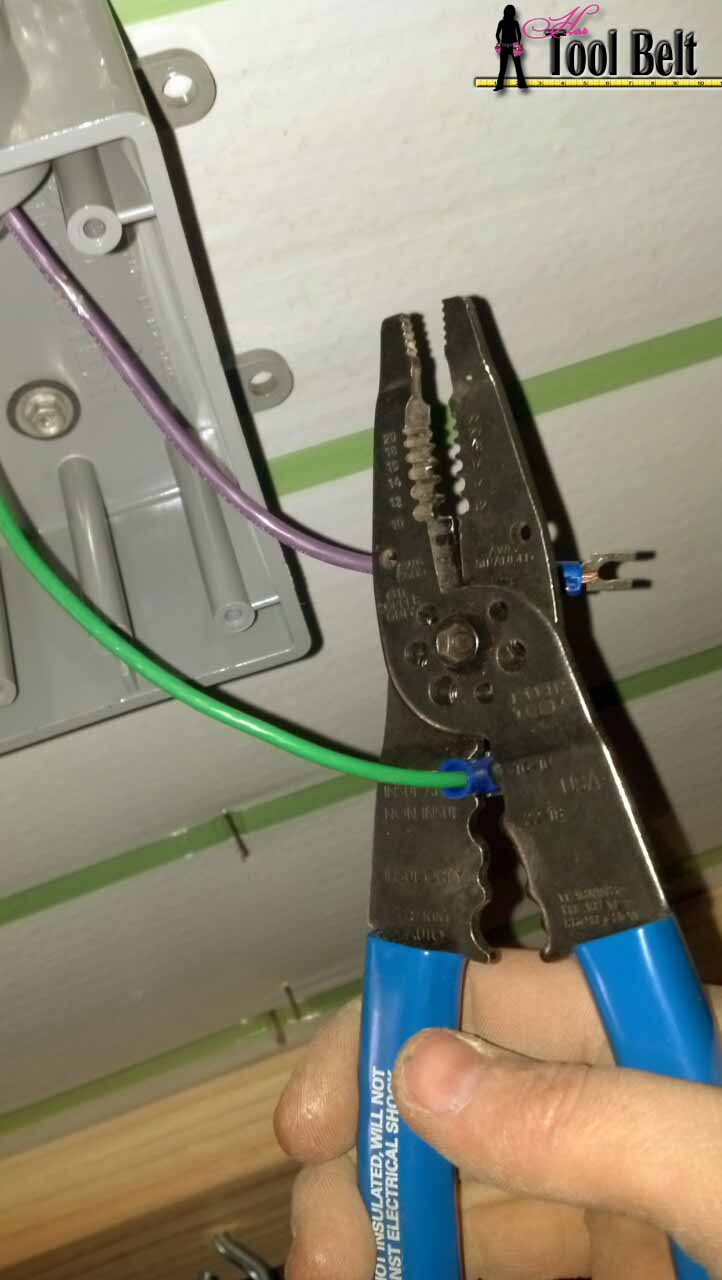 If you are using stranded wire, it is easiest to install spade connectors to the bare wire. Slide the connector onto the bare portion of your wire and use the crimp slots and smash the connector tightly onto the wire. Lightly tug on the connector to make sure its on securely. Repeat for each wire.
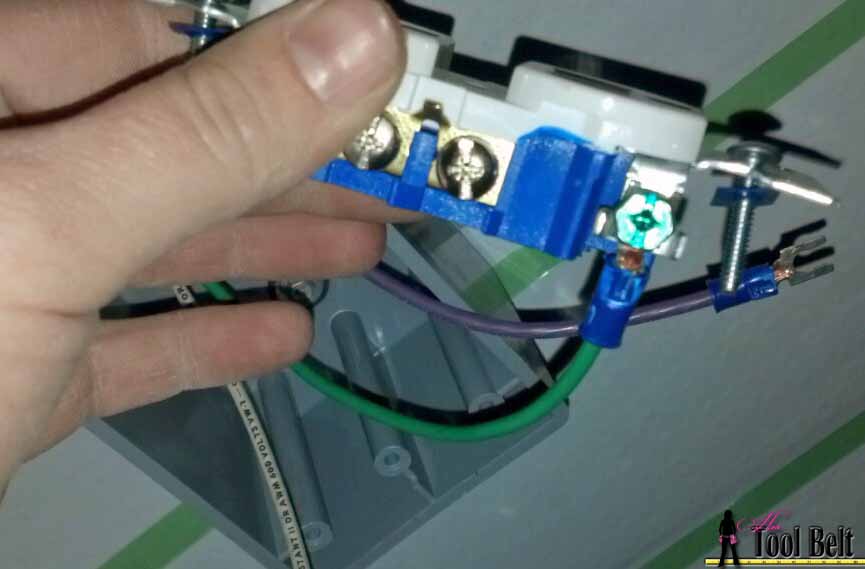 Loosen the green ground screw and attach the green spade to the green screw. Tighten the screw with a screwdriver.
Note: if you are using solid copper wire, make a small loop in the wire and wrap it around the threads of the screw and tighten the screw down.
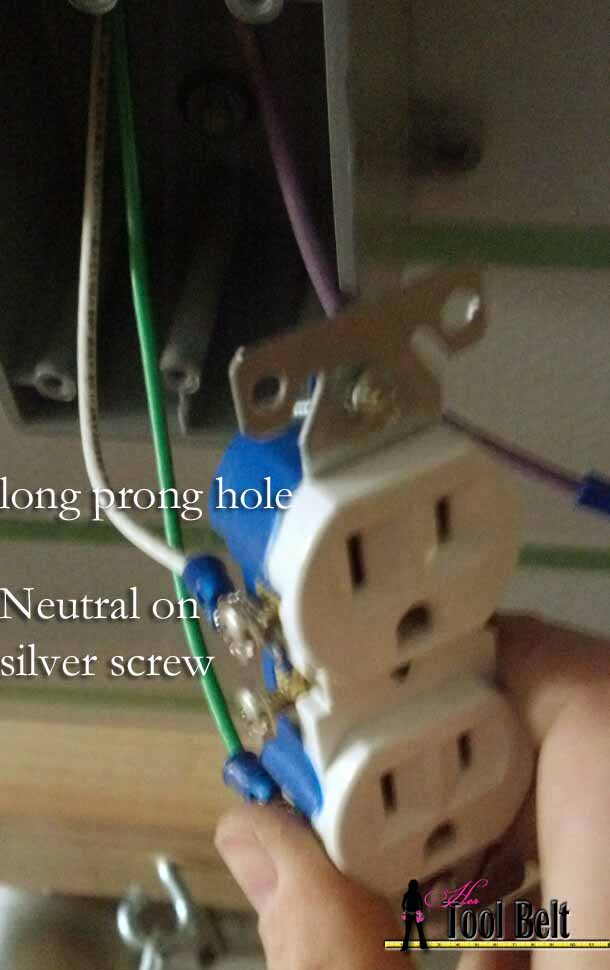 Loosen the top silver screw, attach the neutral wire to one of the silver screws. On a standard 110/120 volt outlet plug, the neutral wire attaches to the long prong hole. Tighten the screw with a screwdriver.
Note: if you are using solid copper wire, make a small loop in the wire and wrap it around the threads of the screw and tighten the screw down.
If this outlet is the last plug on your wire, you will only use the first set of screws. If you are continuing on to another outlet, you will use the other set of screws for the wires that lead to the next outlet.
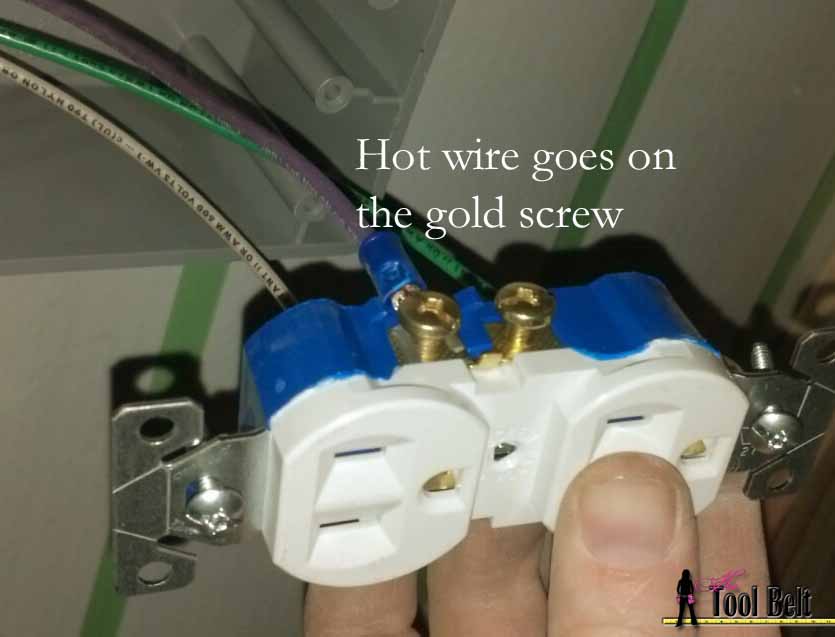 Next loosen a gold screw, and attach the Hot wire on the gold screw (the short prong side). Tighten the screw with a screwdriver.
Note: if you are using solid copper wire, make a small loop in the wire and wrap it around the threads of the screw and tighten the screw down.
Now we’ll attach the outlet to the box by lining up and screwing in the two attachment screws that come with the outlet. When putting the wires into the box, make sure the bare ground WILL NOT touch any of the HOT screws, this will short your power and flip your breaker when you turn it on.
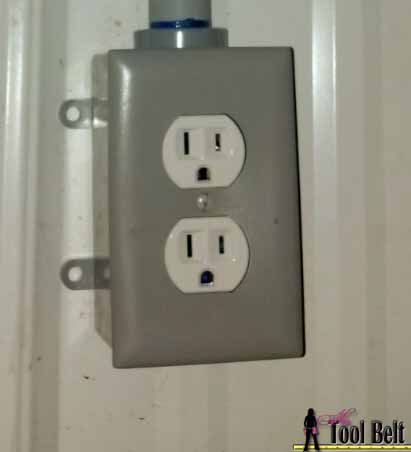 Attach the outlet cover. We are ready to try it out. Flip on the breaker and you should be good to go.
Leave a Reply