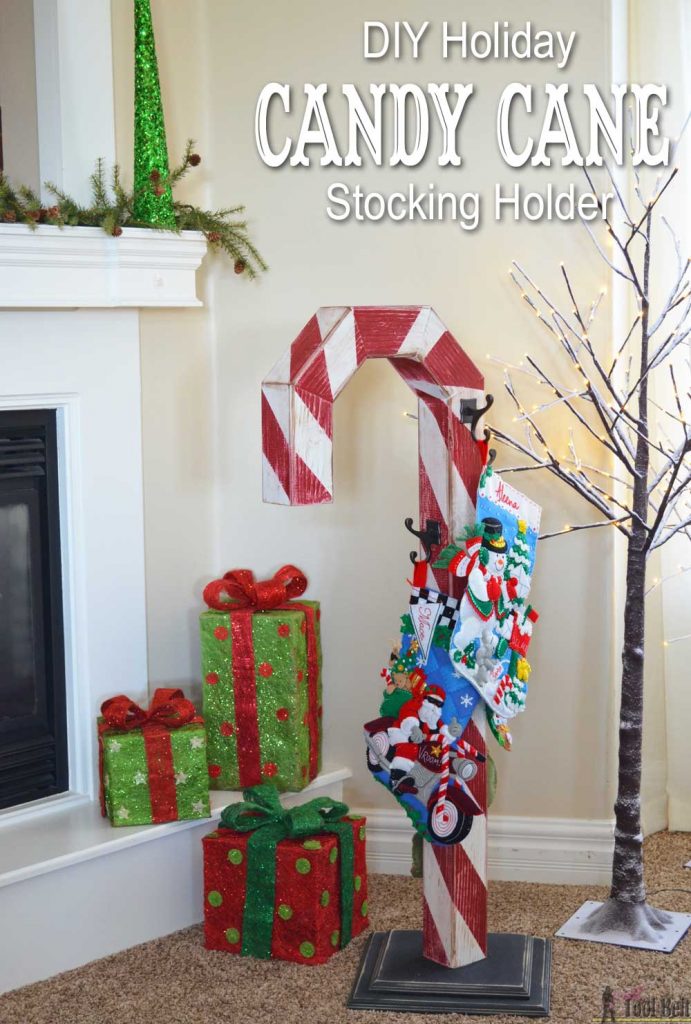
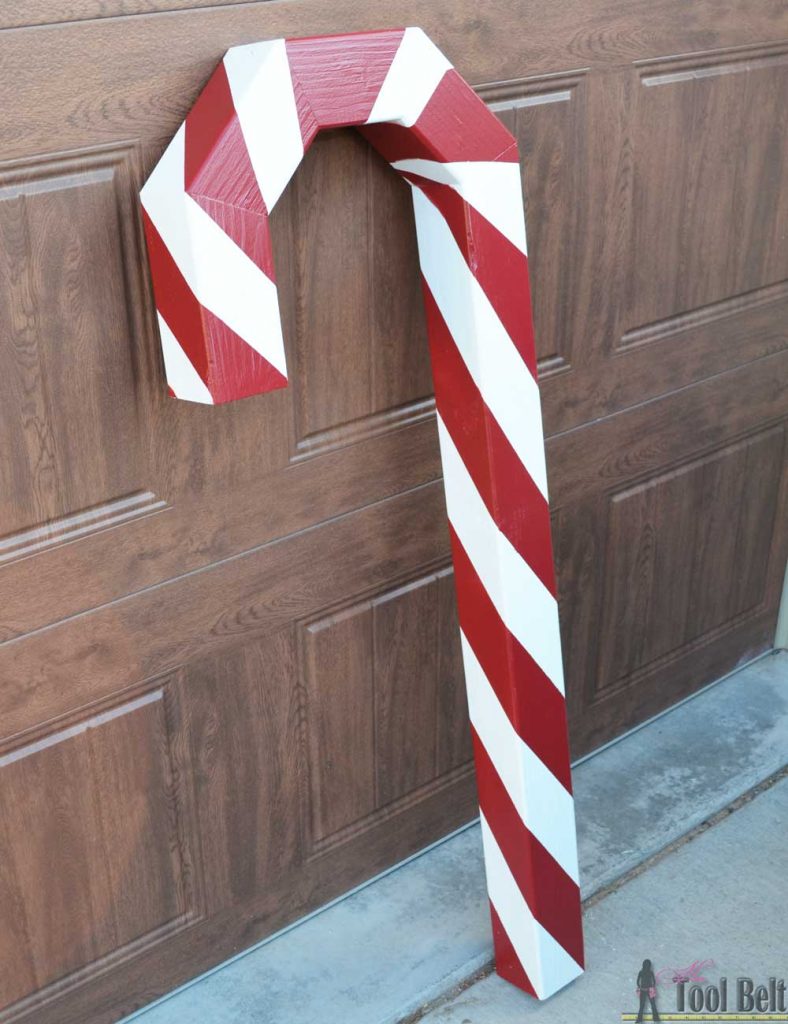
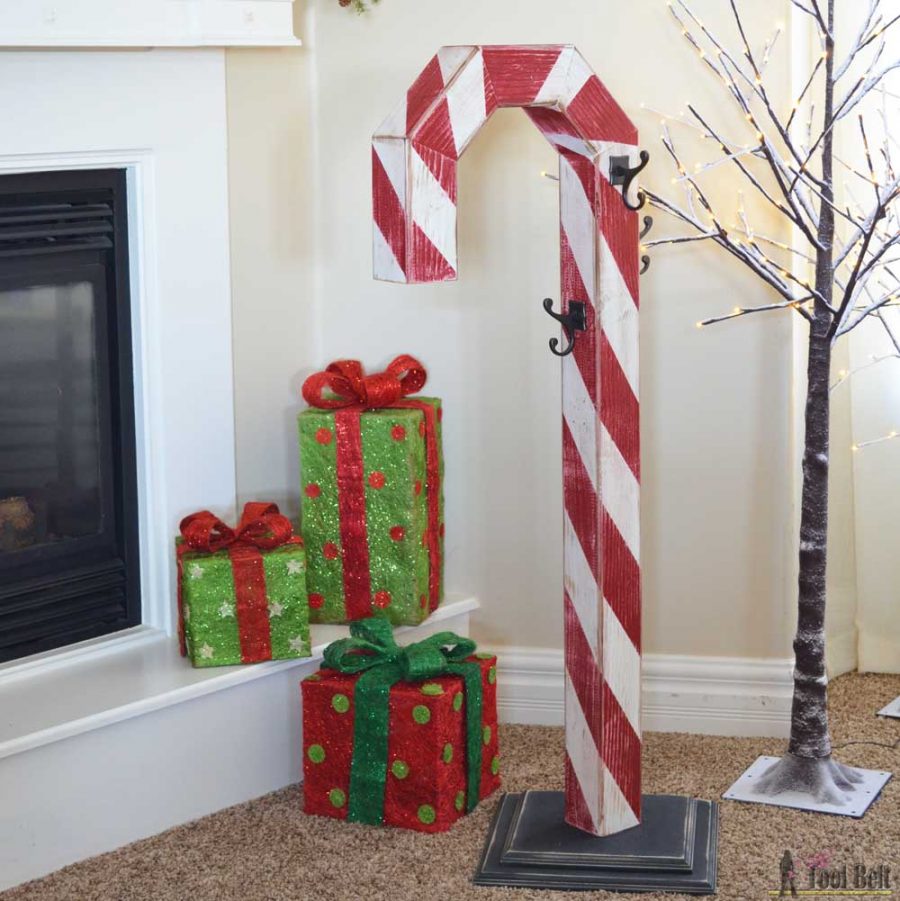
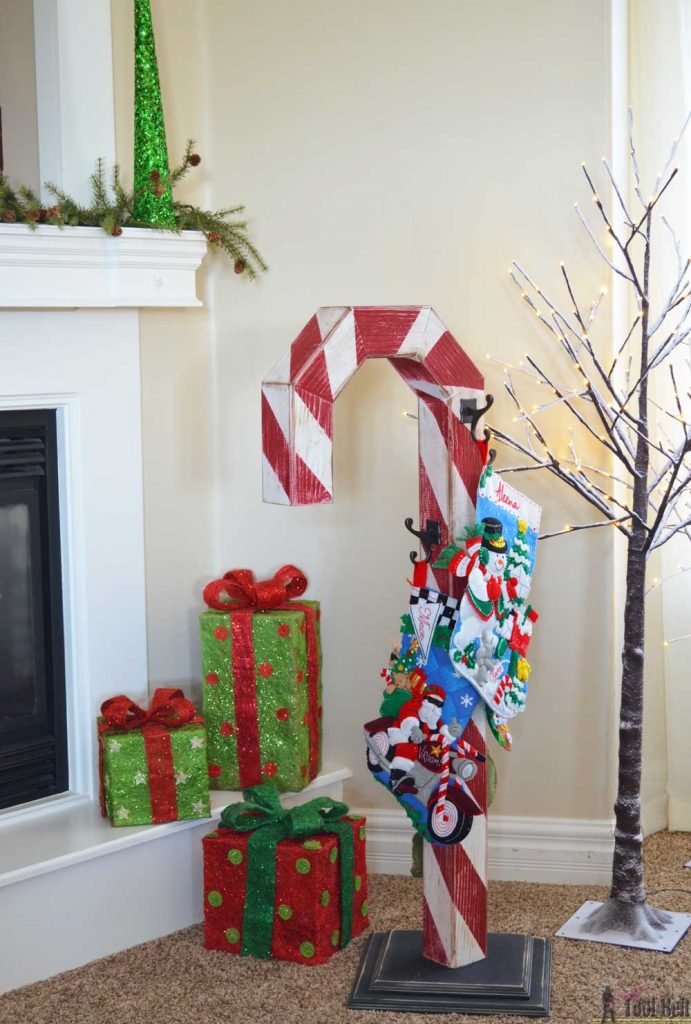
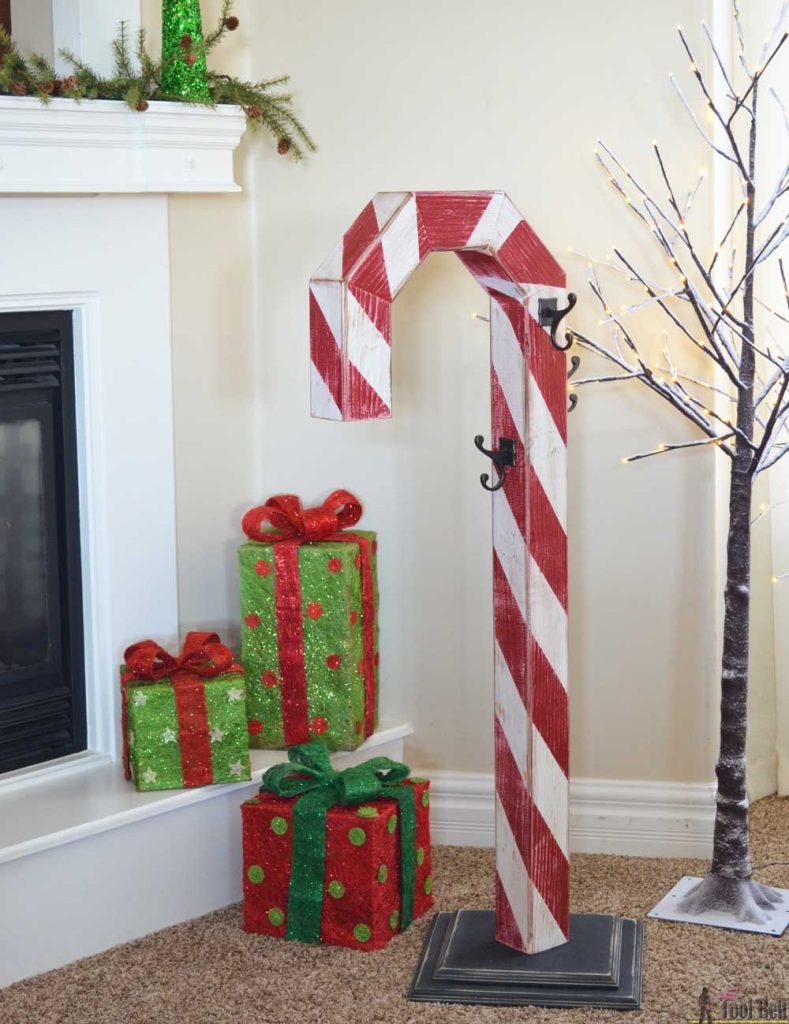
A stocking post is a convenient way to hang up those stockings. It would also look cute by the front door with a welcome or Christmas sign. Today I’m participating in a virtual party with 25 bloggers to show how we customized the Holiday Stocking Post for our homes. I thought it would be fun to customize my Holiday Stocking Post to look like a candy cane.
This post contains some affiliate links for your convenience. Click here to read my full disclosure policy.
How to Make a DIY Holiday Candy Cane Stocking Holder
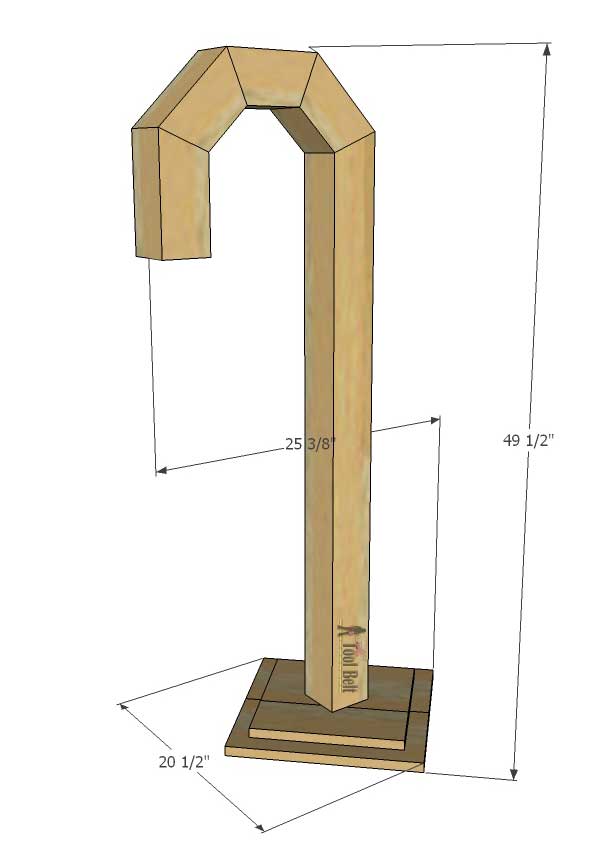
Overall dimensions
Materials
- 1 – 4″ x 4″ x 8′ post lumber (douglas fir/pine)
- 1 – 1″ x 8″ x 6′ board (pine)
- wood glue
- 7 – 1 1/4″ pocket hole screws
- 8 – 2 1/2″ finishing screws
- 6 – 2 1/2″ screws (or longer)
- white paint (I used white paint primer)
- red paint
- black paint
- painters tape
- sandpaper
- hooks
You can make this project cheaper by using landscaping timbers.
Cut List
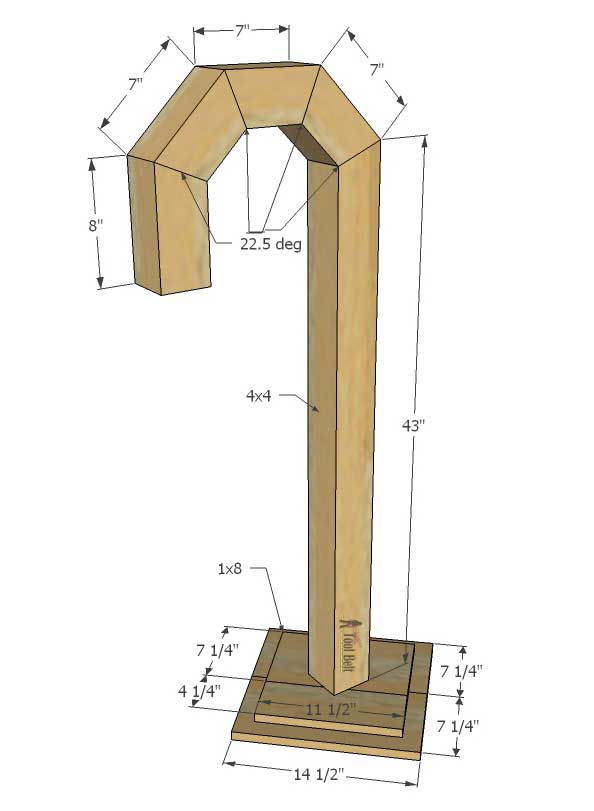
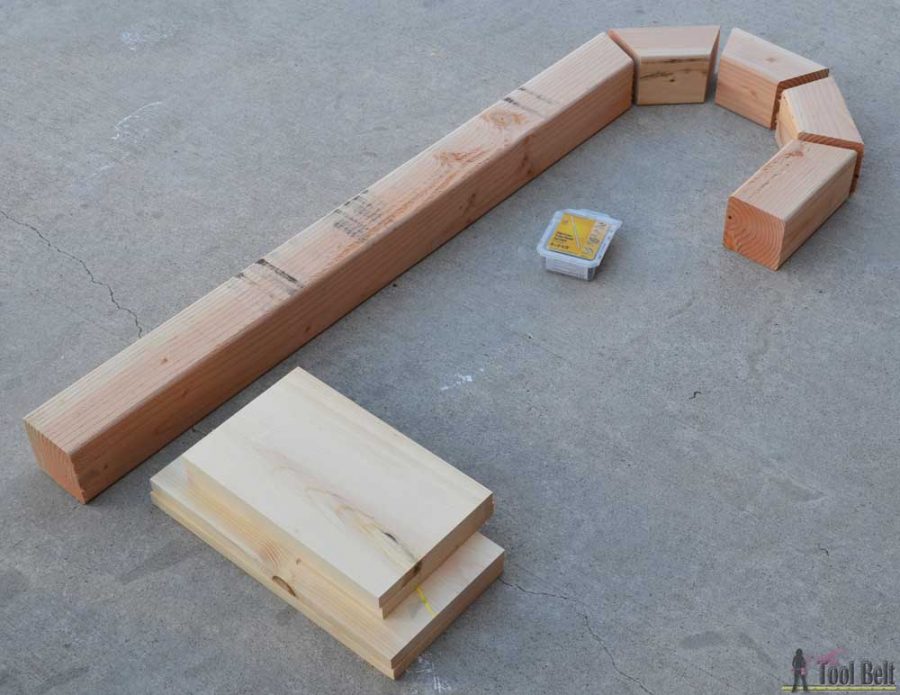
- 1 – 3 1/2″ x 3 1/2″ x 43″ post (22 1/2 deg miter on one end)
- 3 – 3 1/2″ x 3 1/2″ x 7″ post (22 1/2 deg miter on both ends)
- 1 – 3 1/2″ x 3 1/2″ x 8″ post (22 1/2 deg miter on one end)
- 2 – 3/4″ x 7 1/4″ x 14 1/2″ board
- 1 – 3/4″ x 7 1/4″ x 11 1/2″ board
- 1 – 3/4″ x 4 1/4″ x 11 1/2″ board
Candy cane wood piece placement
Make the cuts to the 4×4 post and 1×8 board according to the cut list.
Step 1 – Assemble candy cane
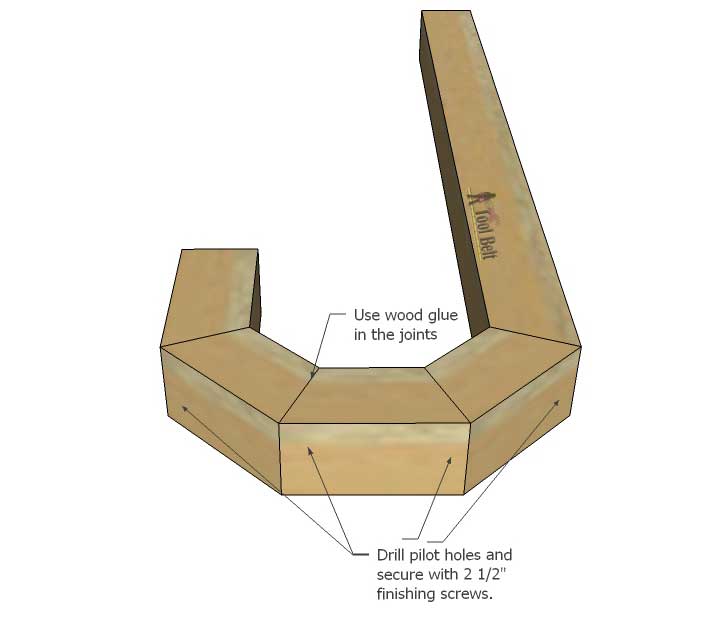
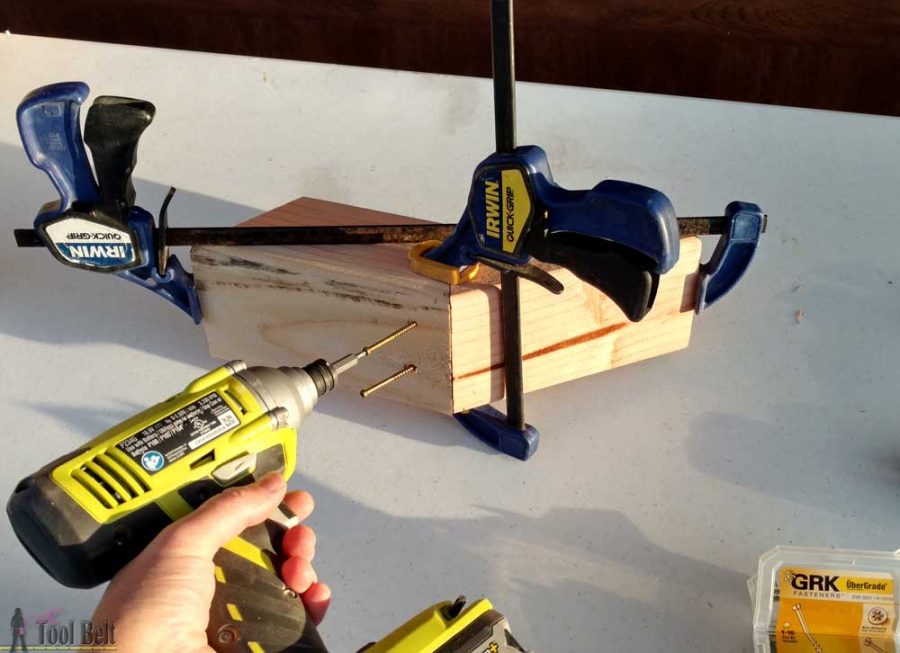
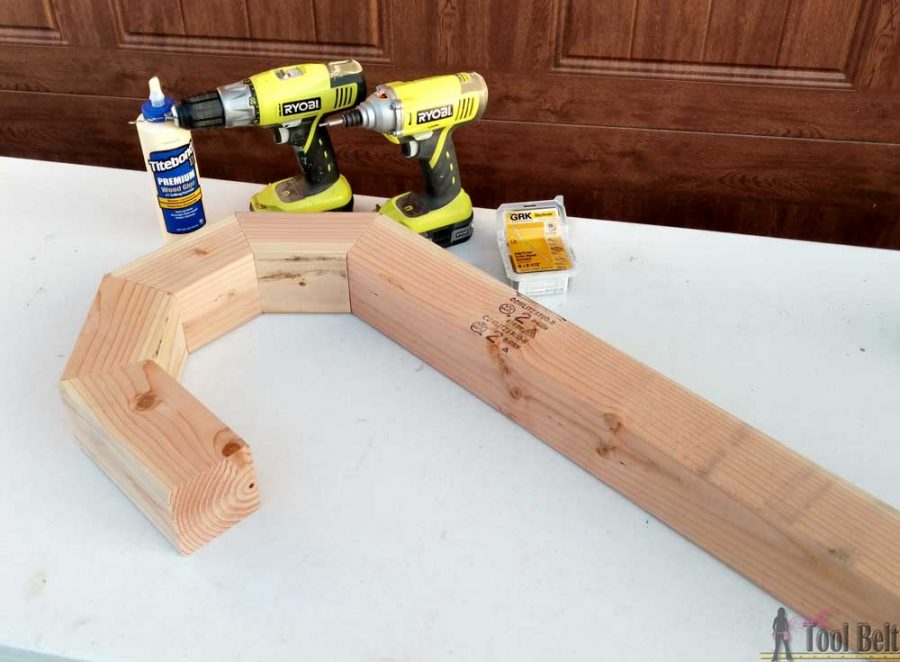
The candy cane pieces are glued together and I added 2 1/2″ finishing screws to give it some strength. The finishing screws have a smaller head (normal wood screws can be used instead but will leave a bigger hole).
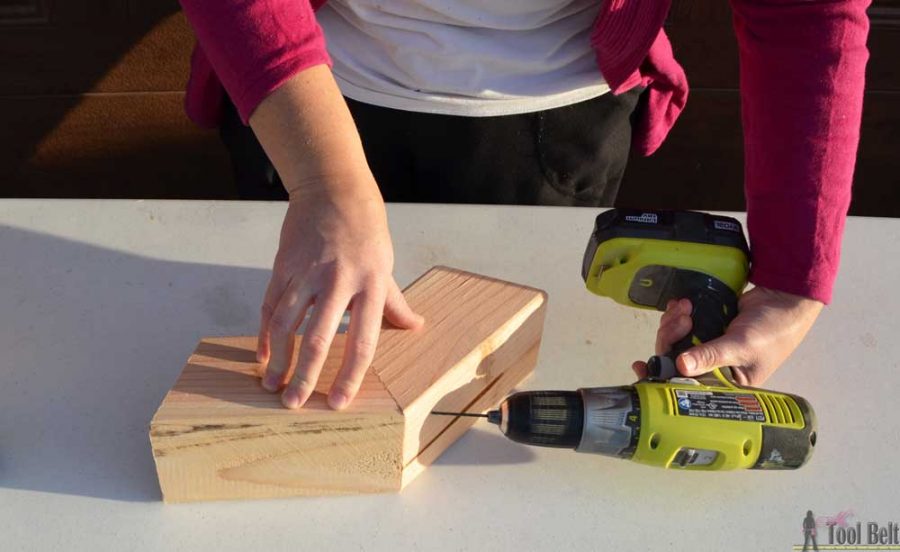
On each of the angled pieces, drill pilot holes for the 2 1/2″ screws. The drill bit for the pilot hole should be about the size of the screw shank (solid part).
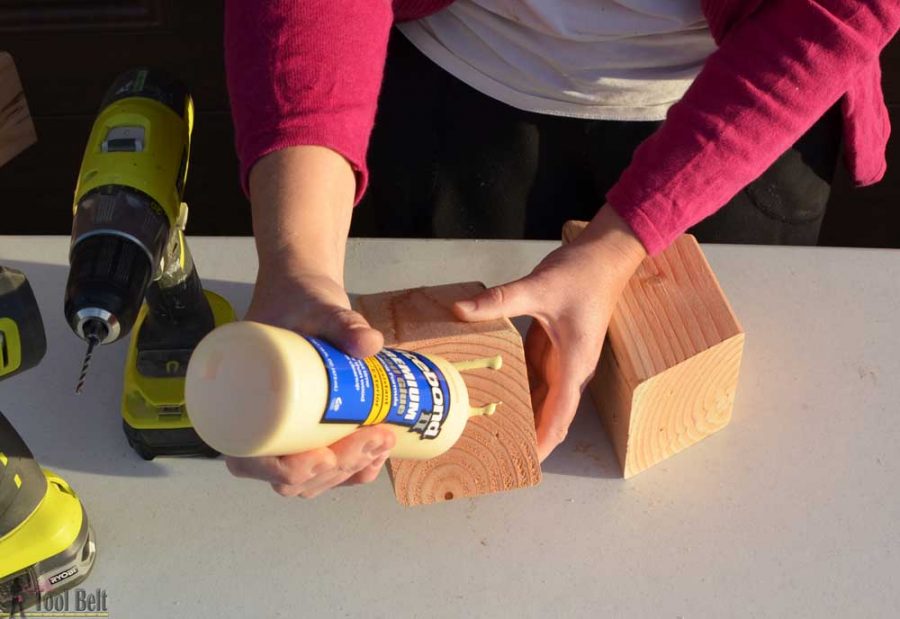
Add plenty of wood glue to the joint.
Use clamps to assist assembly as needed. Secure candy cane pieces together with 2 1/2″ screws.
Repeat for each joint until candy cane is assembled.
Step 2 – Assemble bases
I wanted to route a nice edge around the base pieces, so I chose to use pine boards. Alternatively you can use plywood if you want.
Drill about 4 pocket holes for 3/4″ material in one of the 7 1/4″ x 14 1/2″ base pieces and about 3 pocket holes in the 4 1/4″ x 11 1/2″ base piece. Use wood glue and 1 1/4″ pocket hole screws to join the large base and small base pieces.
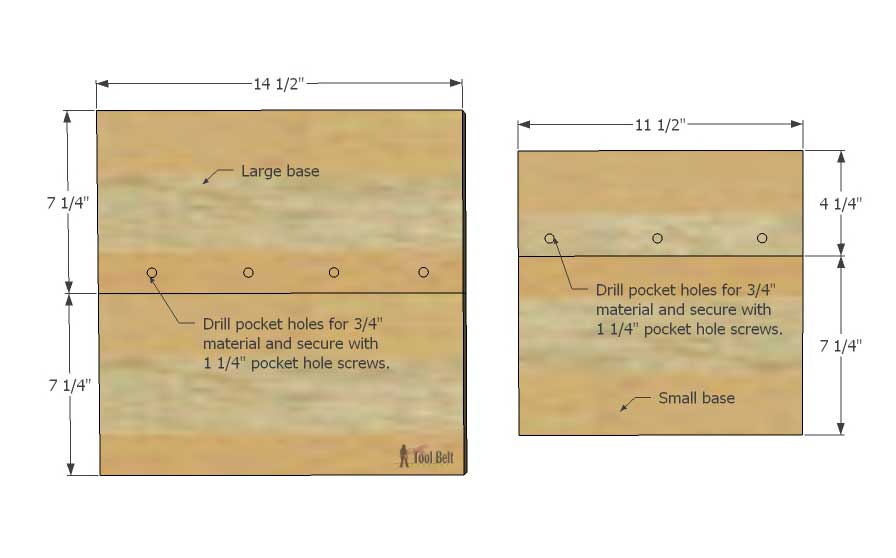 Remove any excess glue and sand smooth. If you want, route an edge around the outside edges of the bases. I painted the base pieces with DecoArt Carbon chalky finish paint.
Step 3 – Paint candy cane
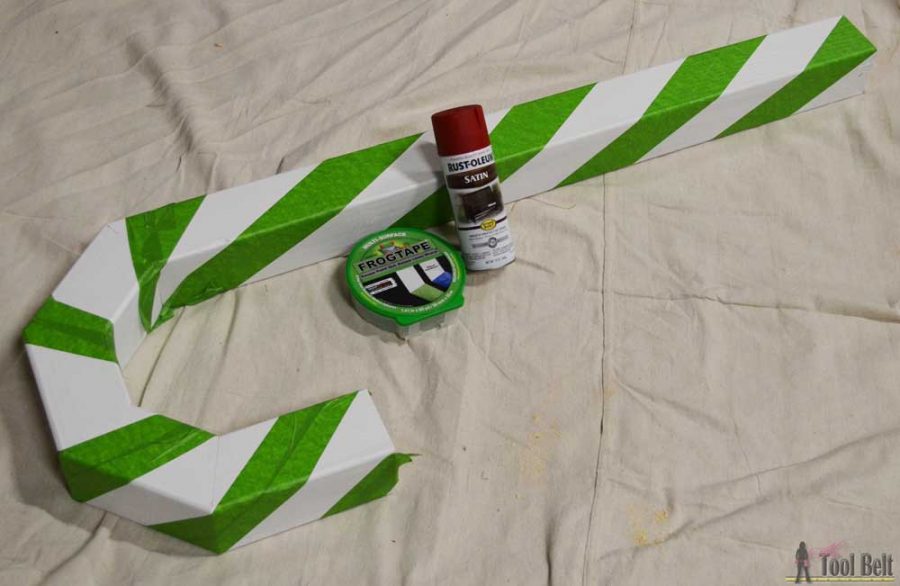
I painted the whole candy cane with white paint primer (primer has a dull finish which I wanted) and let the paint primer fully dry. I wrapped the candy cane with painters tape to make stripes. The straight part is pretty easy to get taped up even, the hook portion is a little tricky I just tried to make it look evenish.
I sprayed the taped up candy cane with Rustoleum heritage red in satin finish and let it fully dry. When I pulled off the painters tape it looked pretty good.
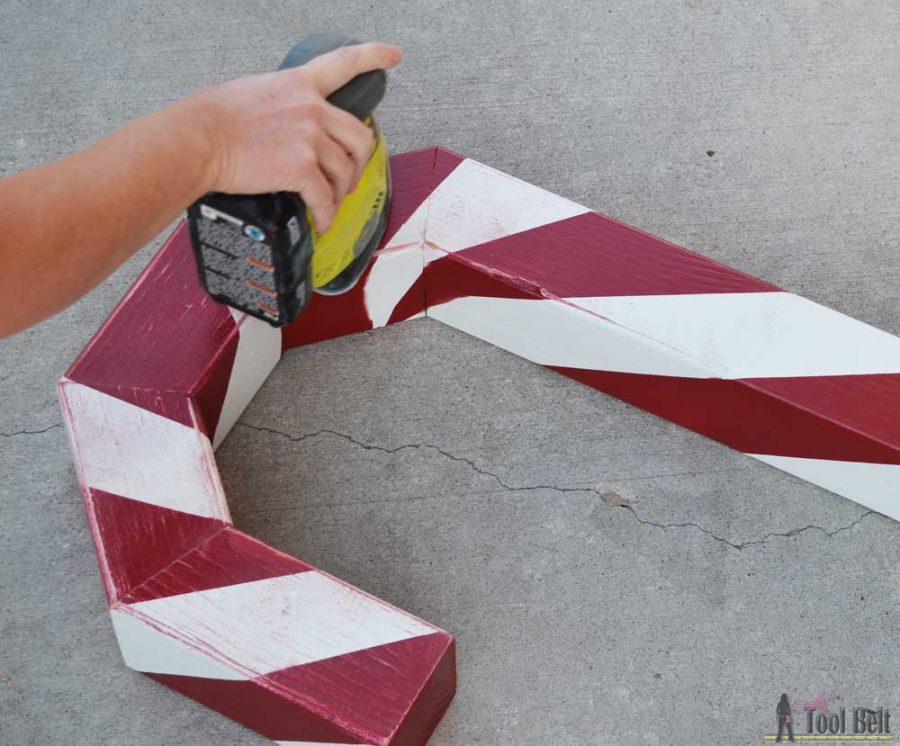
I decided to distress the candy cane, this is easy to do with a sander. Make sure your paint is dry otherwise it’ll make a mess. You can add a little stain to the edges if you want to accent the distressing.
Step 4 – Attach base to candy cane
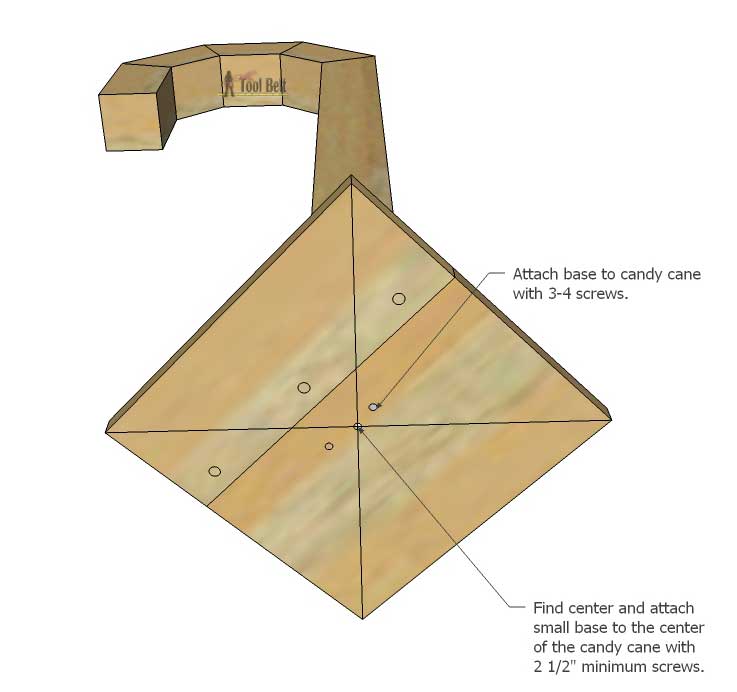
Find the centers on the candy cane bottom and base bottoms (draw diagonals from each corner). Drill a countersink hole in the center of the small base. Use a 2 1/2″ screw through the small base center into the candy cane end center. Drill a couple more countersink holes through the small base into the candy cane and secure with 2 1/2″ screws.
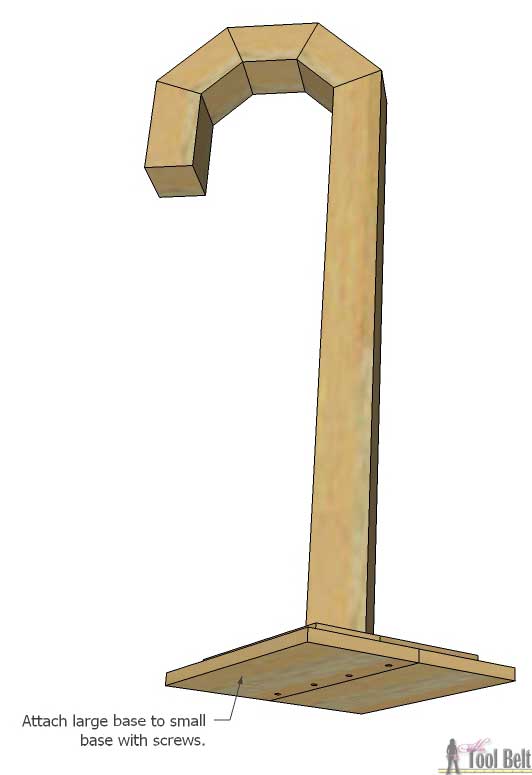
Center the large base on the small base and secure with screws.
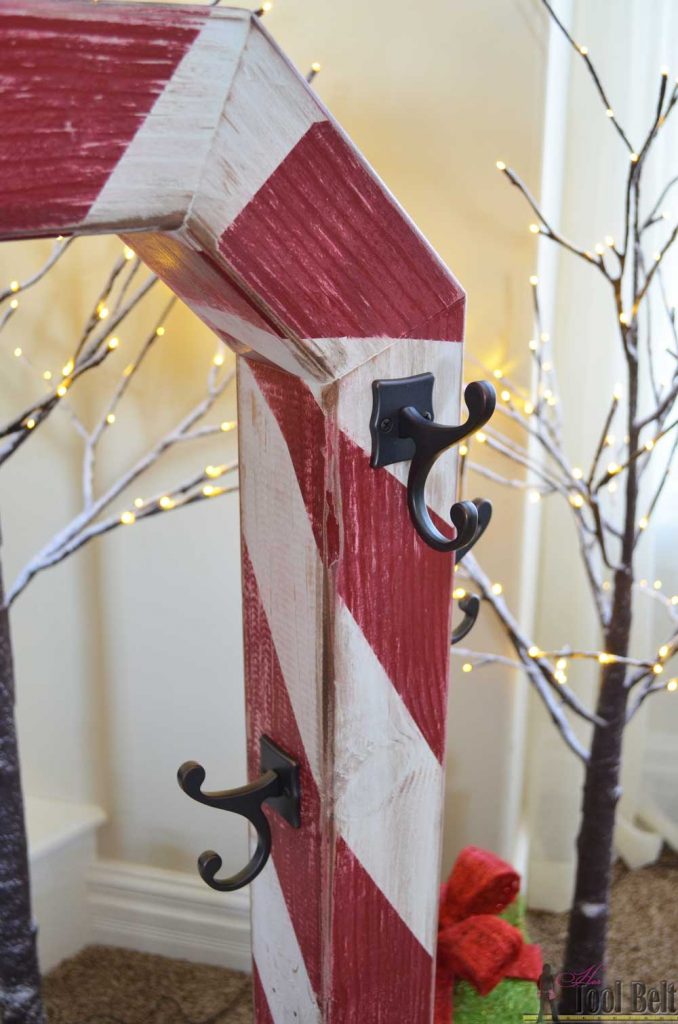
Add hooks to the candy cane stocking holder. I varied the height of my hooks. I splurged on these hooks, they were too cute to pass up. 🙂
The candy cane is now ready hang stockings with care!
Click to download the Free Plans
Candy Cane Post Plans
How would you customize your Holiday Stocking Post? Today I’m participating in a virtual party with 25 bloggers to show how we customized the Holiday Stocking Post for our homes. Check out more custom Holiday Stocking Posts!
- Domestic Charm
- Homemade By Carmona
- My Altered State
- Smart Girls DIY
- Chaotically Creative
- Ciburbanity
- Lazy Guy DIY
- Build Basic
- That’s My Letter
- Her Toolbelt
- The Handmade Home
- The Heathered Nest
- Designer Trapped
- The Chronicles of Home
- Cherished Bliss
- Just a Girl and Her Blog
- House of Wood
- Shades of Blue Interiors
- Uncookie Cutter
- Ella Claire Inspired
- Shine Your Light Blog
- Sawdust 2 Stitches
- Remodelando La Casa
- Paper Daisy Design
- Fix This Build That
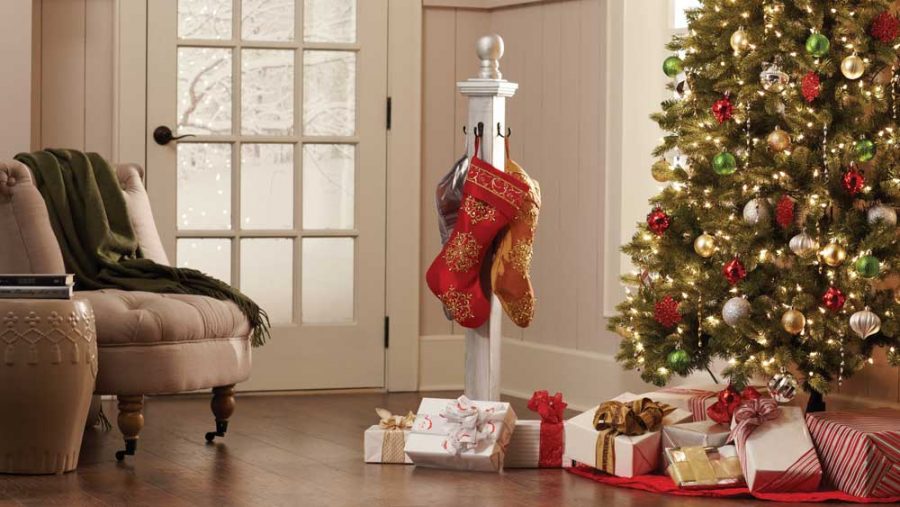
Hi and welcome to the Home Depot DIY Workshop (Do it yourself) Virtual Party! The Christmas holiday is quickly sneaking up on us. The Home Depot’s DIY Workshop this month is to learn how to make this really cute Holiday Stocking Post.
Here is what you’ll learn at the free demonstrative workshop: Learn to build a Christmas stocking holder. Join our workshop and learn to use a saw, drill, and other carpenter tools to cut and craft a decorative and sturdy holder for all your family’s Christmas stockings. Then, give your project some personality with paint or wood stain and celebrate the holidays with a cute way to organize those stocking stuffers.
Attending a DIY workshop is a great way to become more comfortable with power tools and learn how to make a cool project. The Home Depot offers Workshops at all of their locations for do-it-yourselfer’s of all ages and experience levels.
- The Home Depot offers Workshops at all of their locations for do-it-yourselfers of all ages and experience levels.
- There are three types of Workshops offered – Do-It Yourself (DIY), Do-It-Herself (DIH) and Kids.
- Customers can learn how to build décor projects, how to make easy home repairs and how to operate tools through demonstrations and step-by-step instructions.
- Visit http://workshops.homedepot.com to learn more.
Share your project creations with hashtag #DIYWorkshop
*This post is brought to you by the Home Depot, all opinions are my own.
Linked to link parties, savvy southern style, remodelaholic

Oh wow! That is just awesome! I love the candy cane shape, so creative and fun!
This looks great!
Very unique this is really a cute idea. I work at Home Depot and will share this in our workshop
That is too cute! What a great way to hang the stockings!
This is an awesome idea especially for those of us without a mantel. I am going to make a couple extra for gifts. Thanks so much..!
Perfectly done! Love the candy-cane idea.
My husband made this for my daughter and one for me
This is amazing! I’ve been blog hopping to see all the different stocking holders and this one took it to the next level! Such a festive take on the idea! Love it!