• Home
  • Project Gallery
  • About me
    • Disclosure
    • Disclaimer
  • Blog

Her Tool Belt

DIY furniture plans, crafts, and home improvement tutorials to empower you!

  • Free Woodworking Plans
    • Bathroom Furniture
    • Bedroom Furniture
    • Entry
    • Family Room Furniture
    • Garage
    • Kitchen furniture
    • Laundry Room
    • Mudroom Furniture
    • Organization
    • Outdoor Furniture
  • Home Decor
    • Upcycle
  • Crafts
    • Holiday
  • Home Improvement
    • Cleaning
    • Fix IT
    • Paint
    • Tile
  • Tool Reviews
  • Tool Time Videos

DIY Clubhouse Play Set

June 2, 2015 by Amy 74 Comments

Hi!  I’d love to for you to follow me on Pinterest Her Tool Belt  and if you love instagram, you can keep up with me there too!

It’s almost officially summer, and I needed to find a way to keep the kids outdoors and having fun.  So why not build a play set with a clubhouse?  I know I would have loved a clubhouse when I was a kid (that wasn’t made from a cardboard box 🙂 ).

The perfect solution to keep the kids playing outside for hours, check out that fun slide. Build a DIY Clubhouse Play set with tutorial and play set plans.

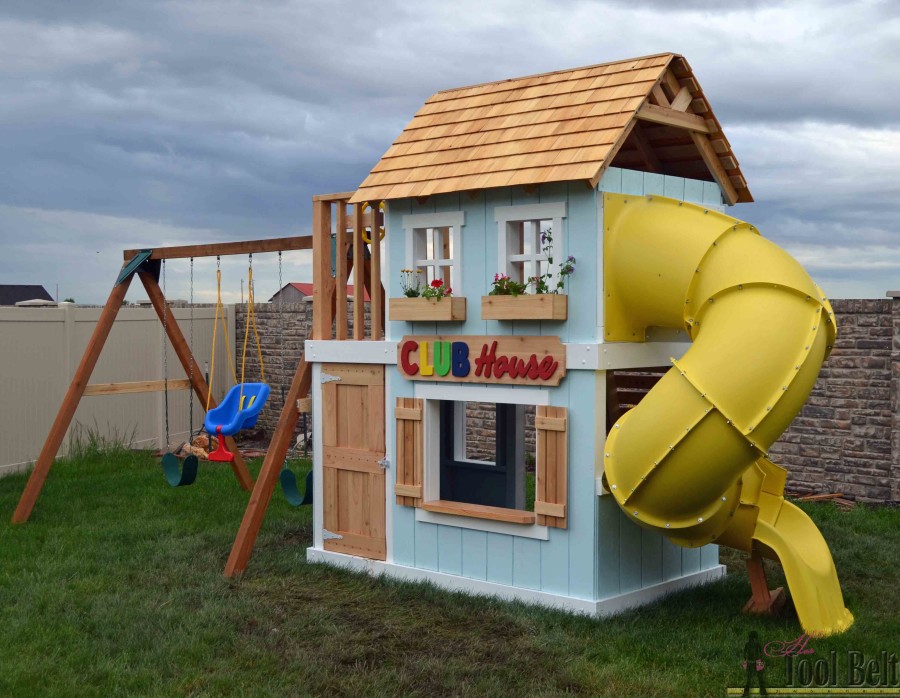
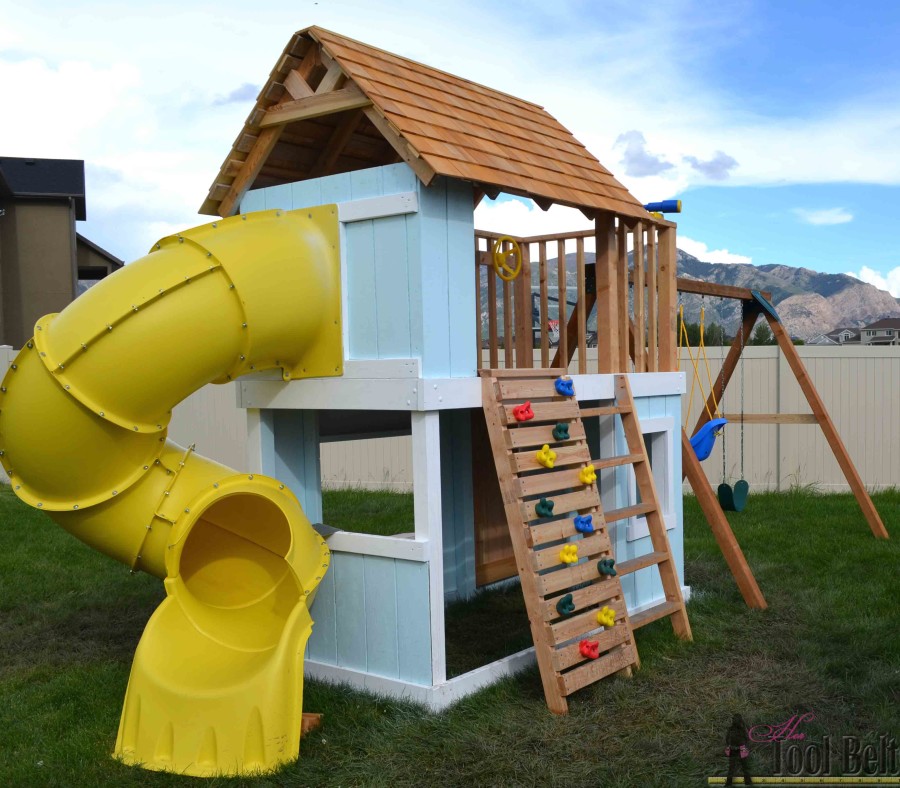
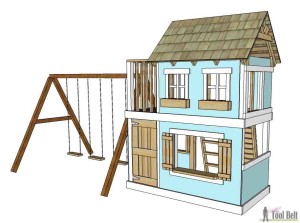
This clubhouse has a super fun 5′ turbo tube slide, 3 swings, climbing wall and ladder, steering wheel, telescope and plenty of play area.  (I purchased all of the parts at Home Depot.)

The perfect solution to keep the kids playing outside for hours, check out that fun slide. Build a DIY Clubhouse Play set with tutorial and play set plans.

Of course I picked the worst possible time to build, right after I started it rained and rained and rained.  Yep that was fun.

The perfect solution to keep the kids playing outside for hours, check out that fun slide. Build a DIY Clubhouse Play set with tutorial and play set plans.

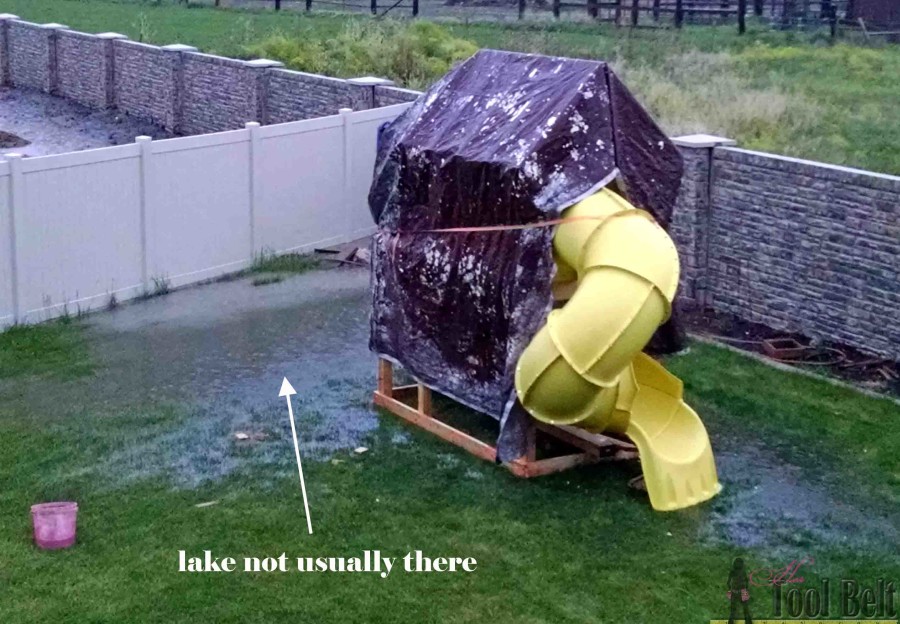
I was able to get it finished in between the daily rain storms.  The kids have loved playing on it…until they saw a bug 🙁  (Hope that stage doesn’t last long.)

The perfect solution to keep the kids playing outside for hours, check out that fun slide. Build a DIY Clubhouse Play set with tutorial and play set plans.

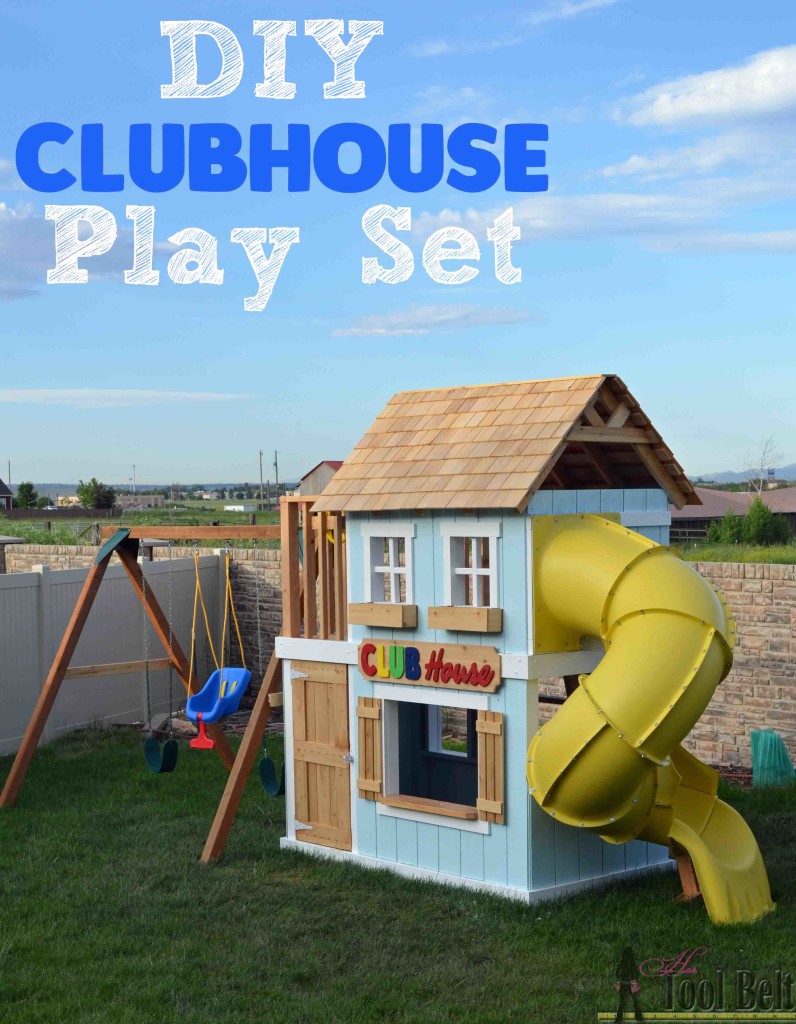
The clubhouse play set is part of the Ryobi Nation June Staycation.  The tutorial and printable DIY Clubhouse Play Set blueprints are available over at Ryobi Nation.

The perfect solution to keep the kids playing outside for hours, check out that fun slide. Build a DIY Clubhouse Play set with tutorial and play set plans.

I cut the letters for CLUB house out of plywood and painted them red, yellow, green blue.  Here are the letter patterns if you’re interested.  CLUB house letters


Good luck and happy building!

Linked to:  Link Parties, Savvy Southern Style, Remodelaholic, HomestoriesAtoZ

This post is for your entertainment, use information at your own risk.

Related

Filed Under: Built From Scratch, Free Woodworking Plans, Giveaway, Outdoor Furniture Tagged With: entertainment, kids, outdoor, play set

Attention: Any do-it-yourself project involves risk of some sort. Your tools, materials, and skills will vary, as will the conditions at your work site. Hertoolbelt LLC will not assume any responsibility or liability for damages or losses sustained or incurred in the course of your project or in the use of the item you create. Always follow the manufacturer's operating instructions in the use of tools, check and follow your local building codes, and observe all commonly accepted safety precautions.

Comments

  1. Jaime Costiglio says

    June 2, 2015 at 10:41 am

    Amy you have outdone yourself!!!! Amazing. Beautiful project your kids are sure to love.

    Reply
    • Amy says

      June 2, 2015 at 10:45 am

      Thanks Jaime!

      Reply
  2. Michelle from Weekend Craft says

    June 2, 2015 at 12:18 pm

    Love this! Also obsessed with the lettering you have been using. Are you buying those or cutting them with the scroll saw? Great job Amy!

    Reply
    • Amy says

      June 2, 2015 at 3:41 pm

      Thanks Michelle, I’ve been cutting them out of scrap wood. I use Elements to write them out in a fun font and size them, then print out the pattern.

      Reply
  3. Meagan B. says

    June 2, 2015 at 12:40 pm

    Awesome job! I may just have to work on this during my summer break!

    Reply
    • Amy says

      June 2, 2015 at 3:37 pm

      Yep Colt needs one right by his awesome sandbox!

      Reply
  4. JenWoodhouse.com says

    June 2, 2015 at 4:56 pm

    WOW! This is amazing, Amy! You win #1 Mom by a long shot!!! LOVE.

    Reply
  5. Pauline Henderson says

    June 2, 2015 at 10:16 pm

    Oh my goodness, this is awesome! And the fact that you did this during the freak rainy streak is even more amazing. (All that rain put me into hibernation and cried a lot.)

    Great job Amy, I love this so much!

    Oh and the bug?… Exactly.
    Two out of my 3 just can’t deal.

    Reply
  6. Stephanie says

    June 4, 2015 at 5:02 pm

    With the Peaked roof how tall is it total?
    The longest boards listed in the cut list is just short of 8′.
    I ask as my city has a goofy high rule in the building codes and anything over 8′ requires a permit, play equipment included.

    Reply
    • Amy says

      June 4, 2015 at 5:12 pm

      Hi Stephanie,
      The total height is about 10 1/2′. The 4″x4″ boards that make up the main vertical portion are 8′, and I didn’t include them on the cut list because they are 8′. Good luck 🙂

      Reply
      • Stephanie says

        June 4, 2015 at 7:42 pm

        Thanks!
        Pestky codes are a thorn to this woodworker, the bigger the project the more fun it is.

        Reply
        • Amy says

          June 5, 2015 at 11:55 am

          Definitely!

          Reply
  7. Wendi @ H2OBungalow says

    June 5, 2015 at 5:16 am

    This is awesome! What kid wouldn’t have wanted to play station, clubhouse like this growing up?

    Reply
    • Amy says

      June 5, 2015 at 11:55 am

      Thanks Wendi…BTW love how your bed turned out, so beautiful!

      Reply
  8. Condo Blues says

    June 5, 2015 at 8:22 am

    This is epic and I’m totally jealous of your kids 🙂

    Reply
    • Amy says

      June 5, 2015 at 11:54 am

      Thanks 🙂

      Reply
  9. Angie T says

    June 5, 2015 at 12:28 pm

    It is amazing! I clicked the link and I signed up for Ryobi Nation. Is that all I have to do to be entered to win the combo set? That would be an awesome win!

    Reply
    • Amy says

      June 5, 2015 at 12:29 pm

      Yep that’s it. Good luck

      Reply
  10. Emily says

    June 5, 2015 at 1:01 pm

    Love this!! I can’t wait to get started!!

    Reply
  11. Jenny @ Refresh Living says

    June 5, 2015 at 8:48 pm

    This is amazing!! We are planning to build a playhouse for our girls this summer, and I was going to do one of those semi-build sets, but I think you just changed my mind! How many hours would you say it took you to complete?

    Reply
    • Amy says

      June 5, 2015 at 9:36 pm

      It took me about a week, I think I could’ve done it faster if I wasn’t dodging rain storms.

      Reply
  12. LZ Cathcart@ The Summery Umbrella says

    June 8, 2015 at 2:30 pm

    Absolutely stunning!! You’ve created such a lovely clubhouse! You’ve definitely motivated me to get going on my daughters. I’m embarrassed to say it has been sitting at the half way point for months… oops! Getting on it now 🙂

    Reply
    • Amy says

      June 11, 2015 at 9:45 am

      Thanks LZ! I’m so much more productive when I have a due date 🙂

      Reply
  13. Meredith @ unOriginalMom says

    June 9, 2015 at 5:04 pm

    This is SO great!! I’ve been looking for a good play set that’s not TOO huge and I really love this – especially the possibilities for imaginative play in that club house! I think this is going to go on my hubby’s to-do list… 😉

    Reply
  14. Carlee says

    June 11, 2015 at 7:30 am

    What a fun club house! My husband has been talking about building something epic for our little guy. I will send this to him for inspiration!

    Reply
  15. Gilly @ Colour Saturated Life says

    June 16, 2015 at 7:41 am

    I cannot let my daughter see this…..ever! She will want one! I want one!

    Reply
  16. Bekah says

    June 16, 2015 at 10:19 am

    What was your total cost after it was completed? Thanks

    Reply
    • Amy says

      June 16, 2015 at 1:19 pm

      About $1300, but I splurged on some of the materials like the roofing and the siding. I also noticed that the slide is $75 cheaper on Homedepot.com now then when I bought it.

      Reply
  17. Stacey says

    June 16, 2015 at 10:25 am

    Oh wow! What kid wouldn’t love that? We don’t have a backyard to put this in, but I’m filing it away for when we do!

    Reply
  18. Trish says

    June 17, 2015 at 7:32 am

    Ooh…I so want one of these for my grands. This looks awesome.

    Reply
  19. Lynn Rickman says

    June 19, 2015 at 9:40 pm

    This is awesome, we’ve got grandkids and great grandkids that would LOVE this! Thanks for sharing.

    Reply
  20. Lou Lou Girls says

    June 22, 2015 at 2:52 pm

    Hi cute ladies! Just stopping by to let you know that your club house will be featured at our party tonight at 7 pm. Woo Hoo! Thanks for sharing it with us. Lou Lou Girls

    Reply
    • Amy says

      June 22, 2015 at 4:03 pm

      Thanks!

      Reply
  21. Bethany says

    June 29, 2015 at 8:55 pm

    Love the playhouse. Thanks so much for the giveaway. (Fingers crossed!)

    Reply
  22. Liz says

    July 1, 2015 at 4:04 pm

    What a beautiful playhouse!!! This is my first visit to your blog and I have no idea why I’ve never been here before. Love it!

    Reply
  23. Melissa Owens says

    December 5, 2015 at 5:15 pm

    Where did u get the letters for the “clubhouse?”

    Reply
    • Amy says

      December 5, 2015 at 6:28 pm

      I cut them out of plywood.

      Reply
  24. Janira says

    February 6, 2016 at 8:39 am

    Up to what age do you think this playhouse will be good for? My son will be 7 next month and I have 1 on the way so I don’t know if this will be too kiddy for him..

    Reply
    • Amy says

      February 8, 2016 at 10:28 am

      The upstairs portion under the roof might be a little short, he’ll have to kneel. I think it’s really a matter of what accessories you add and if that is an interest to him. Good luck.

      Reply
  25. Christi says

    February 17, 2016 at 12:20 pm

    So about how much did this cost? How much was the slide?

    Reply
    • Amy says

      April 1, 2016 at 12:19 pm

      $1300. I bought the slide for $399, but it is $325 on Home Depot.com now.

      Reply
  26. Richard says

    March 11, 2016 at 6:36 pm

    Amazing…Super mom amy…. your the best mom… every mom love to have their kids to have fun.. will do anything to keep them happy…. I love the idea… I remember this when i was a kid… Thank you for the idea….

    Reply
  27. Ric says

    March 31, 2016 at 10:35 am

    This is awesome! Out of all of the options on Pinterest my daughter picked this one! Can you tell me what kind of wood you used for framing? Is this cedar? I’m worried about using pressure treated with kids. Any advice would be greatly appreciated!

    Reply
    • Amy says

      March 31, 2016 at 6:23 pm

      For the playhouse framing I used Douglas Fir. I know it’s not the best option for outdoors, but I painted them with exterior paint so there is some protection. For the swing set pieces, I did opt for pressure treated lumber, but you can sub whatever you feel is best. Good luck!

      Reply
      • Ebba says

        October 3, 2017 at 2:25 pm

        Did you just use plain fir boards and not pressure treated pine? How has it held up. The price difference is substantial, but I also don’t want it to fall apart. Thank you!

        Reply
        • Amy says

          October 5, 2017 at 2:39 pm

          I used pressure treated on the swing set part only. The rest of the boards are plain douglas fir. They have held up nicely because I coat the ‘deck’ boards with Thompson waterseal and the others are painted with outdoor paint.

          Reply
  28. Ashley says

    April 1, 2016 at 6:12 am

    Could you tell me a price estimate? I’m trying to decide whether to build or buy 😉 thank you!

    Reply
    • Amy says

      April 1, 2016 at 8:26 am

      I spent about $1300, although I’ve noticed that some of the material are cheaper now. The slide is $75 cheaper than when I bought it.

      Reply
  29. Michale says

    June 12, 2016 at 9:36 pm

    First instructions don’t make sense

    You refer to two walls when there are four. Then say to bolt joints but only show one bolt point. Which only appears to be bolting a 2×4 to a 4×4. Not a “joint”. Can you clarify.

    Reply
    • Amy says

      June 12, 2016 at 9:53 pm

      Yes sorry, the blue print instructions were written to support the sketchup diagrams and pictures as shown in the build process as seen https://www.ryobitools.com/nation/projects/4489 (See the step after the cut list)
      Call it what you want, but I bolted upper and lower 2×6’s to the 4×4’s for both the front and back walls. I stood both walls up and bolted upper and lower 48″ long 2×6’s to the 4×4’s.

      Reply
  30. Aaron says

    July 16, 2016 at 12:18 pm

    How much did this project cost roughly?

    Reply
    • Amy says

      July 28, 2016 at 1:26 pm

      About $1300, but I splurged on some of the materials like the roofing and the siding. I also noticed that the slide is $75 cheaper on Homedepot.com now then when I bought it.

      Reply
  31. Deana says

    September 21, 2016 at 3:43 pm

    What color stain did you use on your cedar pieces?

    Reply
    • Amy says

      September 22, 2016 at 2:04 pm

      In the pictures the cedar was natural, but eventually I applied a coat of Thompson’s water seal in pecan.

      Reply
  32. Hope J. says

    October 16, 2016 at 9:46 am

    What brand of paint/stain did you use for the blue and white colors? We are planning on building our girls a play house/fort next month, I have found pink items such as the wheel, swings, etc but would like the structure to be blue and white similar to yours. We live in Texas the sun is brutal on outdoor things so I am wondering too how it has held up to the elements. Thank you!!

    Reply
    • Amy says

      November 1, 2016 at 2:19 pm

      Hi Hope,
      Good luck on your build, I bet your girls will LOVE it! My paint has held up really well for two summers being sprayed every other day with sprinklers. I used Zinsser for the primer. The blue is Glidden Exterior in winterscape, the white is Glidden Exterior white.

      Reply
  33. Peter Postiglione says

    September 12, 2017 at 1:15 pm

    Did Ryobi nation pull your plans? I get a 404 error when I go there

    Reply
    • Amy says

      September 12, 2017 at 1:44 pm

      They’ve been having trouble the last couple of days. Hopefully they’ll have it fixed soon.

      Reply
  34. frank says

    April 4, 2019 at 12:02 pm

    Great job! I really liked this project so I decided to build it for my 3 year old daughter. I’m almost done with it and is coming out great. Thanks for showing us how to build it:)

    Reply
  35. Kaitlin says

    April 9, 2020 at 10:47 am

    If you don’t mind me asking, how much did it cost to build this?

    Reply
  36. Mike says

    June 16, 2020 at 11:19 pm

    Hello,

    I am in mid-build on this playset. The detailed plans are very helpful. I really like the cedar shake roof, but having a hard time locating these materials. Did you purchase these at a hardware store like Home Depot, or did you get them online somewhere?

    Mike

    Reply
    • Amy says

      June 19, 2020 at 11:41 pm

      Hi Mike,
      I bought them on homedepot.com and they had to be shipped to my house. This product looks similar to what I used. https://www.homedepot.com/p/SBC-16-in-Maximum-Natural-Tone-Eastern-White-Cedar-Shingle-Siding-25-sq-ft-Box-EHD0810298/204994650

      Reply

Trackbacks

  1. First Friday Features - The House of Wood says:
    June 5, 2015 at 3:41 pm

    […] My friend Amy wins #1 Mom for sure. […]

    Reply
  2. Think and Make Thursday Link Party #35 says:
    June 11, 2015 at 3:50 am

    […] DIY Clubhouse Play Set – Her Toolbelt […]

    Reply
  3. Think and Make Thursdays No. 35 + Features | says:
    June 11, 2015 at 4:00 am

    […] DIY Clubhouse Play Set  |  Her Toolbelt […]

    Reply
  4. The Creative Exchange Link Party #56 - The Happy Scraps says:
    June 11, 2015 at 4:01 am

    […] DIY Clubhouse Play Set | Her Tool Belt […]

    Reply
  5. The Creative Exchange Linky Party - Summer Scraps says:
    June 11, 2015 at 4:02 am

    […] DIY Clubhouse Play Set from Her Tool Belt […]

    Reply
  6. The Creative Exchange Link Party - Liz on Call says:
    June 11, 2015 at 4:03 am

    […] DIY Clubhouse Play Set from Her Tool Belt […]

    Reply
  7. Think and Make Thursday Link Party- No. 35 | Little Red Brick House says:
    June 11, 2015 at 6:31 am

    […] Her Tool Belt // DIY Clubhouse Play Set […]

    Reply
  8. Creativity Unleashed Link Party & GIVEAWAY!! says:
    June 11, 2015 at 4:59 pm

    […] DIY Club House Play Set from Her Tool Belt How To Make A Lavender Wreath from The Pin Junkie Organizing Garden Tools With A Repurposed Rake from Anderson + Grant Vintage Pillowcase Vendor Apron from Sadie Seasongoods Build A Porch Swing from Simply Designing […]

    Reply
  9. Giveaway & Creativity Unleashed No. 73 - Win A $50 Duluth Gift Card! || Practically Functional says:
    June 11, 2015 at 5:00 pm

    […] DIY Club House Play Set from Her Tool Belt How To Make A Lavender Wreath from The Pin Junkie Organizing Garden Tools With A Repurposed Rake from Anderson + Grant Vintage Pillowcase Vendor Apron from Sadie Seasongoods Build A Porch Swing from Simply Designing […]

    Reply
  10. Creativity Unleashed #74 and a Giveaway from Duluth Trading Company! says:
    June 18, 2015 at 5:00 pm

    […] First, Congratulations to our MEGA Rockstar from Creativity Unleashed Week 72, Her Tool Belt! […]

    Reply
  11. Coolest playhouses for kids - Mum In The Madhouse says:
    February 11, 2016 at 12:21 am

    […] and just look at this DIY clubhouse with a twister slide and a climbing wall.  Every boys dream. DIY Clubhouse Anyone that knows me will attest to the fact that I love all things mid-century modern and this […]

    Reply
  12. 16 Creative Kids Wooden Playhouses Designs For Your Yard - Homesthetics - Inspiring ideas for your home. says:
    March 4, 2016 at 10:42 am

    […] Click here for above Tutorial […]

    Reply

Leave a Reply Cancel reply

Your email address will not be published. Required fields are marked *

This site uses Akismet to reduce spam. Learn how your comment data is processed.

Search Her Tool Belt

Follow Me!

  • Bloglovin
  • Email
  • Facebook
  • Google+
  • Instagram
  • Pinterest
  • RSS
  • Twitter
  • YouTube

Top Posts & Pages

Custom Drill Storage and Charge Station - Easy
Cordless Drill Storage - Charging Station
Wood Bunny Easter Basket
Pallet Planter Box For Cascading Flowers
$5 Blanket Ladder
Wood DIY LOVE Marquee Letters
Kid's Step Stool
Convertible Picnic Table and Bench

Check out more projects

Copyright

Thank you for wanting to share my work! No need for my permission to pin my work or to feature 1 or 2 pictures with full watermarks intact that link back to the original project. Please do NOT copy tutorials.

Disclosure & Privacy Policy

Disclaimer

Copyright © 2023 · Magazine Pro Theme on Genesis Framework · WordPress · Log in

This website uses cookies to improve your experience. We'll assume you're ok with this, but you can opt-out if you wish.Accept Read More
Privacy & Cookies Policy

Privacy Overview

This website uses cookies to improve your experience while you navigate through the website. Out of these, the cookies that are categorized as necessary are stored on your browser as they are essential for the working of basic functionalities of the website. We also use third-party cookies that help us analyze and understand how you use this website. These cookies will be stored in your browser only with your consent. You also have the option to opt-out of these cookies. But opting out of some of these cookies may affect your browsing experience.
Necessary
Always Enabled
Necessary cookies are absolutely essential for the website to function properly. This category only includes cookies that ensures basic functionalities and security features of the website. These cookies do not store any personal information.
Non-necessary
Any cookies that may not be particularly necessary for the website to function and is used specifically to collect user personal data via analytics, ads, other embedded contents are termed as non-necessary cookies. It is mandatory to procure user consent prior to running these cookies on your website.
SAVE & ACCEPT