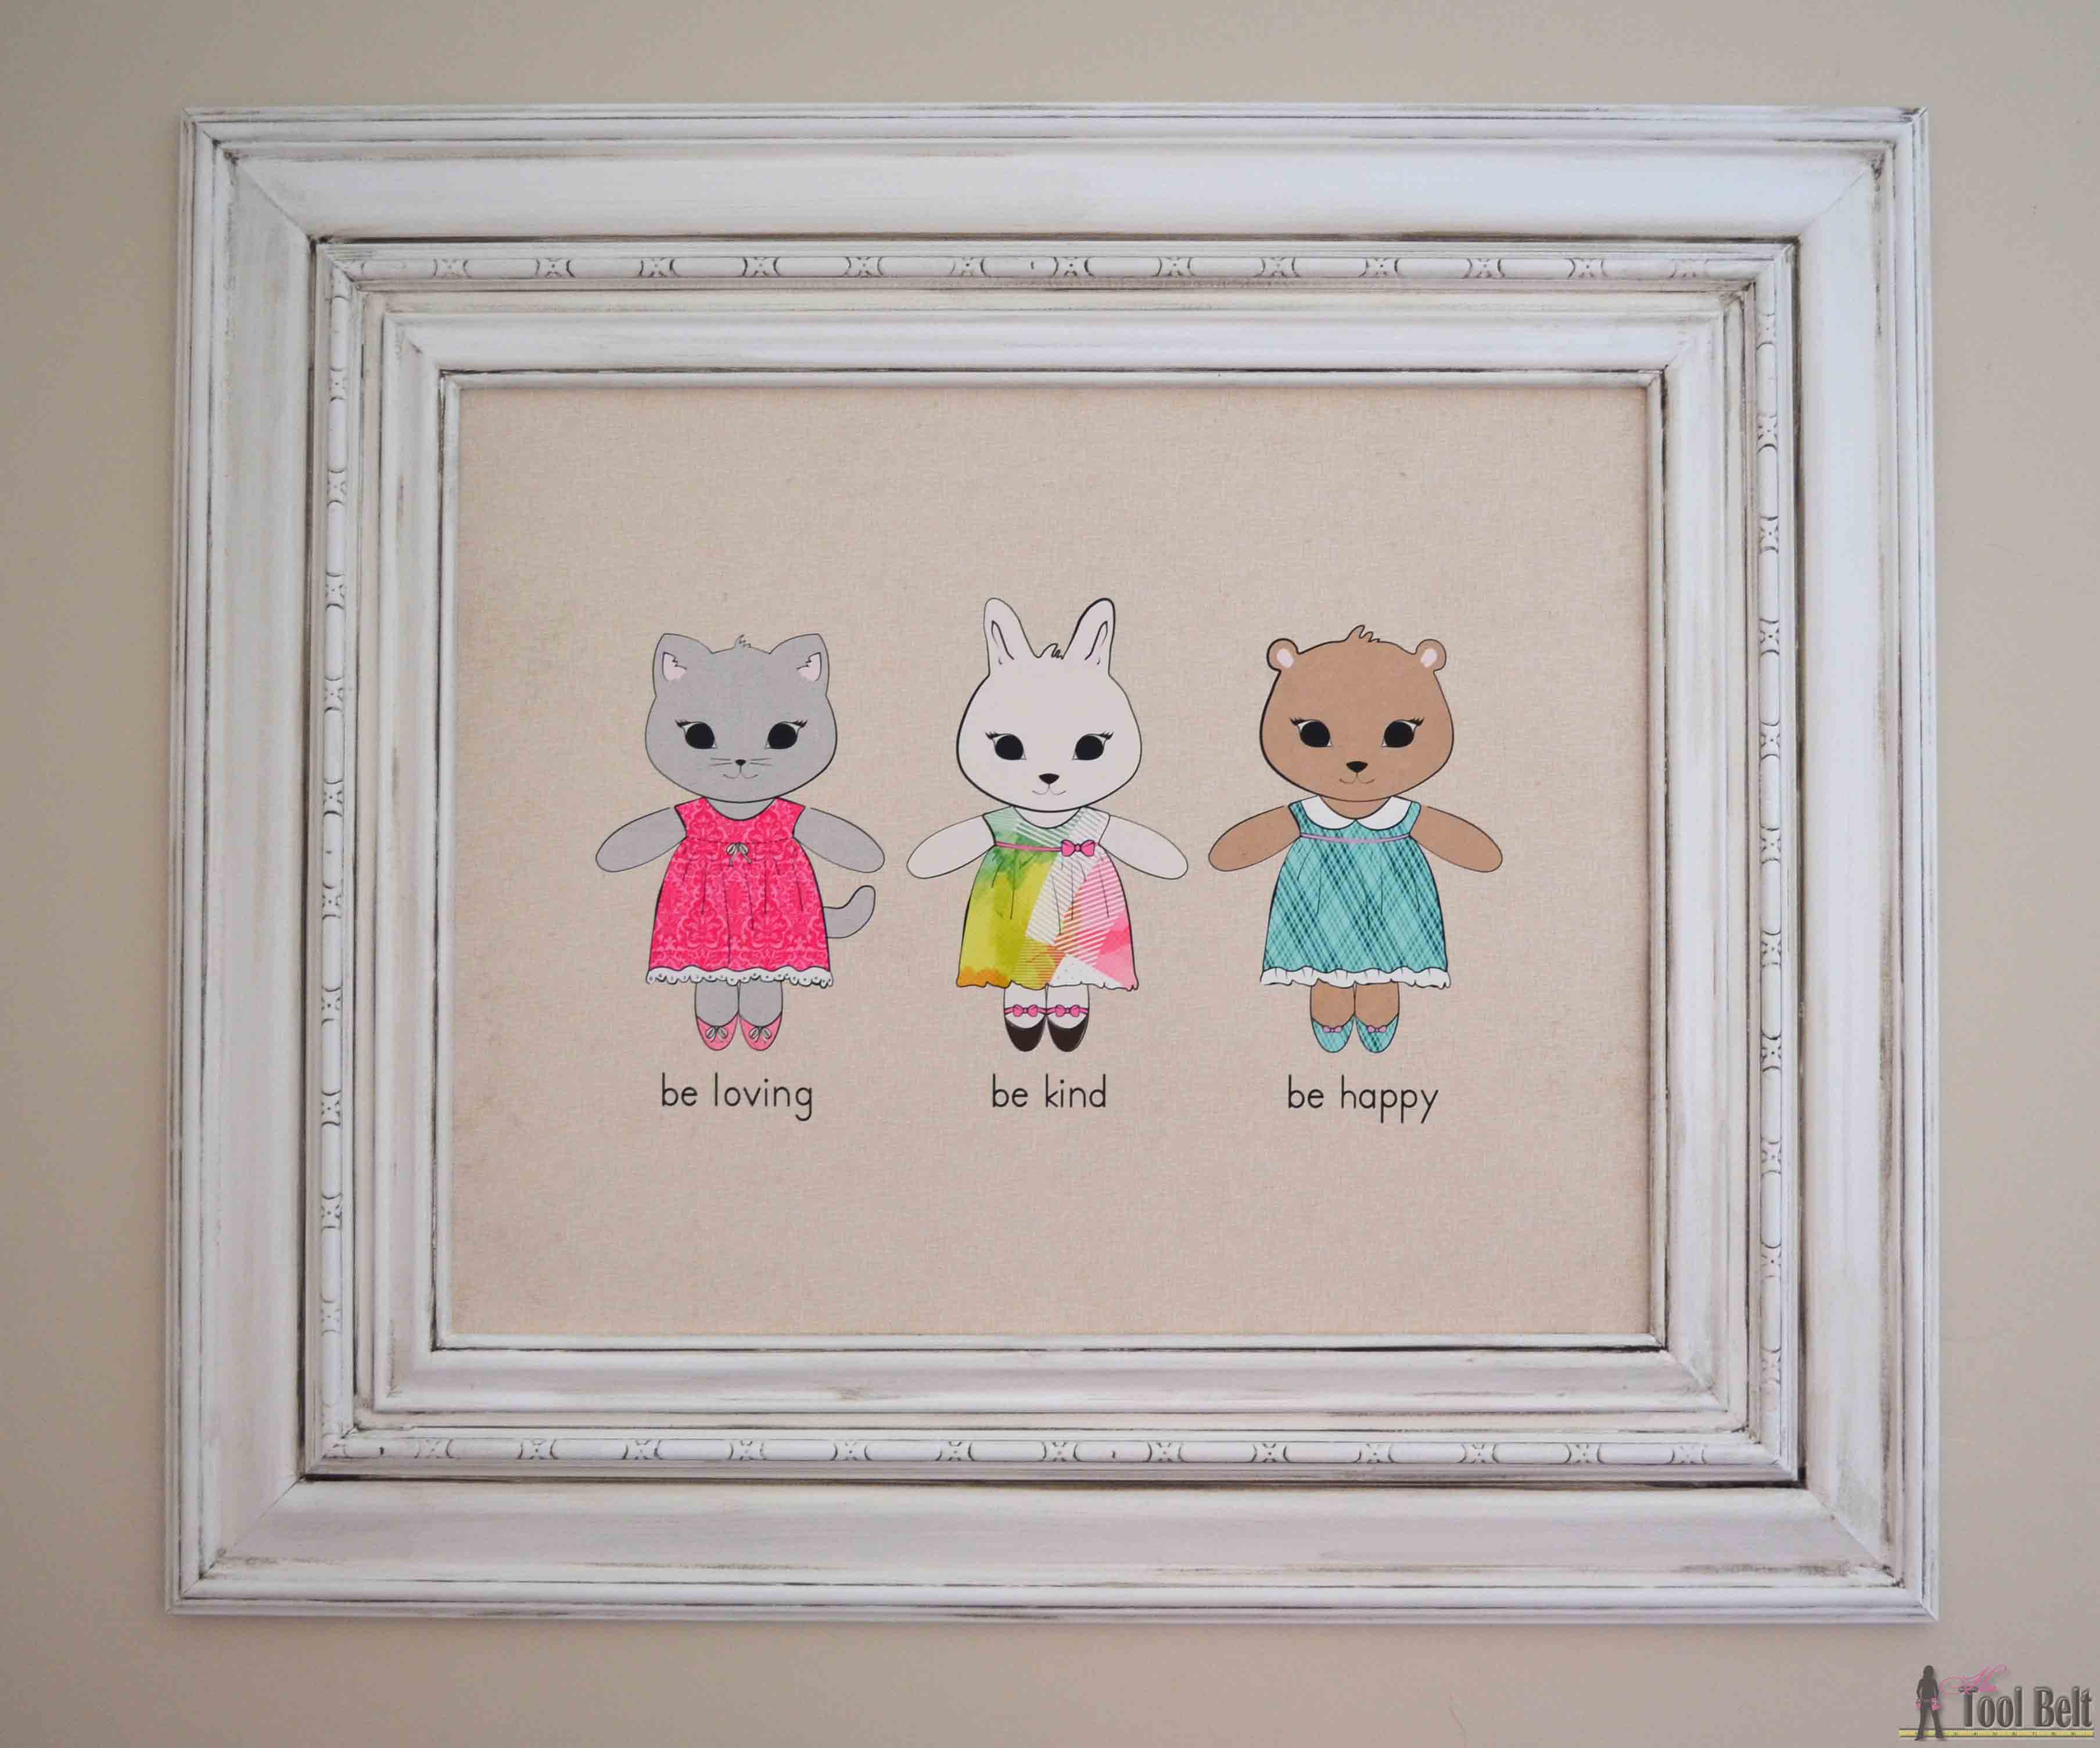
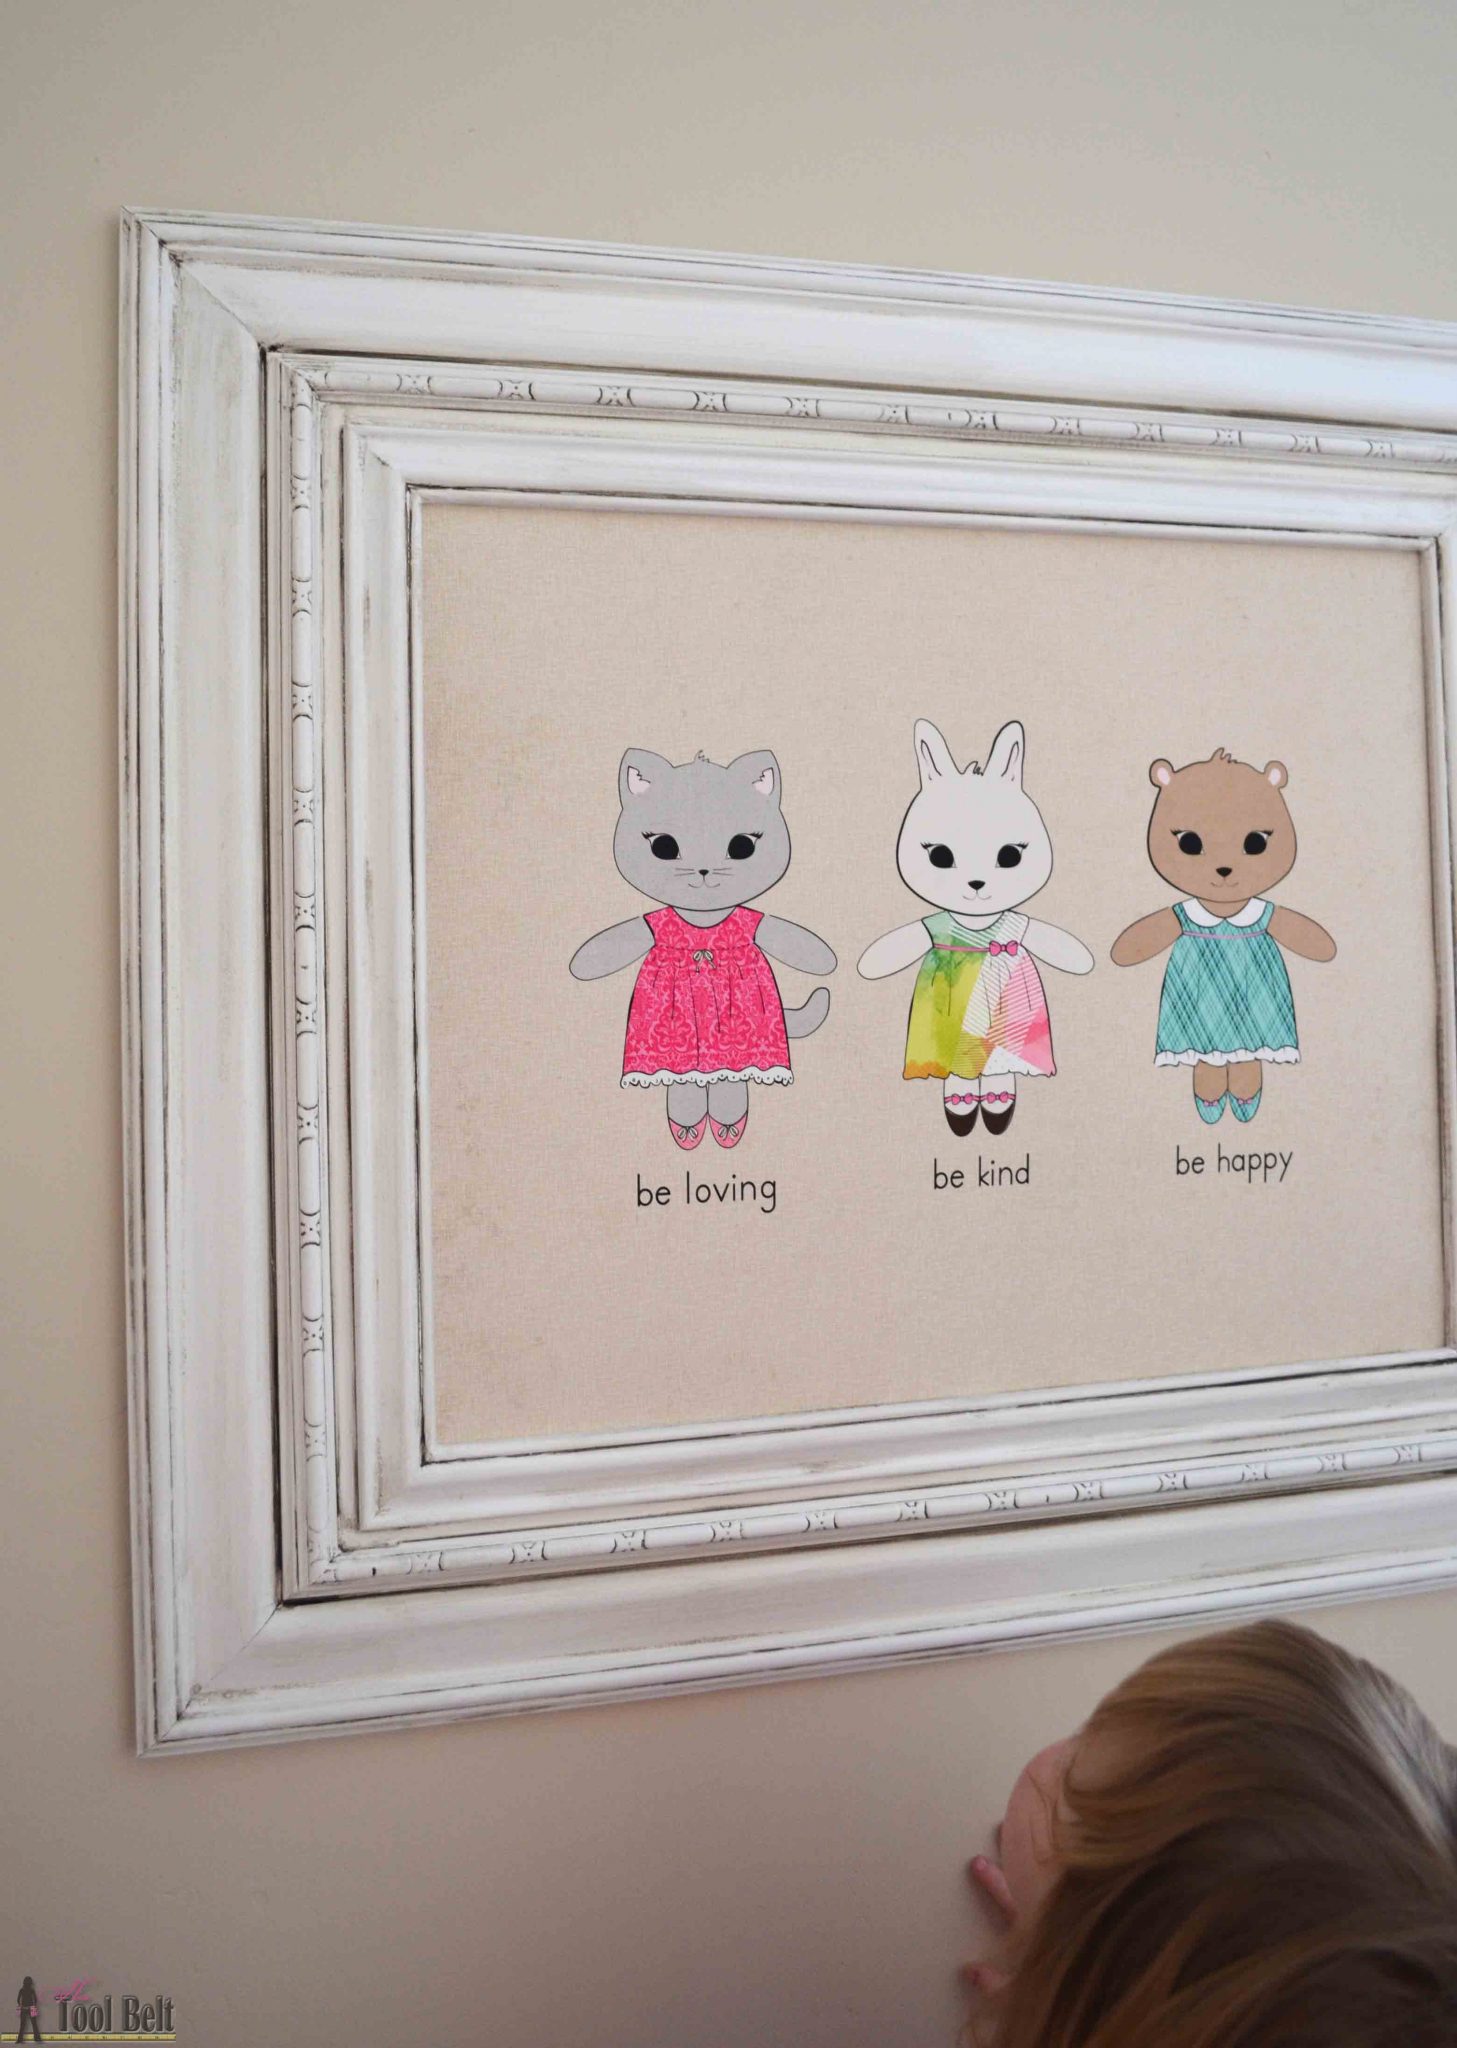
I have been on the look out for cute art and things to hang up in my daughters room, because it’s bare. She’s a pretty spicy 2 year old, so I thought it would be nice if the message was positive (not that she can read yet but soon.) She also loves animals. Then last month while at a blogging conference, I ran across a booth with a really cool concept called Modify Ink. They have a bunch of artwork on their site to choose from, and you use the editor on the site to change the colors and patterns to whatever you want. Isn’t that fun! I found this adorable artwork, positive message – check, animals – check, then customized it to the color scheme of her room – perfect! I ordered it, and when it came I was really surprised at how nice and thick the paper is. (BTW I plan on painting the walls, right now everything blends a little too well :-). If you have a custom piece of artwork, you have to make a custom frame to go with it, right!
How to Build a DIY Custom Picture Frame with Moulding
Materials (16″ x 20″ frame)
- 10′ Victorian base moulding 4 1/2″
- 8′ Embossed panel moulding
- 8′ Panel moulding
- 1″ pocket holes screws*
- 5/8″ brad nails
- wood glue
- sand paper
- paint/primer
- antiquing glaze
- Moulding cost: $30
Step 1
You can do this same process for any size of frame that you need, in this tutorial I am building a frame for a 16″ x 20″ picture. First pick the mouldings for the frame. I went to Home Depot and picked out a large base moulding that I liked, then tried to match up coordinating decorative moulding to stack. For me, I tried to get the decorative mouldings with similar shapes as the base moulding so they look like they belong together.
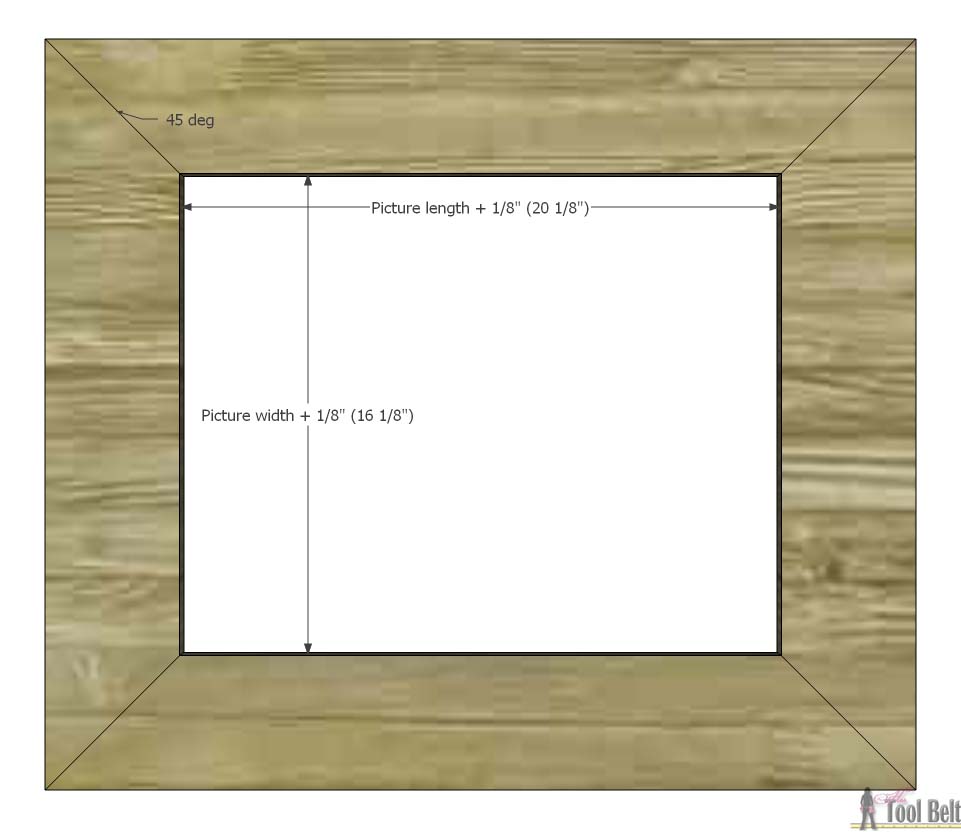
The amount of base moulding you need will depend on your picture size and the width of the molding (4 1/2″). For me: 2*(20″+4 1/2″+4 1/2) + 2*(16″+4 1/2″+4 1/2) = 108″ or 9′ + enough for cuts and a little wiggle room (10′).
To make the miter cuts, go off of the inside dimension and add 1/8″ for a little space.
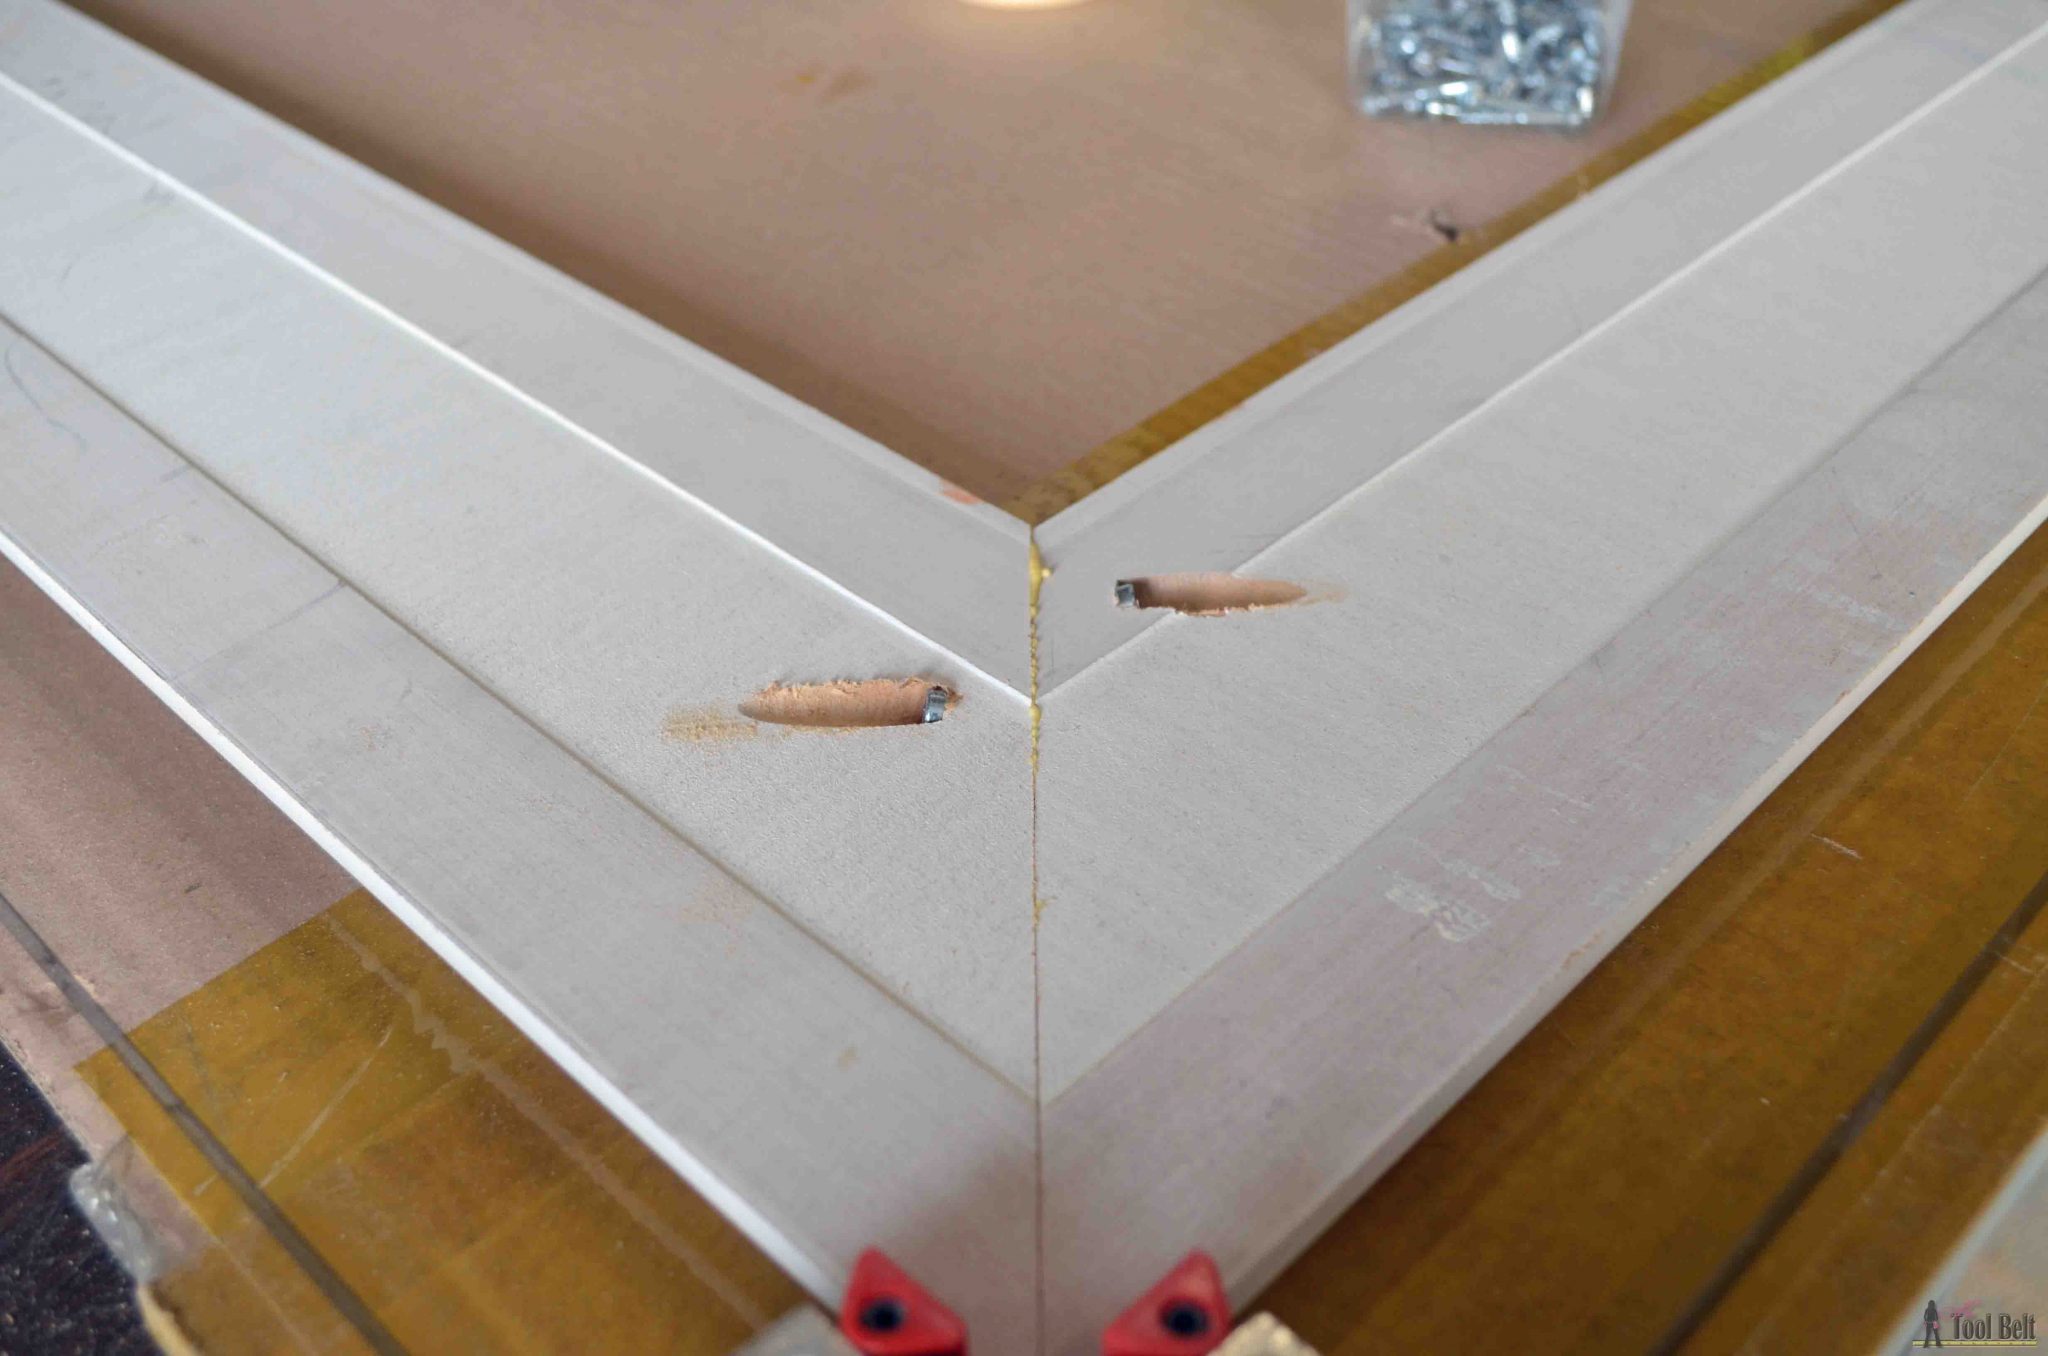
 Join the base moulding together with wood glue and pocket holes or staples. This moulding is 1/2″+ thick, so I drilled pocket holes (affiliate) in the thick part and used 1″ pocket hole screws (afflilate) and allowed the glue to dry. I thought that I might need to staple the outside corner, but the joint is nice and tight.
Step 2
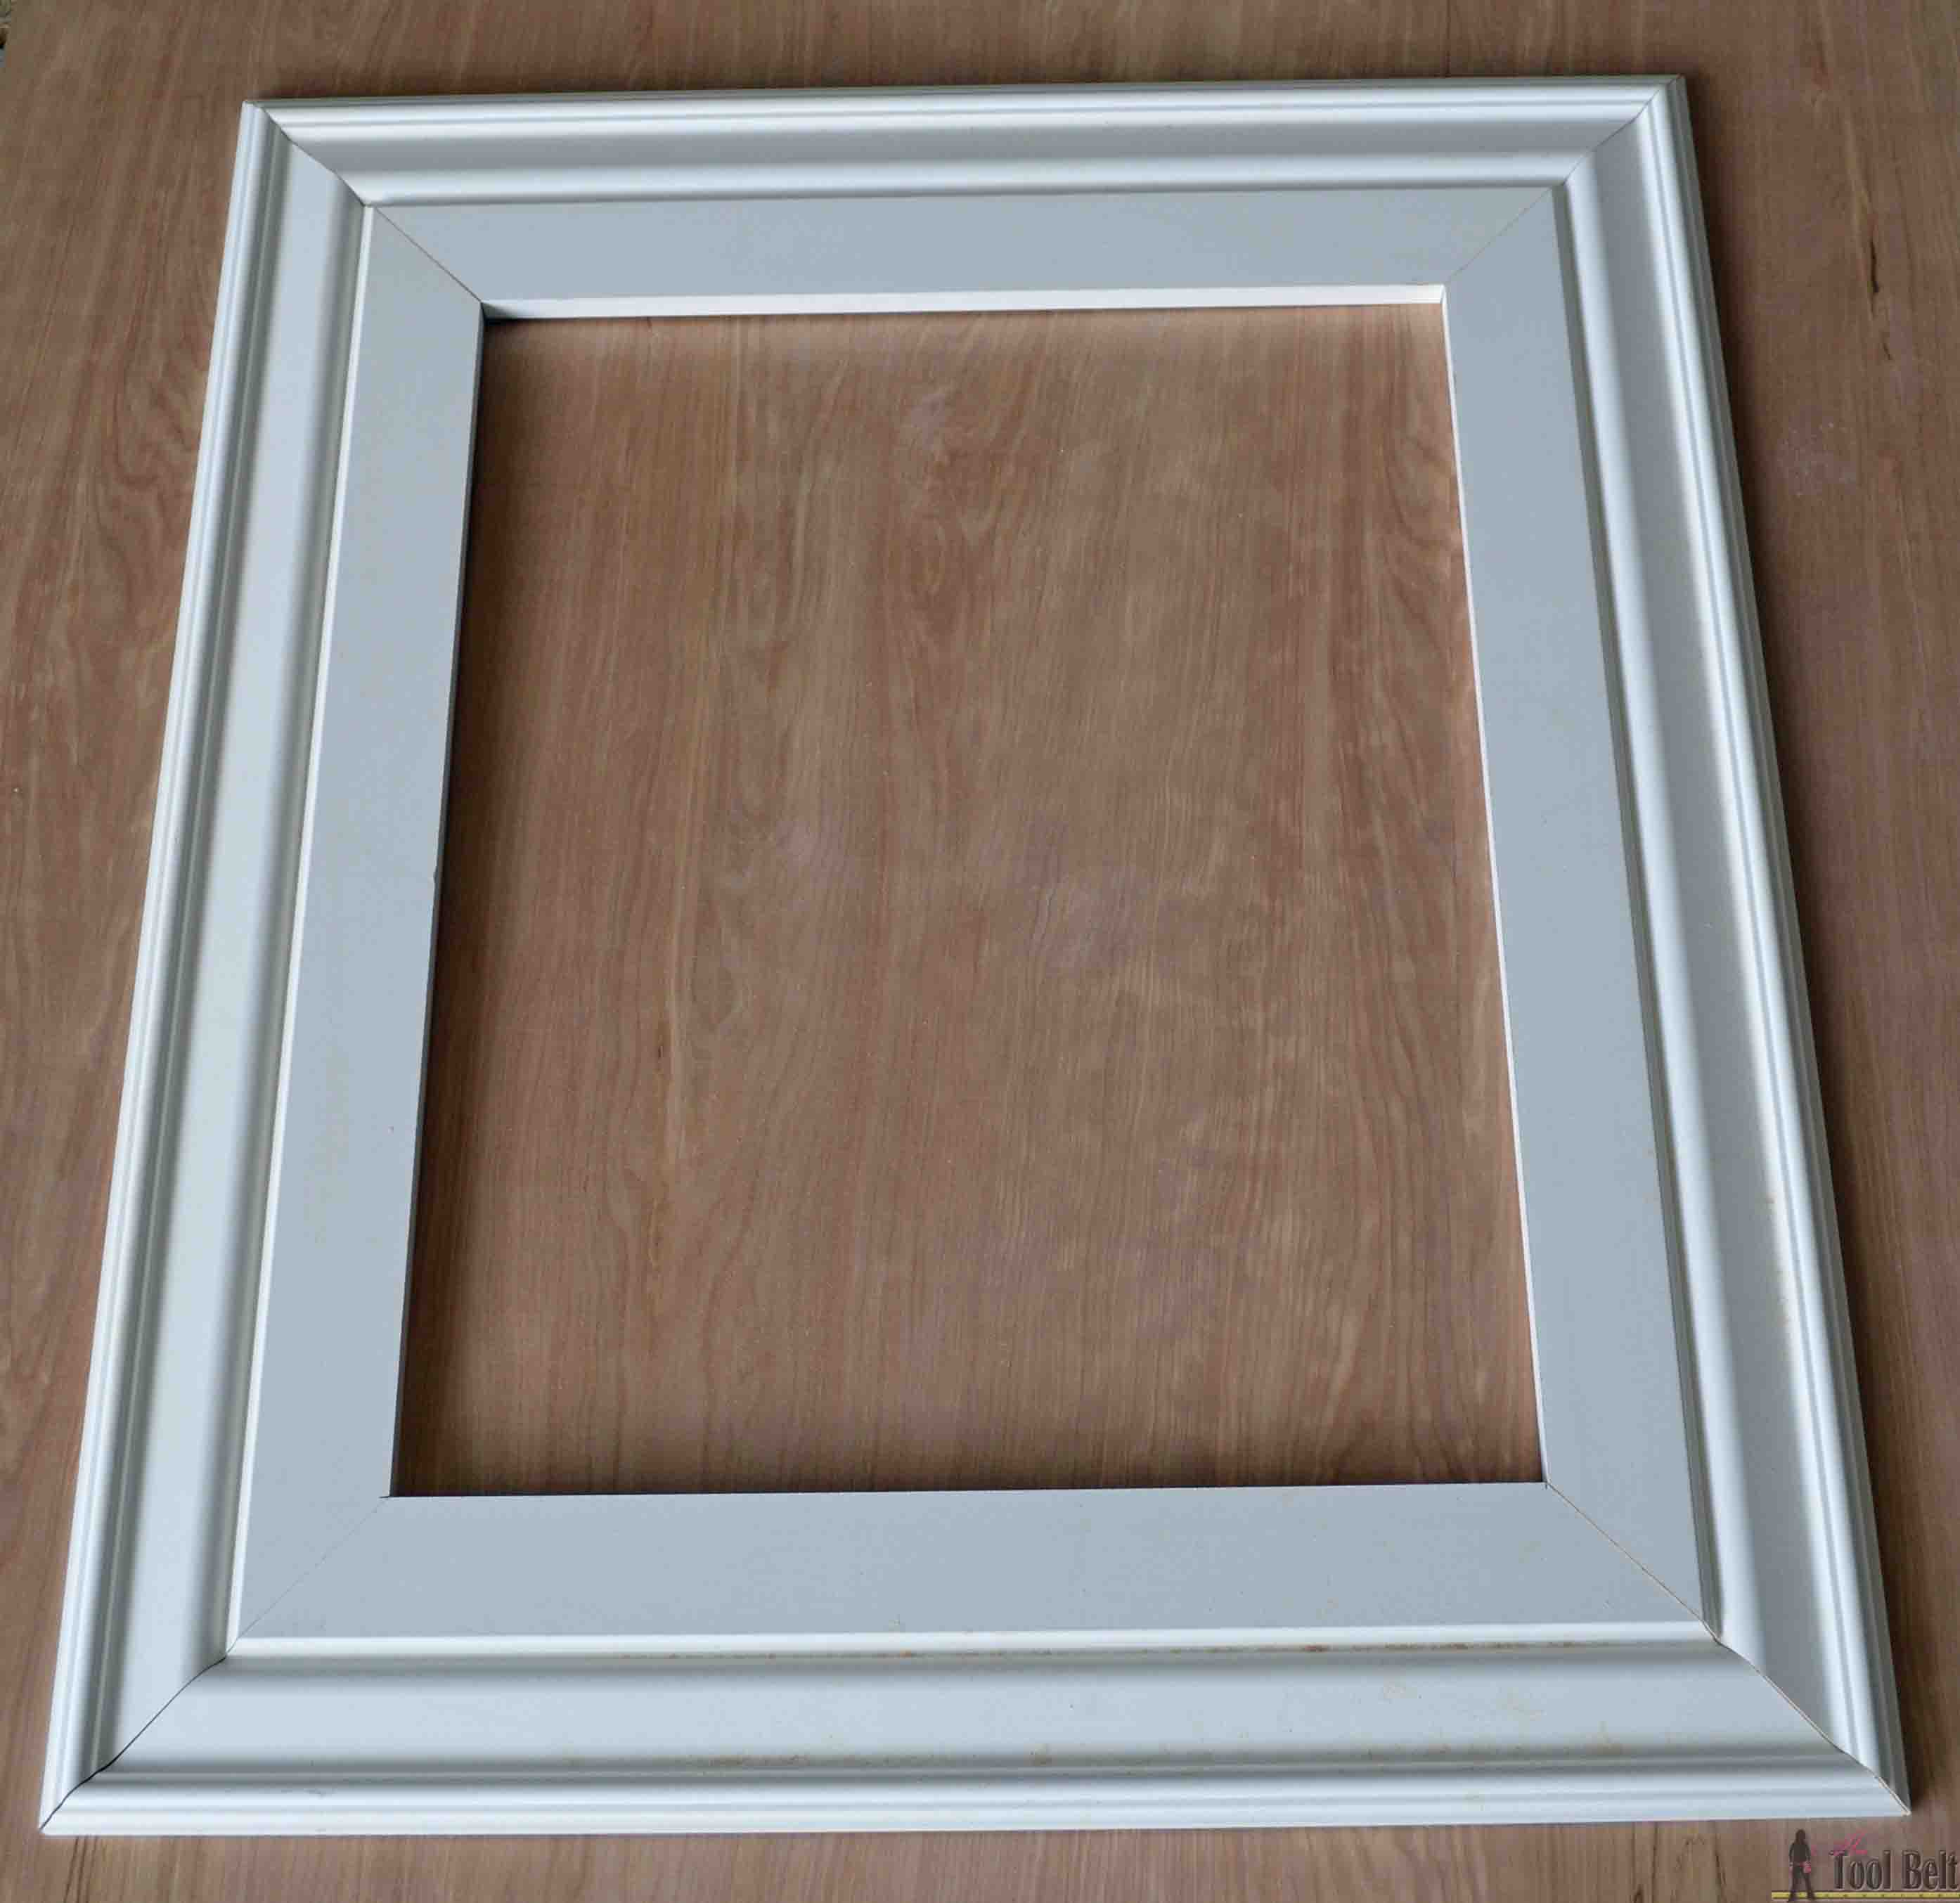
Now we’ll add the decorative molding. The panel moulding will hang over the base molding by about 1/4″ around to make a ledge for the picture to press against. Here are the dimensions for the cuts.
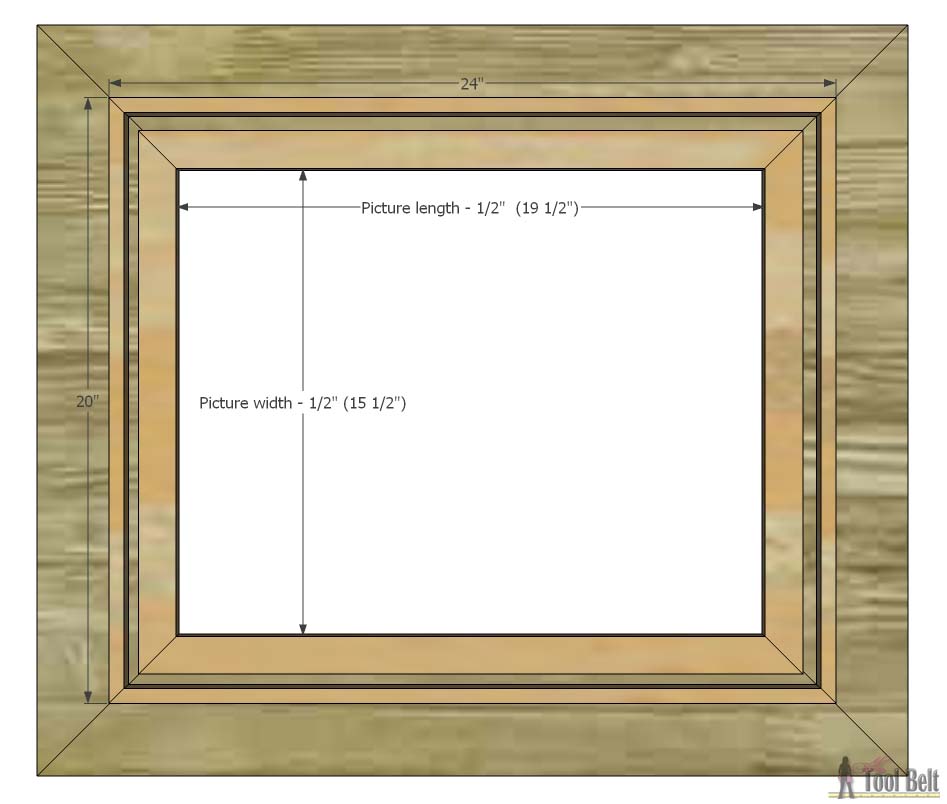 Make sure to get an even amount of hangover (a little over 1/4″ around). Glue and nail the moulding into place.
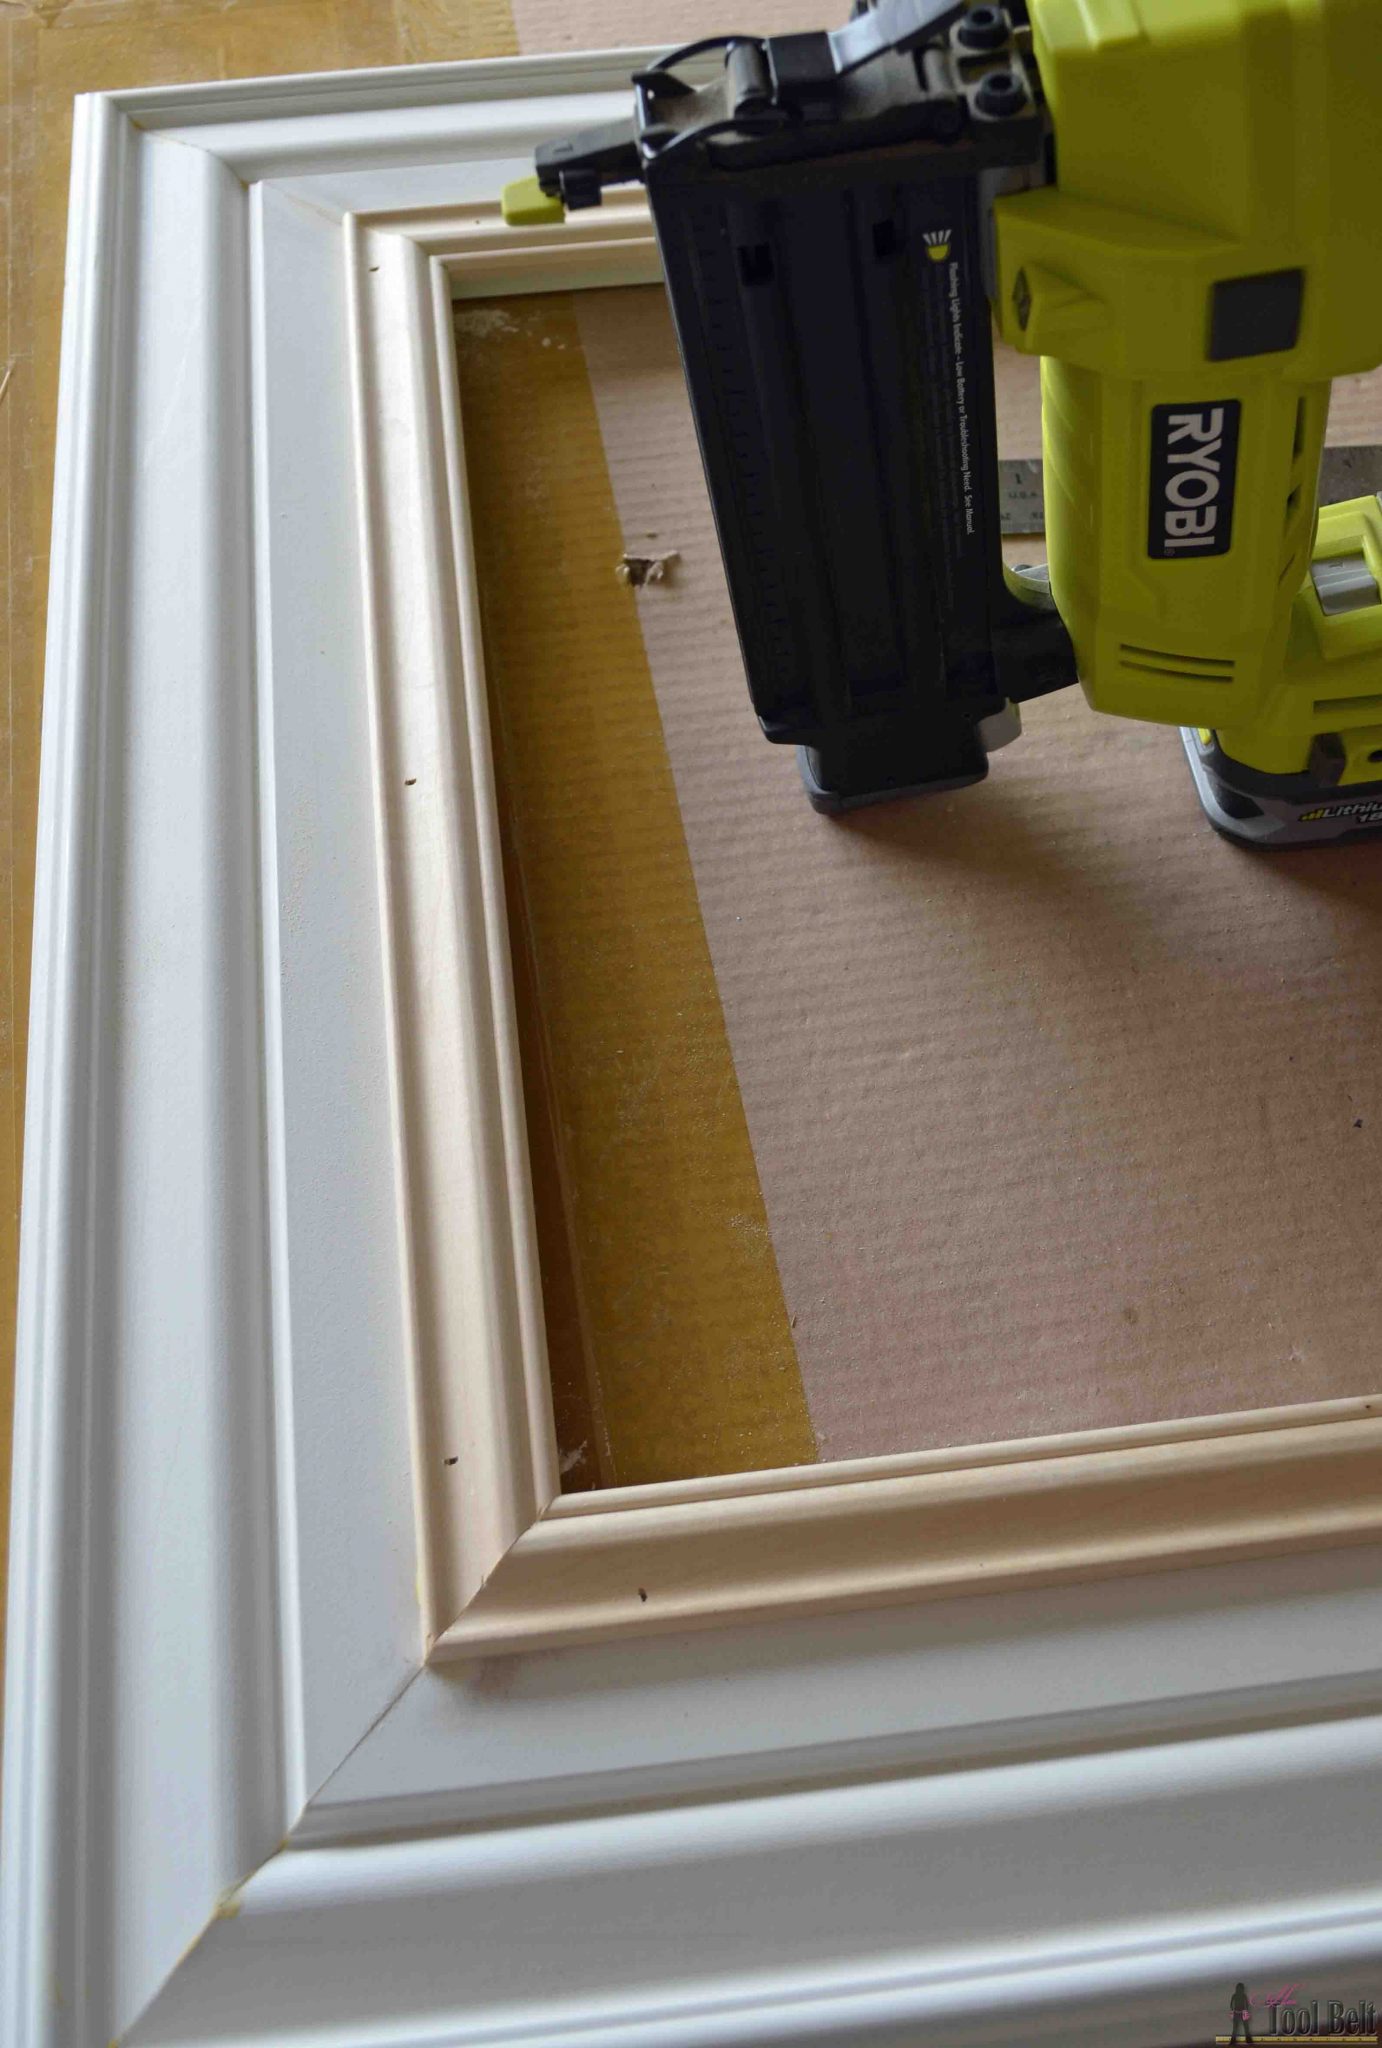 Then add additional trim. Glue and nail into place.
Step 3
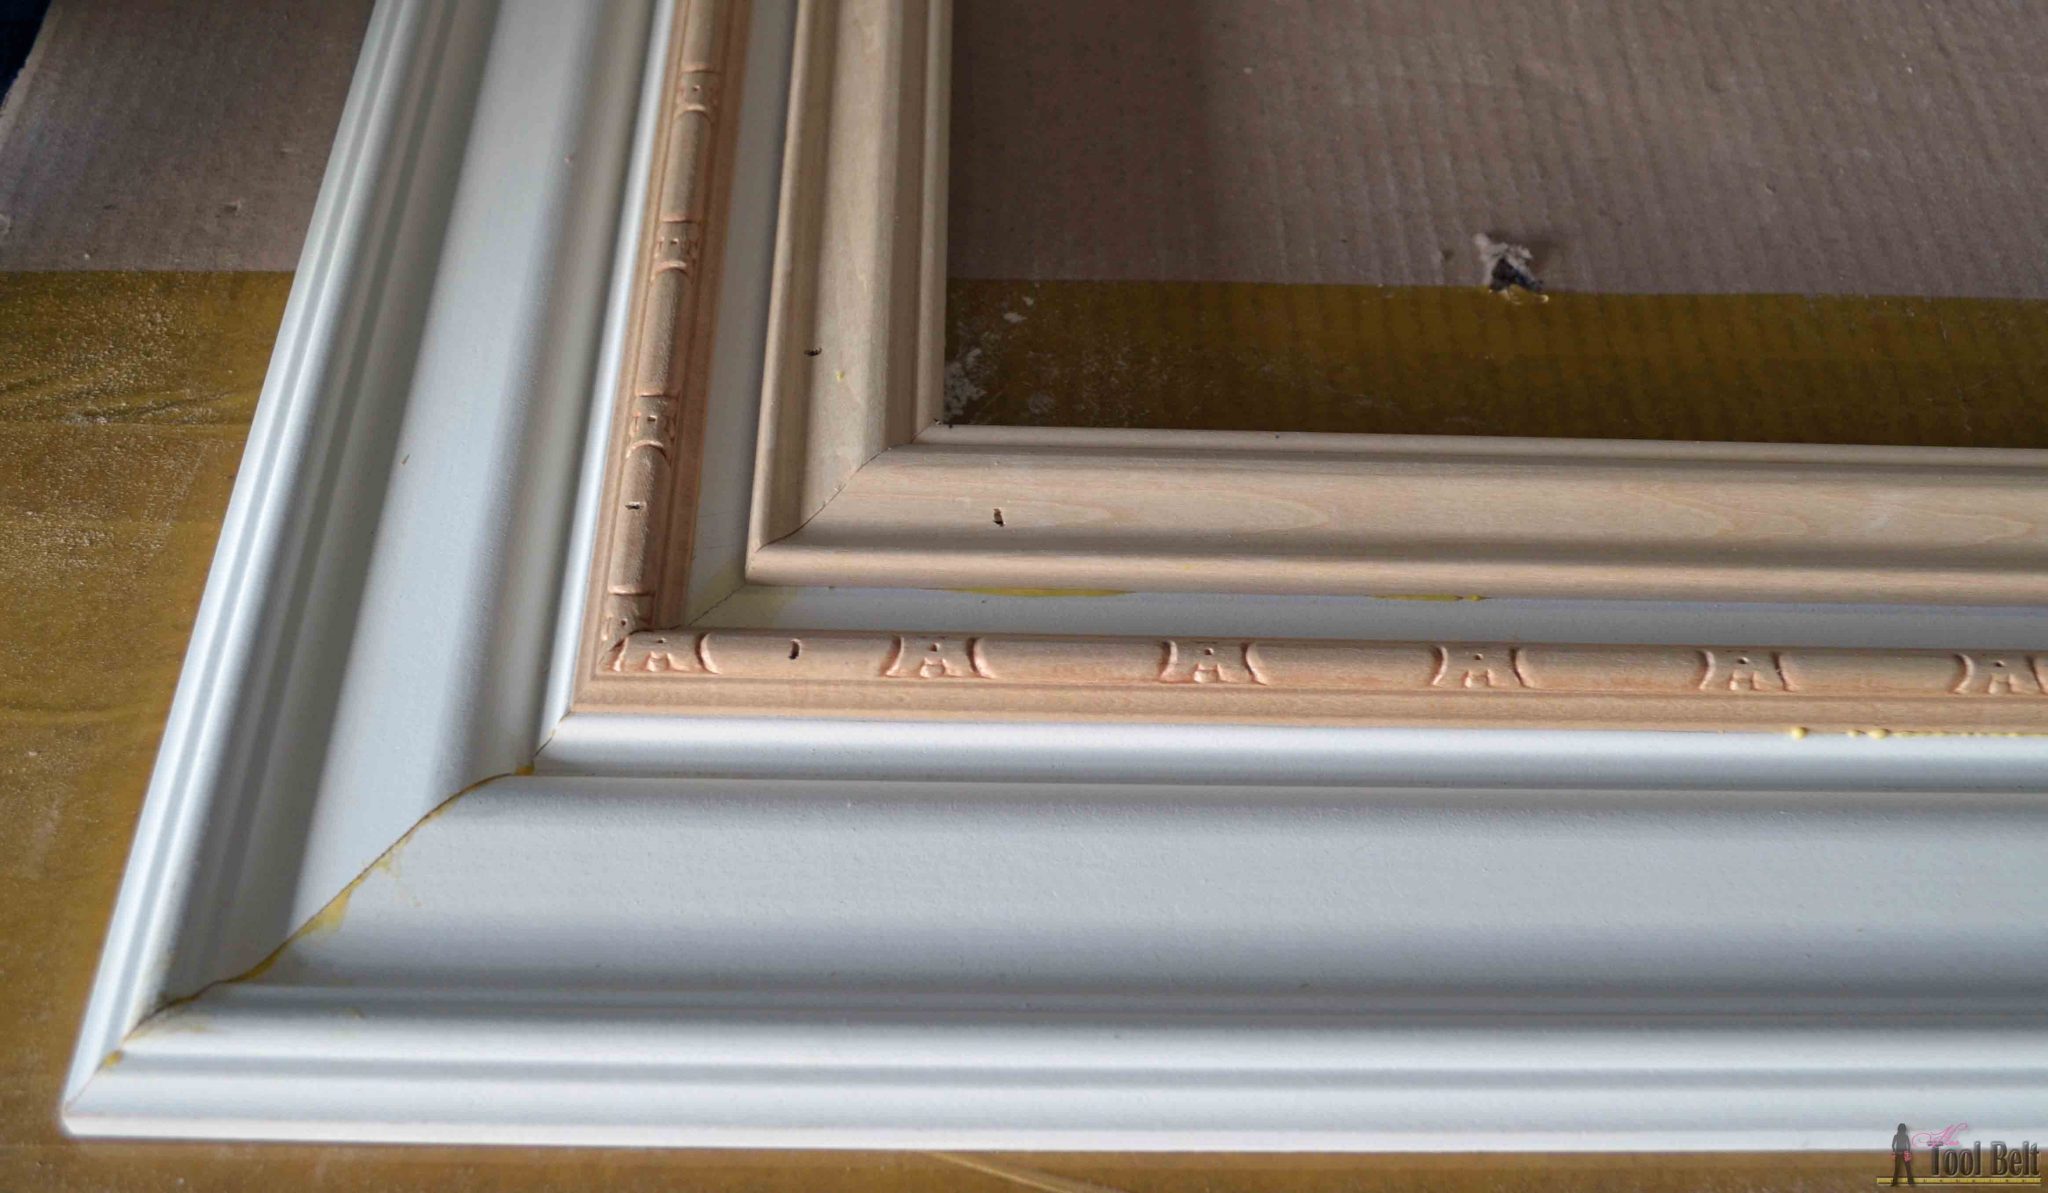
Remove any excess glue. Fill nail holes and blemishes with filler and allow to dry. Sand the filler smooth. Paint the frame with primer and allow to dry. Give the frame 1-2 coats of your favorite paint. After the paint dried, I used Valspar antiquing glaze to give it a little dimension. Add a picture hanger on the back or route a keyhole. Cut a piece of cardboard or hardboard 16″ x 20″ to support the back of the picture, and secure with nails or glazing points.
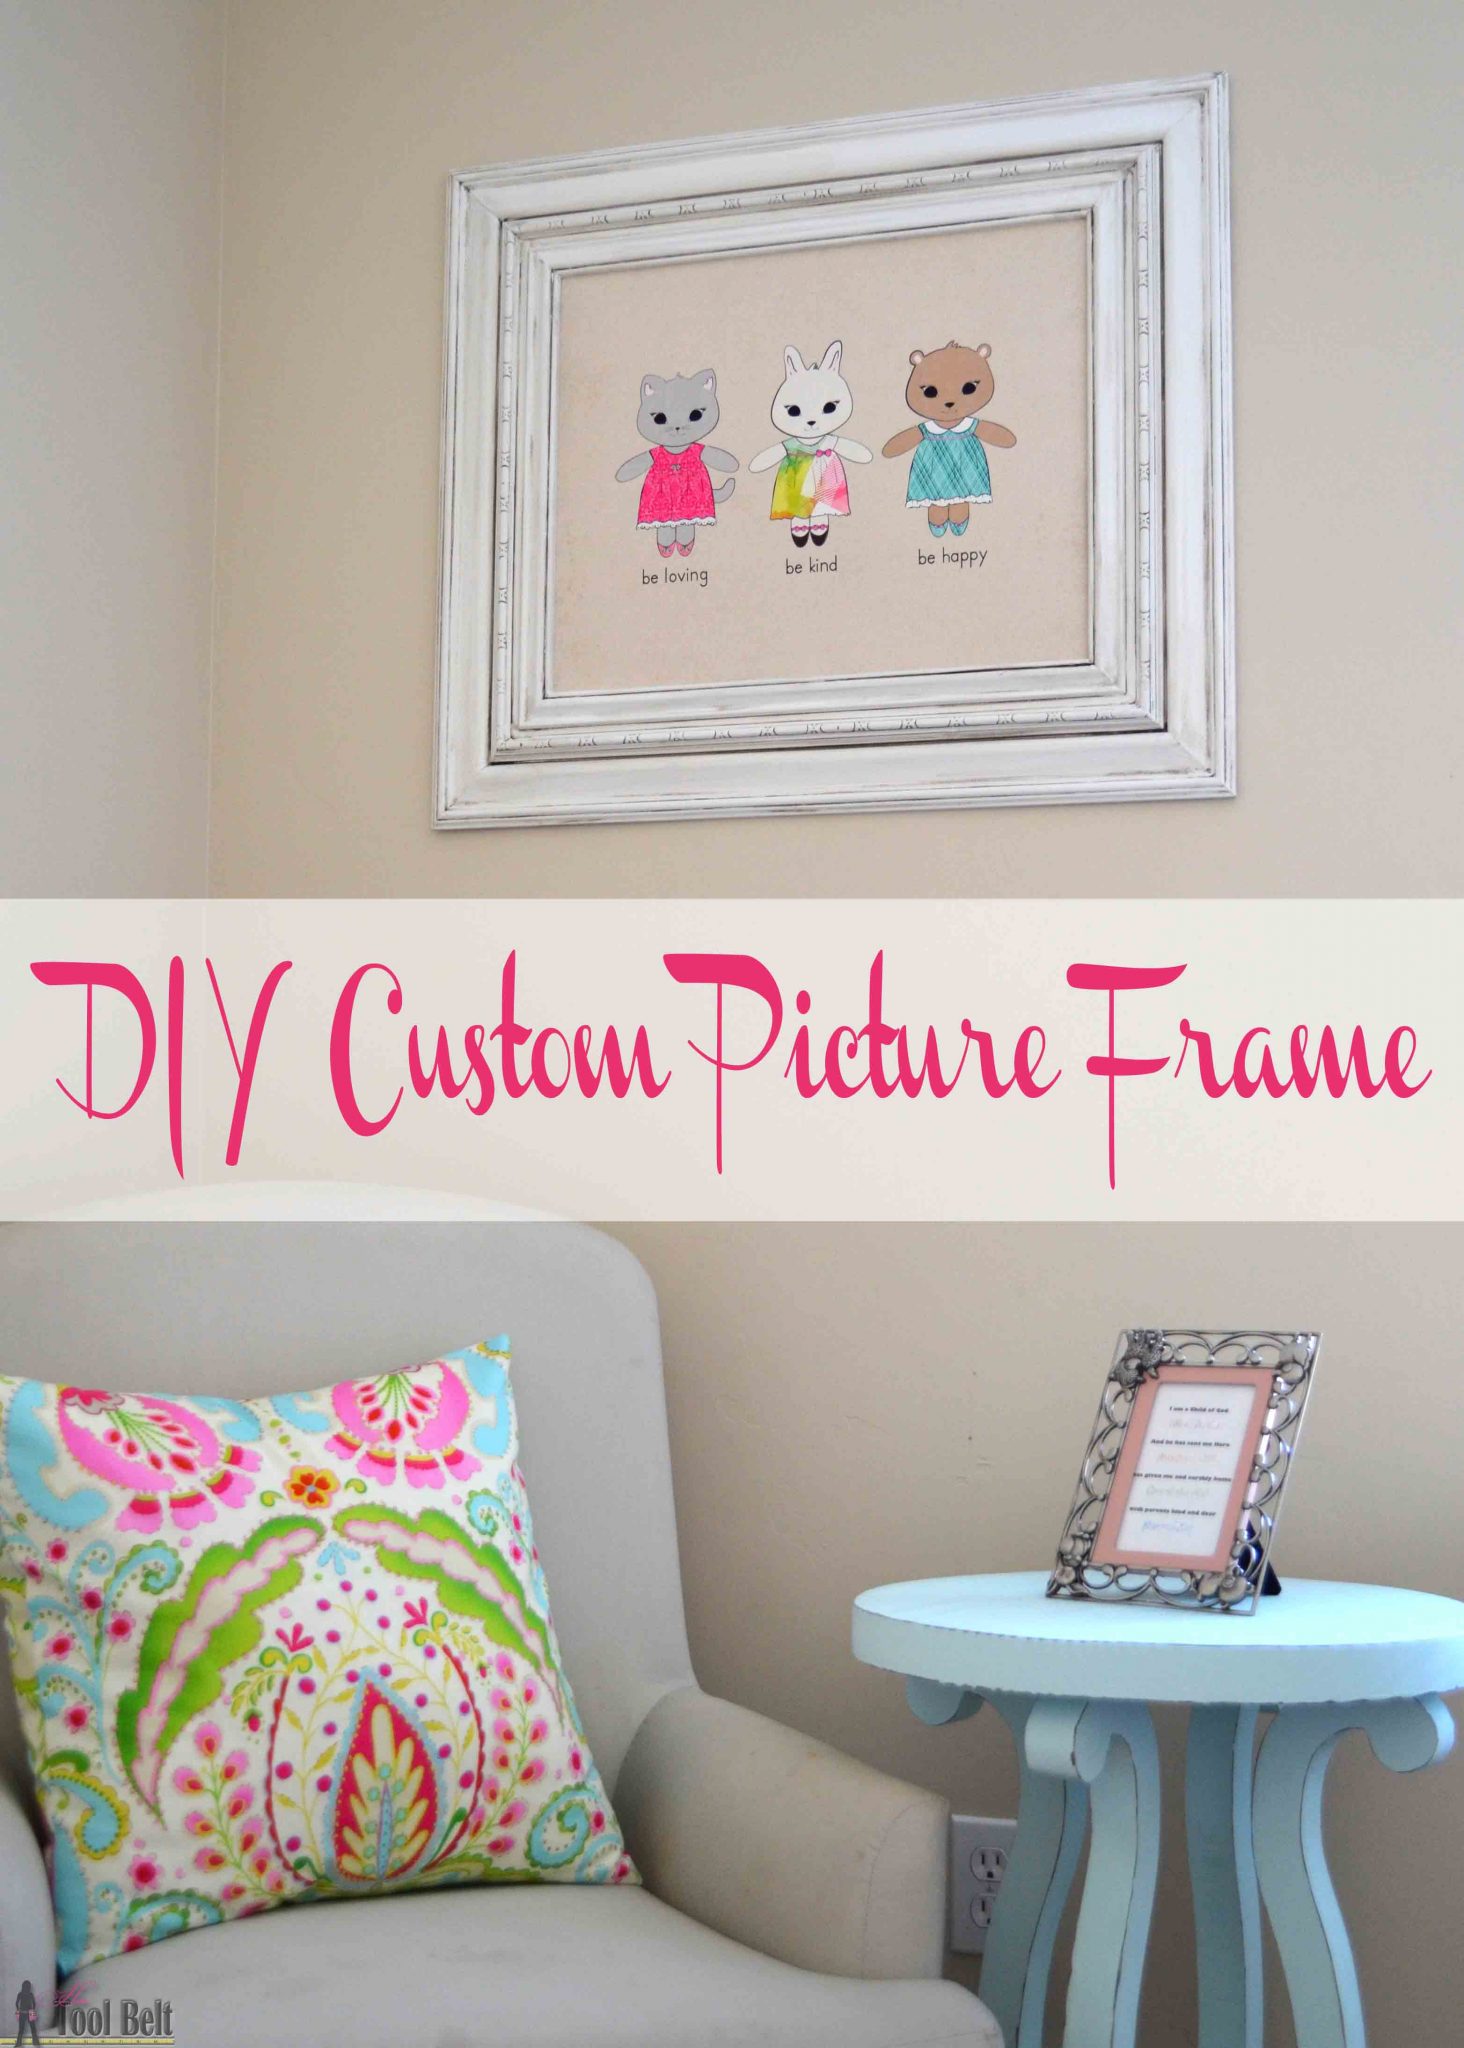
Hang it up and enjoy.
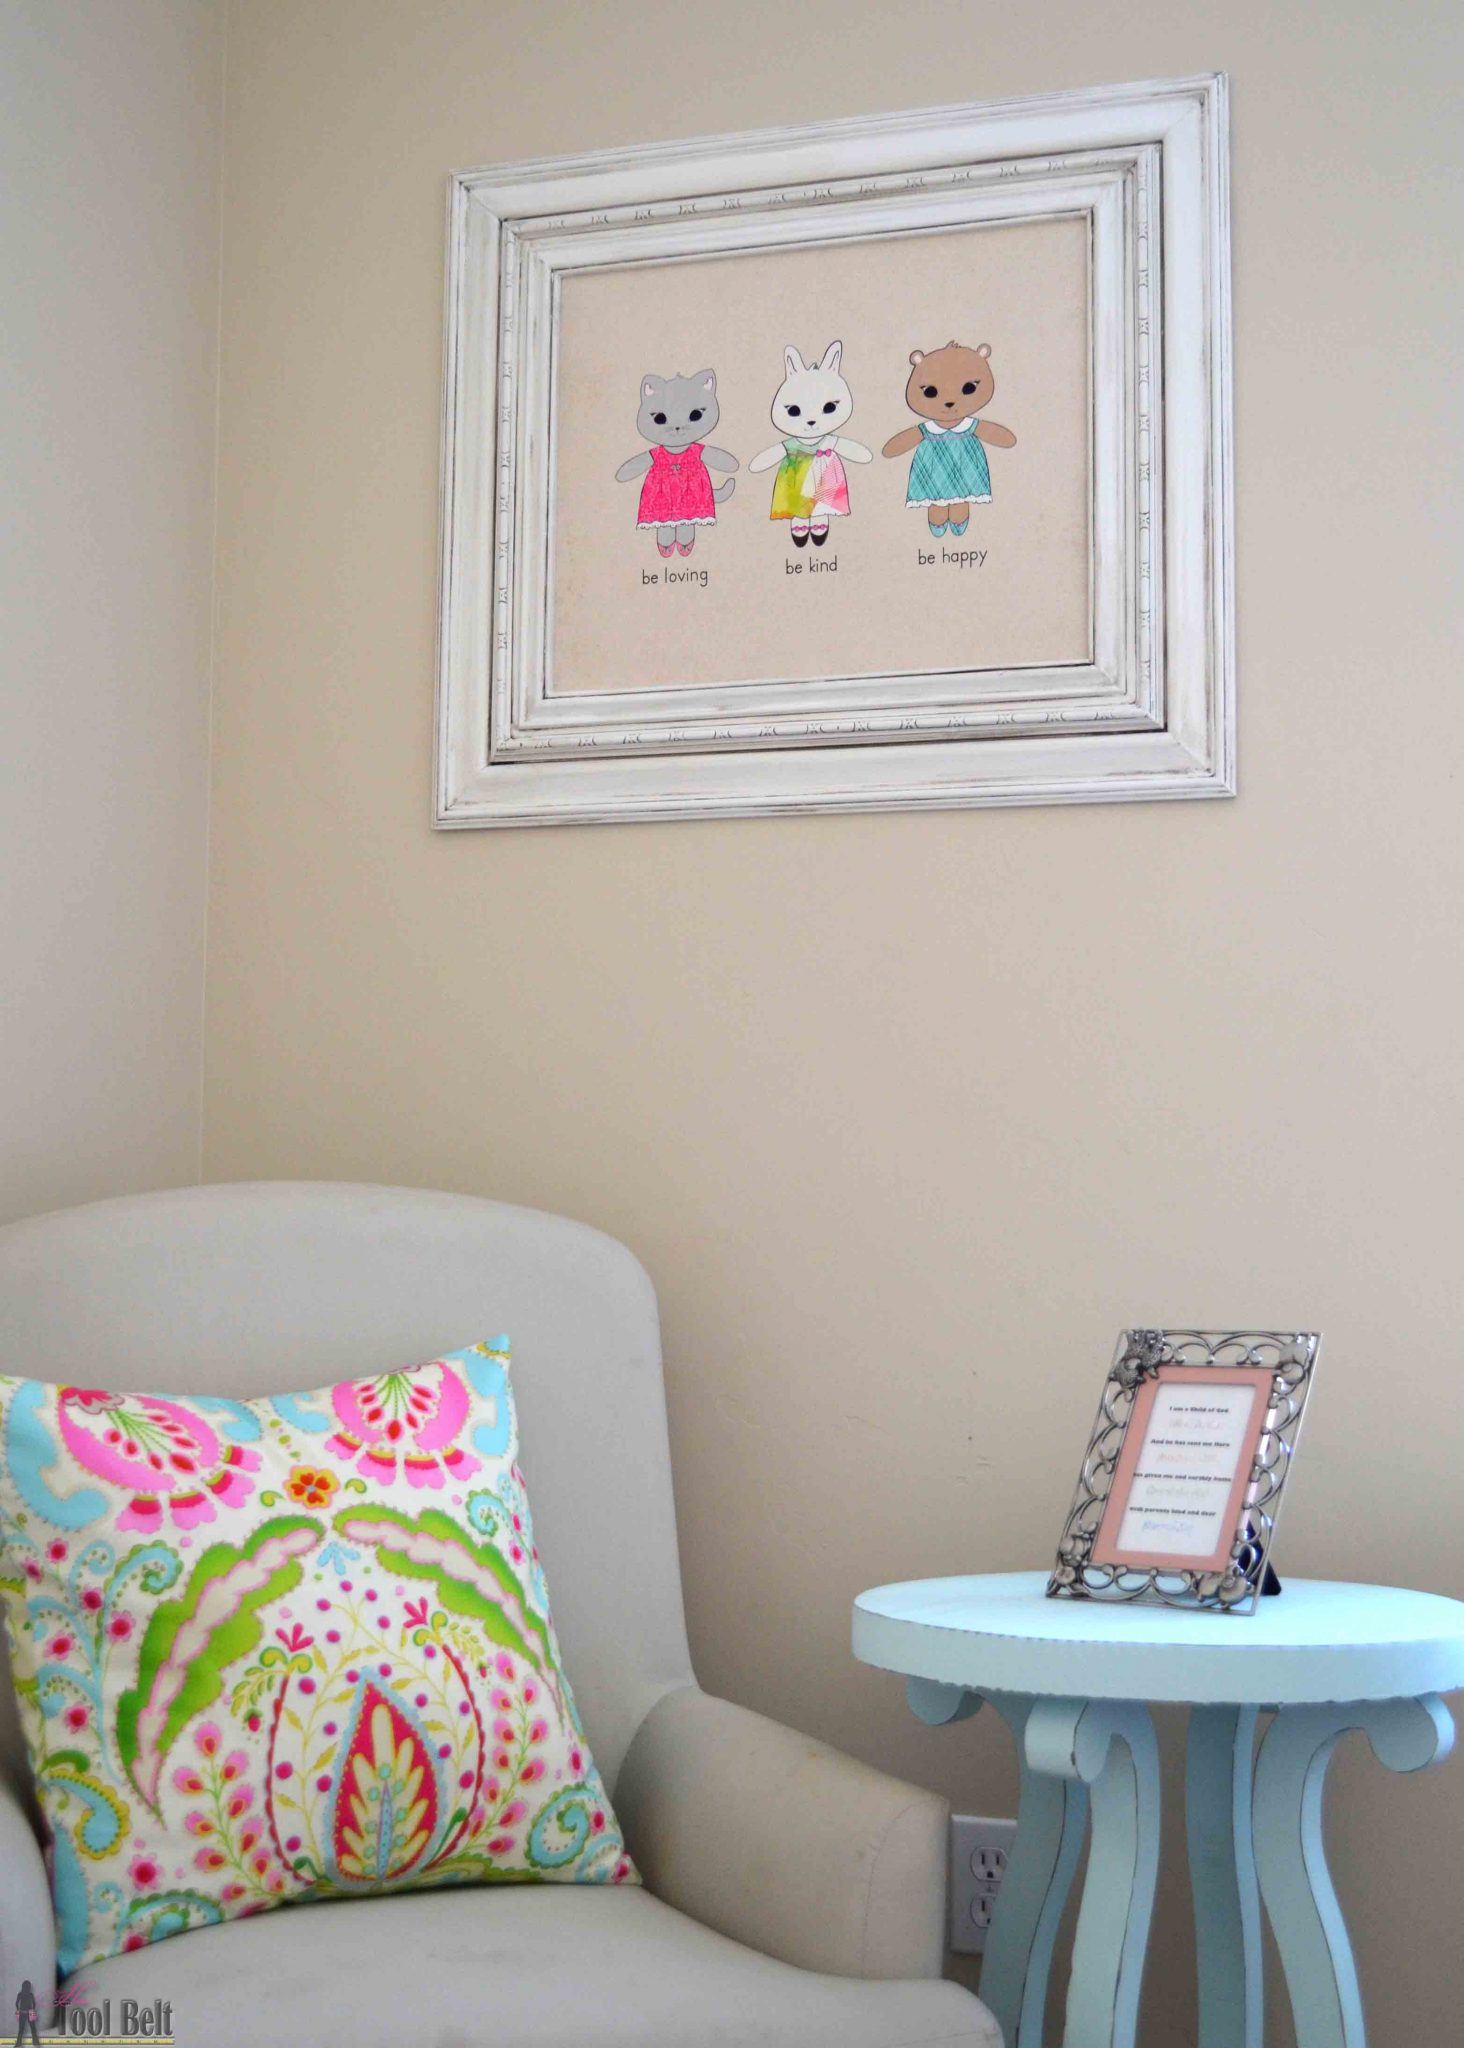 My little girl LOVES the kitty, bunny and bear.
 Modify Ink is offering a 30% discount to Hertoolbelt readers for the next 3 days. If you are looking for artwork for your home, I highly recommend them. (I received a 16″ x 20″ print for reviewing Modify Ink, but I would definitely buy from them again.)
Pin it for later:
Linked to My favorite link parties, remodelaholic, savvy southern style, homestoriesAtoZ
Great project!I love how you beef it up, but the most important thing is that your little one is enjoying it! 🙂
There aren’t many times I feel silly for never even having thought of something – this is one of those times! I love this!
I love this idea! ThE frame is the BOMB DIZZLE