This post contains affiliate links noted by *.
This is a fun project that I did in collaboration with my neighbor who owns DK Leigh. My neighbor, Camille started DK Leigh when she had a hard time finding unique baby bedding for her kids that wouldn’t break the bank. She has a new glamorous bedding line coming out and needs a glamorous crib to go with it.
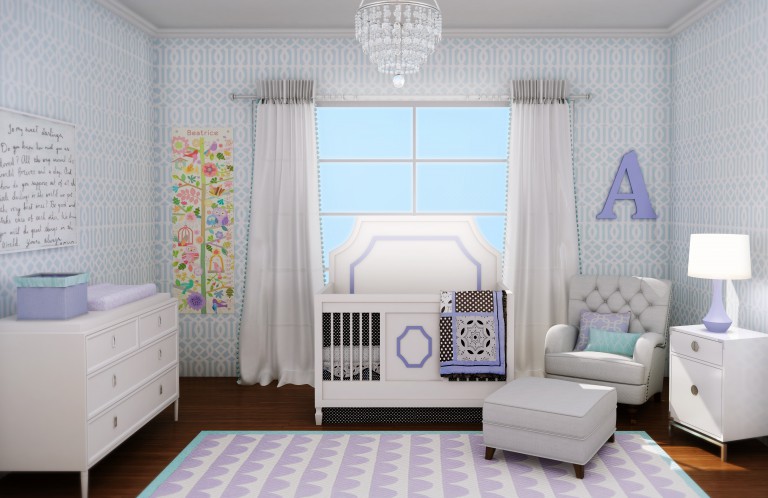
Isn’t this a beautiful room!
However glamorous/designer cribs usually come with a hefty price tag, then she came up with a brilliant idea, why not upgrade an existing cheap crib to look like a designer crib.
That’s where I come into play. In this tutorial, I’ll show you how to take an existing crib and turn it into a DIY Glamorous Crib. This is the inspiration crib. For this tutorial we used a white Graco Charleston convertible crib, but you can do the same thing with many different crib styles.
*
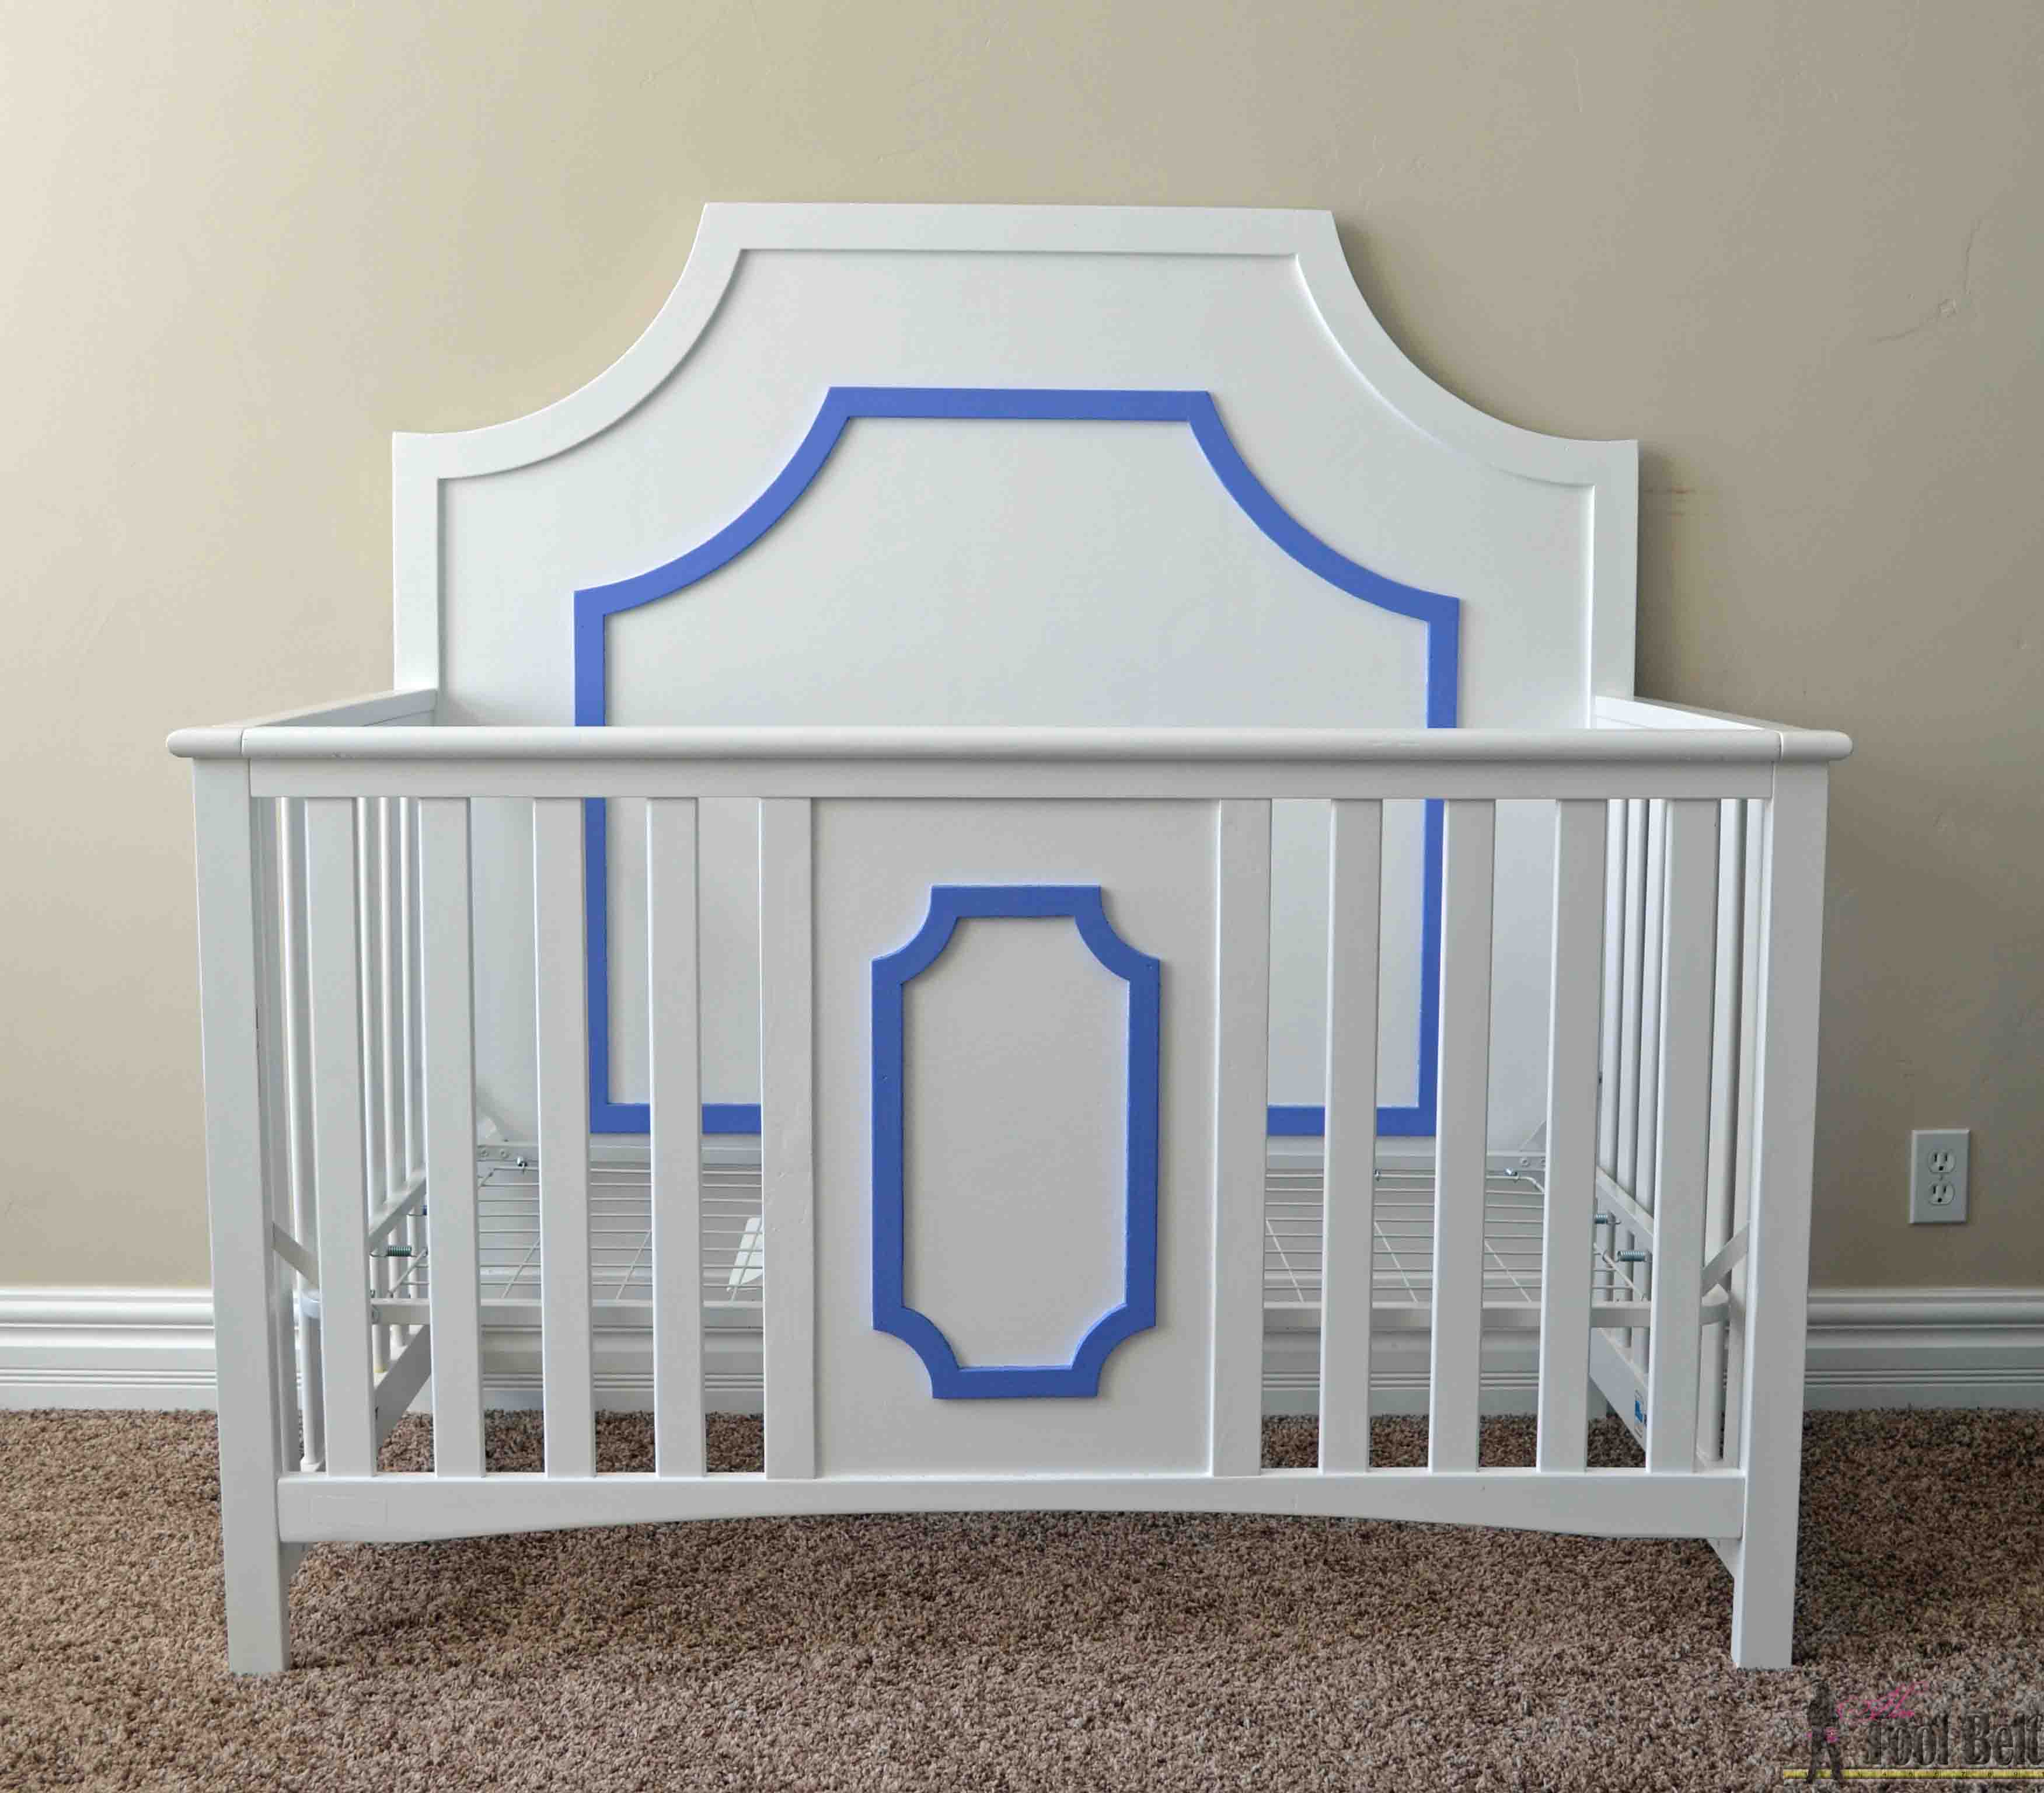
The result:
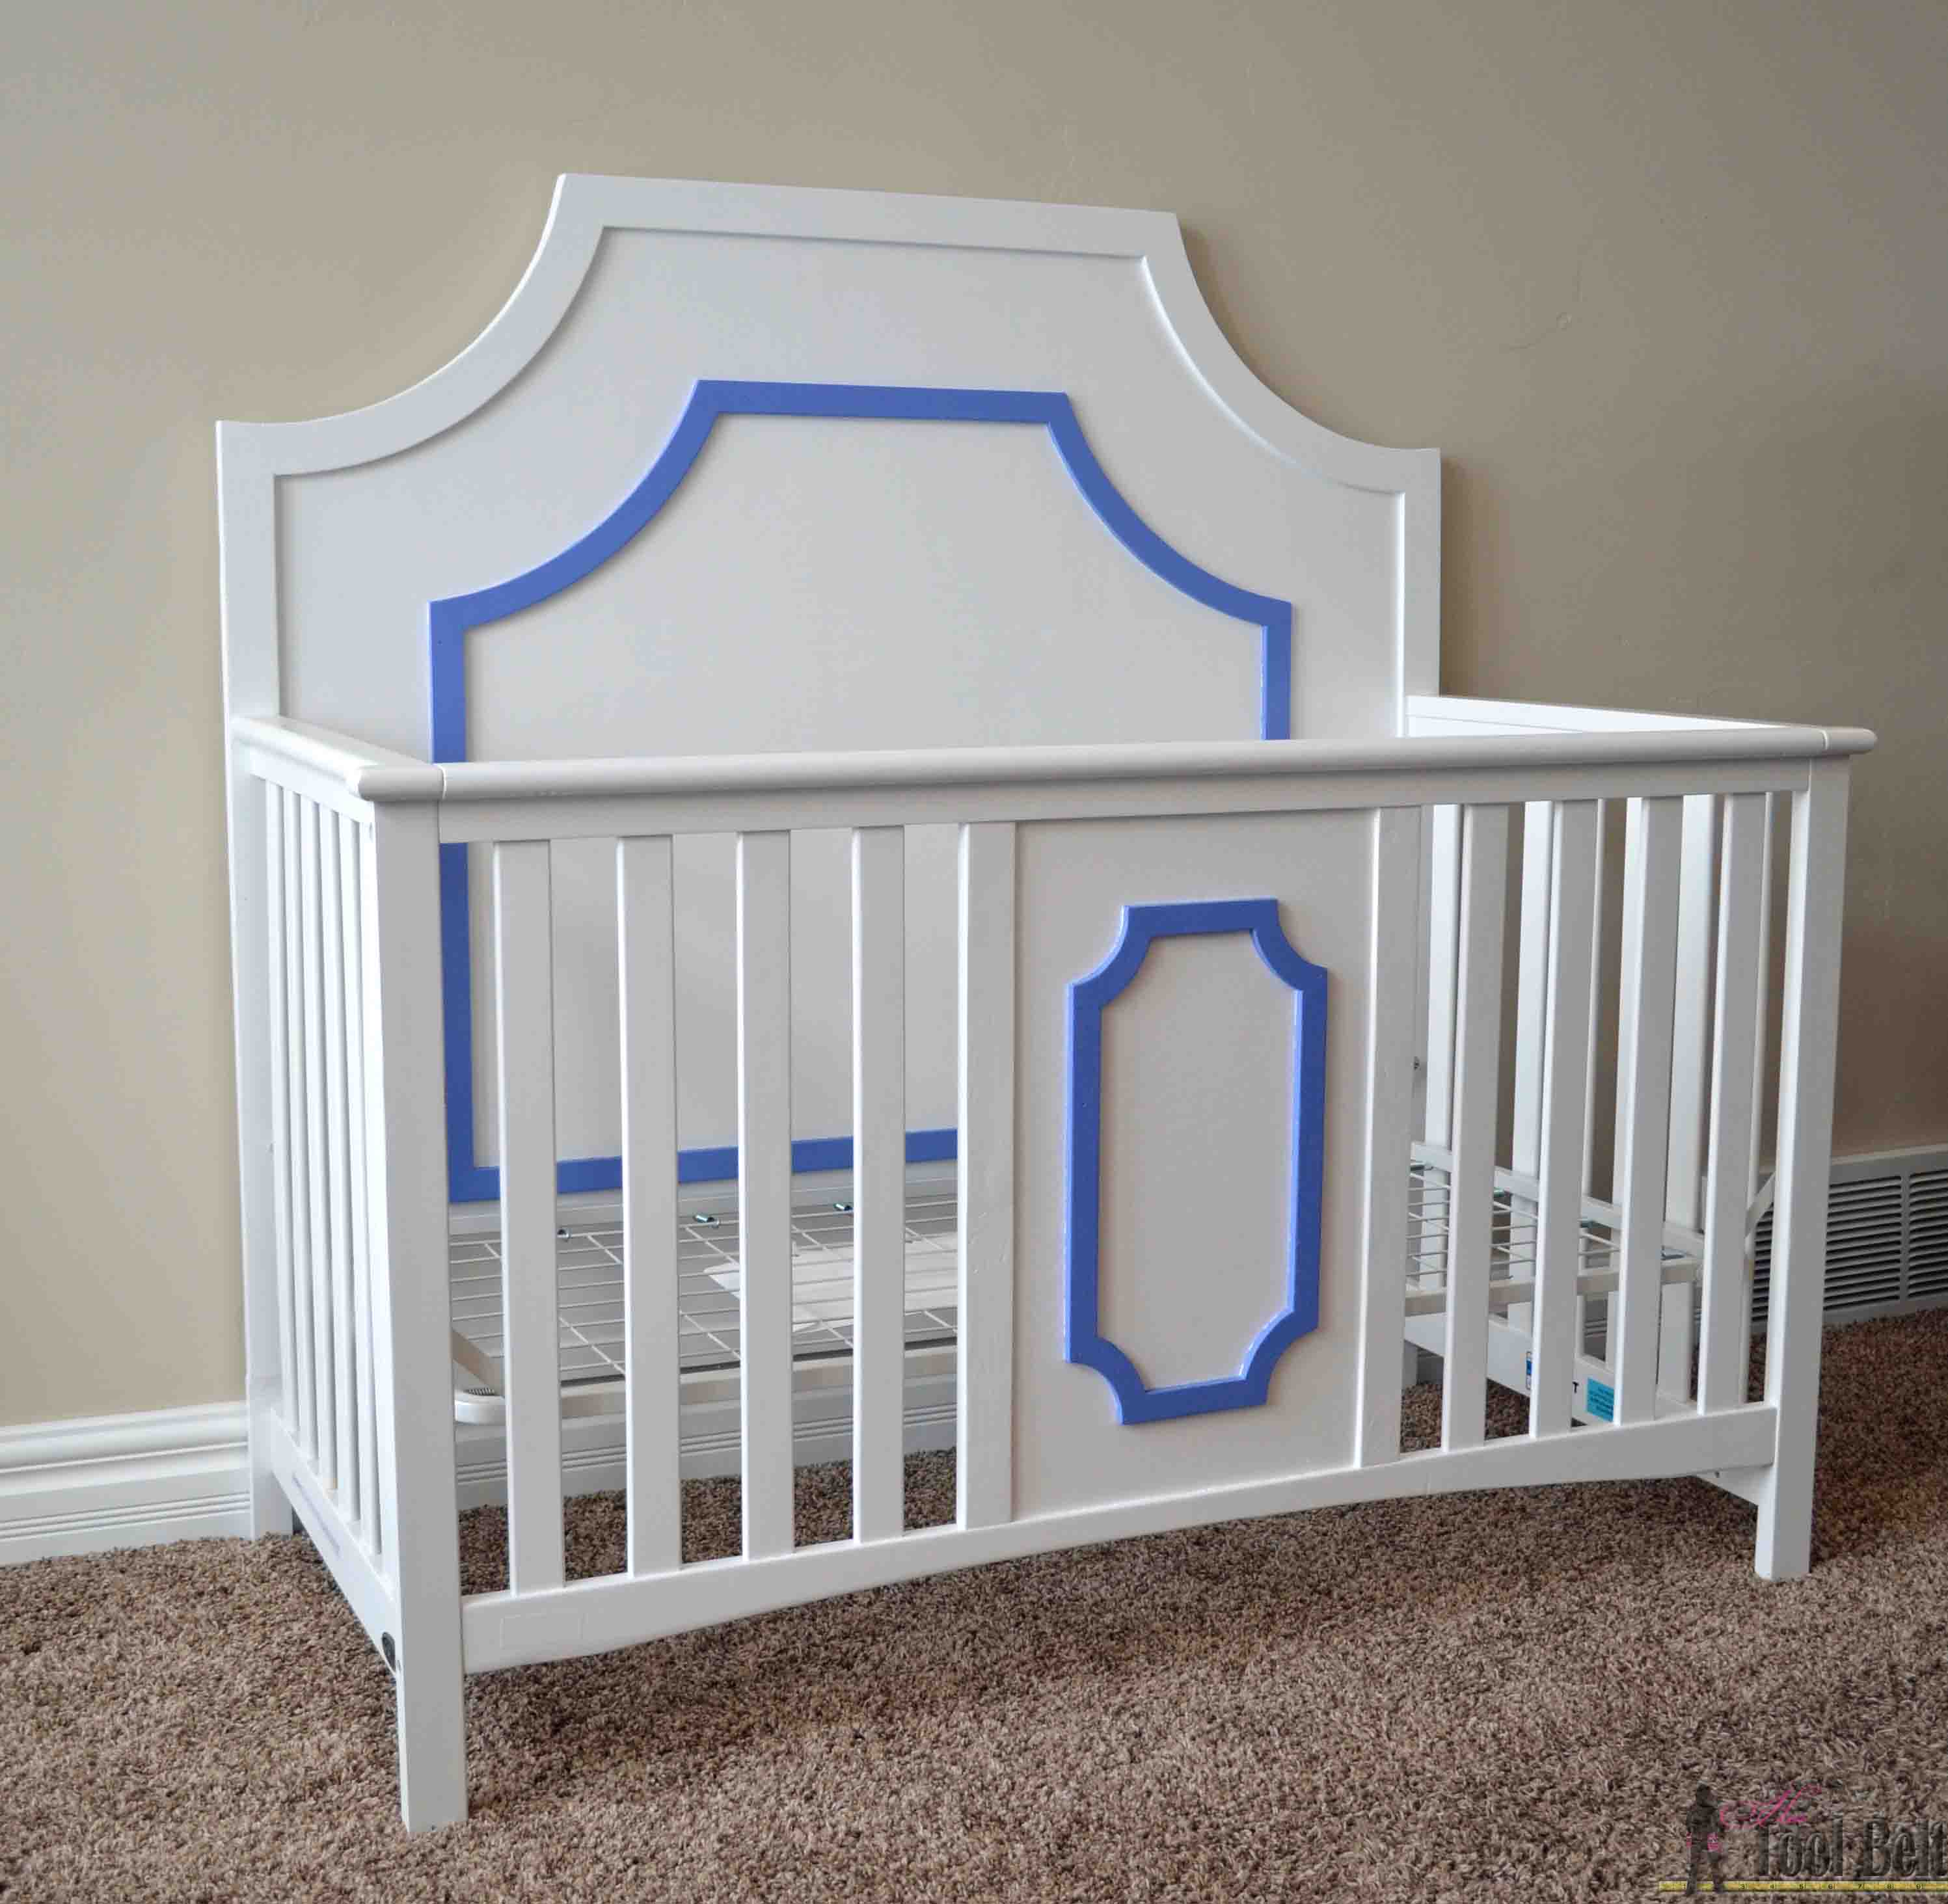
I think the transformation turned out fabulous, the periwinkle trim matches the bedding! The back of the crib will also make a super cute head board for a full bed. You can get the gorgeous bedding here*.
How to Build a DIY Glamorous Crib
Materials:
- 1 sheet 1/2″ plywood or 3/4″ plywood (4′ x 8′)
- 1/2 sheet (or 2 – 1/4 sheets) 1/4″ or 3/8″ plywood, particle board or MDF
- 1 – 1″ x 2″ x 8′ (actual 3/4″ x 1 1/2″)
- 1 – 1″ x 3″ x 8′ (actual 3/4″ x 2 1/2″)
- 5/8″ brad nails
- wood glue
- wood filler
- sandpaper
- white paint/primer
- paint sample size – Glidden Pure Periwinkle 61BB 28/291
- polycrylic top coat*
- 1 1/4″ pocket screws *
- 1″ pocket screws*
- Estimated wood cost: $50
Cut List
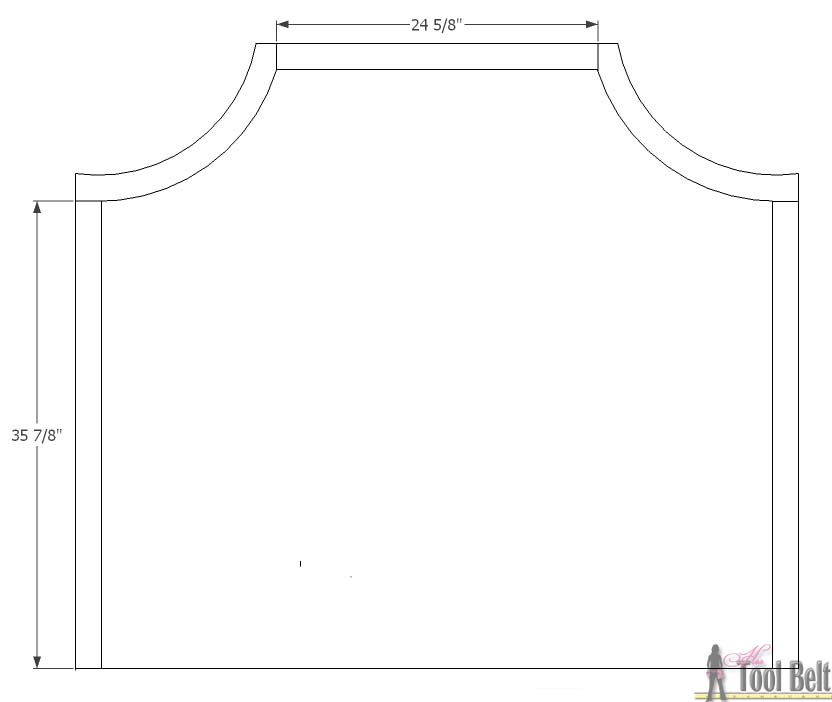
- 1 – 1/2″ plywood – 48″ x 55 1/2″
- 2 – 1/4″ x 2″ x ~35 7/8″
- 1 – 1/4″ x 2″ x ~24 5/8″
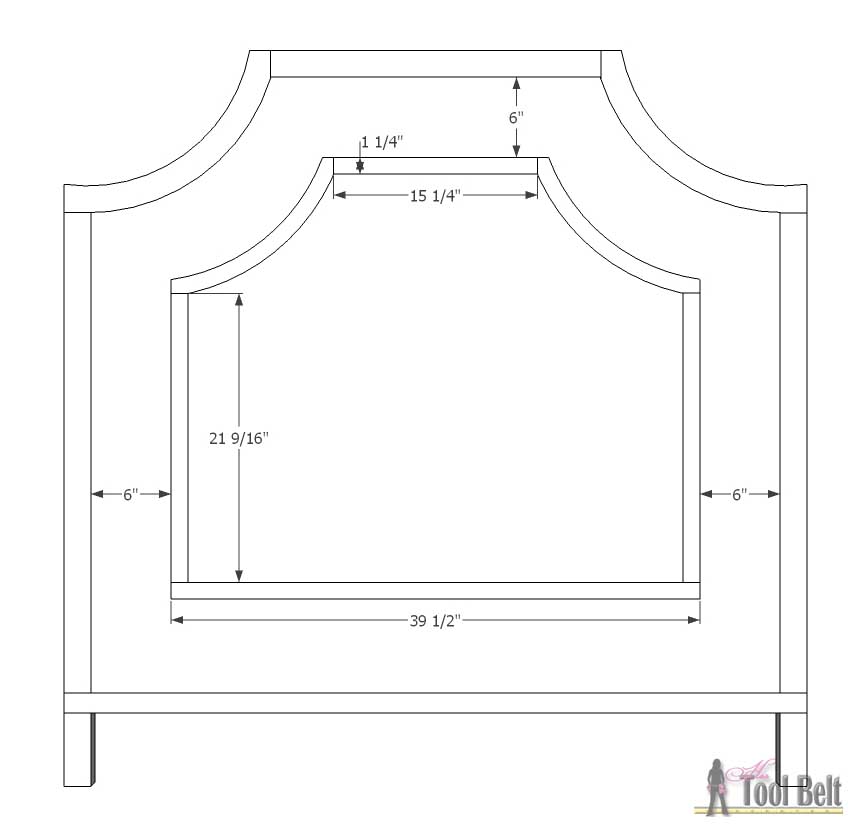
- 2 – 1/4″ x 1 1/4″ x 21 9/16″
- 1 – 1/4″ x 1 1/4″ x 15 1/4″
- 1 – 1/4″ x 1 1/4″ x 39 1/2″
- 1 – 3/4″ x 1 1/2″ x 55 1/2″
- 2 – 3/4″ x 2 1/2″ x 6″
- 1 – 1/2″ x 13 3/4″ x 23 13/16″
- 2 – 3/4″ x 1 3/4″ x 23 13/16″
- 2 – 1/4″ x 1″ x 11 5/16″
Step 1
Download and print out (on 100% not ‘fit to page’) the large curves, line up the pattern, tape together and cut it out. LG 1, LG 2. For the back, 48″ is the vertical and 55 1/2″ is the horizontal. In the upper two corners of the back trace the inside of the curve. On the left corner, the pattern will be face up, on the right it’ll be face down to make sure that it’s a mirror image. 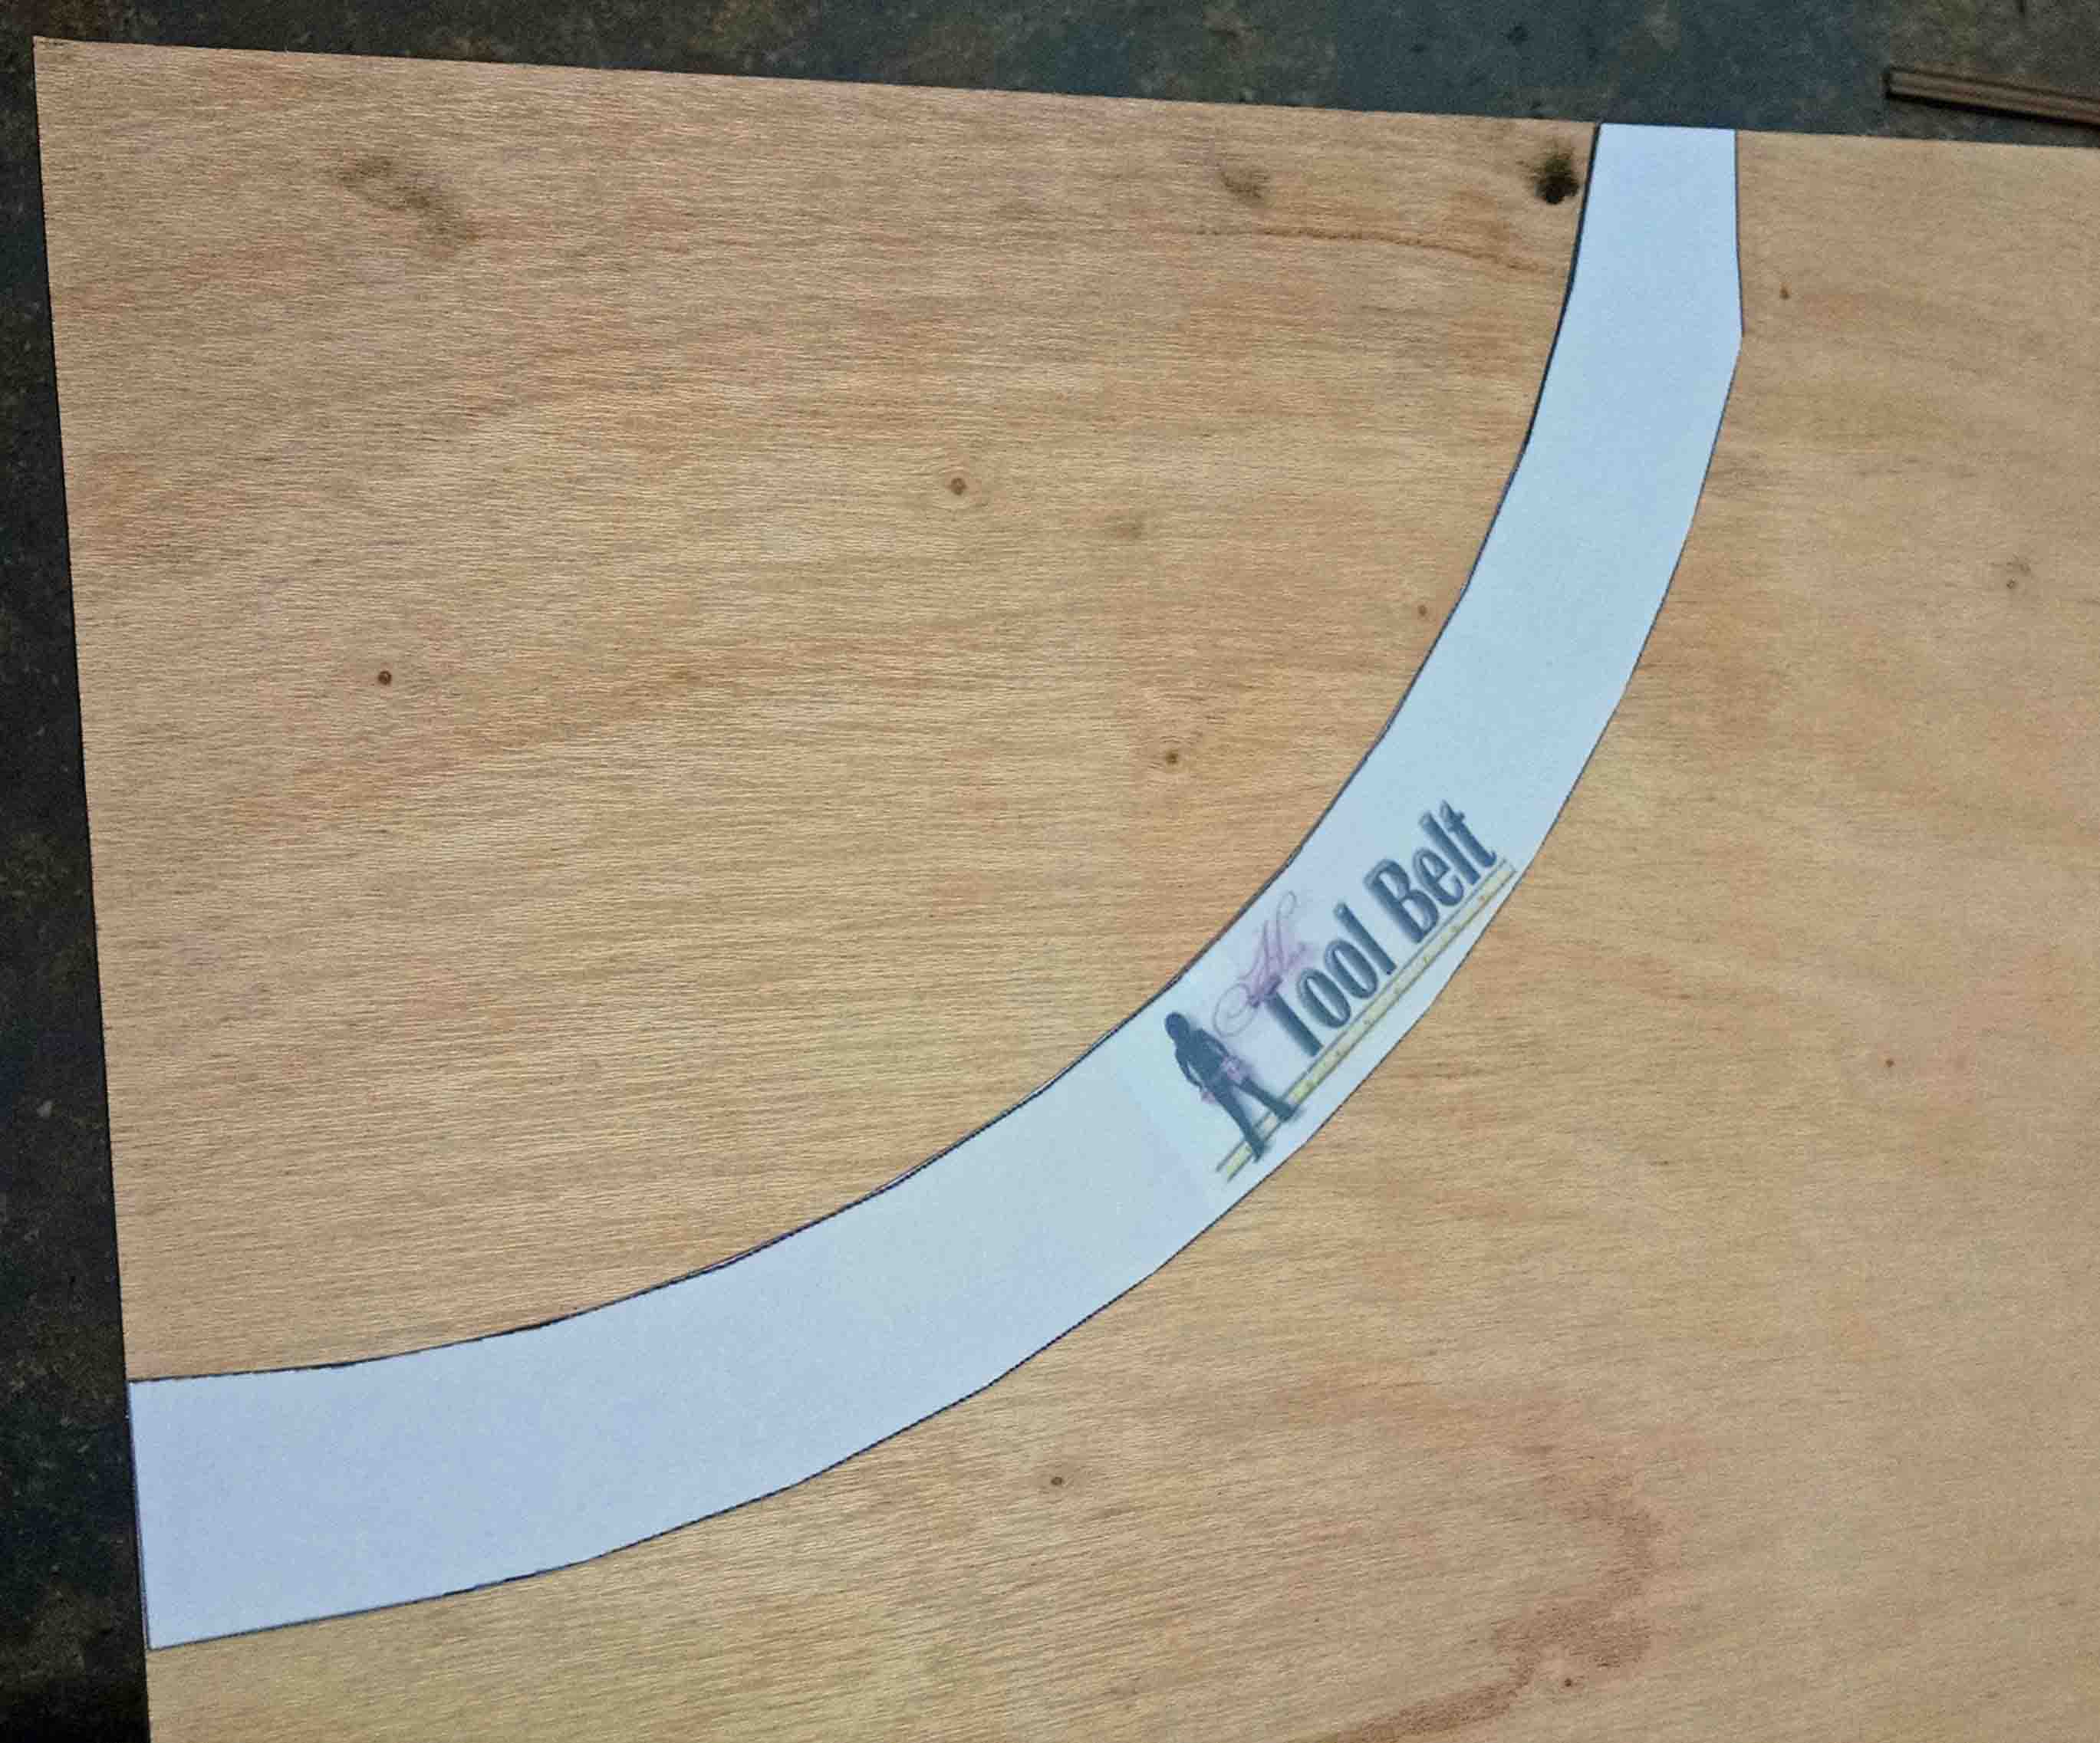
Mark the inside of the curve on the plywood and cut out with a jig saw.
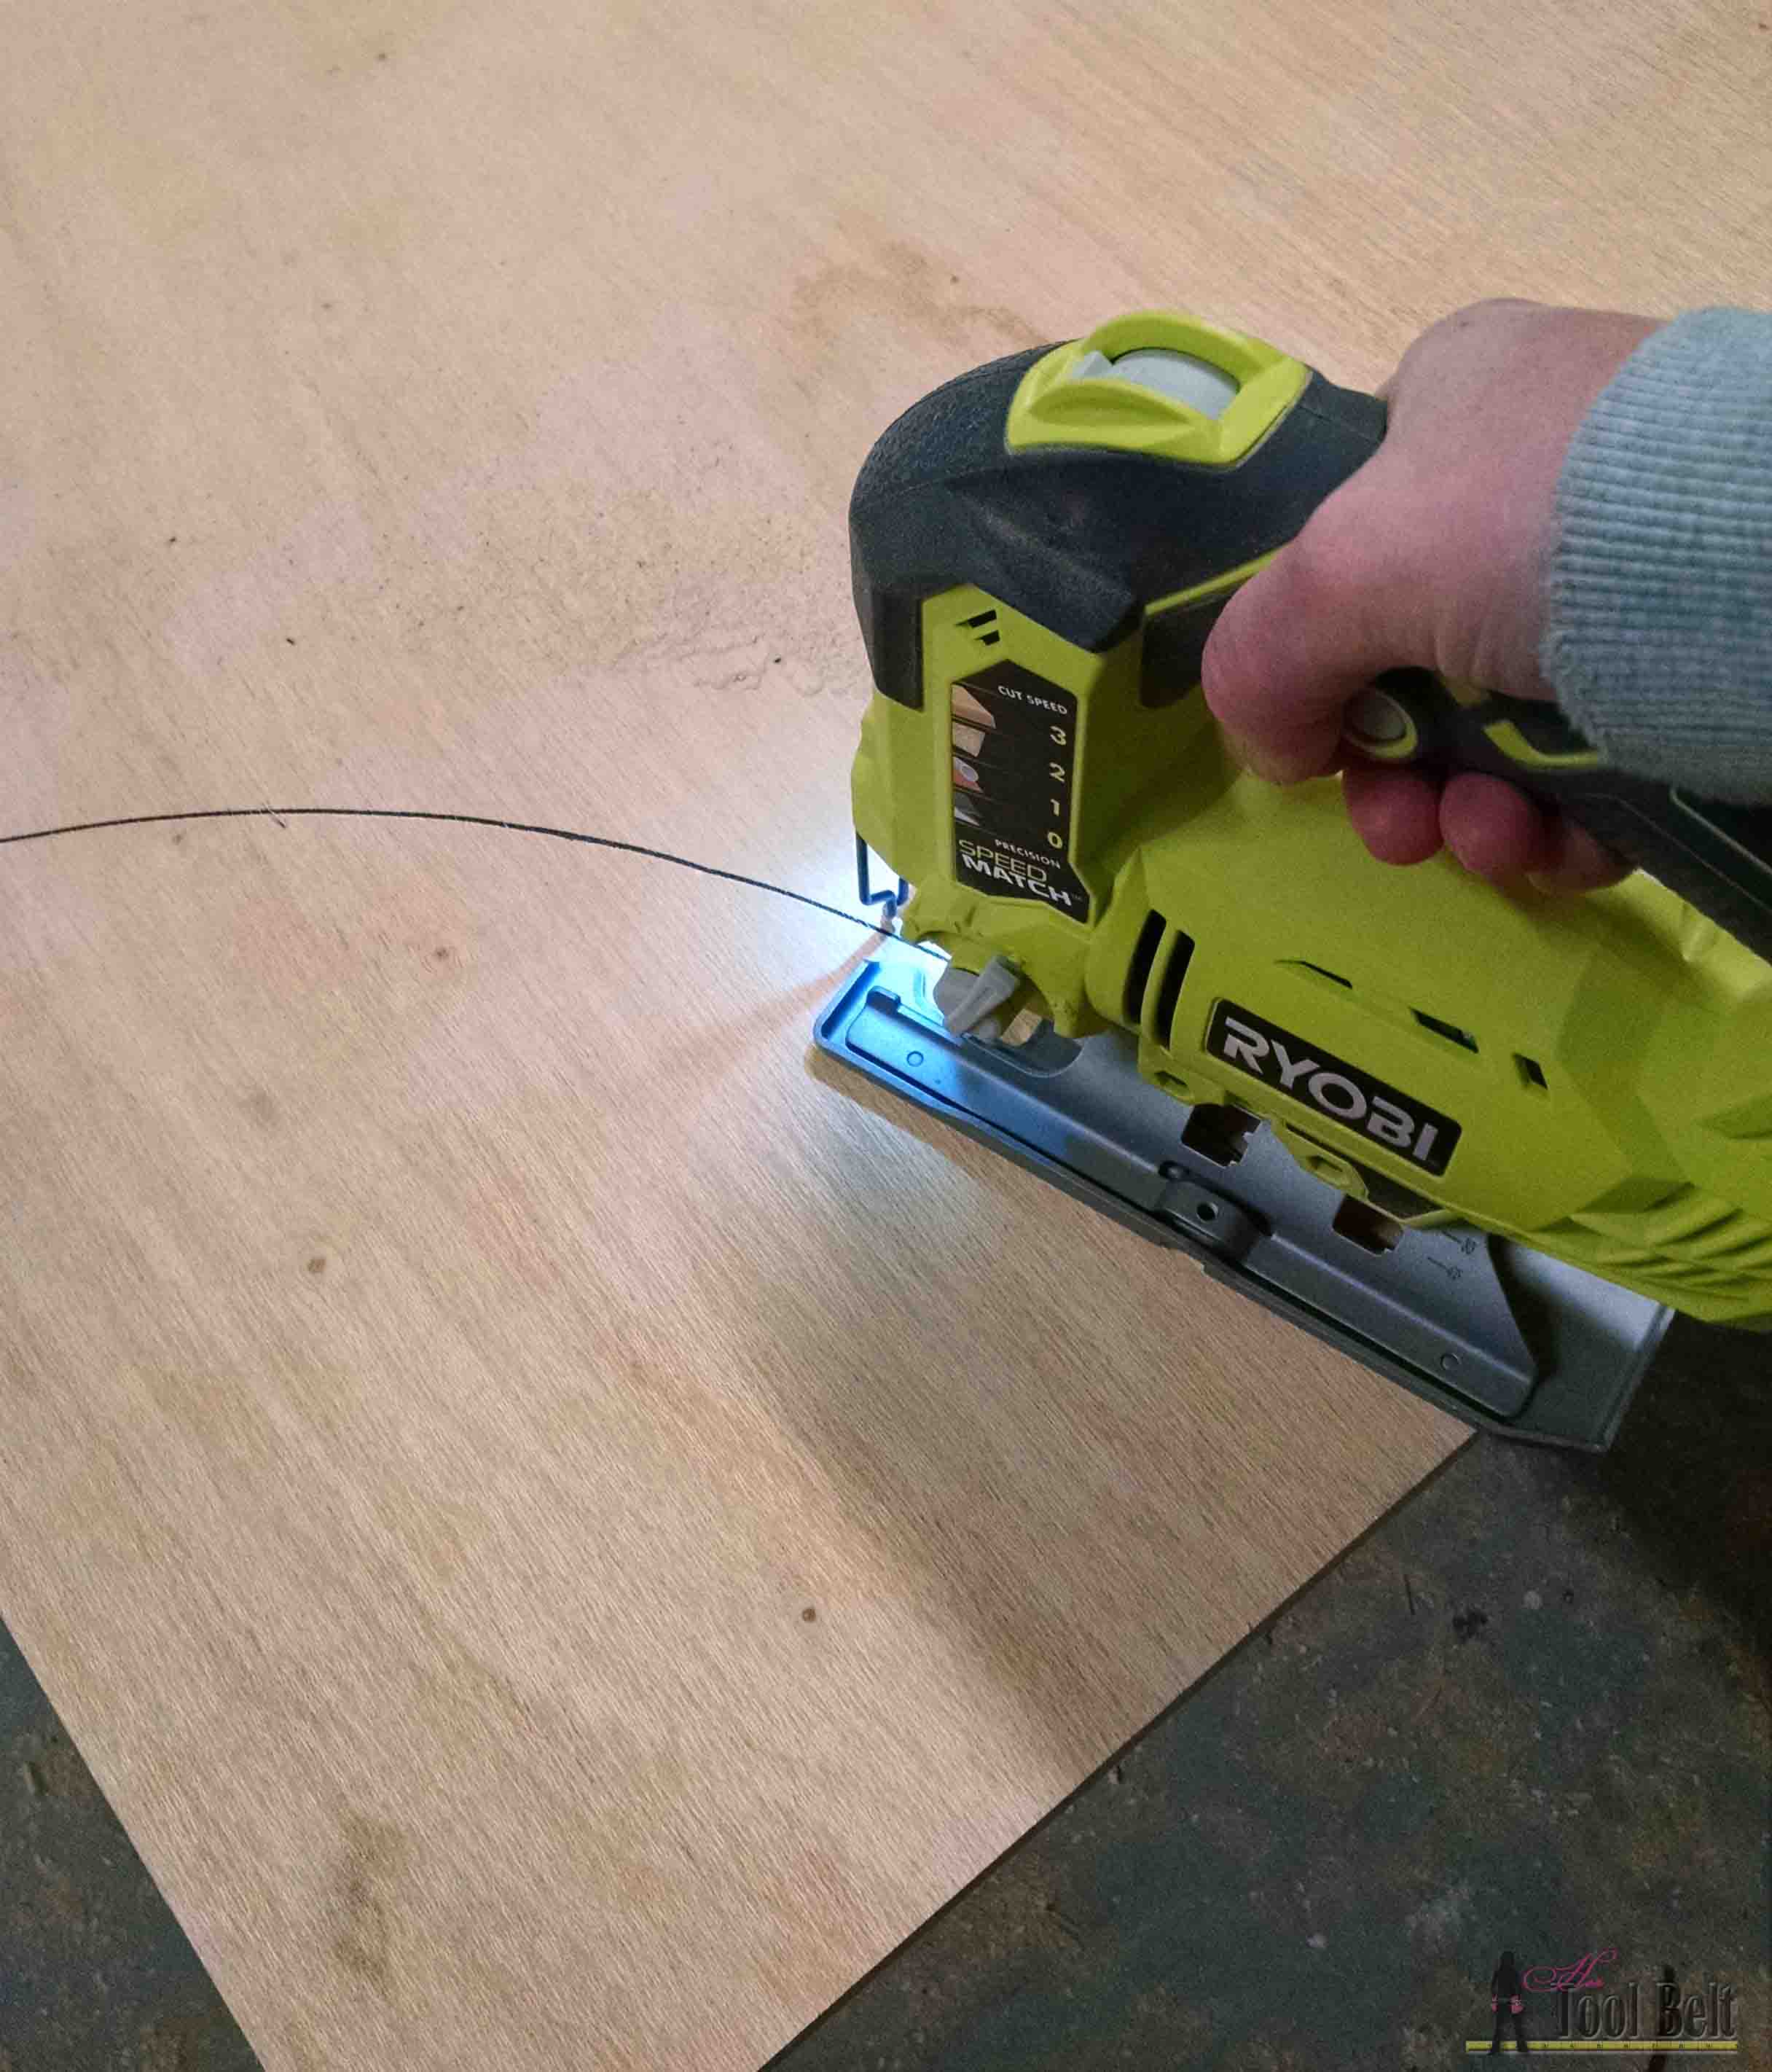
Trace 2 of the large curve pattern on 1/4″ or 3/8″ plywood/particle board/MDF. Cut out the pieces with a jig saw, scroll saw or band saw and lightly sand edges smooth. Use wood glue and 5/8″ brad nails to secure to the 1/2″ plywood. Cut out 2″ pieces that will finish trimming out the outside egde, glue and nail into place.
Download and print out (on 100% not ‘fit to page’) the small curves, line up the pattern, tape together and cut it out. SM 1, SM 2 Trace 2 of the small curve pattern on 1/4″ or 3/8″ plywood/particle board/MDF. Cut out the pieces with a jig saw, scroll saw or band saw and lightly sand edges smooth. Use wood glue and 5/8″ brad nails to secure to the 1/2″ plywood. Cut out 1 1/4″ pieces that will finish trimming out the inside molding, glue and nail into place, see diagram.
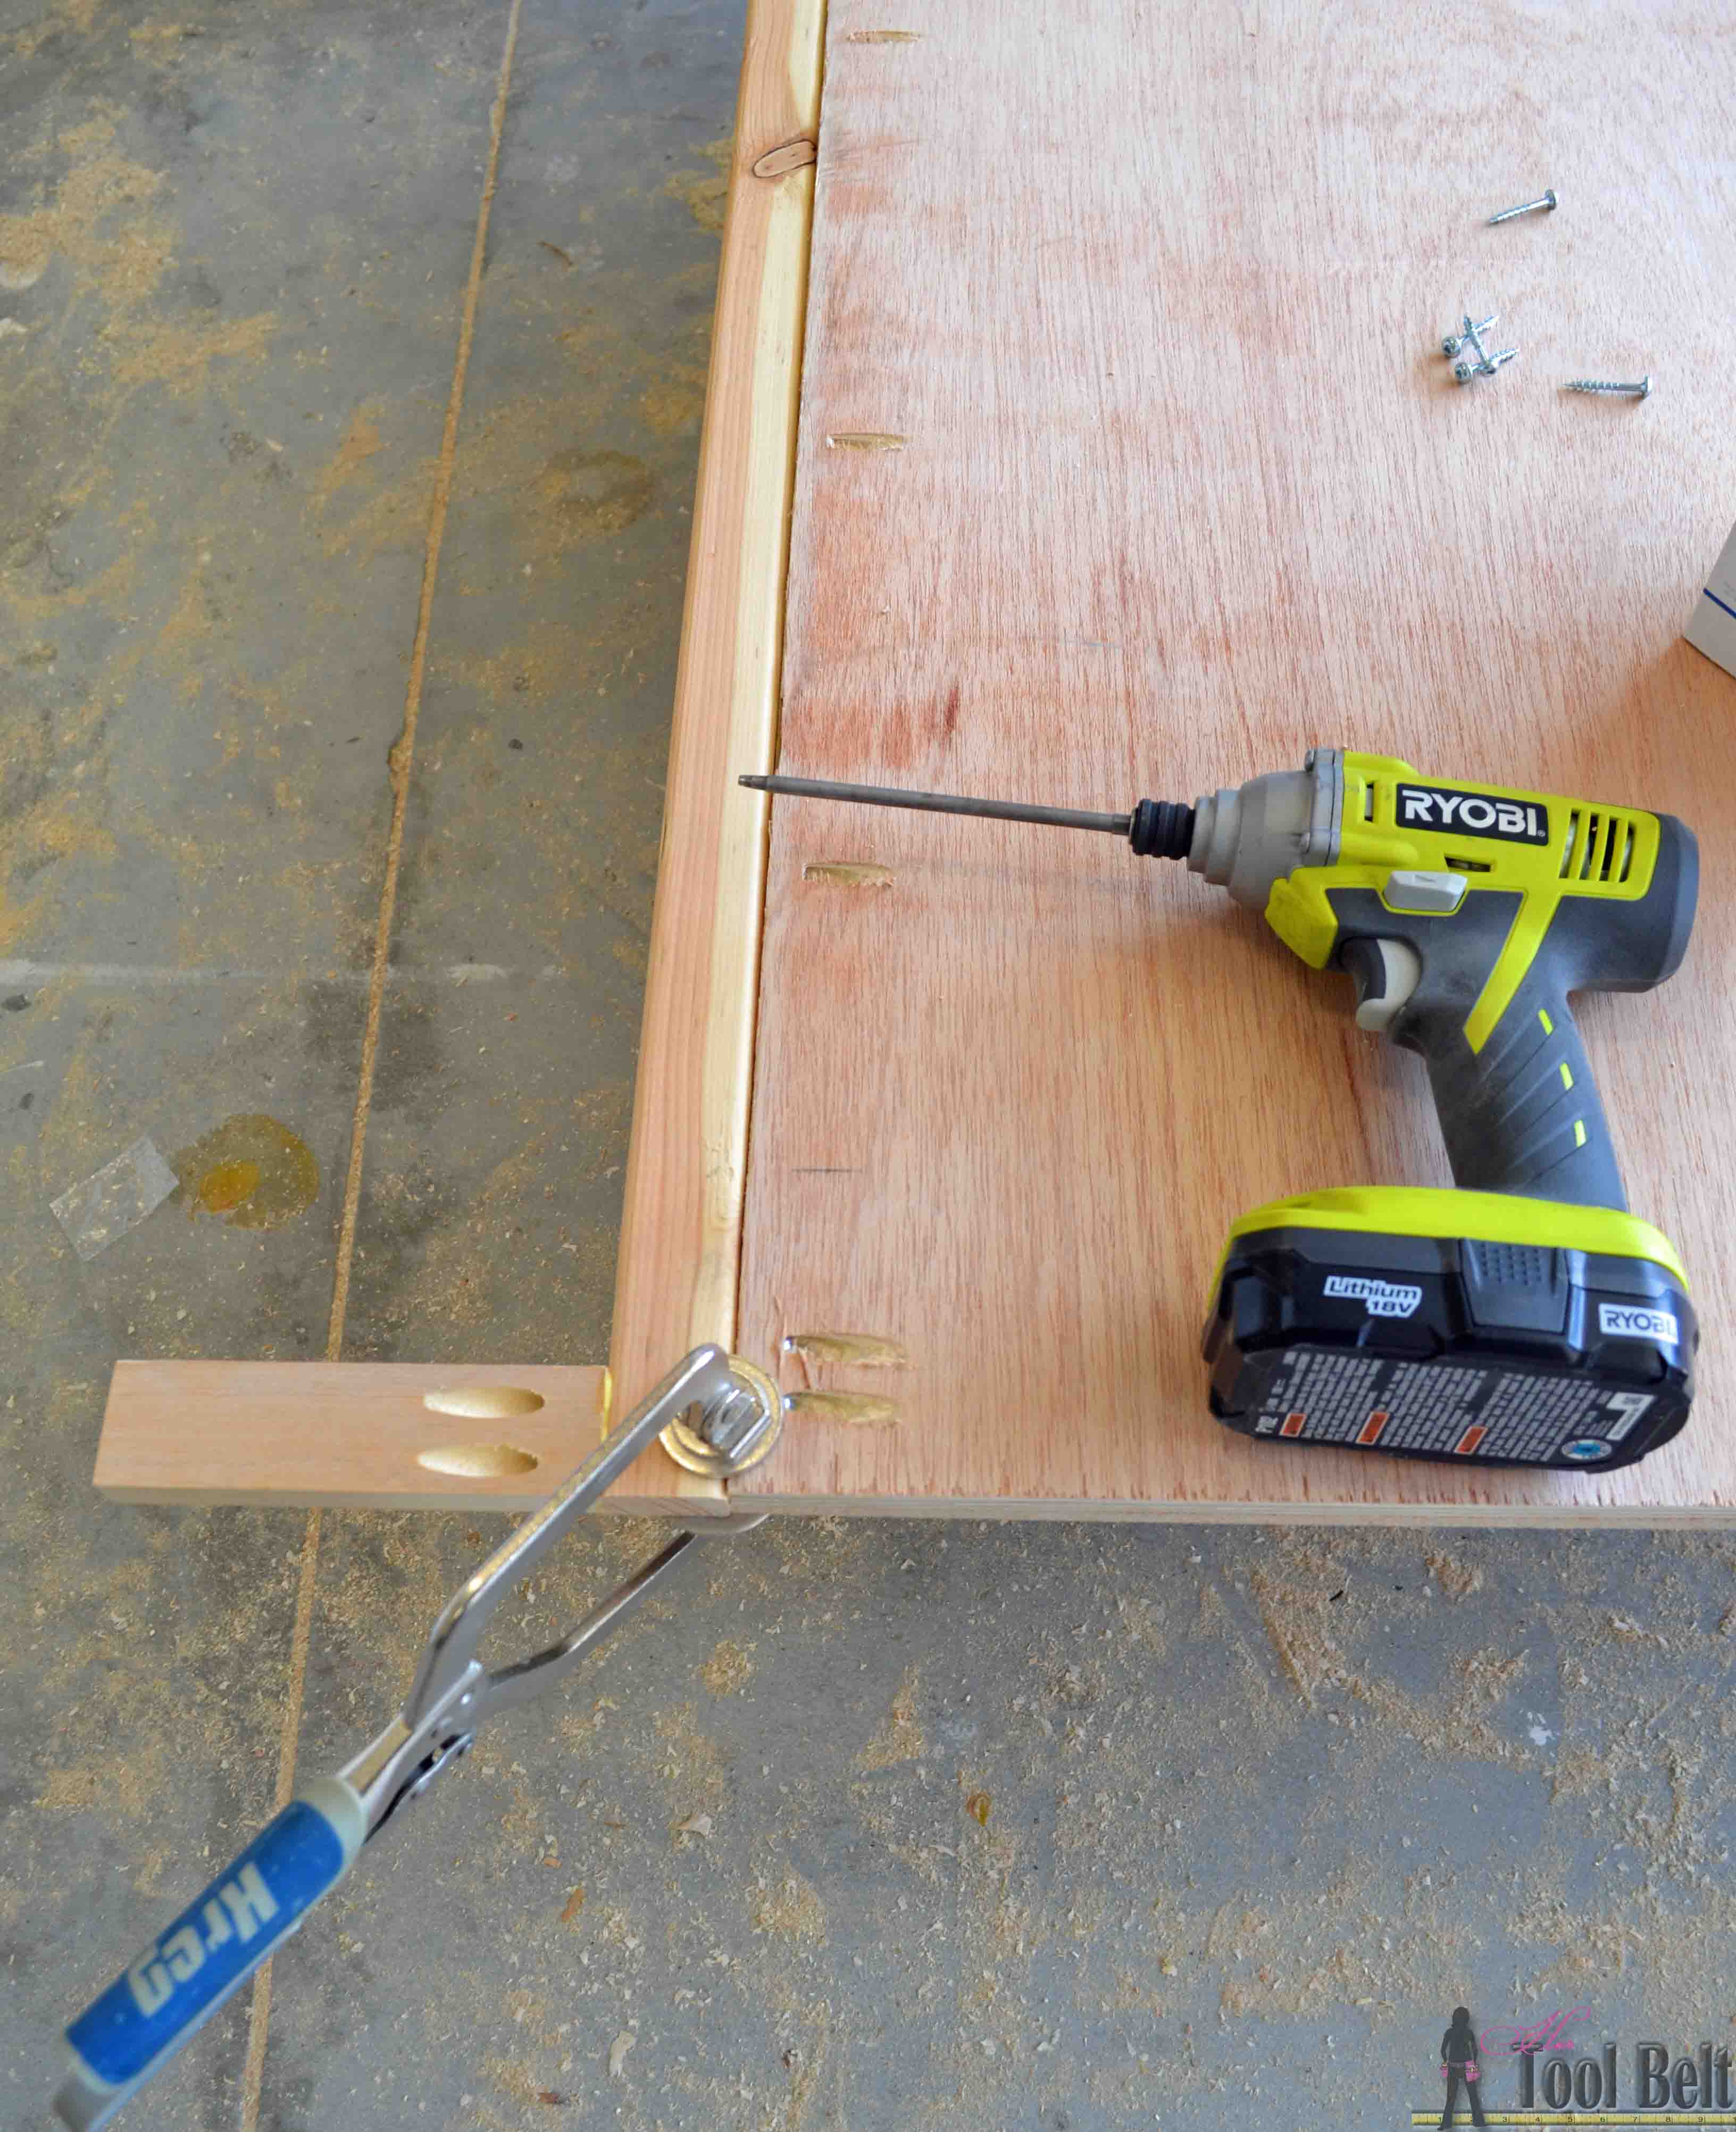
Step 2
Use a Kreg Jig® R3* to drill pocket holes along the bottom of the backside of the 1/2″ plywood. Drill pocket holes in the 6″ pieces. Use wood glue and pocket screws to assemble, 1 1/4″ screws with 3/4″ material, 1″ screws with 1/2″ material.
Step 3
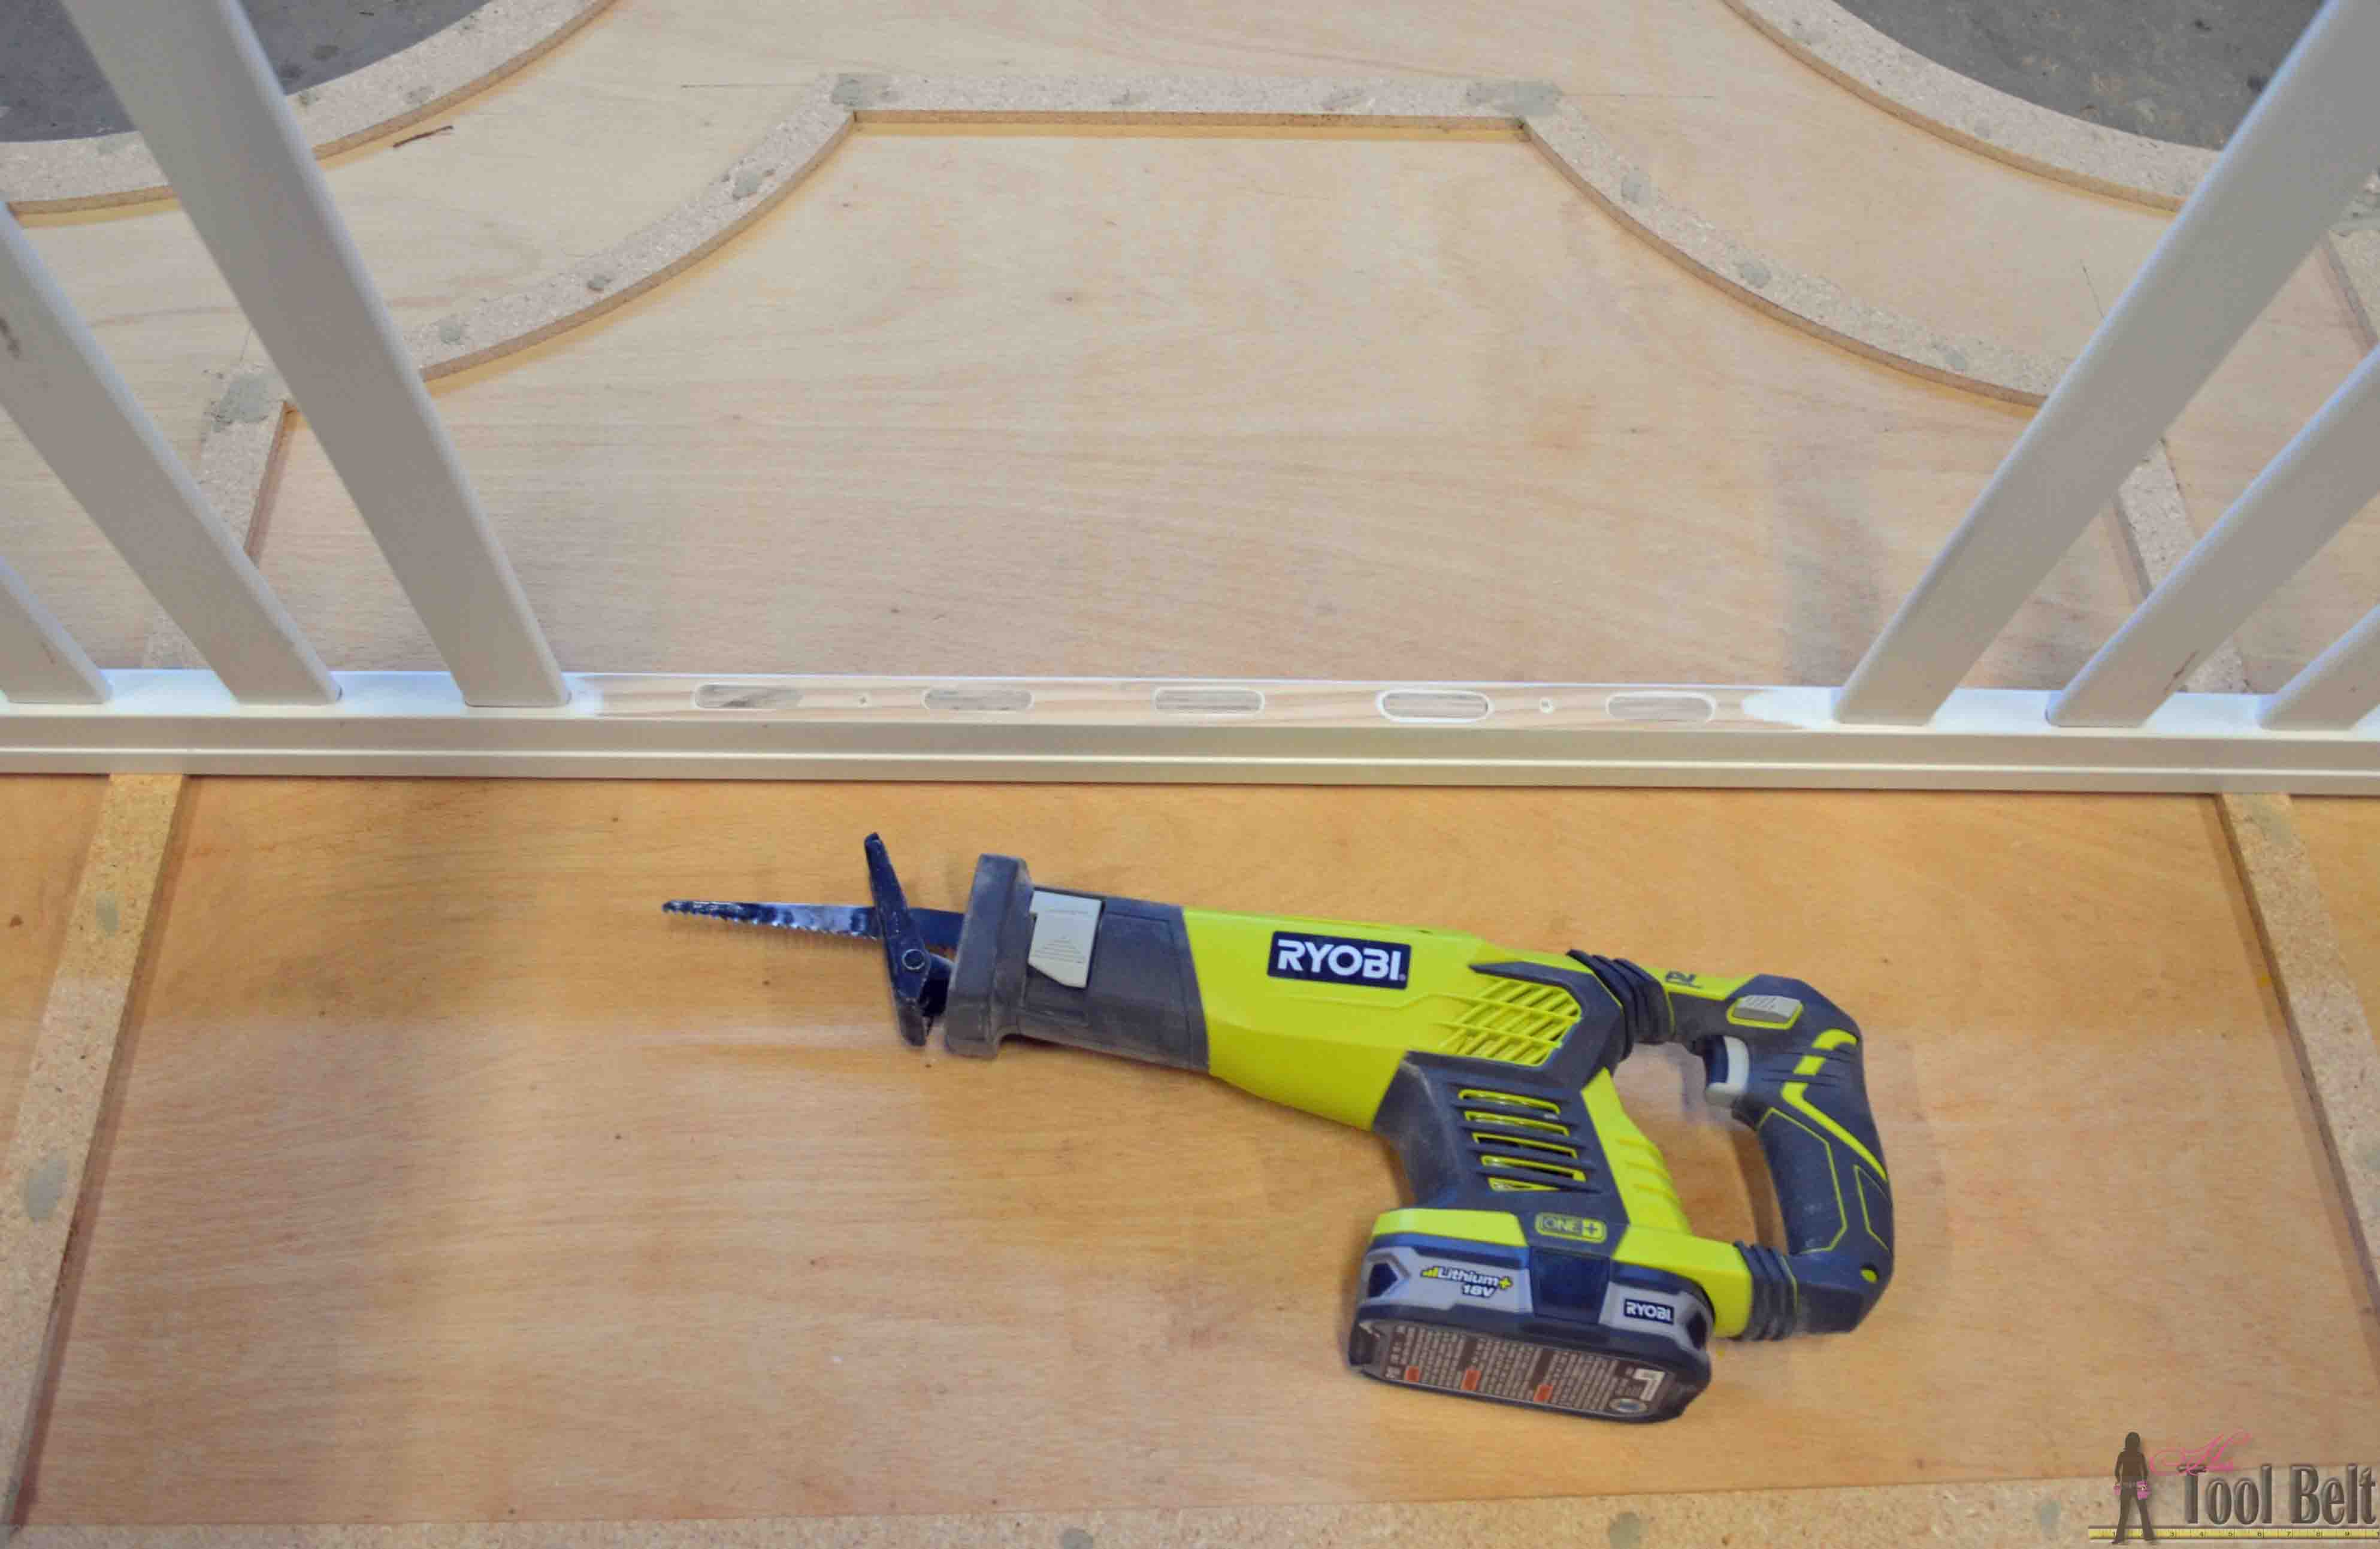
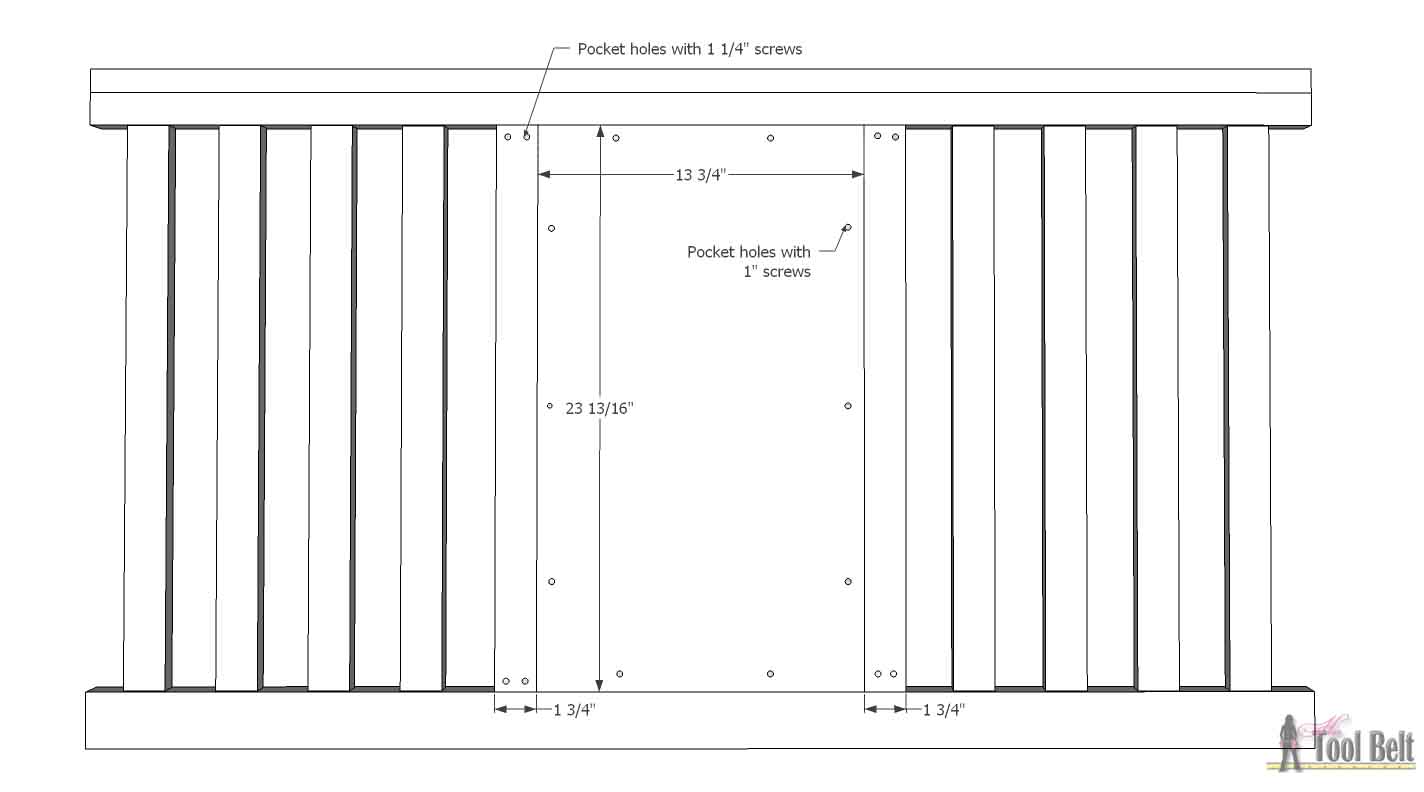
To add the front panel I cut out the middle 5 rails on the crib front, the Ryobi reciprocating saw worked great, then I sanded it smooth.
Drill pocket holes in the 1/2″ panel, all around the edges. 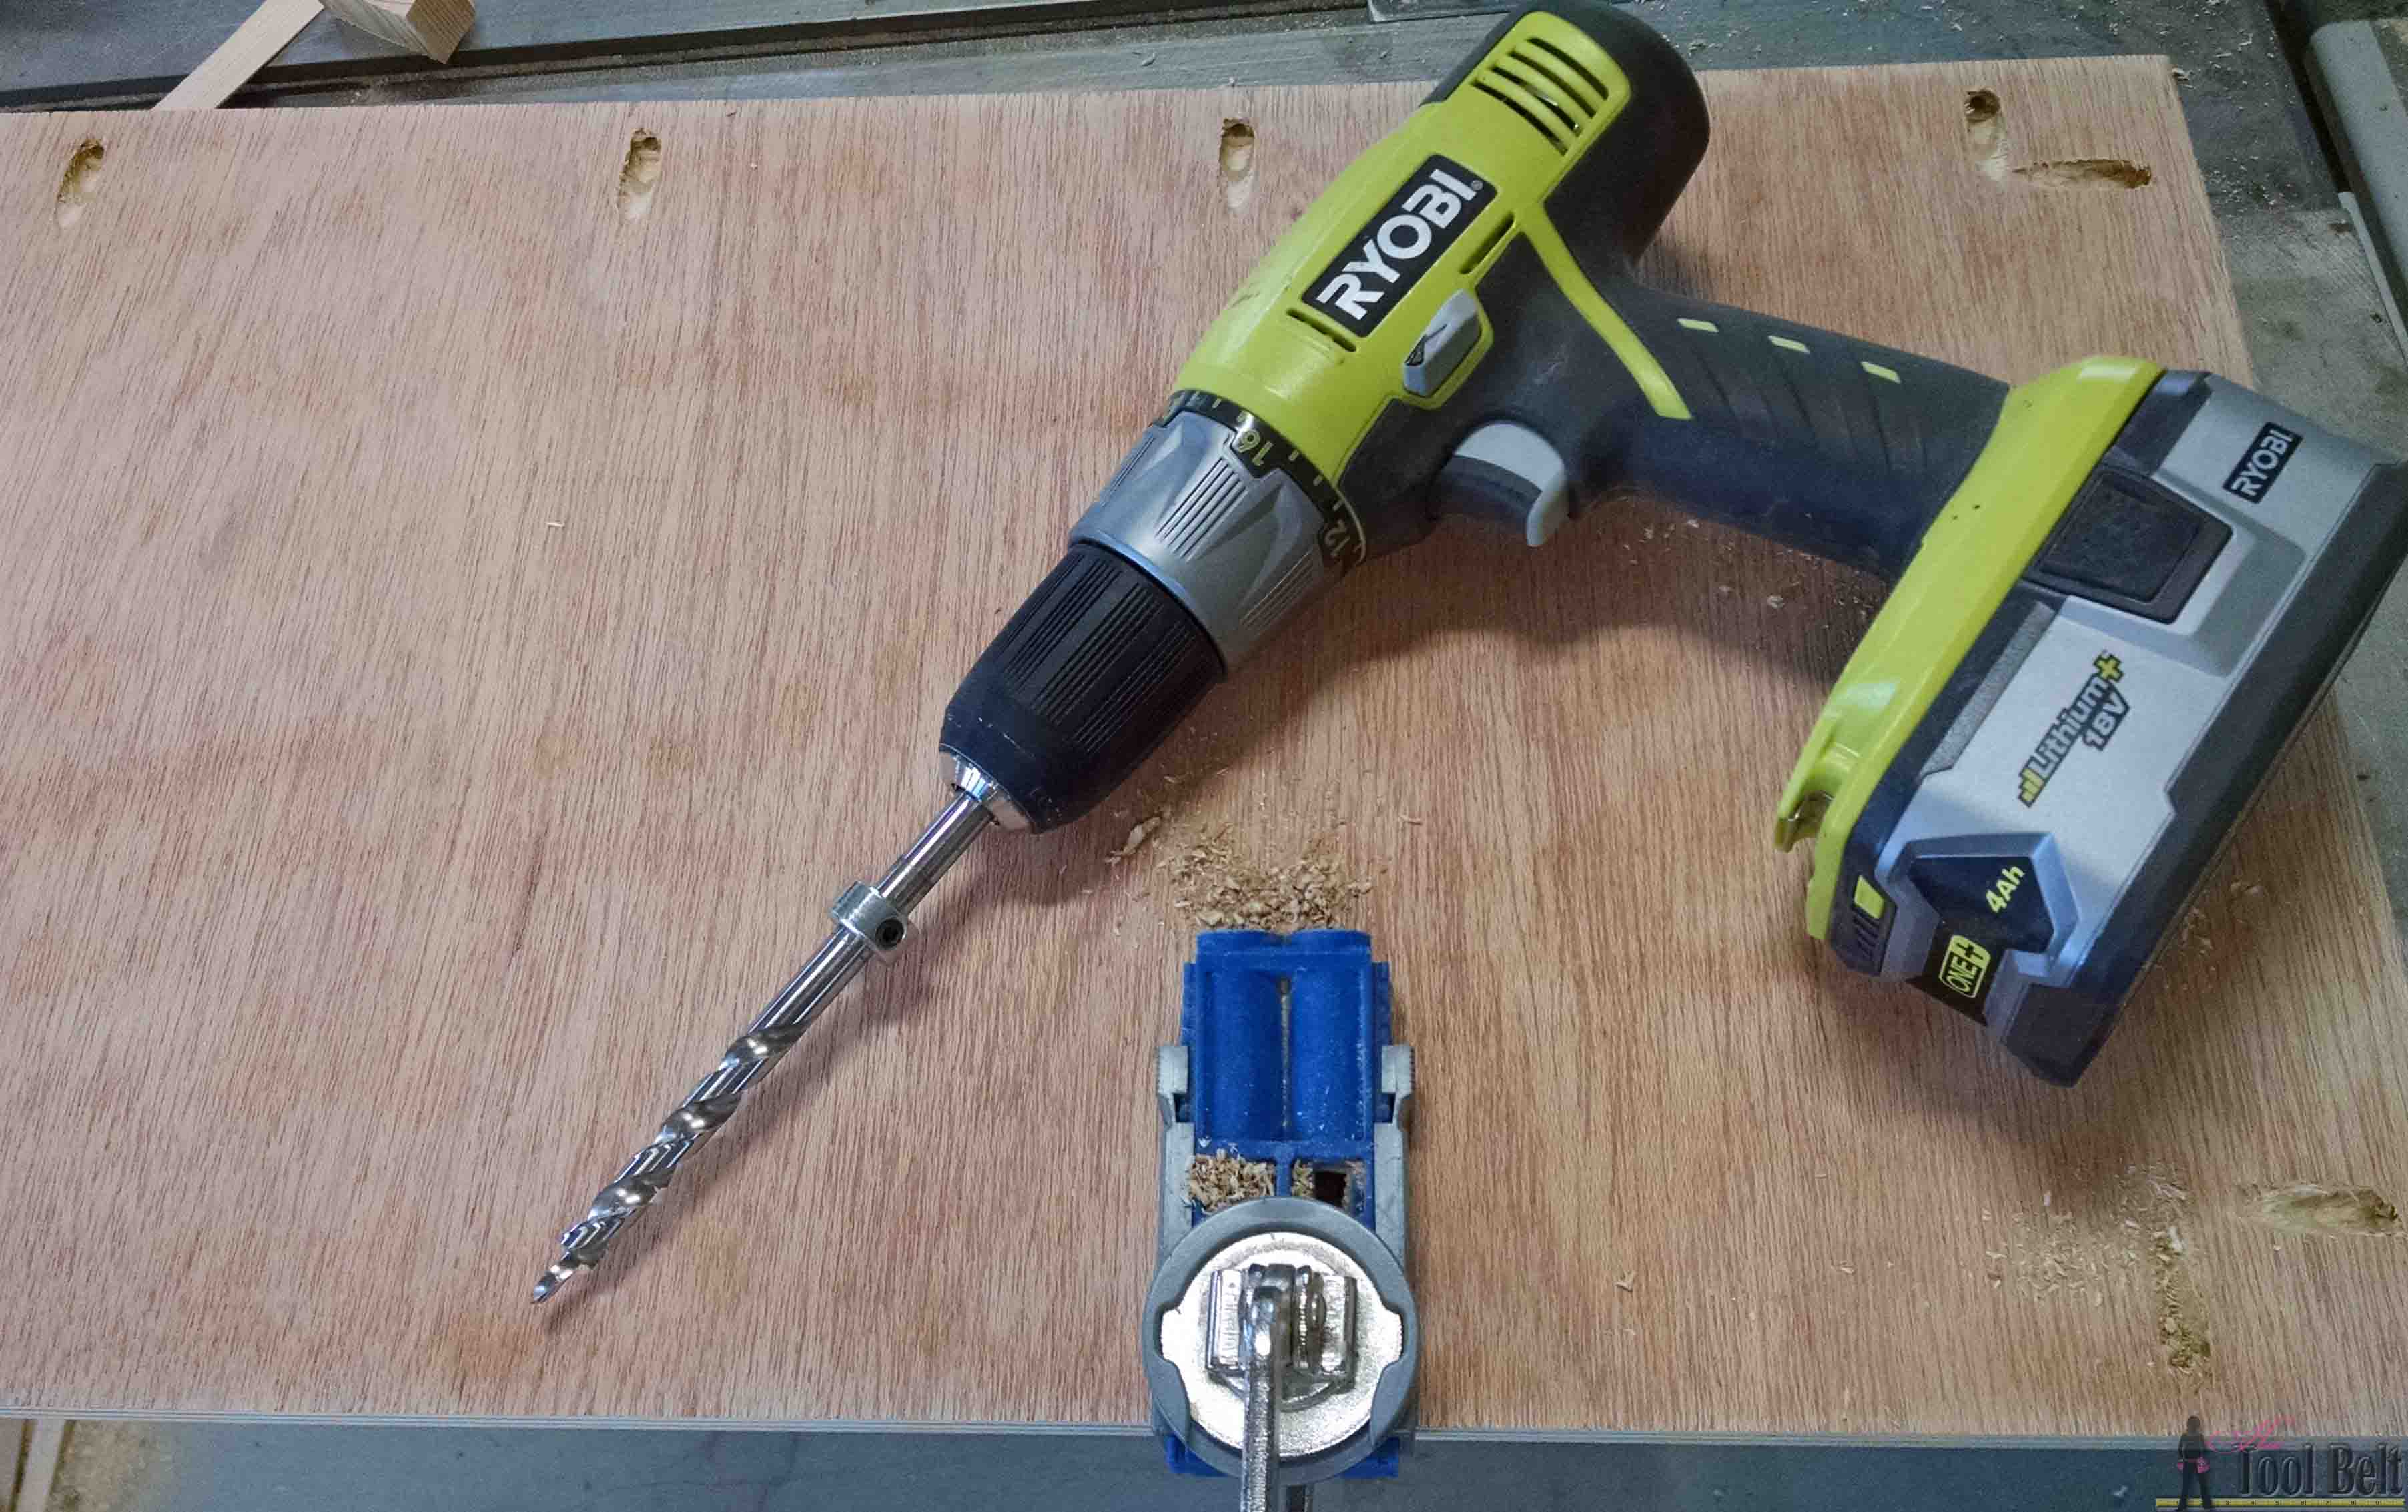
Drill pocket holes in the ends of the 1 3/4″ side pieces. Use wood glue and 1″ pocket screws to attach the panel to the sides. Make the panel and sides flush in the back. Use wood glue and 1 1/4″ or 1″ pocket screws to attach the panel in the crib front.
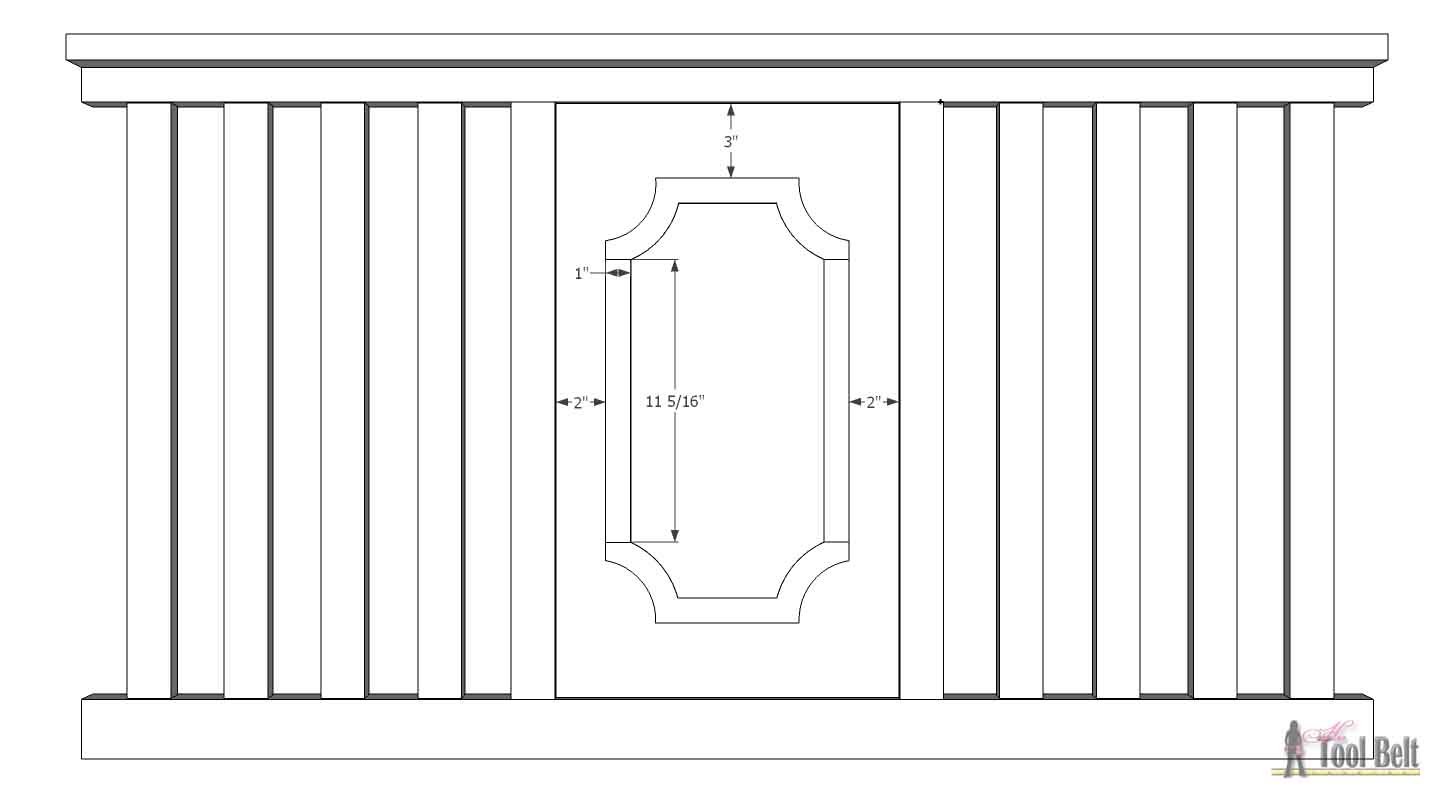
Download and print out (on 100% not ‘fit to page’) the middle curve and cut it out. middle Trace 2 of the middle curve pattern on 1/4″ or 3/8″ plywood/particle board/MDF. Cut out the pieces with a jig saw, scroll saw or band saw and lightly sand edges smooth. Use wood glue and 5/8″ brad nails to secure to the 1/2″ plywood.
Step 4
Drill holes in the back piece to match the holes from the original crib back.
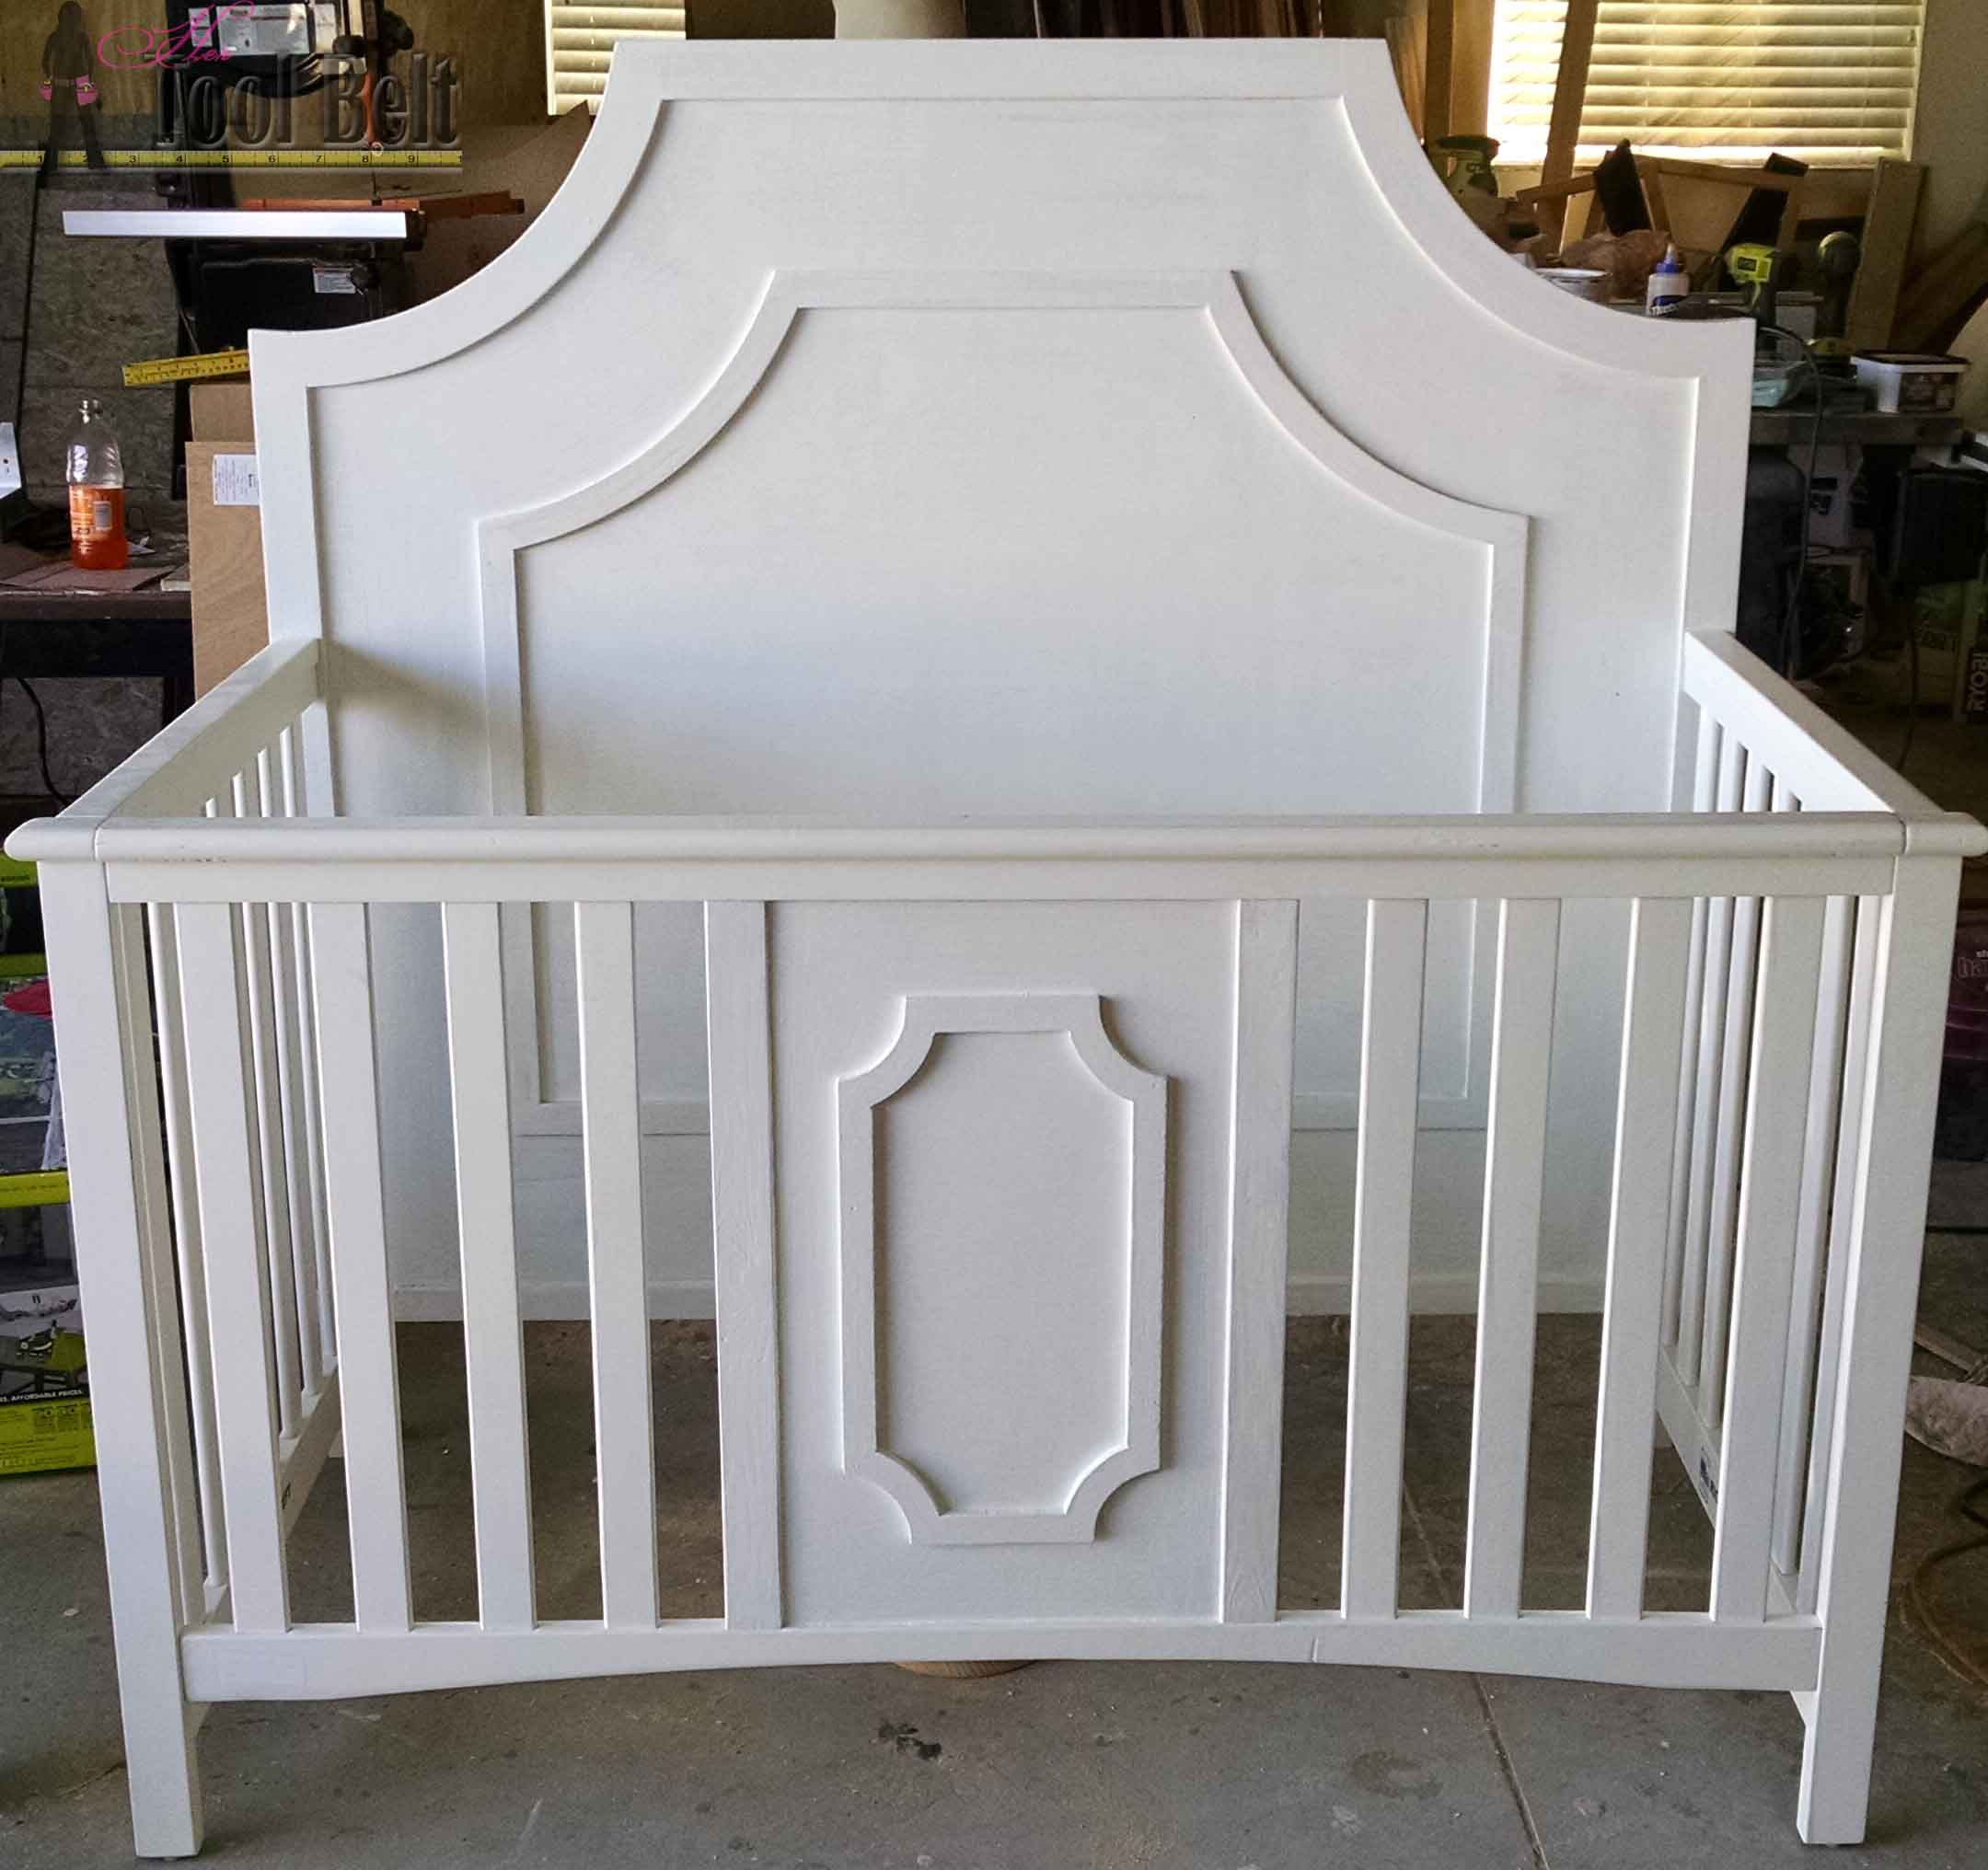
Apply wood filler to any cracks, blemishes and pocket holes as necessary, allow to dry. Sand the wood filler and the crib smooth, ending with 120-150 grit sand paper. Make sure the prime the crib pieces well, especially if you used mdf, let the primer dry. Paint the crib 1-2 coats of white paint, allow the paint to dry.
Here’s a view of the crib in all white.
 If you want to add a pop of color, paint the trim to match your bedding. For the Glamorous collection, the Glidden Pure Periwinkle is a very close match. You may want to add a top coat of polycrylic to protect the finish. Polycrylic is water based and dries clear (unlike polyurethane).
Download and print Plans
DIY Glamorous Crib Plans
Pin it:

Linked to: Link Parties, savvy southern style, homestoriesAtoZ, remodelaholic
Beautiful! You amaze me!
um, yep. that is awesome.
b
You know I love a great repurpose/revamp Amy this is just Awesome!!! You really are the coolest, and I have got to learn how you share your templates…I am so not techy! Love it!
Thanks Mindi, I probably don’t create templates the most efficient way…but it works most of the time.
Oh Amy this is gorgeous!! I thought there was no way you transformed that crib you showed at the beginning!!! LOL!! Awesome as usual!! You just keep inspiring me!!!
Thanks Cara!
Such a nice cribs,congratulation,because i think tat you have to be quite skillfull tofinished such a beautiful crib project.
Hello! I was wondering where you found the spring base? I cannot find one anywhere! I might be using the wrong terminology. Could you help?
I did a quick search and am having a hard time finding one too. I bought one years ago from Rockler, but that was before all the safety changes with cribs.