The Tile Boot Tray with Dremel tool review is sponsored by The Home Depot. I have been compensated for my time and provided with product (tools). Jeffrey Court provided the tile. All ideas and opinions are my own. This post contains some affiliate links for your convenience. Click here to read my full disclosure policy.
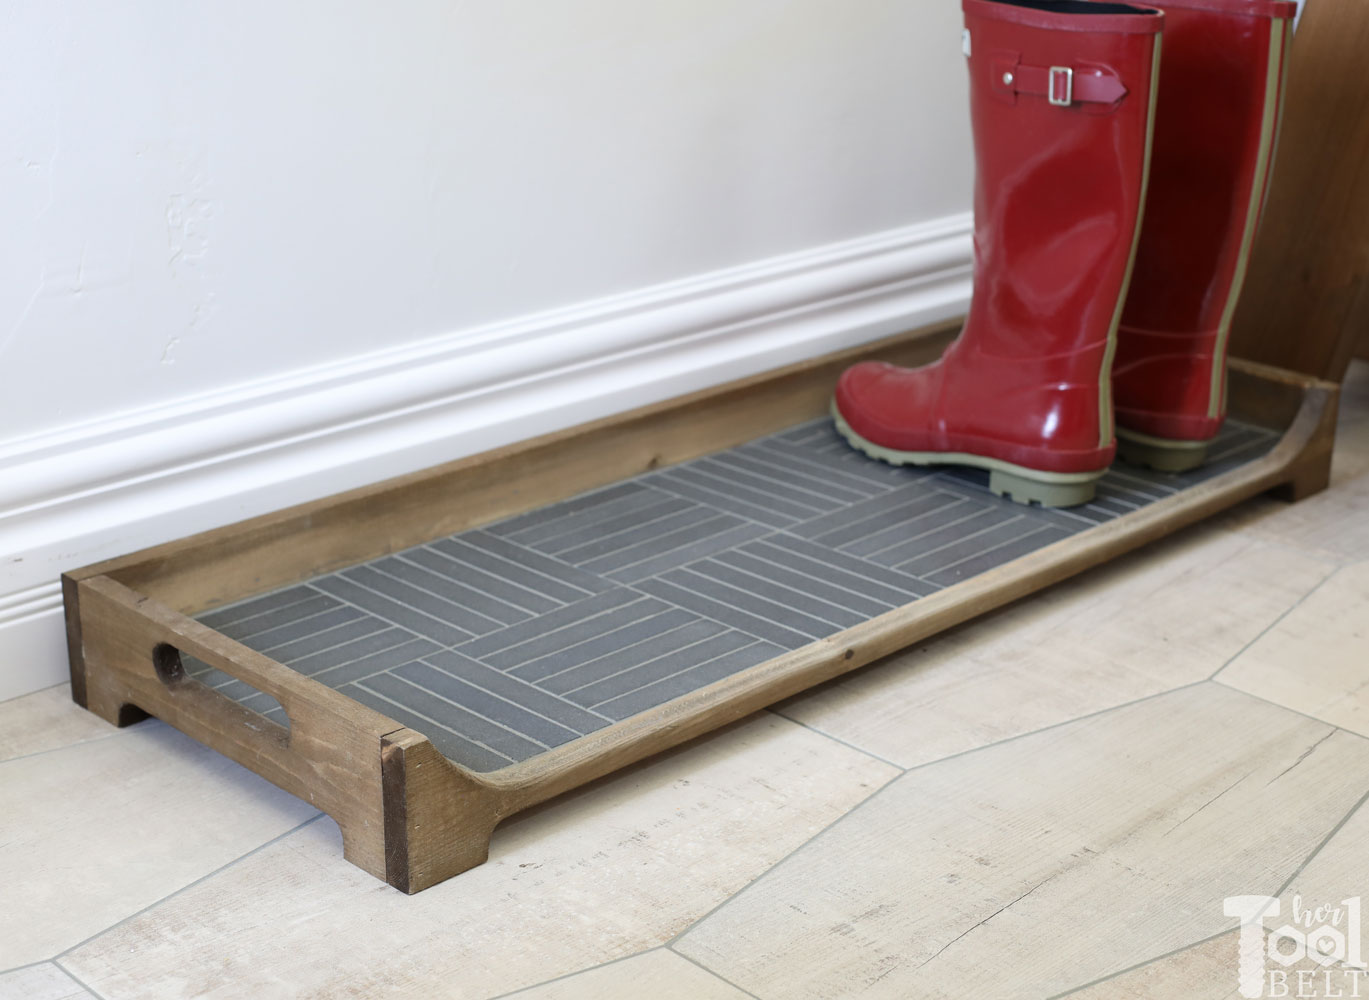
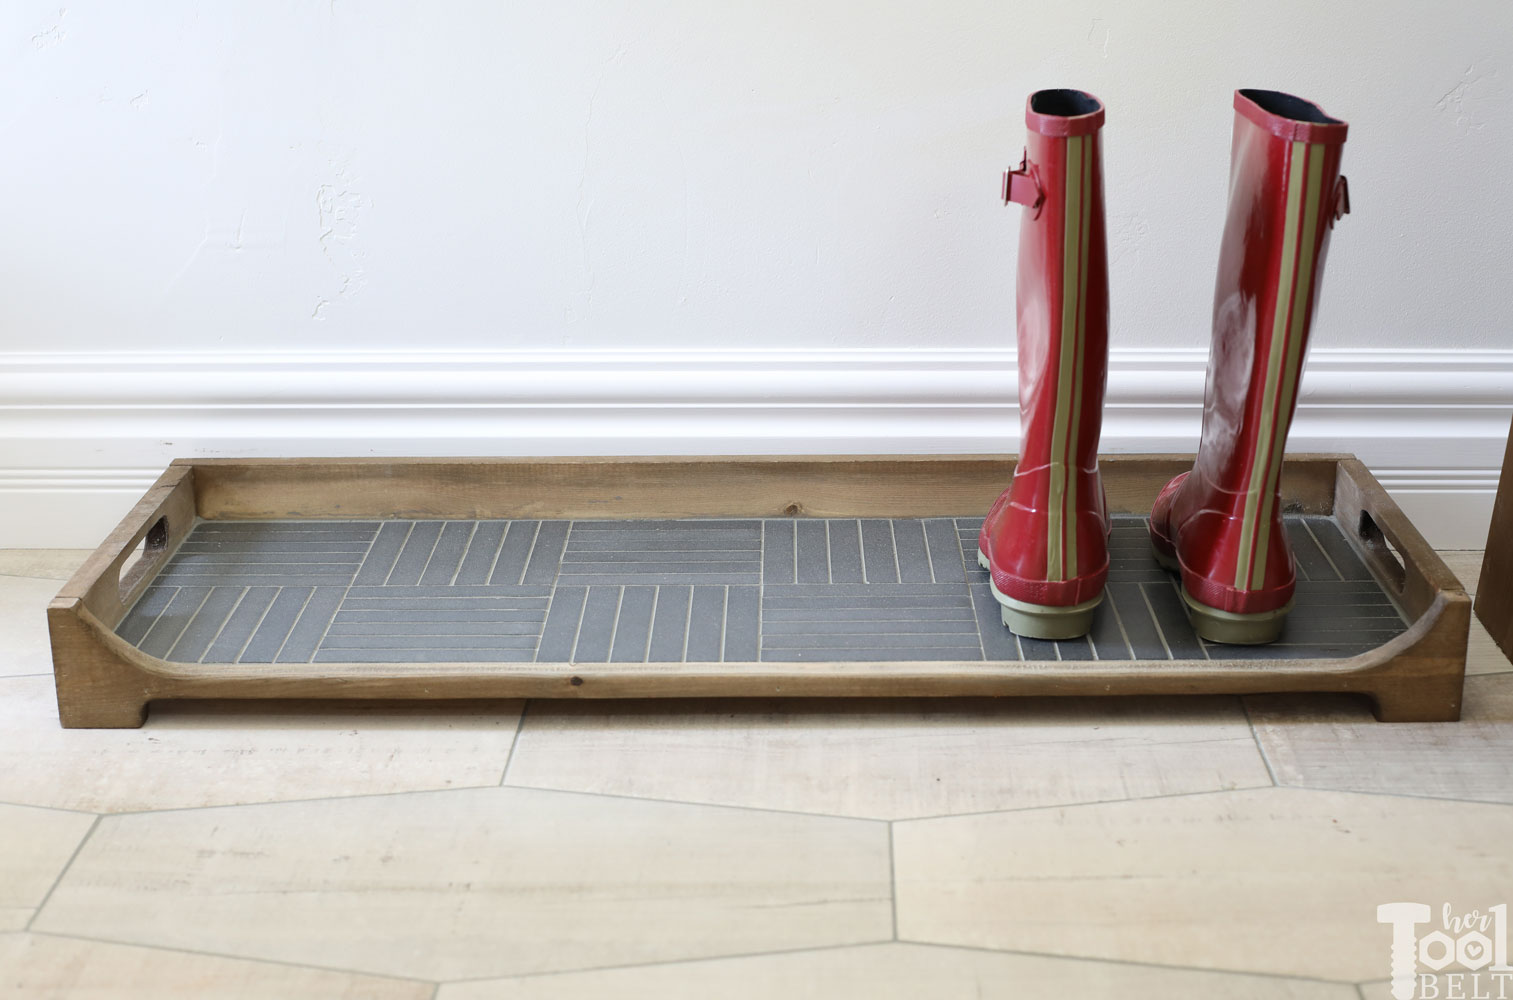
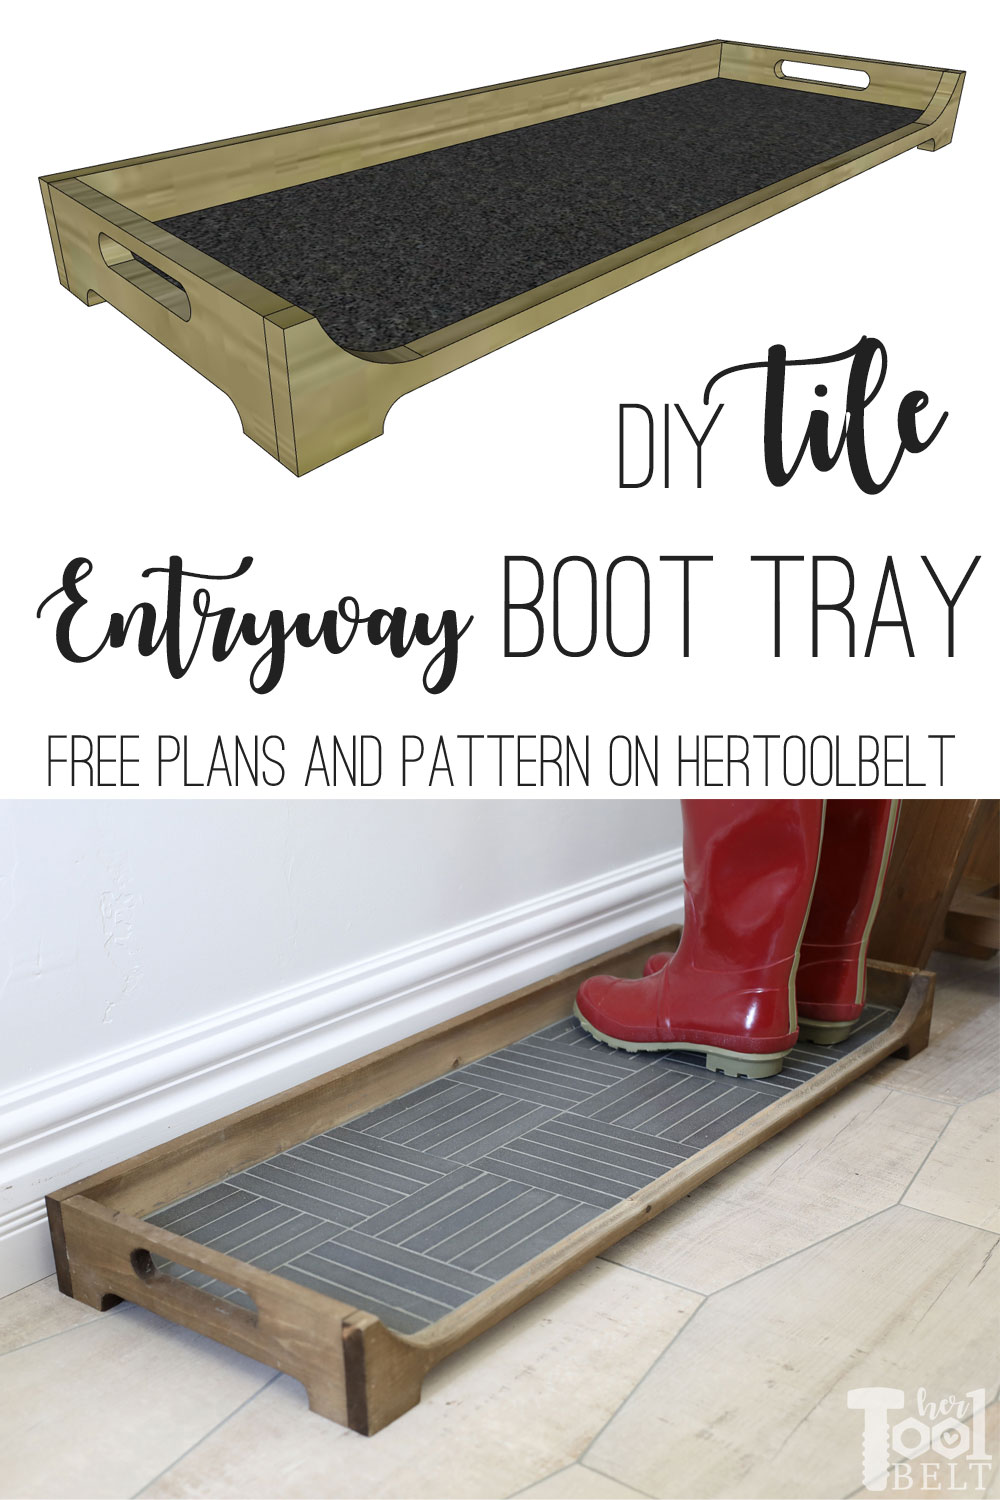
I have been working on remodeling my entryway – you can check it out here. To accomplish the look I wanted, I had to remove the only coat closet in the house (it was small and awkward so I won’t miss it.) To give a place for guests to hang their coats and drop their shoes, I made a coat rack and a boot tray. The boot tray is inspired by a cute one from LL Bean with a few mods. For the main surface of the boot tray I used Hudson Basalt mosaic tile, it’s in a parquet pattern that reminds me of the home I grew up in!
How to Build a DIY Tile Boot Tray
Materials Used
- 2 – 1×4 x 8′ (actually 3/4″ x 3 1/2″)
- 1 – 1/2″ x 12″ x 36″ piece of plywood
- 3 – 12″ square pieces of tile mosaic (tile is optional or can be replaced with pebbles)
- Tile adhesive (if using tile)
- Tile grout (if using tile) – I used natural gray
- sandpaper
- 2″ brad nails
- wood glue
- stain – I used Rustoleum brown accelerator
Tool Used
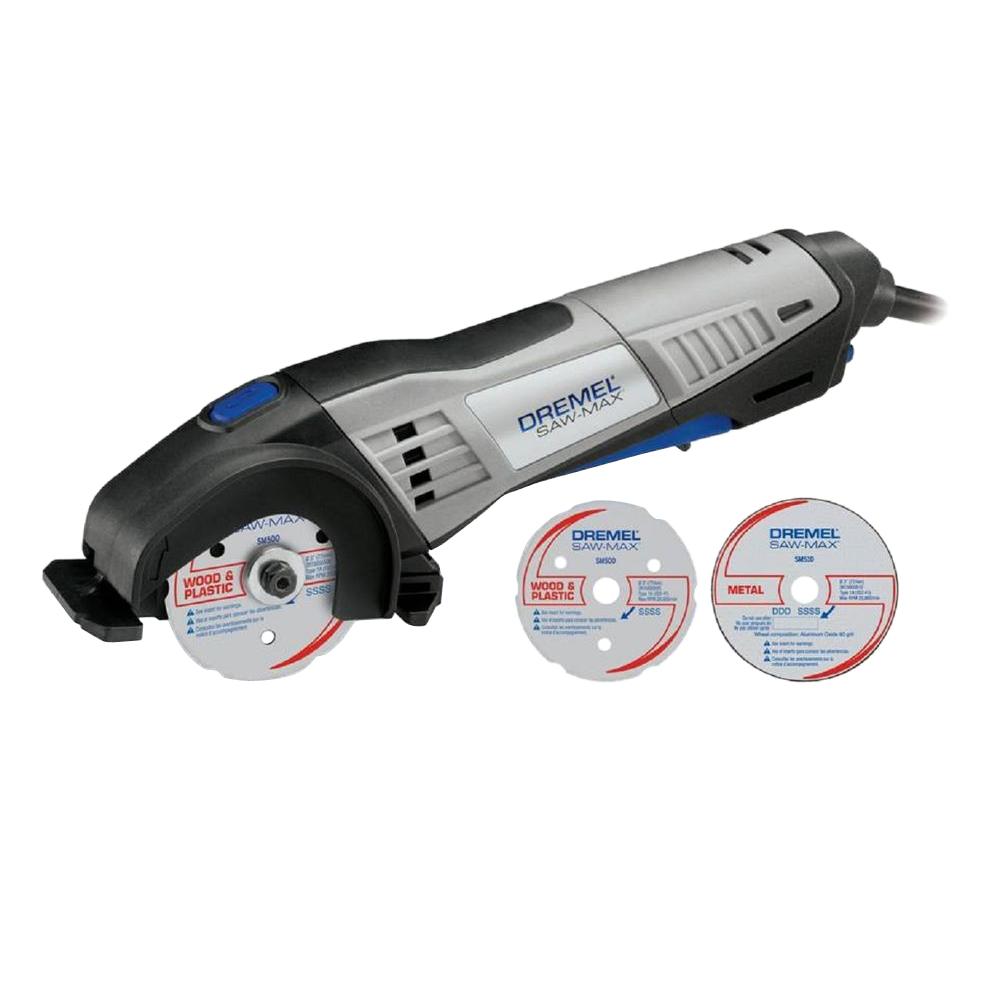
- Dremel Saw Max and speed square
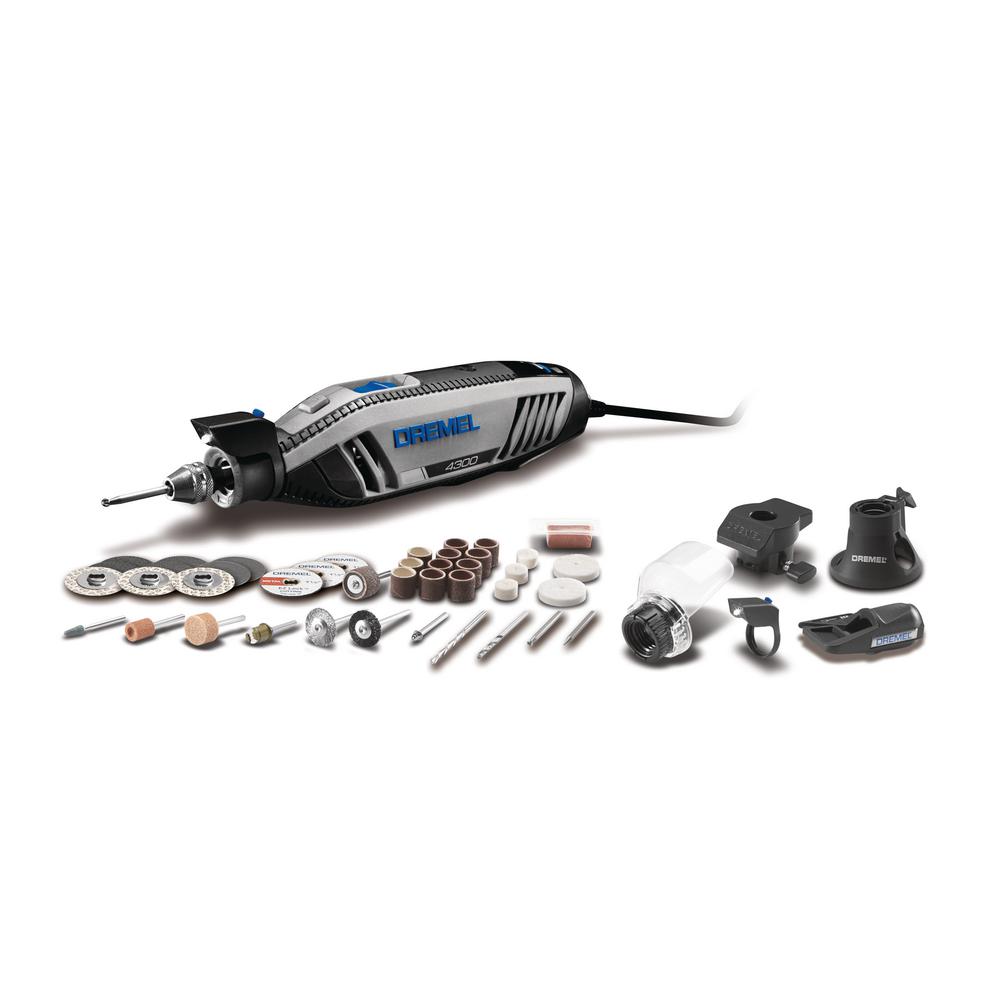
- Dremel 4300 or Dremel 8220 (battery) and flex shaft
- V-notch trowel for tile
- Grout Float for tile
- Brad Nailer
- Tape Measure
 |
 |
 |
 |
 |
 |
 |
 |
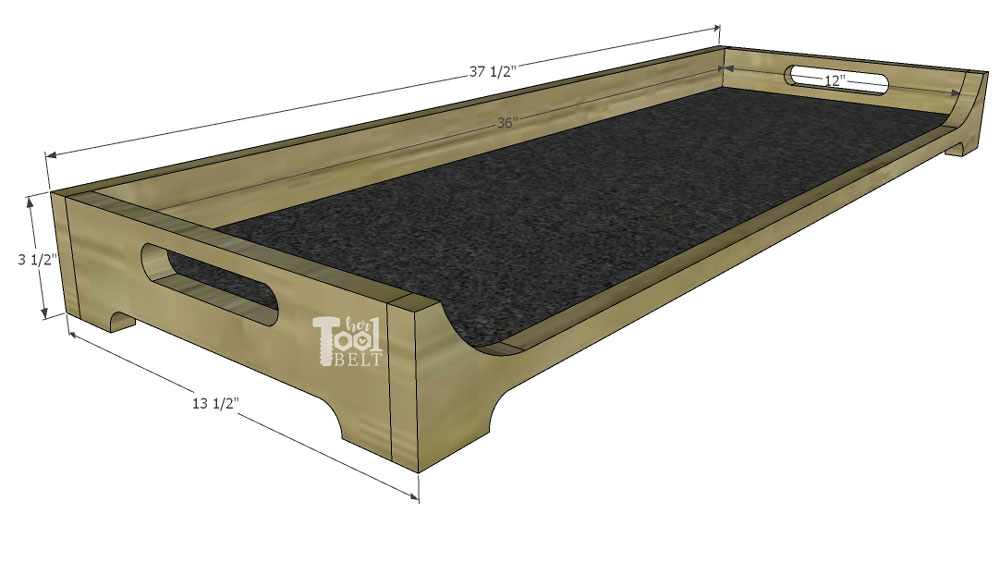
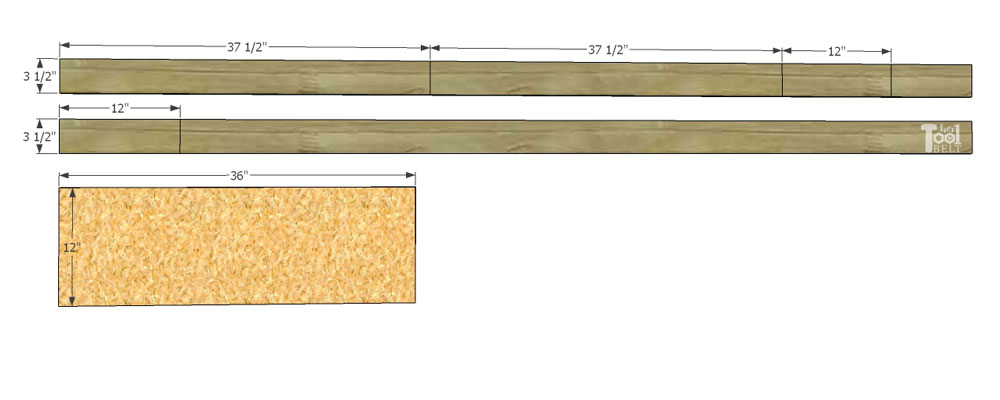
Cut List
- 1 – 1/2″ x 12″ x 36″ plywood
- 2 – 3/4″ x 3 1/2″ x 37 1/2″ (1×4)
- 2 – 3/4″ x 3 1/2″ x 12″ (1×4)
- Download pattern for front/back/side pieces here.
Cut Diagram
Tool Review
During this boot tray build I’ll be reviewing a variety of Dremel products. I just wanted to show that with this project and many others, there are a variety of tools that will do the job. A lot of people have a rotary tool around and it’s uses are vast.
I have used the rotary tool often for engraving wood, glass, eggs 🙂 etc.
 The Dremel 4300 is a great corded model. It is ideal for cutting, sanding, grinding, drilling, carving, or my brother in law uses his to clean up motorcycle parts :-). The 4300 is Dremel’s most powerful 1.8 Amp motor for maximum performance and it includes an array of accessories including removable pivot light.
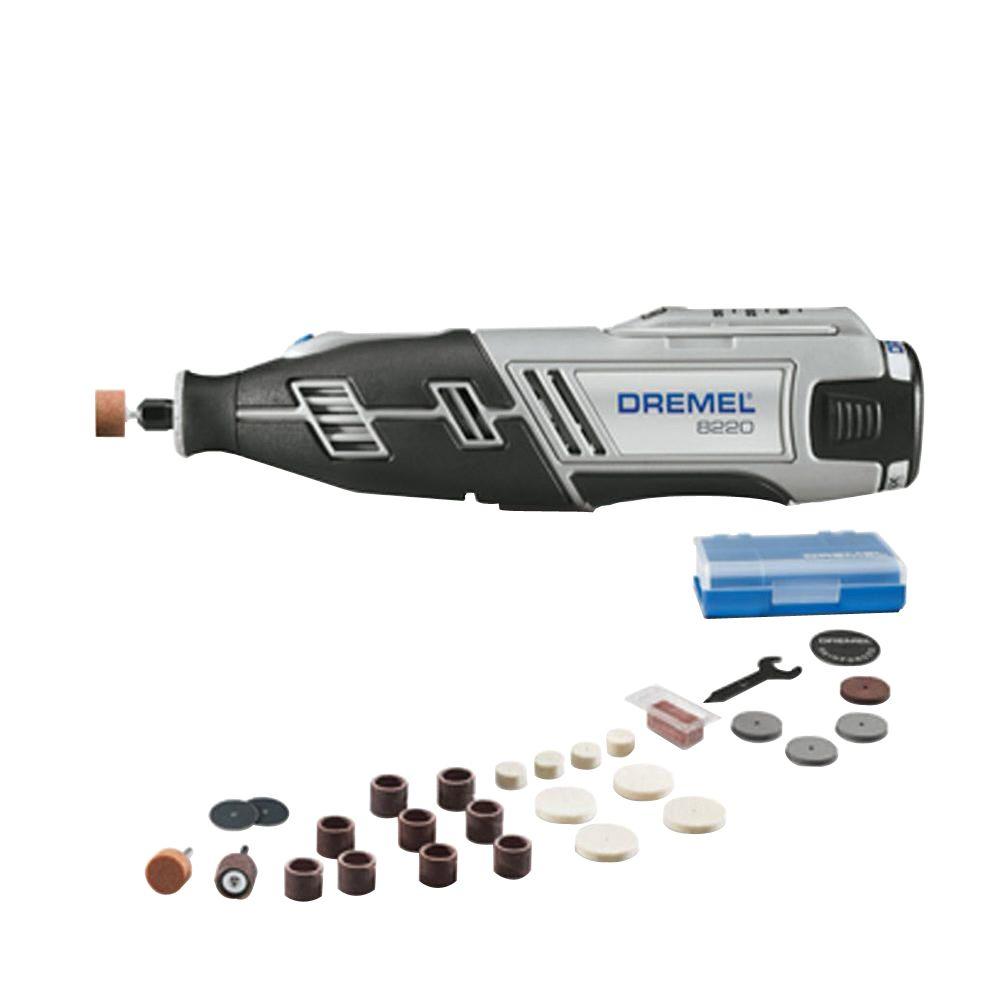
Don’t want to be tied to the cord, I definitely can relate. Dremel has a 12 volt 8220 that is perfect for use on the go and in hard-to-reach places. The 8220 includes tool, 30 accessories, battery, charger and carrying case.
But the beauty of the Dremel rotary tool is that there are so many attachments, to turn the tool into so much more.
- Flex shaft – gives you finer mobility and comfort grip. The cord can bend up to 5″.
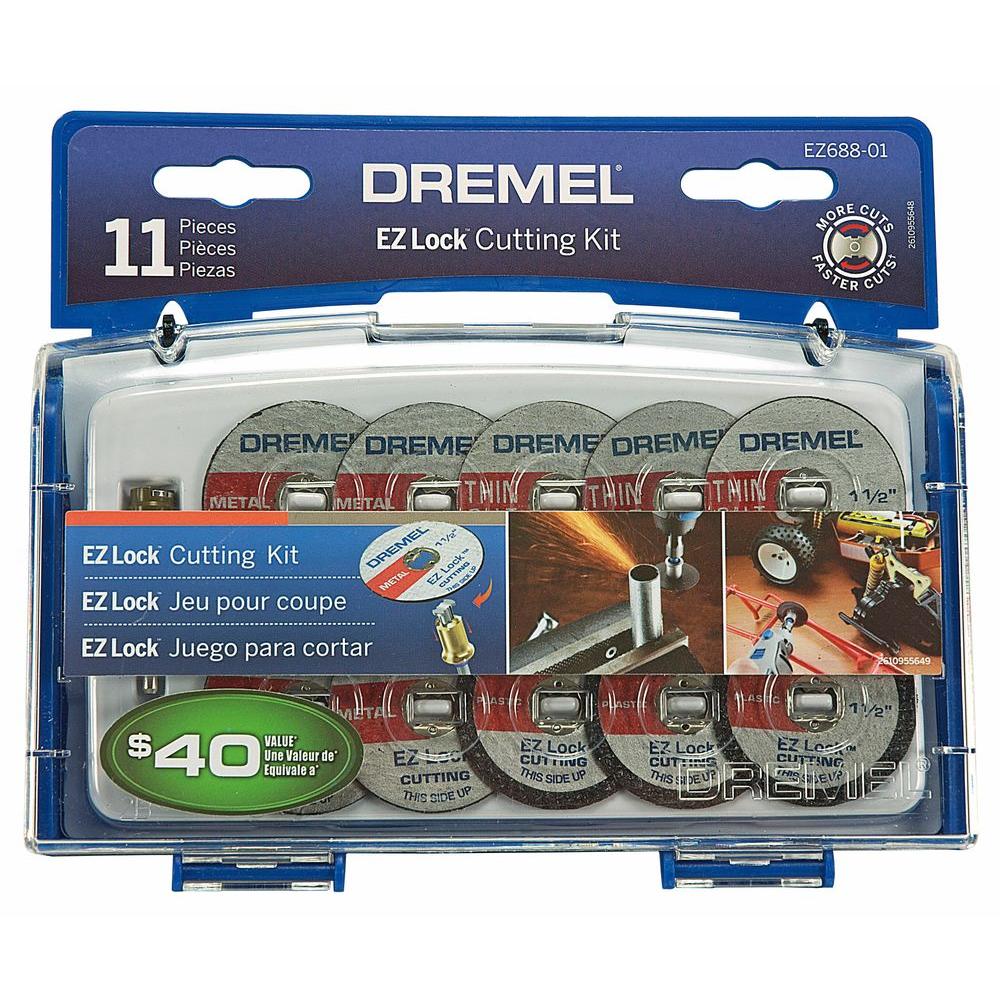
- Metal and plastic cutting kit – includes 1 mandrel and 10 wheels
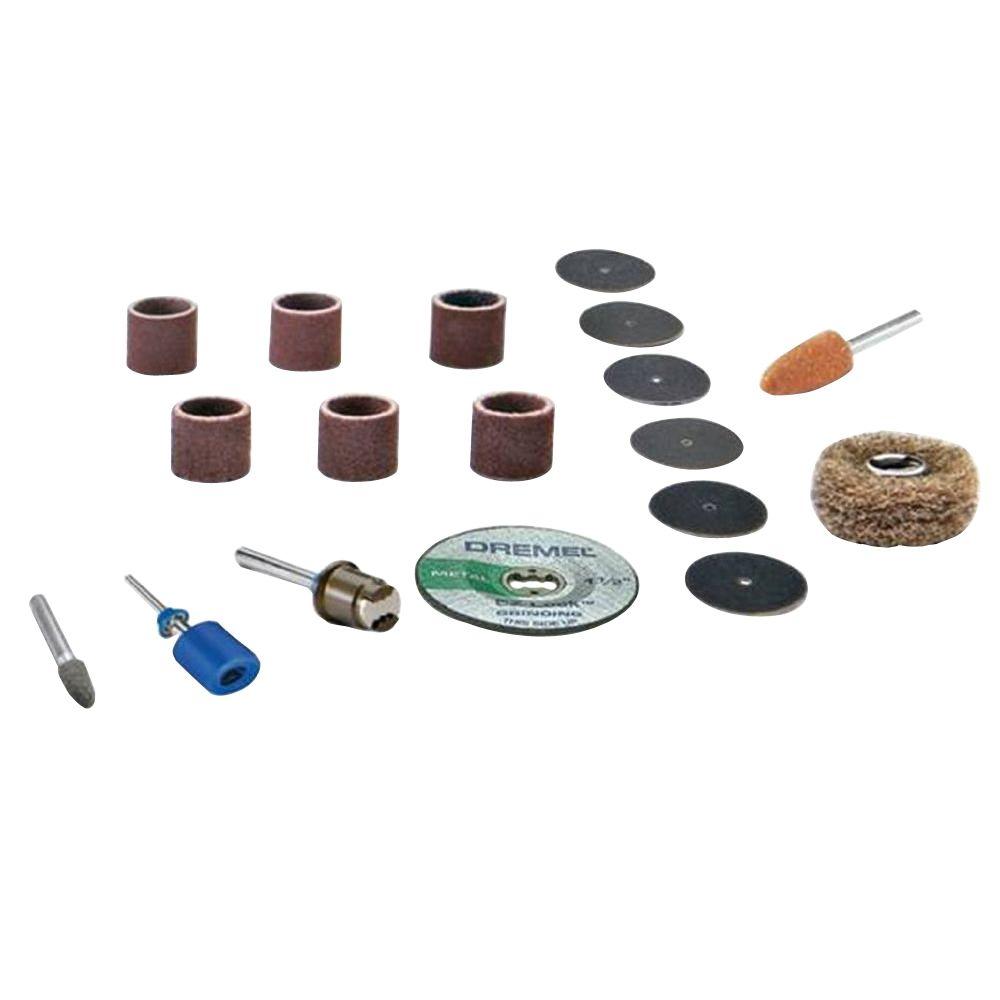
- Sanding and grinding kit – includes 2 mandrels, 6 sanding discs, 2 grinding stones, and more
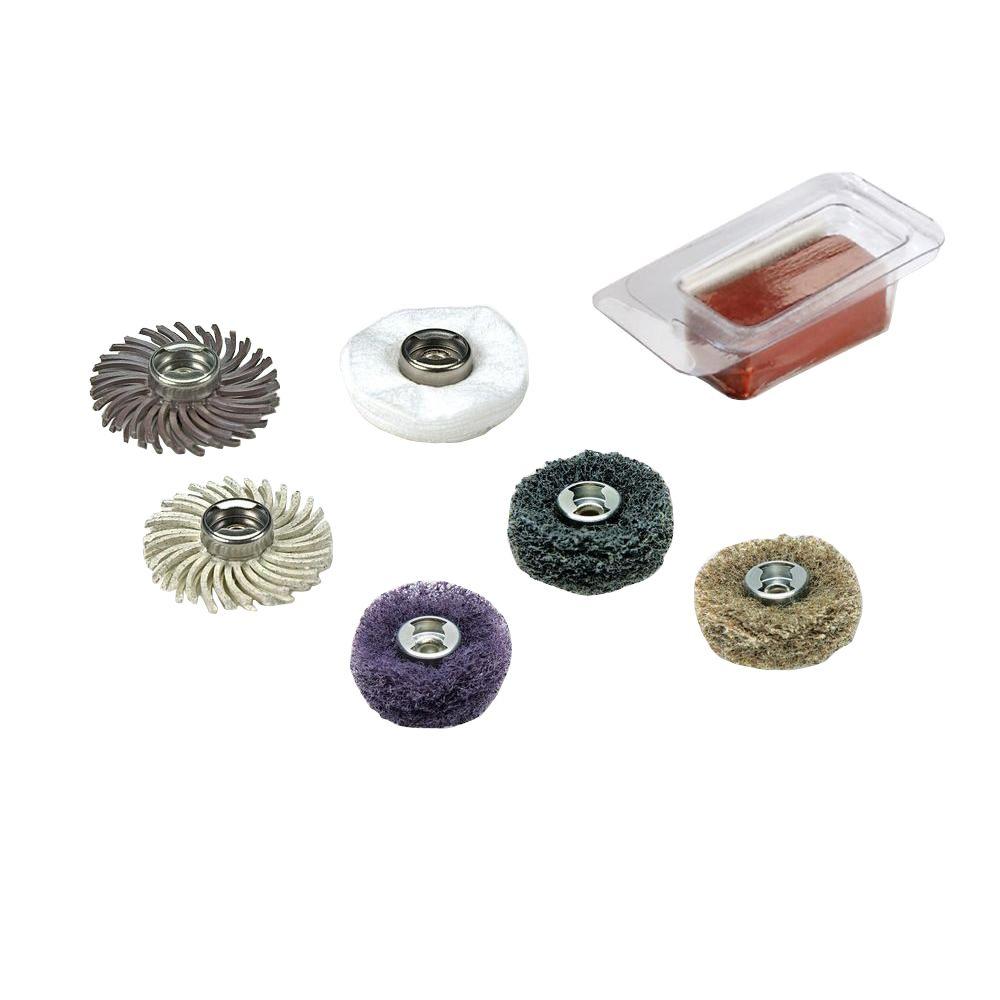
- Sanding and polishing kit – includes 7 EZ Lock sanding and polishing accessories. Helps you clean, polish, smooth or restore materials.
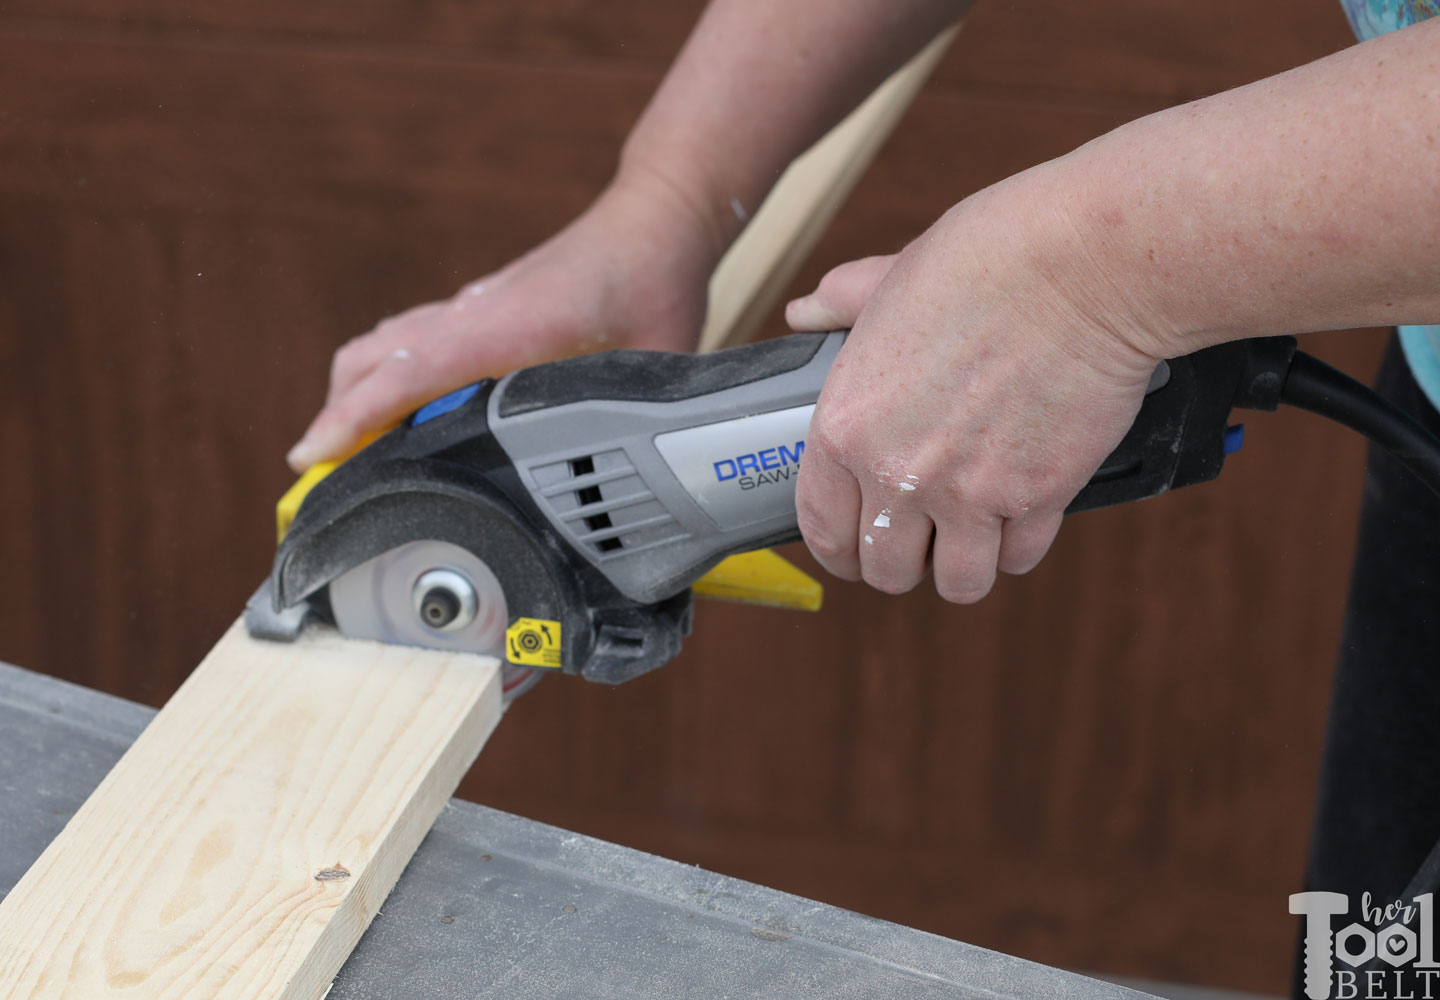
The Dremel Saw Max is a convenient saw for cutting materials 3/4″ thick or less. Use it with a straight edge and it works like a circular saw for ripping down material. There are 3 blade options, wood/plastic, metal and tile (not included). The saw base also makes it easy to make plunge cuts.
Step 1 – Cut plywood and Attach Tile
Cut the 1/2″ plywood piece to 12″ x 36″. This is great project to use up scrap plywood, if you have scrap 3/4″ plywood, that will work fine too, just make the front piece line 1/4″ thicker.
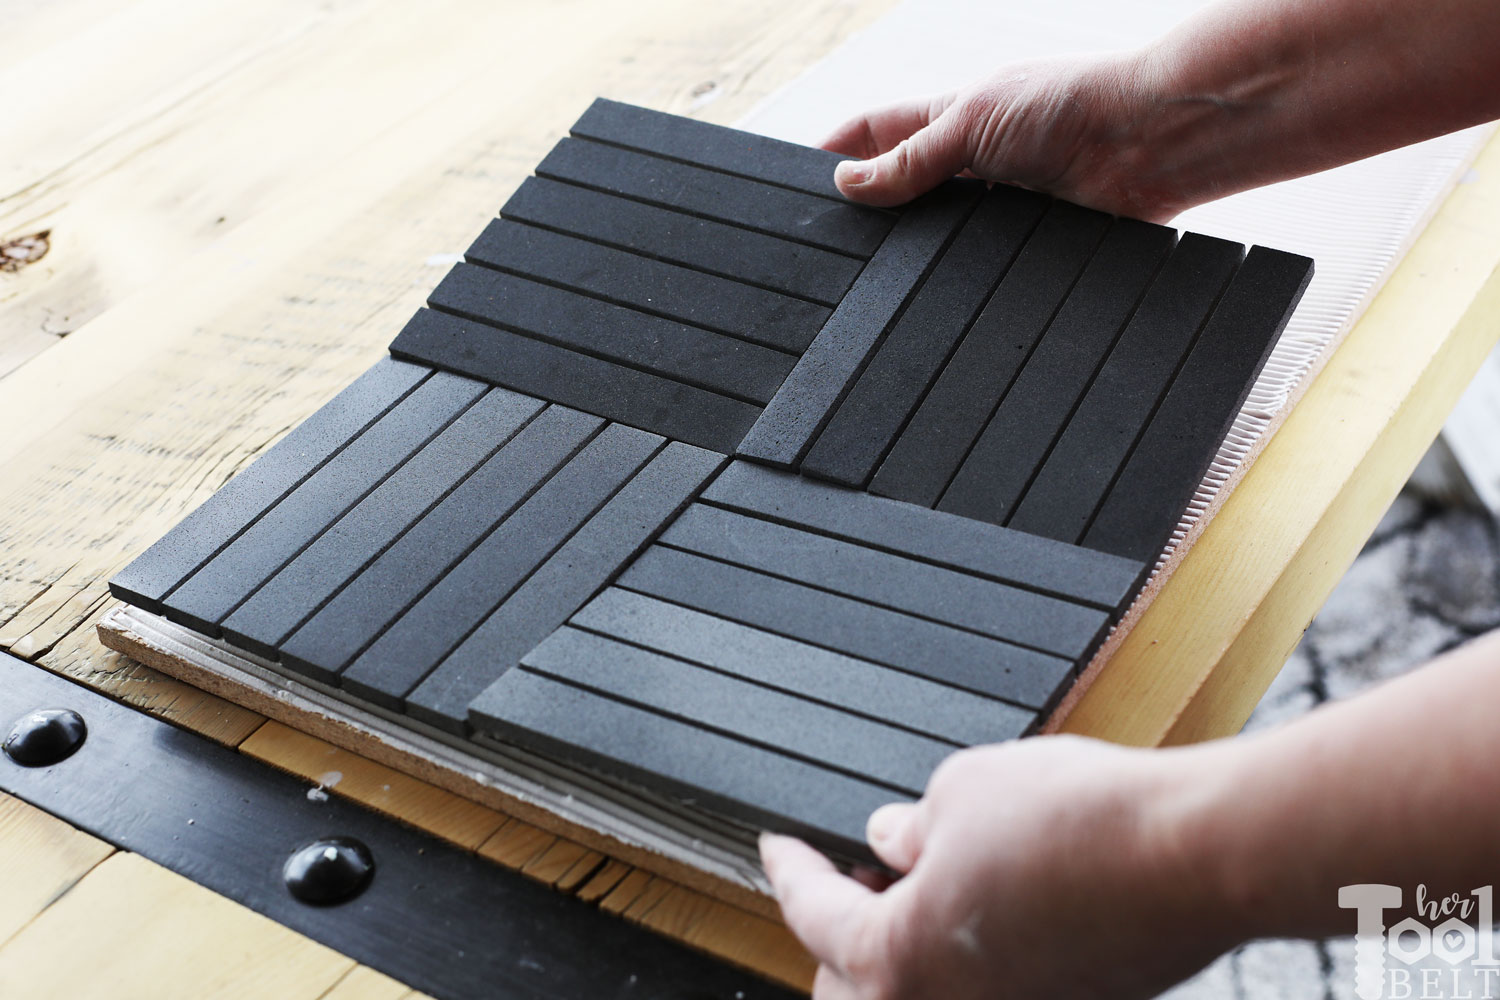
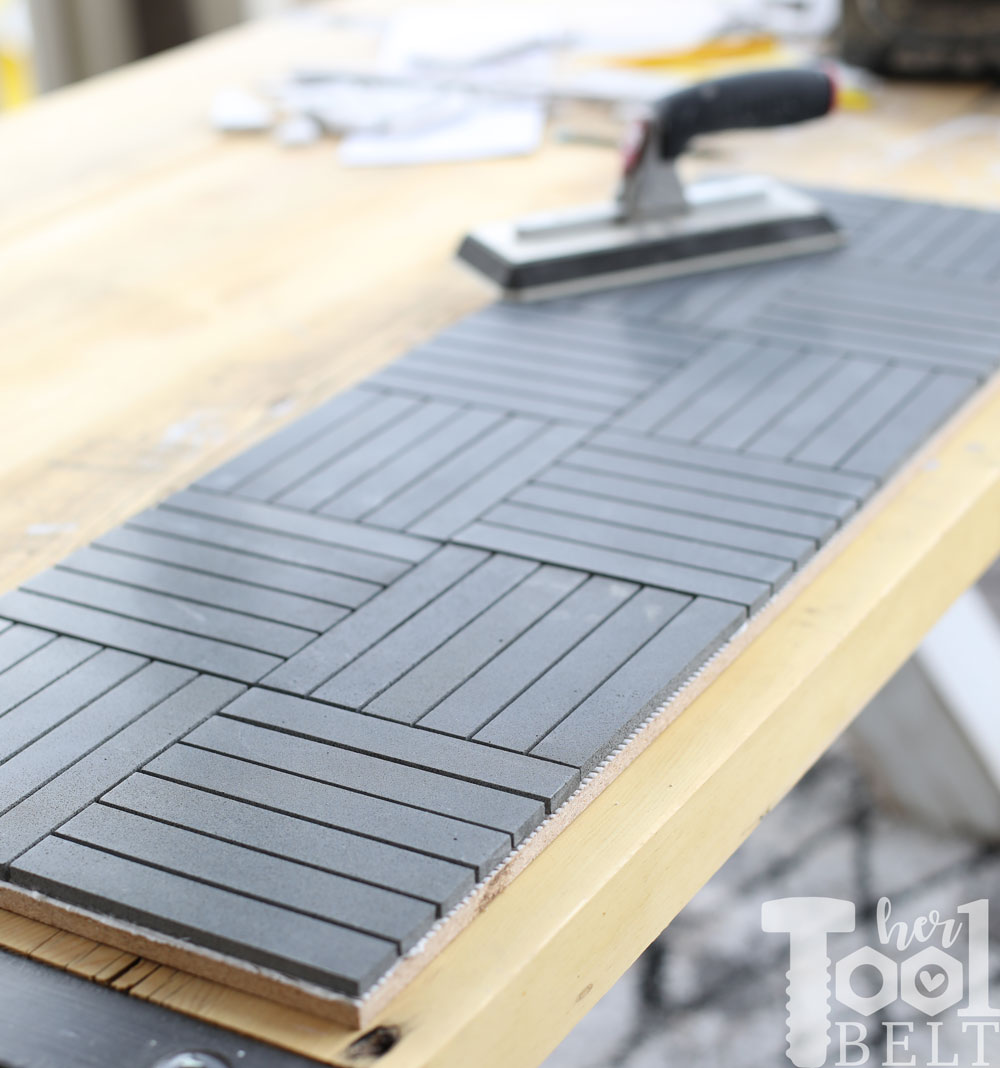
Use a V-notch trowel and spread tile adhesive over the plywood. Then trowel the tile adhesive at a 45 deg angle and remove the excess.
Place the tile mosaic on the tile adhesive/plywood, slightly wiggle the tile into the tile adhesive.
Let the adhesive dry for 24 hours.
Step 2 – Cut Out Tray Front/Back/Sides
Cut the 1×4’s, 2 – 12″ long for sides and 2 – 37 1/2″ long for front and back.
Here I’m using the Dremel Saw Max and a speed square. (alternate method circular saw or miter saw)
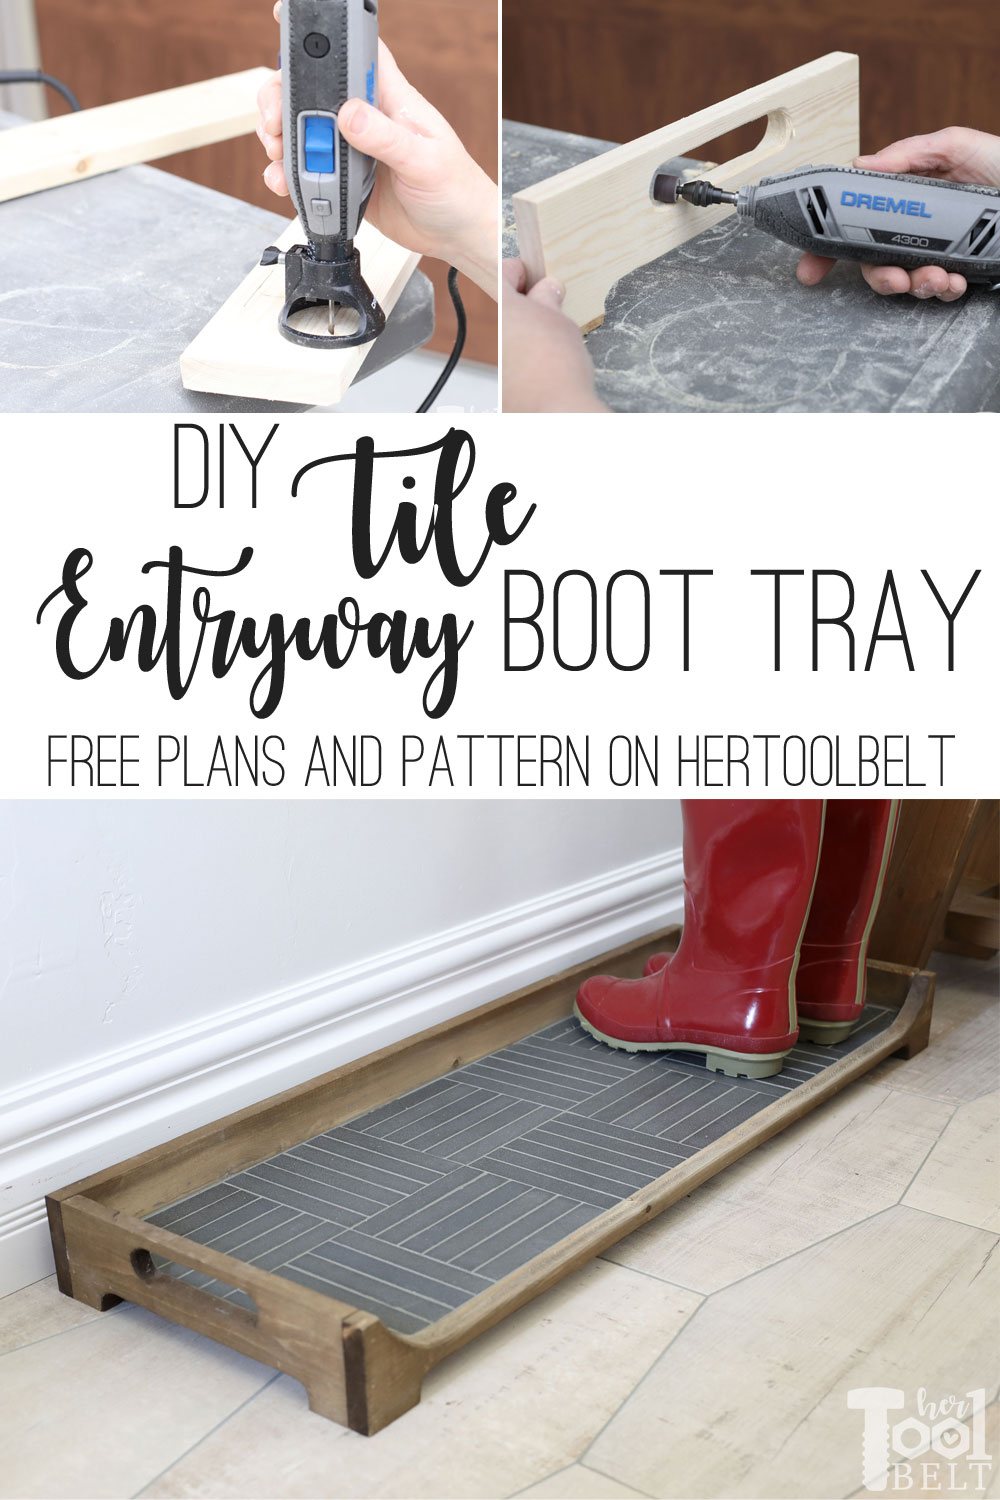
I decided to add a few details to the tray board, handles and sort of a raised look. This is totally optional, if you want straight boards that’s totally fine and you can skip to Step 3.
Download the PDF pattern and cut out the pattern for the front/back and the pattern for the sides.
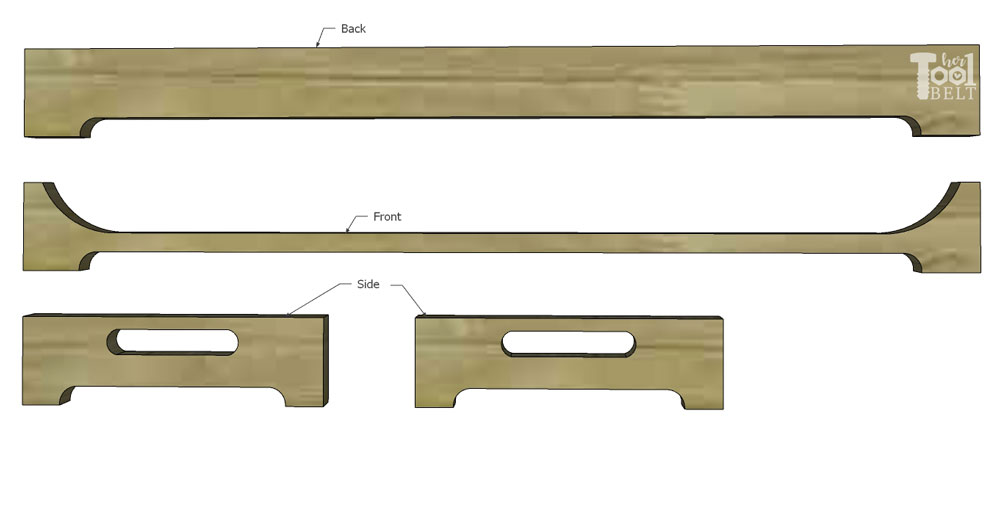
Back Piece
On one of the 3 1/2″ x 37 1/2″ pieces, place the pattern on the left end and trace the pattern for the bottom curve. Flip the pattern around and place it on the right end. Trace the bottom curve. Use a straight line and connect the curves.
Front Piece
On one of other 3 1/2″ x 37 1/2″ piece, place the pattern on the left end and trace the pattern for the curves. Flip the pattern around and place it on the right end. Trace the curves. Use a straight line and connect the curves.
Side Pieces
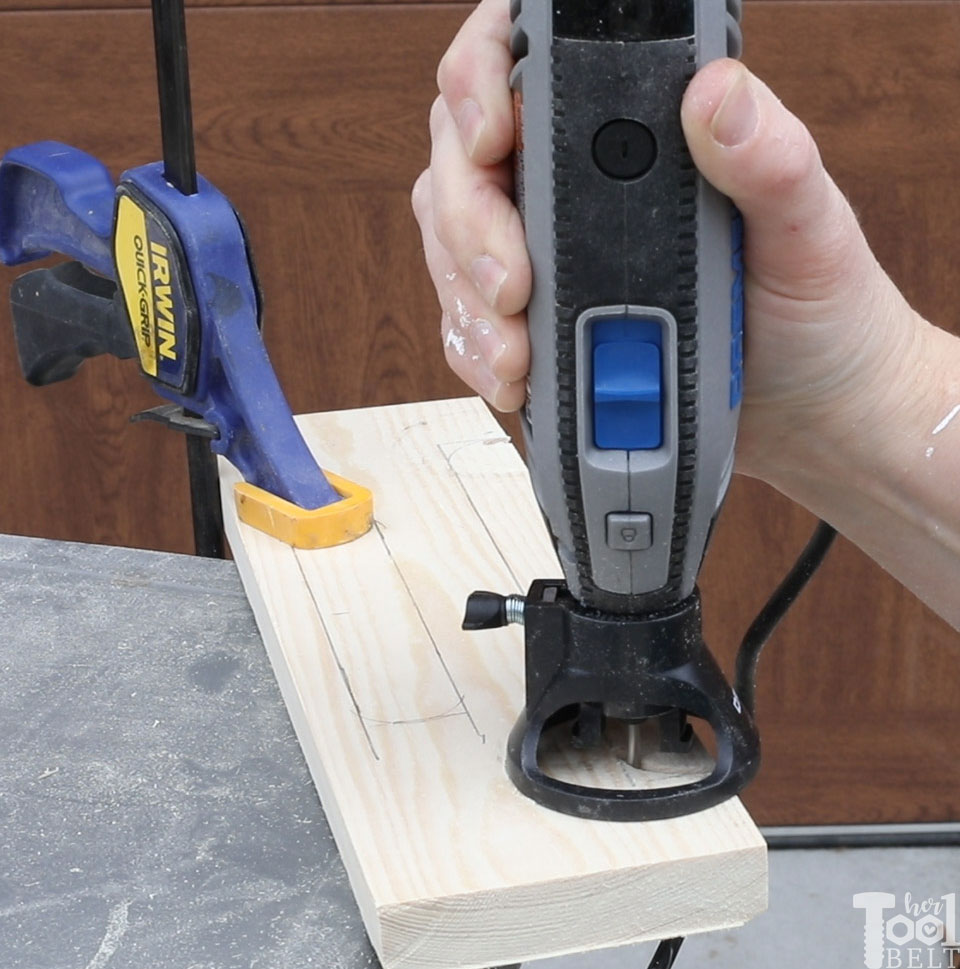
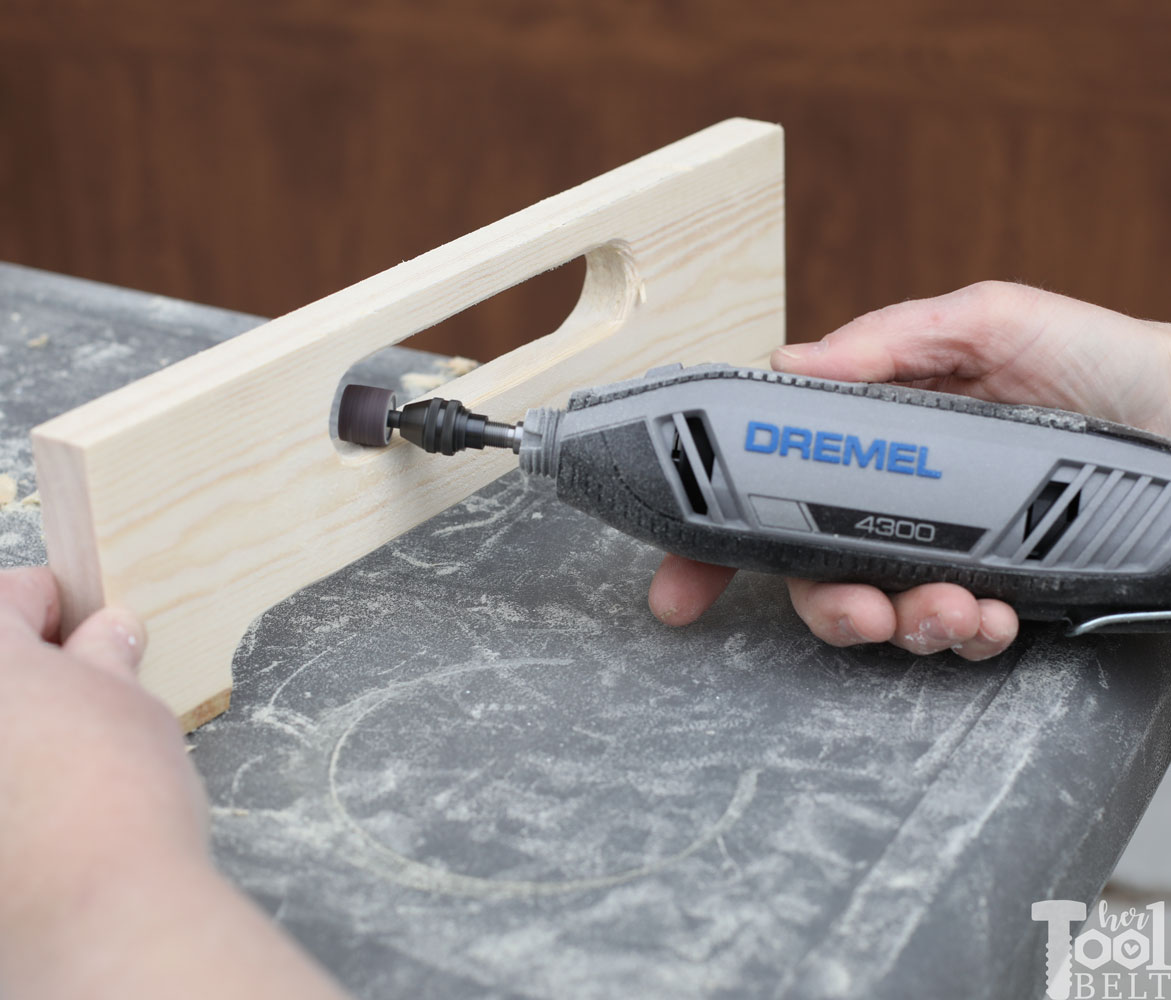
On the 3 1/2″ x 12″ pieces, place the pattern on the left end and trace the pattern for the bottom curve and handle. Flip the pattern around and place it on the right end. Trace the curves.
Cut out the details
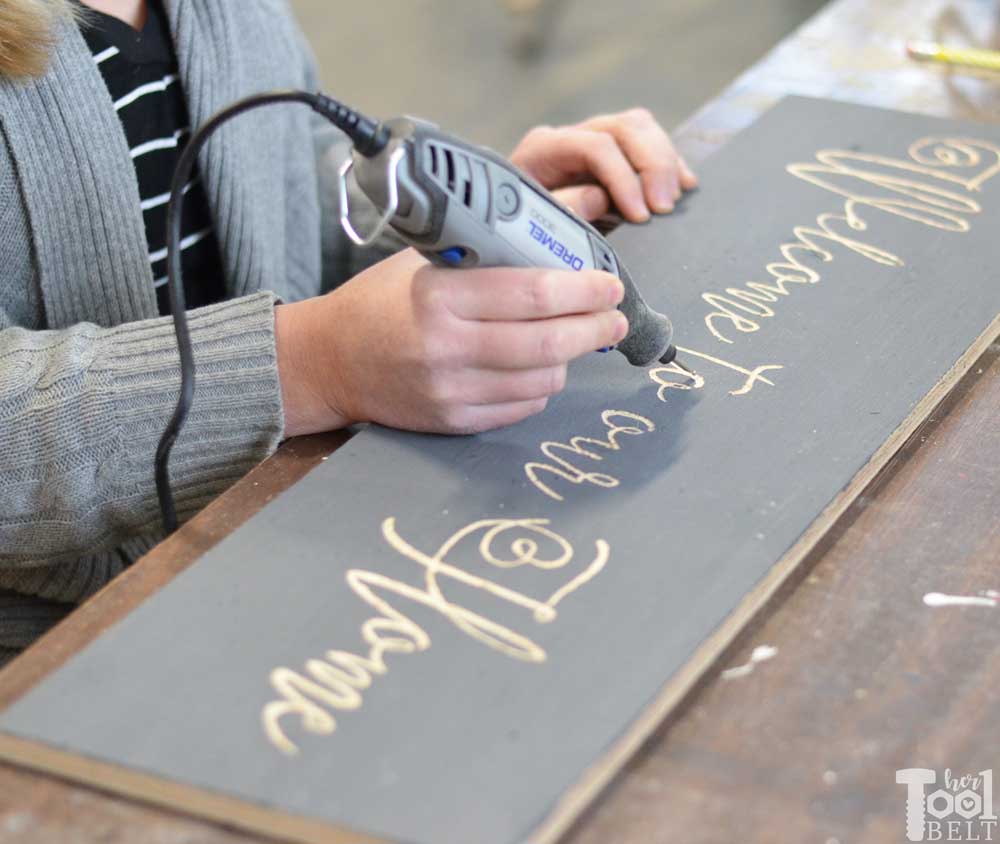
I used the Dremel rotary tool and the spiral bit to cut out the details. (alt you can use a jigsaw, bandsaw, or scroll saw)
To make things quicker, I used the saw max to cut the straight parts.
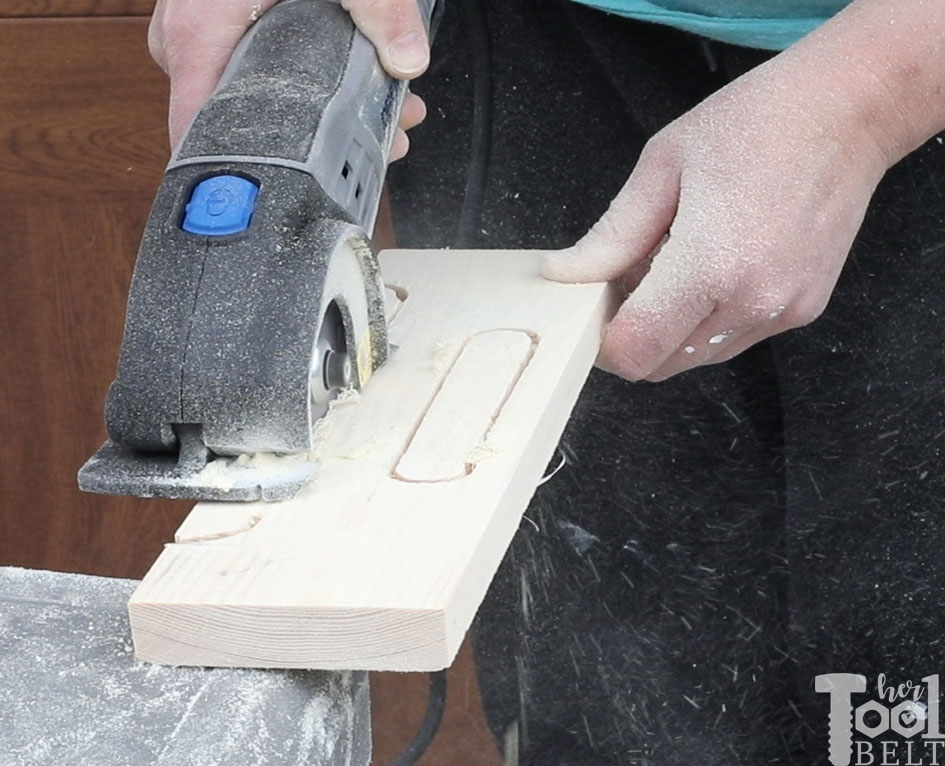
Then I swapped out the spiral bit for the drum sander and smoothed out all of my curves and cuts. If you have the flex shaft, this is a great time to attach that to the Dremel for finer control and more comfort.
Step 3 – Assemble Boot Tray
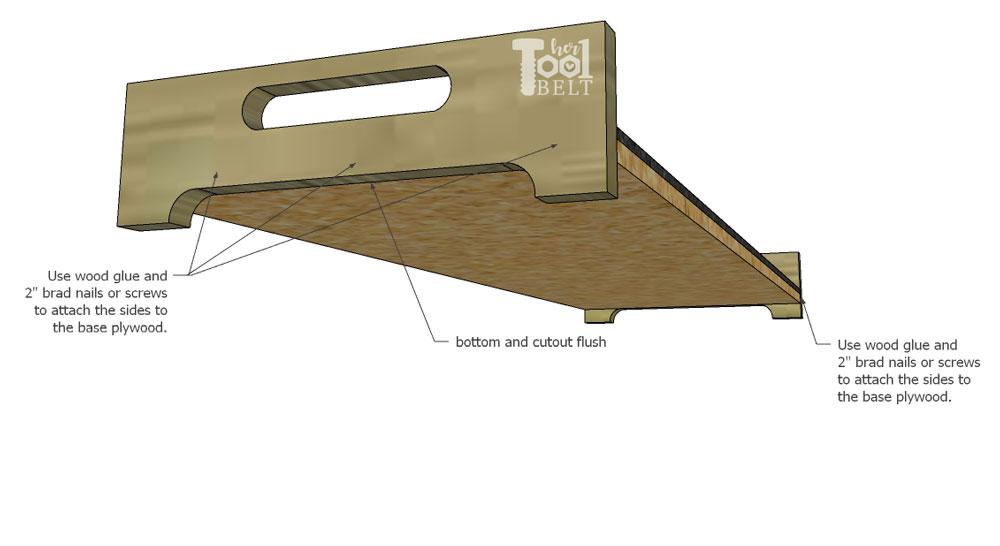
Assembling the boot tray is super easy and you’ll just need brad nails and wood glue. Put wood glue and the 12″ ends of the plywood and attach the sides to each end with 2″ brad nails. Make the bottom of the plywood flush with the curve (or about 3/4″ up).
Run wood glue along the back edge of the plywood and the side ends. Attach the back piece to the plywood and sides with 2″ brad nails. Again the plywood bottom should be flush with the curve or about 3/4″ up.
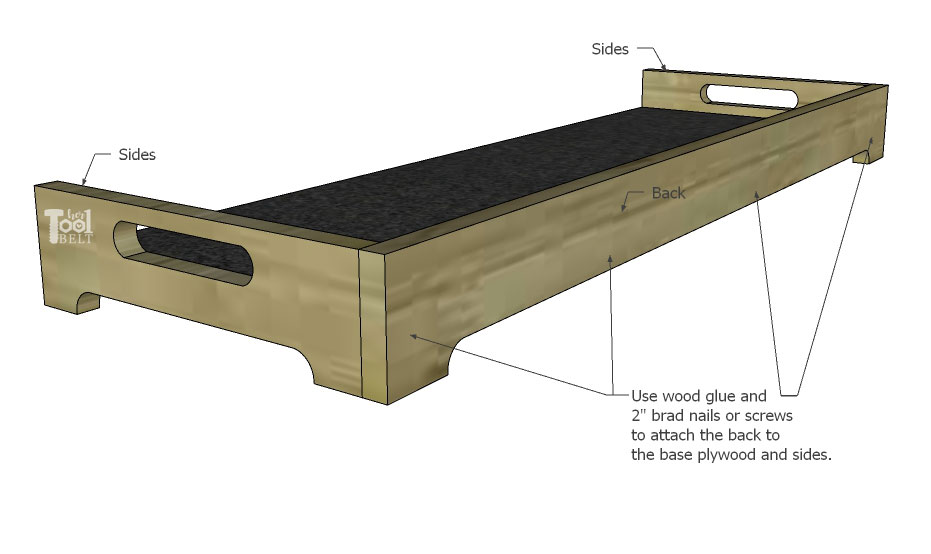
Run wood glue along the front edge of the plywood and the side ends. Attach the front piece to the plywood and sides with 2″ brad nails. Again the plywood bottom should be flush with the curve or about 3/4″ up.
 Let the wood glue dry.
Step 4 – Finish
Once the glue is dry. Sand the tray wood smooth, 120-180 grit sandpaper. Then stain and apply top coat as you’d like. I used Rustoleum weathered wood accelerator in brown.
If you tiled the tray, use a float to grout the tile. Then removed excess grout with a sponge and clean up any grout residue with a microfiber cloth.

Thanks for pinning
“I acknowledge that The Home Depot is partnering with me to participate in the Tool Review Program. As a part of the Program, I am receiving compensation in the form of products and services, for the purpose of promoting The Home Depot. All expressed opinions and experiences are my own words. My post complies with the Word Of Mouth Marketing Association (WOMMA) Ethics Code and applicable Federal Trade Commission guidelines.”
Leave a Reply