This post contains some affiliate links for your convenience. Click here to read my full disclosure policy.
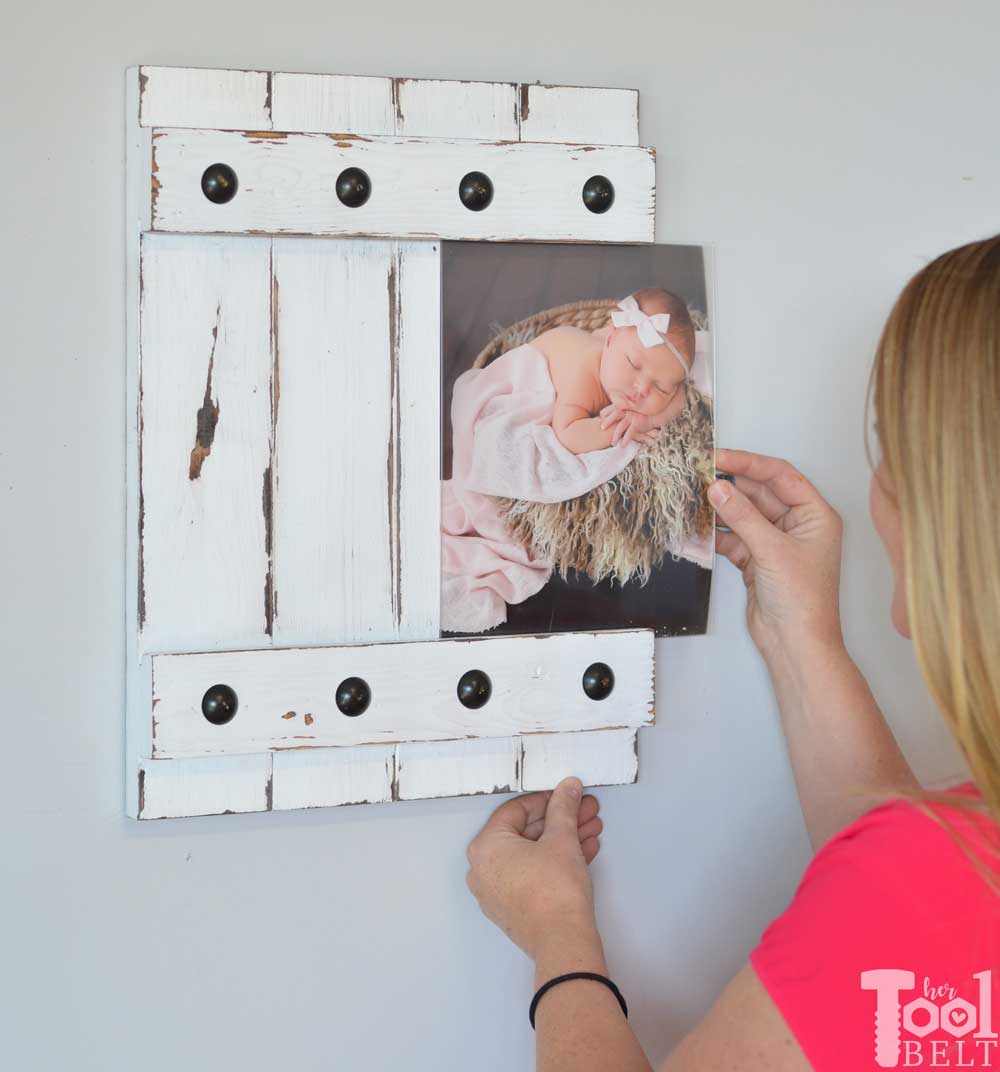
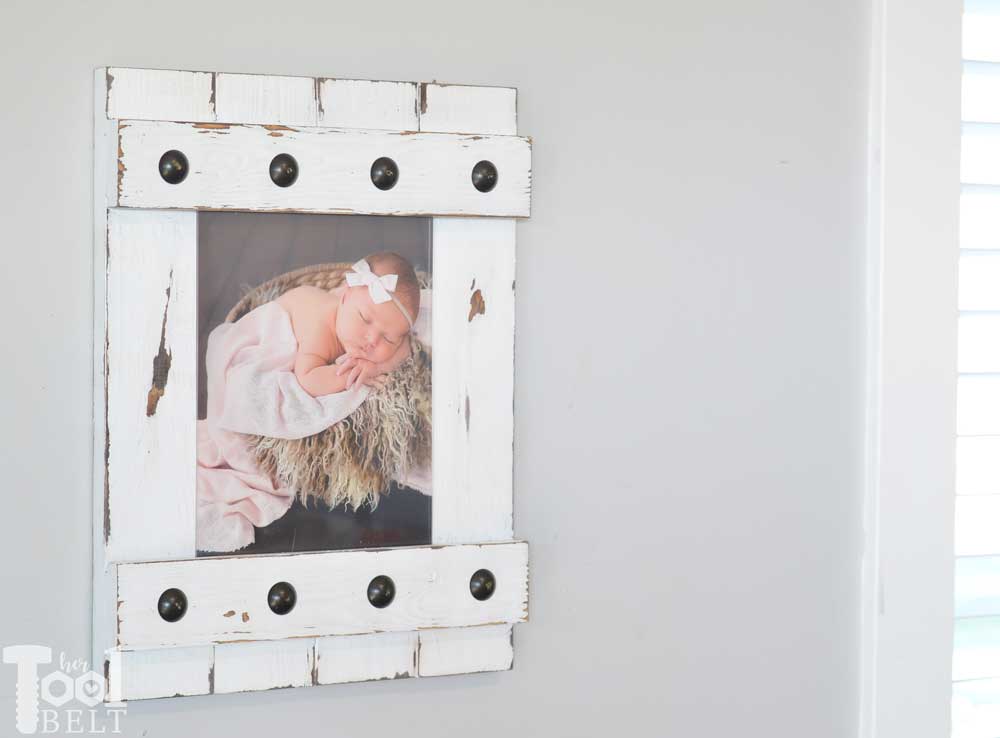
If you caught my DIY Easy Farmhouse Style Picture Frame that fits an 11×14 photo print, this is the plan for an 8×10. These farmhouse style picture frames are simple to make. My favorite feature is how easy it is to switch out your prints, they just slide out! They can be made to fit protective glass/plastic or just the print.
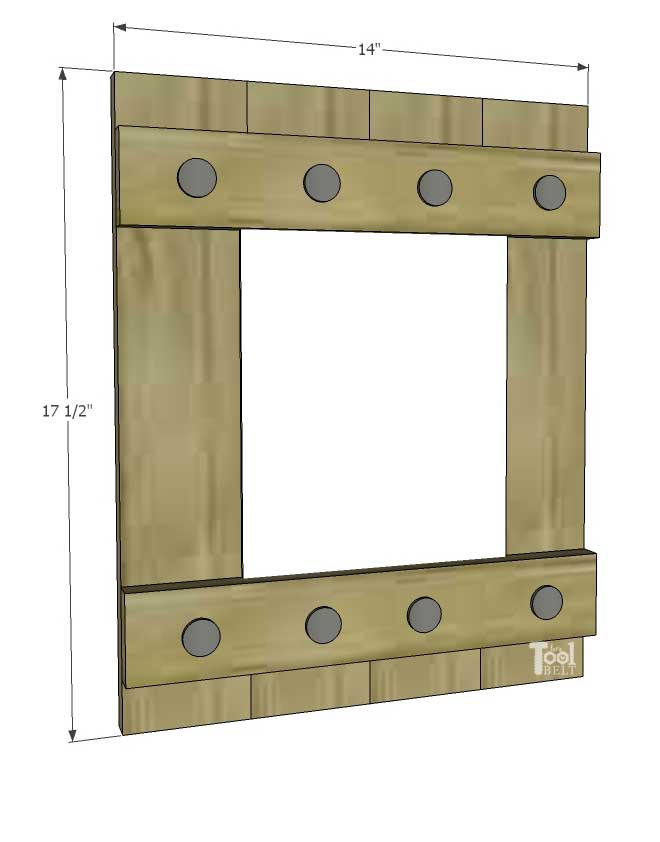
How to Make a Sliding Picture – Farmhouse Style Frame
For 8″x10″ photos
Materials
- 1 – 1″ x 4″ x 8′ boards (actual 3/4″ x 3 1/2″)
- 1 – 1″ x 3″ x 8′ or 6′ board (actual 3/4″ x 2 1/2″)
- 1 1/4″ brad nails
- wood glue
- sandpaper
- stain (I used Varathane Kona, Behr Ultra Pure White Paint and Petroleum Jelly)
- brush
- 8×10 glass or 8×10 plexi – optional
- picture hanger – optional
- 1″ Nail heads – optional (painted oil rub bronze) – optional)
Tools Used
- Circular Saw
- Carpenter Square
- Brad Nailer
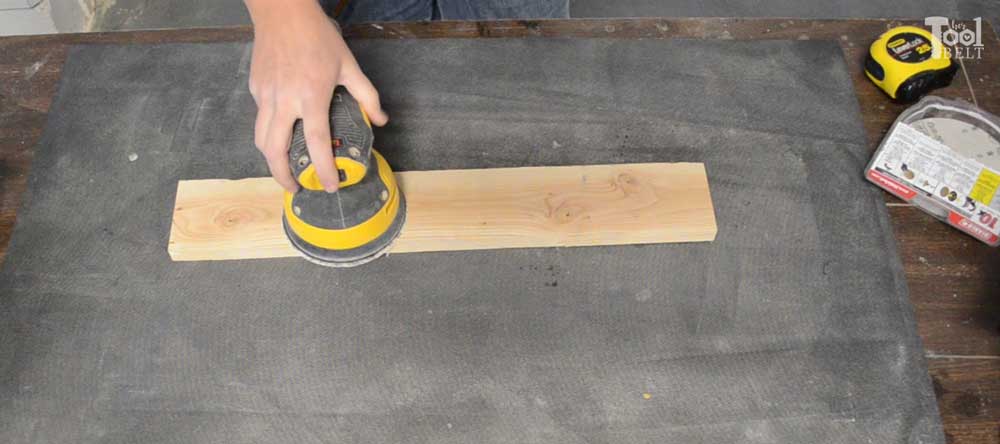
- Sander
- Tape Measure
- Table Saw (optional)
- Router (optional)
- Hammer (optional)
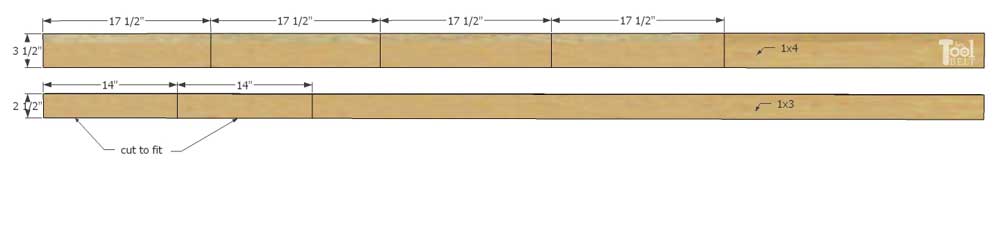
Cut List
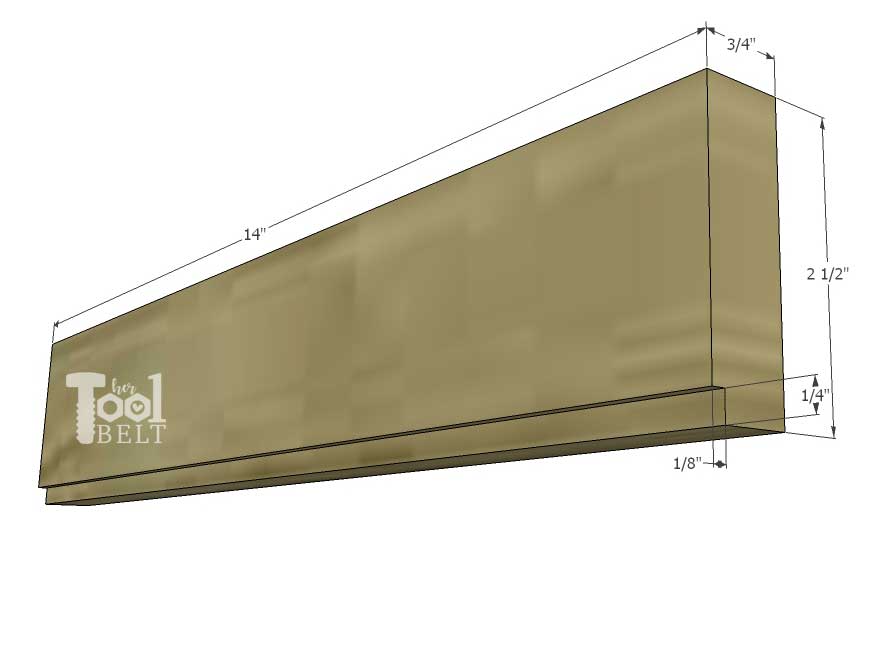
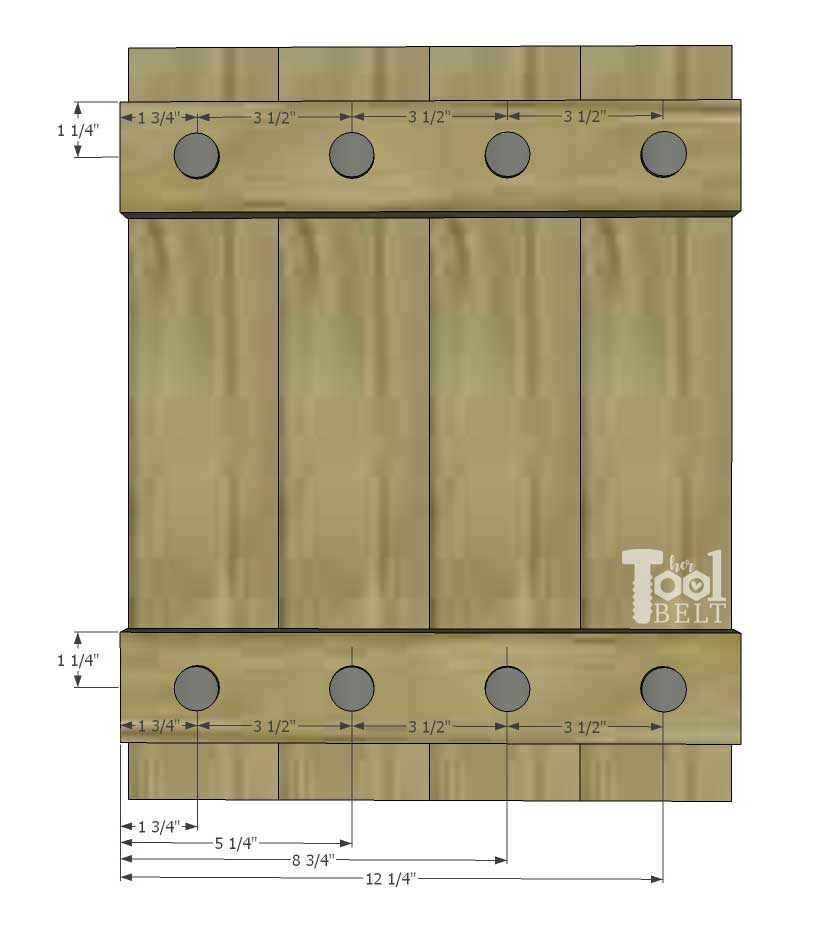
- 4 – 3/4″ x 3 1/2″ x 17 1/2″
- 2 – 3/4″ x 2 1/2″ x 14″ (cut to fit)
Cut Diagram
Step 1
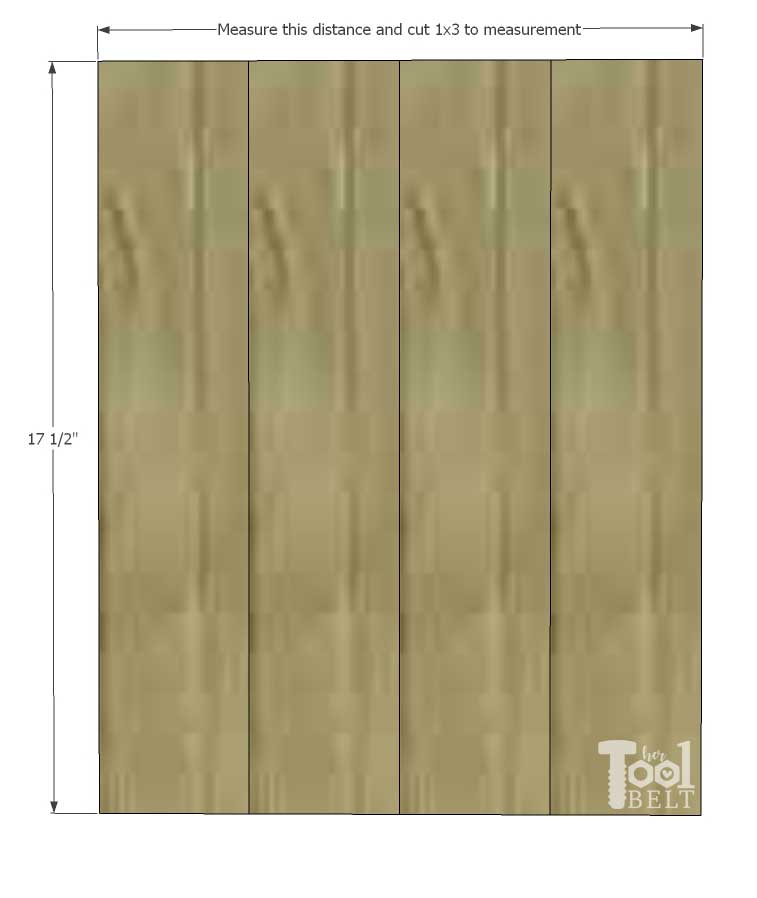
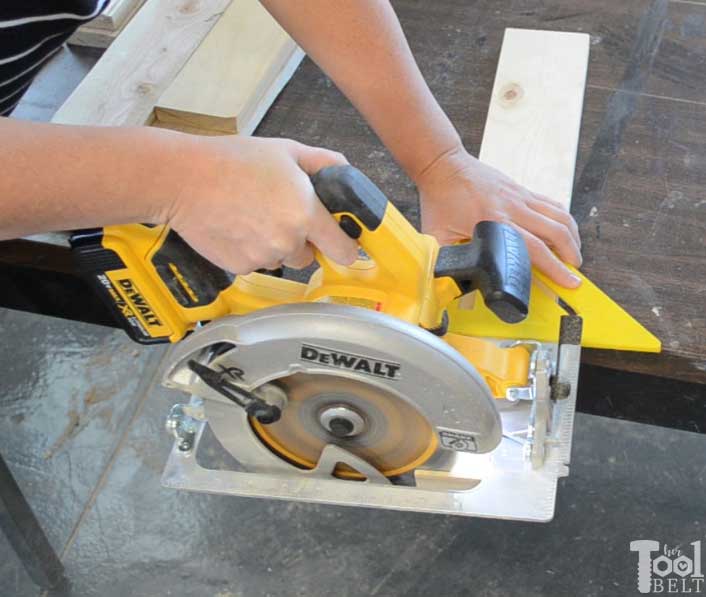
Cut all of the boards according to the cut list. Place all of the 1×4 boards together and measure the width of the frame (approximately 14″) and cut the 1×3 board to that measurement.
Cutting boards to length. Tip using a speed square (carpenter’s square) with a circular saw is a quick way to make cross cuts straight/square. These cuts are also easily made with a miter saw.
Step 2
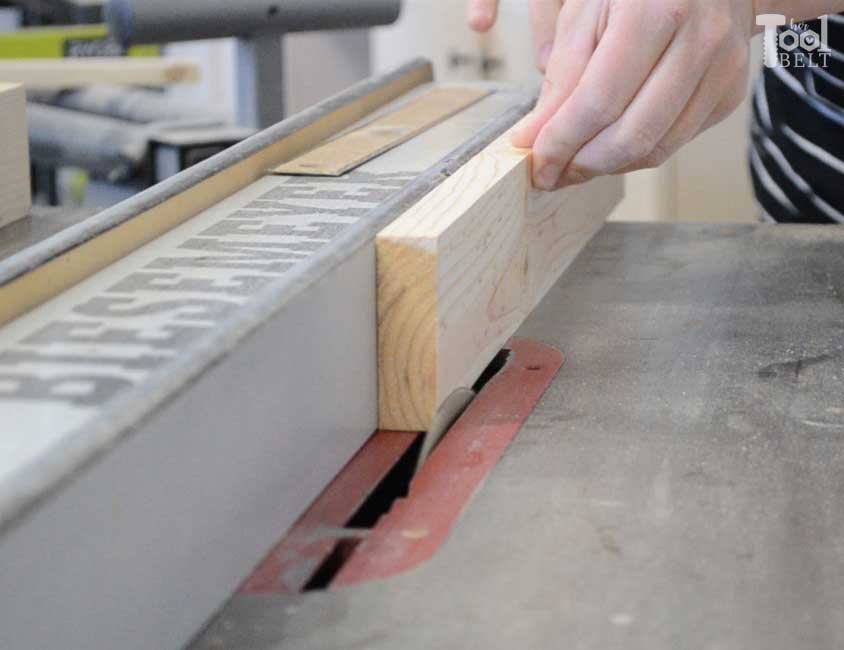
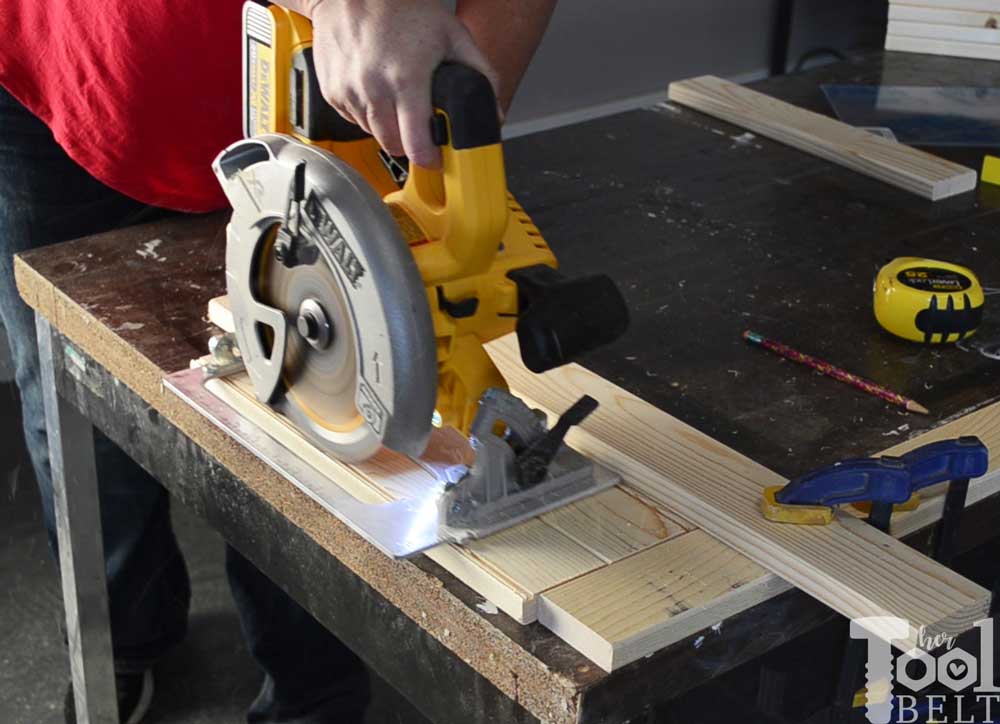
Cut a slot in each 1×3 for the pictures. The slot should be 1/4″ tall (or slightly more) and about 1/16″ – 1/8″ wide (1/16″ without glass – 1/8″ with glass).
 There are multiple ways to cut the slot depending on what tools you have, here are a few methods I have used.
- Cutting the slot with the table saw – set the blade at 1/4″ high and fence about 11/16″ – 5/8″ from the blade.
- Cutting slot with multiple passes with circular saw – set the circular saw depth to just more than the thickness of the glass/plastic. Set up a temporary fence and start cutting 1/4″ from the edge and repeat sliding the saw closer to the edge until you’ve cut the whole slot.
- Alternate method – You can make the slot with a router.
Sand all of the boards before frame assembly.
Step 3
Line up the 4 – 1×4’s and mark 1 1/2″ from each end. Make sure the tops of all of the 1×4’s are flush, use wood glue and 1 1/4″ nails to secure the top board and bottom board to the 1×4 slats. Important – The slots on the 1×3 both need to be towards the center of the frame.

Step 4
Let the glue fully dry. Apply paint or stain as desired.
Chippy Paint Finish
I decided to do a chippy paint finish on this farmhouse style picture frame, I thought it would be a nice contrast to the decorative nails.
For the chippy paint look:
- First I applied a coat of Varathane Kona and let that fully dry.
- I applied a small amount of petroleum jelly (carmex 🙂 ) around the edges and everywhere I don’t want the paint to stick.
- I applied a thin coat of white paint to the entire frame and let that dry.
- Finally taking a piece of sandpaper, I distressed around the frame and rubbed off any spots with the petroleum jelly.
Add a picture frame hanger to the back of the farmhouse style frame, or route one with a keyhole router bit.
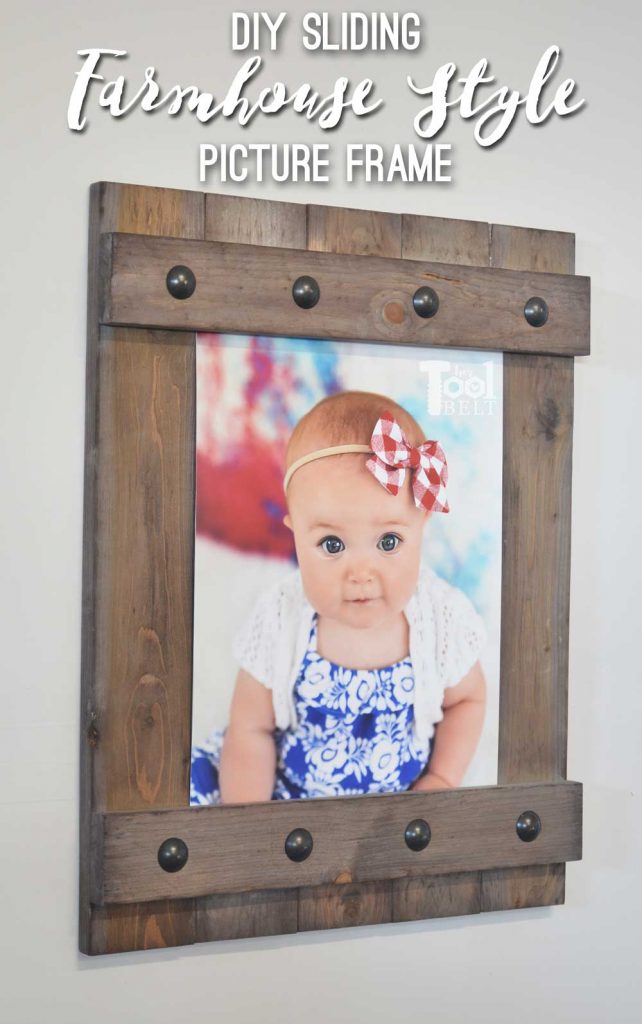
If you want to add decorative nail heads, measure along the top and bottom boards 1 3/4″, 5 1/4″, 8 3/4″, and 12 1/4″ and center it at 1 1/4″.
Farmhouse style picture frame
Thanks for pinning!
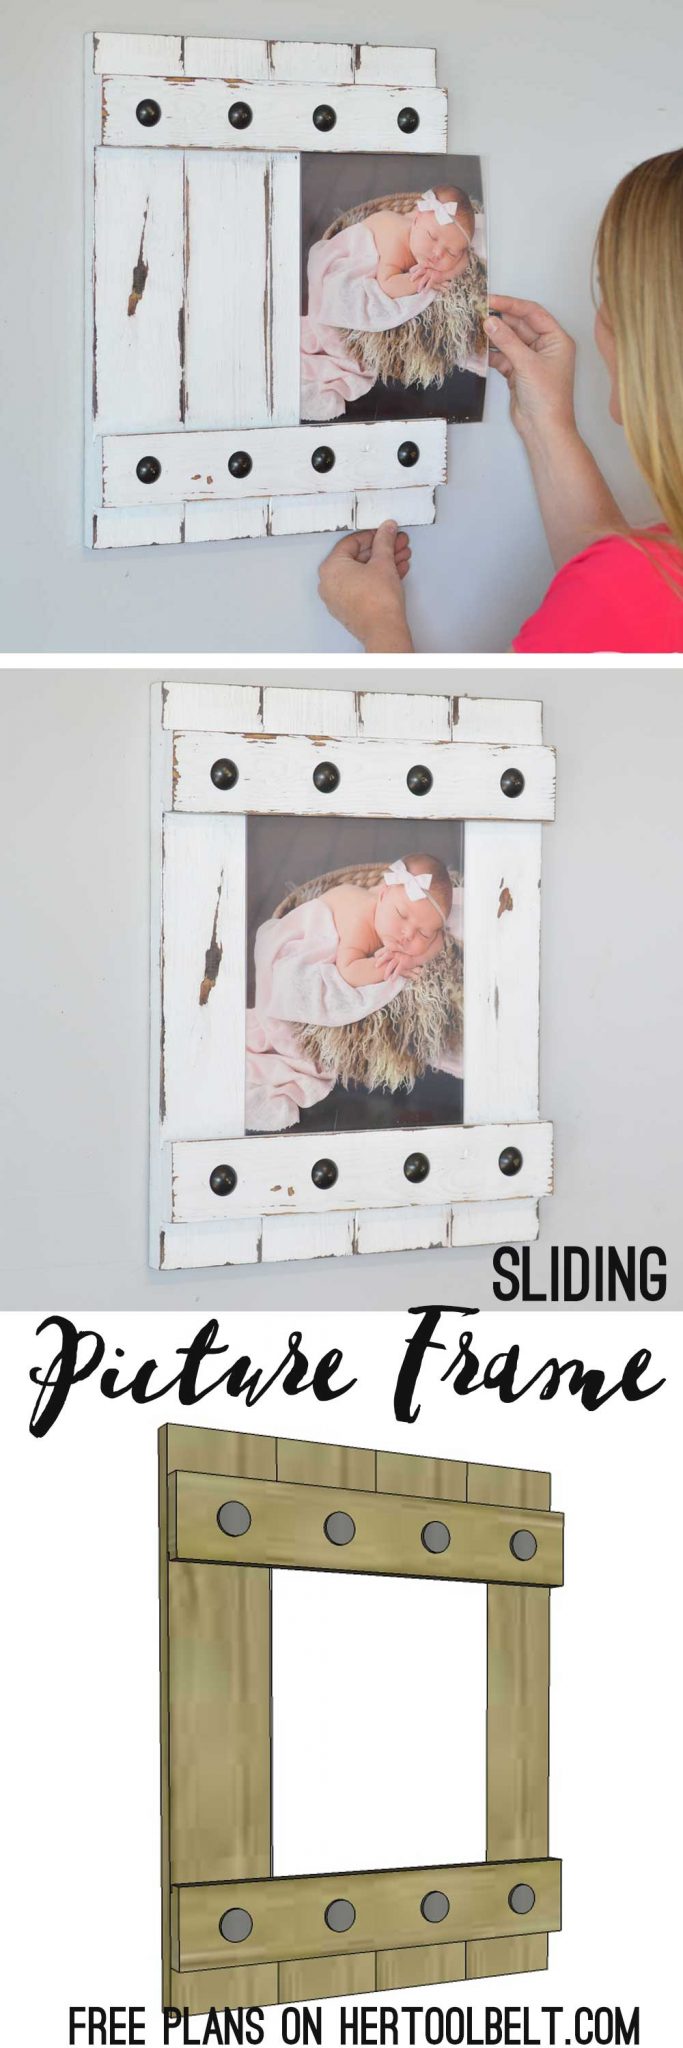
Download the Free Plans
8×10 Farmhouse Style Picture Frame <–Click Here To Download
Check out the plans for the 11×14 farmhouse style frame with weathered wood finish.
Love this! Do you have the feee plans to download like you do for the 11×14? Thanks!
Sorry for the delay, you can print the plans now (near the bottom of the post). Thanks for visiting!
These are so awesome!! I love them. Makes me miss my son even more. He will have a list of things to make me when he gets back from his mission. I’m not sure if I could do it, I may have to give it a try though.
My first grandchild was born yesterday. I’m making this frame. Can’t wait to give it to the new parents!