Piano Octave Sign and Diablo tool review is sponsored by The Home Depot. I have been compensated for my time and provided with product (tools). All ideas and opinions are my own. This post contains some affiliate links for your convenience. Click here to read my full disclosure policy.
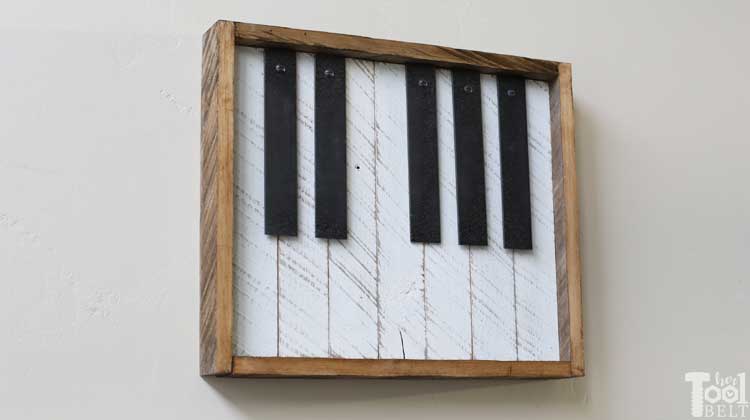
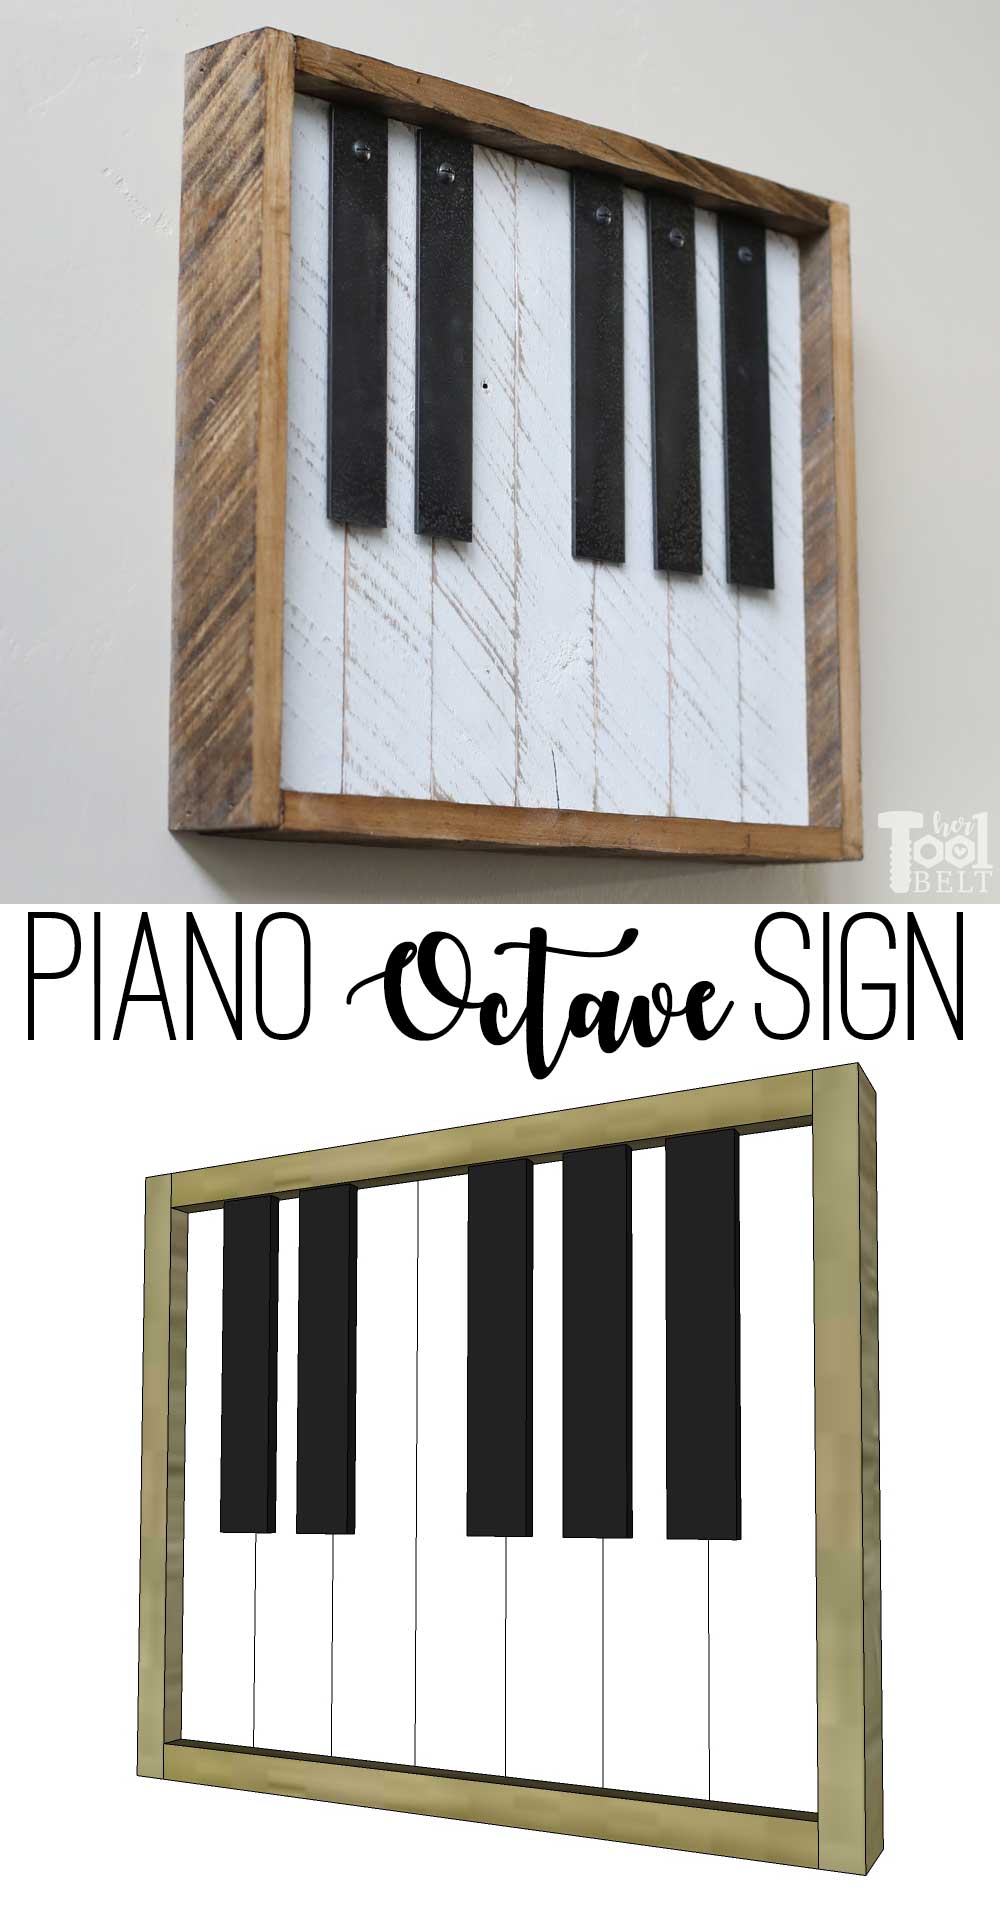
A few months ago at the Swiss Days Craft Fair, I saw the cutest full piano keyboard sign. I thought it was pretty novel and super cute for piano enthusiasts. This quarter in the Home Depot THDprospective campaign I’m in, I have been reviewing 2 types of specialty circular saw blades: Diablo steel demon and Diablo wood and metal. The steel demon is awesome for cutting thin steel bar and tubing. The wood and metal blade is fantastic for situations where you may hit nails or metal embedded in wood aka pallets! I thought it would be fun to make my piano teacher friend an inspired version of the full keyboard, with pallet wood and flat bar metal, but only do one octave of keys.
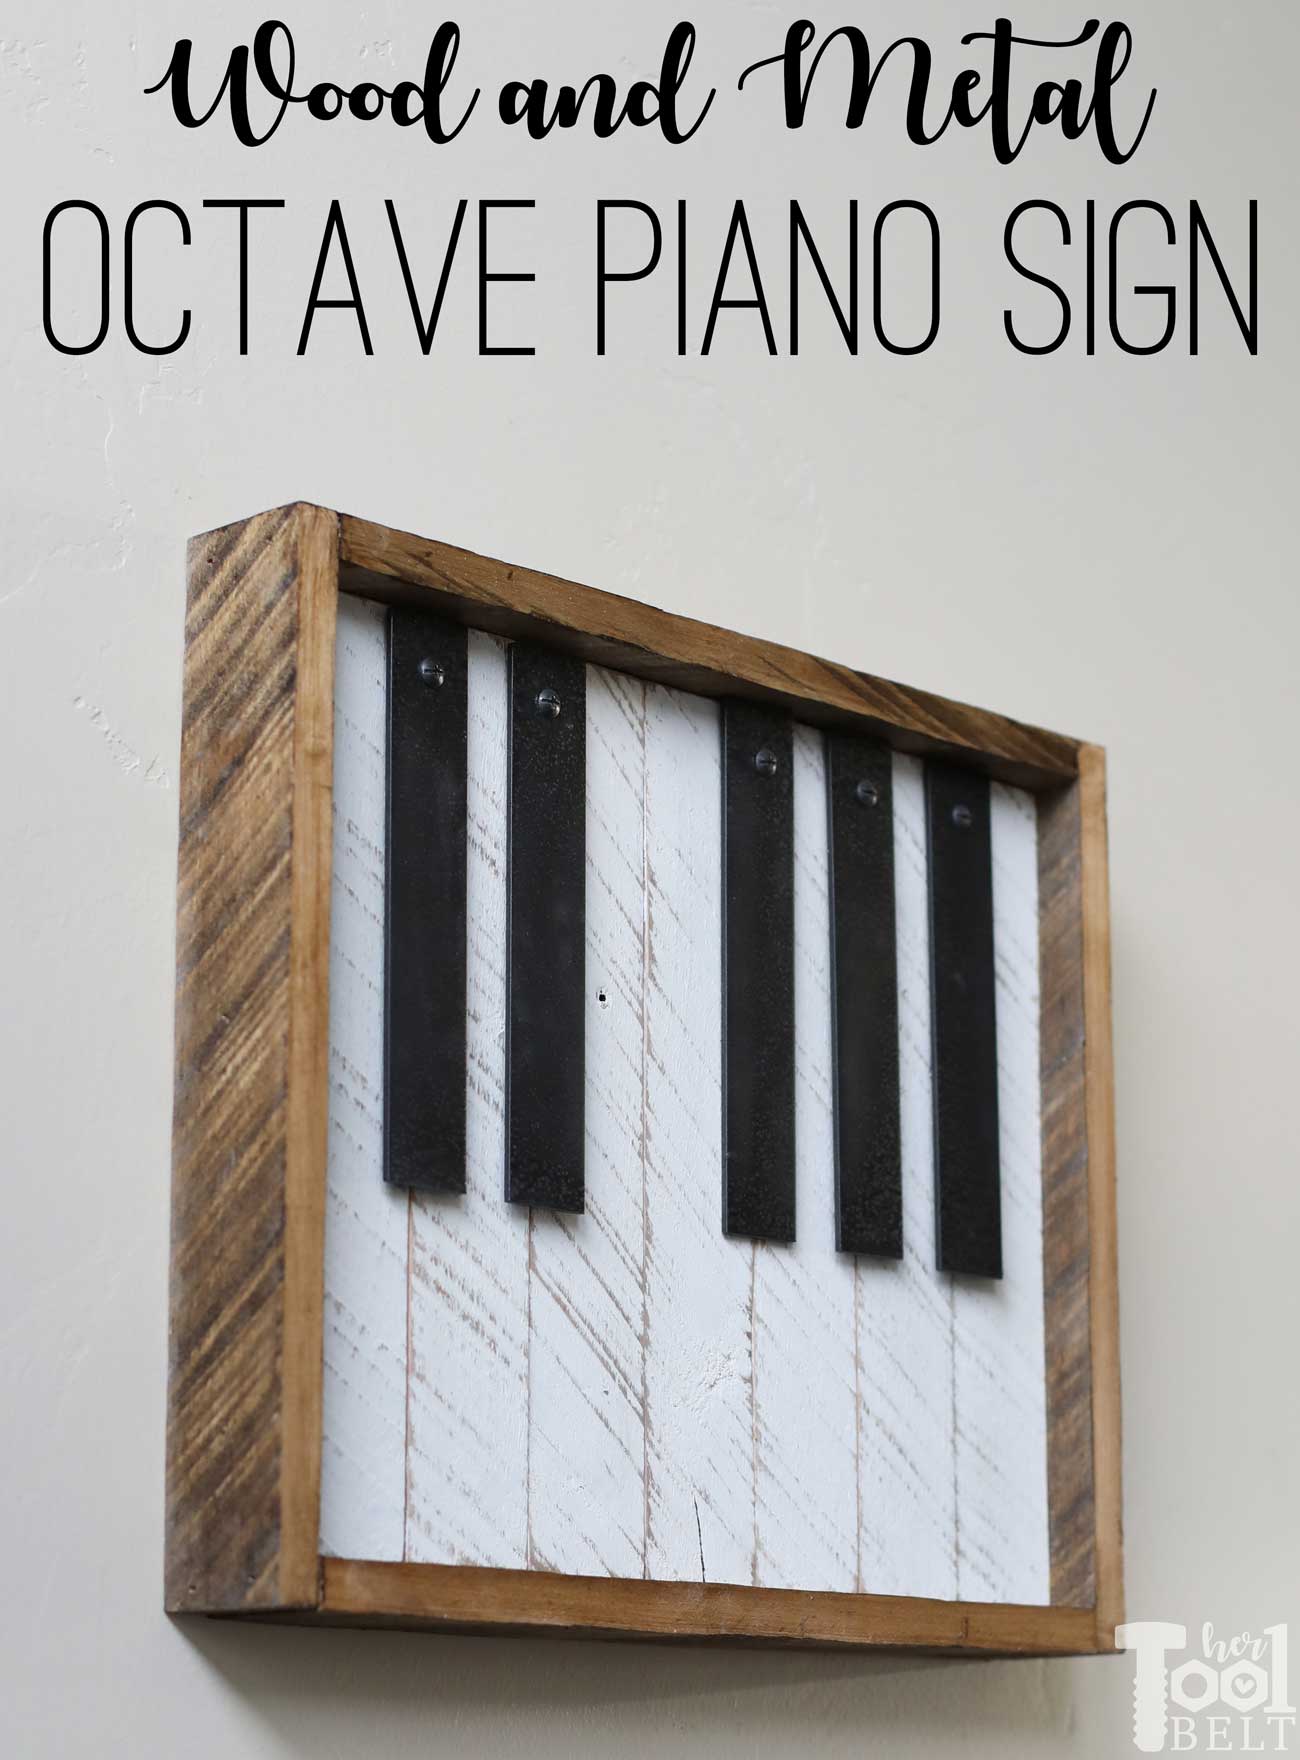
How to Build a Farmhouse Piano Octave Sign
Materials
- Pallet or 2 cedar pickets
- 1 – 1 1/4″ x 36″ flat bar (1/8″)
- 1 1/4″ brad nails
- 5 – 8-32 x 1 1/4″ screws and nuts
- #8 washers for standoff if wanted
- Paint – White, black spray paint, stain
- wood glue
- sawtooth picture hanger, if desired
Tools Used
- Diablo Steel Demon blade
- Diablo Wood and Metal blade
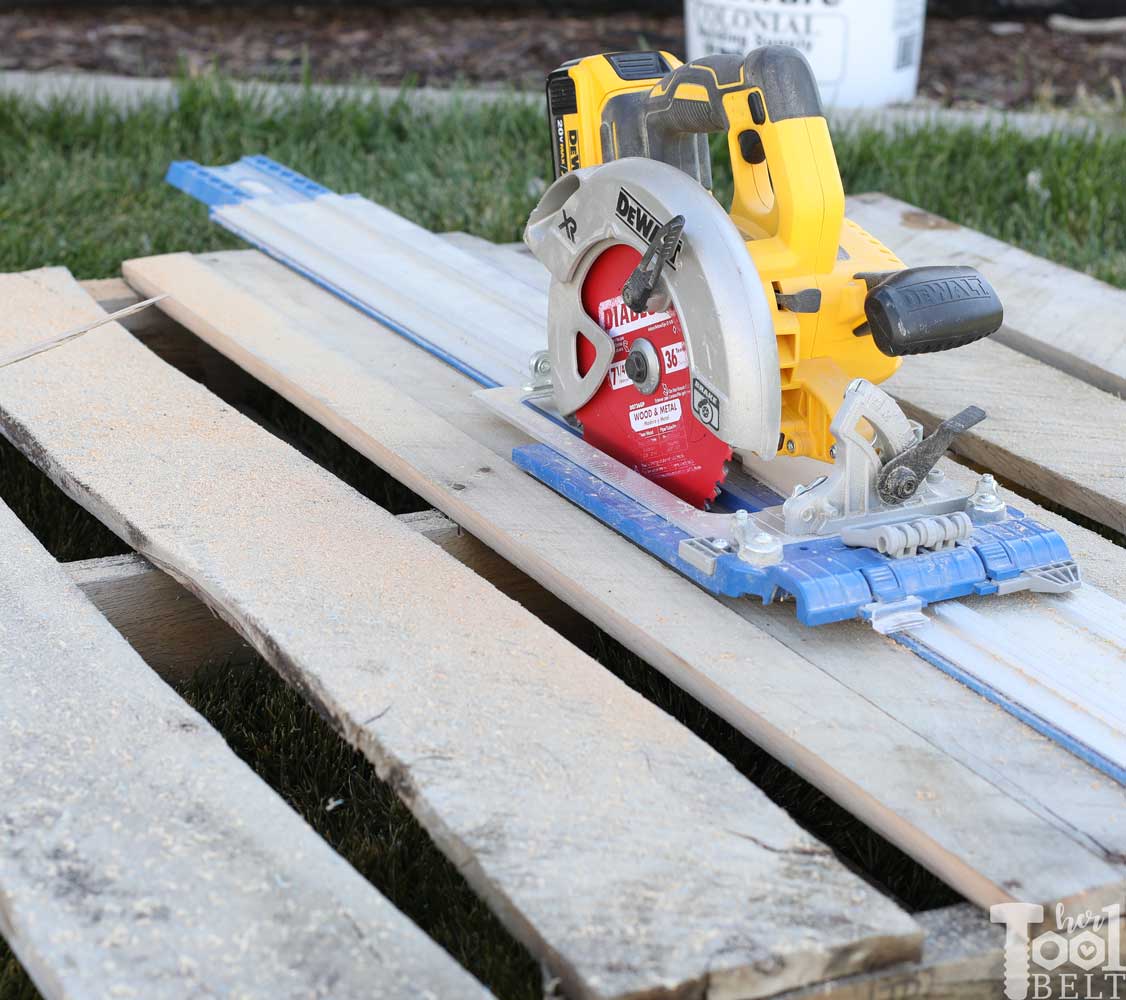
- DeWALT Circular saw (7 1/4″) with Kreg Accu-Cut
- Ryobi Brad nailer
- Sander or sanding block
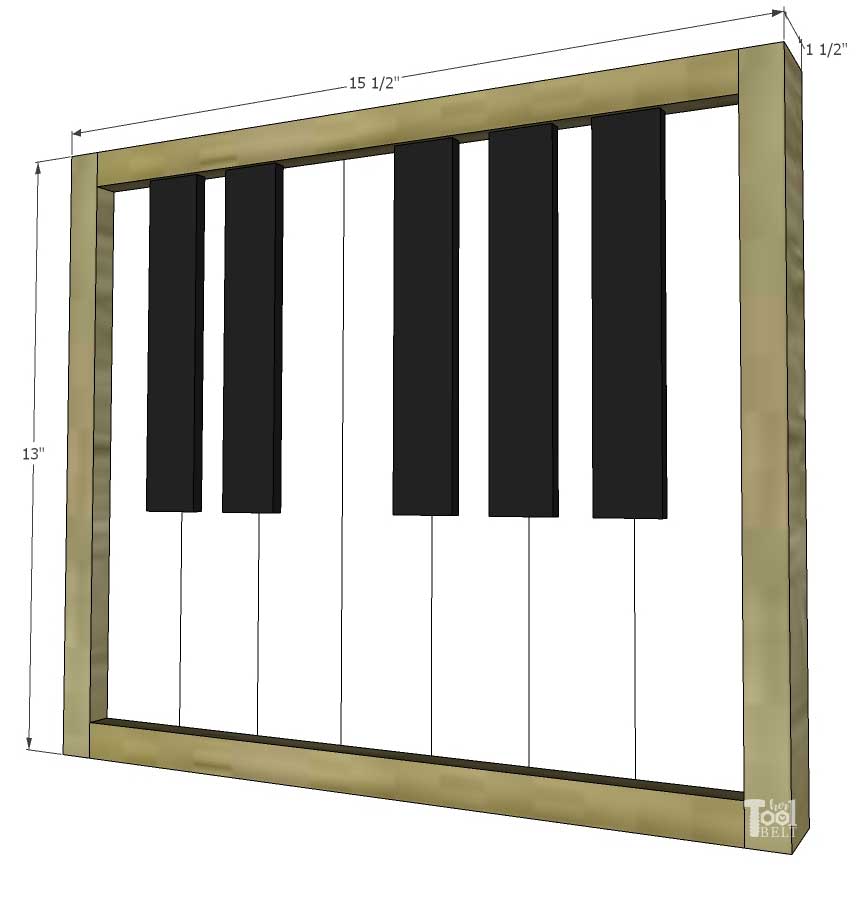
Cut List
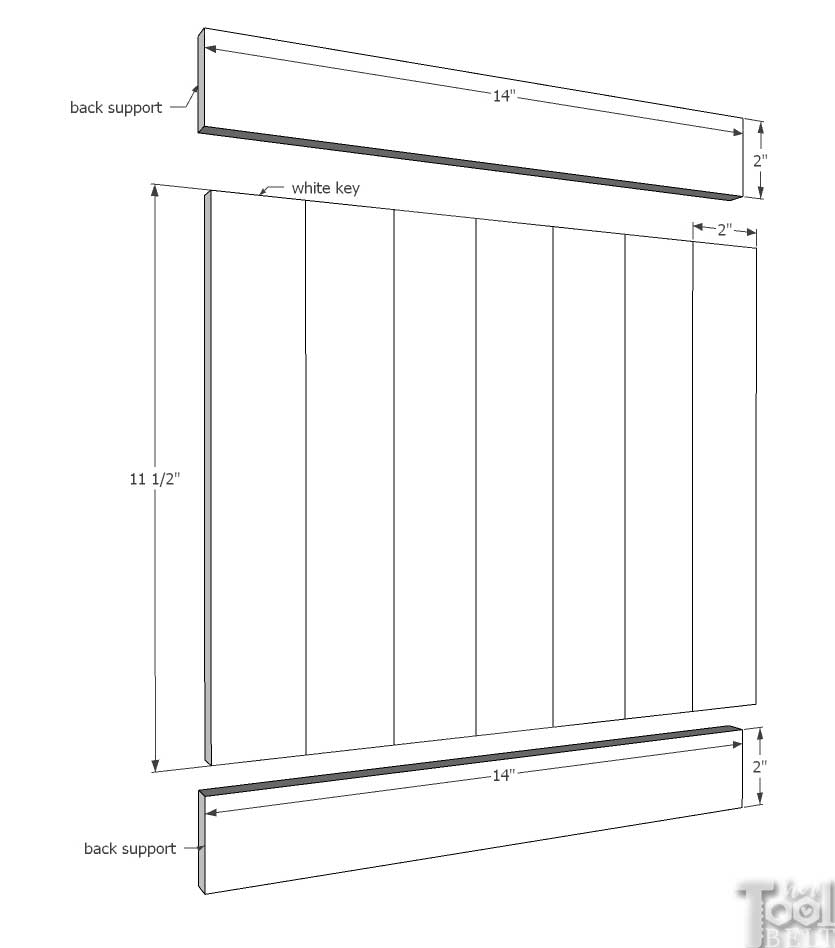
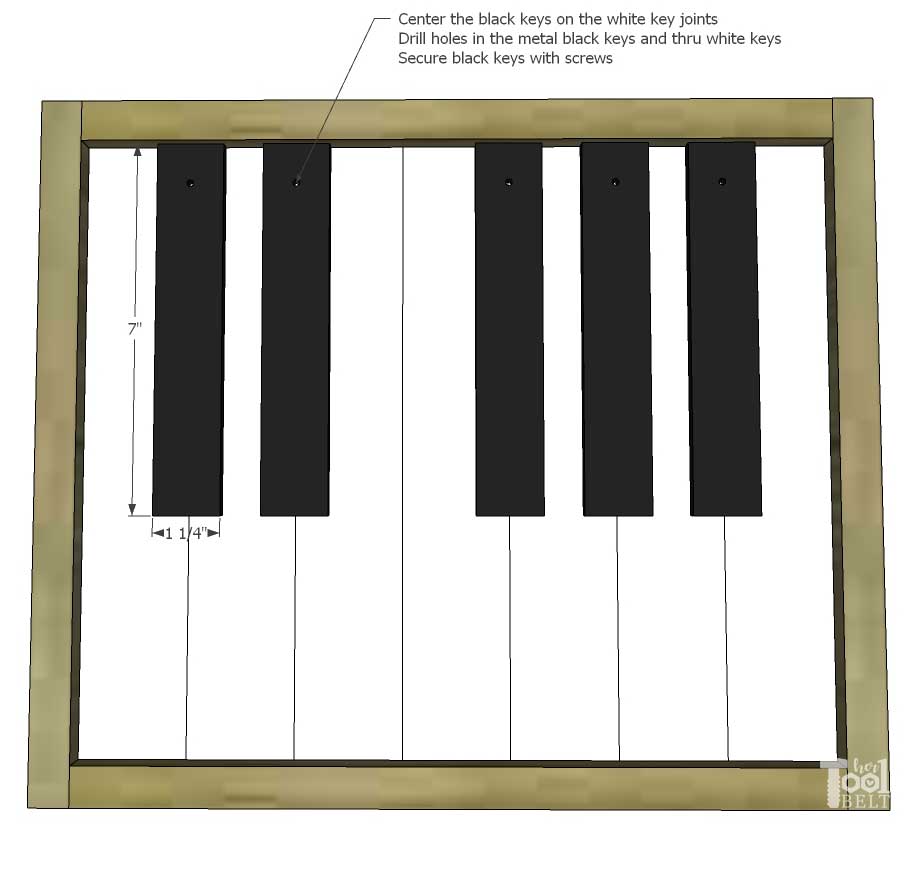
- 7 – 2″ x 11 1/2″ pallet pieces – white keys
- 2 – 2″ x 14″ pallet – back support
- 5 – 1 1/4″ x 7″ flat bar metal – black keys
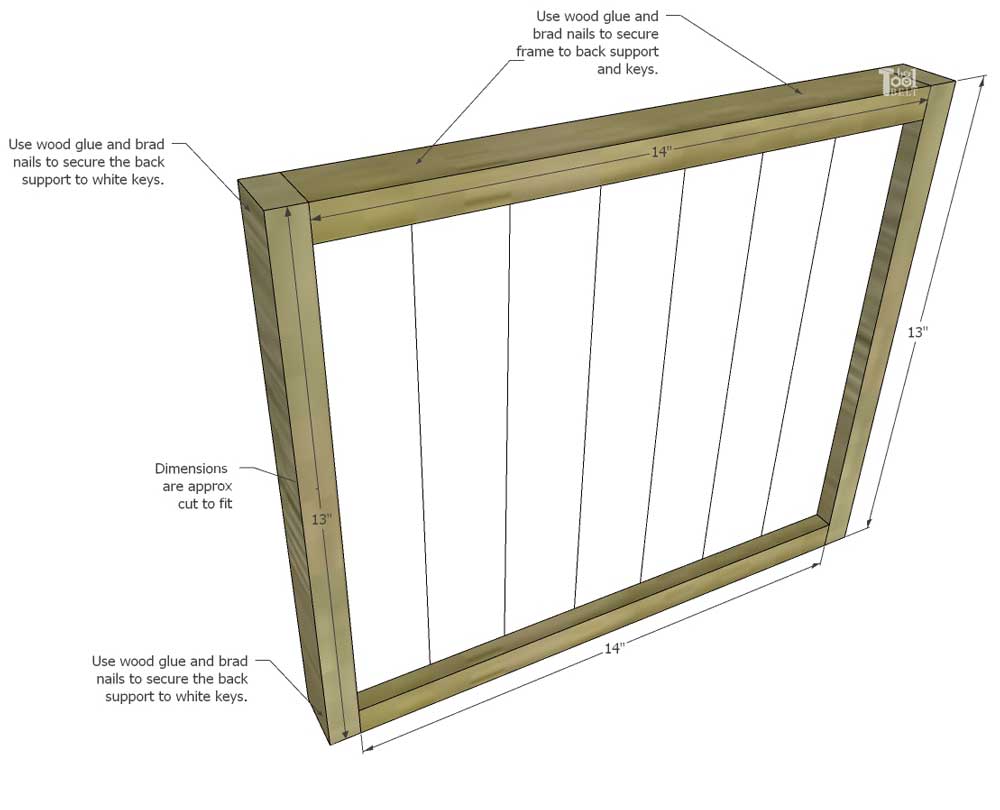
- 2 – (1 1/2″-2″) x 14″ pallet (cut to fit) – frame
- 2 – (1 1/2″-2″) x 13″ pallet (cut to fit) – frame
White Keys and Frame
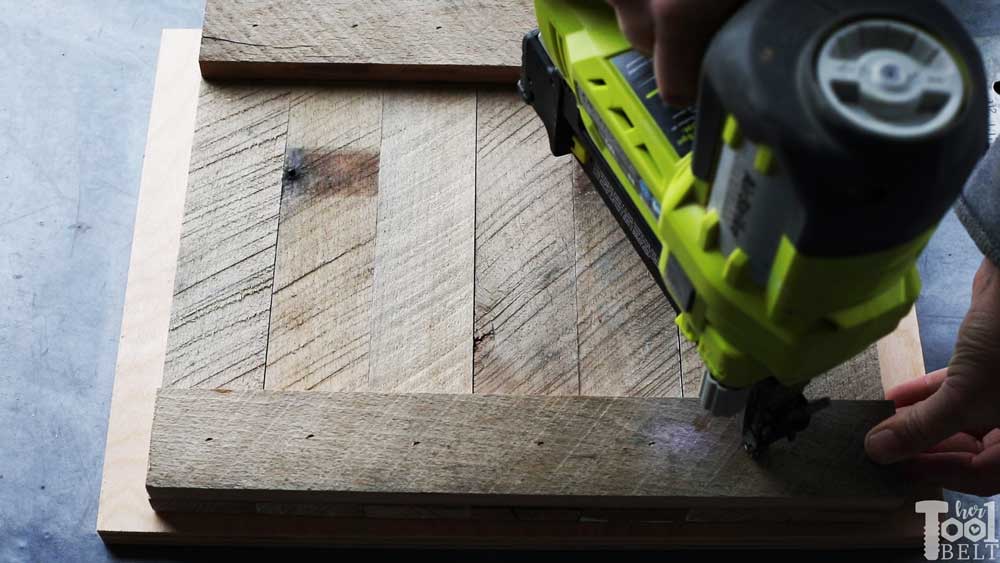
I love really distressed look that pallets can add to a project, so the wood portion I cut from pallets. One issue when cutting pallets is if you run into nails with a saw blade. The great thing about the Diablo wood and metal blade is that the blade tips are titanium cobalt carbide, which make it so you can also cut through metal just fine.
Cut 7 pieces of pallet wood 2″ x 11 1/2″ and cut 2 pieces that are 2″ x 14″.
Before assembling, I painted the 7 white keys with white chalk paint and let that dry. Then I lightly distressed the chalk paint with a sander.
I placed the front side of the keys down, and lined the 7 keys in a row.
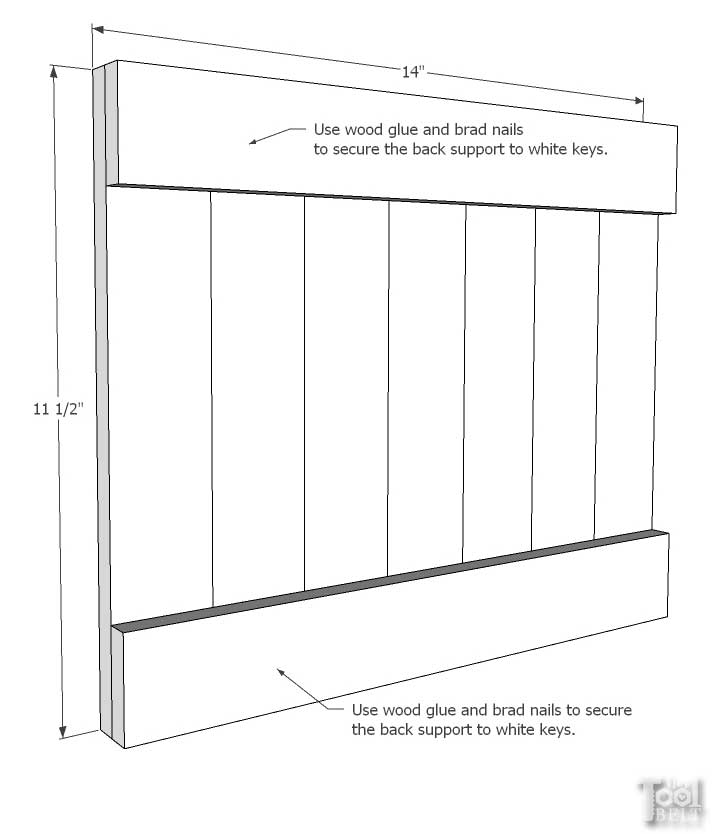
Then I spread wood glue on the 14″ back support pieces and secured the back support to the keys with brad nails. (My pallet wood was 3/4″ thick so I used 1 1/4″ brad nails, check your wood thickness, you may need shorter nails!)
Since my pallet wood thickness was 3/4″, I made my frame board widths 2″. Cut to fit 2 frame pieces for the top and bottom, should be close to 14″. Attach the frame pieces to the top and bottom of the keys with wood glue and 1 1/4″ brad nails. Then measure the length of side frame pieces you’ll need, cut and secure with wood glue and 1 1/4″ brad nails.
Black Keys
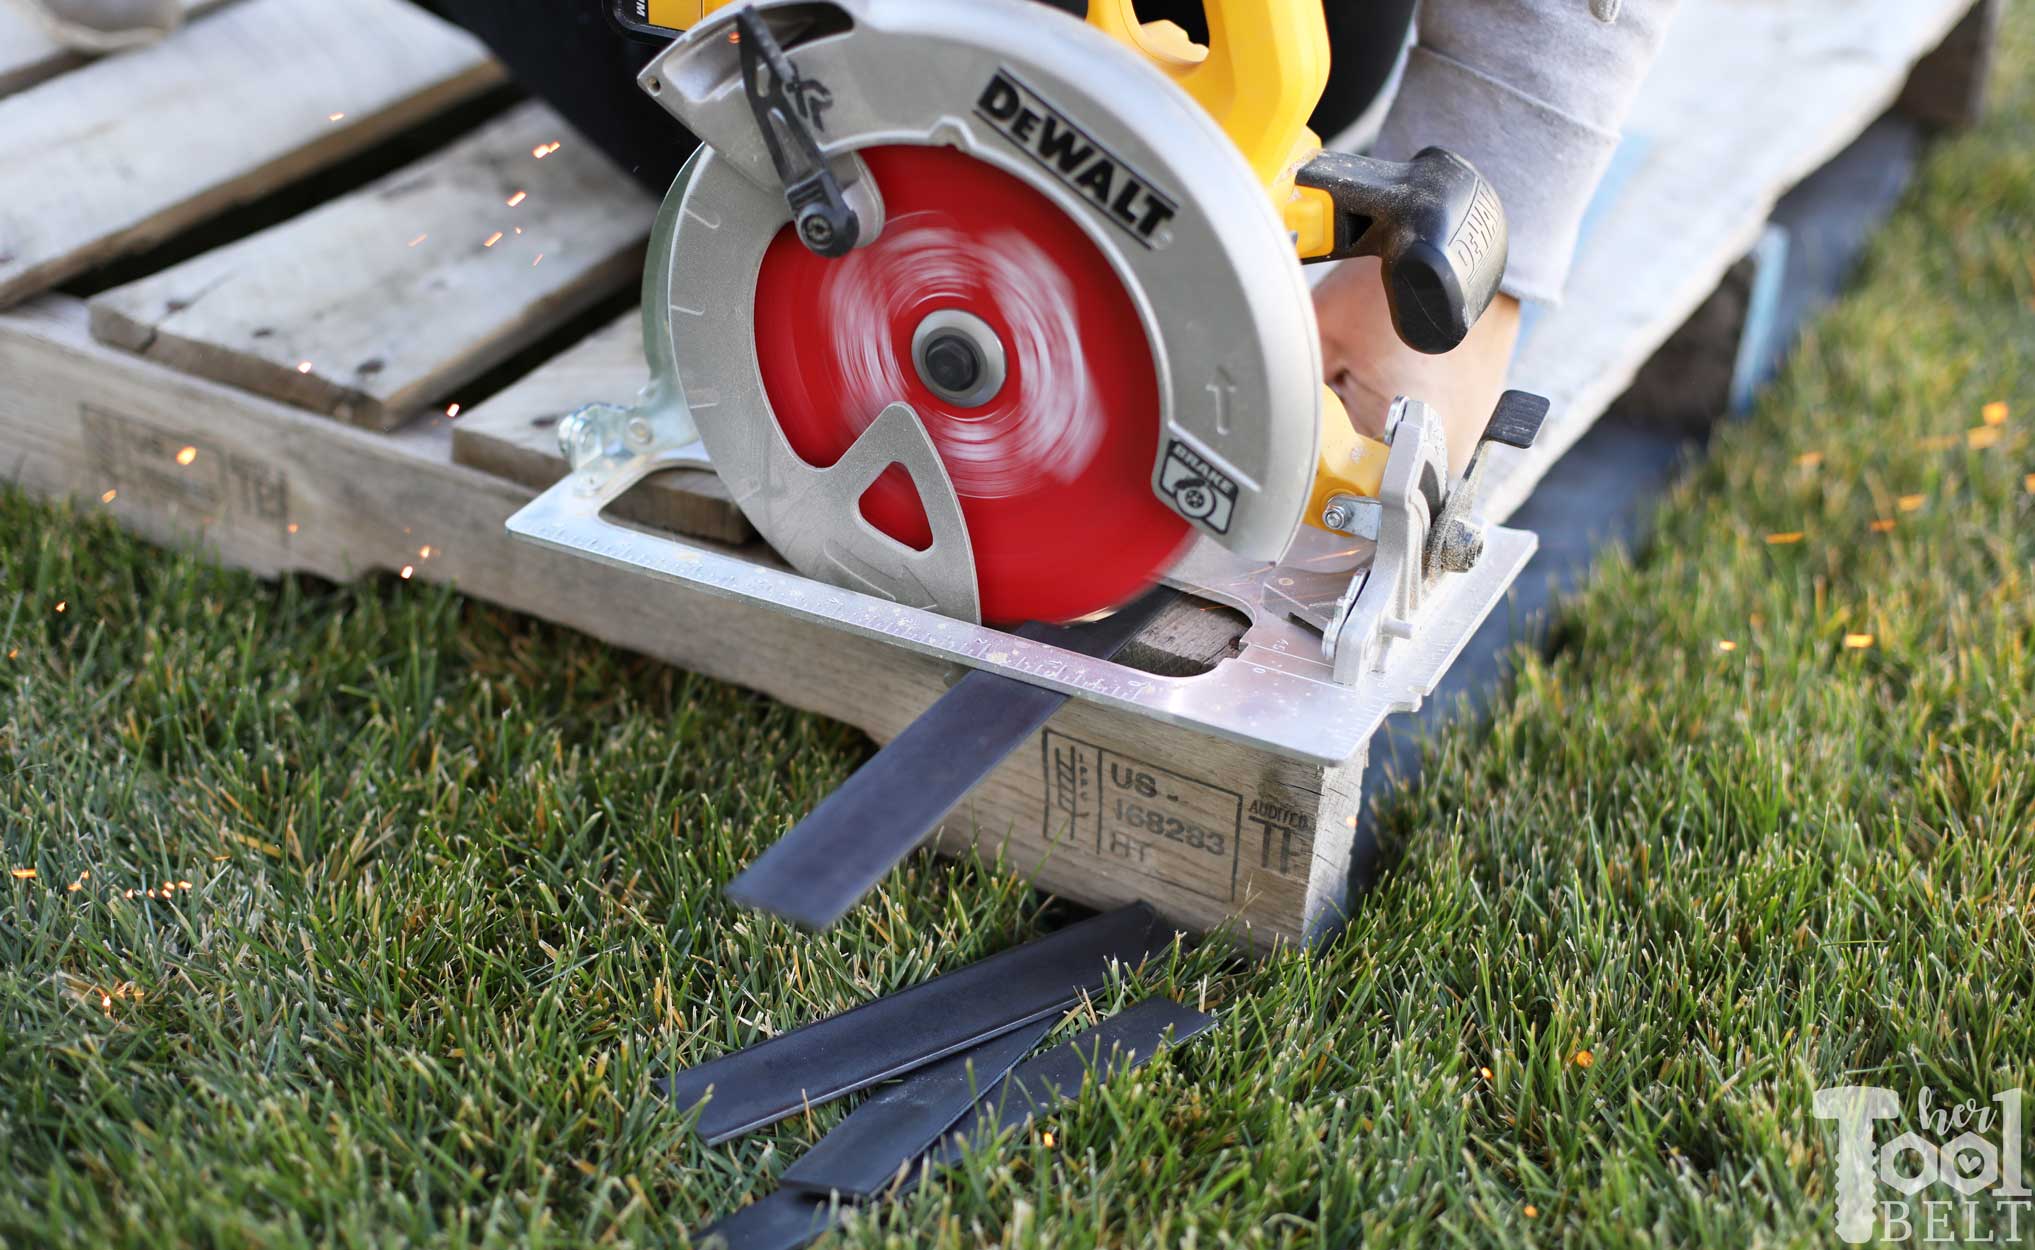
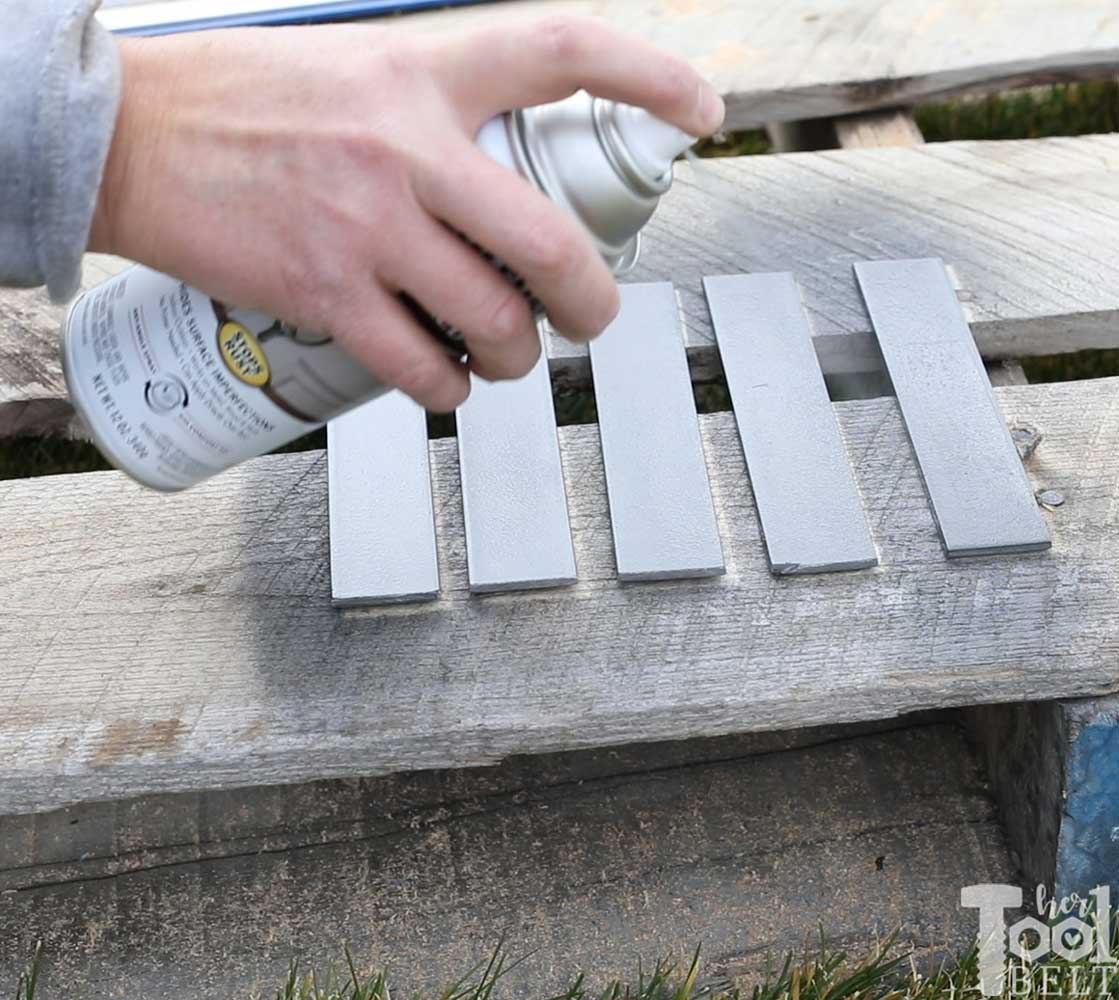
The black keys can be made from pallet wood, but I thought it would be a fun look to make them out of metal. I used 1 1/4″ x 1/8″ flat bar. Mild steel is super easy to cut with the Diablo steel demon blade.

The steel demon teeth are cermet, a ceramic and metallic blend. One cool thing is that it cuts so quickly that the pieces aren’t too hot to handle right after cutting! And the cuts are nice an clean without burrs. It’s very cool!
Then I spray painted the 5 keys black with Rustoleum hammered black and let the paint dry. I also sprayed the heads of the little #8 bolts.
Once the paint fully dried, I drilled 3/16″ holes about 3/4″ from the top of the keys.
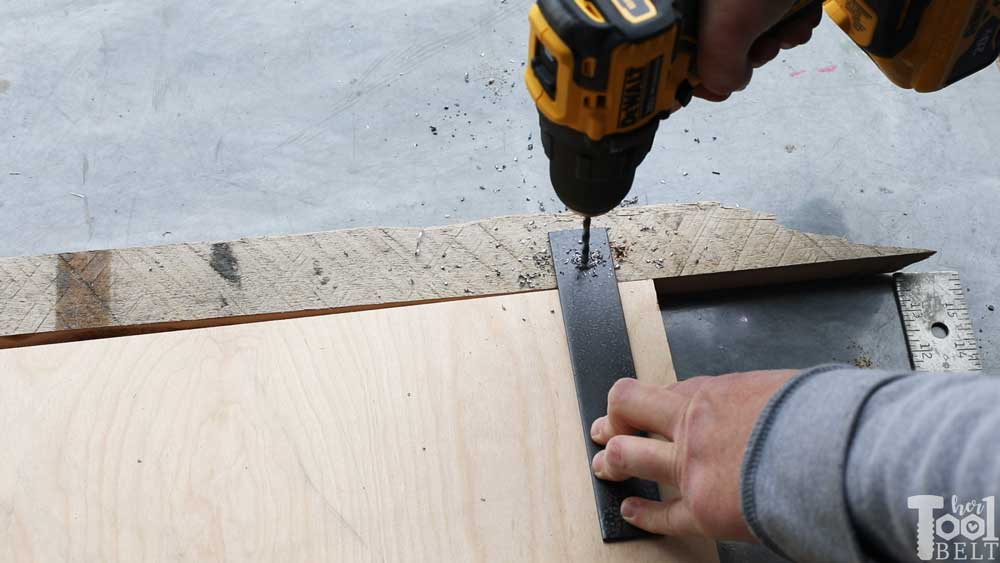
Then placed the black keys on the white key joints and drilled a whole through the white keys. On the backside of the back supports, I ended up drilling 3/8″ holes to inset the #8 nut so it wouldn’t stick out. Then I secured the black keys to the white keys with the #8 bolt and nut. If you want to raise the black key for more dimension, add #8 washers under black key.
Finally if you want to hang the piano sign, add a sawtooth picture hanger or route a keyhole in the back of the frame.
 Thanks for pinning!
“I acknowledge that The Home Depot is partnering with me to participate in the Tool Review Program. As a part of the Program, I am receiving compensation in the form of products and services, for the purpose of promoting The Home Depot. All expressed opinions and experiences are my own words. My post complies with the Word Of Mouth Marketing Association (WOMMA) Ethics Code and applicable Federal Trade Commission guidelines.”
Leave a Reply