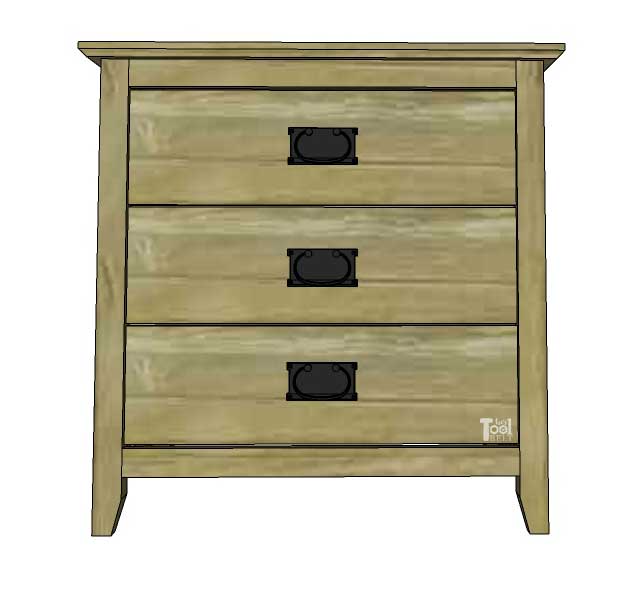
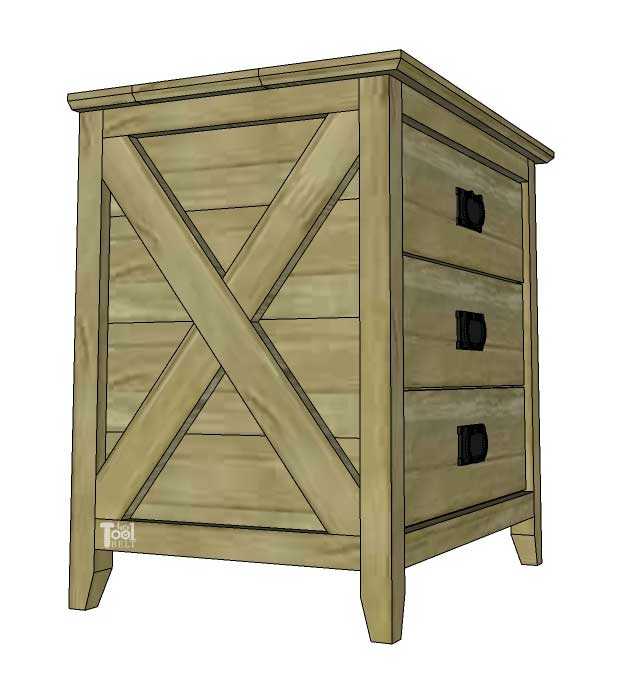
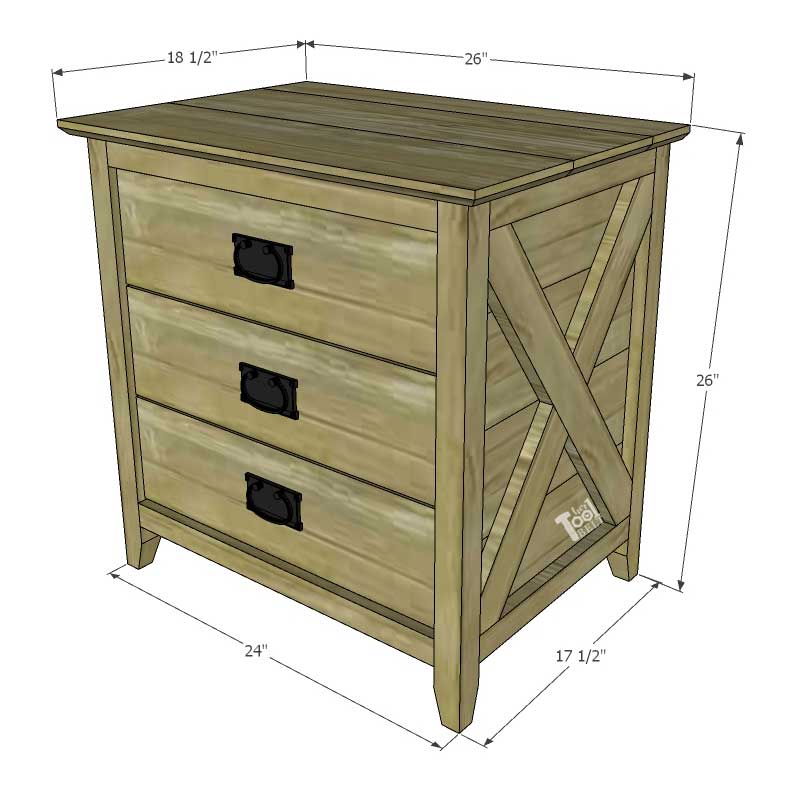
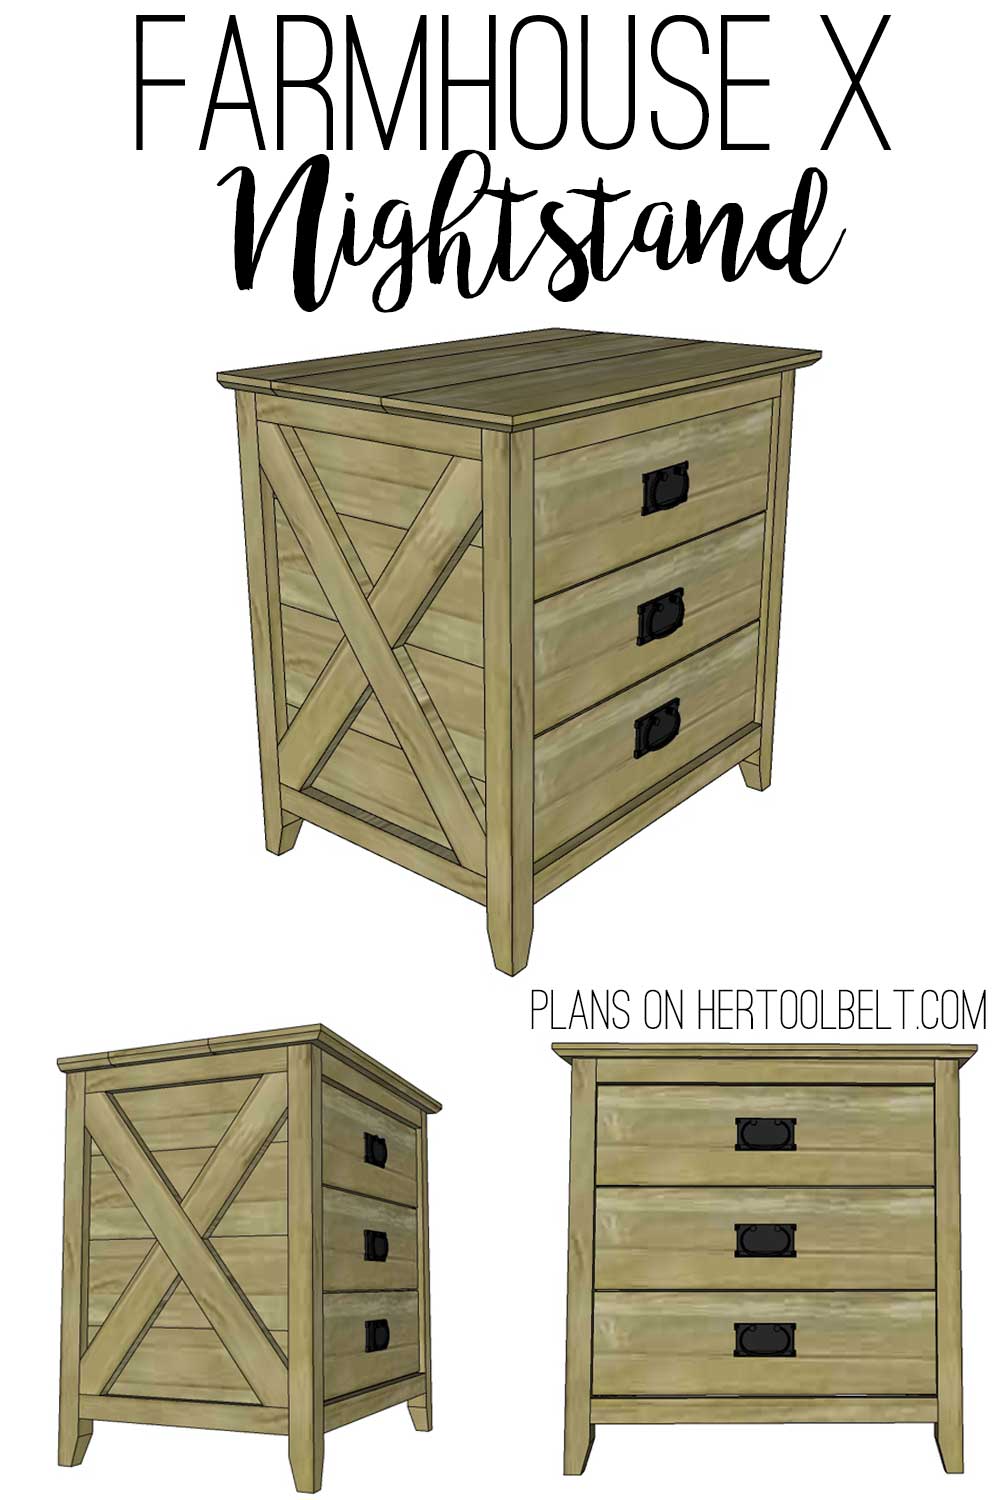
New plans for a farmhouse nightstand with X detail. I built a pair of these nightstands to go with my King X Barndoor Farmhouse Bed. The nightstand has 3 generous sized drawers to hold all your stuff. The side planking and X detail mimic the style of the Farmhouse Bed. Generally speaking a nightstand should be about the same height of the top of the mattress. You can adjust the height of the nightstand legs to fit your needs.
This post contains some affiliate links for your convenience. Click here to read my full disclosure policy.
How to Build a Farmhouse X Nightstand
Materials
- 1 – 1×8 x 8′ board
- 2 – 1×6 x 8′ boards
- 3 – 1×4 x 8′ boards
- 1 – 1×3 x 8′ board
- 2 – 1×2 x 8′ boards
- 2 – 2×2 x 8′ boards
- 1 1/4″ pocket hole screws
- 1 1/4″ brad nails
- 3/4″ brad nails for the back
- 3 – 16″ drawer slides
- Varathane Briarsmoke
- sandpaper
- wood glue
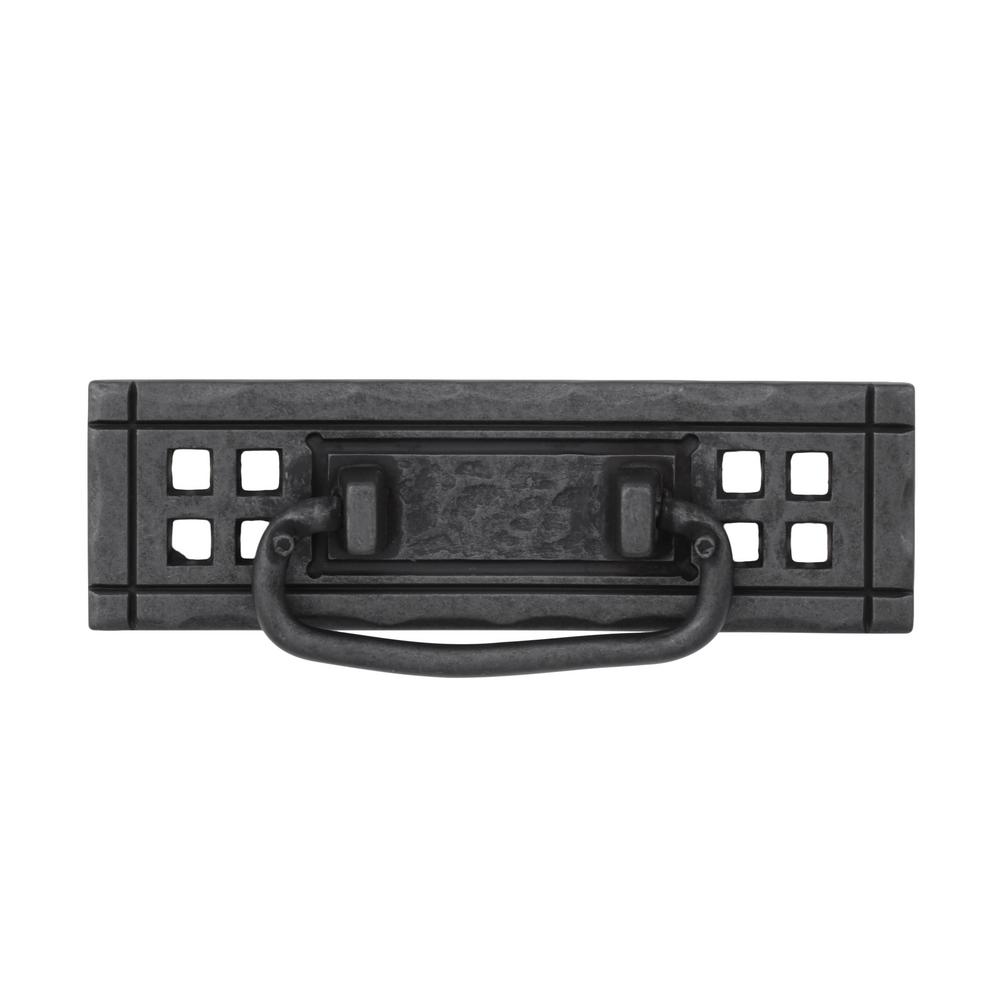
- 3 – drawer pulls, mine are mission style
- wood filler
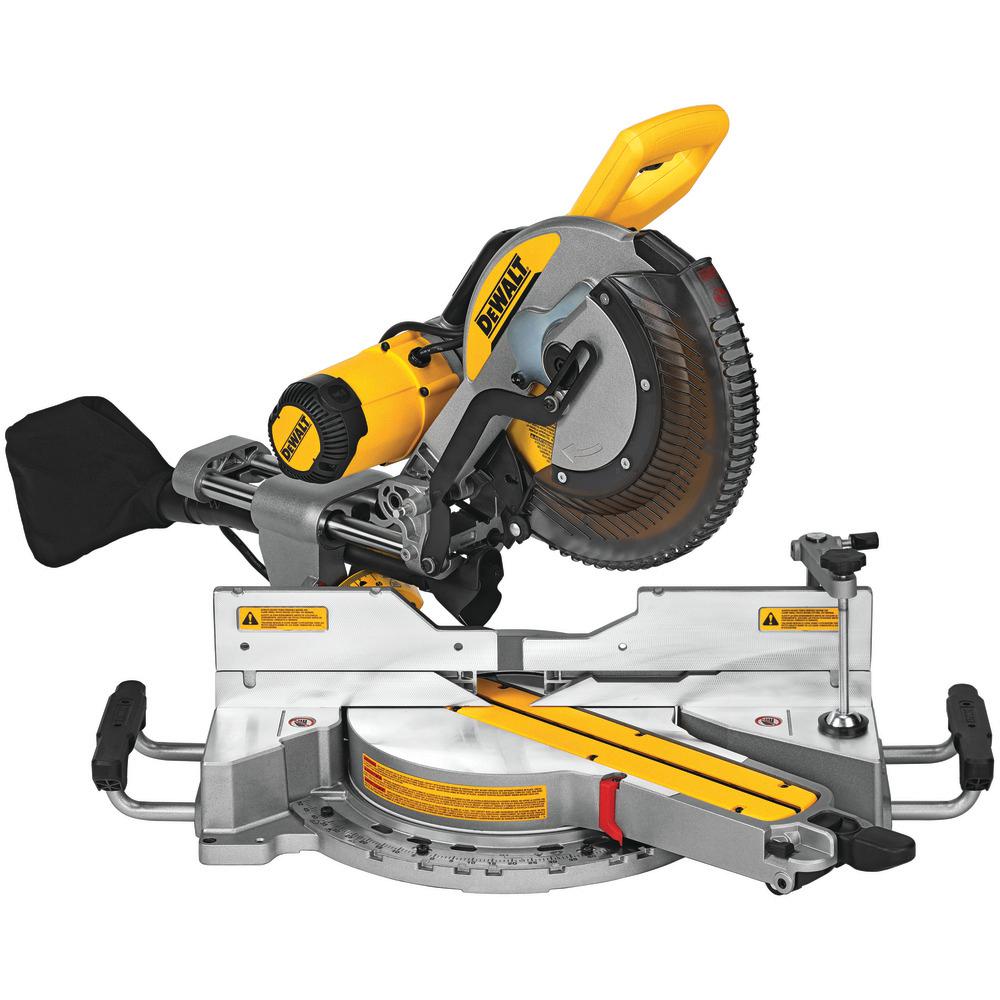
Tools Used
 |
 |
 |
 |
 |
 |
 |
 |
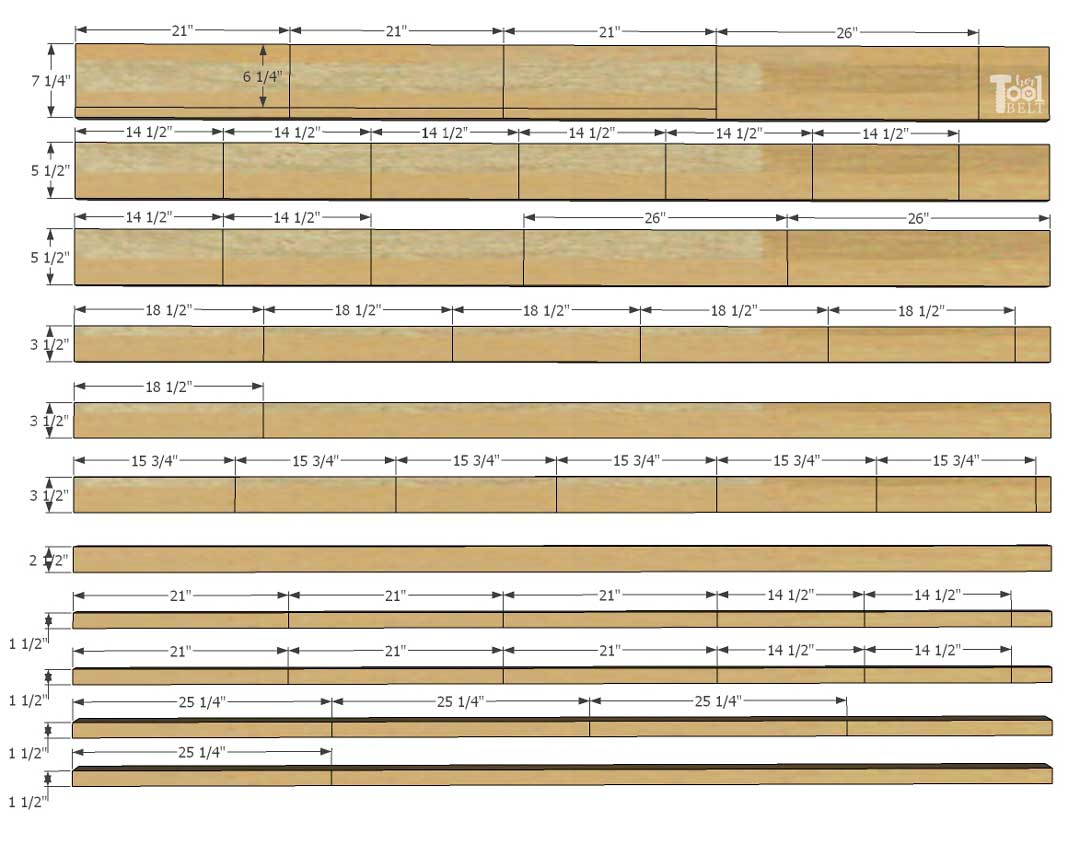
Cut List
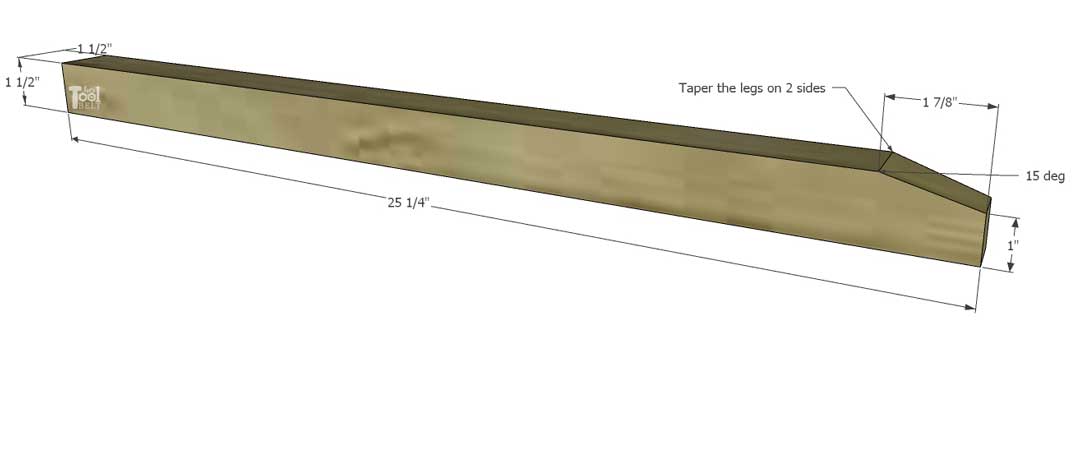
- 4 – 1 1/2″ x 1 1/2″ x 25 1/4″ – legs
- 3 – 3/4″ x 6 1/4″ x 21″ – drawer fronts (cut to fit)
- 1 – 3/4″ x 7 1/4-1/2″ x 26″ – top
- 8 – 3/4″ x 5 1/2″ x 14 1/2″ – side planks
- 2 – 3/4″ x 5 1/2″ x 26″ – top
- 6 – 3/4″ x 3 1/2″ x 18 1/2″ – drawer f/b
- 6 – 3/4″ x 3 1/2″ x 15 3/4″ – drawer sides
- 2 – 3/4″ x 2 1/2″ x cut to fit – X pieces
- 6 – 3/4″ x 1 1/2″ x 21″ – support rails
- 4 – 3/4″ x 1 1/2″ x 14 1/2″ – side rails
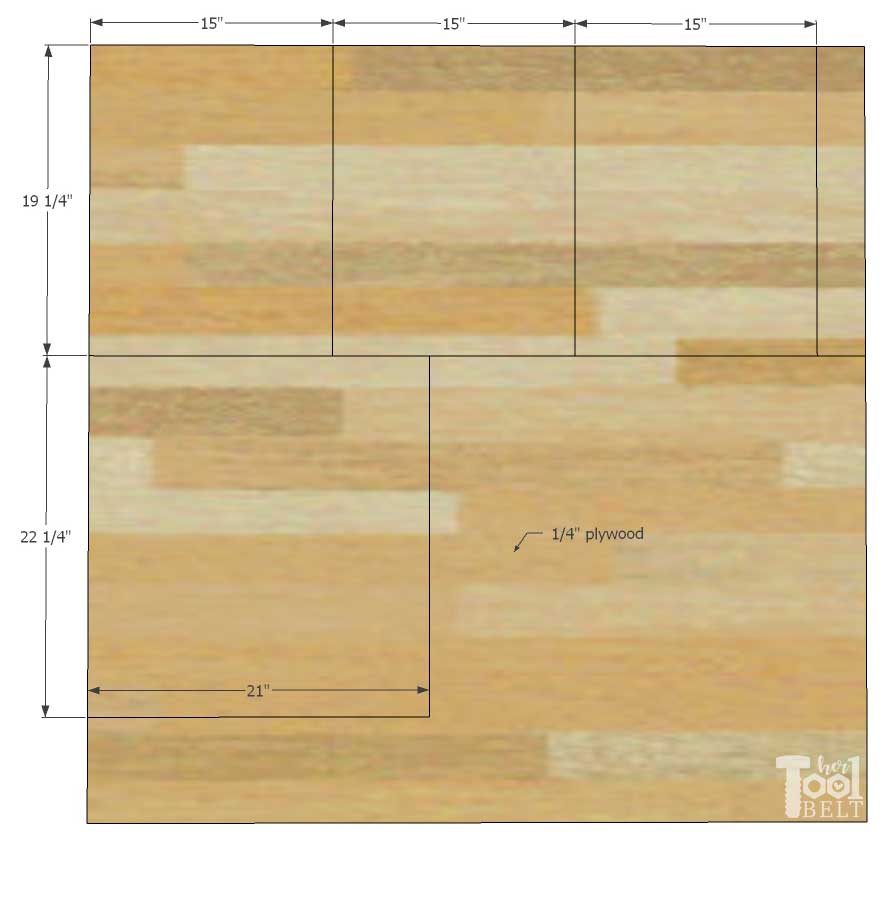
- 3 – 1/4″ x 15″ x 19 1/4″ – drawer bottom
- 1 – 1/4″ x 21″ x 22 1/4″ – back
Cut Diagram
1/4″ Plywood Cut Diagrams
Step 1 – Nightstand Sides
Tapering the legs is an option step and only for looks.
Taper legs
Mark over about 1″ on the end of the legs, cut a 15 degree angle to create a leg taper. Repeat on an adjacent side, so 2 sides are tapered. The tapering can be done on a table saw, jig saw, circular saw or miter saw with a jig.
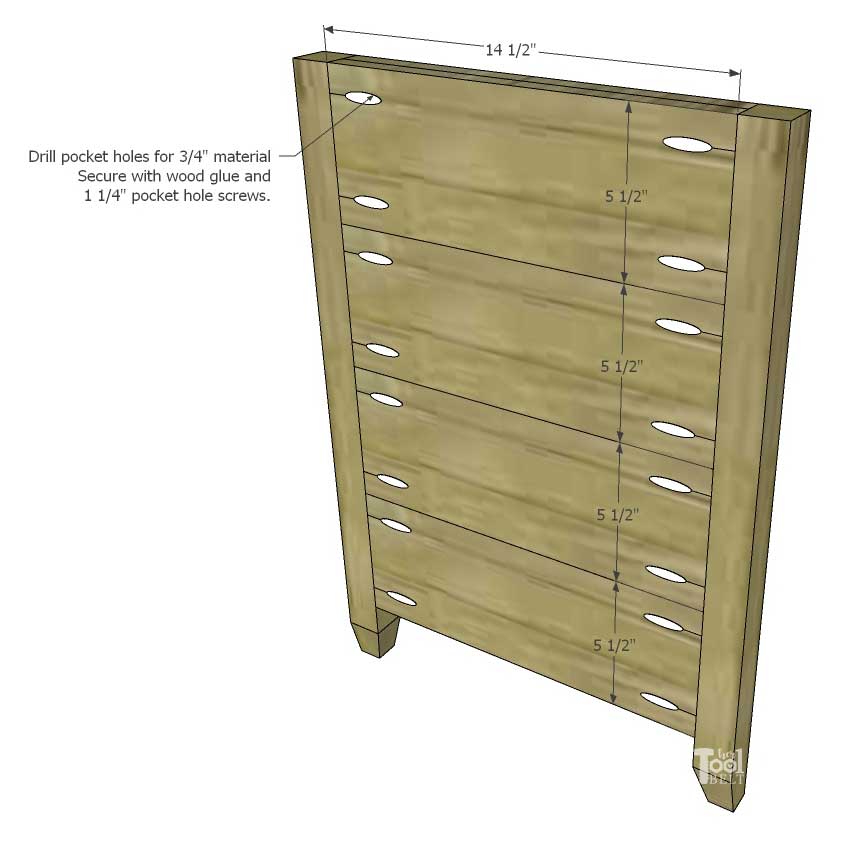
Assemble Side Panels
Drill pocket holes for 3/4″ material in both ends of the 1×2 x 14 1/2″ side rails. On the legs, mark down from the top 20 3/4″. If the legs are tapered, orient the tapers to be on the inside corners, see sketch. Secure the 14 1/2″ side rails to legs with wood glue and 1 1/4″ pocket hole screws. One side rail will be flush with the leg tops and one at 20 3/4″. Repeat for 2nd side assembly.

Drill pocket holes for 3/4″ material in both ends of the 1×6 x 14 1/2″ side planks. Sand a small round over/chamfer on the 14 1/2″ edges for plank line definition. Secure the 14 1/2″ side planks to legs with wood glue and 1 1/4″ pocket hole screws. Repeat for 2nd side assembly.
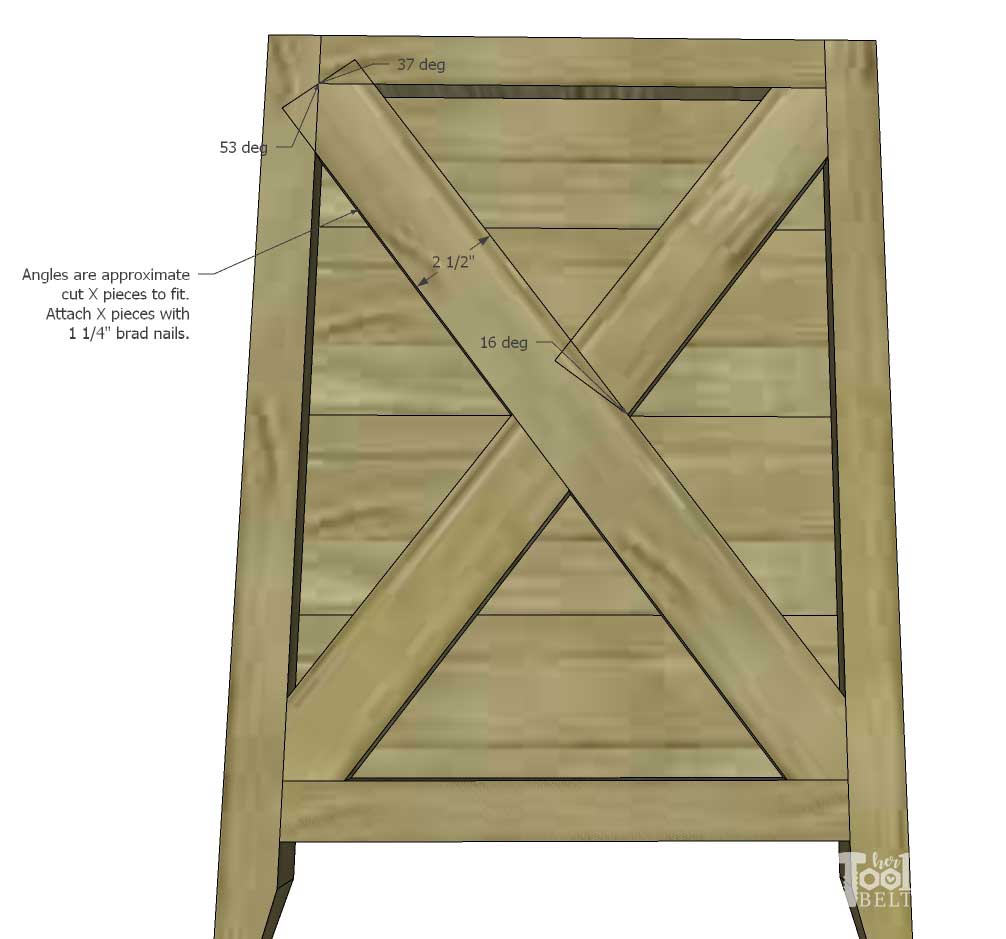
Cut the X detail pieces to fit from the 1×3 (2 1/2″ wide) board. The following angles are for reference. Attach X pieces with wood glue and 1 1/4″ brad nails.
Step 2 – Build Nightstand
Drill pocket holes for 3/4″ material in both ends of the 1×2 x 21″ support rails. If you want to attach the top with pocket holes, then drill pocket holes in 2 support rails along a long side and attach these rails at the top.
Front Support Rails
On the legs, mark down from the top 20 3/4″. On the front legs mark down 7 5/8″ and 14″ from the top, also mark 1 1/4″ inset from the front.
Secure the 21″ support rails to legs with wood glue and 1 1/4″ pocket hole screws.
- Attach one vertical, flush with the front and top.
- Attach one horizontal, inset 1 1/4″ and 7 5/8″ down from the top.
- Attach one horizontal, inset 1 1/4″ and 14″ down from the top.
- Attach one vertical, flush with the front and 20 3/4″ down from the top.
Back Support Rails
- Attach one vertical, inset 1/4″ from the back and flush with the top.
- Attach one vertical, inset 1/4″ from the back and 20 3/4″ down from the top.
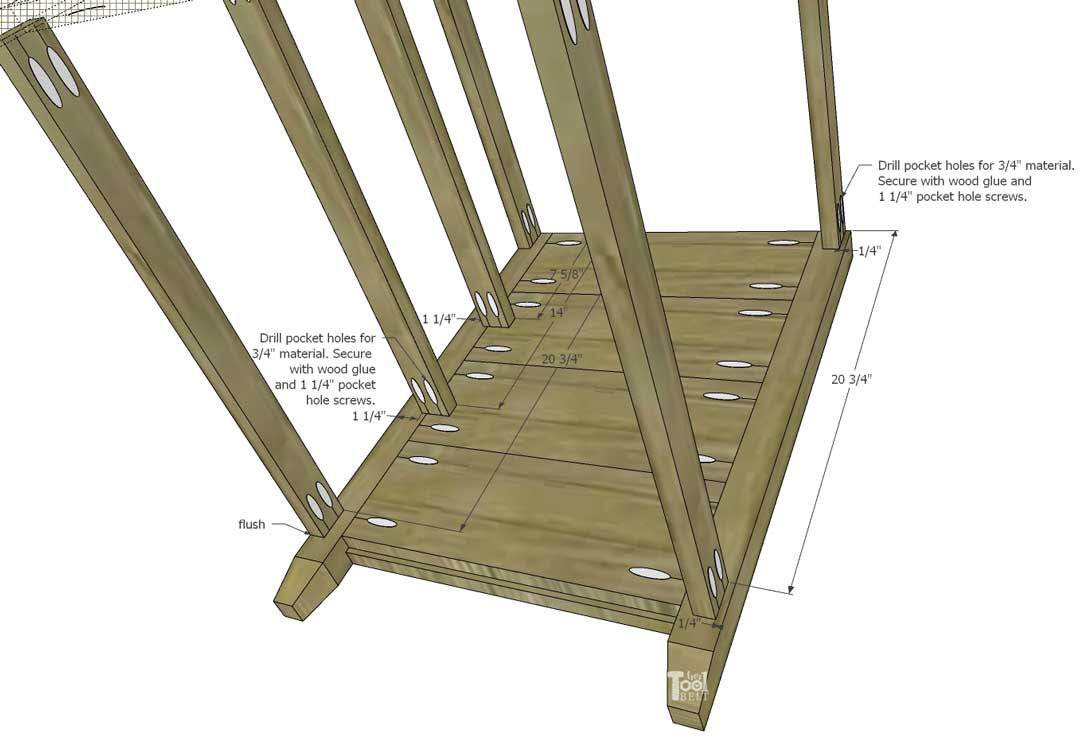
Repeat to attach to the other side assembly.

Join Top
Drill pocket holes for 3/4″ material in one side of the 1×6 x 26″ top pieces. Glue together the 3 top pieces, secure the 26″ top pieces with 1 1/4″ pocket hole screws.
If desired, route a chamfer on the underside of the top, on the side and front edges.
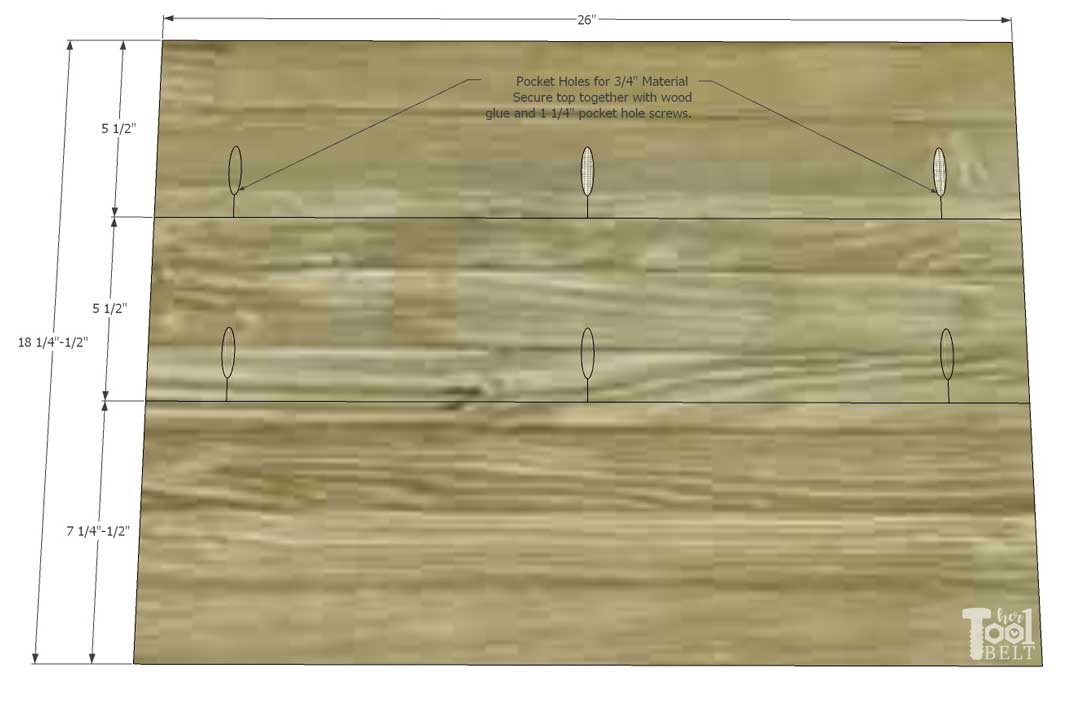
Attach the top to the front and back top rails with 1 1/4″ pocket hole screws or 5/8″ screws and top attach brackets.
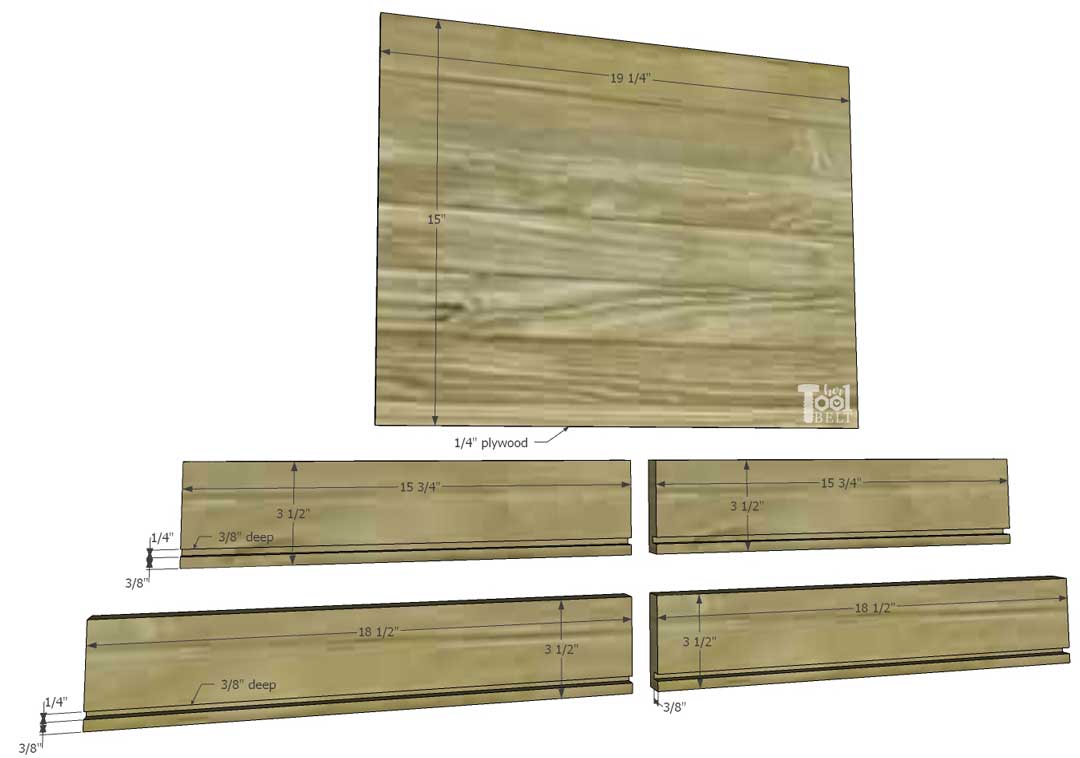
Step 3 Drawers
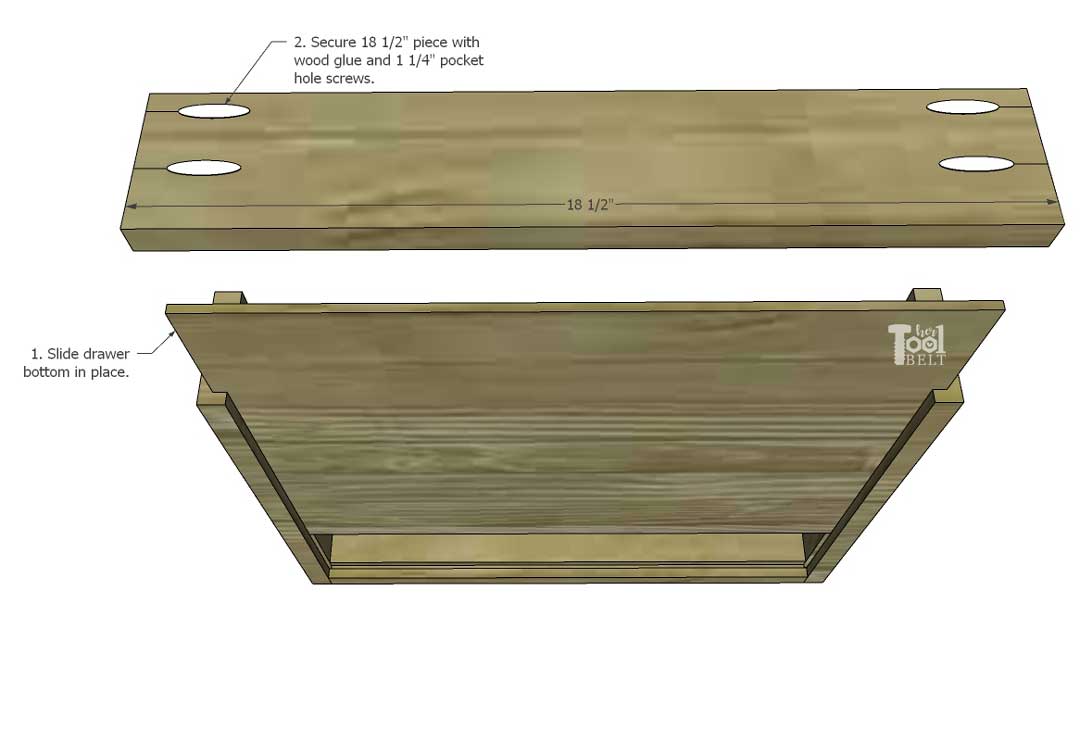
Each drawer will have a 1/4″ drawer bottom, 2 sides 15 3/4″ long and 2 front/backs 18 1/2″ long. Mark 3/8″ up from the bottom of each side/front/back piece. Use a router with 1/4″ straight bit, circular saw or table saw to route a groove 1/4″ wide and 3/8″ deep.
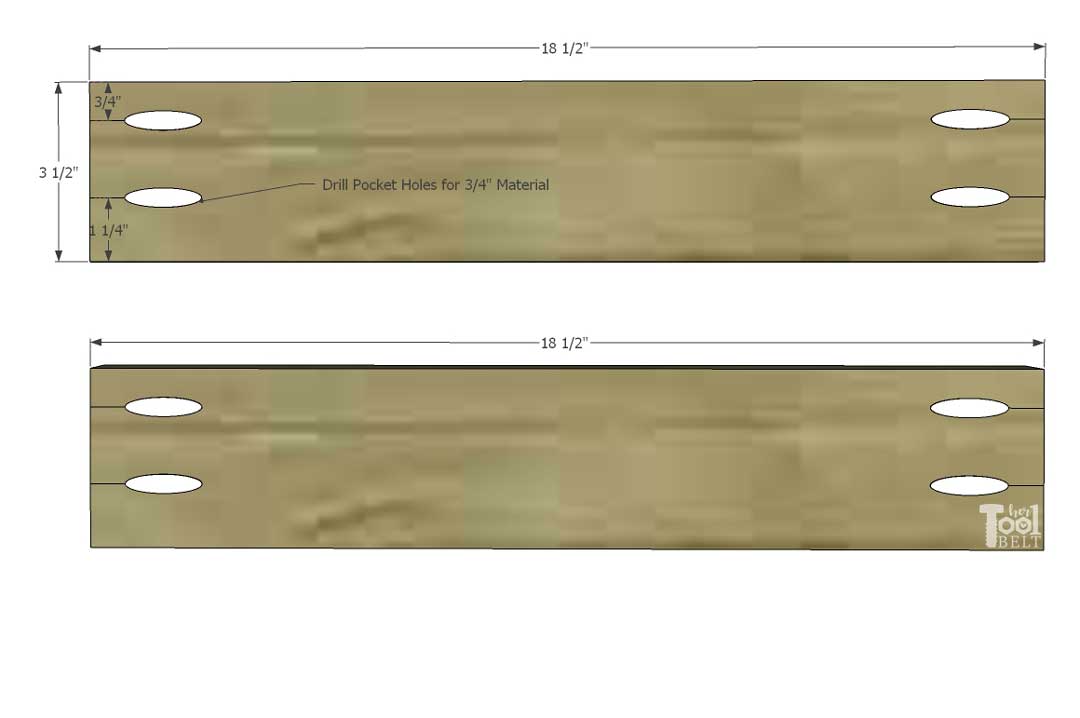
On the opposite side as the groove, drill pocket holes for 3/4″ material in each end of the 18 1/2″ front/back pieces. Note: Don’t drill a pocket hole too close to the groove.
Secure a 18 1/2″ piece to 2 sides (15 3/4″) with wood glue and 1 1/4″ pocket hole screws.
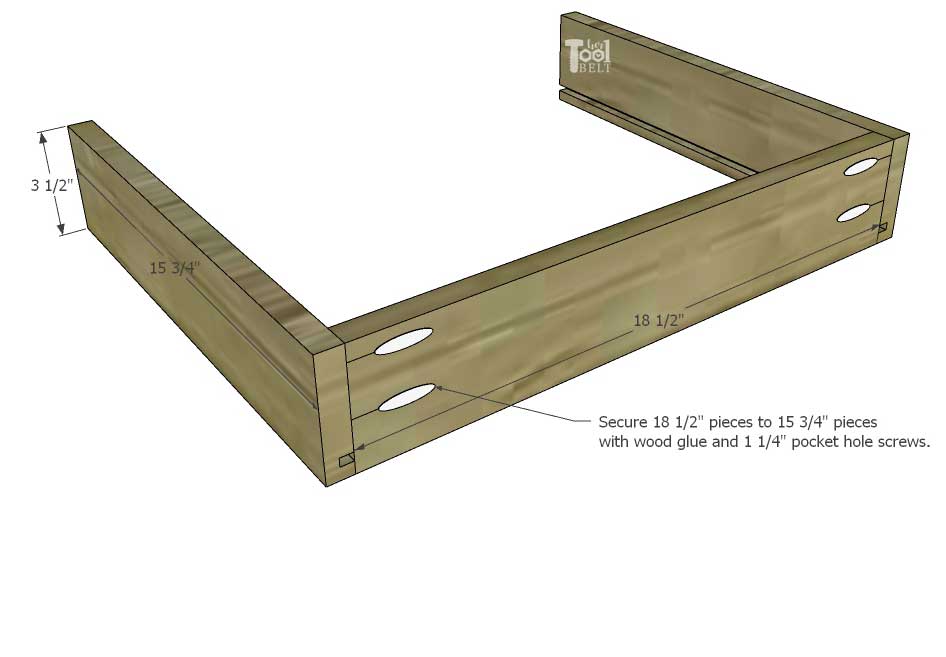
Slide a 1/4″ bottom piece into the groove, and attach another 18 1/2″ piece to the sides with wood glue and 1 1/4″ pocket hole screws.
Repeat to make 3 drawers.
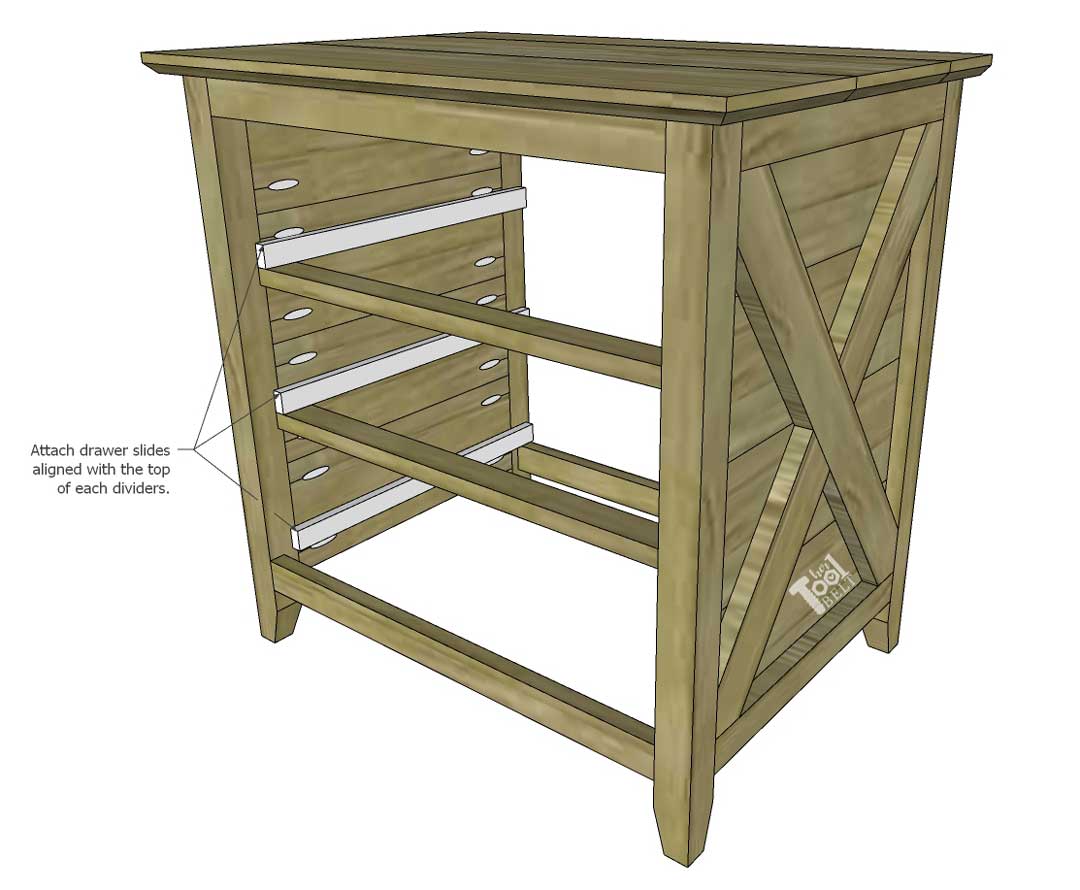
Attach the 16″ drawer slides to the bottom of the drawers. Attach the other portion of the drawer slides to the nightstand sides aligned with the top of the support rails.
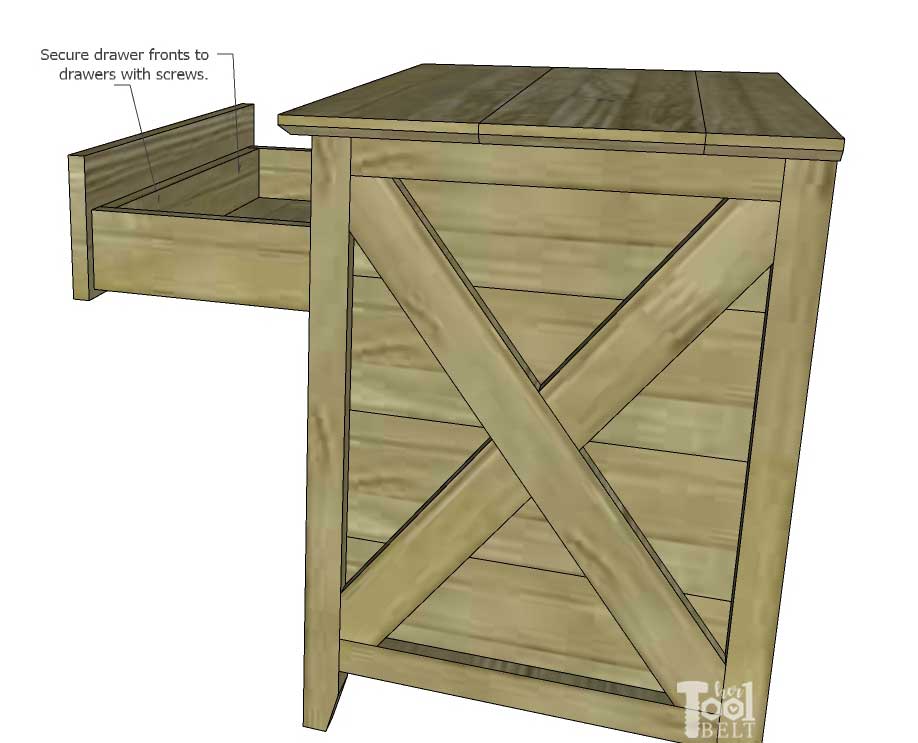
Trim the drawer fronts to fit, leaving a 1/16-1/8″ gap. Secure the drawer front to the front of the drawer with 1 1/4″ screws from the inside of the drawer into the drawer front. Attach drawer pulls to the drawer as desired.
Attach the 1/4″ back with 3/4″ brad nails.

Step 4 Finish
Fill all nail holes and blemishes with wood filler and allow to dry. Sand the nightstand smooth, starting with 80 grit sandpaper and working up to 180-220. I stained the nightstands with Varathane Briarsmoke. Once the stain dried, I applied 2 coats of satin polyurethane, sanding lightly between coats.
Download the plans for the Farmhouse X Nightstand –>Here<–
Thanks for pinning!
Leave a Reply