Fix the Sagging Deck and Tool Review is sponsored by The Home Depot. I have been compensated for my time and provided with product. All ideas and opinions are my own. This post contains some affiliate links for your convenience. Click here to read my full disclosure policy.
Check out this view of the deck floor while coming up the stairs. It sort of reminds me of Galloping Gertie!
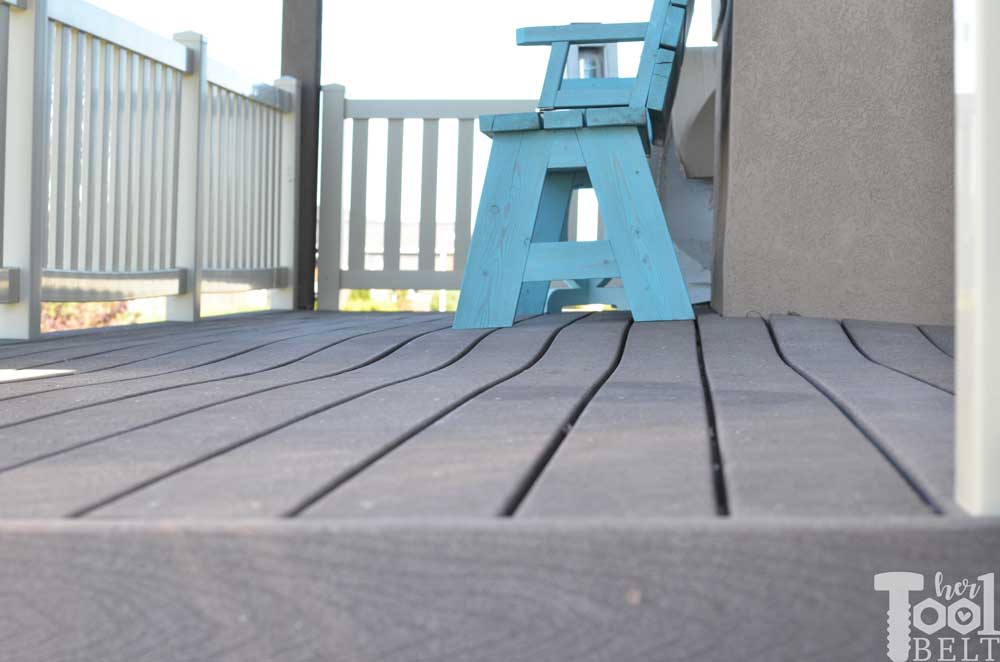
That is my deck waving at you! When we bought this house, it was unfinished and bank owned. The contractor had some guys install the deck, it wasn’t level when we moved in. There was definitely a noticeable slope downwards.
However over the last 8 1/2 years it has gotten worse.
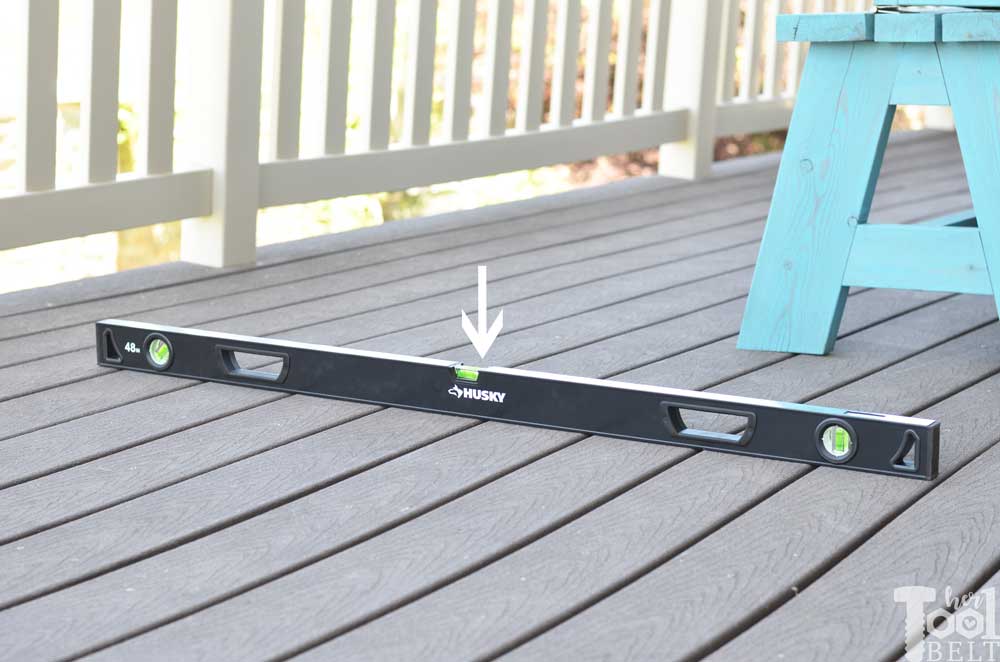
The deck guys didn’t install stairs either, so I installed some about 6 years ago. I should’ve fixed the slope then, but didn’t. I installed the stairs level, you can see the deck slope.
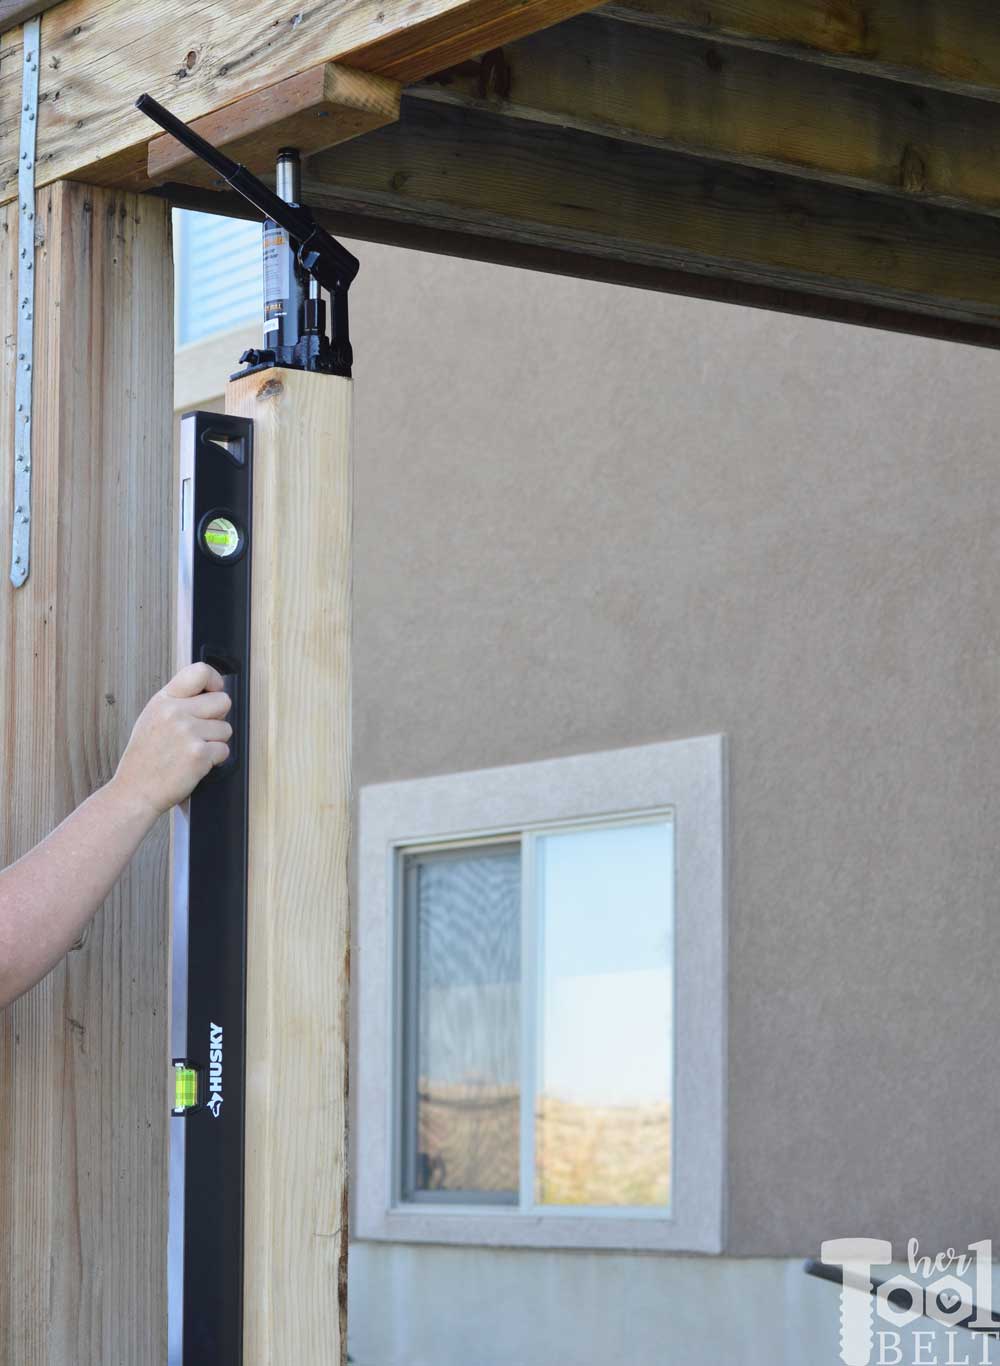
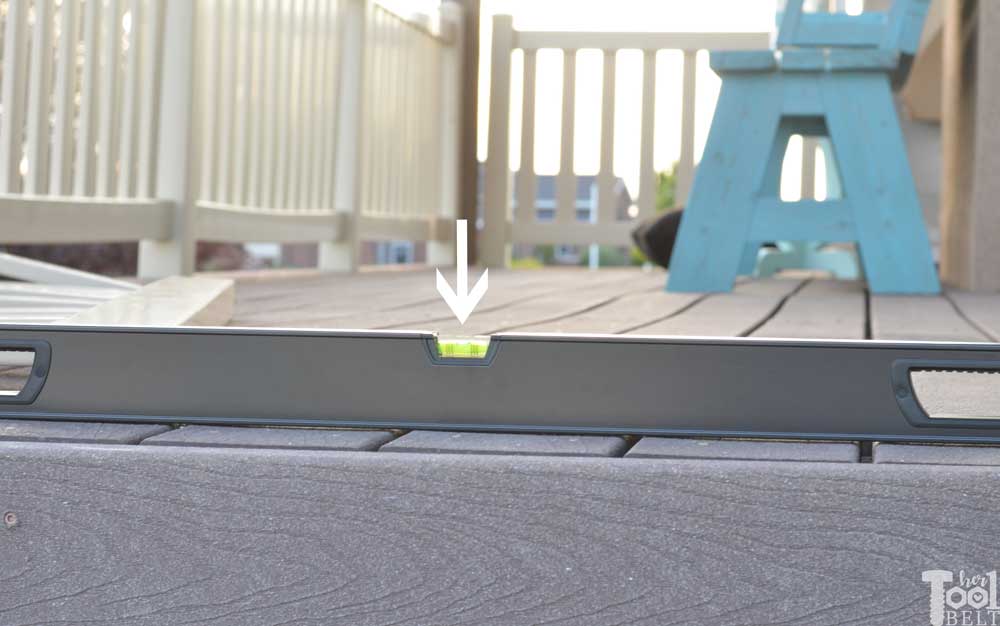
Now to see how level the deck is. Yep just what I thought, it’s not level, the bubble is over on the far right side.
From what I’ve read, a deck without gaps in the flooring should slope about 1/4″ over 12′ to allow for watershed. Decking with gaps doesn’t require the watershed angle. I guesstimate my deck is sloping a few inches over 12′.
Fix the Sagging Deck – The Game Plan
The plan is to jack up the deck and replace the 6×6 deck posts with posts that are the correct length.
Supplies Needed:
- 3 – 6″ x 6″ posts (actually 5 1/2″ x 5 1/2″)
- Nails
- 4′ level – it is useful to have multiple levels
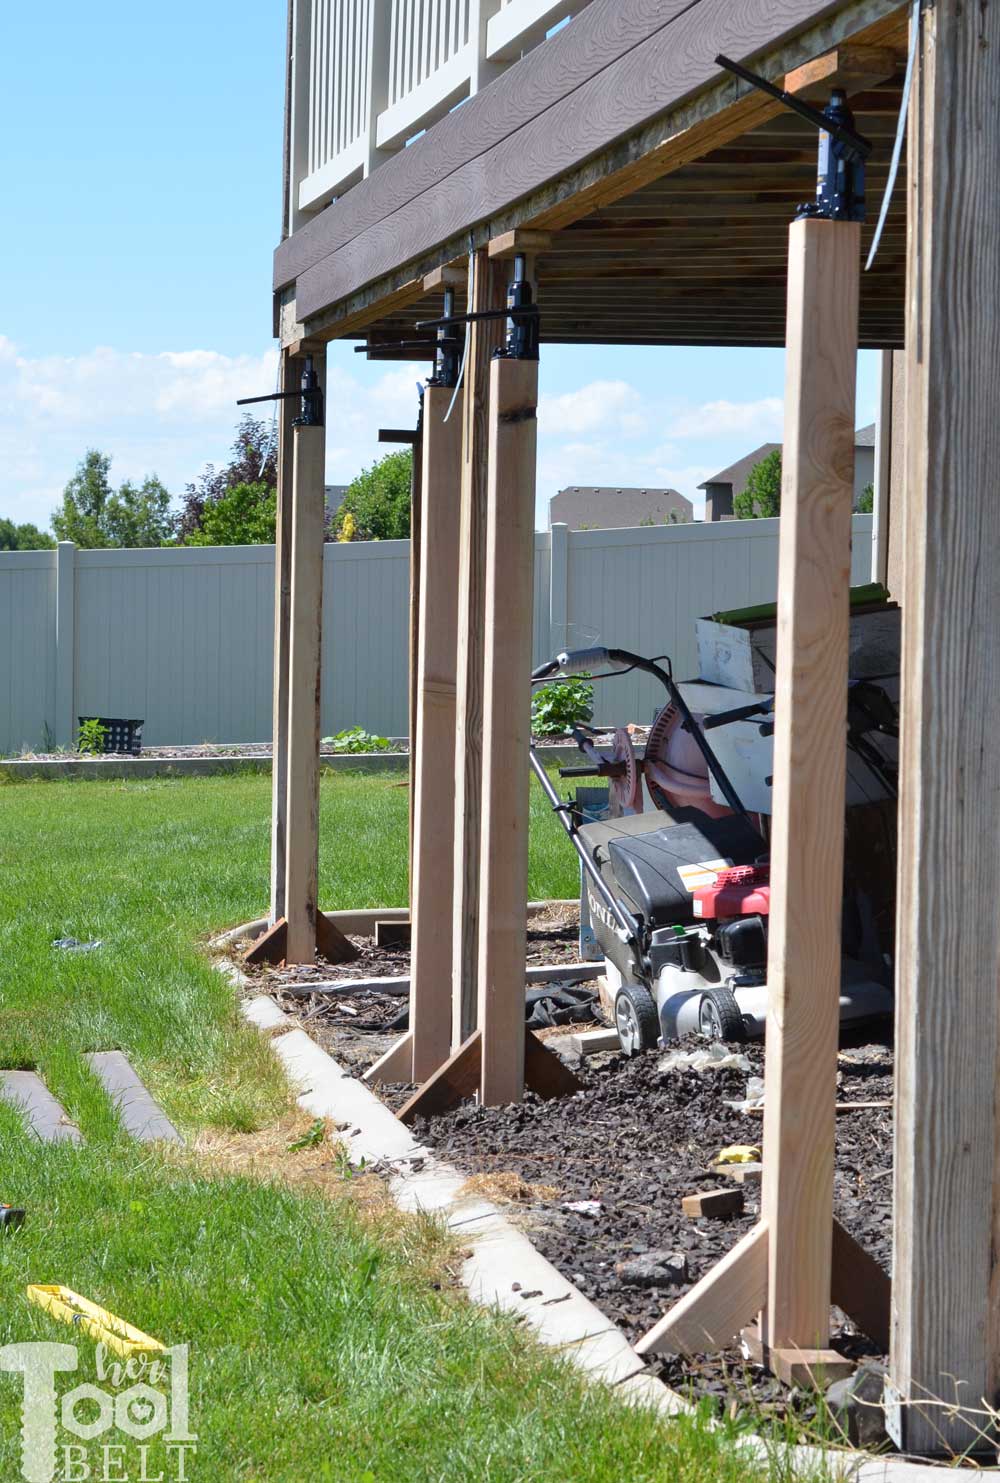
- 6 – 4 ton bottle jacks (I bought Black Bull but they seem to be out of stock) I wanted to put 2 on either side of each post.
- 6 – 4×4 posts (to support bottle jacks)
- scrap 2×4’s
- Reciprocating saw + Battery
- Wood and Nail reciprocating saw blades
- Hammer
- Circular Saw
- Impact Driver (to remove deck wrap/facing)
- Square
- Pry bar
- 2 1/2″ screws
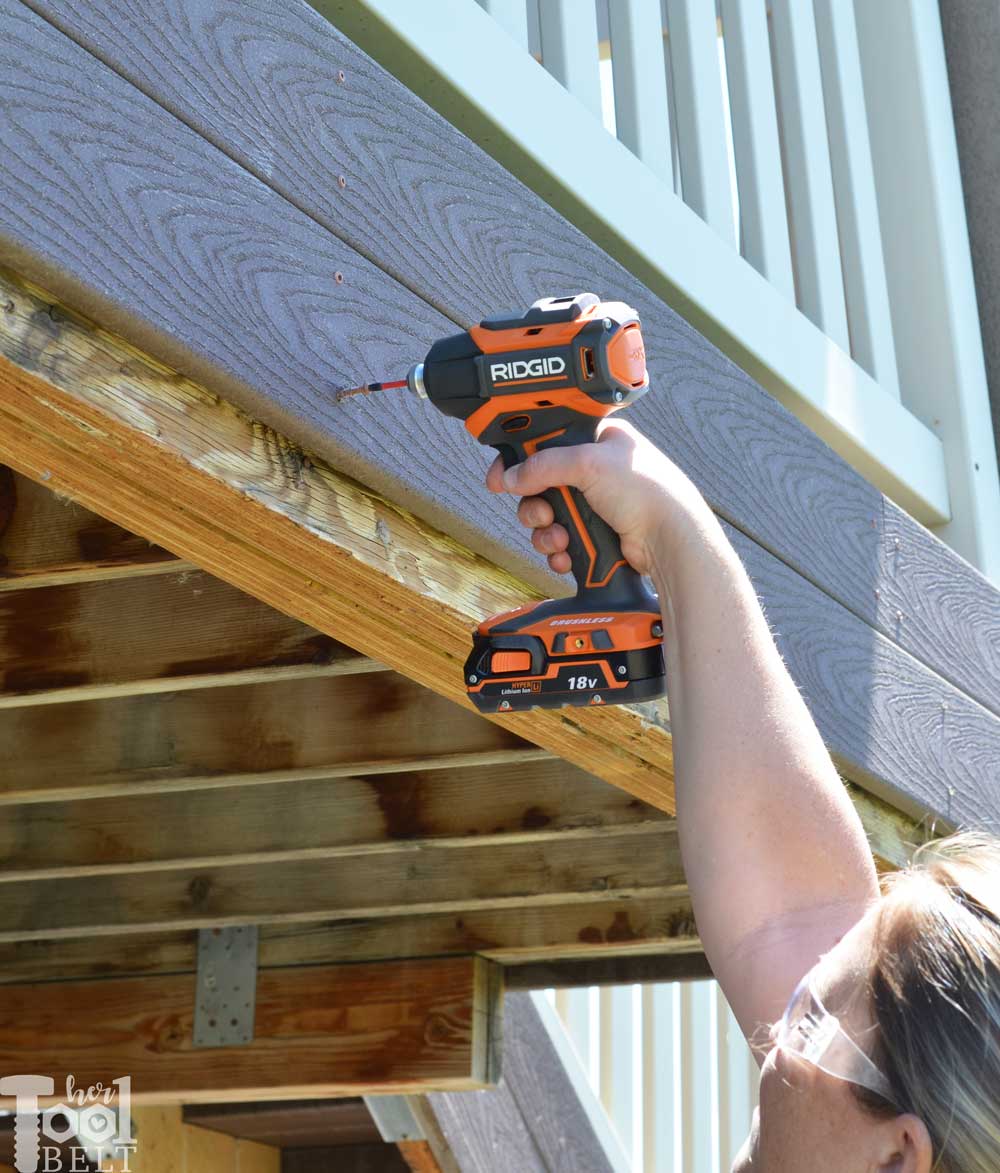
First I used an impact driver to remove the deck wrapping (treks). This Ridgid impact driver is a must have tool. I love that Ridgid has 3 torque settings on the impact, it makes a huge difference in applications like working with treks!
Now to set up the jacks. I decided to have 2 jacks adjacent to each deck post (3 posts x 2 jacks = 6 jacks). I got some 4×4 posts and screwed on some scrap 2×4 to the bottom to make a T and leveled out the ground as needed. To distribute the jack load on the main beam that is laminated, I attached more scrap 2×4. Then I leveled the posts and pumped up the jacks to be taut.
The jacks lined up and ready to go.
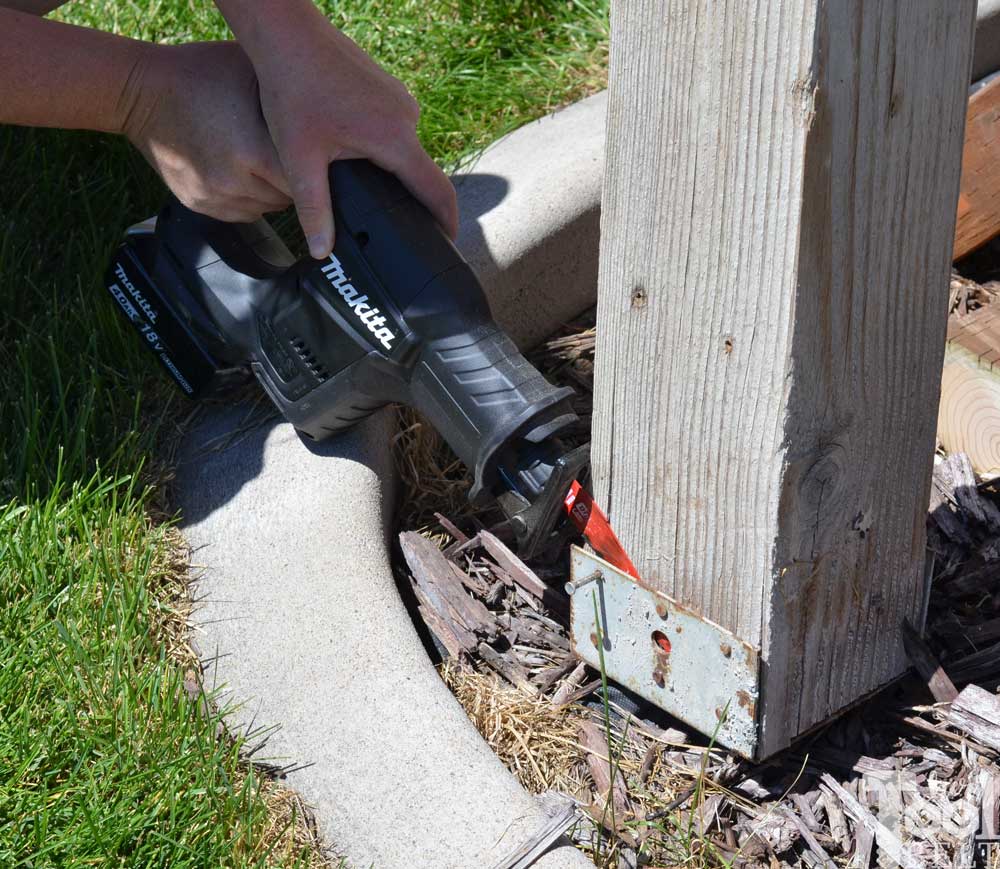
Then I cut the bottom of the existing deck posts to be free. Some of the nails came out easily with a hammer and pry bar, others I used the wood and nail Diablo blades with the Makita reciprocating saw. This recip saw is part of Makita’s sub compact line. I really like the smaller body 12 1/2″ long, but it still has plenty of power! It’s variable speed too, depending on how far you pull the trigger.
I also detached the stairs from the deck.
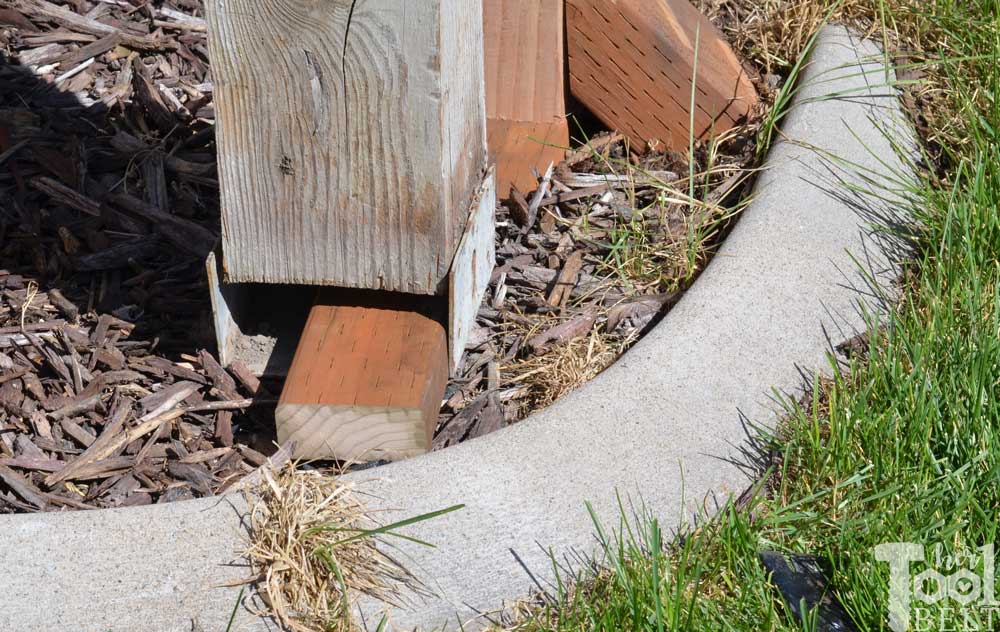
Time for the excitement, jacking up the deck. I started on one end and gave each jack a pump going down the line, and repeated pumps in order until the deck started to become level. The farthest corner got to level first. It only needed to come up about 2 1/2″ (I put a 2×4 in the gap for comparison).
 I detached the top of the post with the reciprocating saw, cutting through the nails. Did I mention how much I love the Diablo wood and nail blades, they are fantastic.

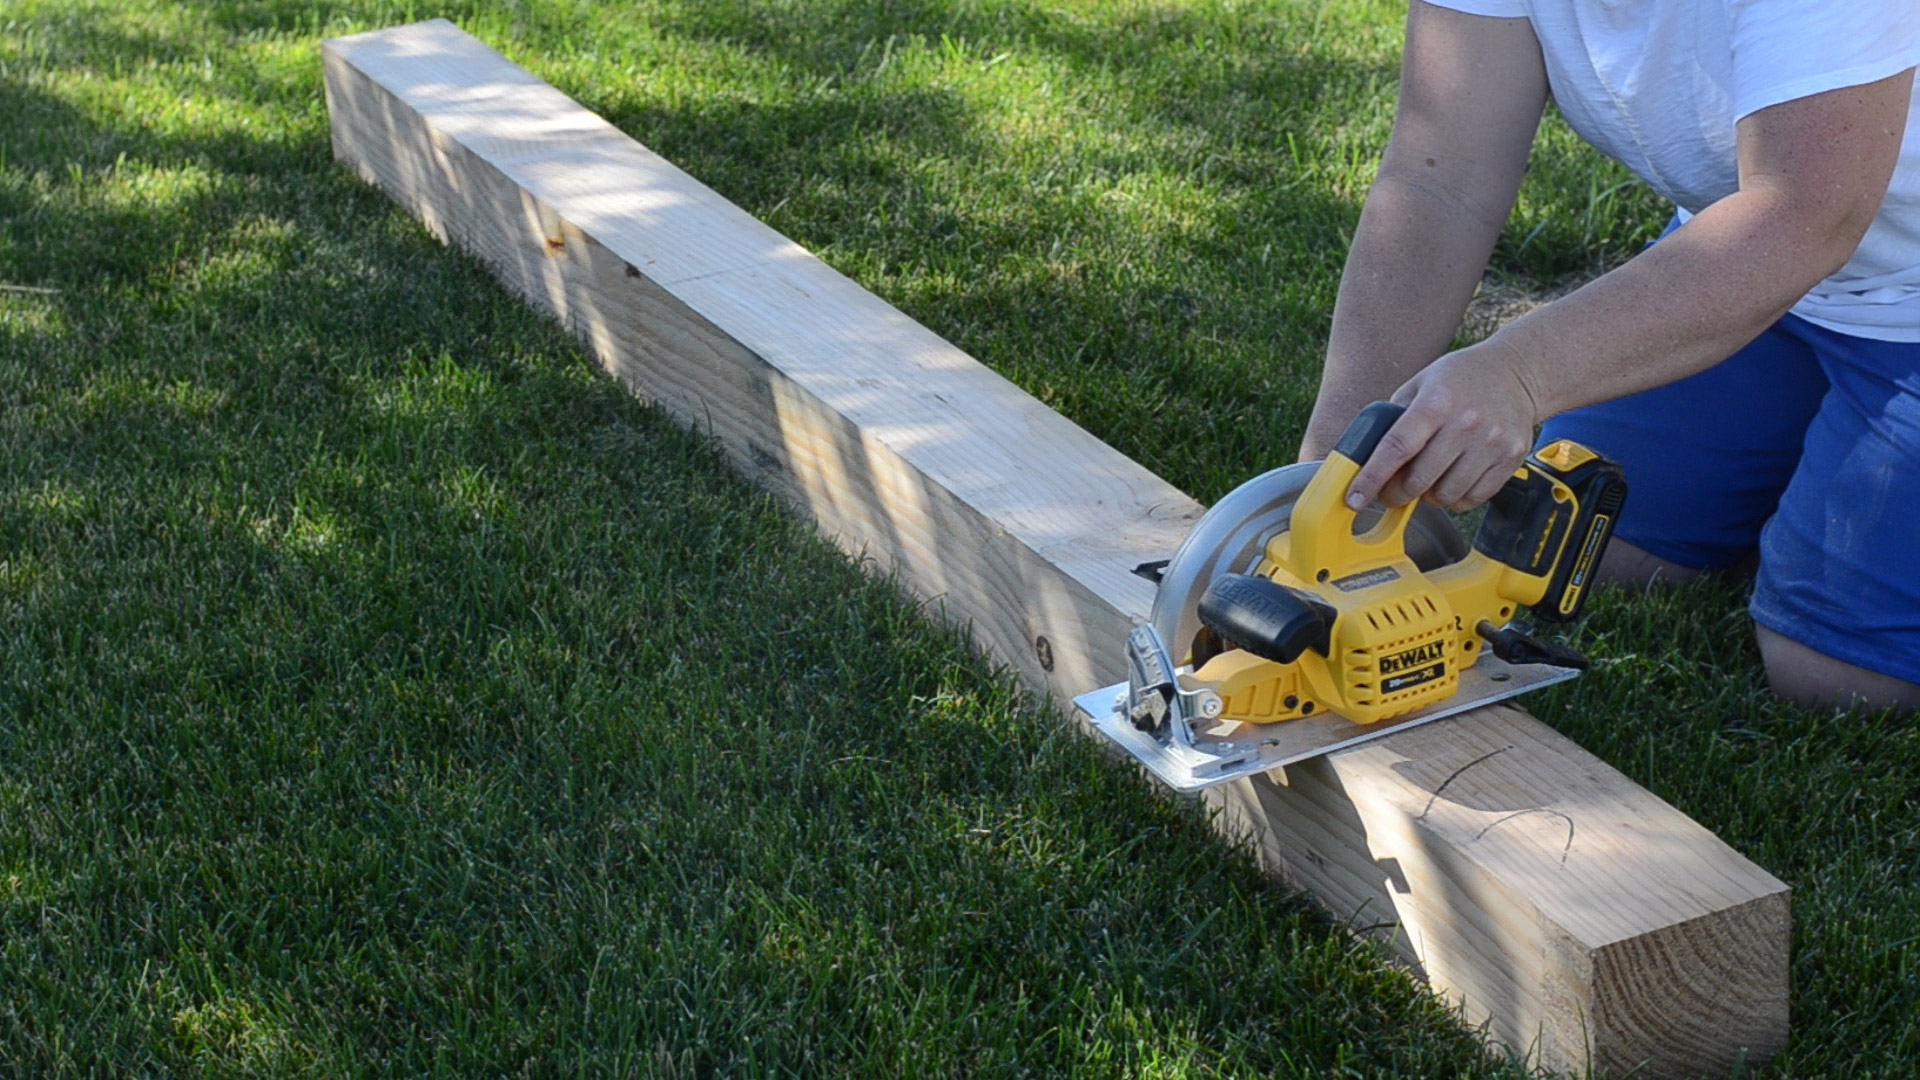
I measured from the saddle to the main deck beam to get the new deck post length, and cut the post to length with a circular saw.
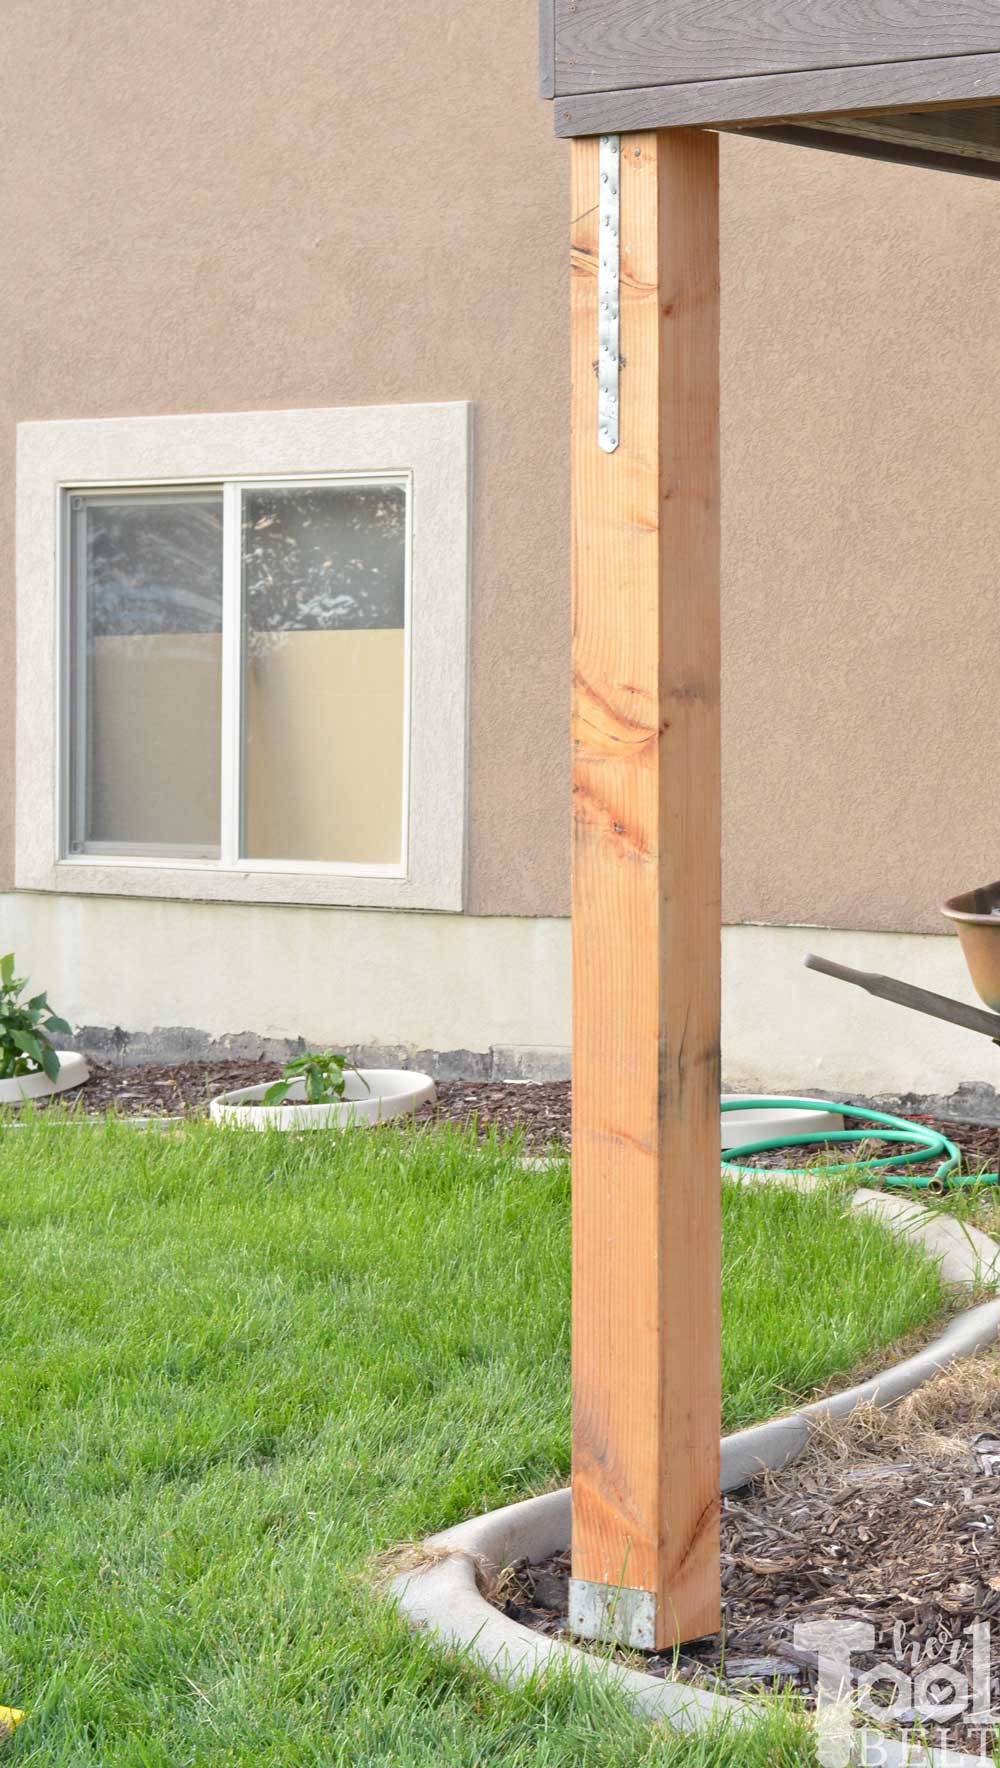
I slid the post into place and made sure it was level. Then attached the strap and footing bracket to the post, also toe nailing a few nails into the deck beam for good measure. After I installed the first post, I moved the jacks down to the other corner of the deck to provide more support.
The center post was next to get level, the gap on that post and the last corner post was a whopping 4″! I repeated the same process to replace the center and corner post.
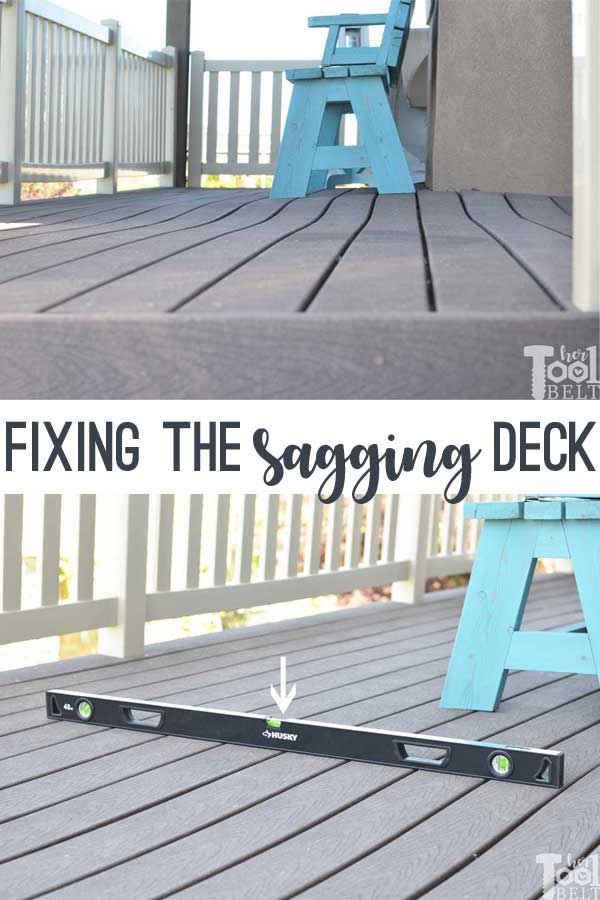
Looky looky we are now level! You can see a small wave over by the blue bench, I need to adjust a couple of the joists that were mounted a little low. Overall I’m thrilled though.
Now to get those stairs reattached!
Now to add some patio decor. This egg chair swing looks fun.

“I acknowledge that The Home Depot is partnering with me to participate in the Tool Review Program. As a part of the Program, I am receiving compensation in the form of products and services, for the purpose of promoting The Home Depot. All expressed opinions and experiences are my own words. My post complies with the Word Of Mouth Marketing Association (WOMMA) Ethics Code and applicable Federal Trade Commission guidelines.”
Great job leveling your deck! I’m buying a place with a wavy (but level) deck and was wondering if you came up with any solution to fix that. Love all your projects!