A couple of years ago, I wanted to redo my mudroom and make it more functional and a little fun. The mudroom is hidden from the main part of the house, so I wasn’t worried about the decor matching.
I built a shoe shelf bench and cabinets. Stripes on wall were really big then, so I decided to go bold and paint turquoise stripes!
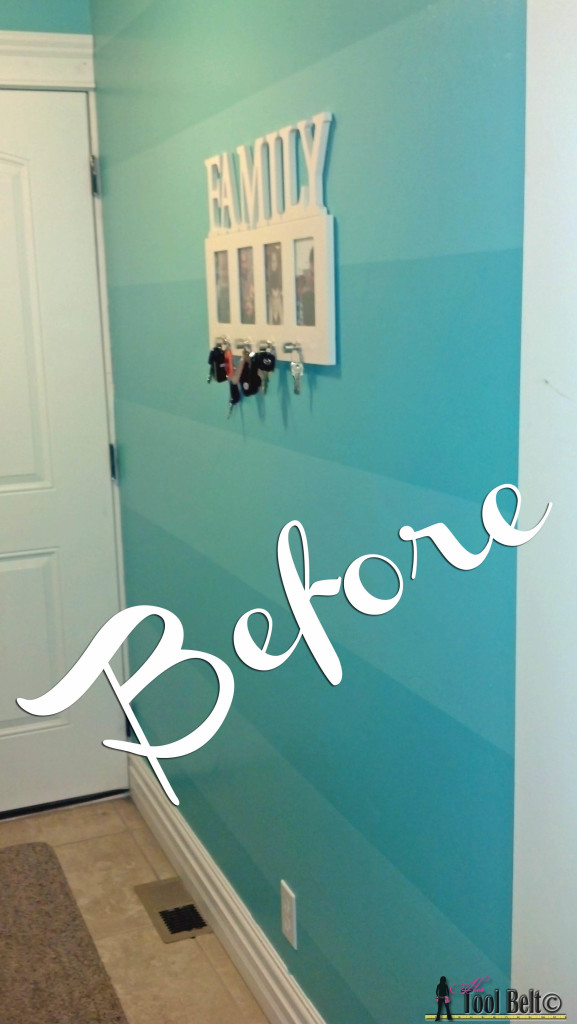
Well the only thing missing in that space was the fish…because my small mudroom felt like an aquarium!
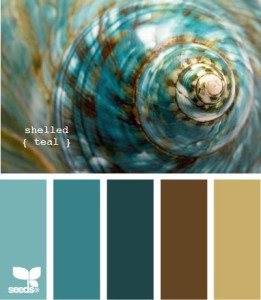
I used this shelled teal color scheme as my color planner.
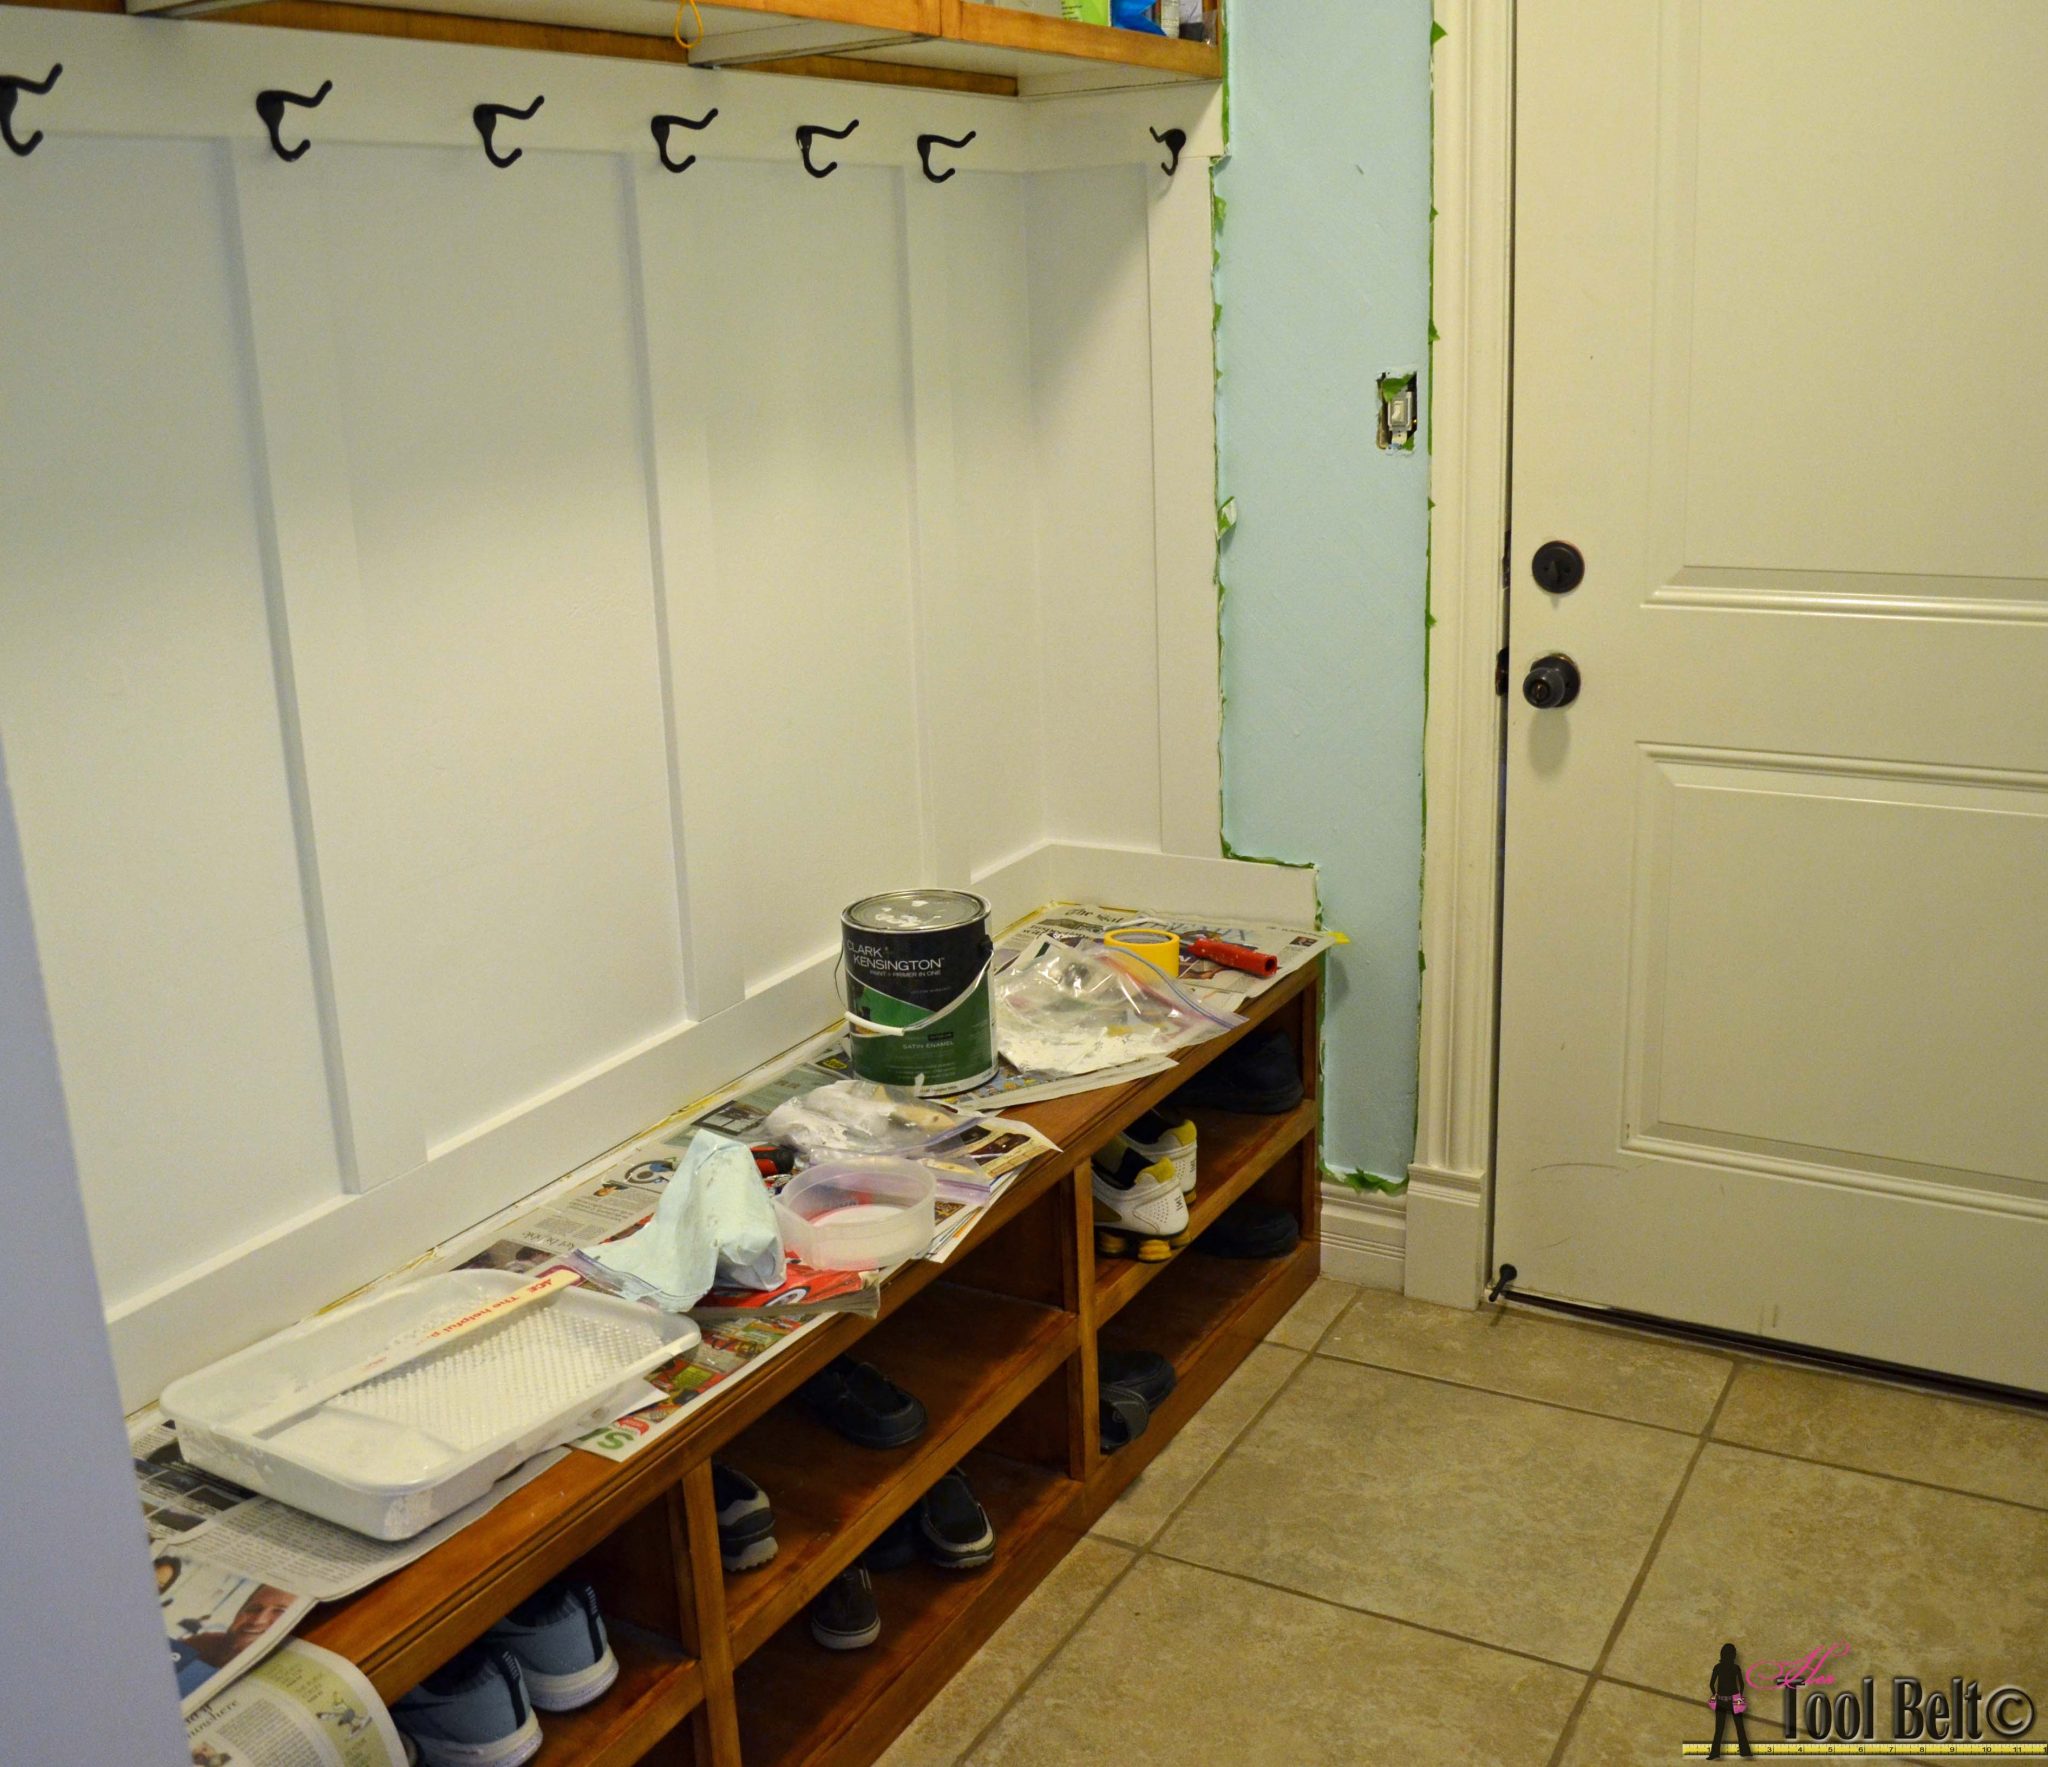
I built the cabinets and bench out of maple. Originally I wanted to have color stained cabinets, but the colored stain would NOT stain the hard maple. (This was before Express Color came out, I’m sure that would work now.) I stained the cabinets a honey color and put up a little wainscoting. As you can see, that’s a lot of turquoise!!! (I like turquoise, but it was too much.)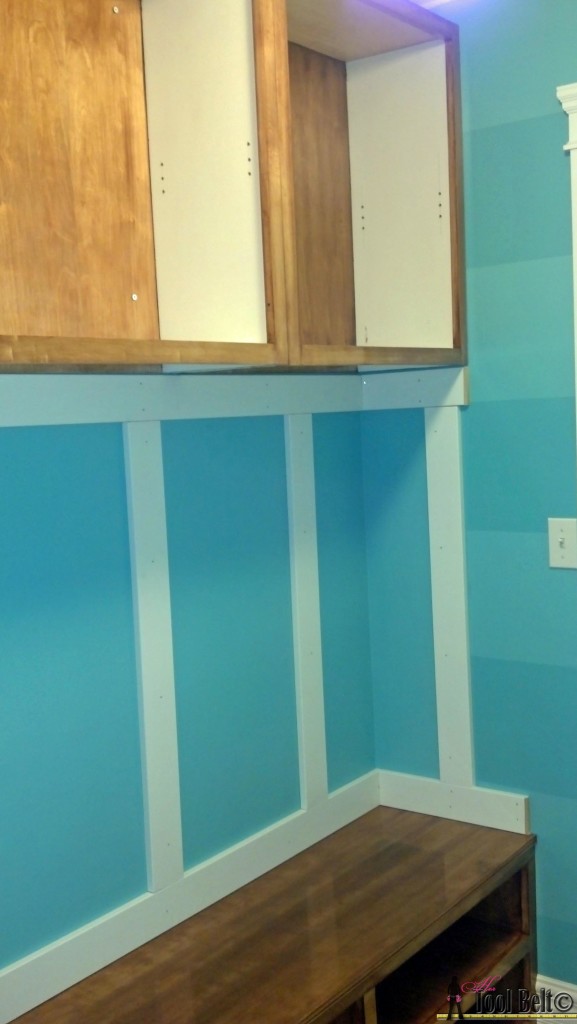 I also didn’t think the cabinet color went that well with the turquoise, but it wasn’t bad enough to change it at the time. Fast forward a couple of years, and Frog Tape is having a yearly Earn Your Stripe Contest. I’m a sucker for contests, that’s enough motivation for me to finish and repaint the dreadful mudroom aquarium.
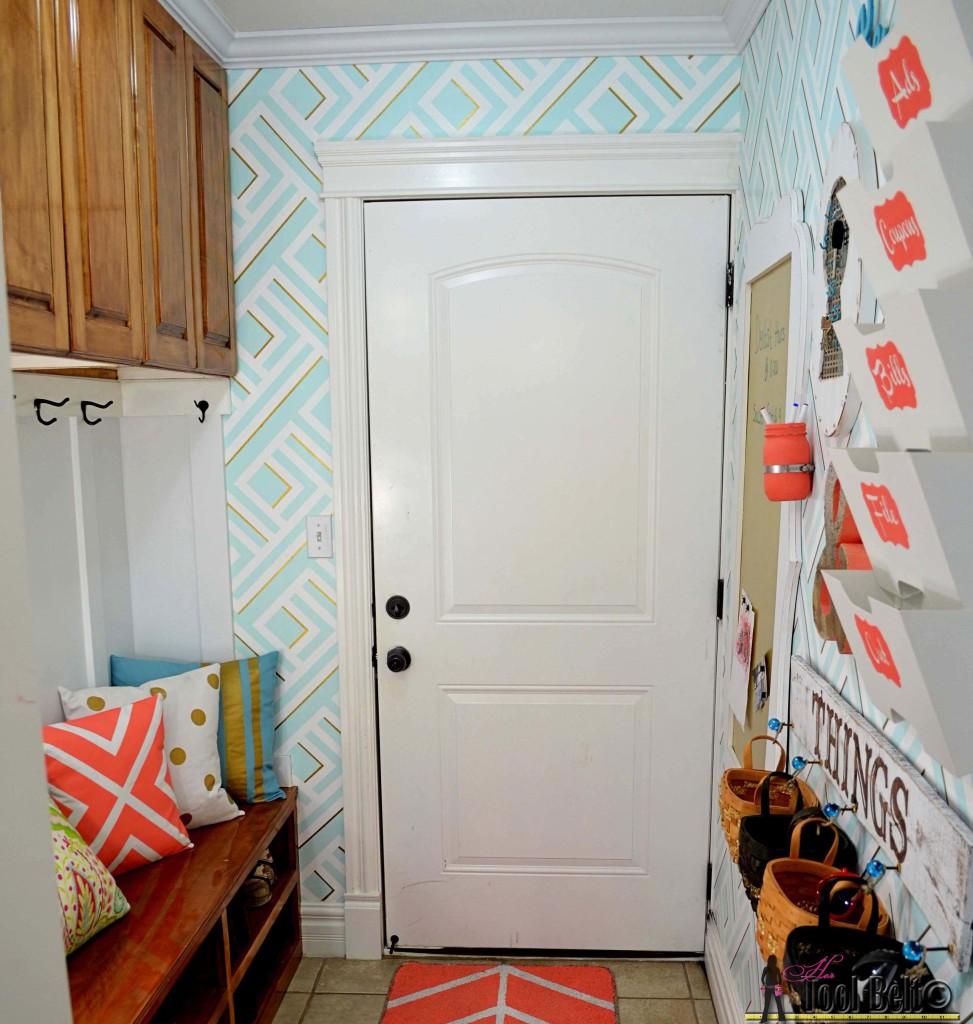
My idea for the room was to paint a fun geometric pattern on the wall, and create a very functional command center like a gallery wall. I found my inspiration for the geometric wall from a RUG that I saw on pinterest. Also I have always wanted to add pinstripes of metallic color, I saw the idea in a magazine 15 years ago. So that was the plan, white, aqua, and gold!
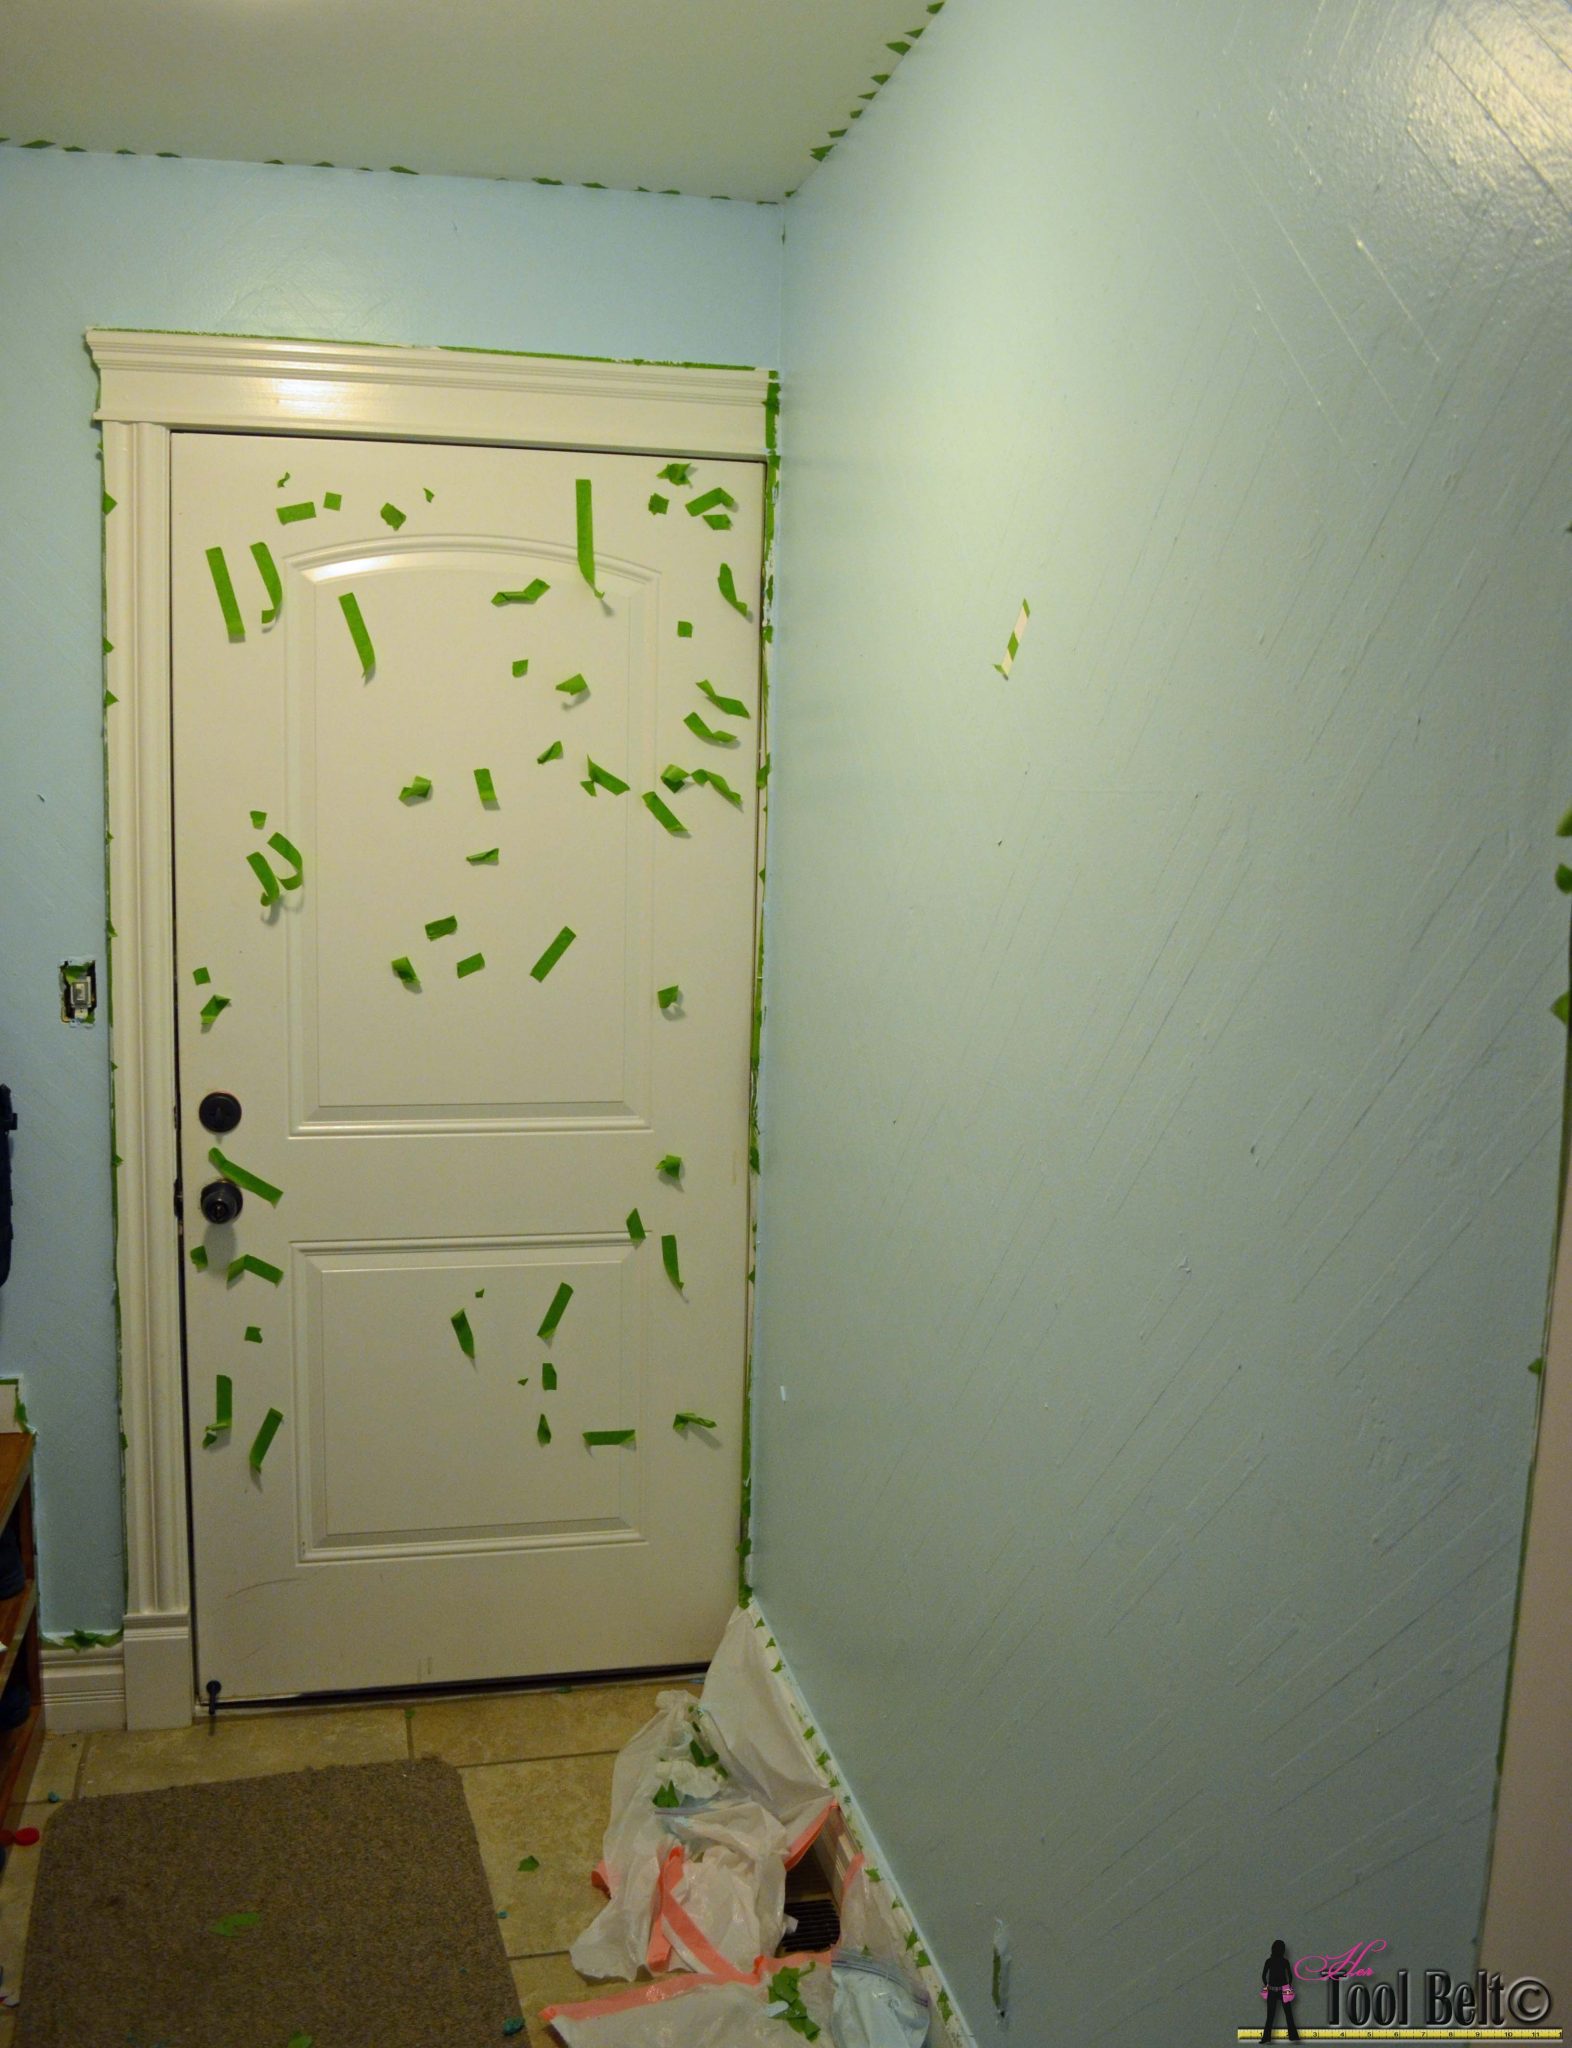
First things first, if you are painting over stripes, take a minute and sand any paint ridges left on the wall between stripes. This will make your freshly painted wall look much better. I taped off the moldings, door and the ceiling. Then primed the walls. After the primer was dry I painted the walls white. I let the paint dry for about 5 days, to make sure that it was dry enough for tape.
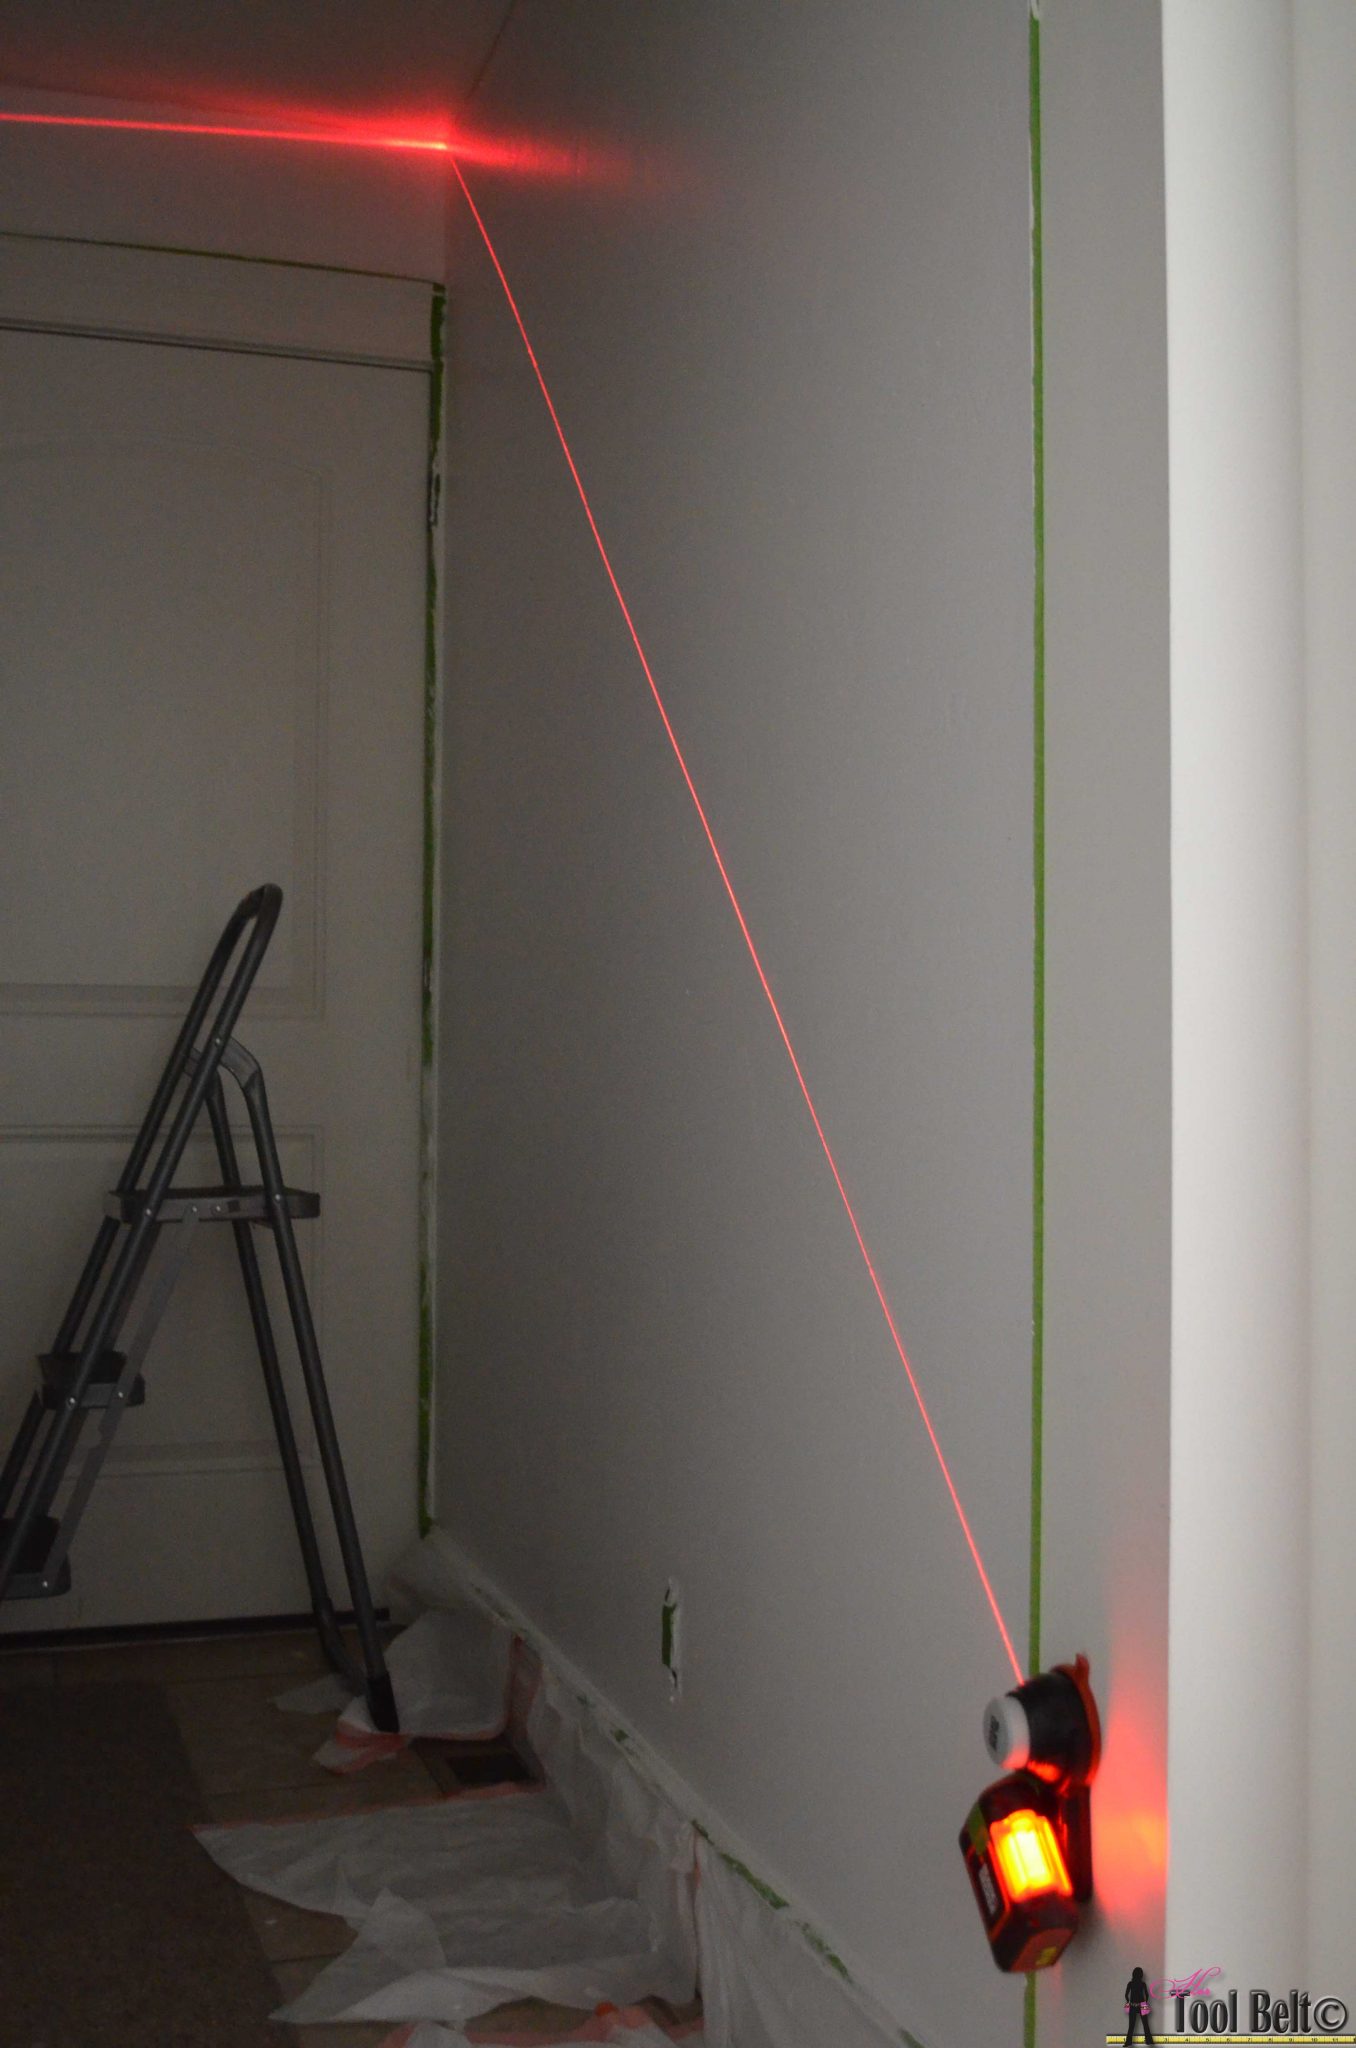
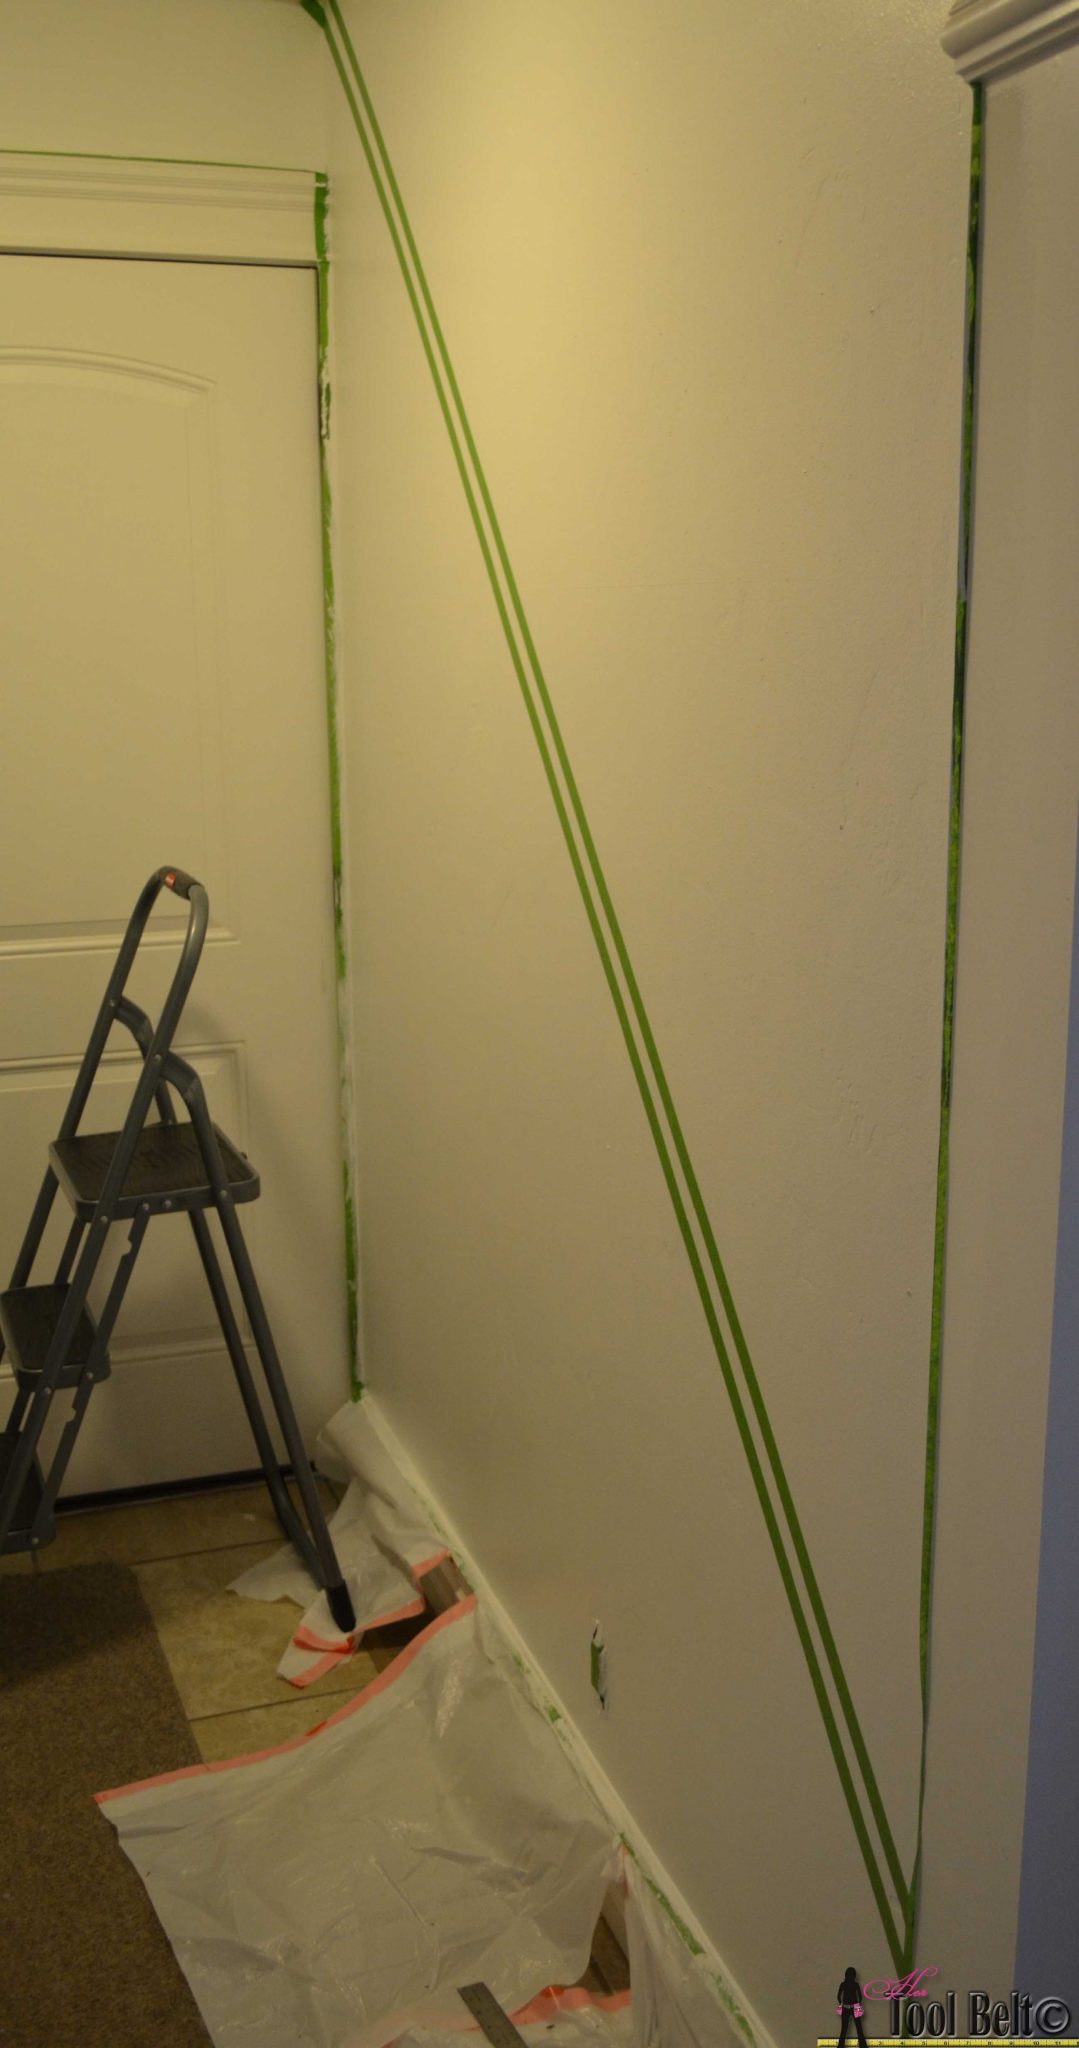
My secret to painting the straightest lines is a laser!!! It’s a must have for painting stripes. I set up the laser at a 45 deg angle. Starting at the upper corner of the wall and ceiling, I measured over 7 feet and measured straight down 7 feet and marked that spot on the wall. I lined up the laser beam with the marked spot and the ceiling/wall corner.
 Apply tape to the laser line (I usually pick to follow the top or bottom of the beam line). The Frog Tape is 15/16″ wide, so I measured down 15/16″ and started my next row of tape. (I only use the laser for a few rows, then use a ruler after that.)
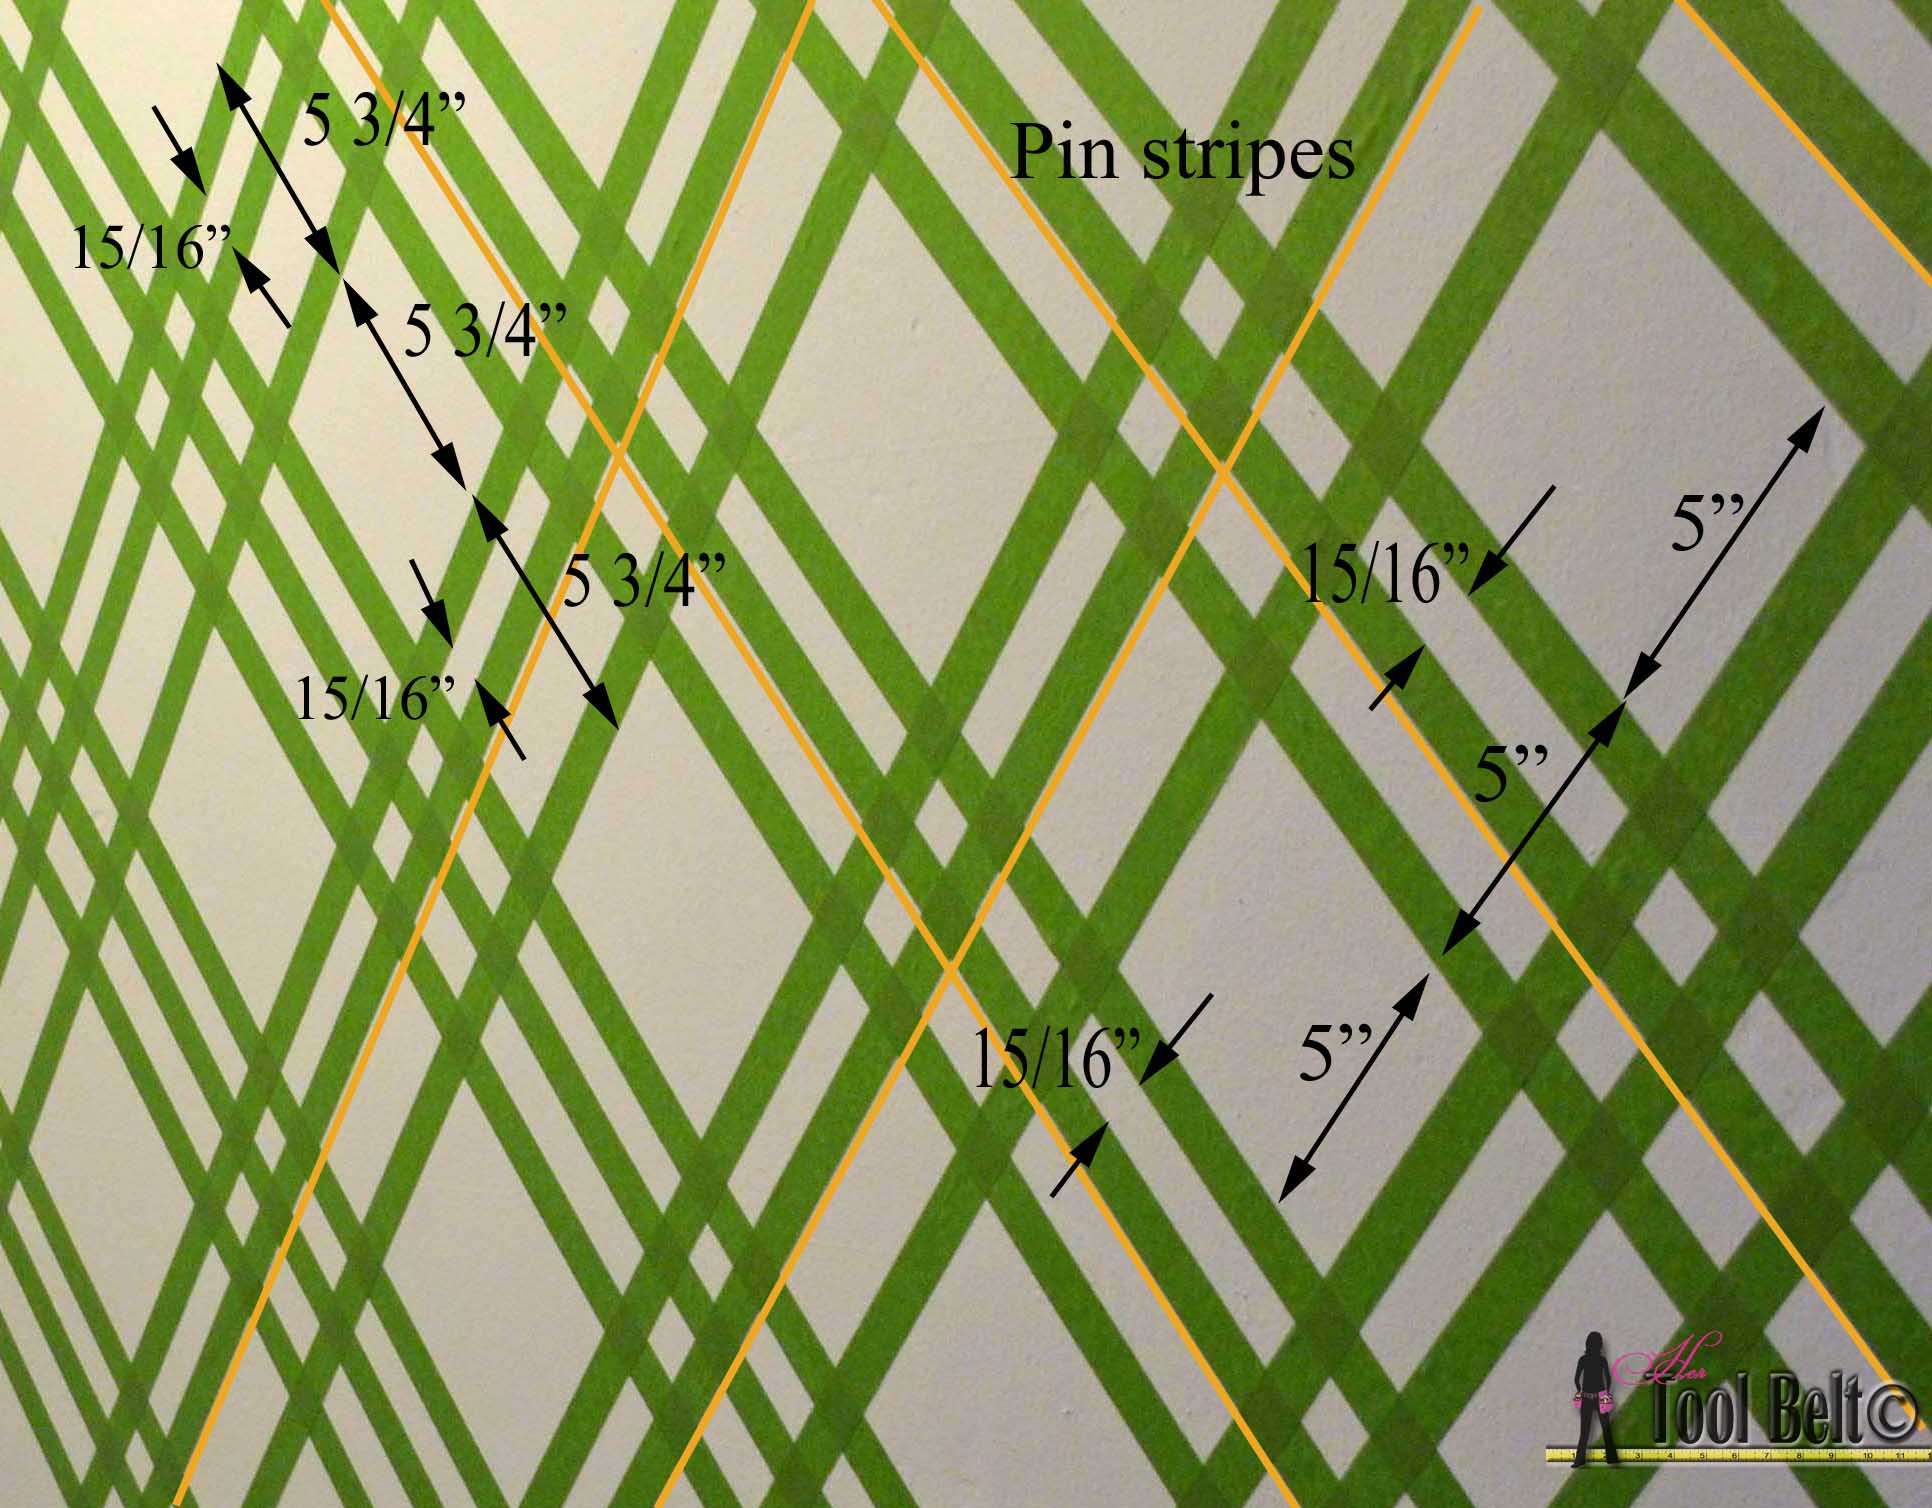
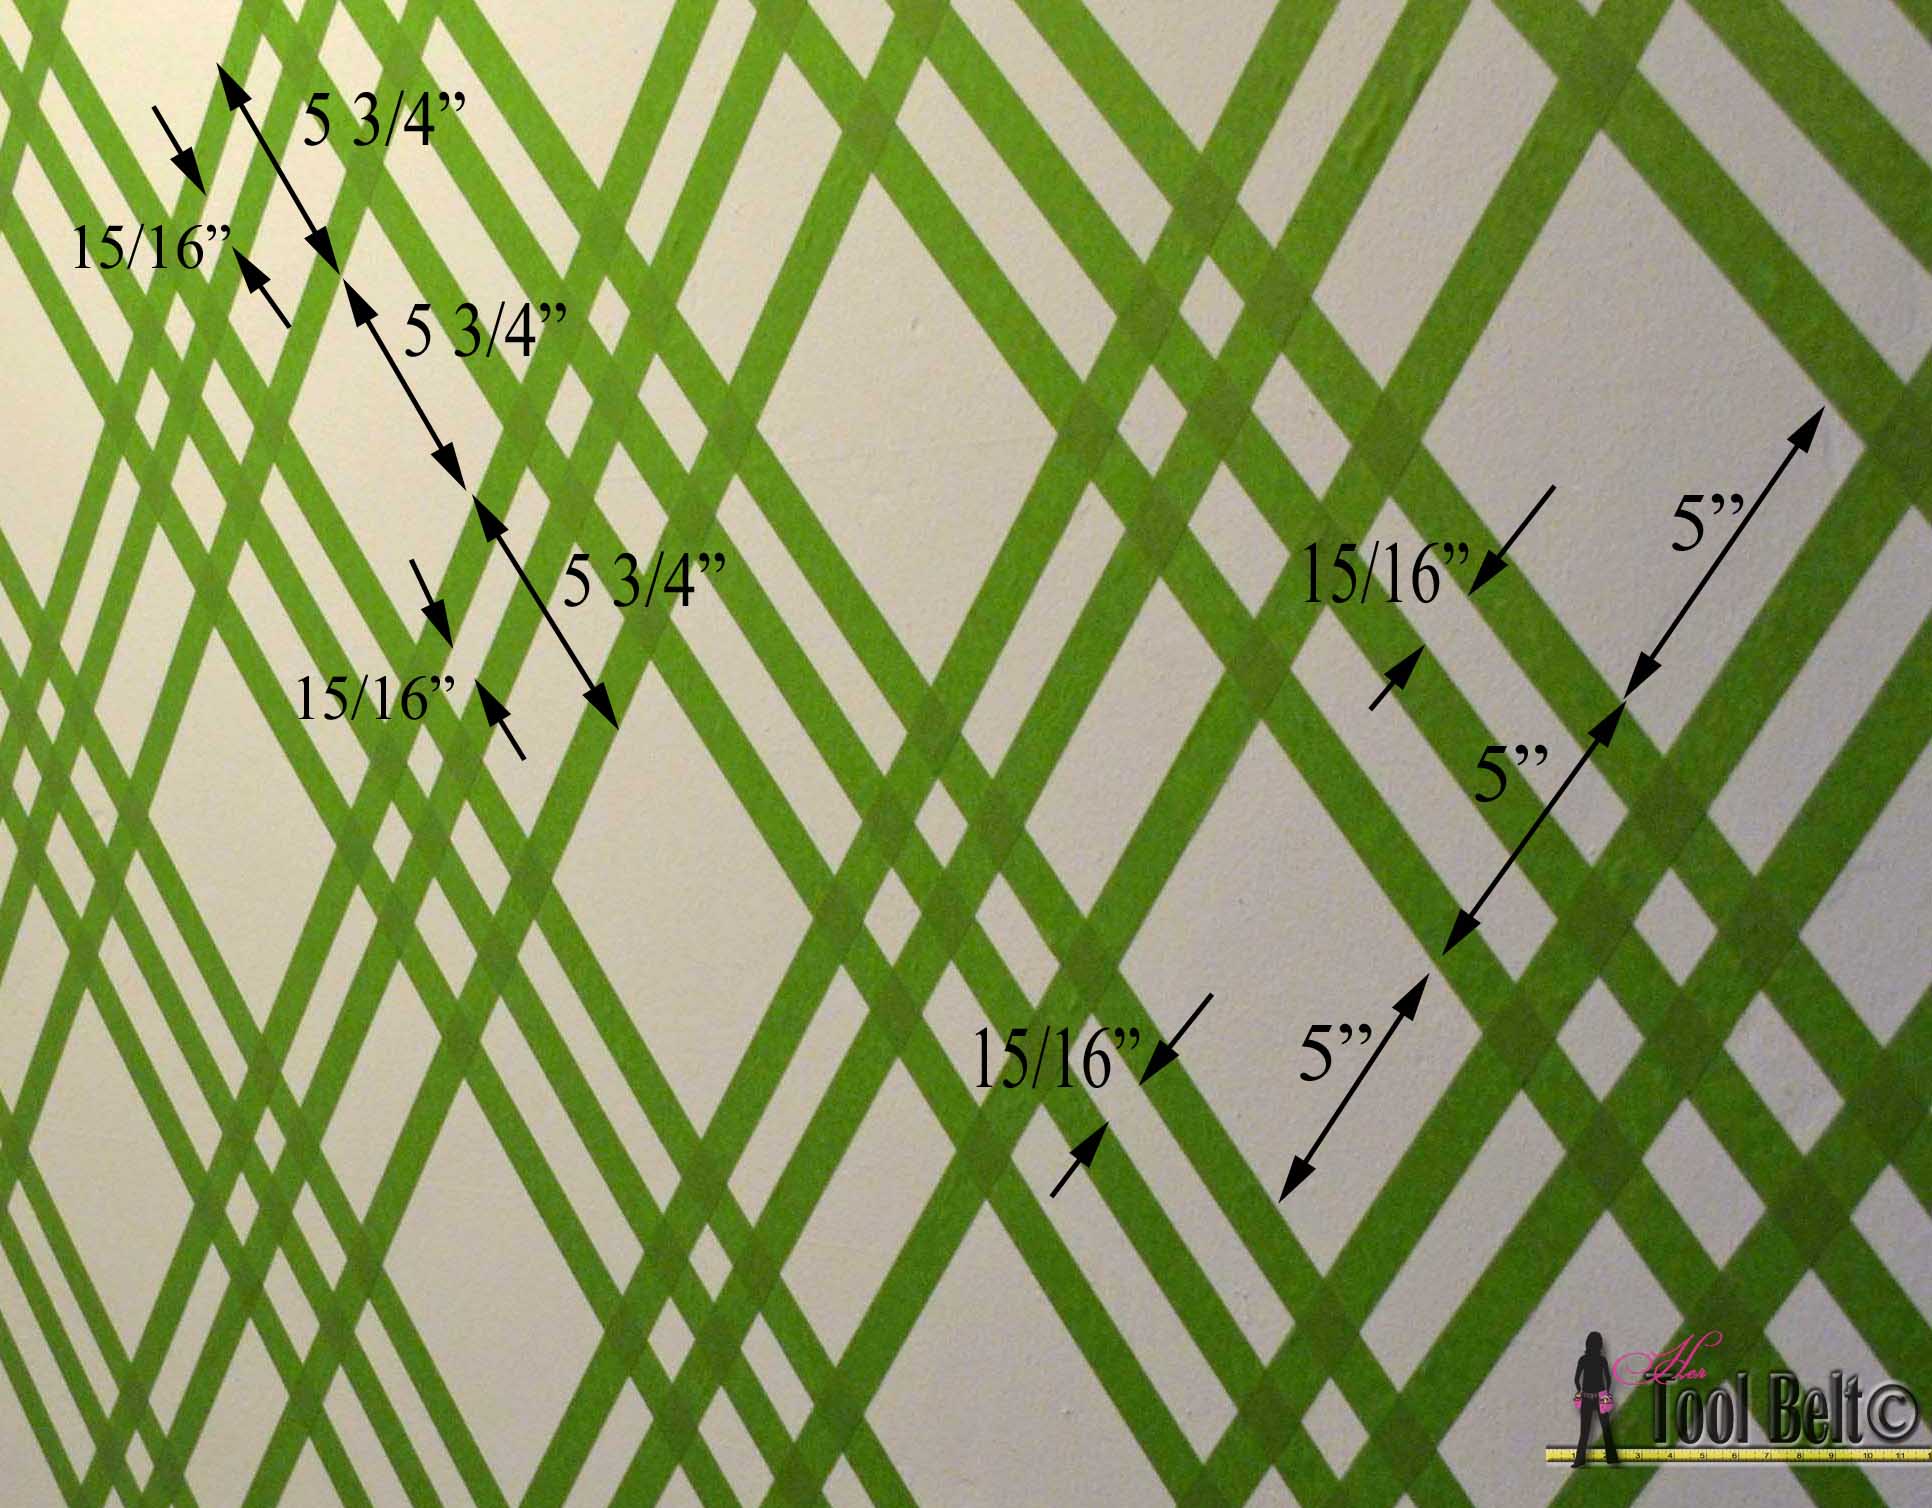
 For the 3rd tape line, I measured down 5″ from the top of the first tape and this is the bottom of your 3rd tape line. Now from the bottom of the 3rd tape line, measure 5″ and that is the top of your next line set. Repeat until the wall is striped. Each set of 3 lines is 5″ wide and space the sets of lines 5″.
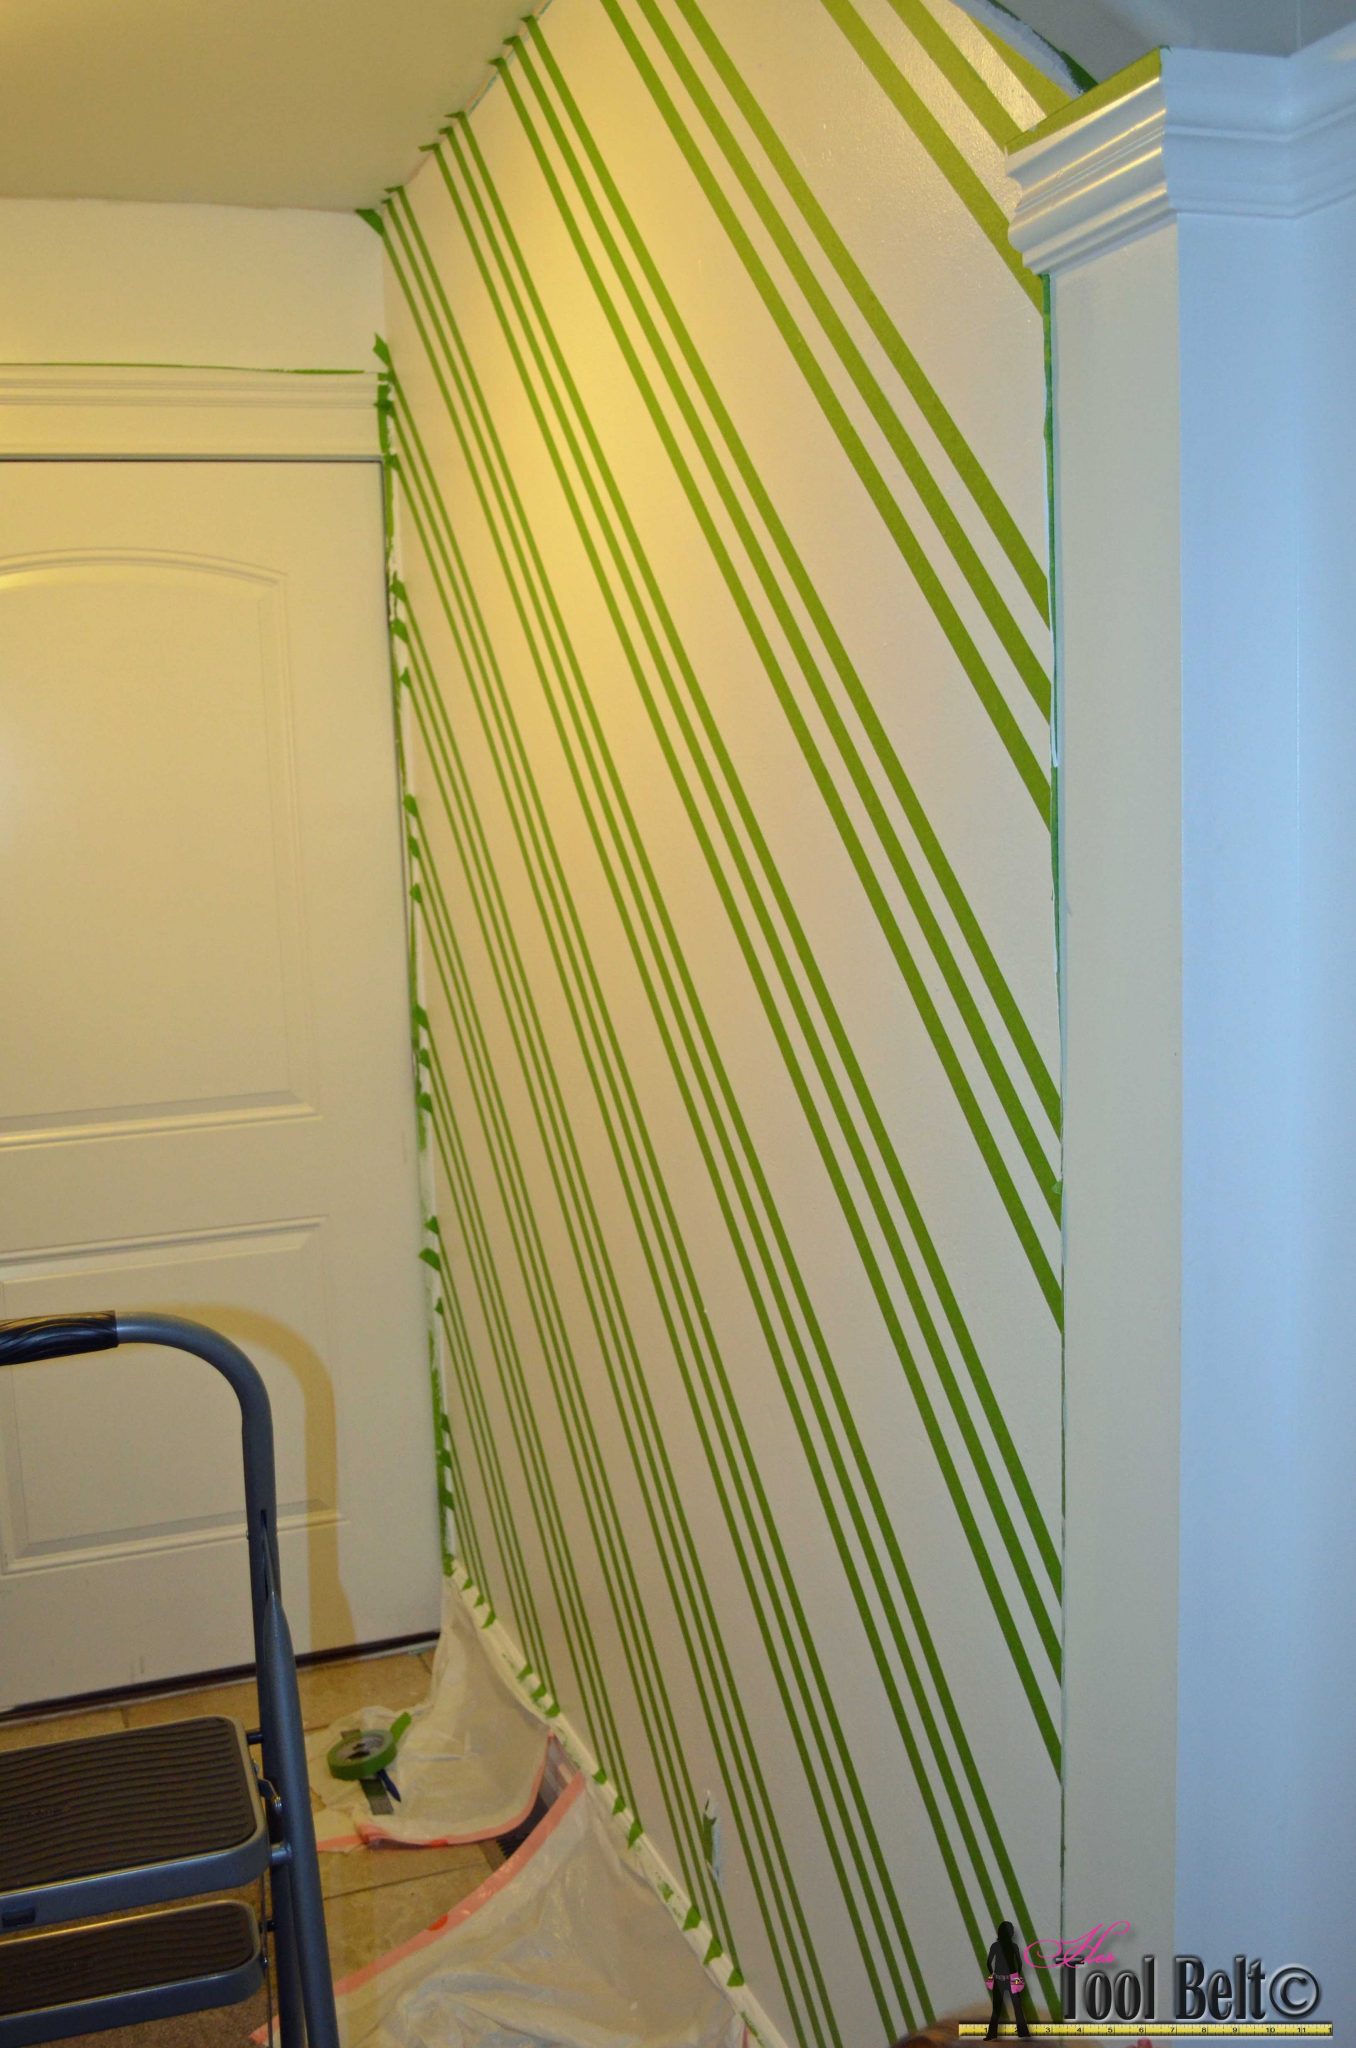 To start the other direction, I measured 7 feet over and 7 feet down from the opposite wall/ceiling corner. Set up the laser and tape the 1st line. Measure down 15/16″ and tape the second line. This time measure 5 3/4″ from the top of the 1st line and this is the bottom of line 3. For the next set of lines, measure 5 3/4″ from the bottom of line 3 and this is the top of line 1. We’ll use the extra space to add pinstripes later.
The taping really goes fast once you get going. Once both diagonal directions are on, start removing some tape pieces to make a weave look. I found it easiest to use a razor blade and a ruler, to make sure the cuts are straight and square.
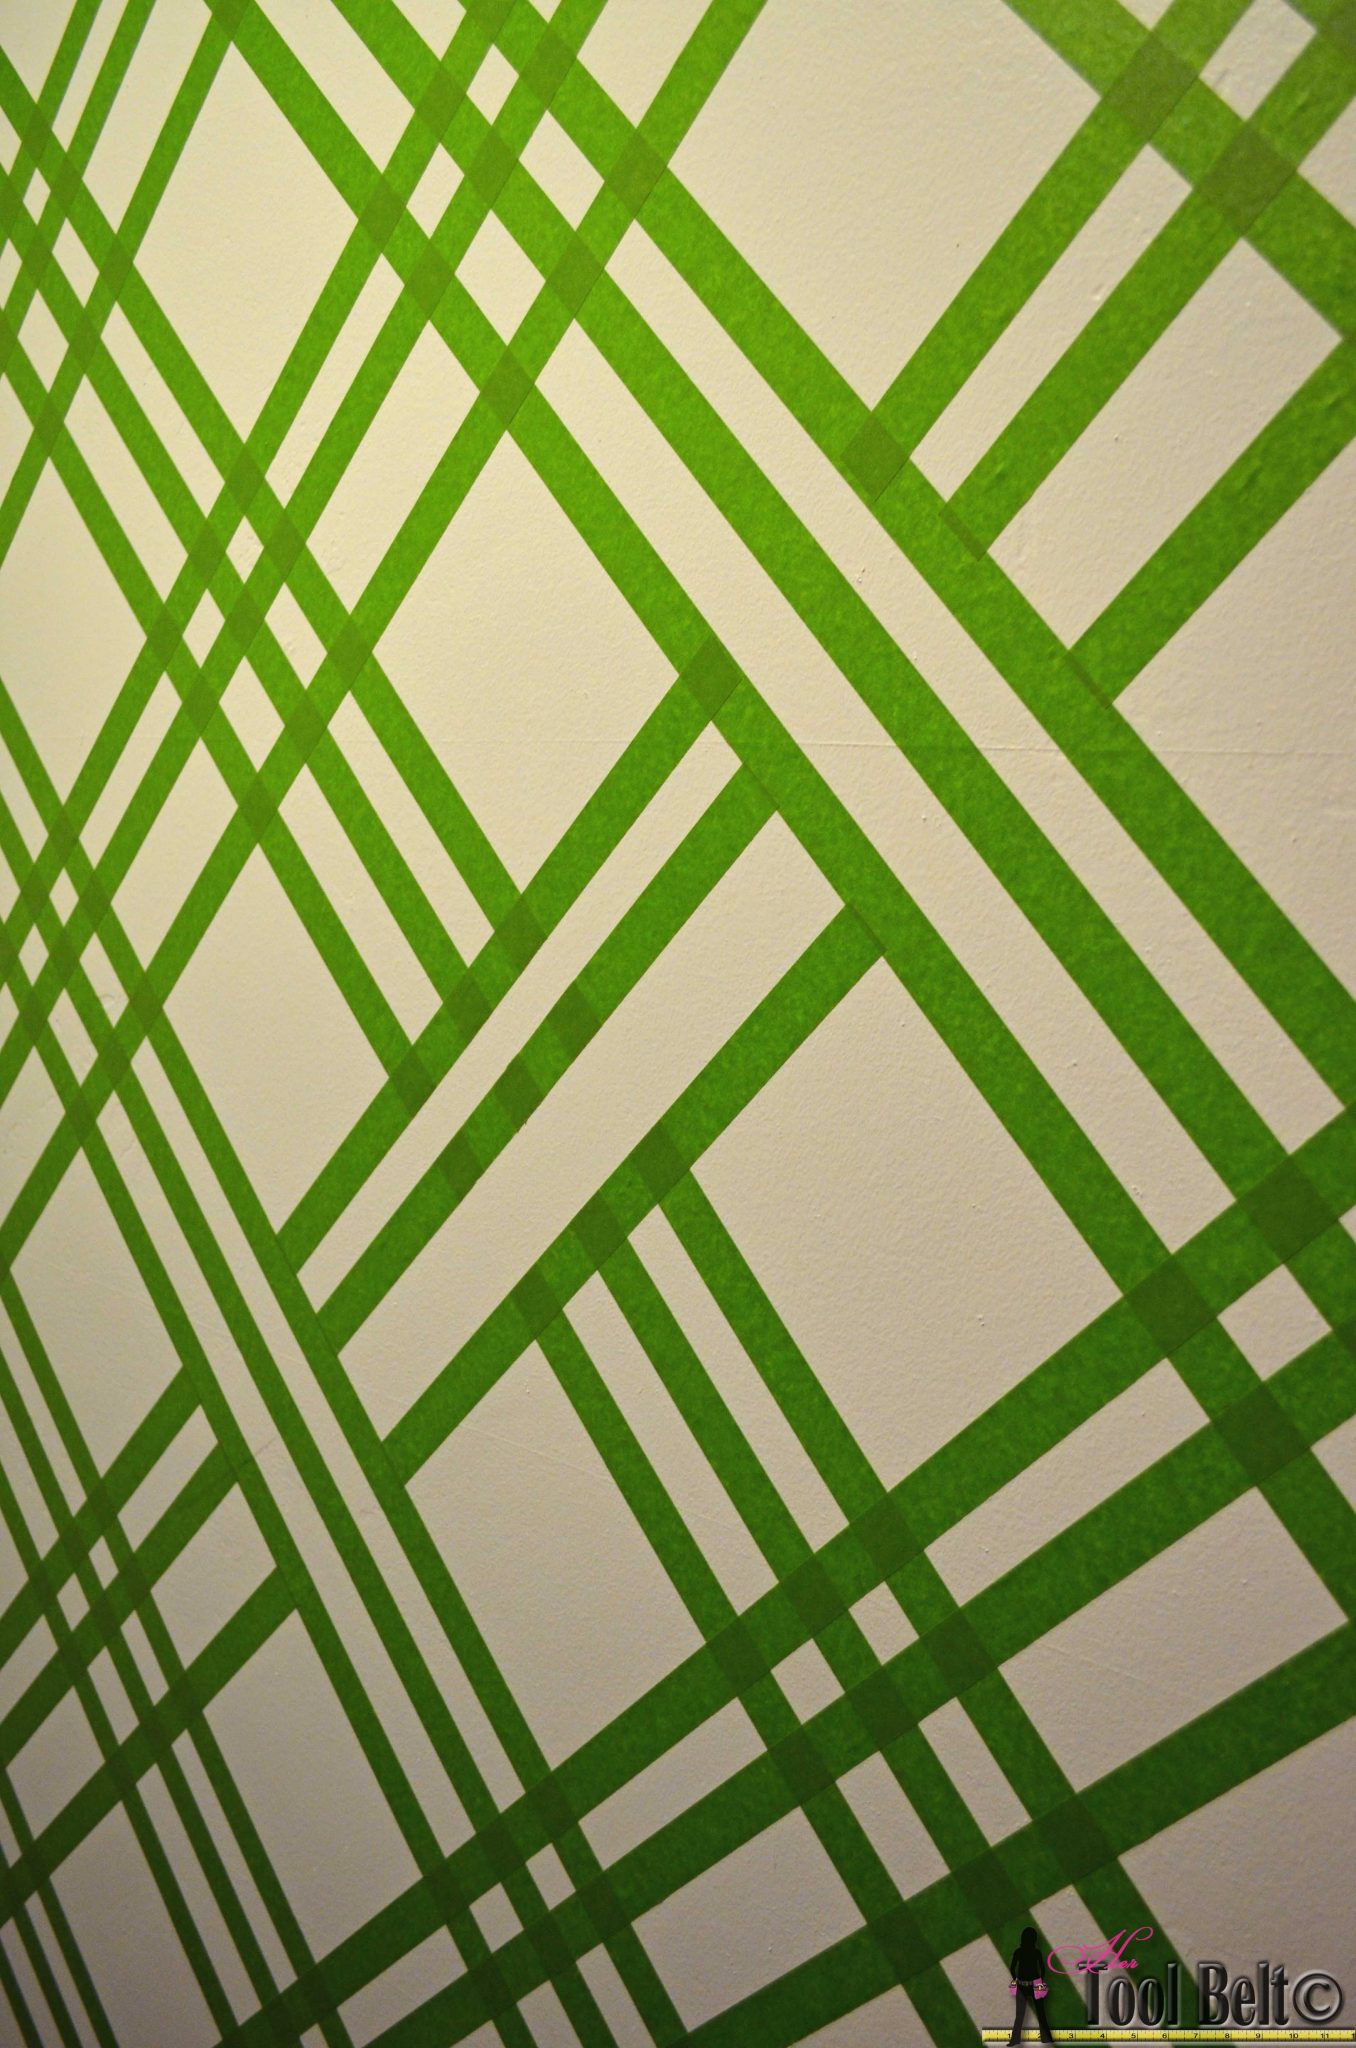
As you’re weaving it will start to look like a lattice. Kind of fun. At this point I wasn’t sure if I was going to do the adjacent walls, but I ended up doing them.
Once the lattice is done, we weave more! YAY!
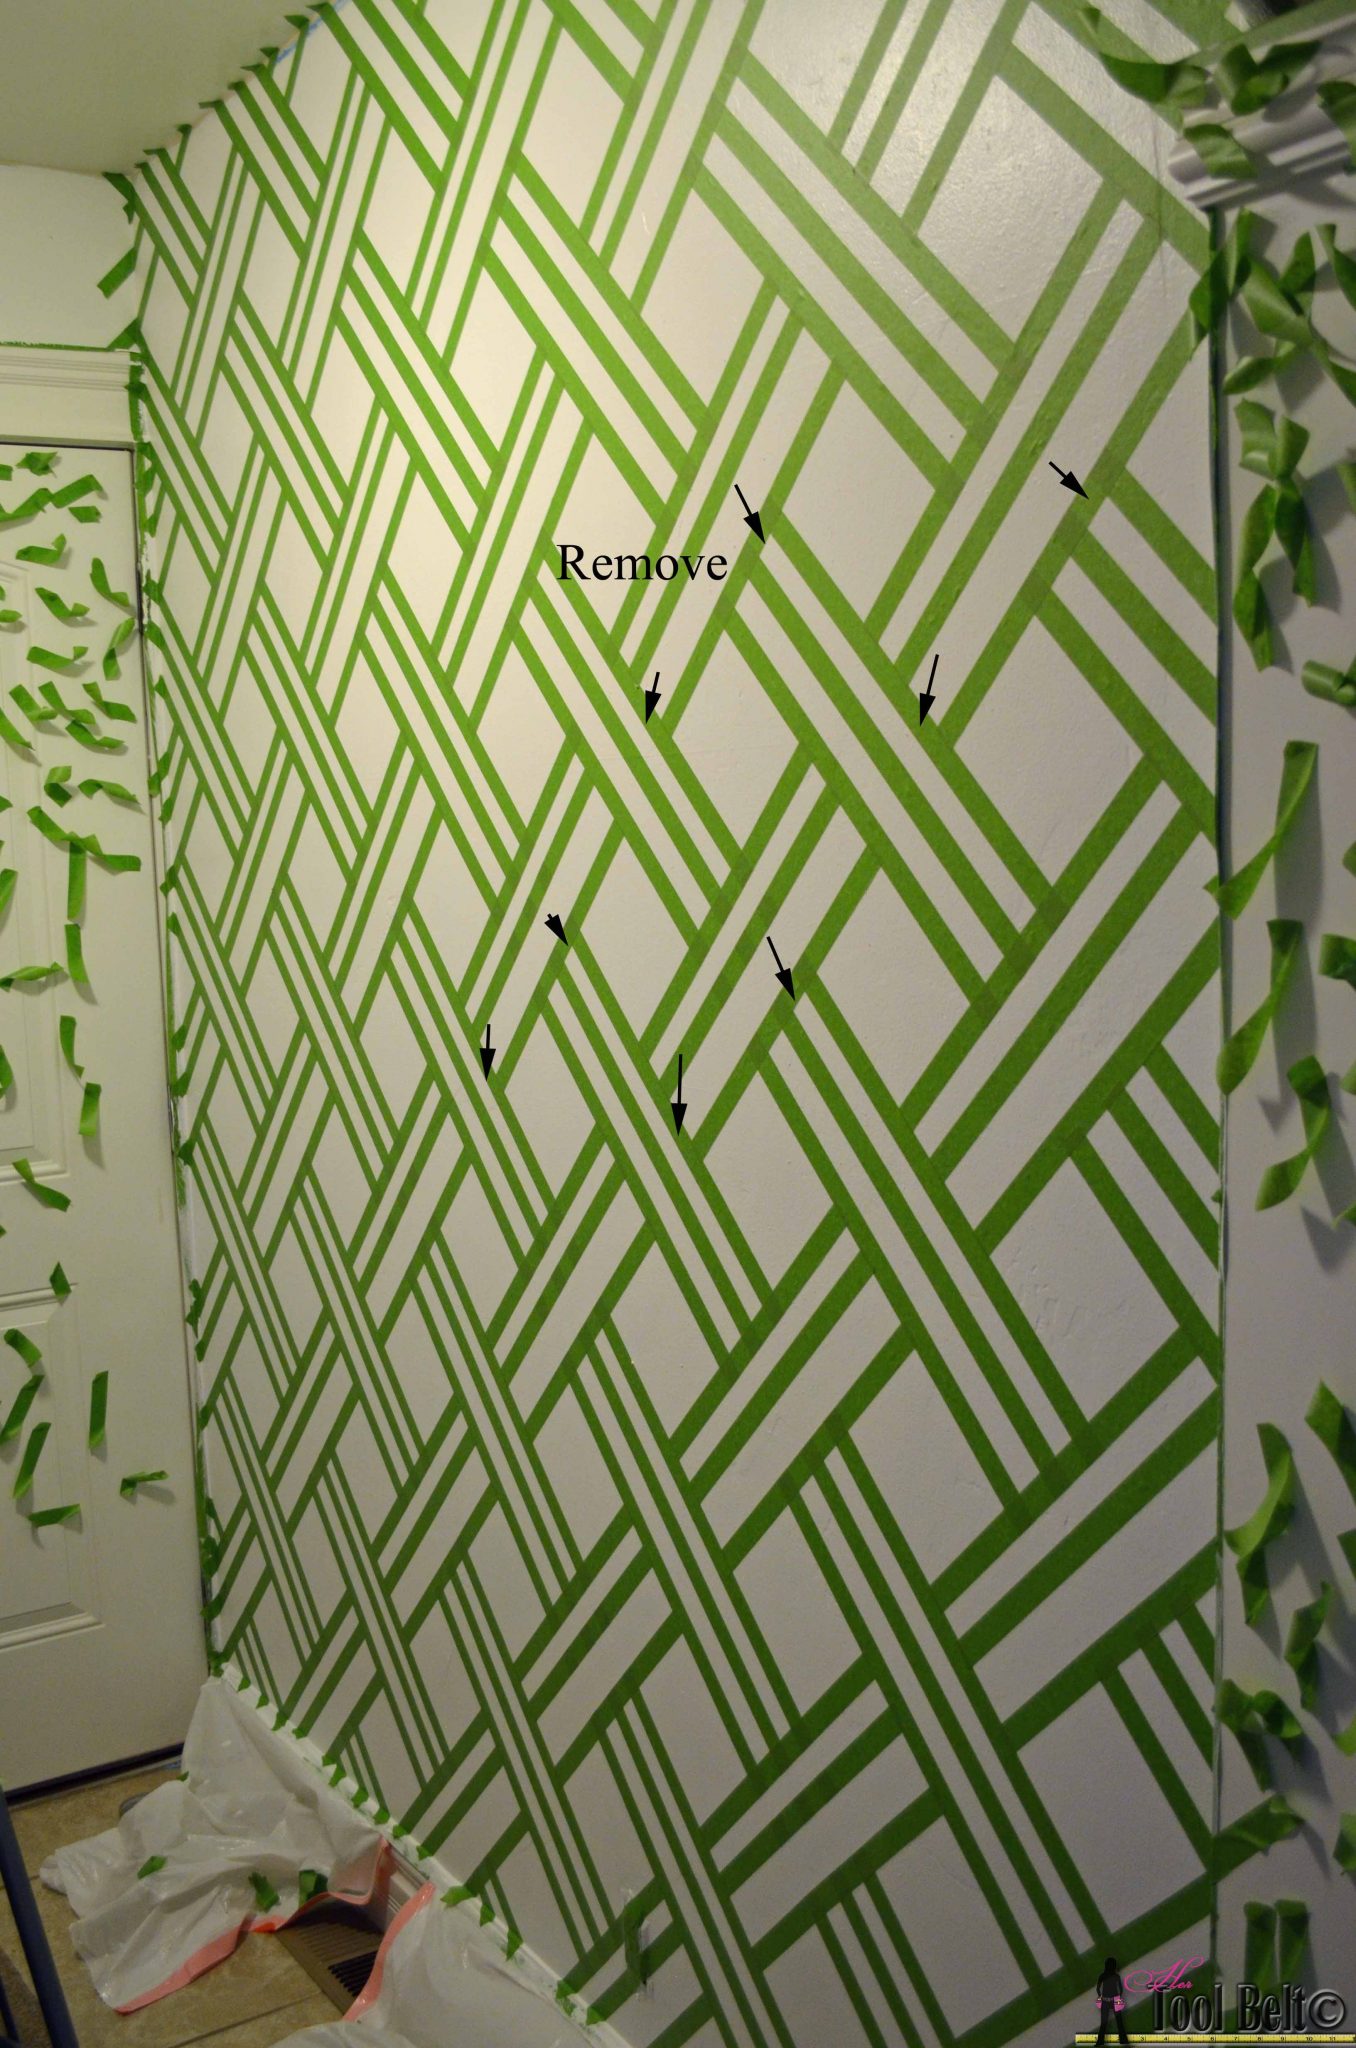
Remove the pieces where the arrows are and continue removing that pattern. It helps the lines flow a little more.
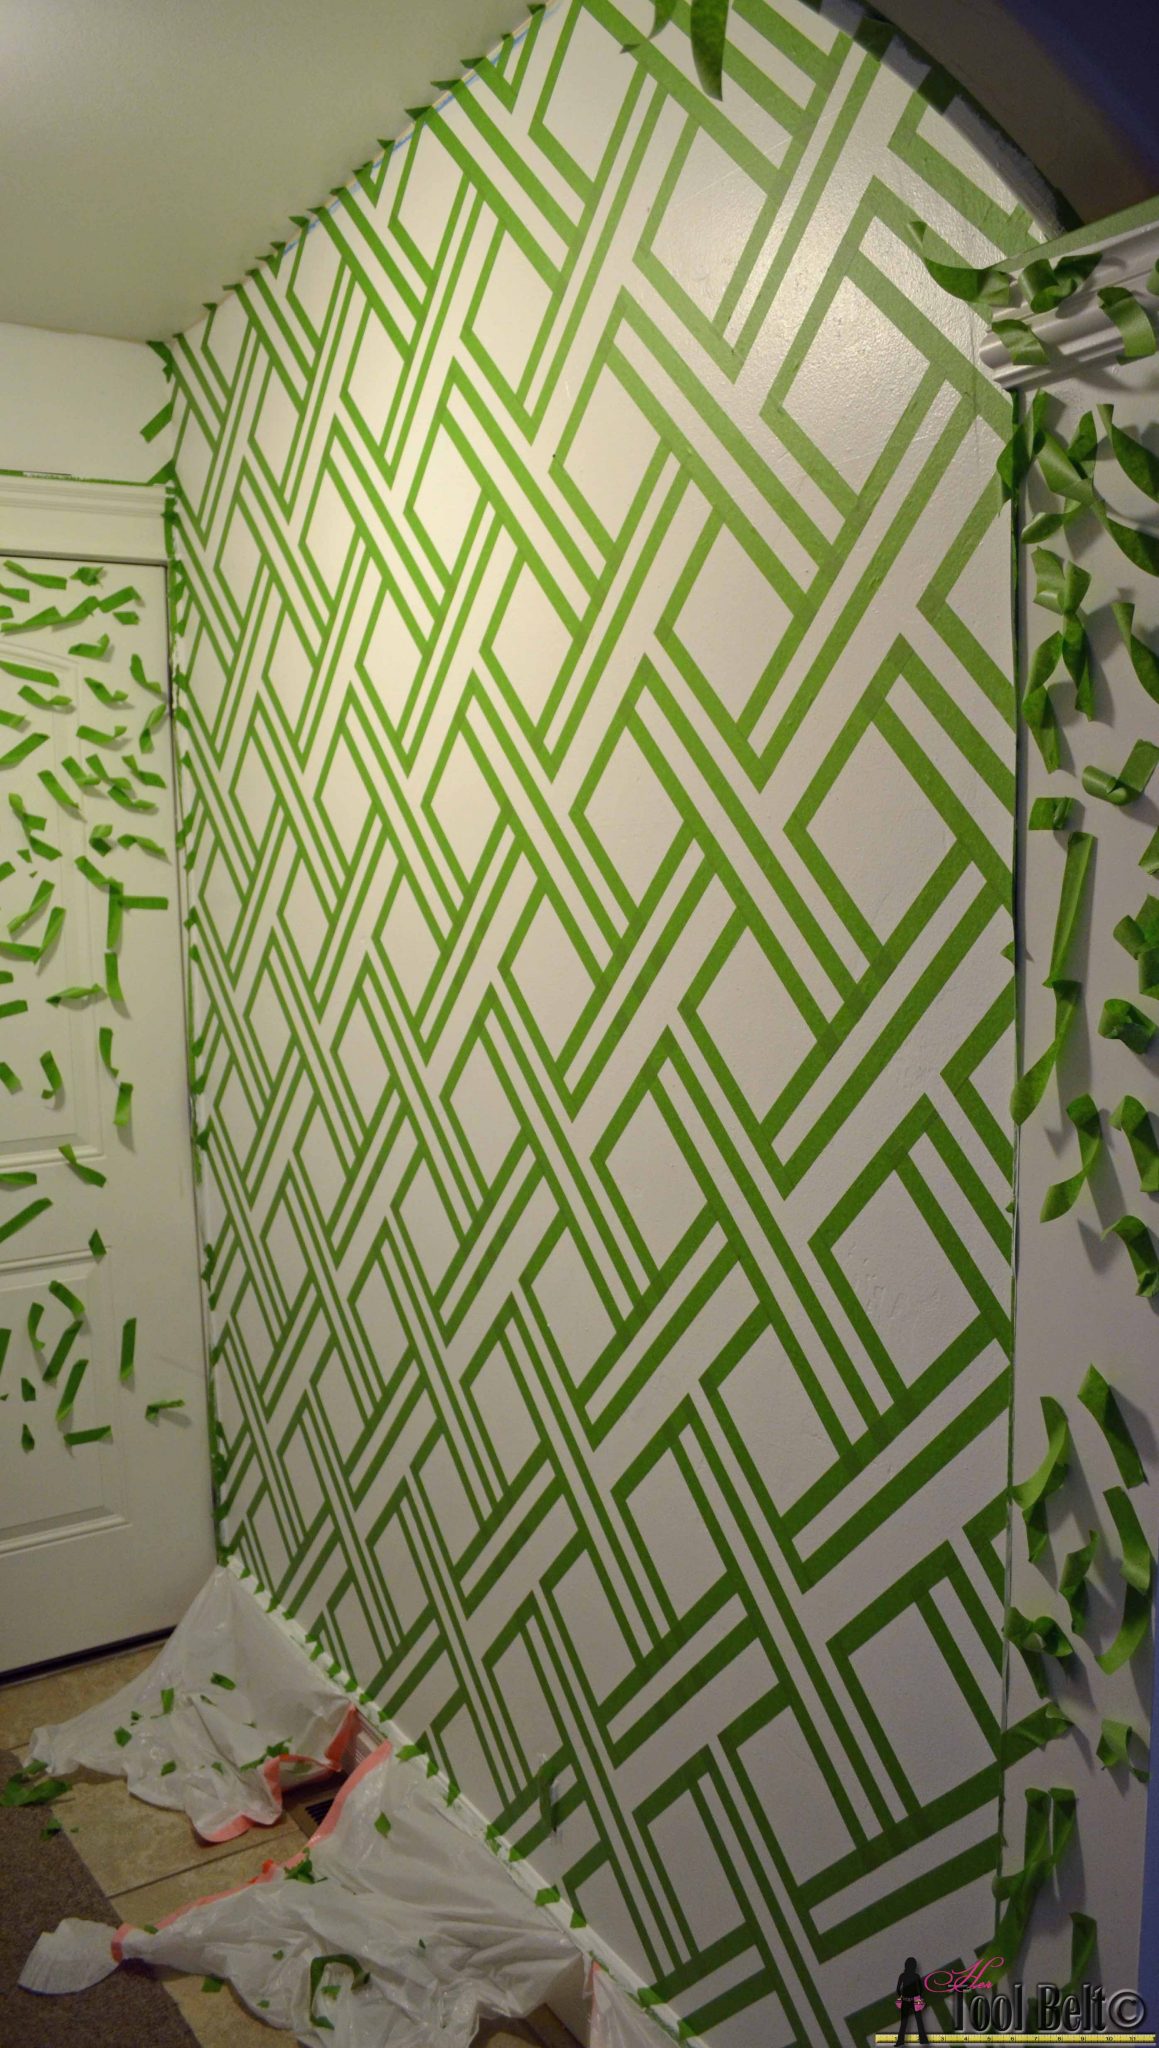 Now I added a little ‘L’ in the diamond. From the top right and bottom right sides of the diamond, I measure over 15/16″ and put 2 pieces of tape.
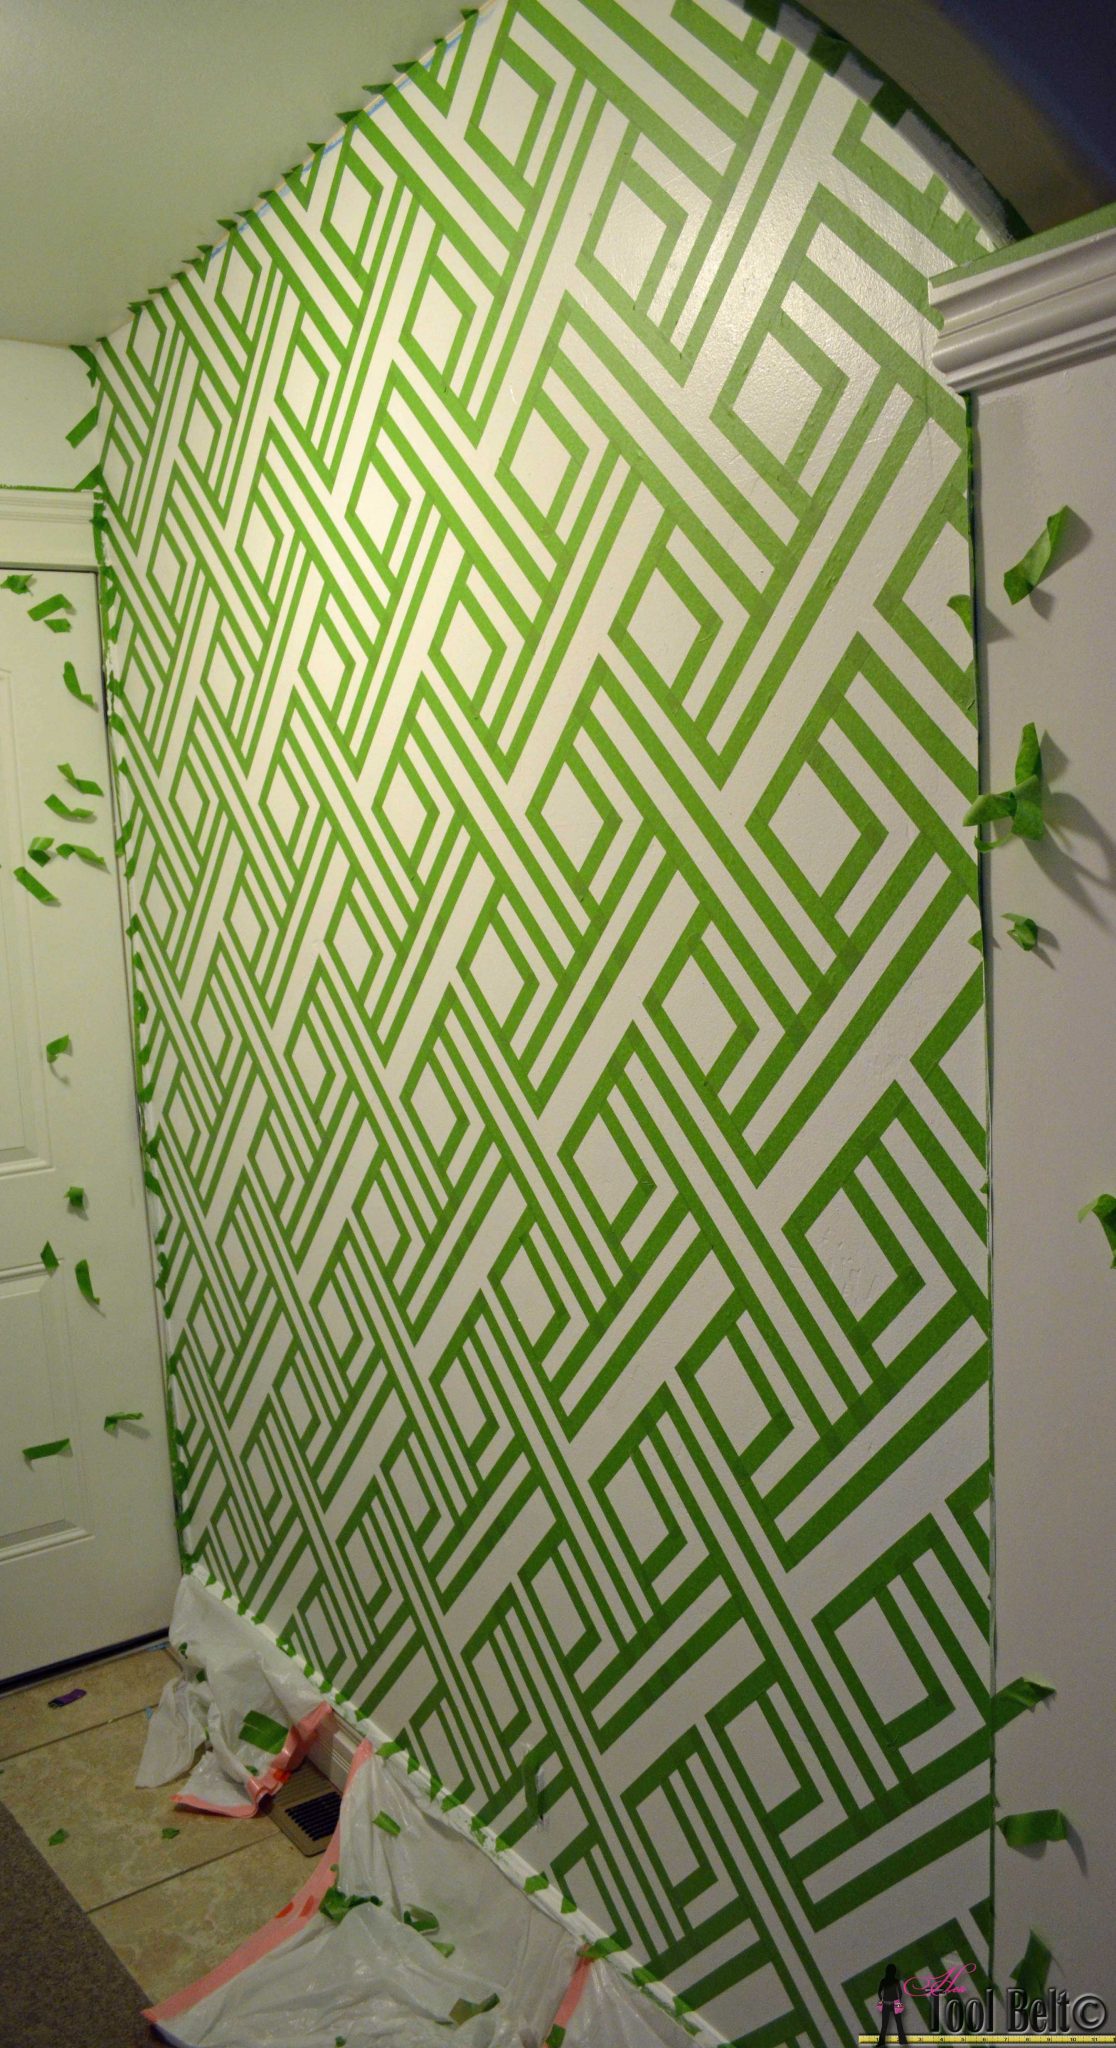 Kind of crazy, but cool. It’s time to paint. Make sure all of the tape is pressed down firmly. One big tip with painting stripes, is do not soak the tape. Thin coats of paint are better. Some people will actually take a wet Q-tip along the edges to start the Frog Tape goo activation. I haven’t tried that yet.
The color of paint I picked is Behr Spa, it’s a nice pretty aqua color.
 I also painted the wainscoting background color white…word to the wise, don’t change brands of white in the middle of a project, they probably aren’t the same ‘white’.
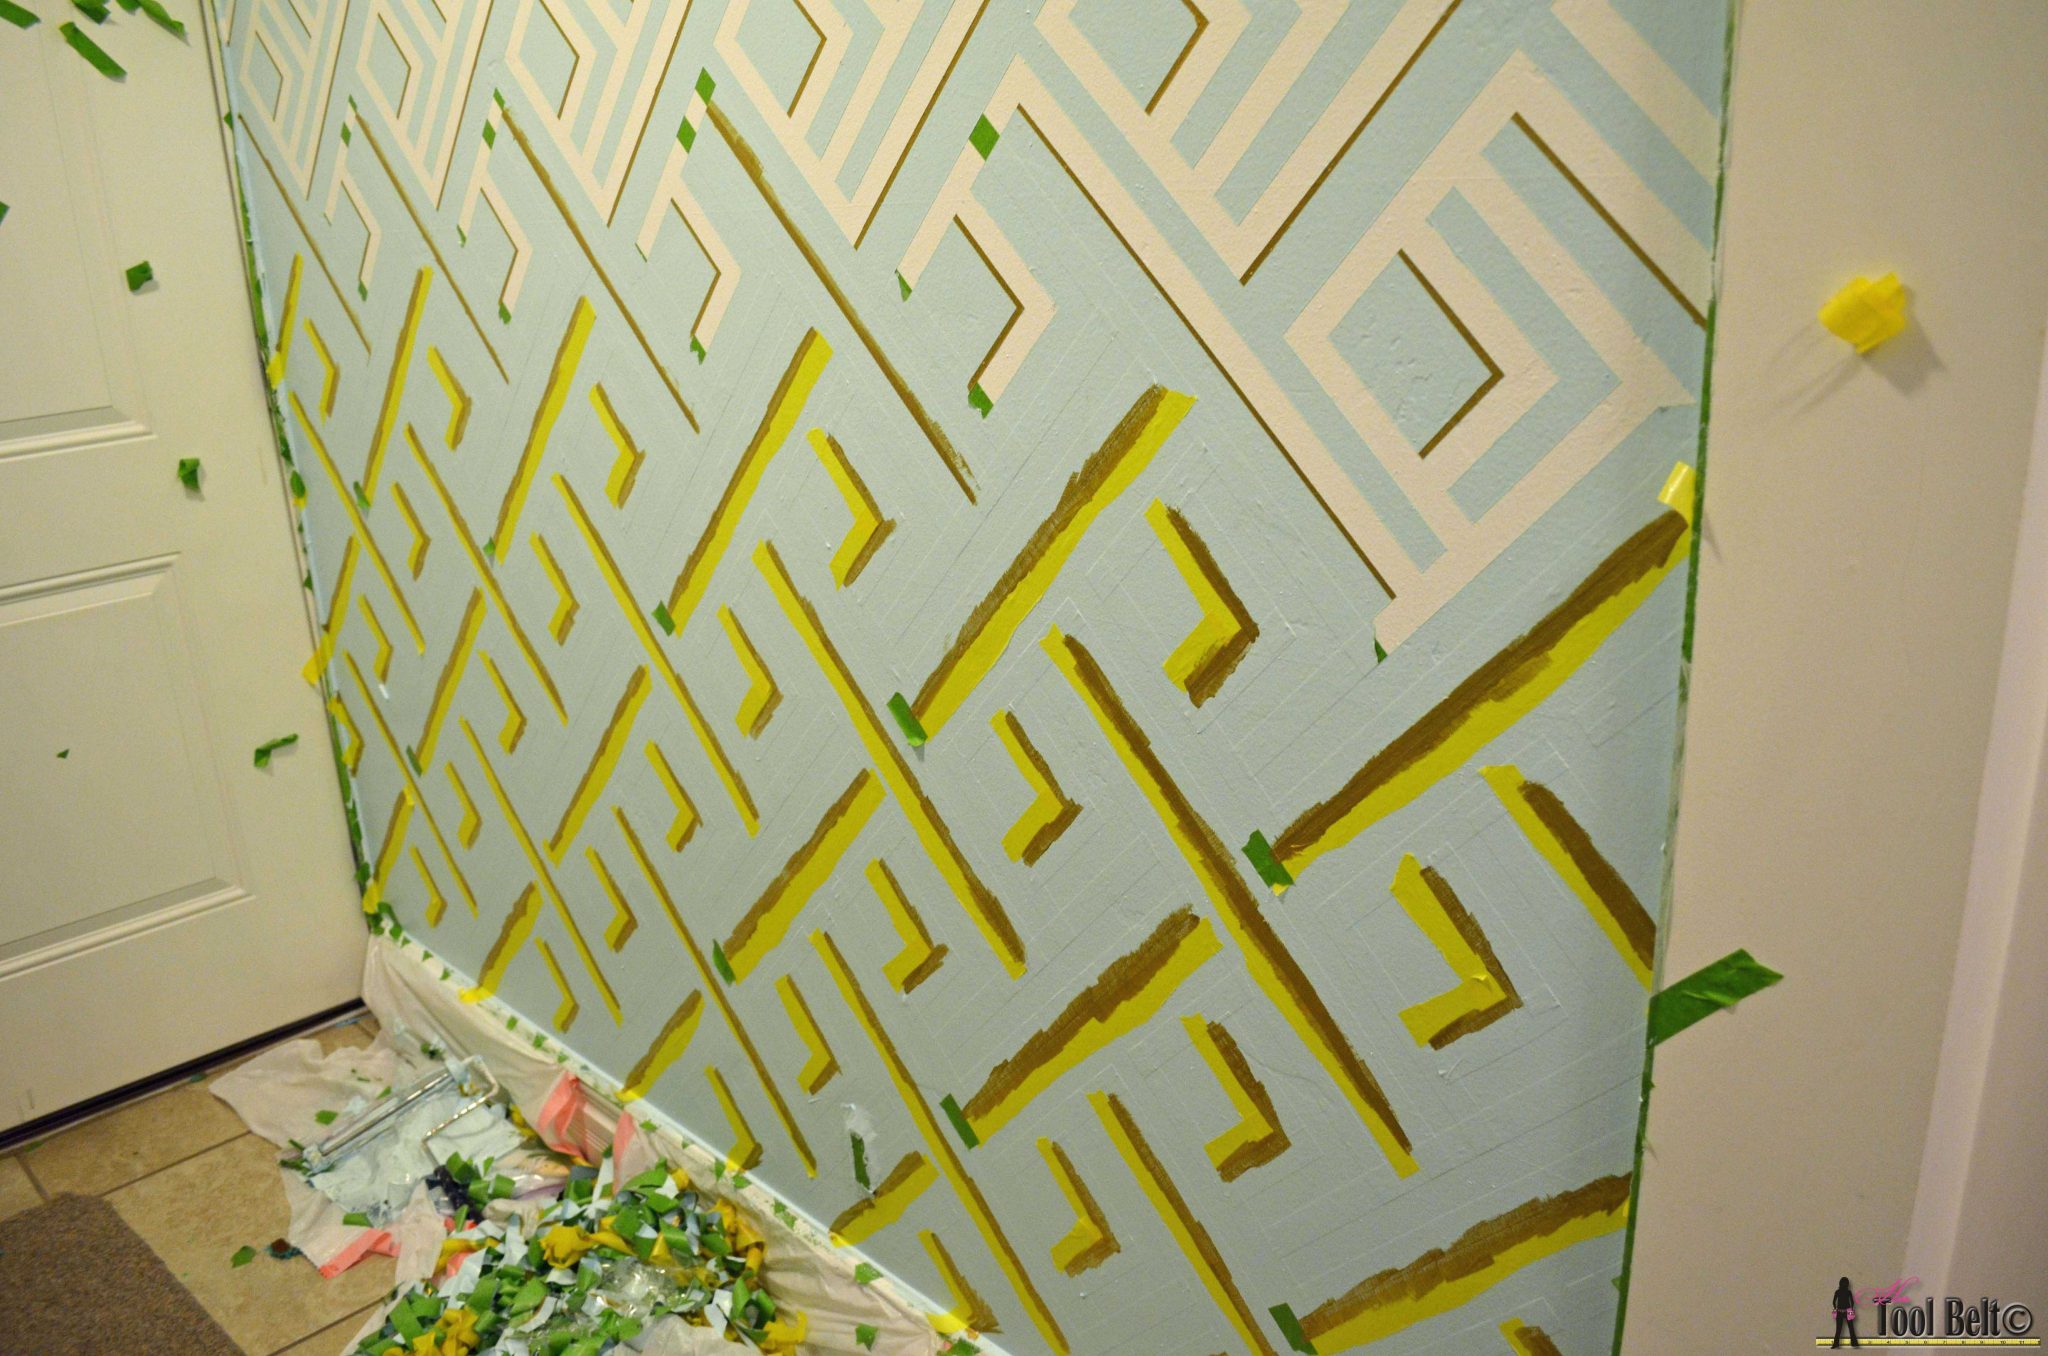
I painted 2 coats of the aqua paint, and let it dry for a couple of days. Now it’s time for pin-striping!!! I used Martha Stewart Metallic Gold acrylic paint. I don’t know if you are suppose to use acrylic paint on walls, but I did.
I also decided to use Frog Tape delicate surface tape (yellow) to make sure I didn’t pull off any of that blue paint. The pin stripes are 3/16″ wide. The gold metallic paint needed 2 coats of paint.
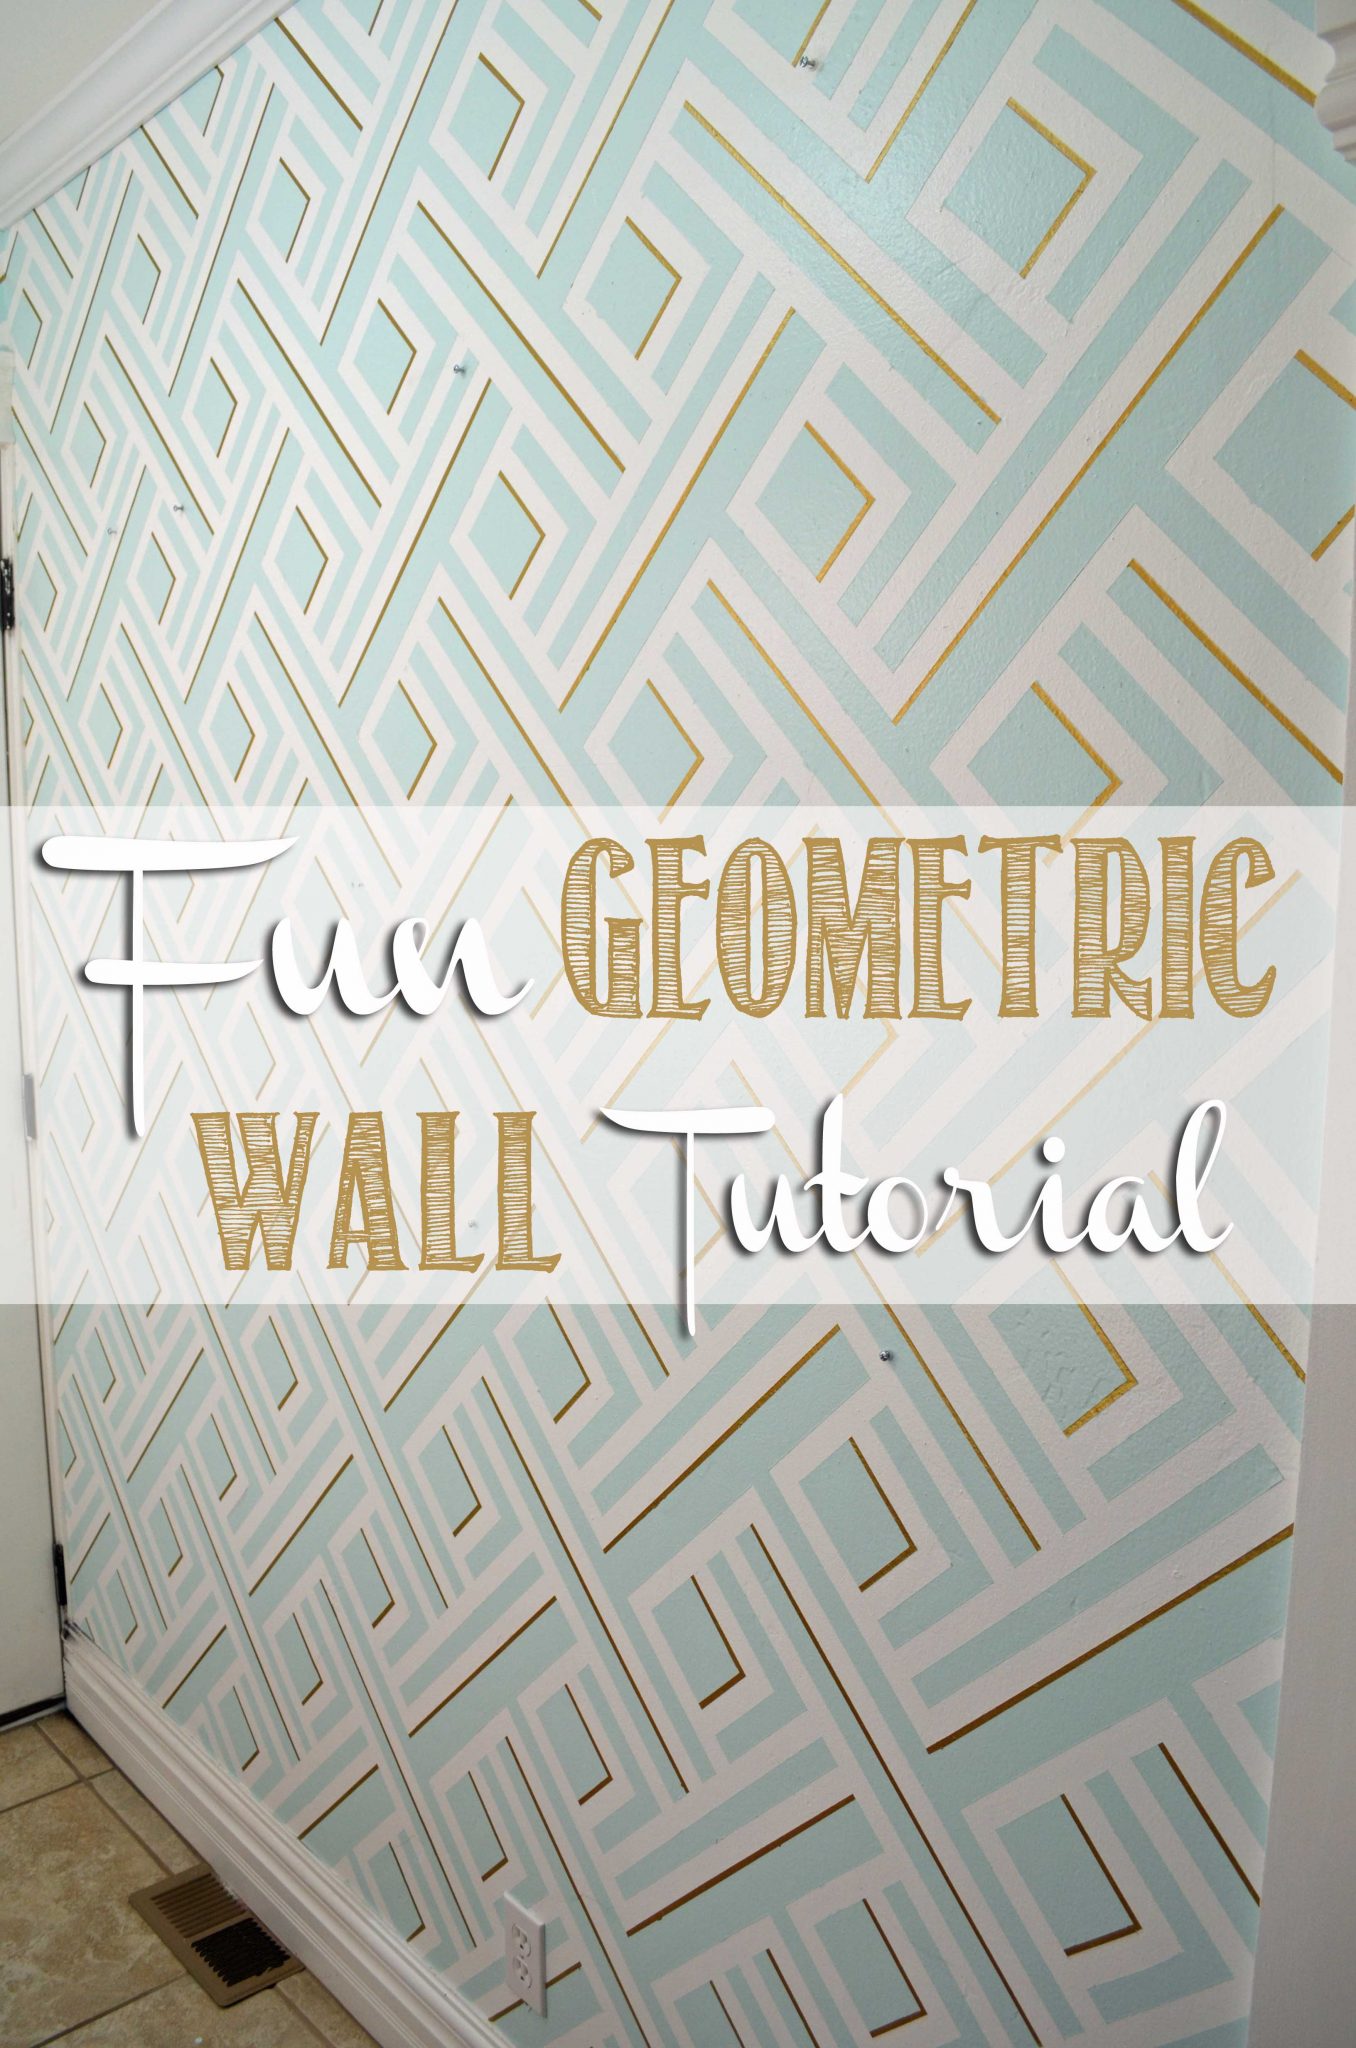
After I put on the 2nd coat of gold I pulled the tape off, the wall was stunning. The design is modern and fun.
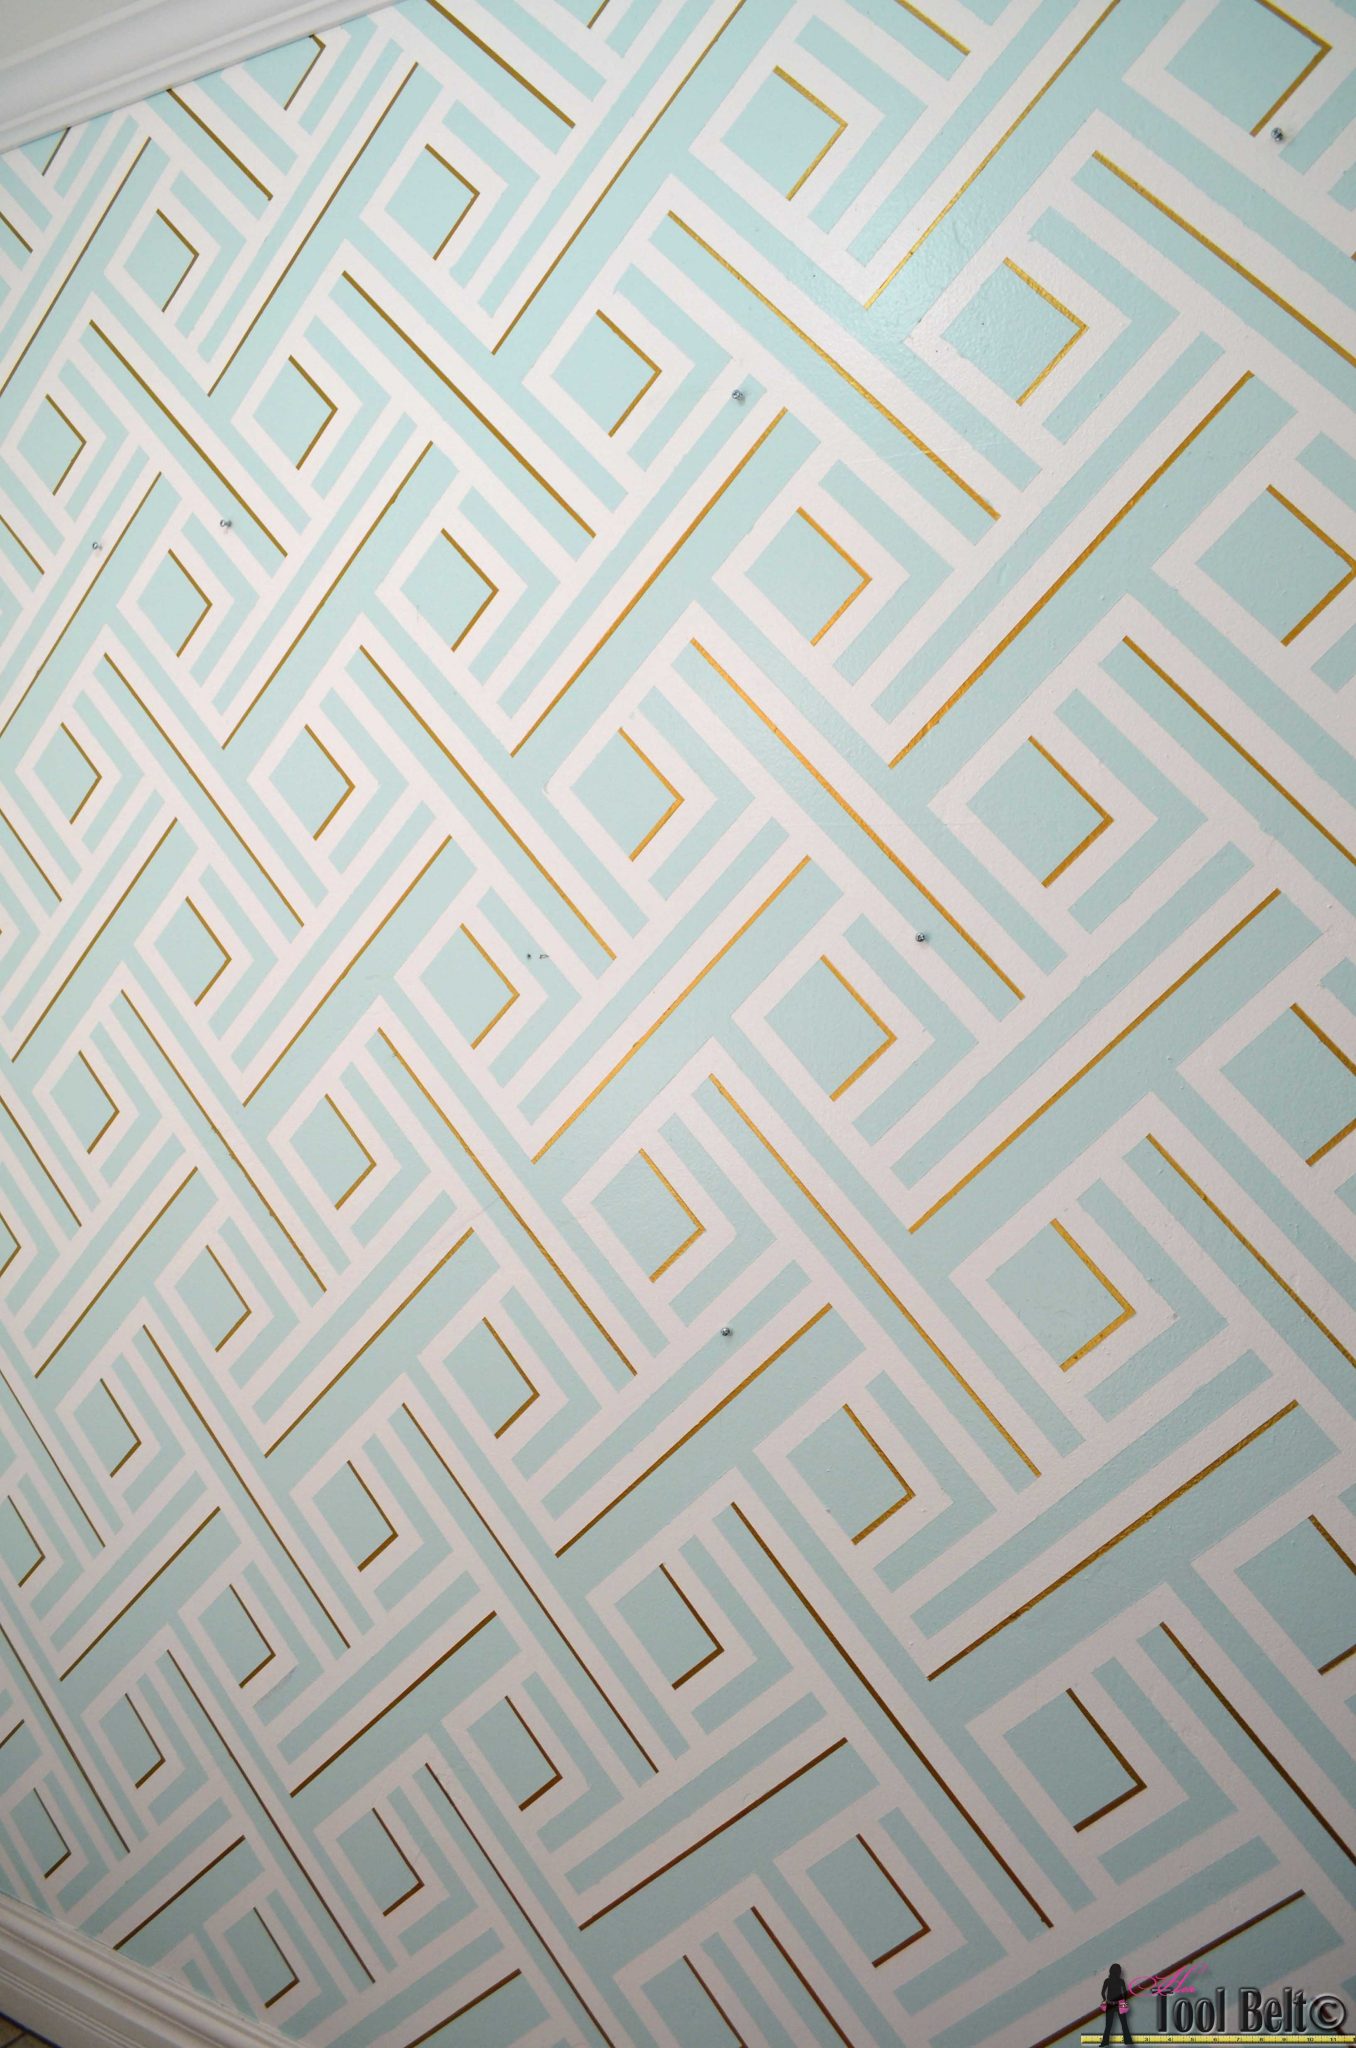
I love how well the gold ties in the cabinet color, it’s perfect!
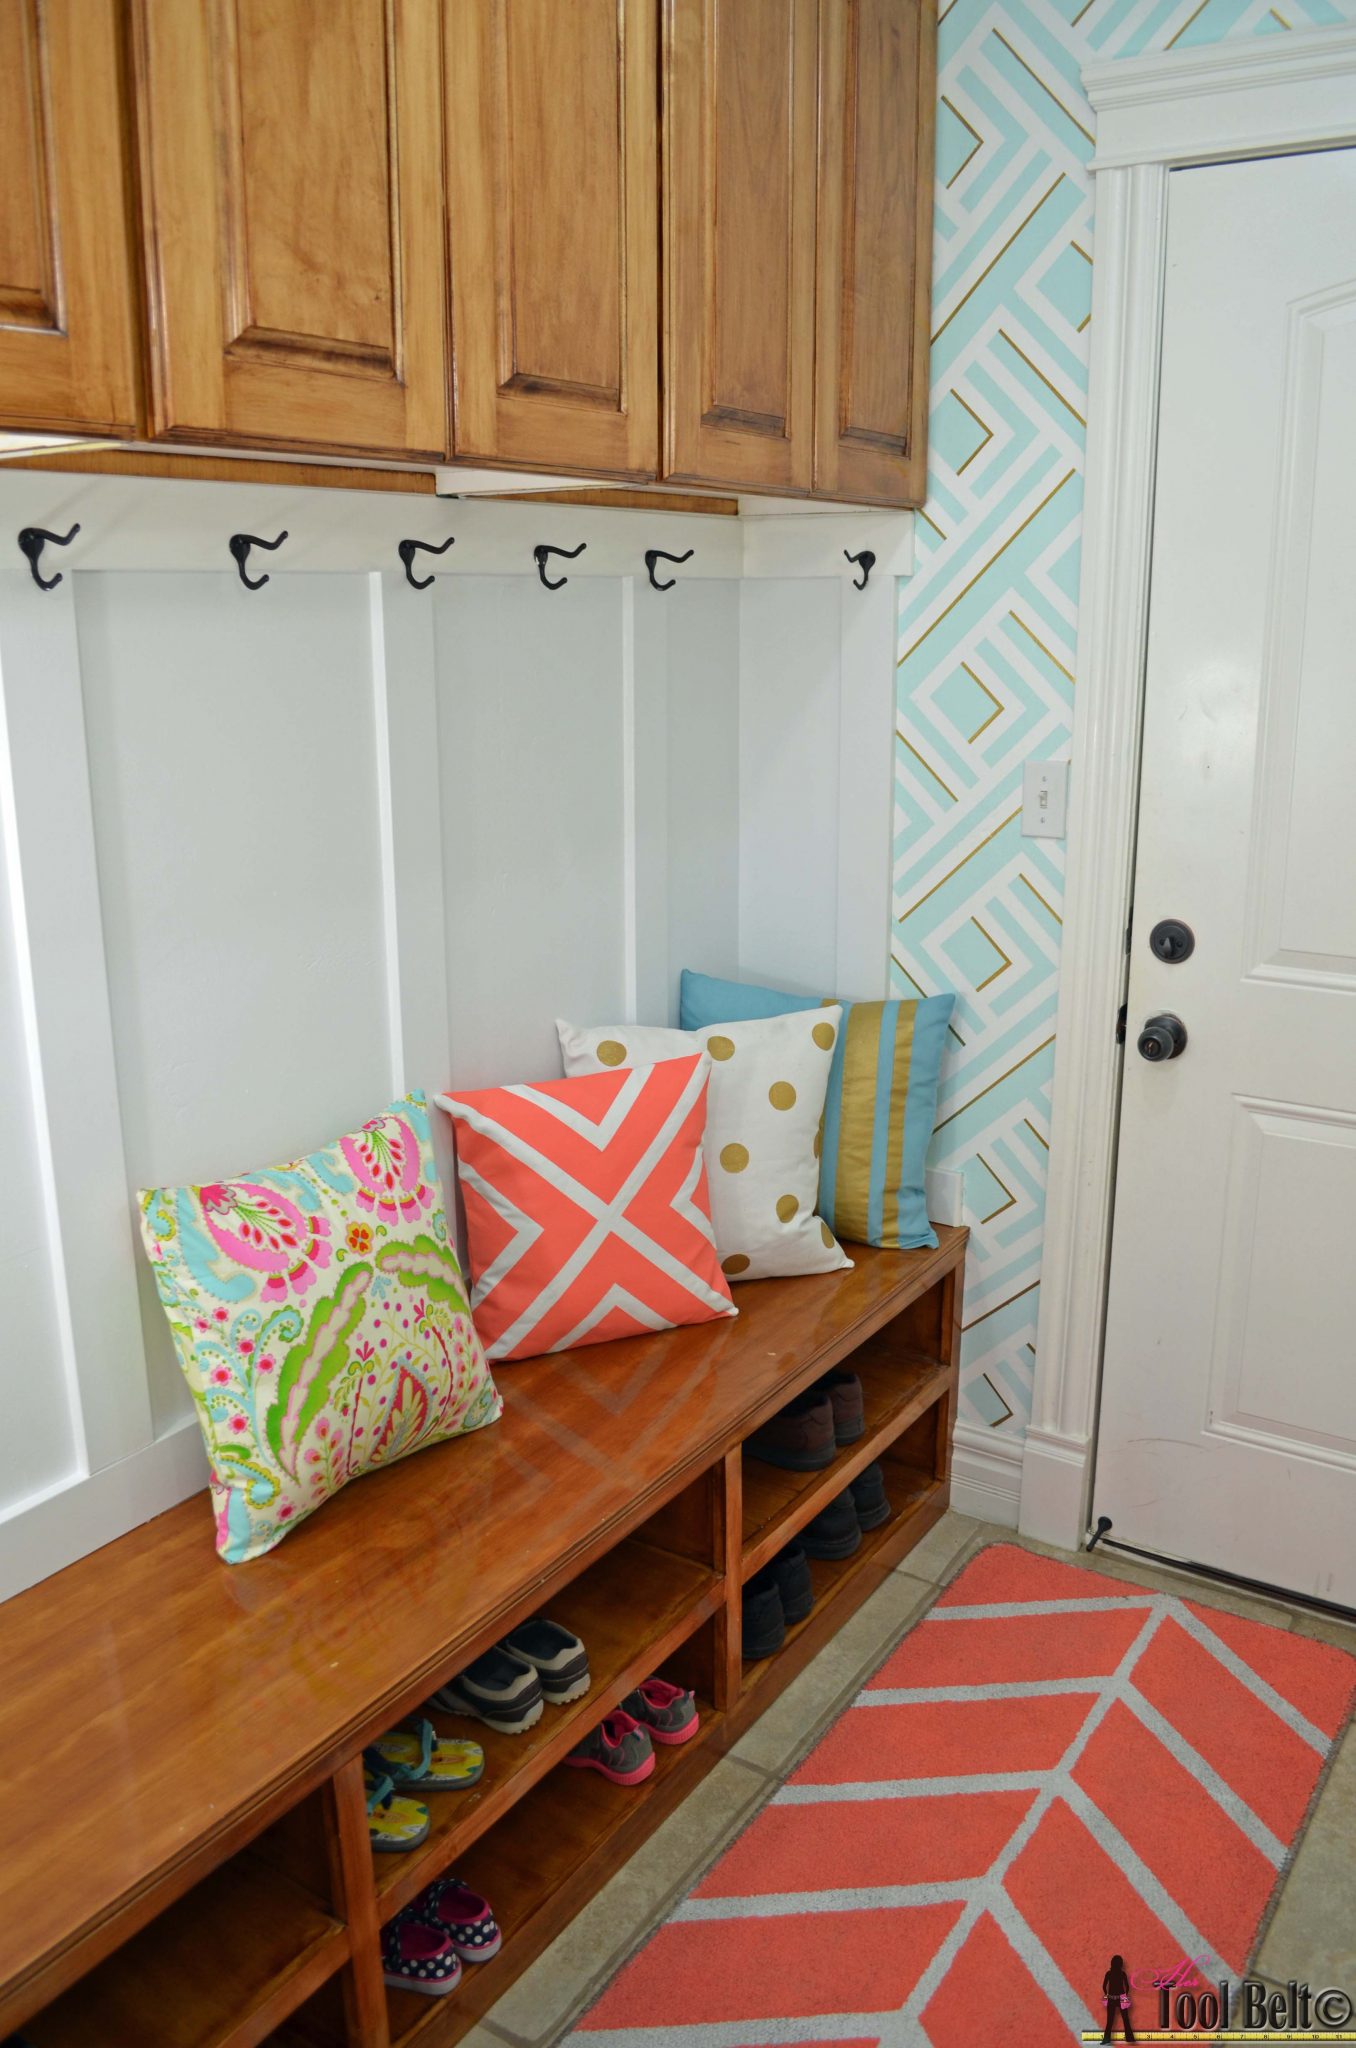
Here’s an end view of the room. The geometric painted wall reminds me of modern wallpaper.
 A painted geometric wall may seem a little intimidating, but it’s really easy. It just takes a little time and measuring. The best part is that it’s cheap, just the cost of paint and a few rolls of painters tape. (BTW it was cheapest on Amazon.)
Pin for later
Linked to: My Favorite Link Parties & Remodelaholic, Savvy Southern Style, Link it or Lump it, Creativity Unleashed
BTW my room won the 2014 Frog Tape Earn Your Stripes contest…just the kick in the rear I needed to fix my mudroom.
This is amazing, the wall is truly a work of art! Seriously, I don´t have words to express how blown away I am, everyone must be 🙂
Thanks it was fun!
Um, this is SO awesome!! What a great job! I love everything about this space. And your aquarium joke made me laugh 🙂
Thanks, luckily that aquarium is history!
Holy moly! This wall is out of control stunning! And then I love all the other touches, too. Please come share at our link party going on now. http://www.delineateyourdwelling.com/2014/07/link-it-or-lump-it-party-number-48-and.html
Thank you!
You did an amazing job! That’s a lot of tape! Beautiful! I’m pinning!
Thanks
Thank you
wow amazing and i am totally speechless! I so want this geometric wall!!
Oh my goodness! Love, Love, Love!
Thanks!
This is amazing! The wainscoating is quite an addition to helping change the space. Wonderful job with this!
WOW! This is jaw-dropping amazing. I am so, so impressed. Thank you so much for sharing it with us at The Makers.
I can’t even believe how AWESOME your design is! I would never even know where to start to create anything even close to this. Of course you won the frog tape contest! I actually clicked on the pic to see what kind of stencil you could possibly have used for your walls. I’m sharing and pinning! Thanks for linking up with Creative Spark Link Party.
Glenna @ My Paper Craze
Thanks!!!
Wow! Congrats for winning! Well-deserved; that pattern is awesome!
Thank you
oh my gosh, that is so neat! and i love the bench it really anchors the space opposite such a funky wall. enjoy.
b
Thank you
Oh my gosh! How many rolls of frog tape did you use for this? This is truly amazing!!!!!! I’m so glad you linked it up to the Be YOU tiful link party. Pinning!
I used just over 3 rolls. I was really surprised that I didn’t need more.
This looks amazing! Pinned. Cassie loved it so much that we will be featuring it at our Monday party. Happy dance! Thank you for being a part of our party. We really appreciate it! Happy Sunday~ Lou Lou Girls
Yay! Thanks
I am so impressed! Your wall turned out amazing! Beautiful! Thanks for linking up to The Creative Exchange! I am featuring your project this week. xo, Laura
Thank you!!!
This is amazing! I have never seen anything like it. This looks like wall paper, it is done so well! Thank you for sharing at Friday Favorites!
Thank you
Wow! I love how this turned out and the color combo is gorgeous! 🙂
Wow! You must be the most patient person in the world!! 😉 It looks fabulous!!
Thanks
Congrats! You’ve been featured this week on Creative Sparks Link Party. Thanks so much for linking up week after week. Check out your feature here and link up again! http://bit.ly/1kGF4f5
P.S I swear I don’t try to pick the same features week after week. I look at the content then the blogger! Your projects are just really standing out and grabbing me! Wish I was renting so I could do this to a wall in my house!
Believe me, I don’t mind 😉 Thanks a ton.
Hi May! I just wanted to let you know that I LOVE your Geometric Wall {which you already know cuz I got your comment!} , and I’m featuring you as one of my Rockstars this week from Creativity Unleashed!
As a Rockstar you’re in the running for this week’s MEGA Rockstar! Grab your friends and come vote at http://www.theboldabode.com/2014/08/letters-rockstars-creativity-unleahsed-week-31.html
The MEGA Rockstar gets loads of love including:
1. Shout outs on all my social media houses.
2. A bucket full of Pins to my biggest group boards
3. A big sidebar ad proclaiming them the MEGA Rockstar of the week
4. And a feature in my weekly newsletter!
Congratulations and Good Luck!!!
wow its stunning great job of coarse it won!! yay!!
This is amazing to me, I am featuring you at Friday Favorites this week. It goes live today at 4pm. Come and grab a button! I am still trying to wrap my mind around how you even thought of this and then did it. Amazed!
http://www.ourhousenowahome.com/2014/08/friday-favorites.html
Wow! This is amazing! Great job pulling this project off! It’s so beautiful! =)
HI Amy! I just wanted to let you know that you are this week’s MEGA Rockstar from Creativity Unleashed!
I’will be shoutin you out on all my social media outlets, adding you to my sidebar and will have tons of pins going up tonight on my biggest boards starting around 7:30EST.
I’ll also be featuring you in my weekly newsletter on Thursday.
I hope you get LOTS of love this week! You totally deserve it, girl!!!
Saw the article in the SE today. Congrats on winning, your wall is fantastic. I am interested in the map dresser featured in the paper. Is it posted on your site?
Thanks Susan! Here is the post about the map dresser. We love it, it’s a fun piece. https://www.hertoolbelt.com/the-map-dresser/
Oh my gosh Amy!!! How did I not see this before?! This is freaking amazing and I L-O-V-E it! Definitely pinning for inspiration.
Thanks Elisha! The question is how did you find it 🙂 It didn’t circulate very far. It was a fun project, kind of crazy.
Can you tell me what brand and model the laser you used is?
Hi, I used this laser… http://www.amazon.com/Black-Decker-BDL100AV-SureGrip-Laser/dp/B004SQSU6I/ref=sr_1_1?ie=UTF8&qid=1439343288&sr=8-1&keywords=black+and+decker+sure+grip
Can you come and do it in my house? You obviously k ow what your doing I am not an expect on drawing
Thank you for this tutorial!
I’m making an office sanctuary for my wife, and using this pattern for her focus wall.
I left out the tiny L, and I also wrapped the pattern at the tops of the walls, to blend it with the rest of the room.
Time consuming, but once it’s done, it’s totally worth the labor!
WOW! While I certainly appreciated the creativity and work involved, I didn’t think I’d like it. Boy was I wrong! It looks awesome!!!!
All I can say is “WOW” Love it!!
Wow what a beautiful job! I envy people like you (HA), so talented. I could NEVER figure out those measurements. But I can sure sit back and admire your walls and what a wonderful job you have done.
Hi!
I’ve been loving this design for aaaaages! I’ve had it pinned for as long as i can remember…
I’m renovating a 40 year old house with my boyfriend and guess what i pullen up on pintrest…? Right! This design!
I put on my big girl pants, stocked up on some frogtape and got to work on the feature bedroom wall. The way you explain things is awesome and so detailed. This entire project was super easy to follow, specially thanks to your photo’s. The entire project looks so complicated but it’s actually pretty easy. Just some coffee, a few days of time and some patience 😉
Thank you so much for this design, idea and amazing explenation!
Inez,
I’m so happy to hear it. It’s a fairly simple project, but you are right, you need a heavy dose of patience and caffeine ha ha!