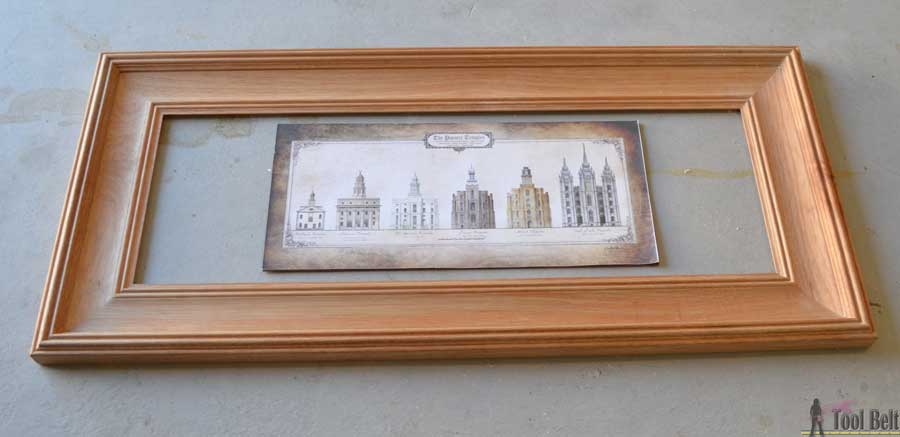
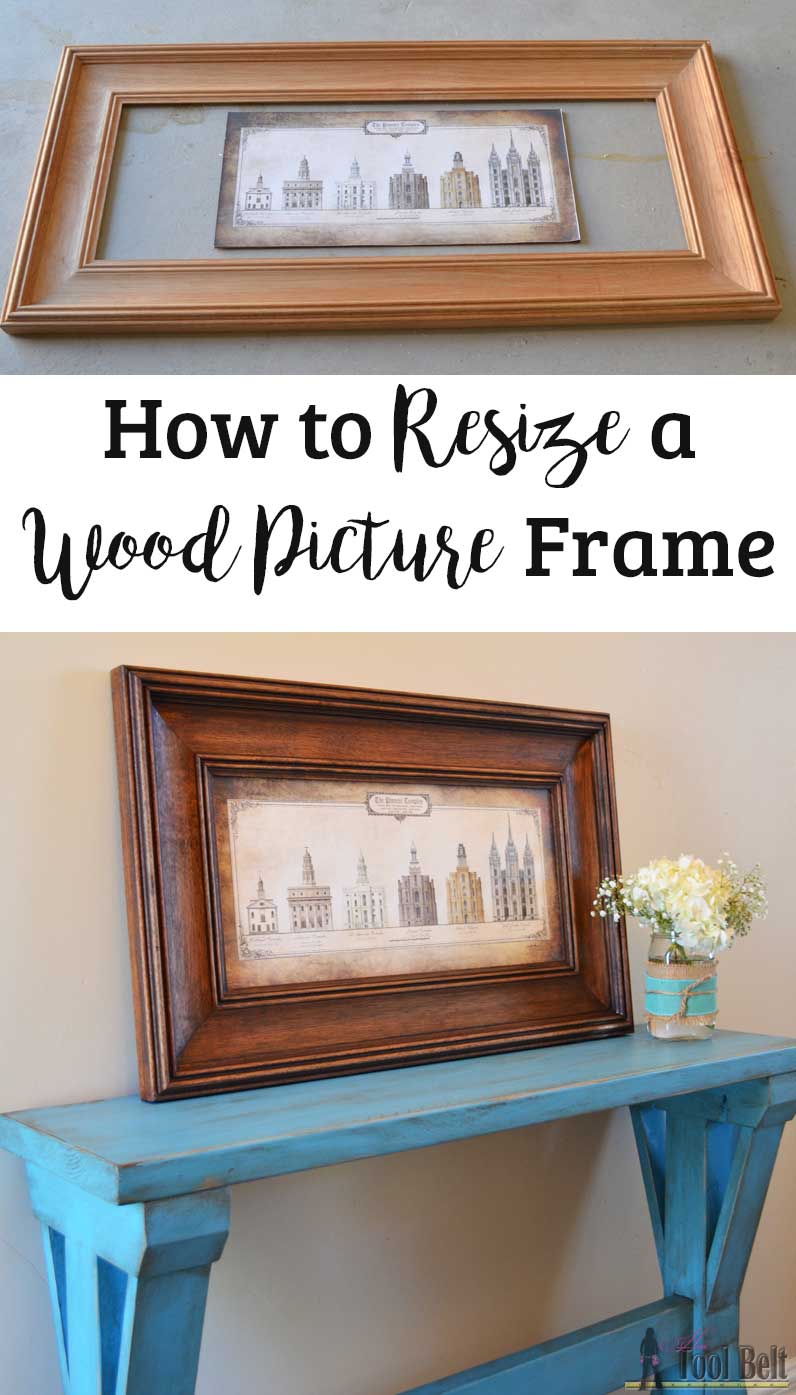
Last year I bought an art print by Clayton Vance at Swiss Days (Utah’s most happening craft fair!) I figured that I’d make myself a frame for the print once I decided on a style. As usual the print sat and sat because there is always something else to work on. Then a few months ago, I was browsing Tai Pan Tradings summer tent sale and found this nice solid mahogany wood picture frame for $20. I knew it was the wrong size, but for $20 I couldn’t pass it up. A DIY molding frame would cost at least that much to make, and that’s for MDF that would need to be painted.
To resize a wood picture frame you’ll need a miter saw and depending on how you want to make your joints, a drill and Kreg pocket hole jig. For this frame I used pocket holes to make the new joints.
This post contains affiliate links noted by *, see my disclosure policy.
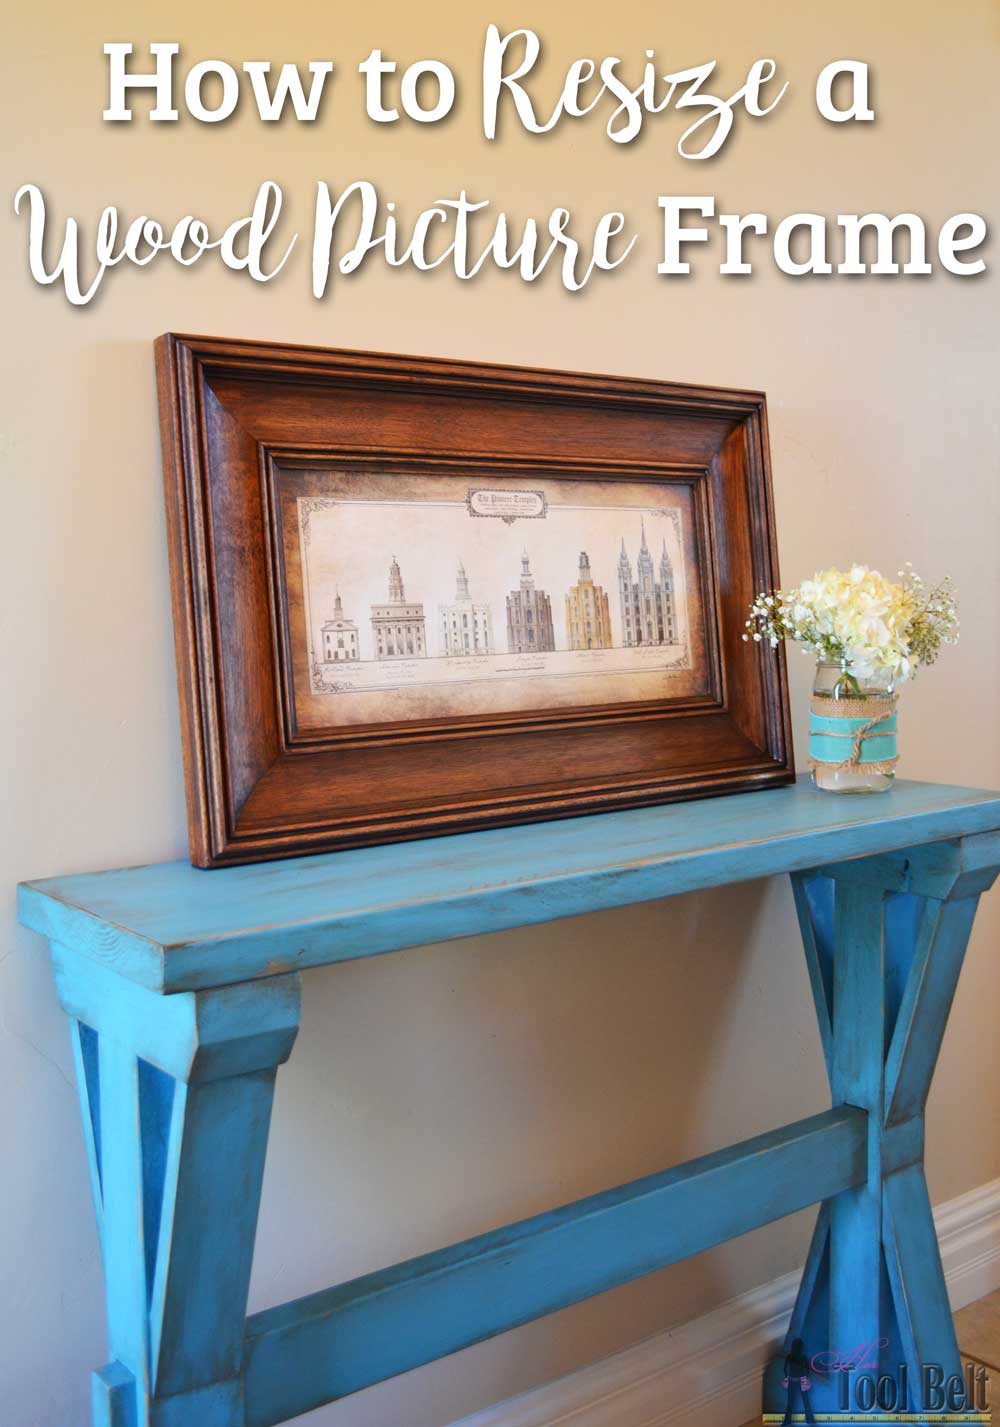
How to Resize a Wood Picture Frame
Materials
- A picture frame that is too big
- wood glue
- 1″-1 1/4″ pocket hole screws
- sandpaper as needed
The most important part of this project is figuring out what the new size of frame should be, and that’s pretty easy with these simple steps.
How to calculate desired frame dimensions:
- Measure the new pictures length and height.
- Measure the amount of inset for the picture on the back of the frame (probably around 1/4″).
- The New frame inside length is ‘new picture’ length – 2 times inset. In my case the inside length needs to be (22″ – 2 X 1/4″ = 21 1/2″)
- The New frame inside height is ‘new picture’ height – 2 times inset. In my case the inside height needs to be (10″ – 2 X 1/4″ = 9 1/2″)
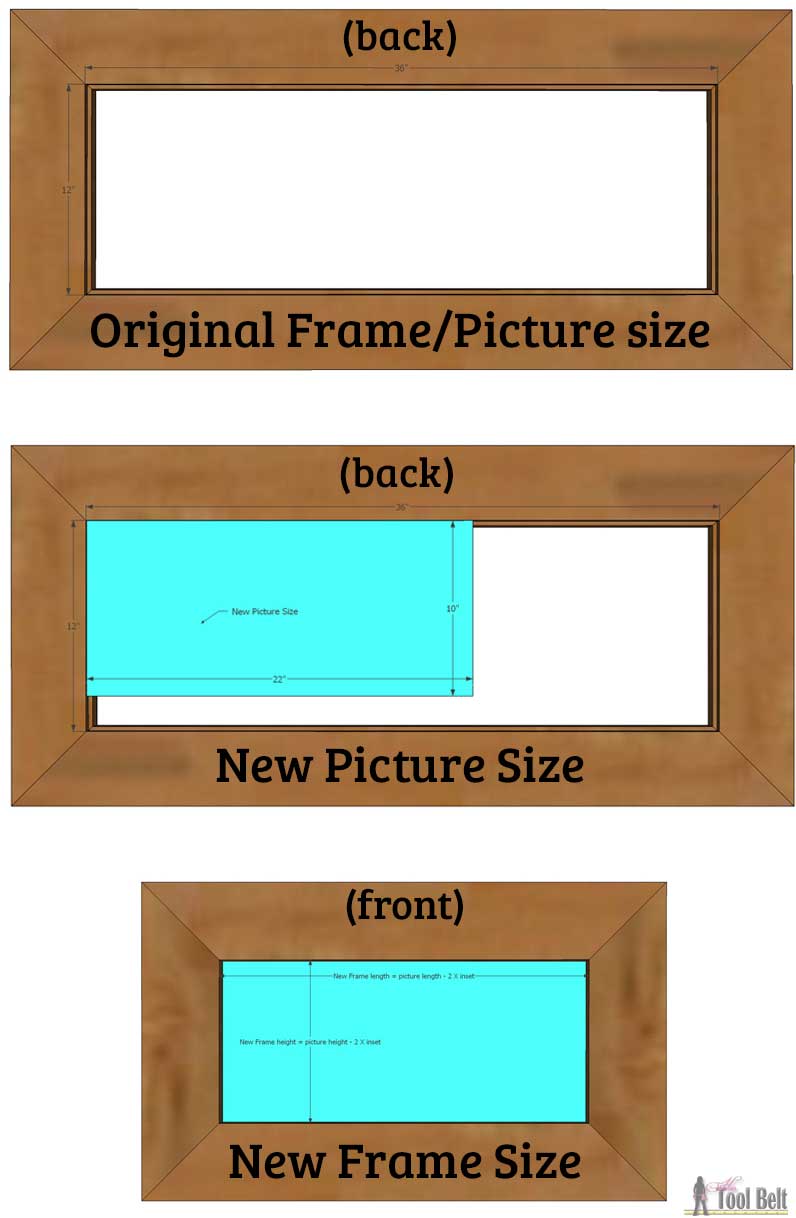
To start off I measured the length and height of the print that I wanted framed. The length is 22″ and height is 10″.
Next I measure the inset of the frame for the picture to sit, for this frame it is 1/4″ which is pretty normal.
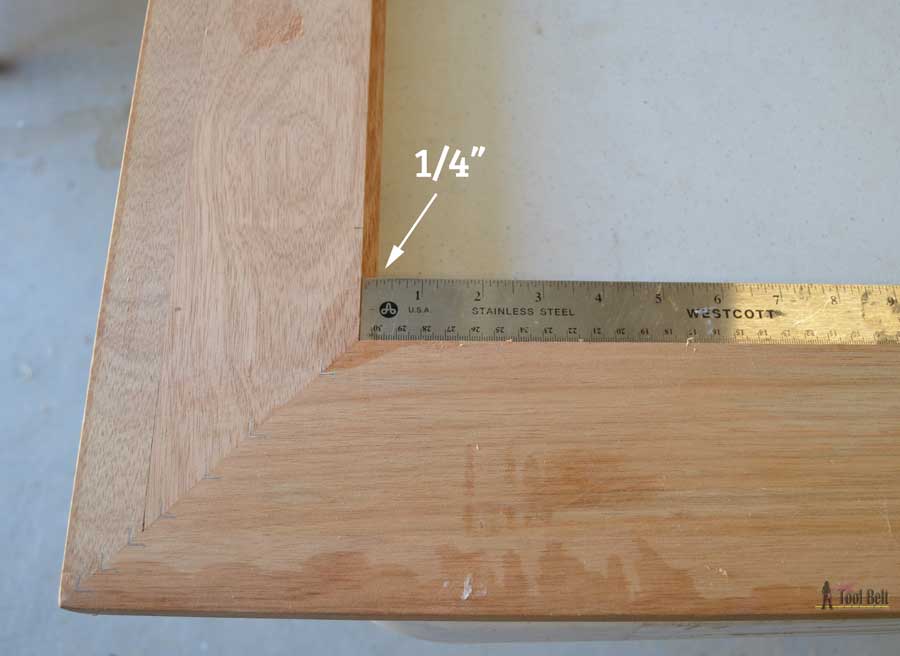
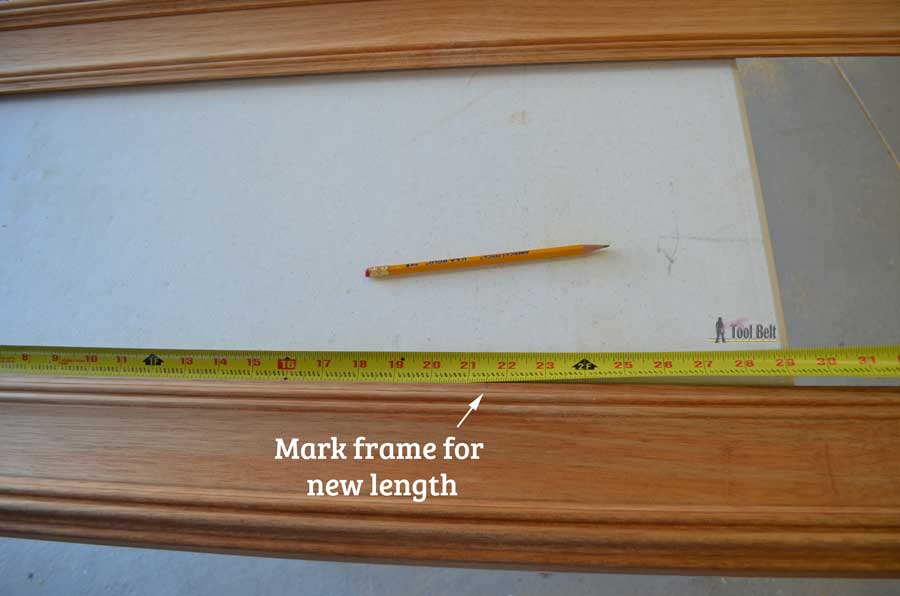
On the inside portion of the frame, I measured and marked 21 1/2″. This is where I want the 45 deg angle to be cut for the new frame corner. On the short inside portion of the frame, I measured and marked 9 1/2″.
I cut the frame at 45 deg. (Note: Make sure you’re not cutting on the side of the mark that you want to keep. You can always cut again if it’s to big 🙂 )
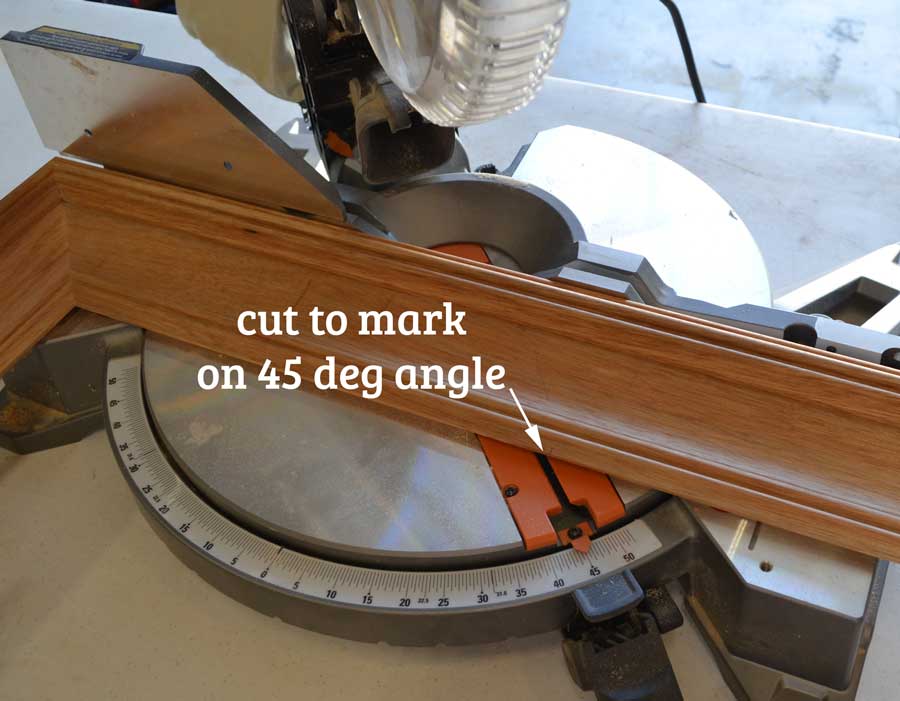
Repeat for the opposite frame corner.
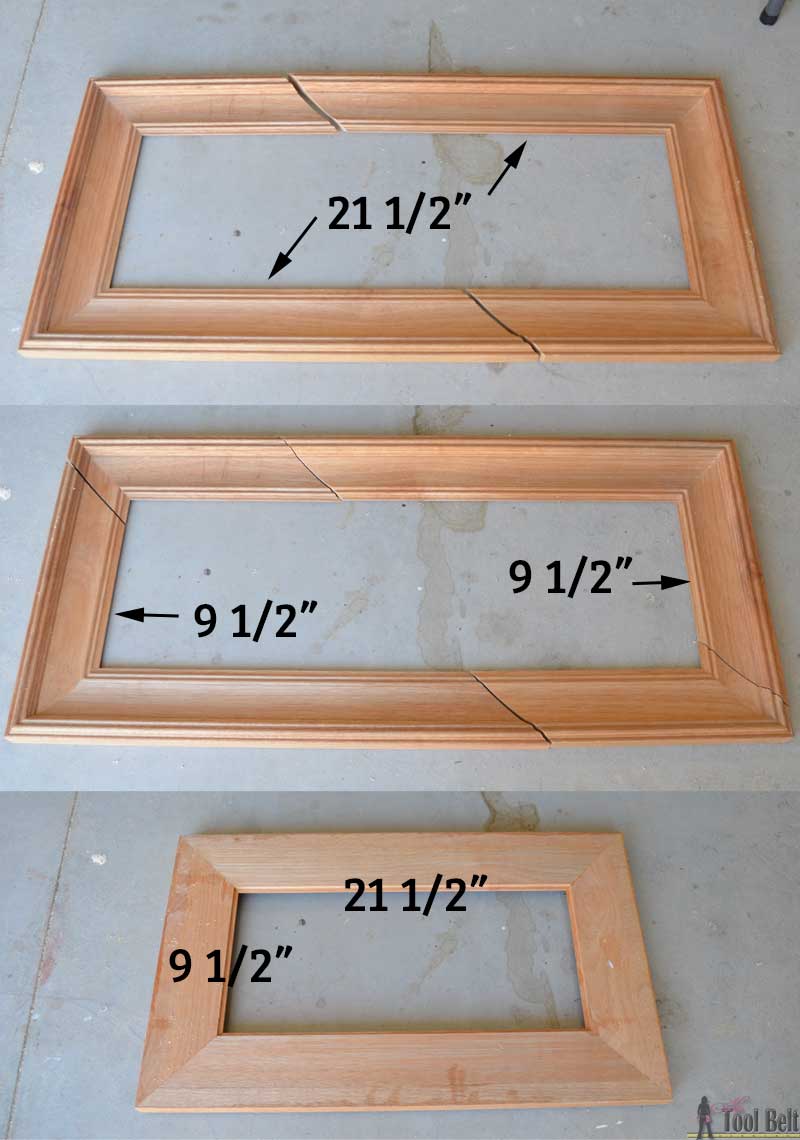
Dryfit your newly sized frame with the picture, trim or adjust as needed. Everything looks good, so onto assembly!
A Kreg pocket hole jig* is an easy way to secure the mitered corners of a frame (if the frame material is thick enough for pocket holes). Measure the thickness of the frame and drill pocket holes accordingly. My frame had 1/2″ material on the inner corner and a bit over 3/4″ material near the outside.
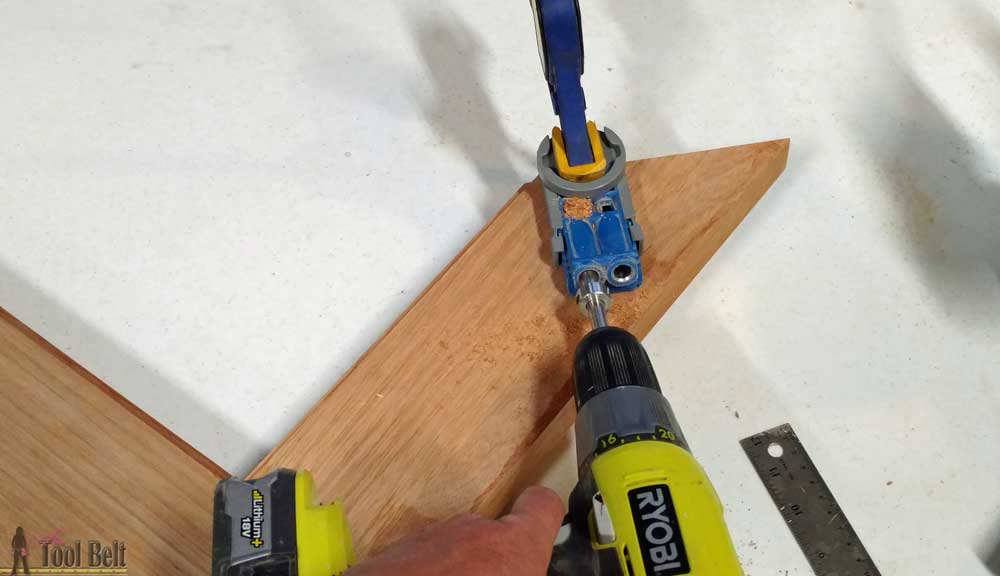
Use wood glue and clamp the frame together. I have a handy multi-corner clamp* that helps me easily line everything up and keep it in place while the glue dries. (Definitely not required, but it is nice to have around.)
Add the pocket hole screws to secure the frame together. (Note: I did this with the clamp still attached, but I forgot to take a picture until after.)

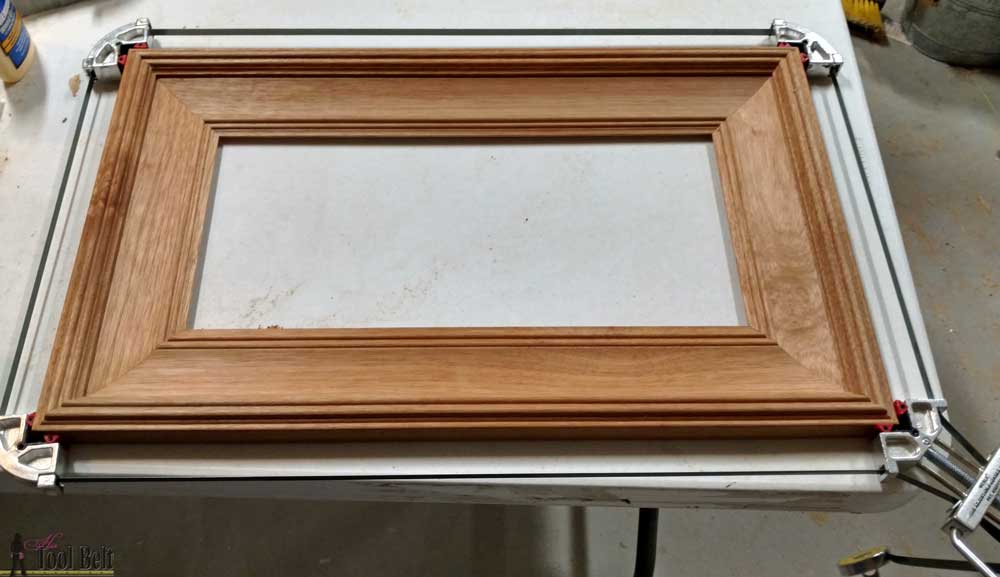
I like to use a keyhole bit to route a slot to hang the picture*, it saves me from buying those sawtooth picture hangers* all of the time.

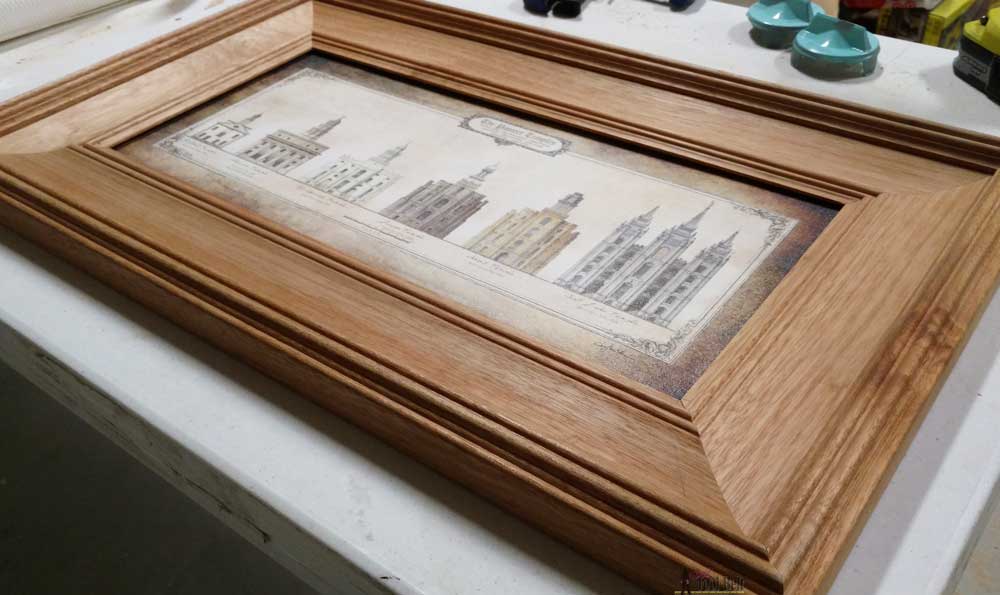
Now the frame is all finished and ready for sanding and staining!
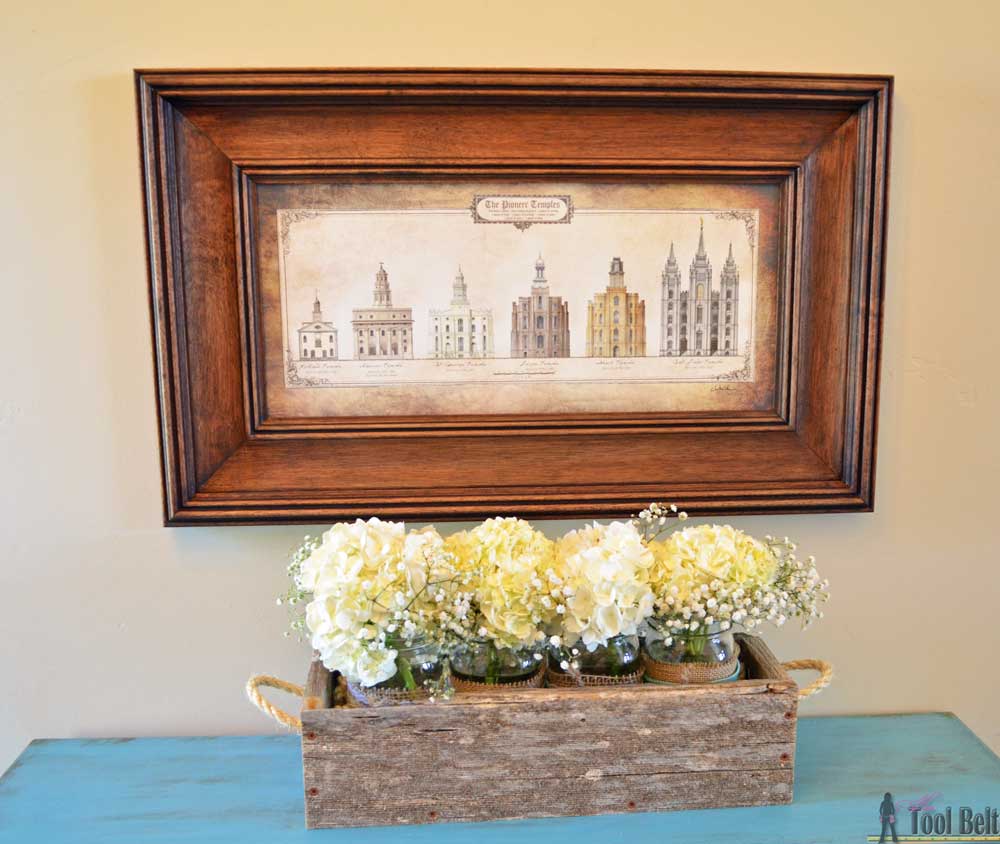
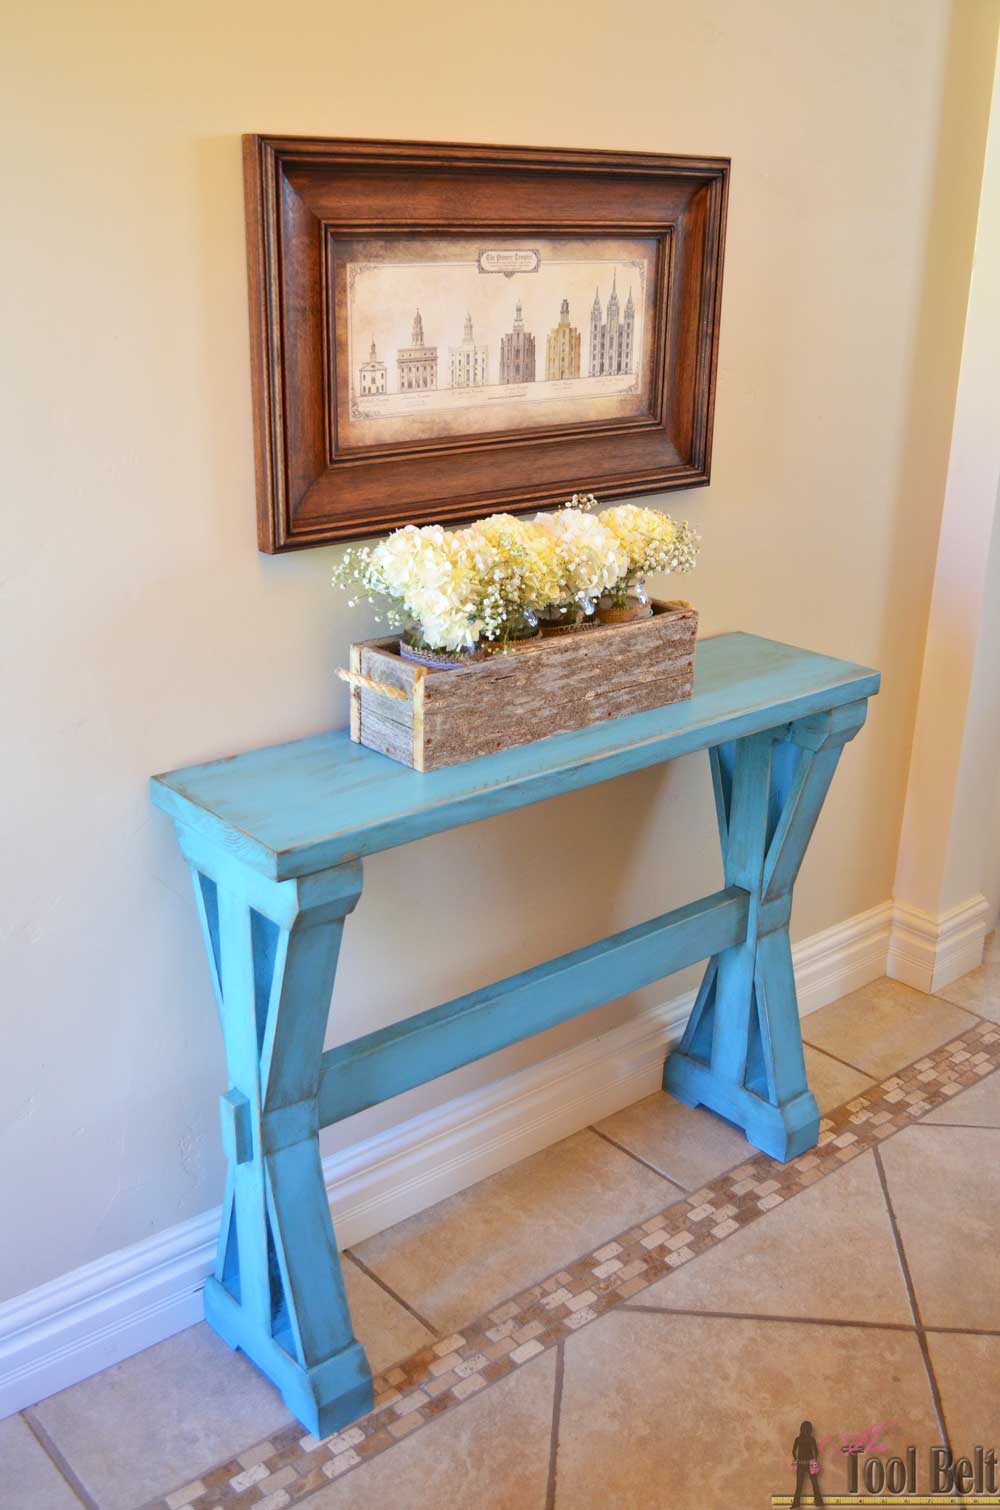
Plans for the barn wood box are here. Plans for the narrow trestle table are coming soon!
Thanks for pinning!
I’m participating in a Power Tool Challenge, this month’s theme is MODIFY. Check out all of these cool projects that were modified!
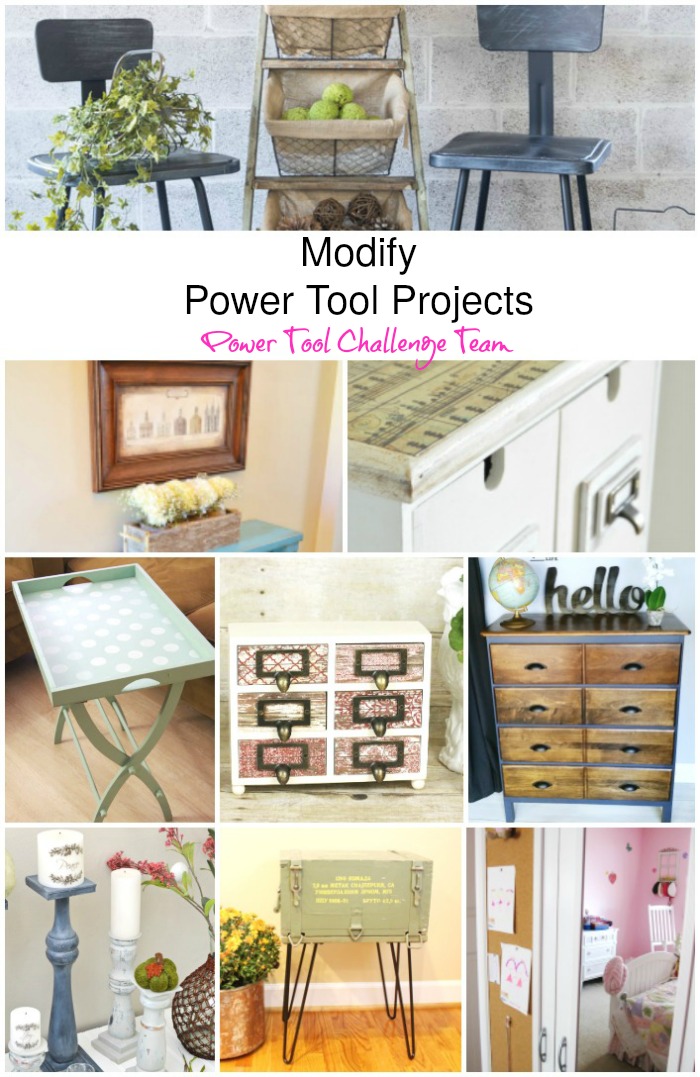
Modified Leaning Ladder Storage By Designed Decor
How To Resize A Wood Picture Frame By Her Tool Belt
Ikea Moppe Hack Apothecary Cabinet by Interior Frugalista
Portable Craft Table By Create and Babble
Grown Up Jewelry Box By Kim Six
Modified Dresser By My Repurposed Life
Bed Spindle Candle Holders By H2OBungalow
Ammunition Crate Table by Virginia Sweet Pea
Ikea Wardrobe Update By Domestically Speaking
Scrap Piece Sign By My Love 2 Create (Not Pictured)
Linked to: Link Parties, Savvy Southern Style, Remodelaholic
This is such a useful project! I’ve passed on many good frames because the size wasn’t right. Little did I know they could be modified! Looking forward to your trestle table plans too! Pinned:)
Thanks Wendi!
Super tutorial on changing up a frame size! Picture frames are so plentiful at thrift stores.
great tips!
gail
Very clever and awesome tutorial, Amy! I am pinning this to share but mostly to refer back to because there have been a few times where I passed up the perfect frame because of its size. Thanks for the tutorial! Your frame style and stain color compliment the art beautifully.
Thanks Marie!
How absolutely clever! XO
You are so smart to figure out how to do this. Frames are so expensive and I’m thrilled to now know how to get just this size that I need from one I already have.
Definiltely pinning this for later!
Awesome thanks!
This is so smart! So many times I have passed on a picture frame because of the size. No more, thanks Amy!
Amy, the color on the finished frame is perfect for that print! I would be so afraid to mess up the measurements if I tried to cut a frame down, I always mess up on measurements for 45 angels. You make it look so easy!