• Home
  • Project Gallery
  • About me
    • Disclosure
    • Disclaimer
  • Blog

Her Tool Belt

DIY furniture plans, crafts, and home improvement tutorials to empower you!

  • Free Woodworking Plans
    • Bathroom Furniture
    • Bedroom Furniture
    • Entry
    • Family Room Furniture
    • Garage
    • Kitchen furniture
    • Laundry Room
    • Mudroom Furniture
    • Organization
    • Outdoor Furniture
  • Home Decor
    • Upcycle
  • Crafts
    • Holiday
  • Home Improvement
    • Cleaning
    • Fix IT
    • Paint
    • Tile
  • Tool Reviews
  • Tool Time Videos

Be Merry Christmas Sign

December 8, 2014 by Amy 4 Comments

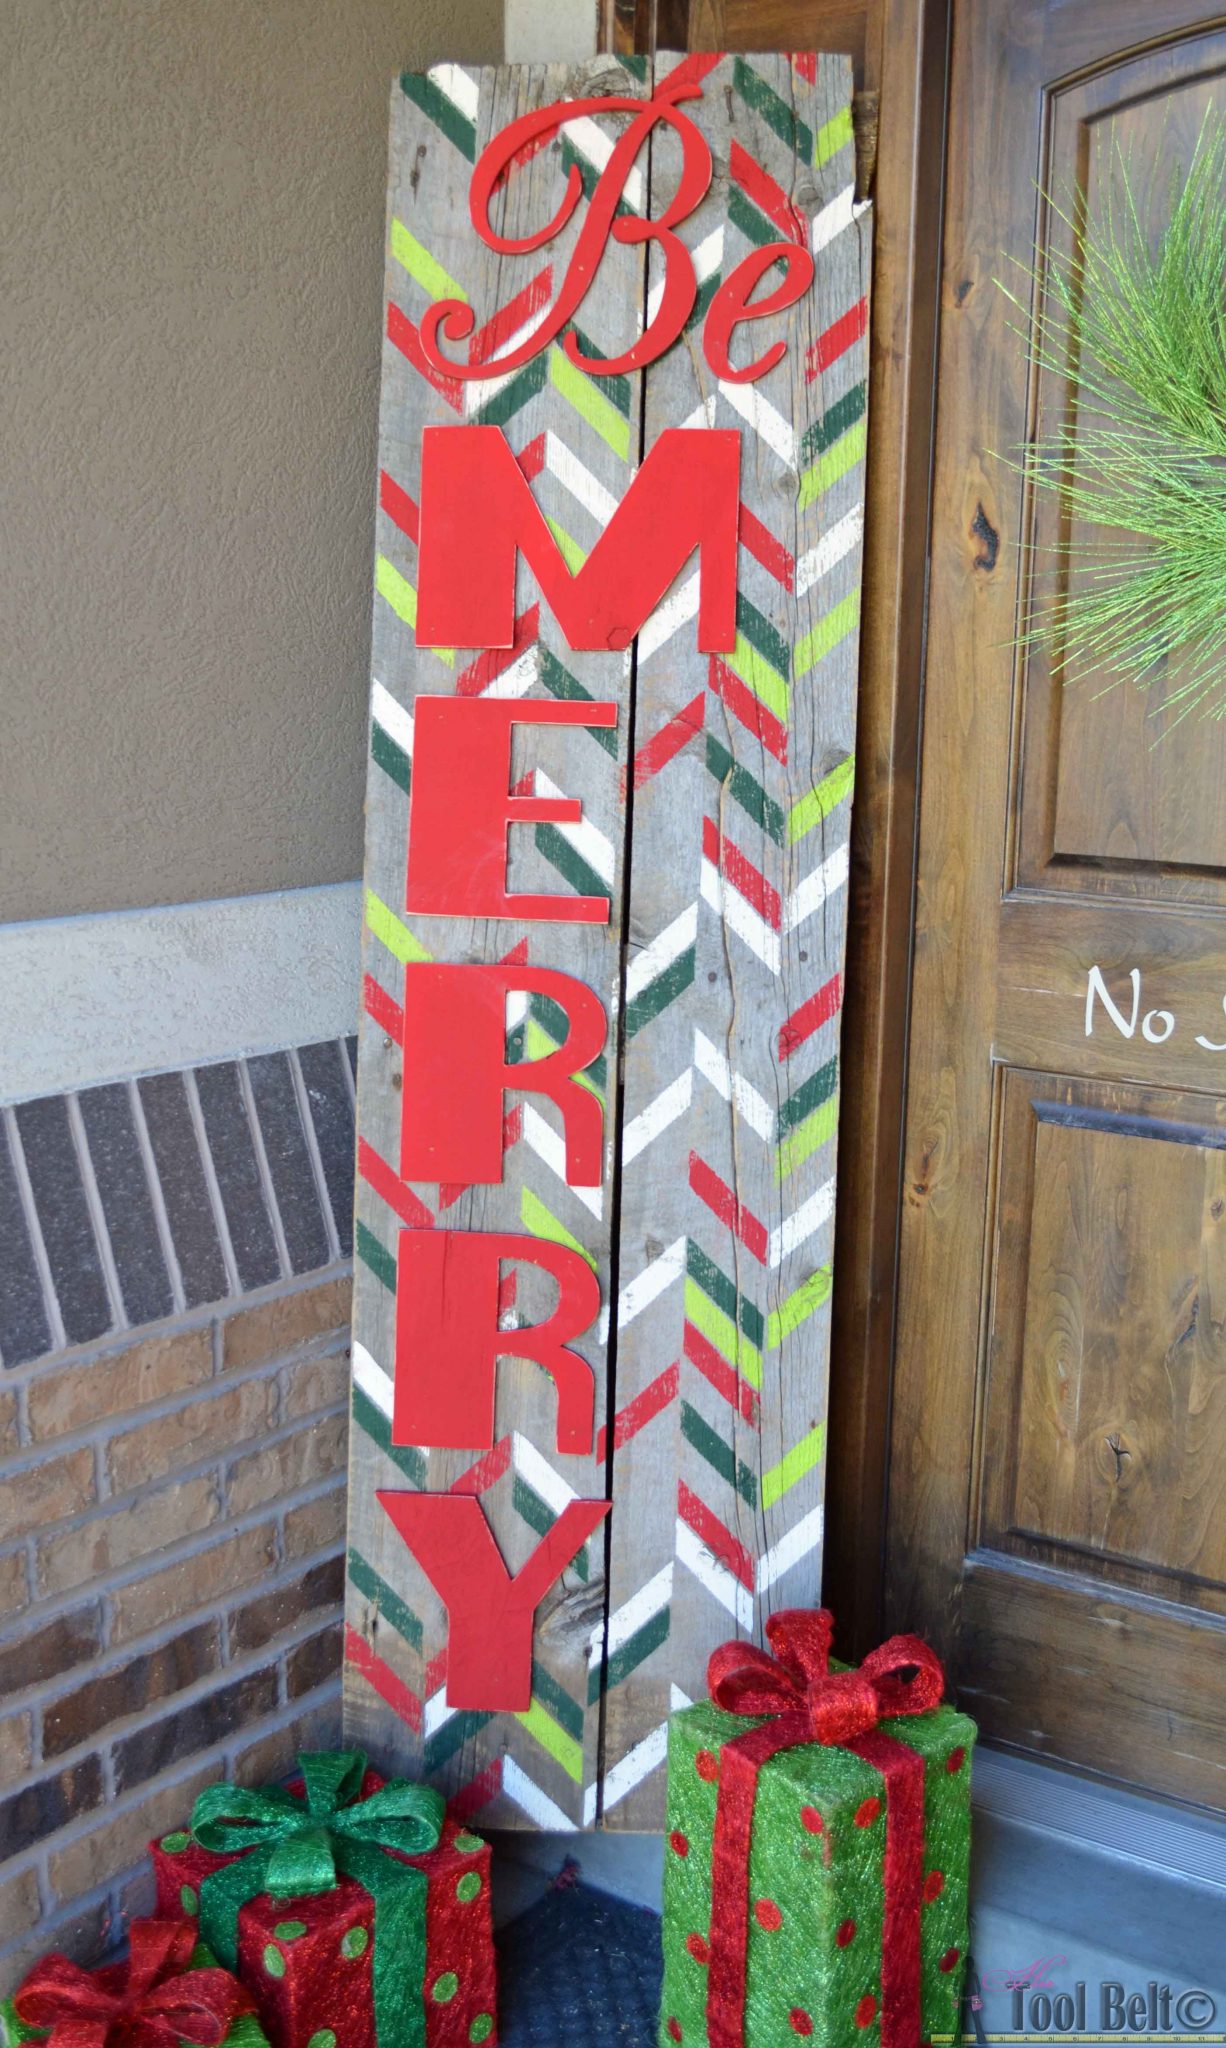
‘Tis the Season for magical decor, twinkling lights, bells, music in the air and snow.  Christmas time brings out the little kid giddiness in me.  I don’t have a ton of Christmas decorations, but each year I like to build a few more pieces to add to my collection.  I really like those big statement porch signs PEACE, JOY, BELIEVE, so I decided to do a gigantic Be Merry sign!  For the accent design, I thought it would be fun to use the Herringbone Shuffle stencil from Royal Design Studio. The chevron shape of the herringbone reminds me of pine boughs and the random colors seem like twinkling lights.  I’ve been wanting to try it ever since I saw the amazing herringbone shuffle wall designs floating around Pinterest.

How to build a Be Merry Christmas Sign

Materials

  • 2 – 6′ x 10″ boards (reclaimed lumber or new)
  • 1 – 2″ x 4″ x 8′ board
  • 1 – 4′ x 4′ x 1/2″ plywood
  • 2″ brad nails or screws
  • 1″ brad nails
  • paint
  • Herringbone Shuffle Christmas Stencil

Step 1

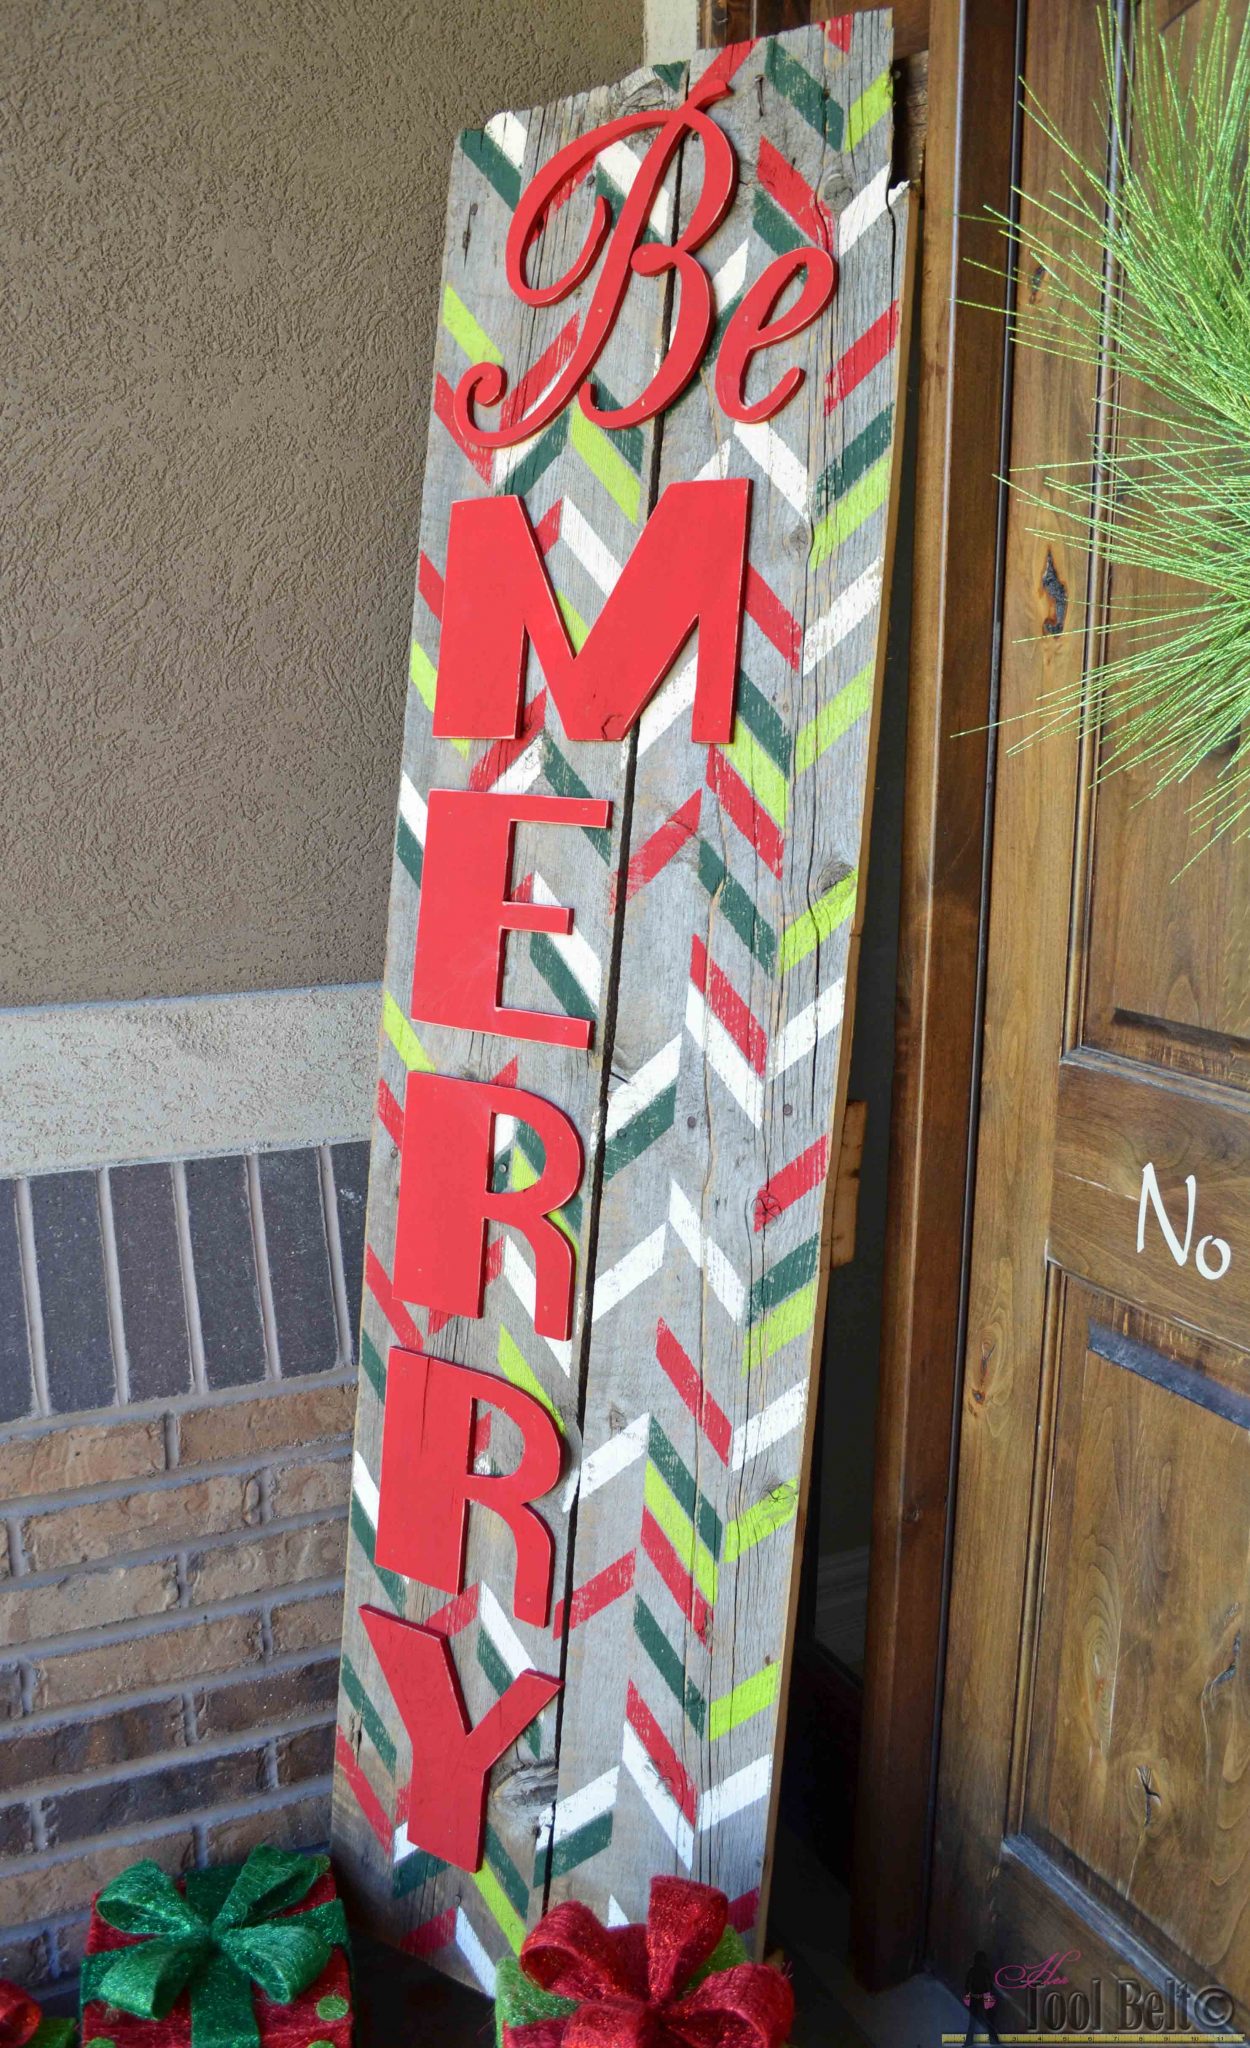
For this Christmas Sign, I though it would be fun to combine the modern design of the herringbone shuffle with the rustic flare of the reclaimed lumber.  I grabbed a couple planks of weathered barn wood and cleaned them off.  Be Merry rustic Christmas sign - use the herringbone shuffle stencil to create a festive statement piece for your holiday decor.  #royaldesignstudio
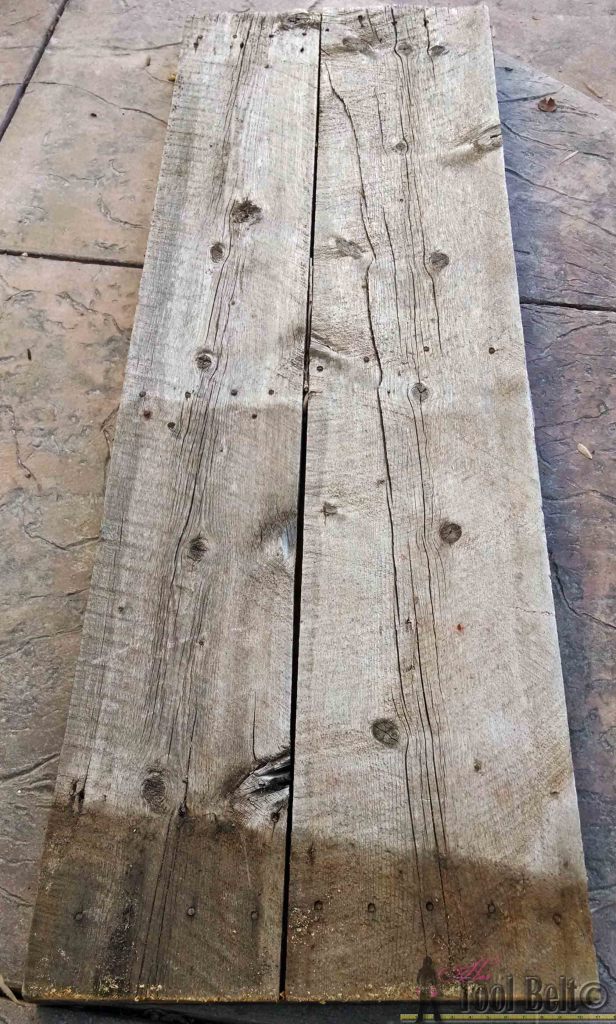
Cut the length to about 6′, and the width between 18″ – 21″.  Cut 3 pieces of 2″ x 4″ x 18″ long for the supports.  Place a support at the top, middle and bottom, nail the planks to the 2″ x 4″ boards with 2″ nails or screws.
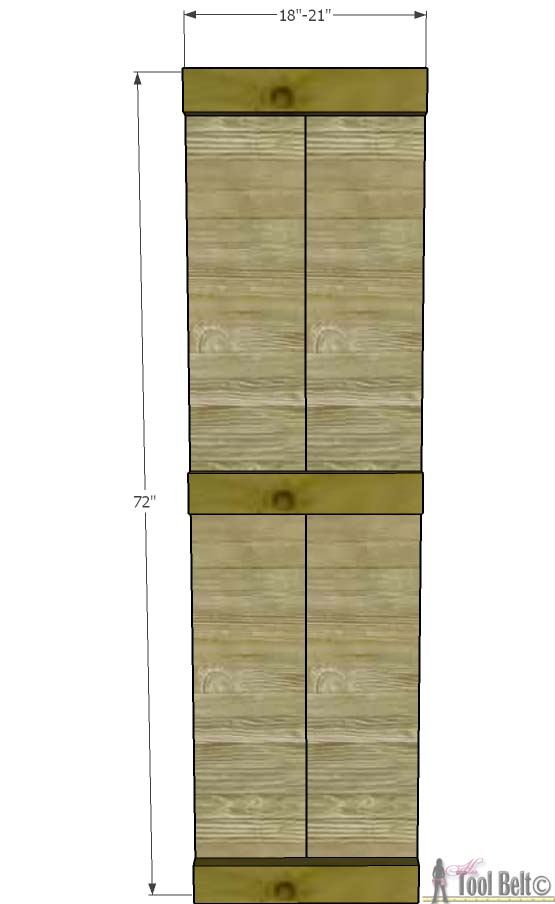
Be Merry rustic Christmas sign - use the herringbone shuffle stencil to create a festive statement piece for your holiday decor.  #royaldesignstudio

Step 2

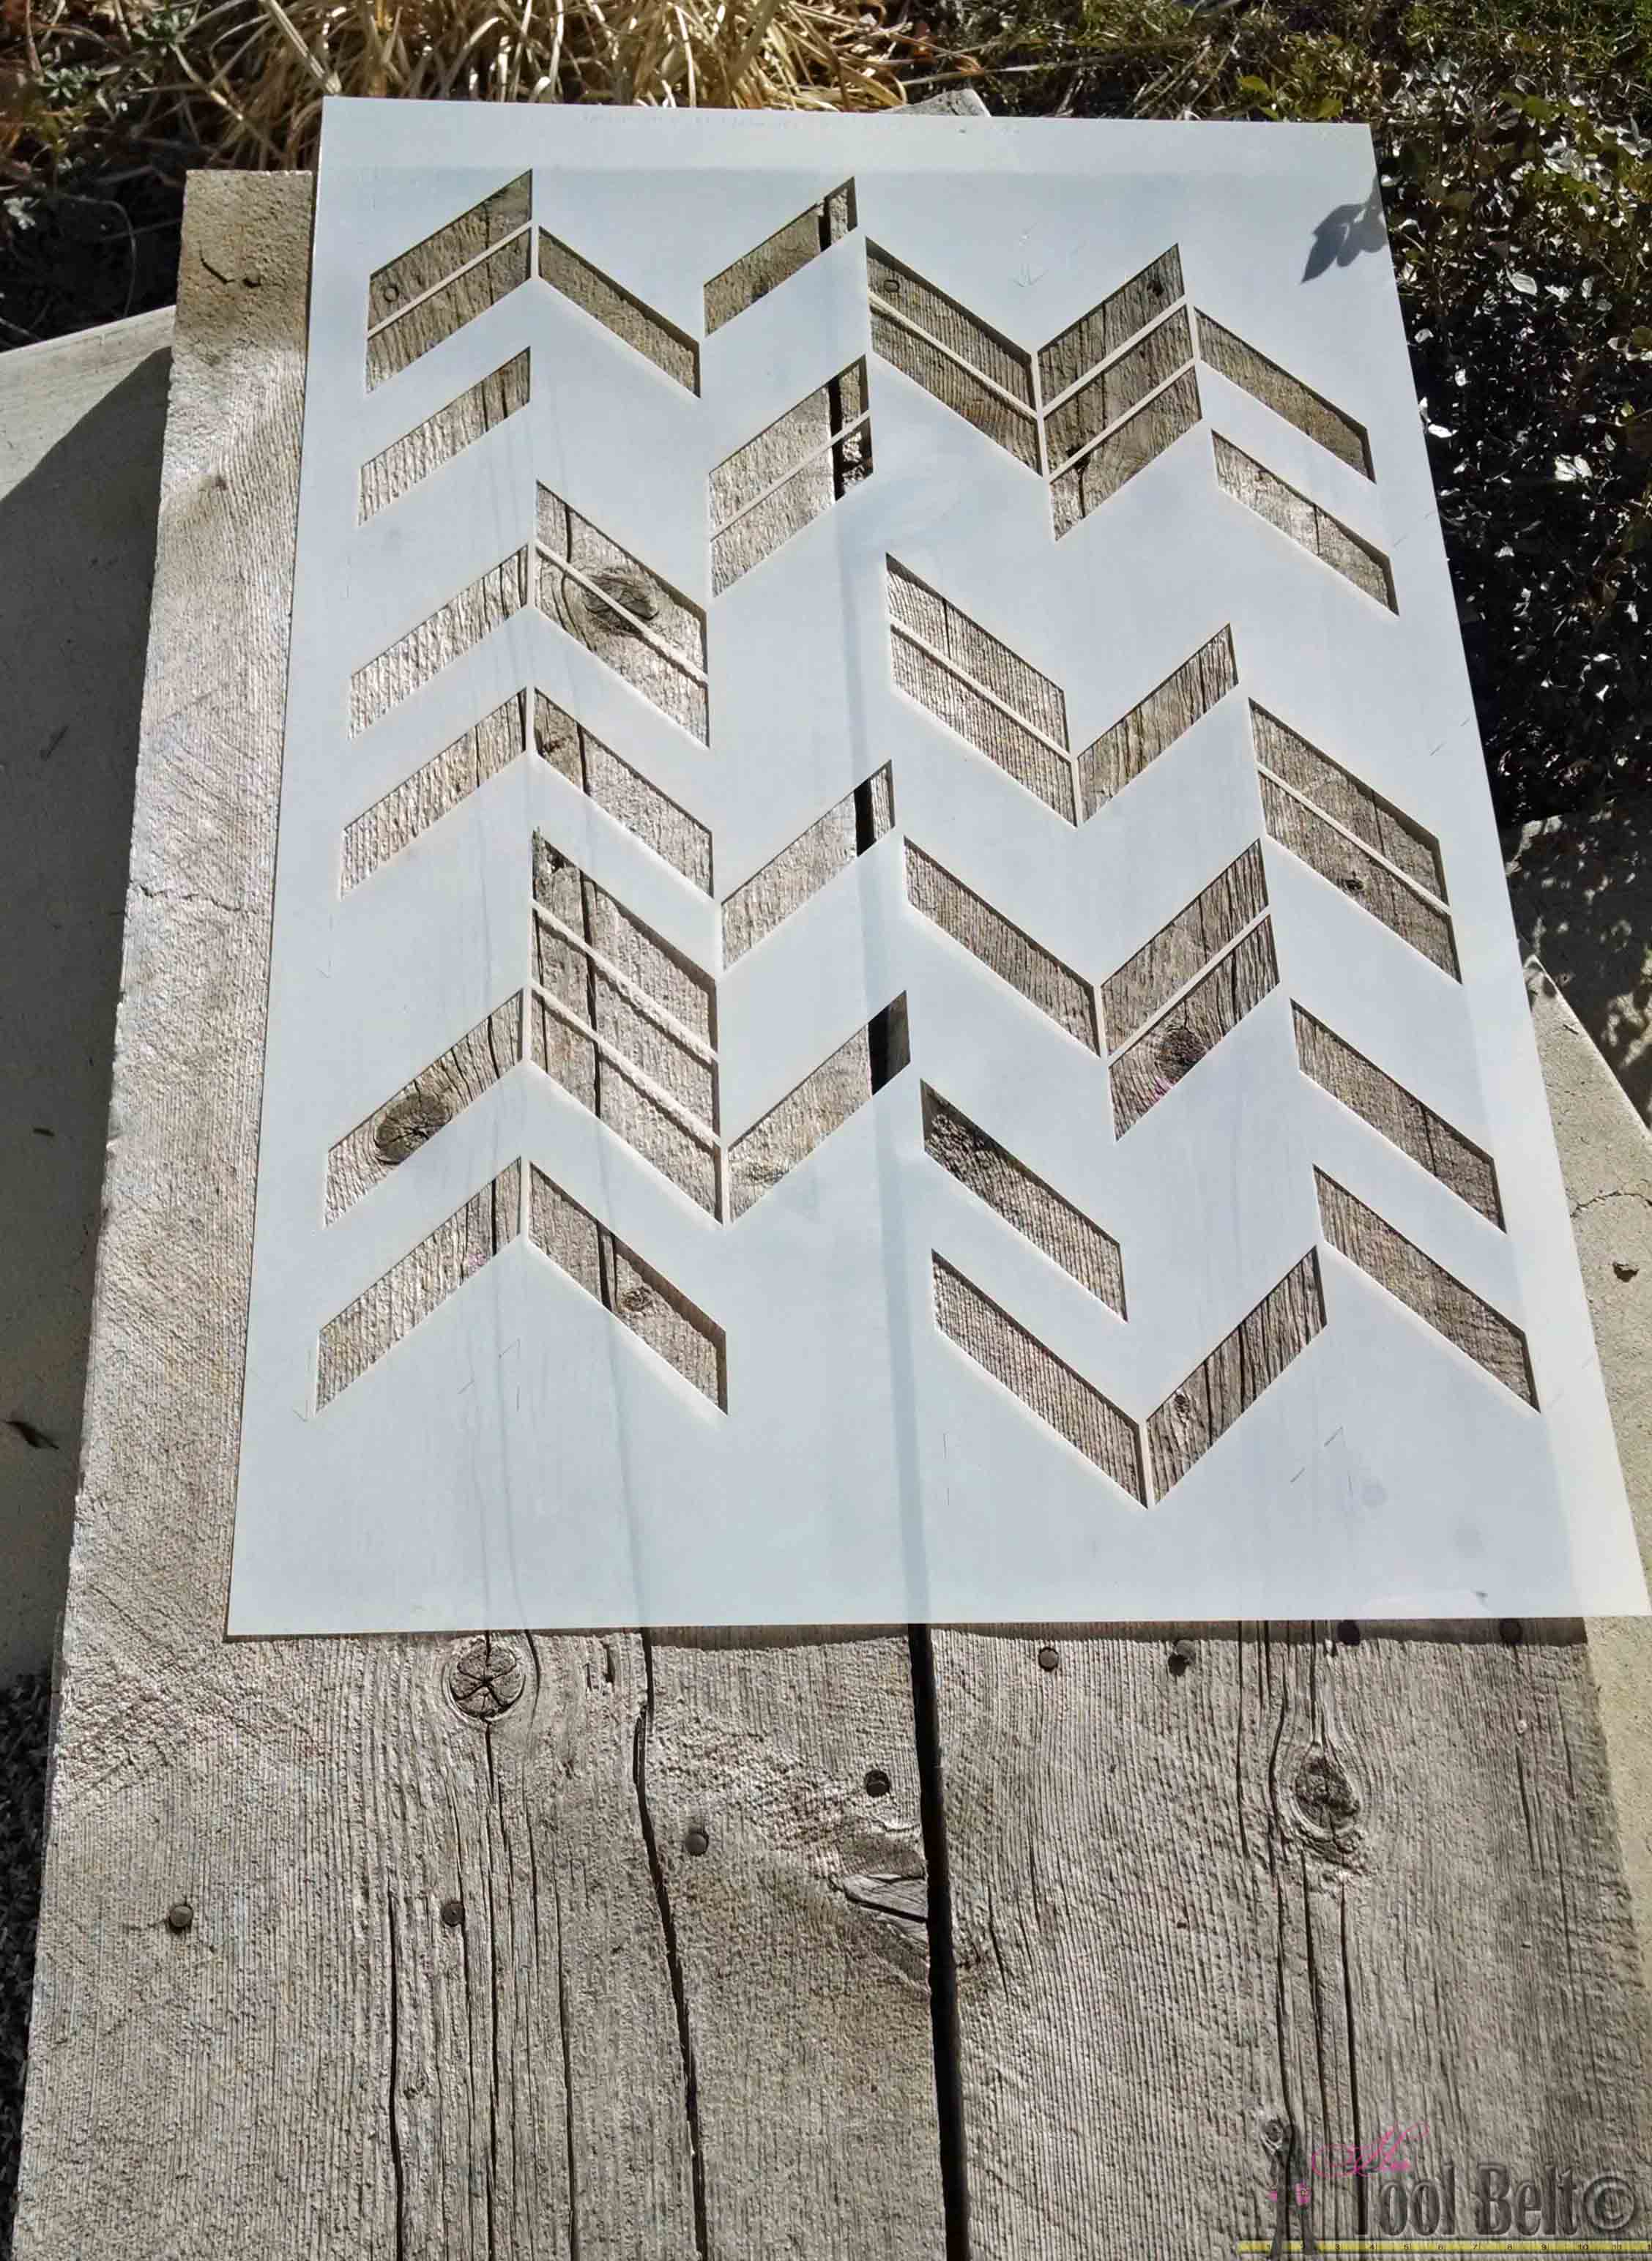
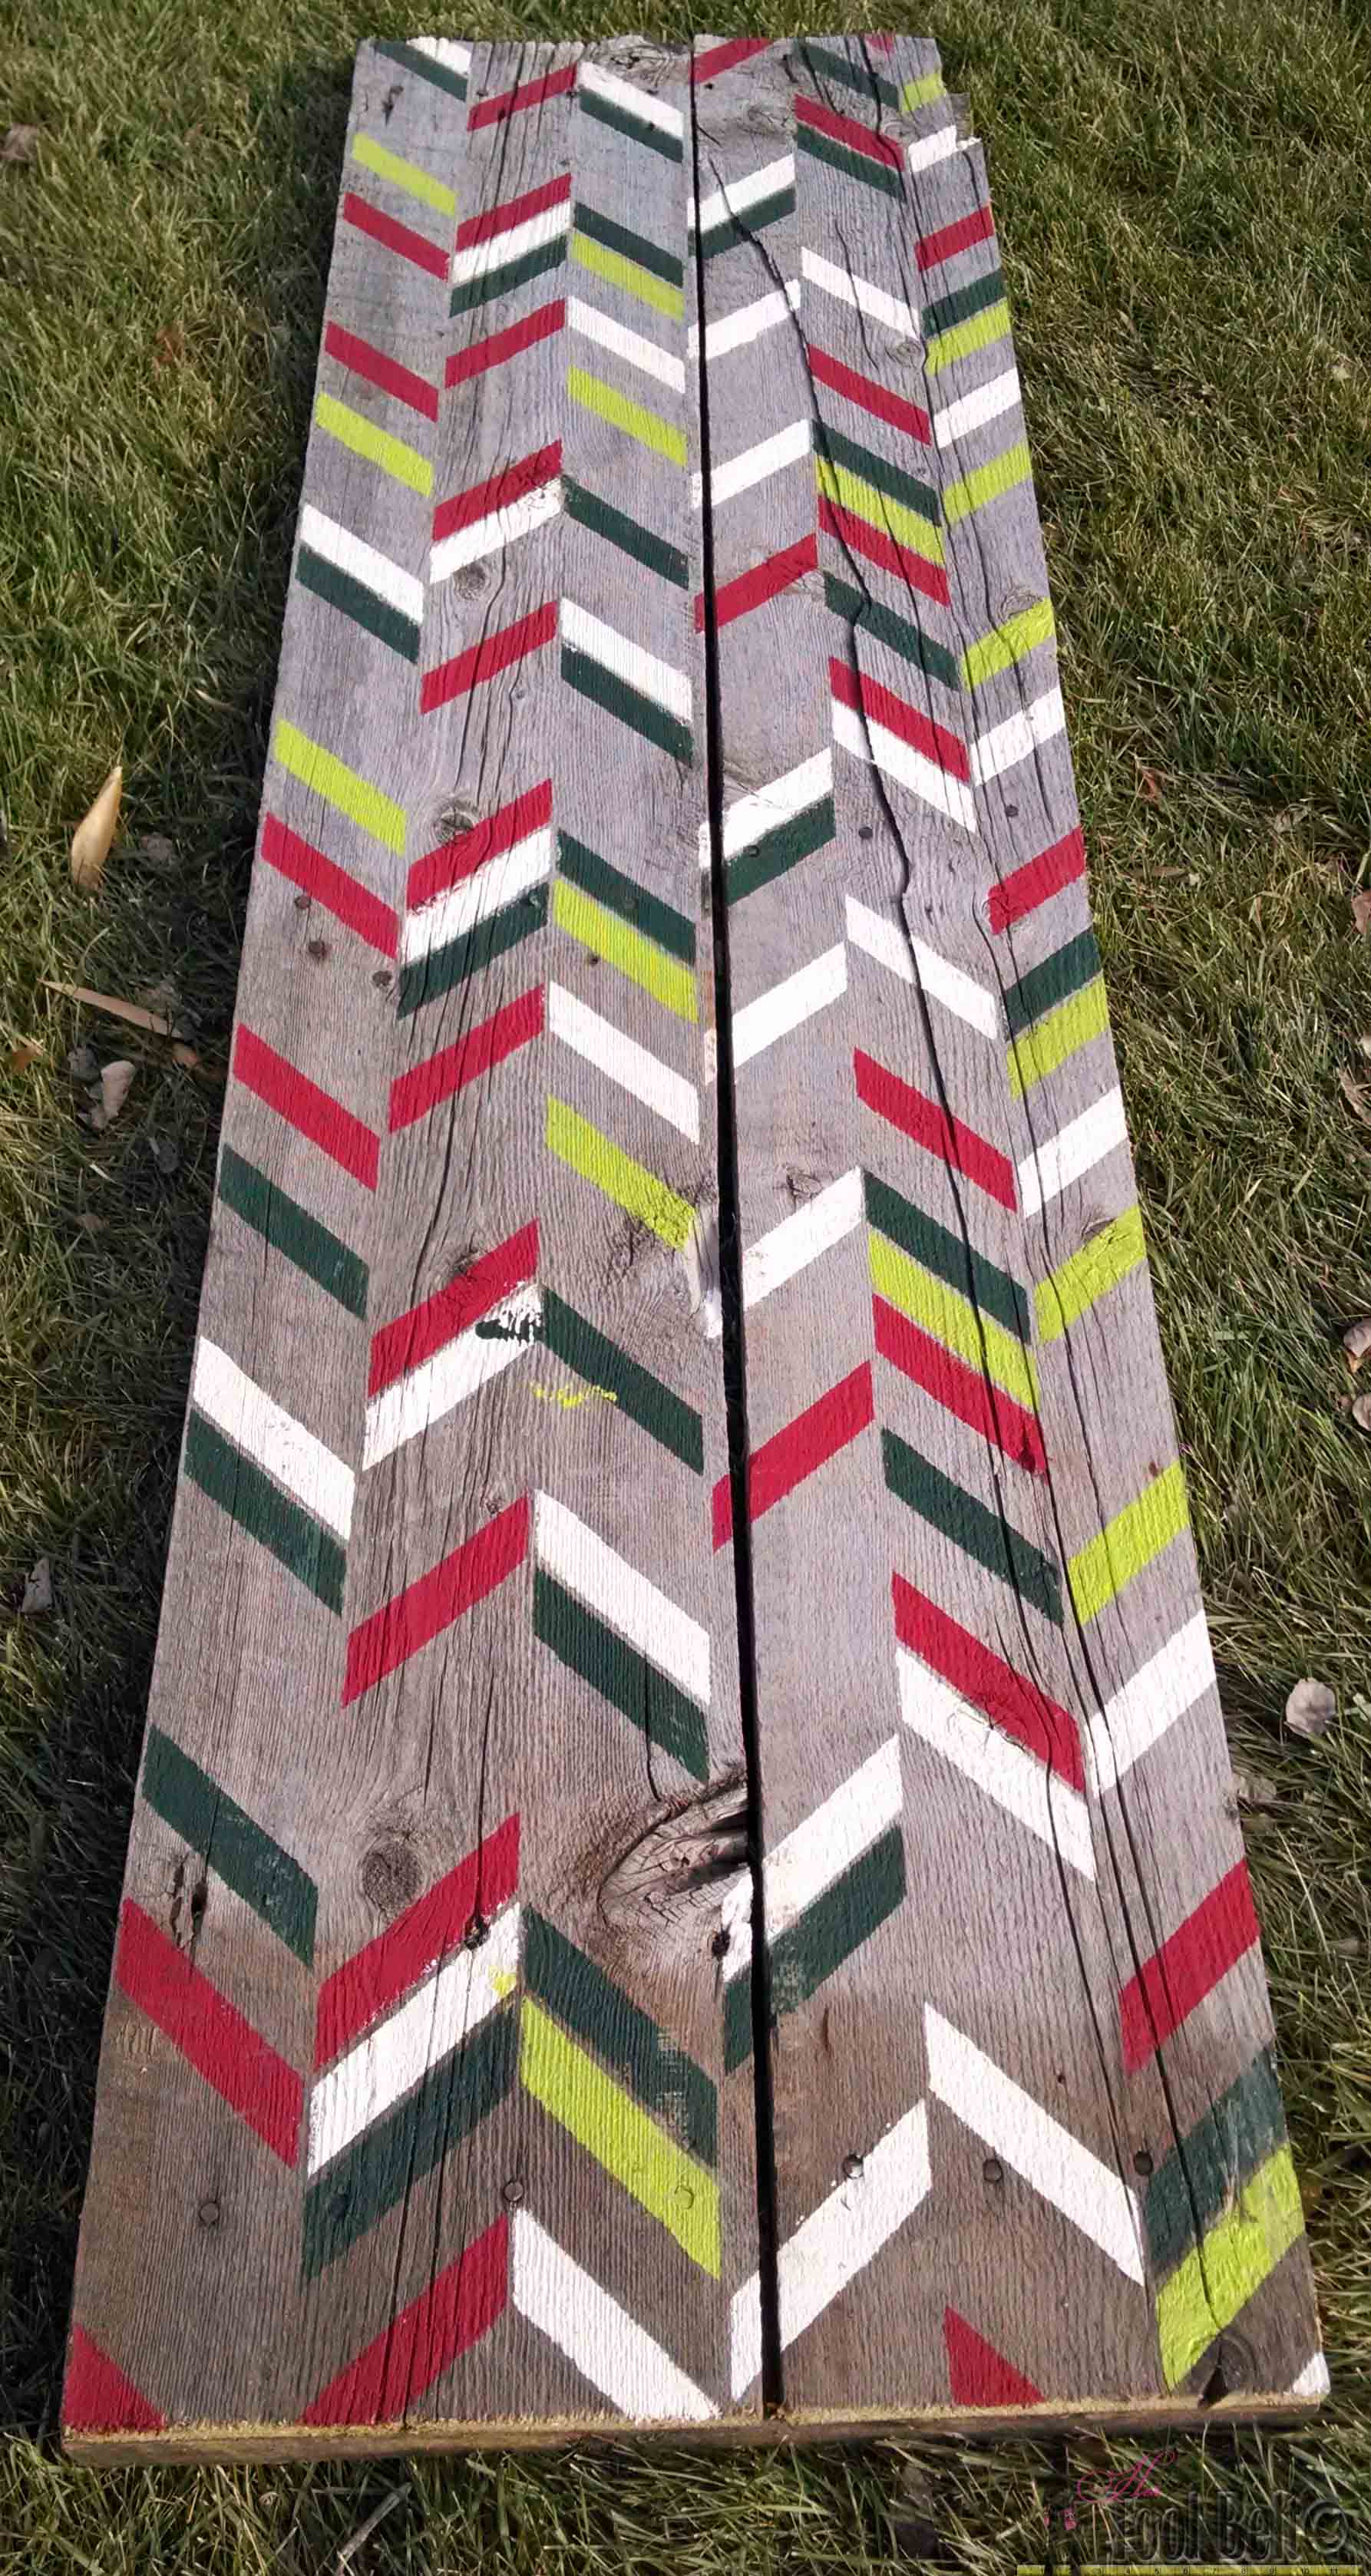
Pick out a few colors for the stencil.  I used white, red, forest green and lime green.  The stencil was super easy to use.  I lined up the markings with the side of the wood and bottom, then taped it in place.

Be Merry rustic Christmas sign - use the herringbone shuffle stencil to create a festive statement piece for your holiday decor.  #royaldesignstudio

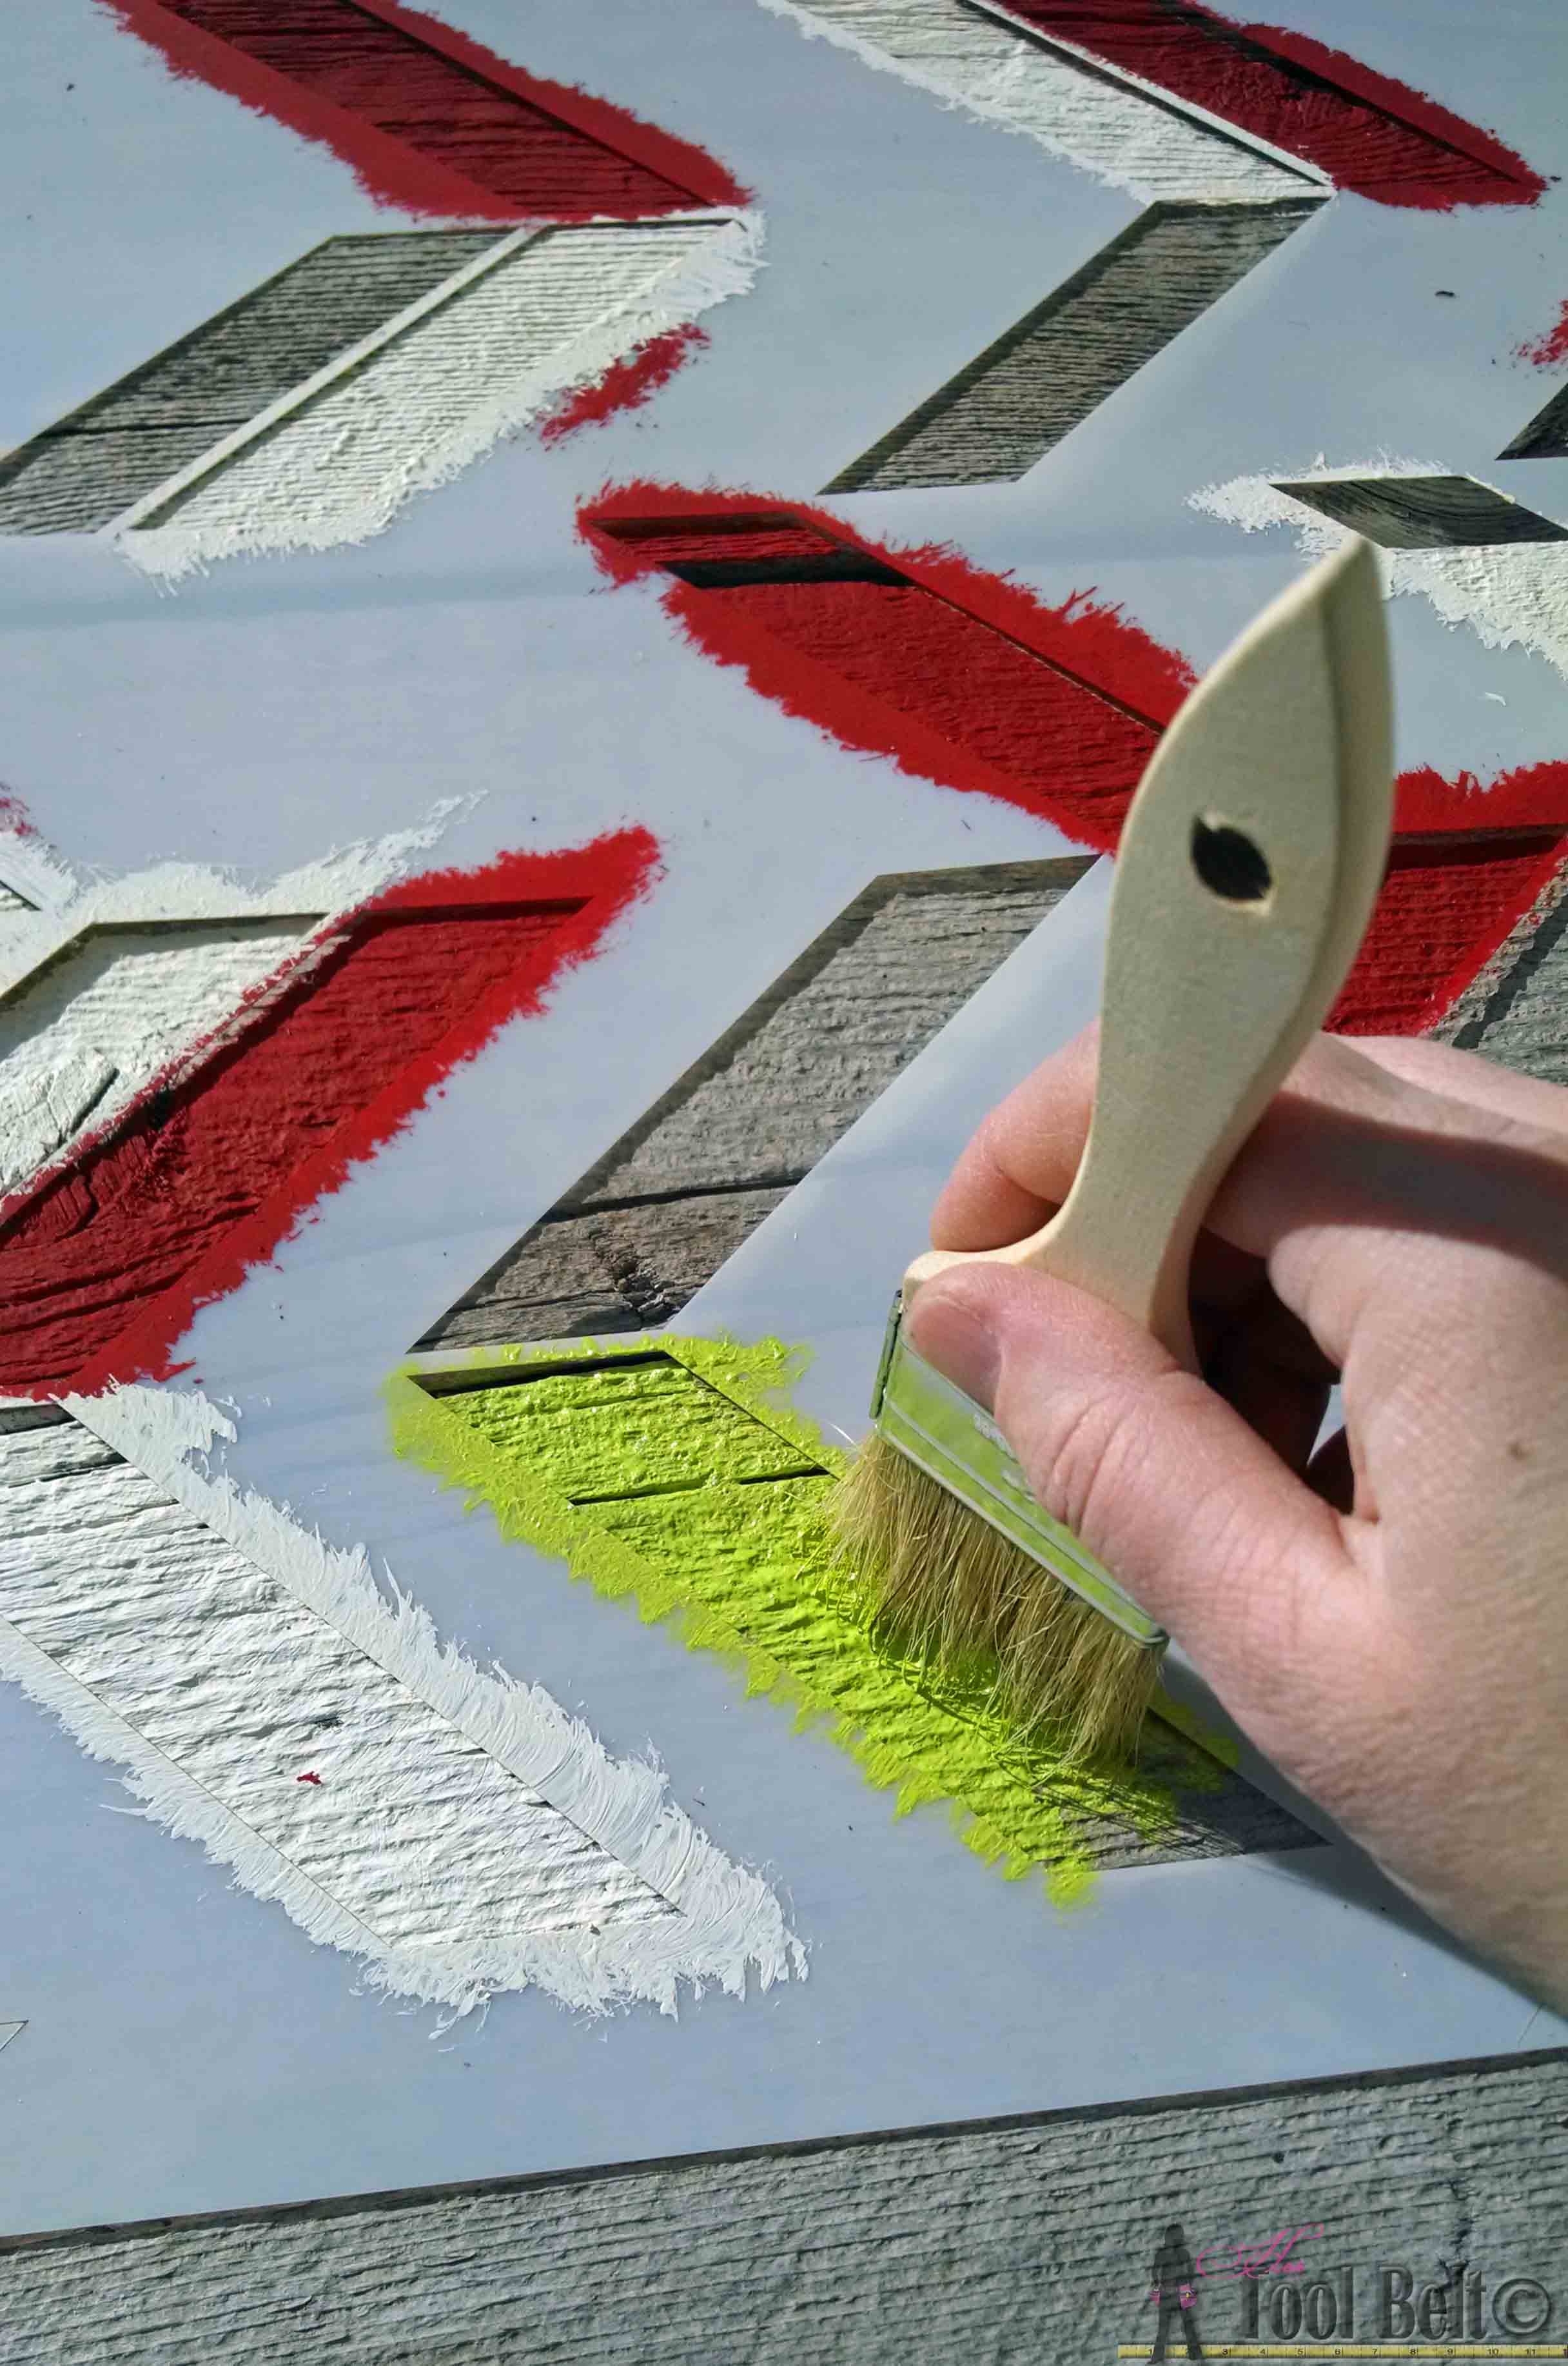
For the color scheme, I decided to pick a color order (white, red, lime green, forest green).  I pretended that there was a herringbone block at each spot, and if it was open it got painted whichever color I was on, if not I kept rotating colors.  While painting, I found it easiest for me to dab a small amount of paint on my brush and pounce it onto the wood.  I was surprised at how well the stencil lines came out, even on the super rough barn wood surface.

Be Merry rustic Christmas sign - use the herringbone shuffle stencil to create a festive statement piece for your holiday decor.  #royaldesignstudioOnce I finished the first block of stencil painting, I moved the stencil and lined up the very convenient markings on the stencil.  Painted and repeated moving until everything was painted.  Turned out fun.

Be Merry rustic Christmas sign - use the herringbone shuffle stencil to create a festive statement piece for your holiday decor.  #royaldesignstudioI let the paint dry, then lightly sanded the wood to distress it a bit.

Step 3

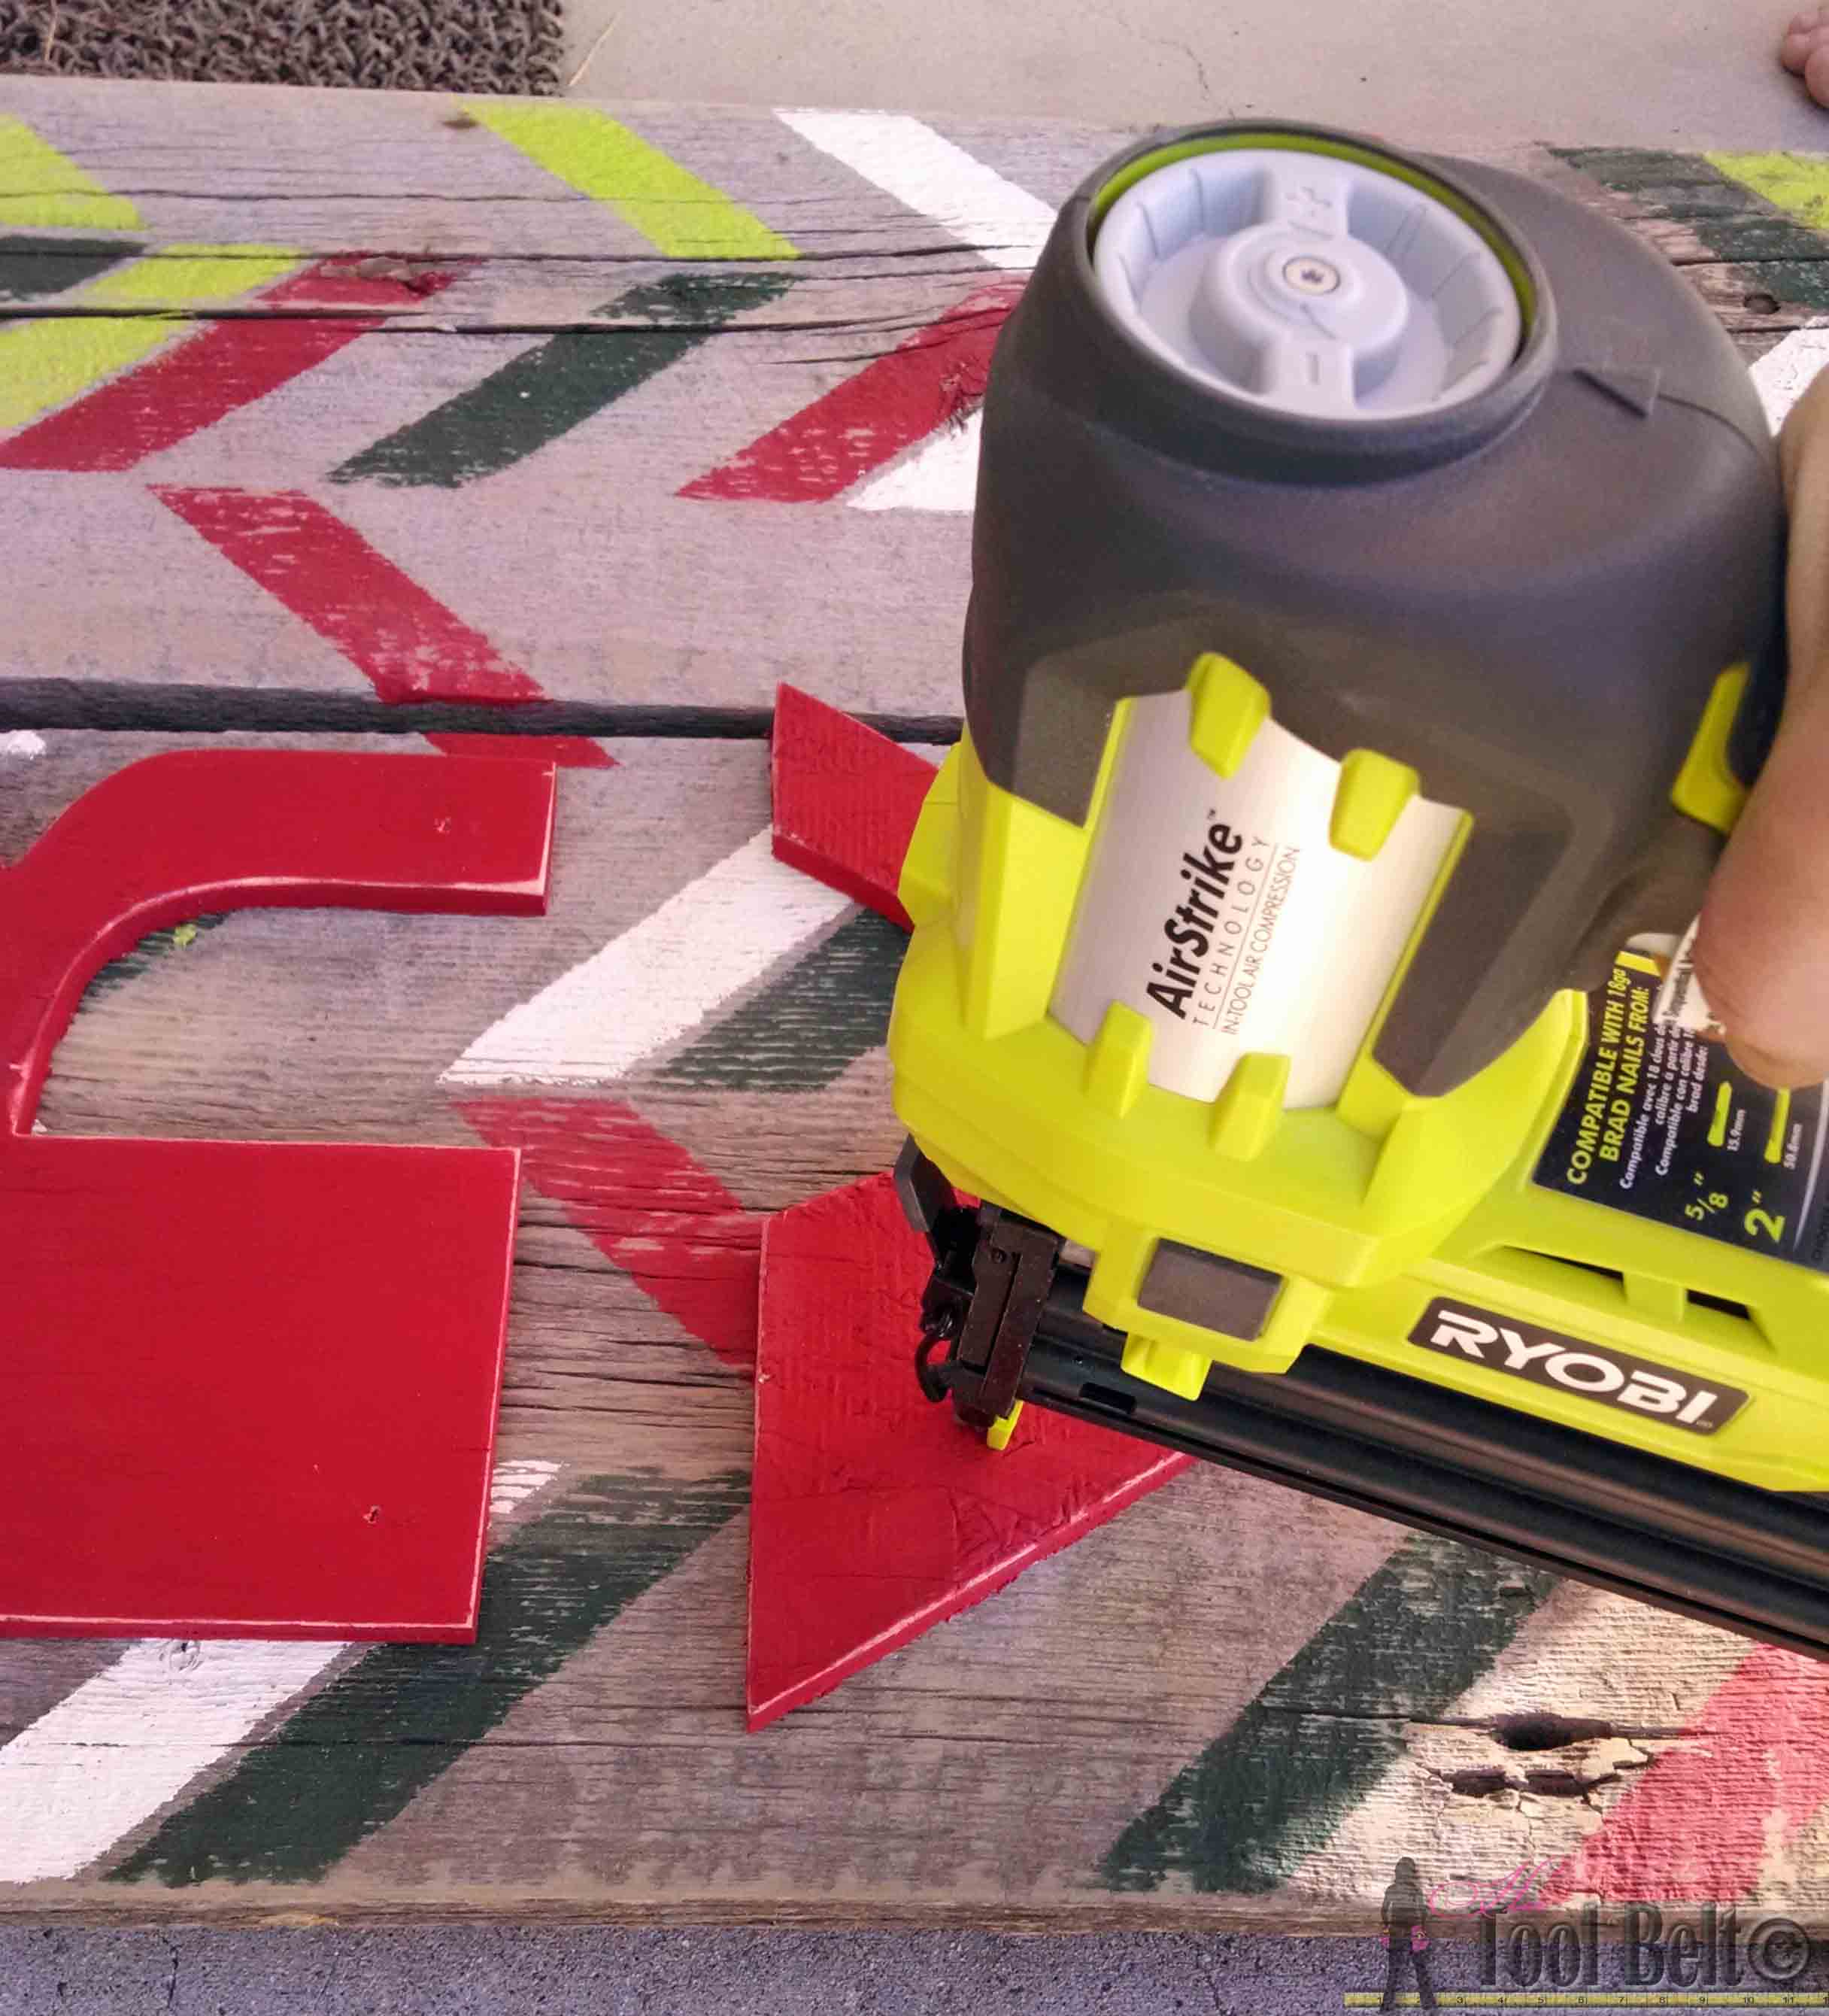
I cut Be Merry out of 1/2″ plywood.  (Note: If you don’t want to cut out your own letters, you can purchase pre-cut wood/cardboard letters from many of the craft stores.)

Be Merry rustic Christmas sign - use the herringbone shuffle stencil to create a festive statement piece for your holiday decor.  #royaldesignstudio

Download and print the following letter patterns:  Be1 Be2 Be3  M1 M2 E R Y1 Y2 make sure your print settings are on 100% and not ‘fit to page’.  Line up the multiple paper patterns (Be, M, & Y) and tape together.  Cut out the letter patterns, (the E and R take up the whole width of the page 8 1/2″ even though the ink may be slightly cut off).  Trace the letters onto plywood and use a jig saw, band saw or scroll saw to cut out the letters.  Lightly sand the letters as needed.  Paint the letters, I used red.  Once the paint is dry.  Nail the letters onto the sign with 1″ brad nails.

Be Merry rustic Christmas sign - use the herringbone shuffle stencil to create a festive statement piece for your holiday decor.  #royaldesignstudio

And it’s done!  Love my Christmas sign – it’s got a big impact 🙂

Be Merry rustic Christmas sign - use the herringbone shuffle stencil to create a festive statement piece for your holiday decor.  #royaldesignstudio

Be Merry rustic Christmas sign - use the herringbone shuffle stencil to create a festive statement piece for your holiday decor.  #royaldesignstudio


(Note:  I received the Herringbone Shuffle Christmas Stencil in exchange for reviewing the product.  I love it, can’t wait to stencil my son’s room!)

Linked to: My favorite link parties, Remodelaholic, Savvy Southern Style.

Related

Filed Under: Crafts, Holiday, Home Decor, Outdoor Furniture, Upcycle Tagged With: Christmas, herringbone shuffle, stencil

Attention: Any do-it-yourself project involves risk of some sort. Your tools, materials, and skills will vary, as will the conditions at your work site. Hertoolbelt LLC will not assume any responsibility or liability for damages or losses sustained or incurred in the course of your project or in the use of the item you create. Always follow the manufacturer's operating instructions in the use of tools, check and follow your local building codes, and observe all commonly accepted safety precautions.

Comments

  1. Megan @ Our Pinteresting Family says

    December 12, 2014 at 11:02 am

    Very cool sign! I love the herringbone. 🙂

    Reply
    • Amy says

      December 12, 2014 at 11:03 am

      Thanks!

      Reply
  2. Emily says

    December 18, 2014 at 8:25 am

    This is such a great idea! Awesome tutorial!

    Reply
  3. Emily, Our house now a home says

    December 19, 2014 at 9:00 am

    This is beautiful! I featured it from last weeks Fiiday favorites link up. Have a Merry Christmas!
    http://www.ourhousenowahome.com/2014/12/last-weeks-friday-favorites-features.html

    Reply

Leave a Reply Cancel reply

Your email address will not be published. Required fields are marked *

This site uses Akismet to reduce spam. Learn how your comment data is processed.

Search Her Tool Belt

Follow Me!

  • Bloglovin
  • Email
  • Facebook
  • Google+
  • Instagram
  • Pinterest
  • RSS
  • Twitter
  • YouTube

Top Posts & Pages

Custom Drill Storage and Charge Station - Easy
Wood Bunny Easter Basket
Cordless Drill Storage - Charging Station
$5 Blanket Ladder
2x4 Console Table
Pallet Planter Box For Cascading Flowers
Project Gallery
Wood DIY LOVE Marquee Letters

Check out more projects

Copyright

Thank you for wanting to share my work! No need for my permission to pin my work or to feature 1 or 2 pictures with full watermarks intact that link back to the original project. Please do NOT copy tutorials.

Disclosure & Privacy Policy

Disclaimer

Copyright © 2023 · Magazine Pro Theme on Genesis Framework · WordPress · Log in

This website uses cookies to improve your experience. We'll assume you're ok with this, but you can opt-out if you wish.Accept Read More
Privacy & Cookies Policy

Privacy Overview

This website uses cookies to improve your experience while you navigate through the website. Out of these, the cookies that are categorized as necessary are stored on your browser as they are essential for the working of basic functionalities of the website. We also use third-party cookies that help us analyze and understand how you use this website. These cookies will be stored in your browser only with your consent. You also have the option to opt-out of these cookies. But opting out of some of these cookies may affect your browsing experience.
Necessary
Always Enabled
Necessary cookies are absolutely essential for the website to function properly. This category only includes cookies that ensures basic functionalities and security features of the website. These cookies do not store any personal information.
Non-necessary
Any cookies that may not be particularly necessary for the website to function and is used specifically to collect user personal data via analytics, ads, other embedded contents are termed as non-necessary cookies. It is mandatory to procure user consent prior to running these cookies on your website.
SAVE & ACCEPT