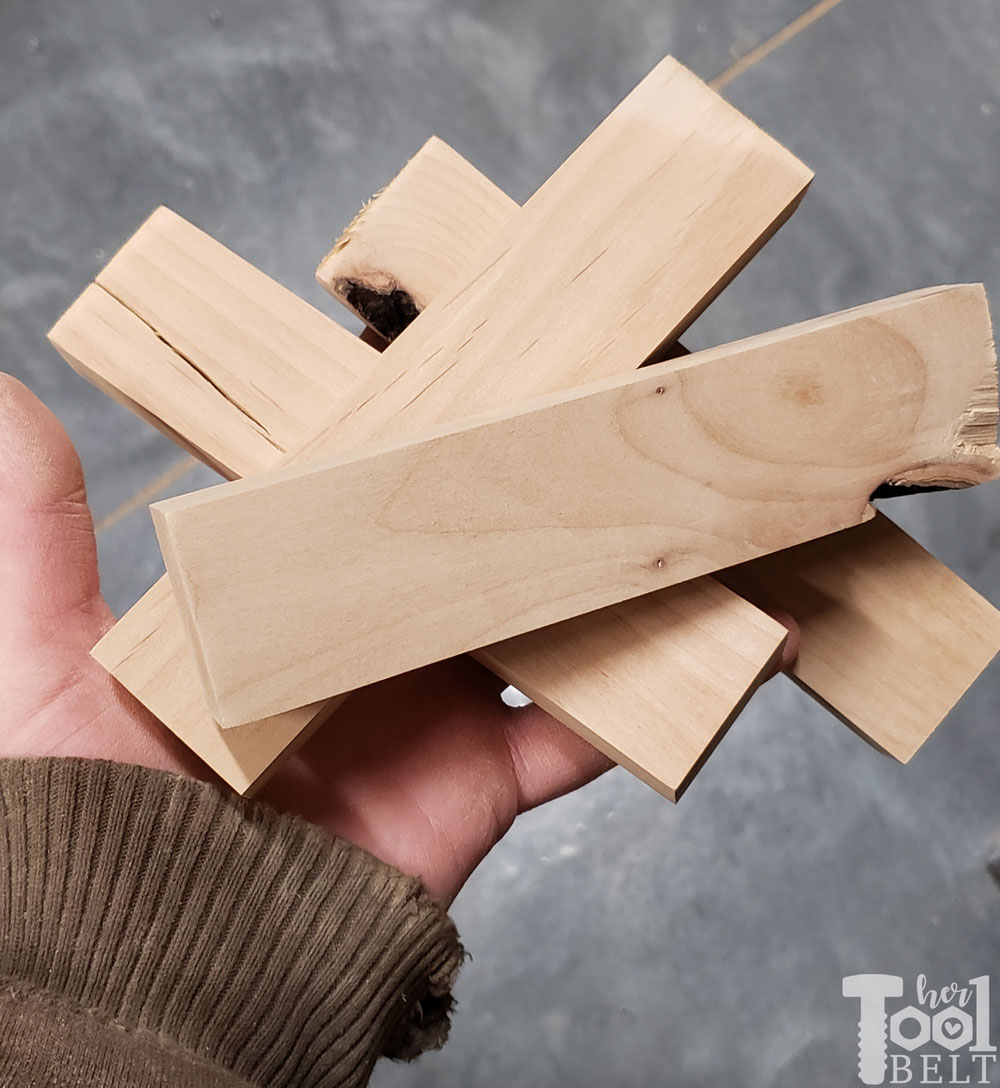
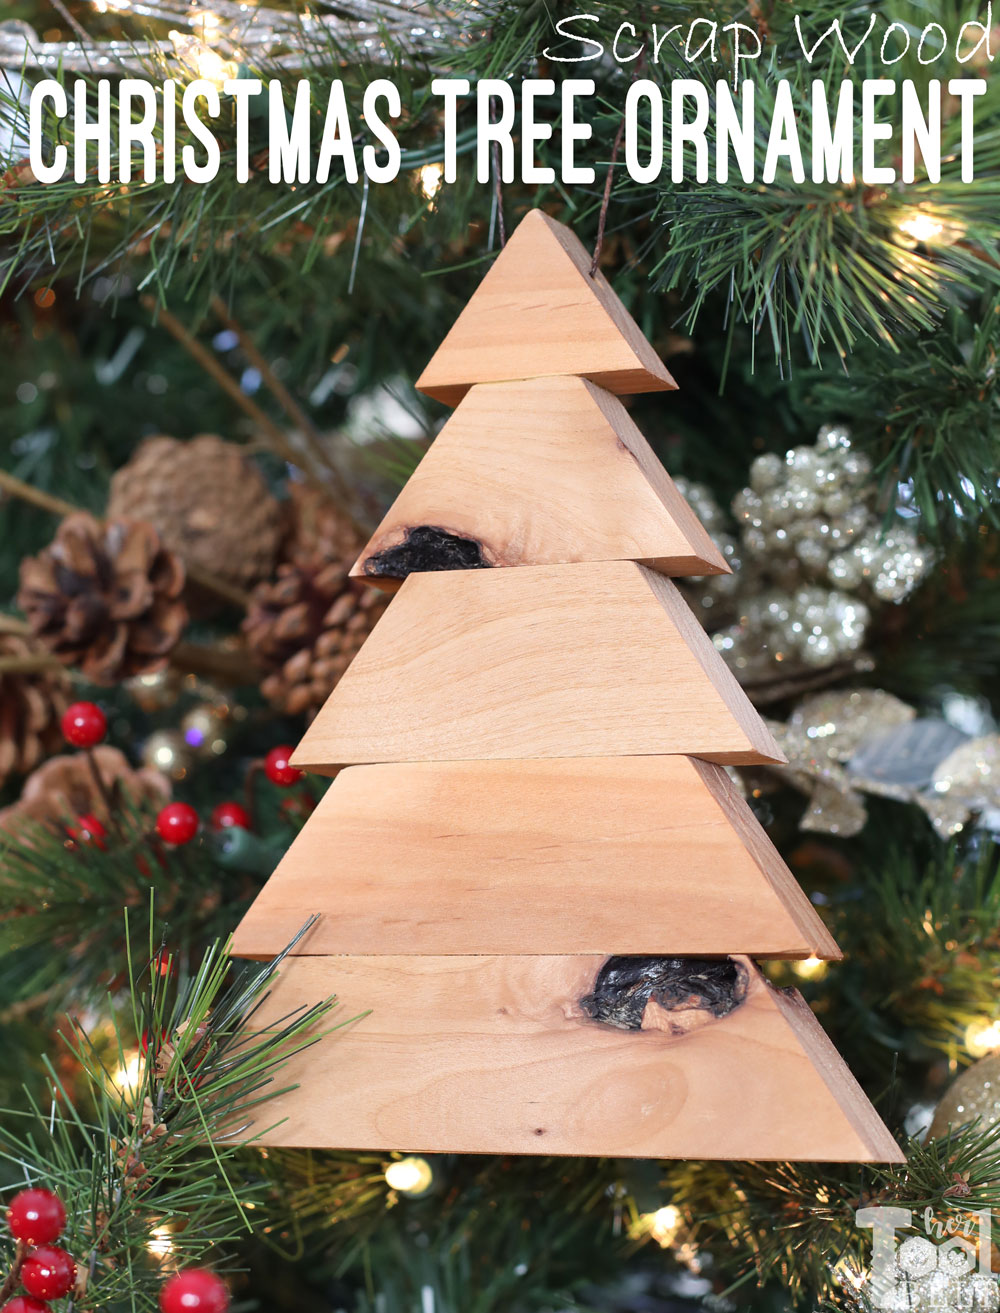
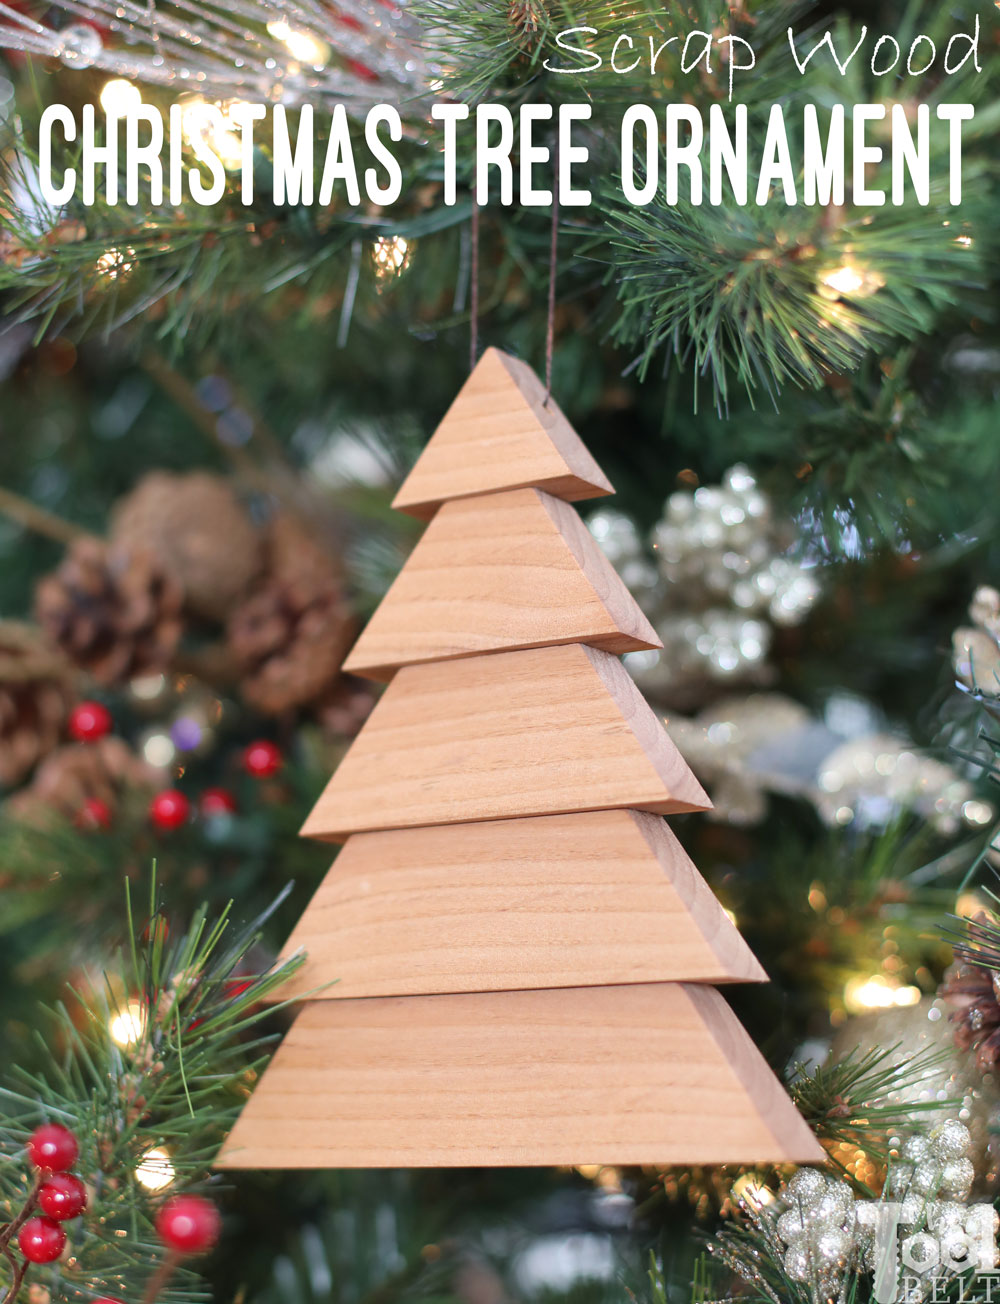
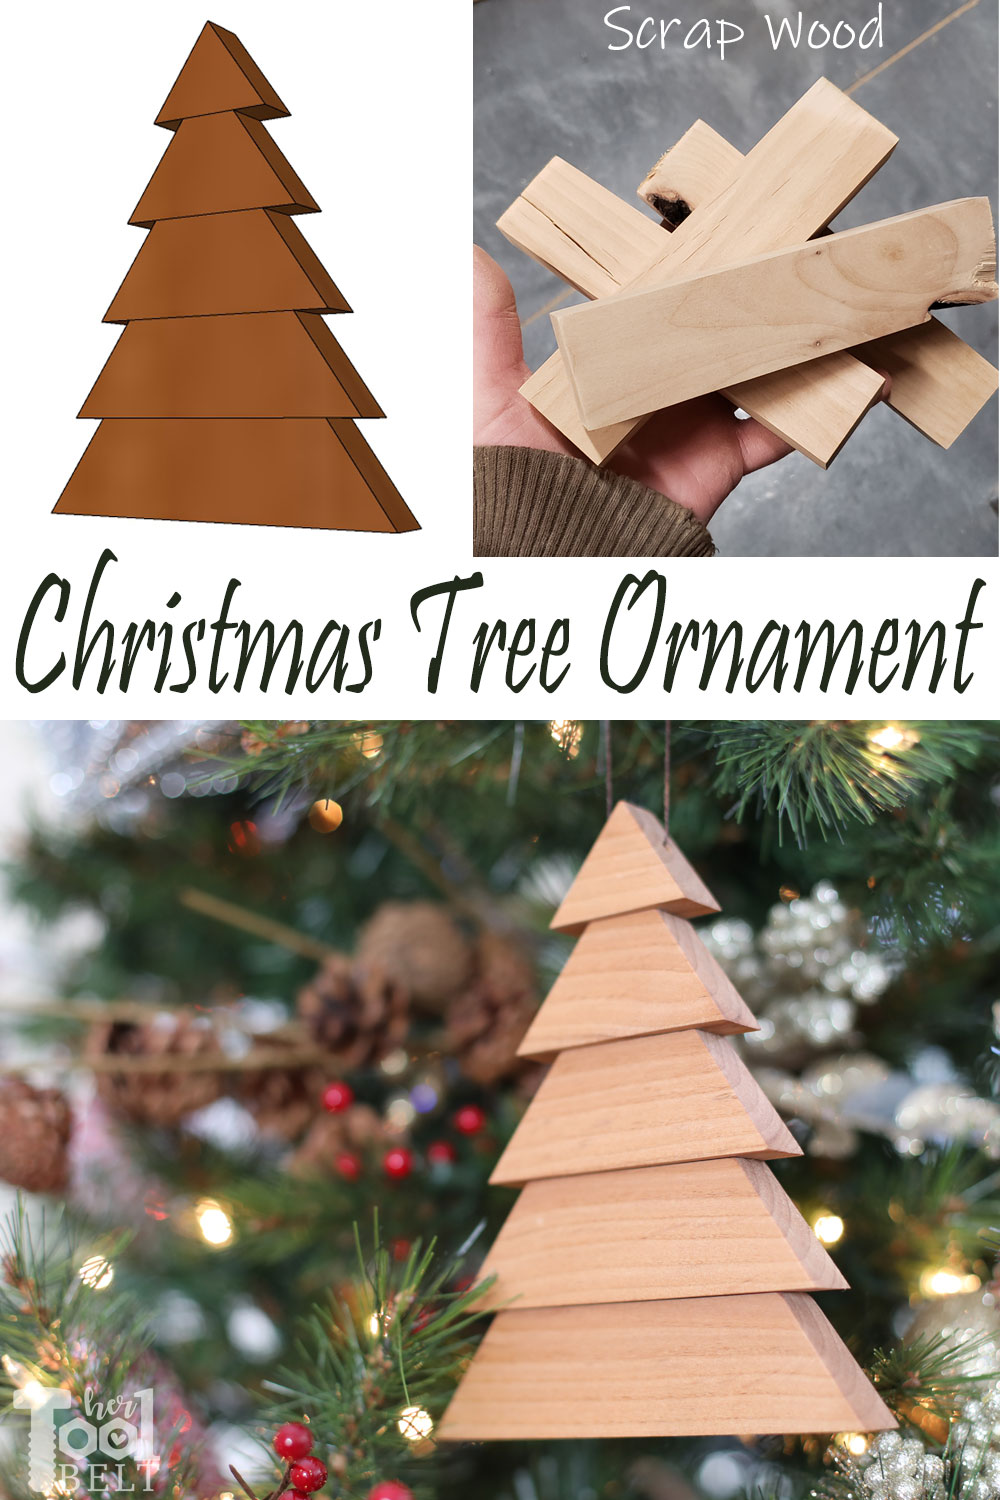
Can it really be December already? Christmas is just right around the corner. Time to get that Christmas tree put up and decorated! I’ve been using knotty alder in some of my build projects lately, leaving me lots of small 6″ or less cut offs. Looking at my growing pile of scrap wood, I decided to make a few new ornaments to add to my tree. These scrap wood Christmas tree ornaments are a perfect way to use up scrap wood 6″ or less. Plus they are very simple to make.
or the beveled tree
 The scrap wood Christmas Trees would pair great with scrap wood Patchwork Stars!

How to Make Scrap Wood Christmas Tree Ornaments
Materials
- Scrap wood or 1×2’s about 20″ long
- Wood Glue
- String
- Sand paper
- Stain/Top coat
Tools Used
- Miter Saw
- Table Saw for optional beveled tree
- Clamp
- Tape Measure
- Sander
I cut all of my scrap wood into 3/4″ x 1 1/2″ pieces by whatever length. 3/4″ x 1 1/2″ is the standard dimensions of a 1×2.
Cut List
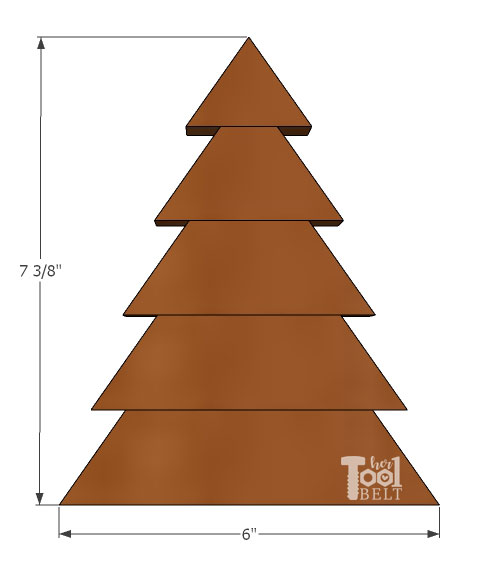
Each layer of wood will be cut with 35 deg miters on either end and the width of the wood is 1 1/2″.
 Tree Layer Lengths
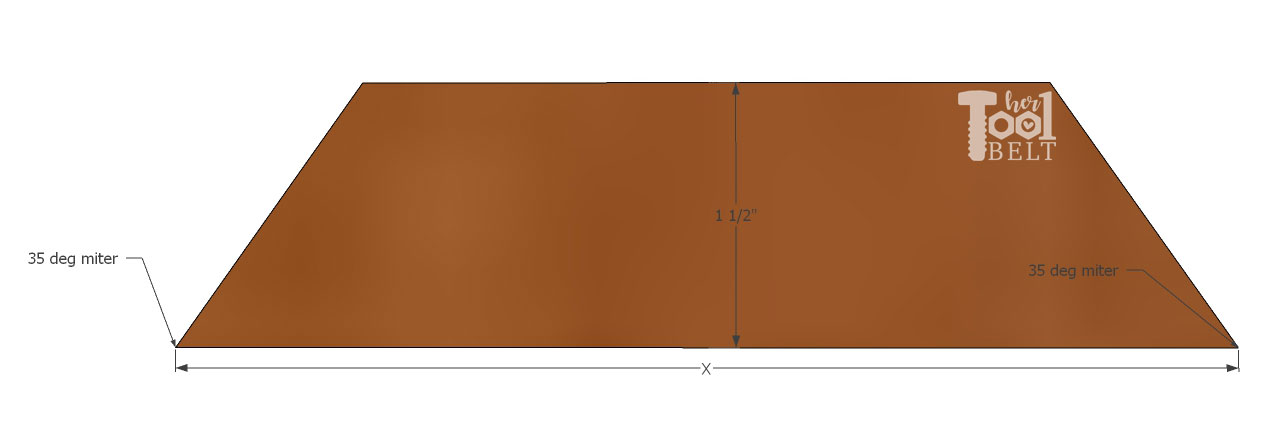
- 3/4″ x 1 1/2″ x 6″
- 3/4″ x 1 1/2″ x 5″
- 3/4″ x 1 1/2″ x 4″
- 3/4″ x 1 1/2″ x 3″
- 3/4″ x 1 1/2″ x 2″
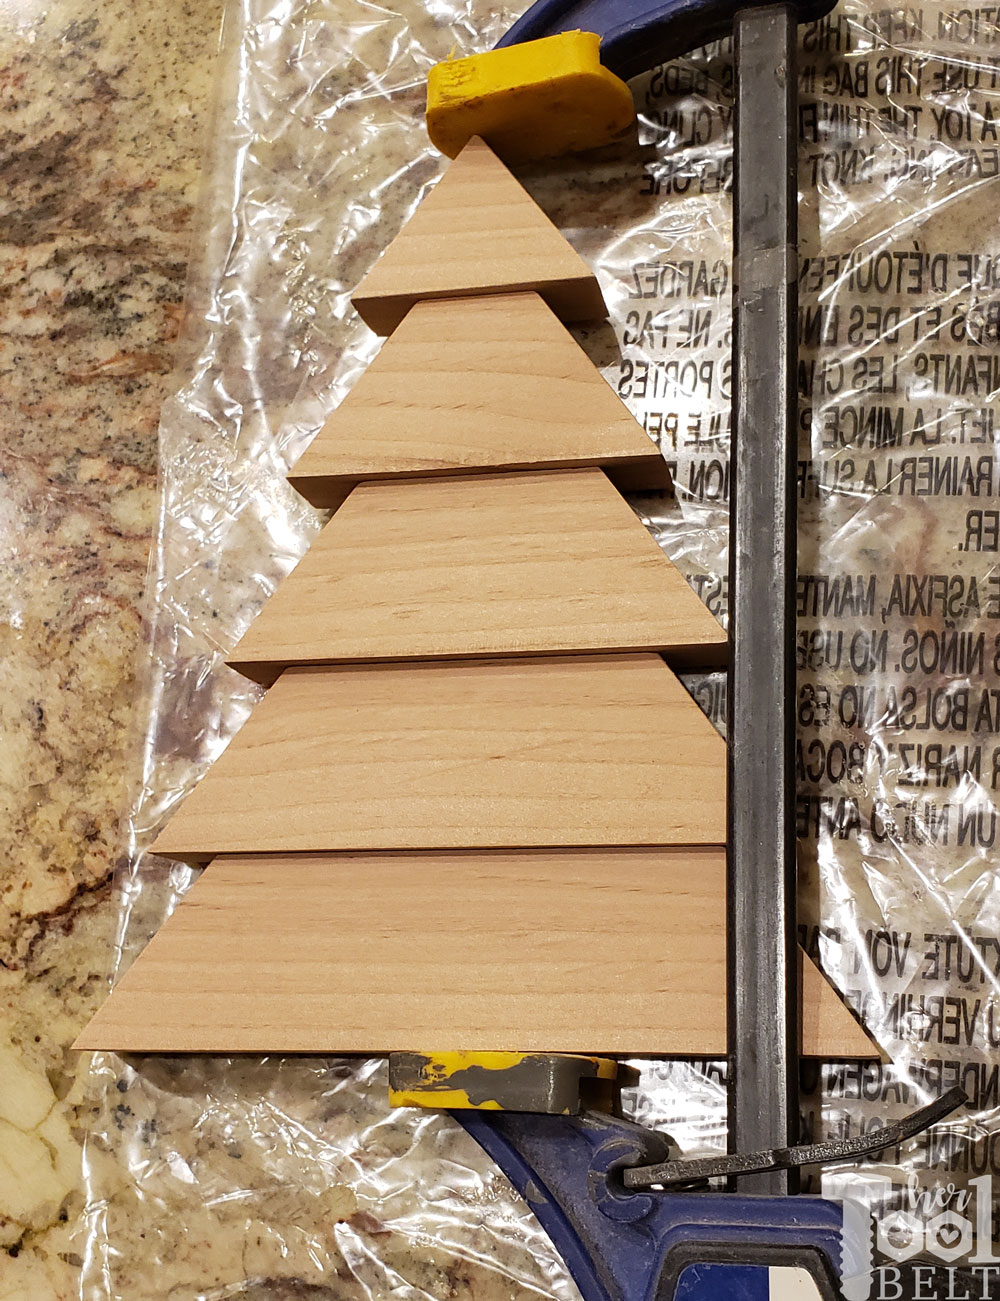
 Step 1 – Cut the Layers
Set the miter saw angle to 35 deg. Cut the 5 ‘layers’ of the scrap wood Christmas tree ornaments.
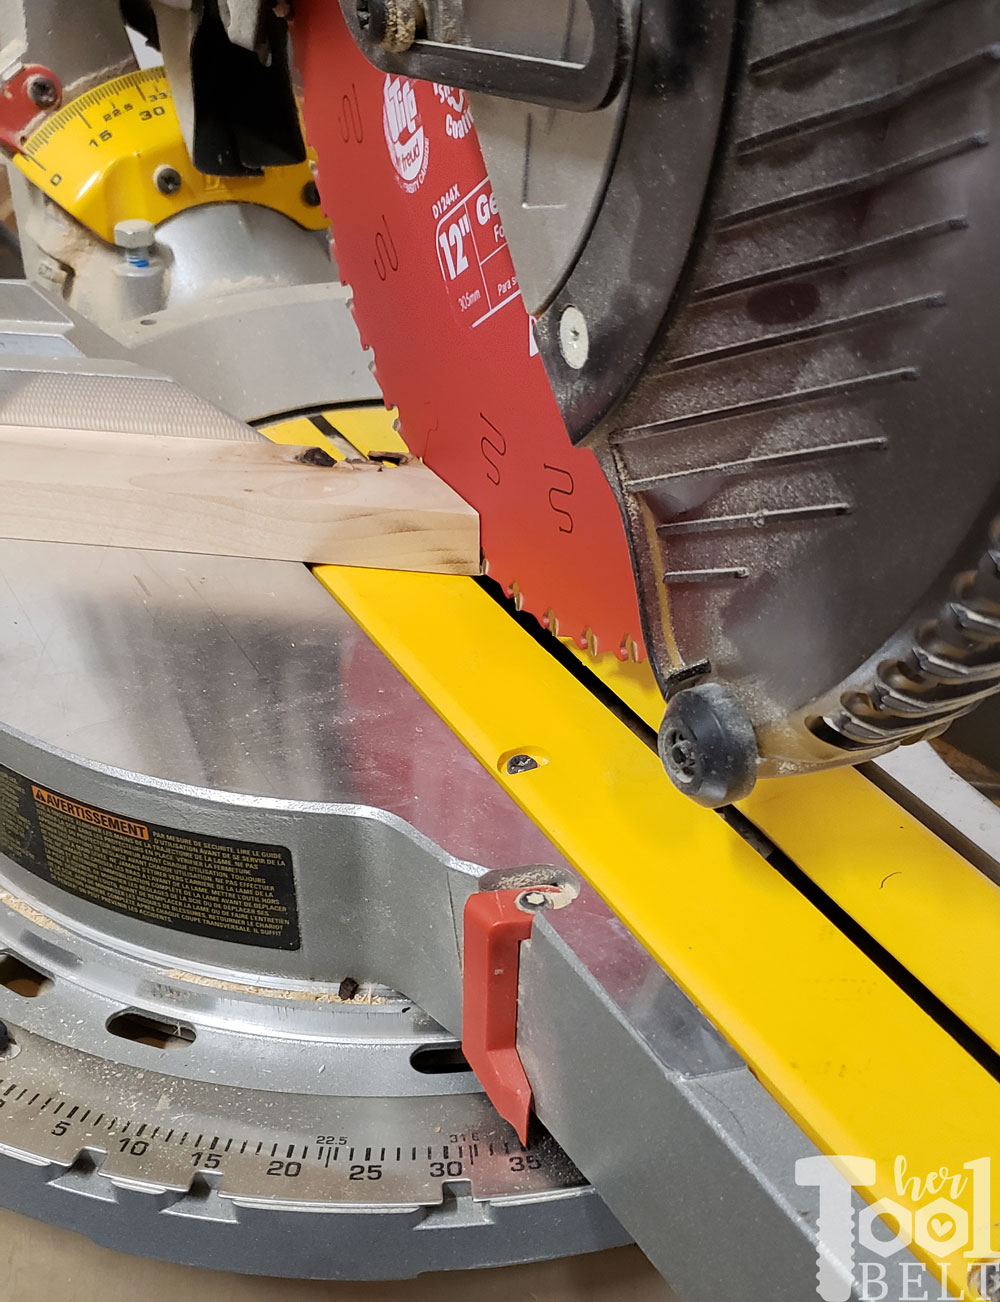
A little safety note, cut those small pieces first out of larger pieces, so you have something to hold on to. When I cut the 2″ pieces, I held the board on the other side of the saw blade, where there was plenty of board to hold on too.
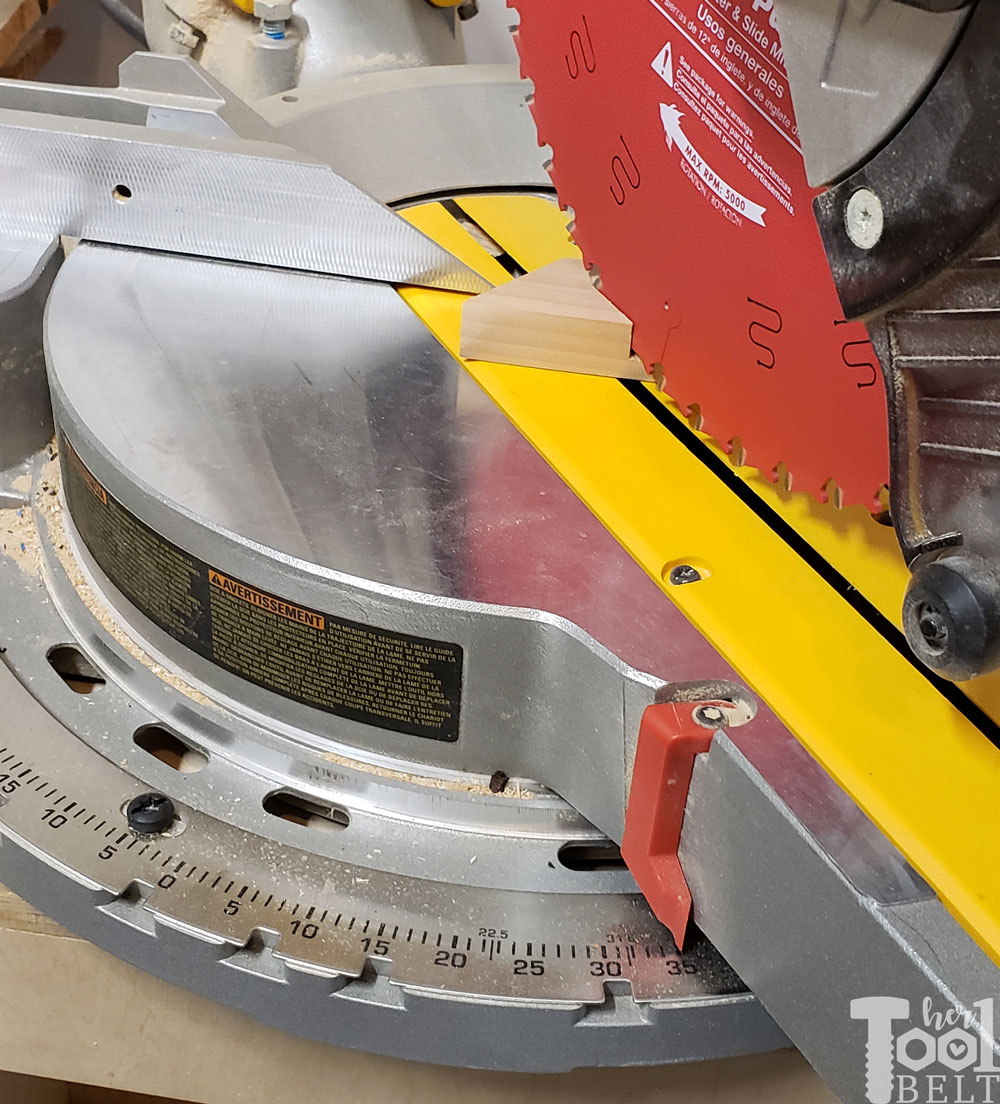
Now I’ve traded my scrap rectangle pieces for scrap triangle and trapezoid pieces! 🙂

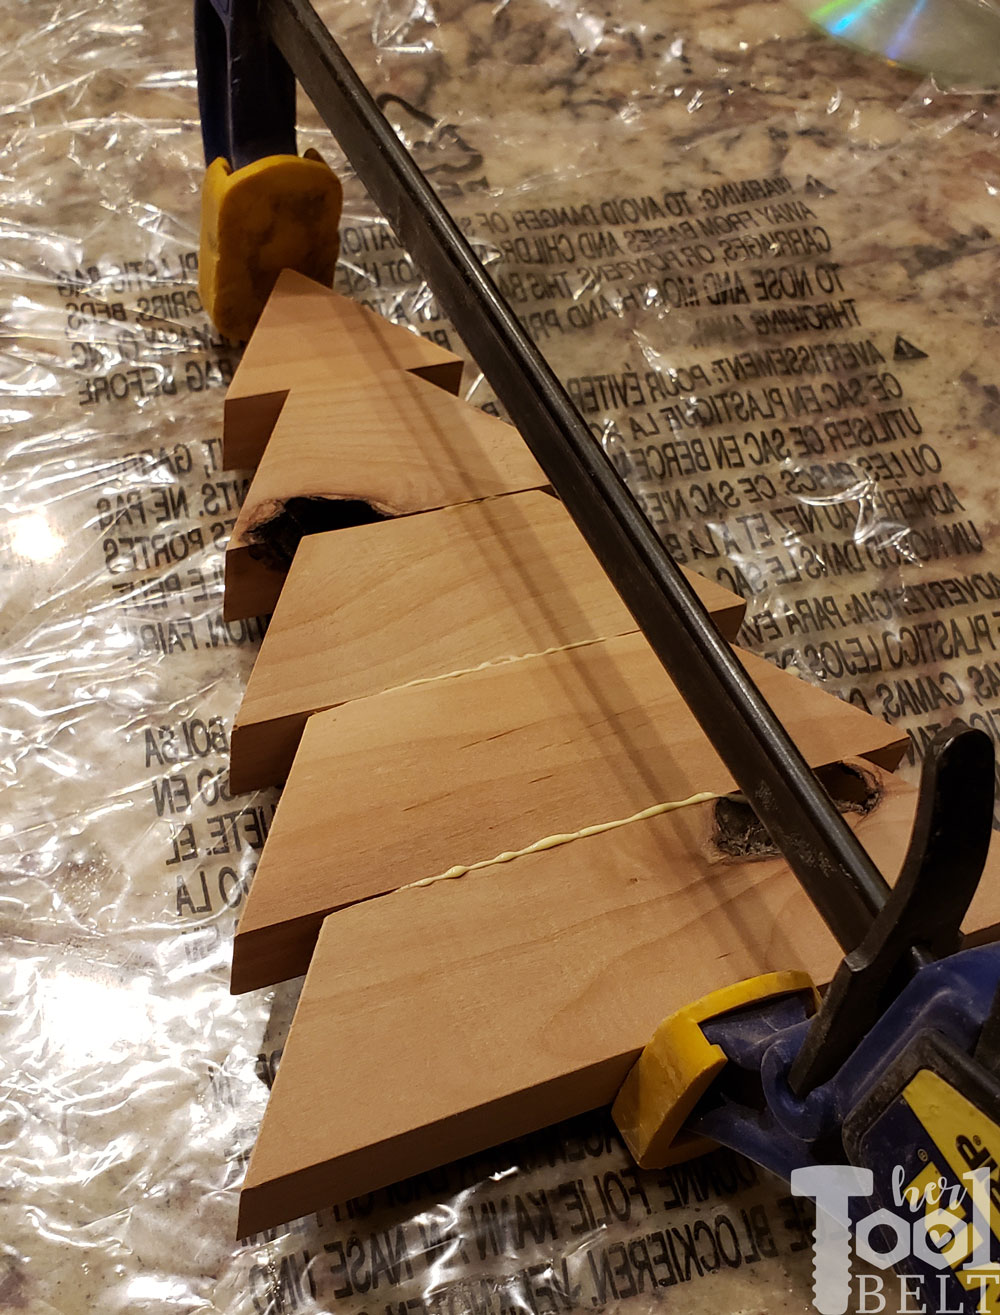
Step 2 – Glue Up
Use wood glue to attach each layer of the ornaments together. There should be about 1/2″ overhang on each side of the layers.
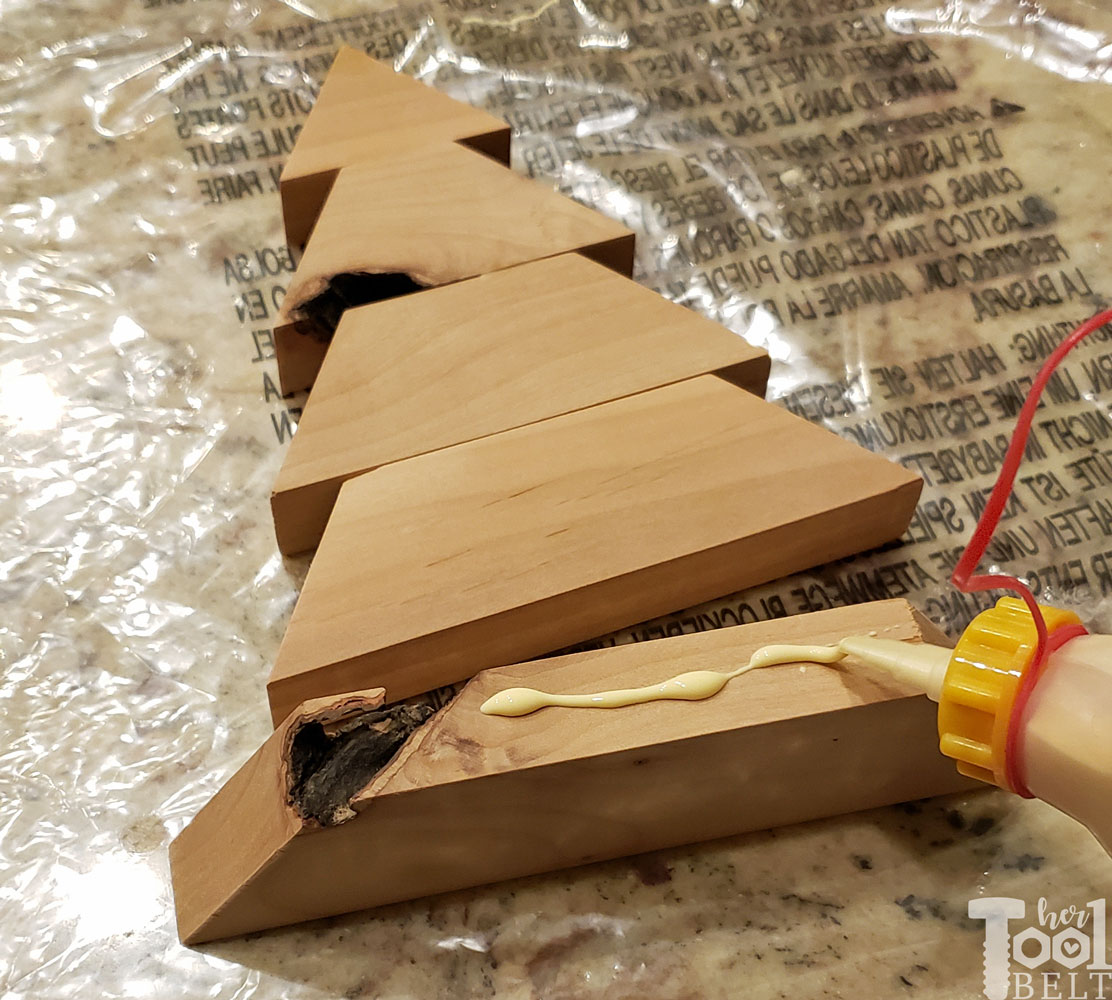
Then clamp the scrap wood Christmas tree layers together, and let the wood glue dry.
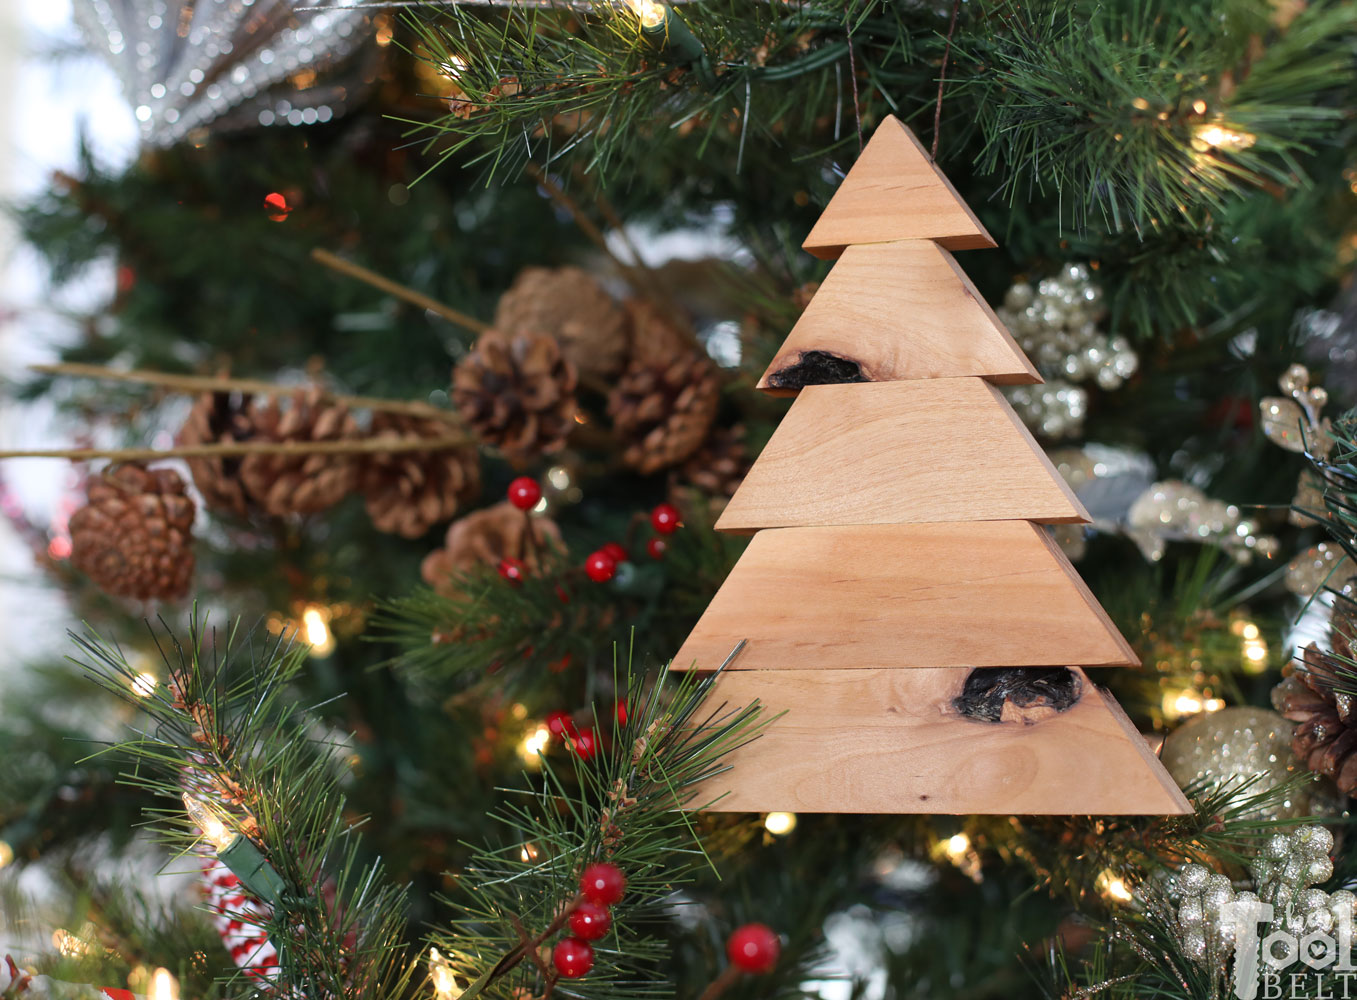
 Once the glue has dried. Remove any excess glue and sand smooth. I applied a thin coat of polyurethane. Then I drilled a hole thru the top triangle, added a string and it’s ready to hang.
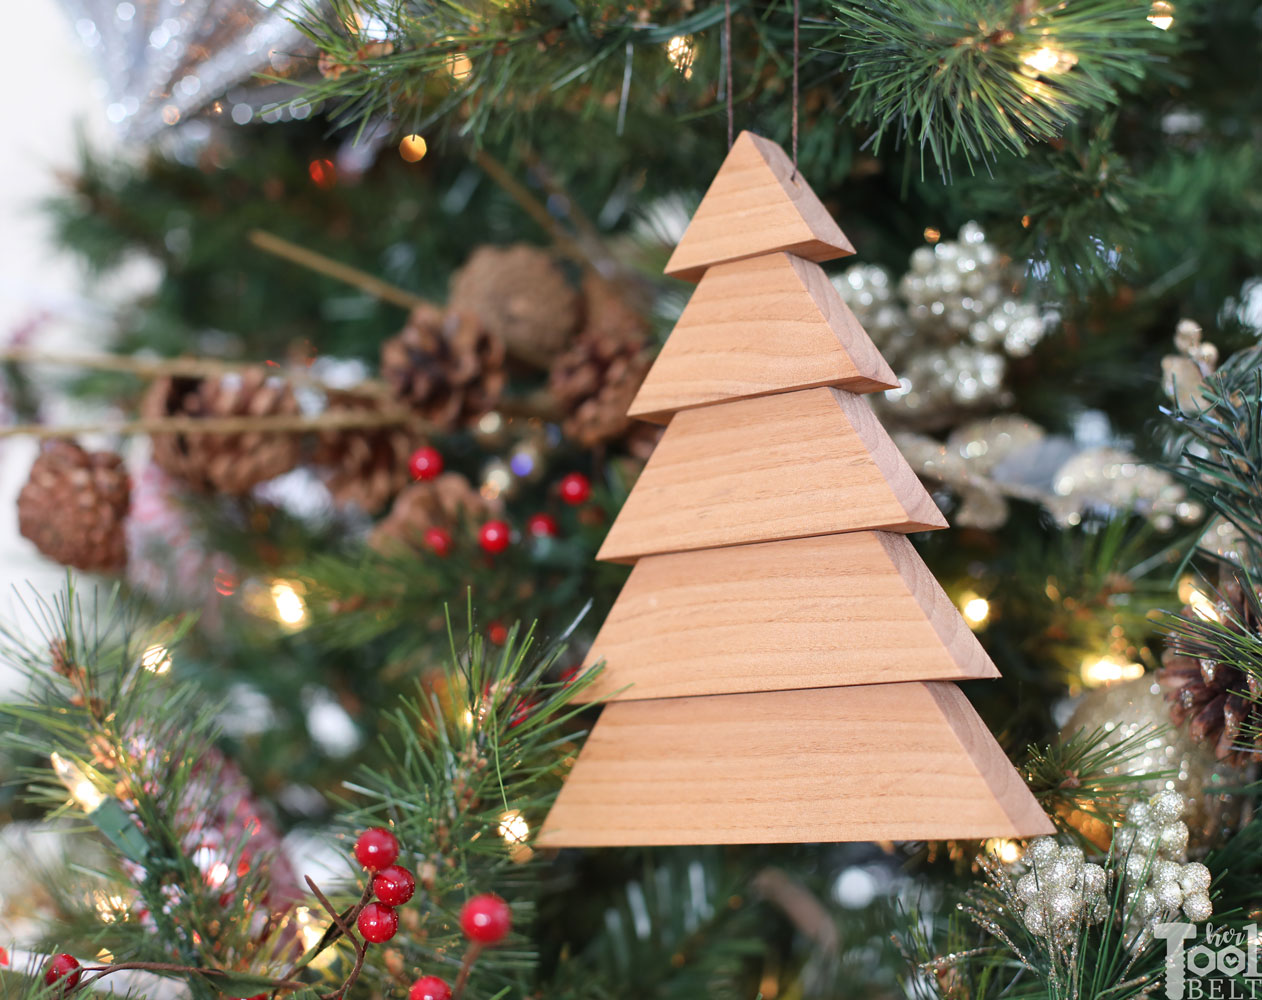
Beveled Tree Option
I wanted to add a little more depth to some of the scrap wood Christmas tree ornaments. On some of my scrap wood boards, I used my table saw and cut a 5 deg bevel on the front face of the boards. Then I cut the tree layers, just like I did the other tree. I love the depth the beveled wood adds to the layers.
Once the glue has dried. Remove any excess glue and sand smooth. I applied a thin coat of polyurethane. Drill a hole through the top layer and add a string!
Check out all of the other DIY Ornament projects!


Beautiful! It’s rustic and natural, it looks beautiful on the tree. Great tutorial so I can make my own.
WOW! Such a beautiful ornament!!! It would make a great large tree as well! Pinned!
I love the knots in this tree. Makes it even prettier. Great use of scrap wood! Adding this to my Christmas round up.
I now know what to do with the tote full of odds and ends. Thank you for sharing. Was unable to locate a “pin” button or icon anywhere on this page. Can you help?
I love this simple way to add to a Christmas tree collection. The rustic style is perfection! Thanks for the amazing tutorial.
These are so pretty! I like them! I cut out some of the trees a couple weeks ago using your tutorial. Stenciled them up with one of your stencils I won from you last year. The Christmas crate stencil. Love how they turned out. Now I will have to make these.