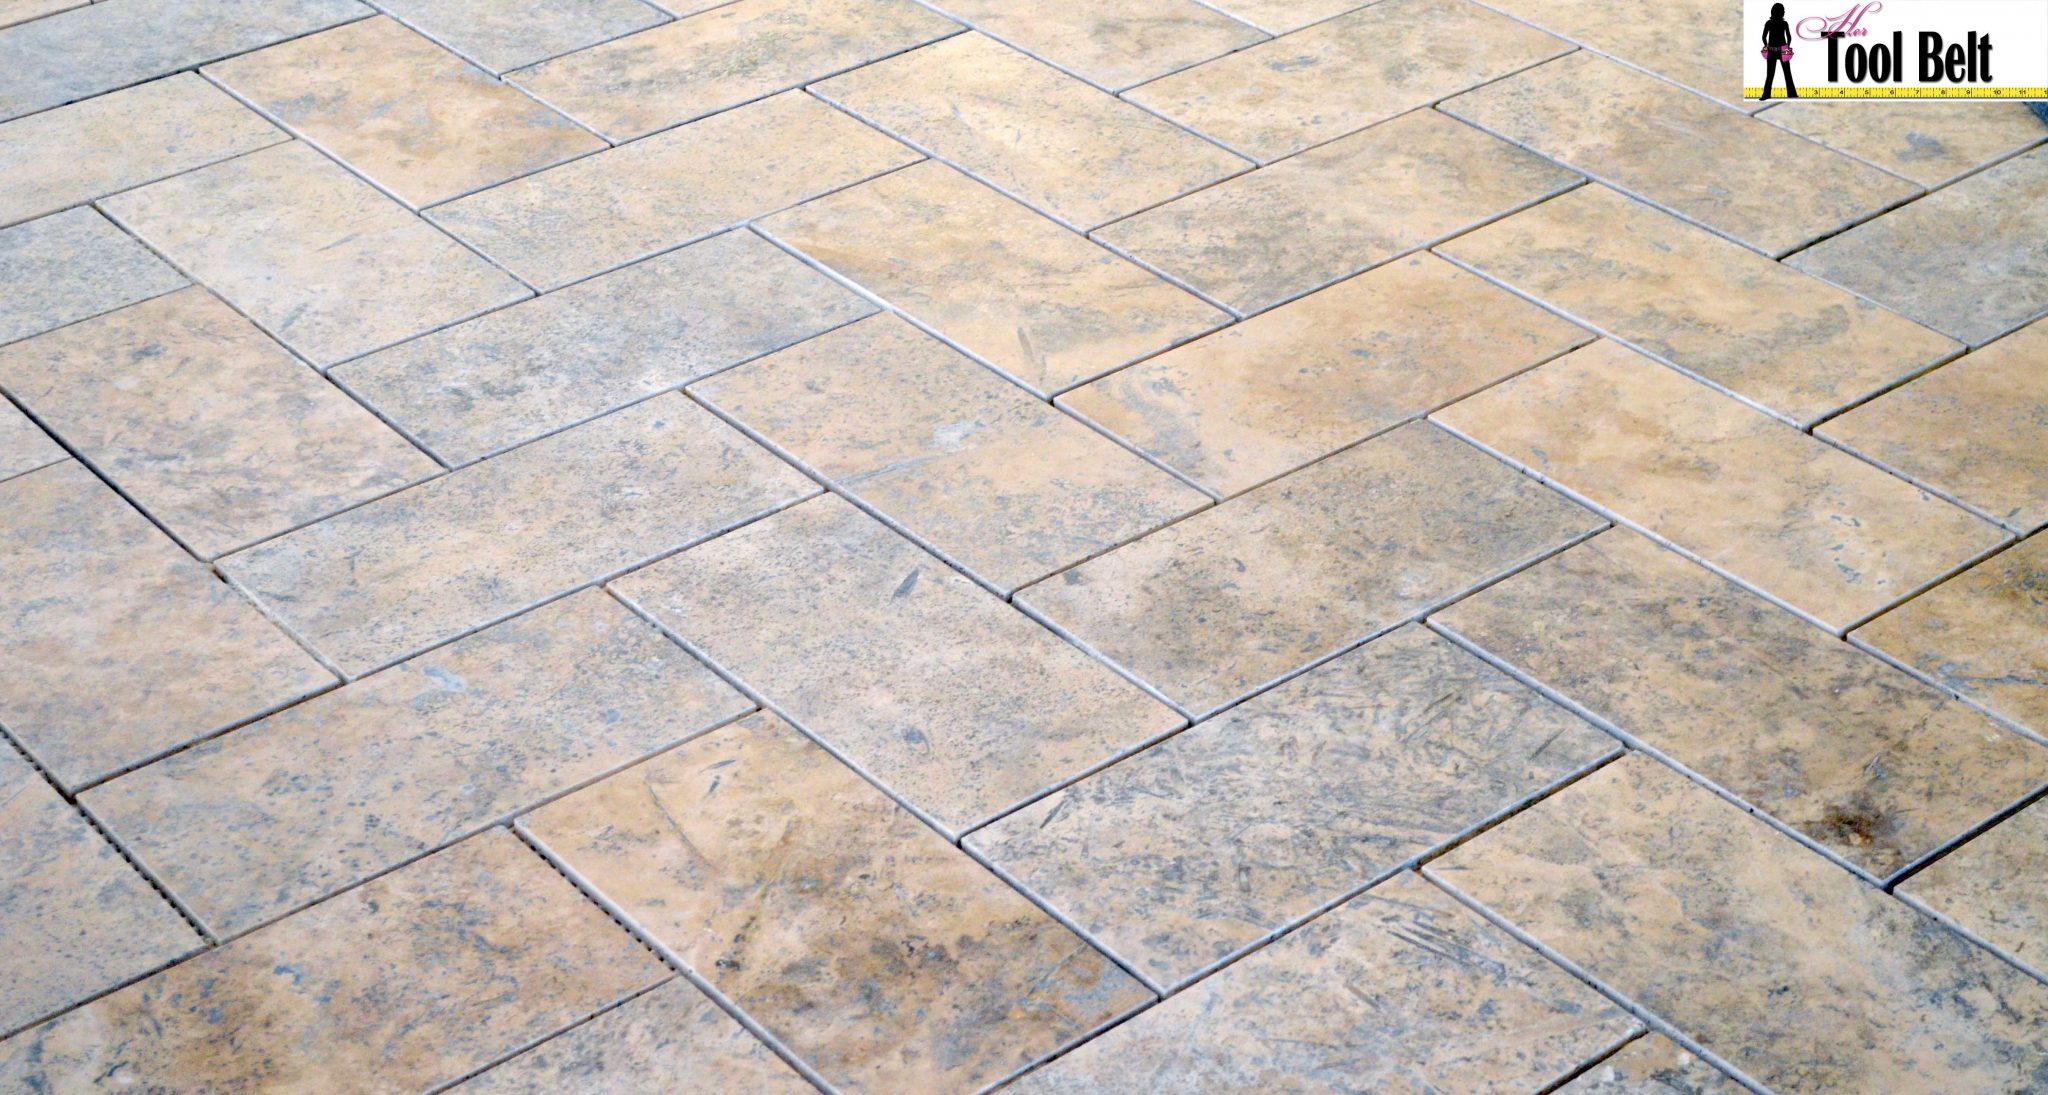
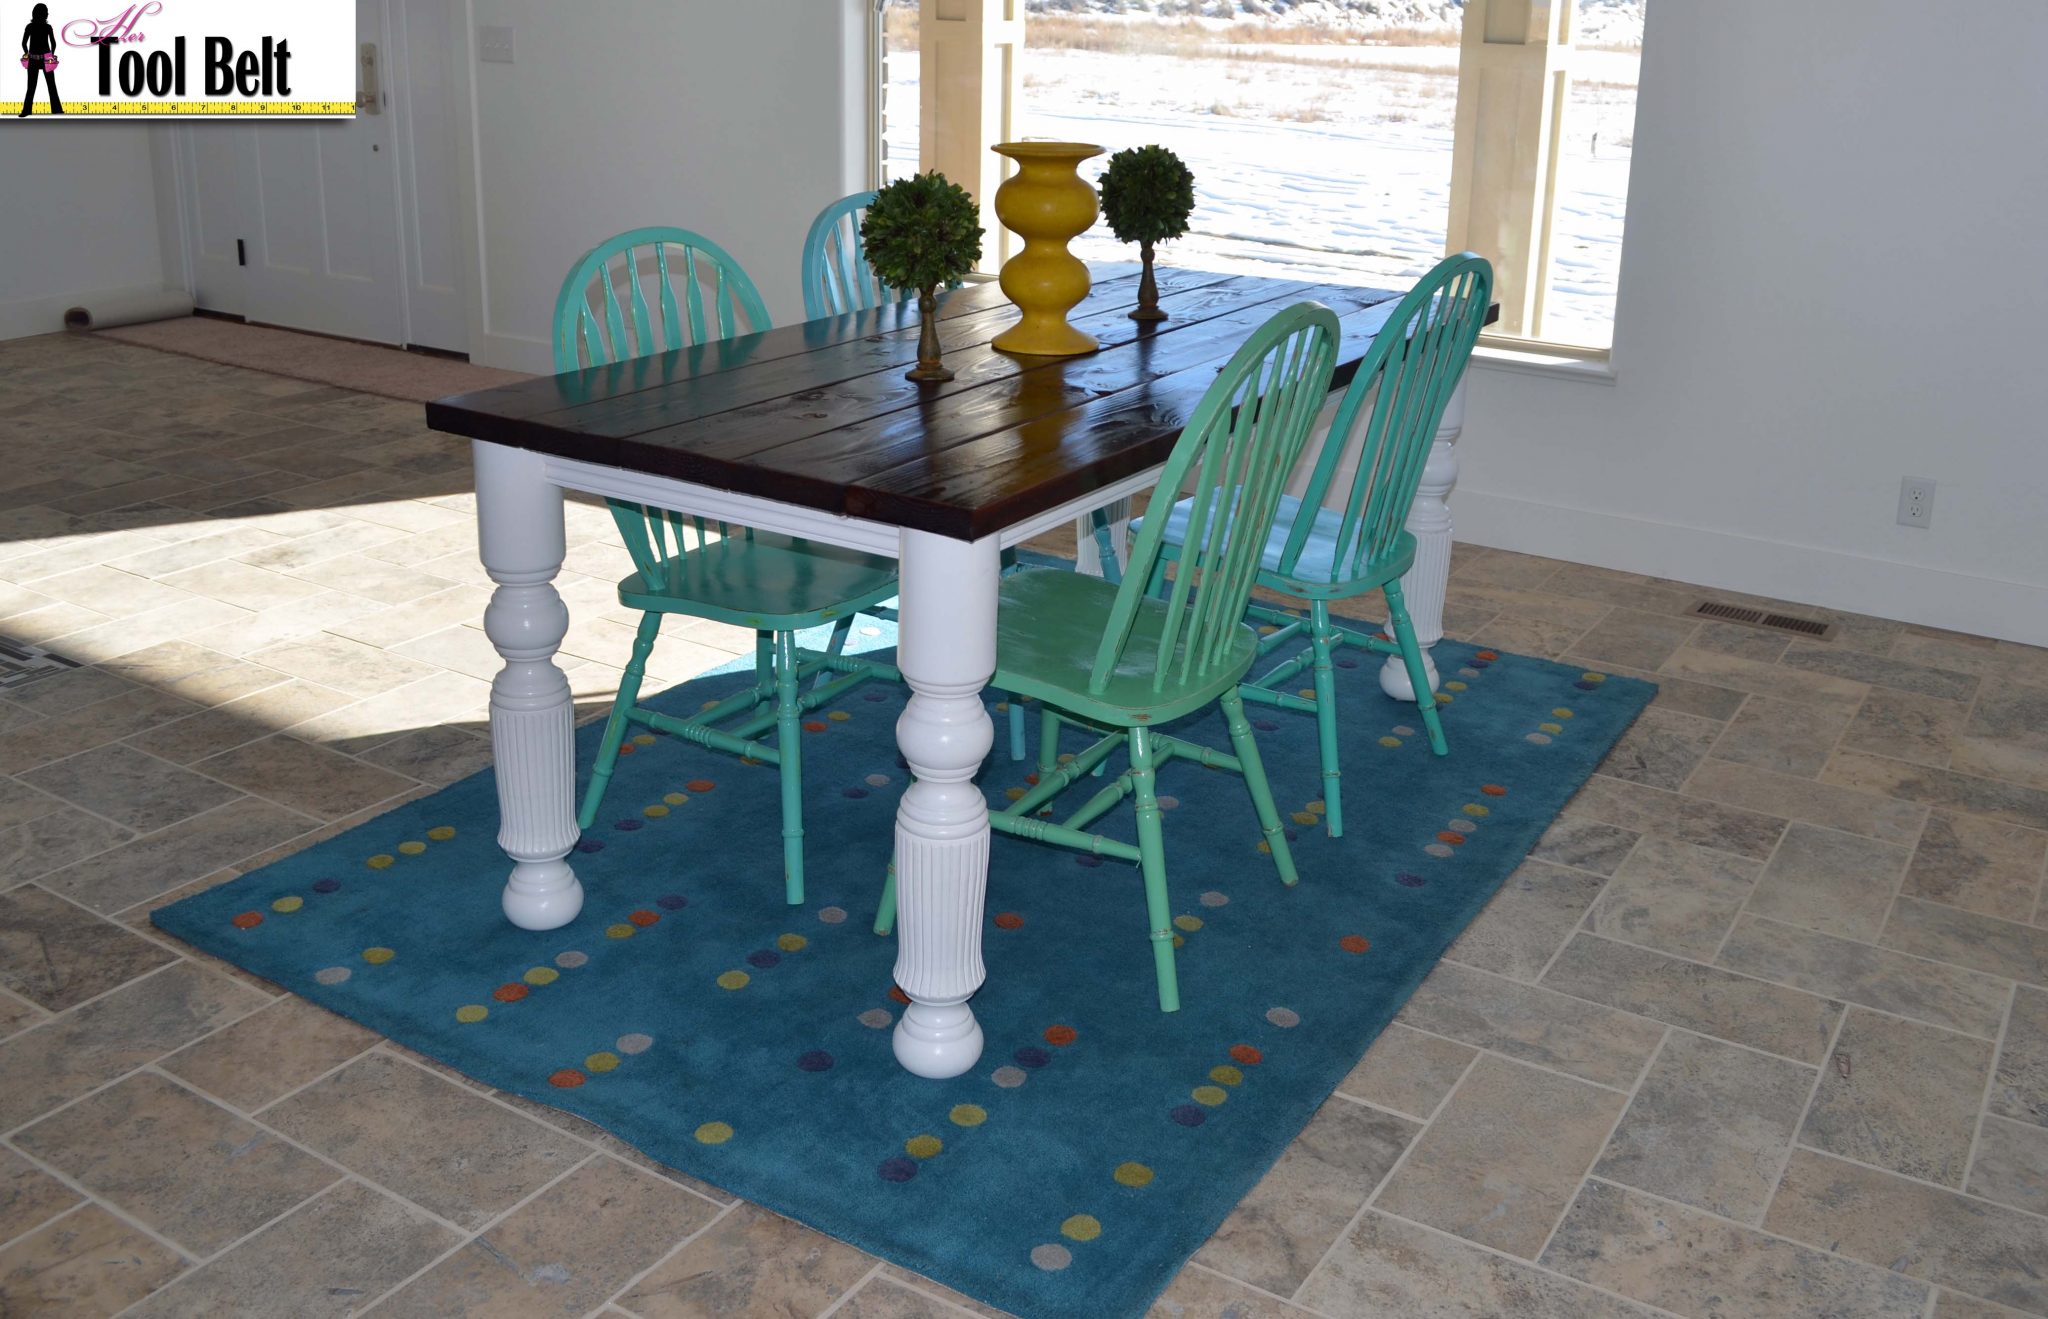
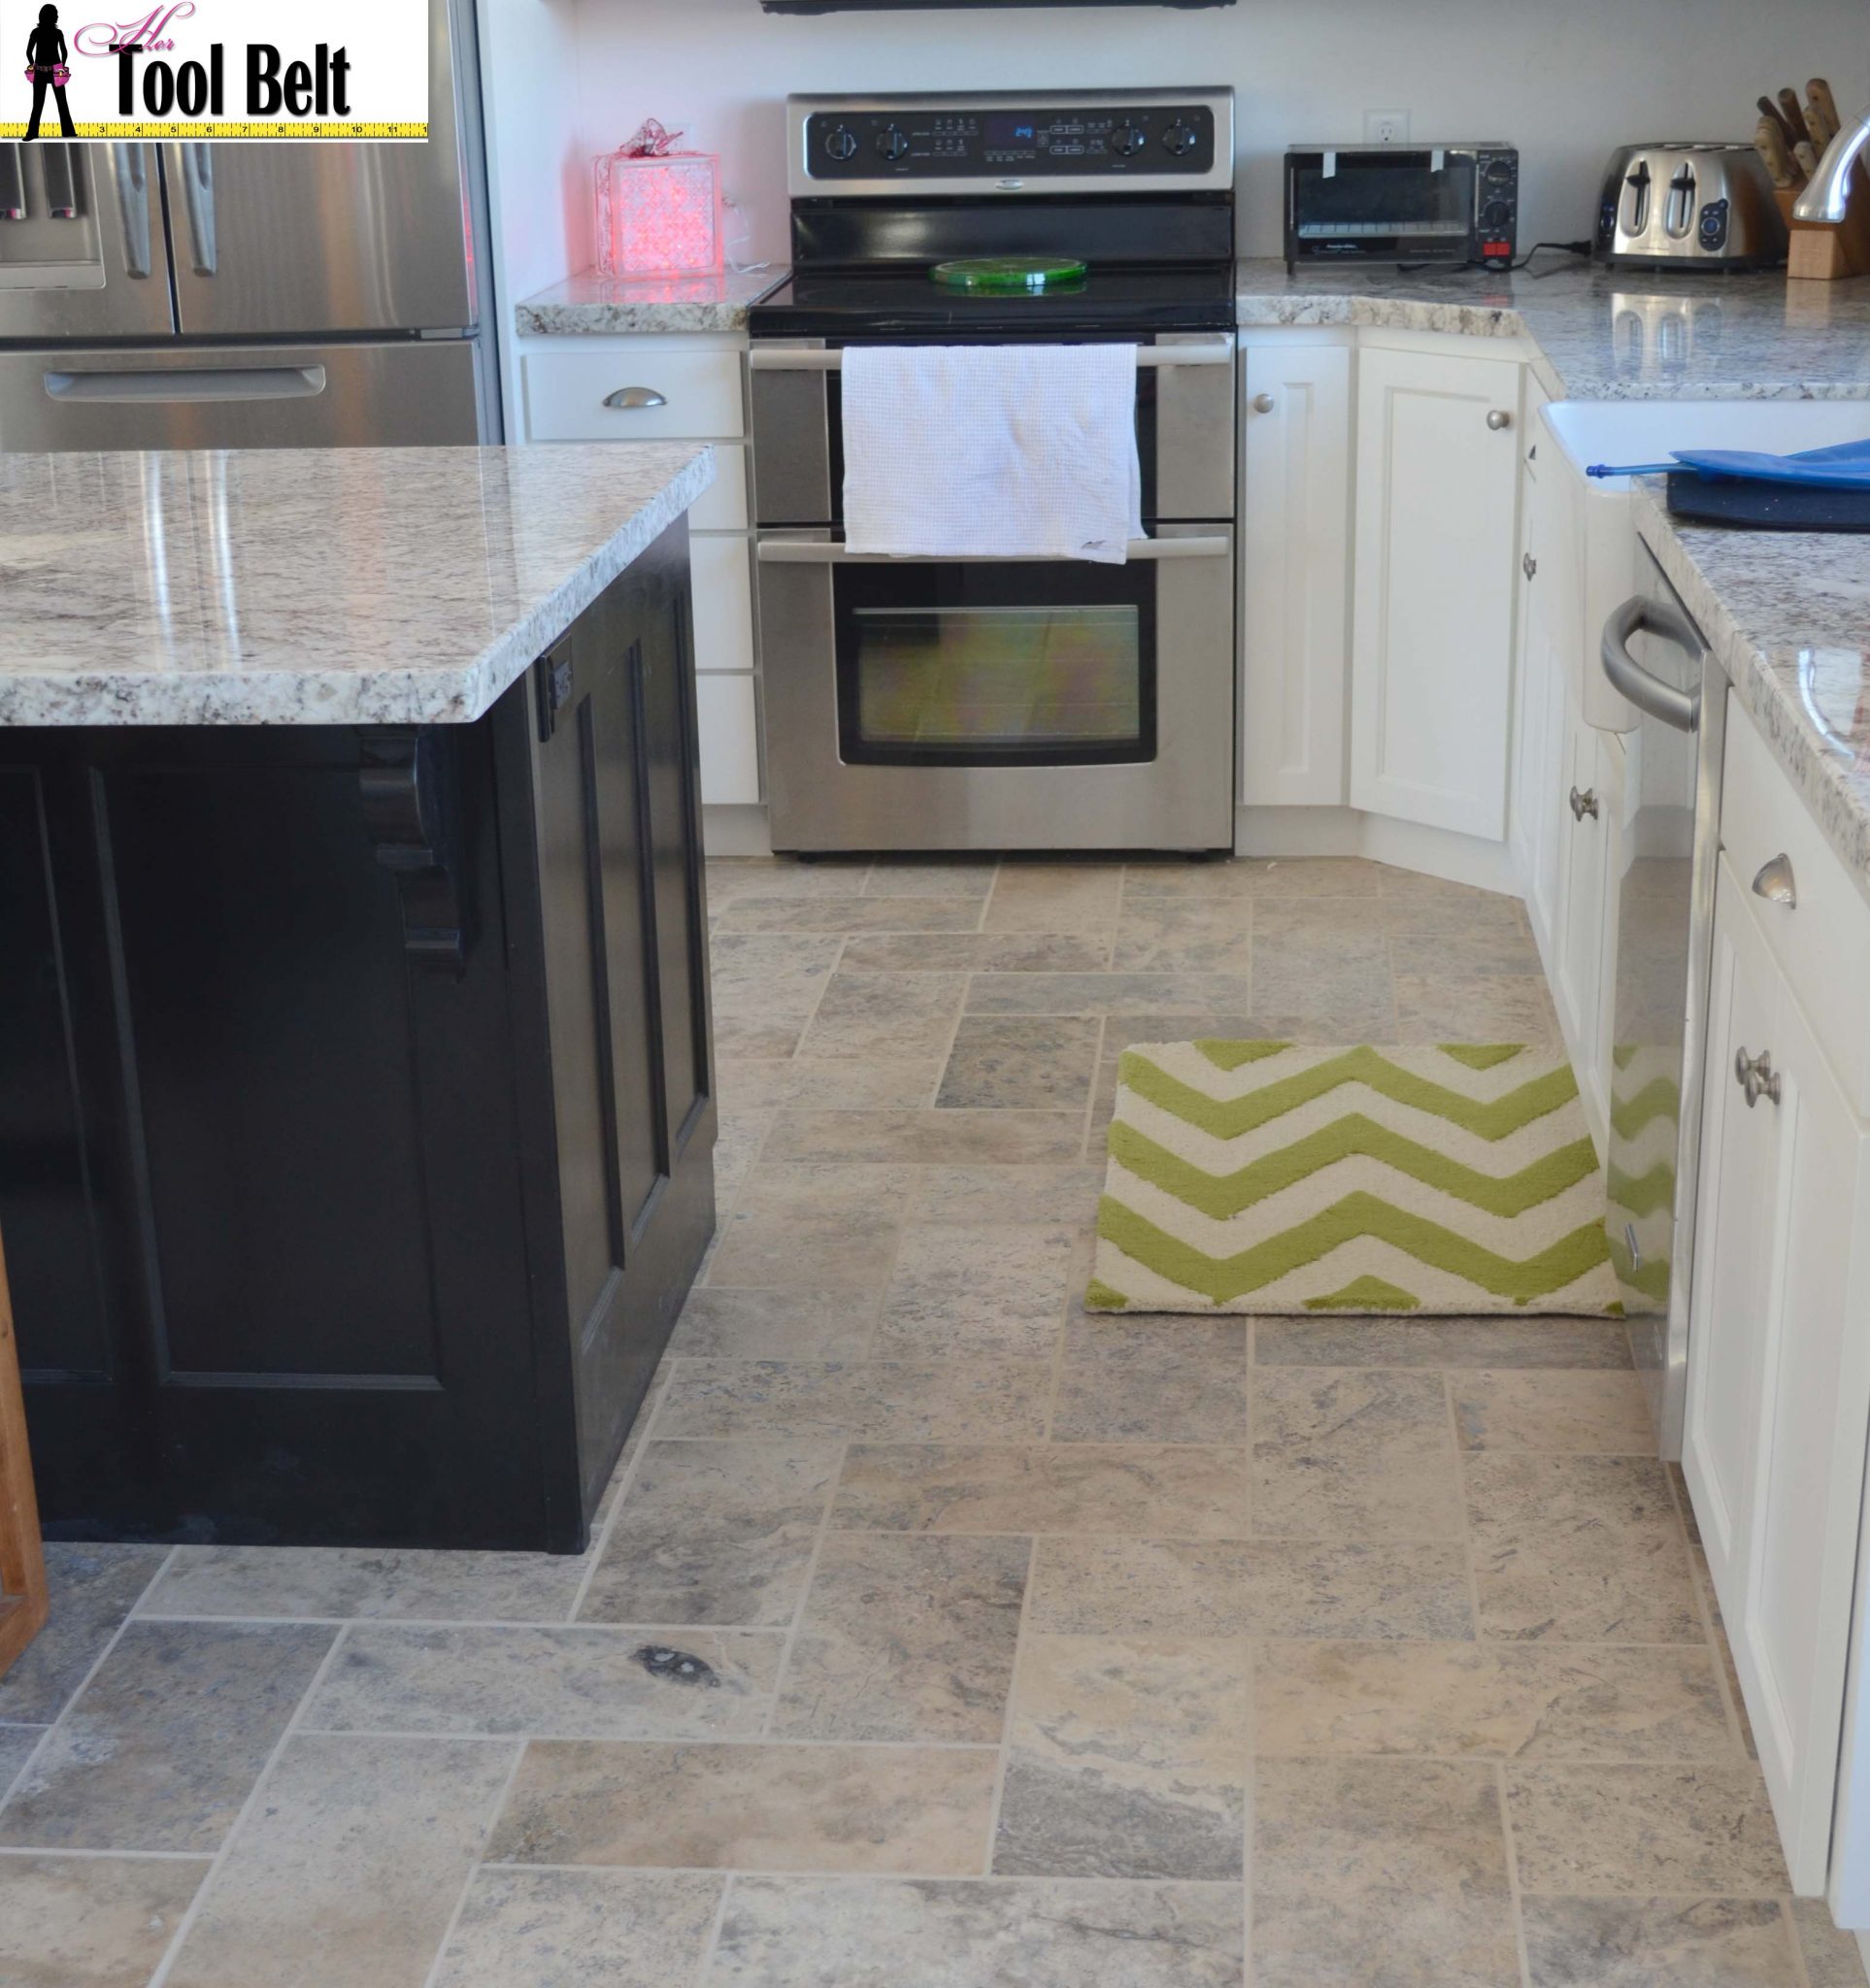
My sister just finished building a house. She longingly dreamed of the amazing kitchens, rooms and floors that she pinned and saw on houzz!!! However she was on a budget, ha ha, and patterned tile floors can come with a hefty price tag. Around these parts labor averages $10-$12/sq ft. She has a lot of tile floors (about 1,200 sq-ft). So she begged her handy sister (me) to ‘help’ her lay the tile floors. These floors are in a tile herringbone pattern, they turned out gorgeous!!! Here’s how you can get the same look…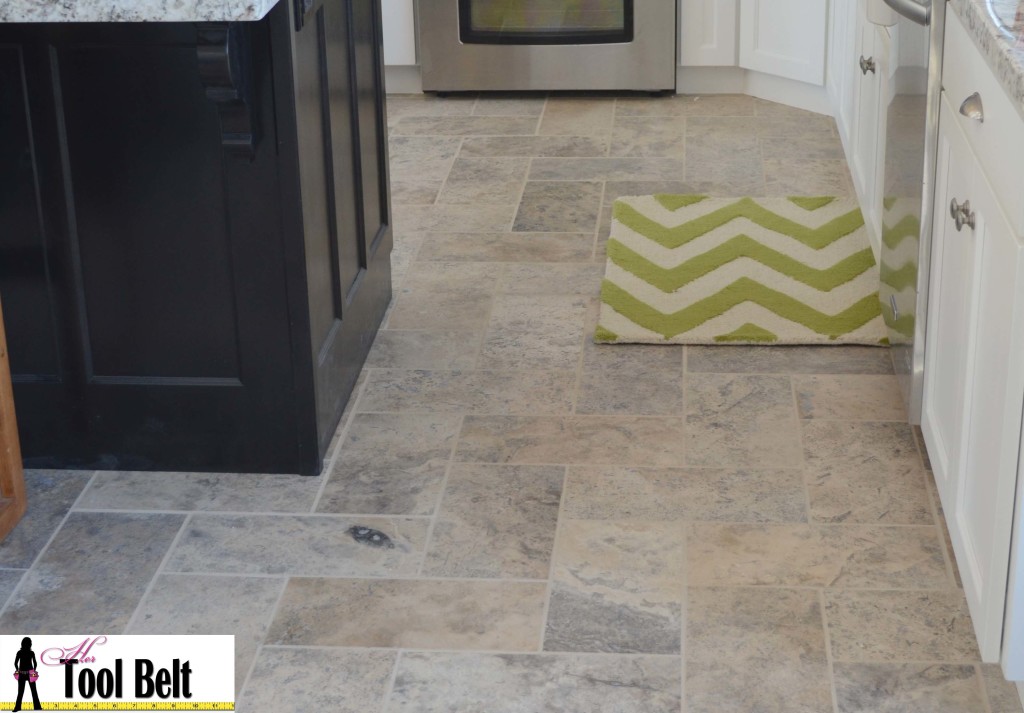
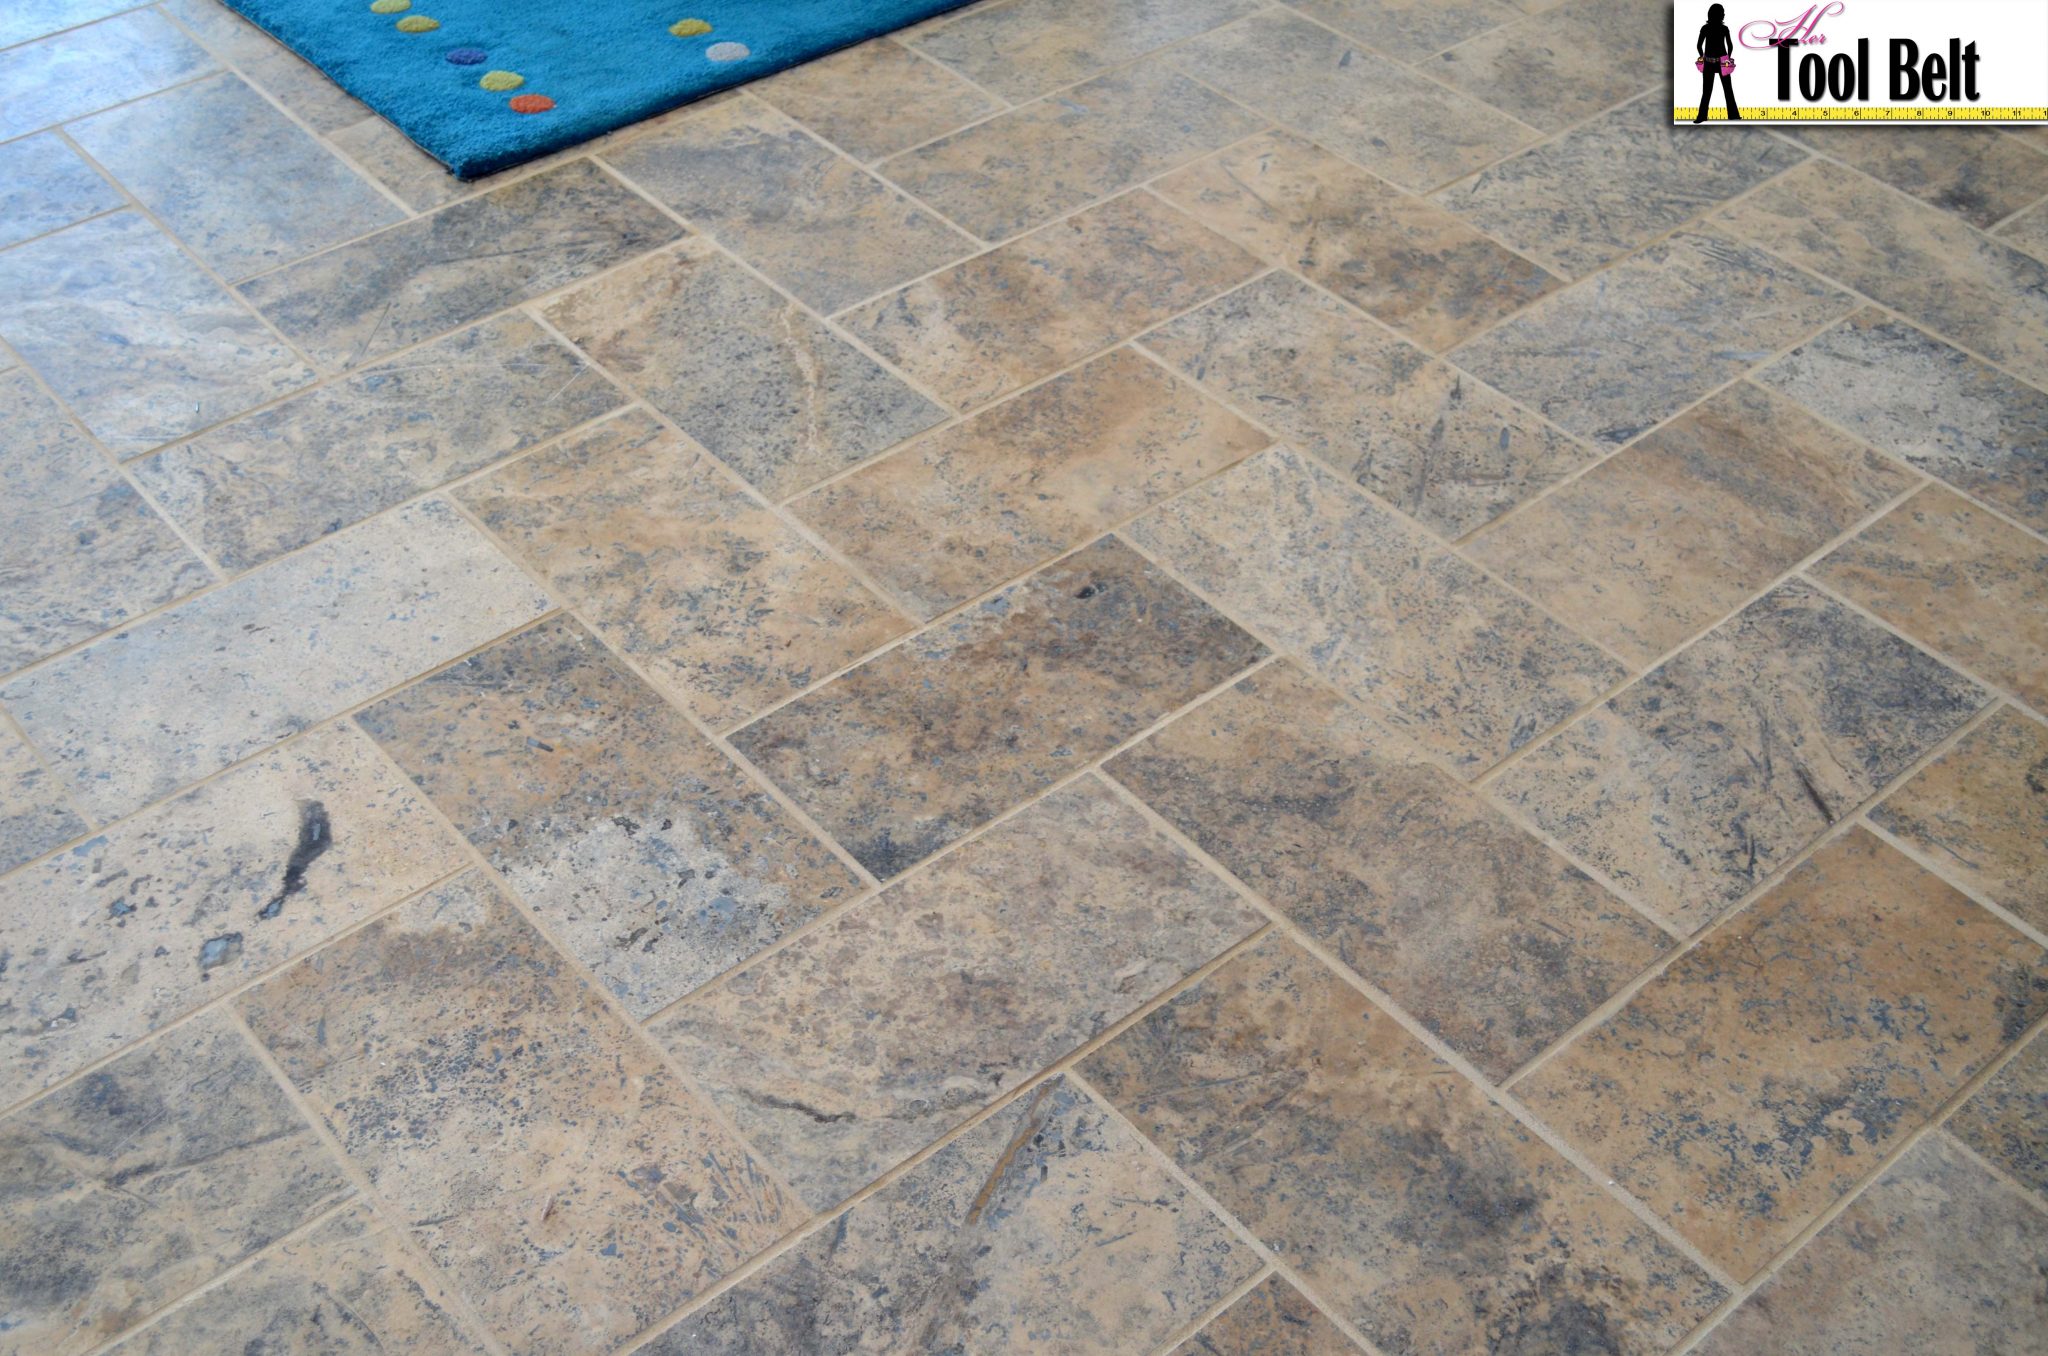
She purchased the tiles from Containers Direct a tile and flooring company. These tiles are called Silver Travertine they are filled and honed and measure 16″ x 16″. Most natural stones have holes throughout, filled means that the holes have a putty filling in them. Honed means that the tops have been polished smooth, but they are not as shiny as marble. Don’t be afraid to ask for a discount, some of these stores will discount the materials if you are buying enough.
First item of business – determine square footage (sq ft)
You need to measure the square footage of the area that you are laying tile. Area is measured by Length x Width = Area. If your room is a funny shape try and visually break it up into squares and add your area squares together. When dealing with tile, we mostly use square foot. Here are some helpful equations:
length in inches x width in inches = area in square inches divide that by 144 to get square feet.
When buying your tile, you’ll want to order about 15% extra to account for cracked tiles, edge pieces, etc. Multiply the square footage of your room by 1.15 to get the amount of tile that you should buy.
Materials needed:
- Tile (room sq-ft x 1.15)
- thinset (between tile and backerboard)
- Backerboard (room sq-ft)
- 1 1/4″ Rock-on cement board screws (drilled in every 8″)
- Thinset (between backerboard and plywood)
- Tile saw
- trowel (1/4″x1/4″x1/4″)
- trowel (1/4″x3/8″x1/4″)
- no notch margin trowel (spatula)
- natural stone sealer
- 5 gal bucket
- thinset mixing paddle
- 1/2 inch drill
- knee pads!!!
- rubber grout float
- extra large orange grout sponge
- level
- 1/4″ tile spacers
- chalk line
- measuring tape
- 2″ backerboard seam tape
- impact drill
- Backerboard scoring knife
- straight edge
- optional: grinder with a tile blade
You can pick most of these items up at Lowe’s or Home Depot. You don’t need a fancy tile saw, although it would probably be easier, I have a cheap ($80ish) saw that I’ve used for years and it has done the job.
An important part of any tile floor is the cement bed, under the tile. There are a number of different products out there for the cement bed. For my sister’s floor we went with 1/4″ Hardiebacker cement board (wonderboard is a little cheaper, but Hardiebacker is easier to cut and has the 8″ screw pre-marked). Cement board is a fairly easy to use product for the DIY-er. A note: 1/2″ cement board is usually used for walls where you are installing tile.
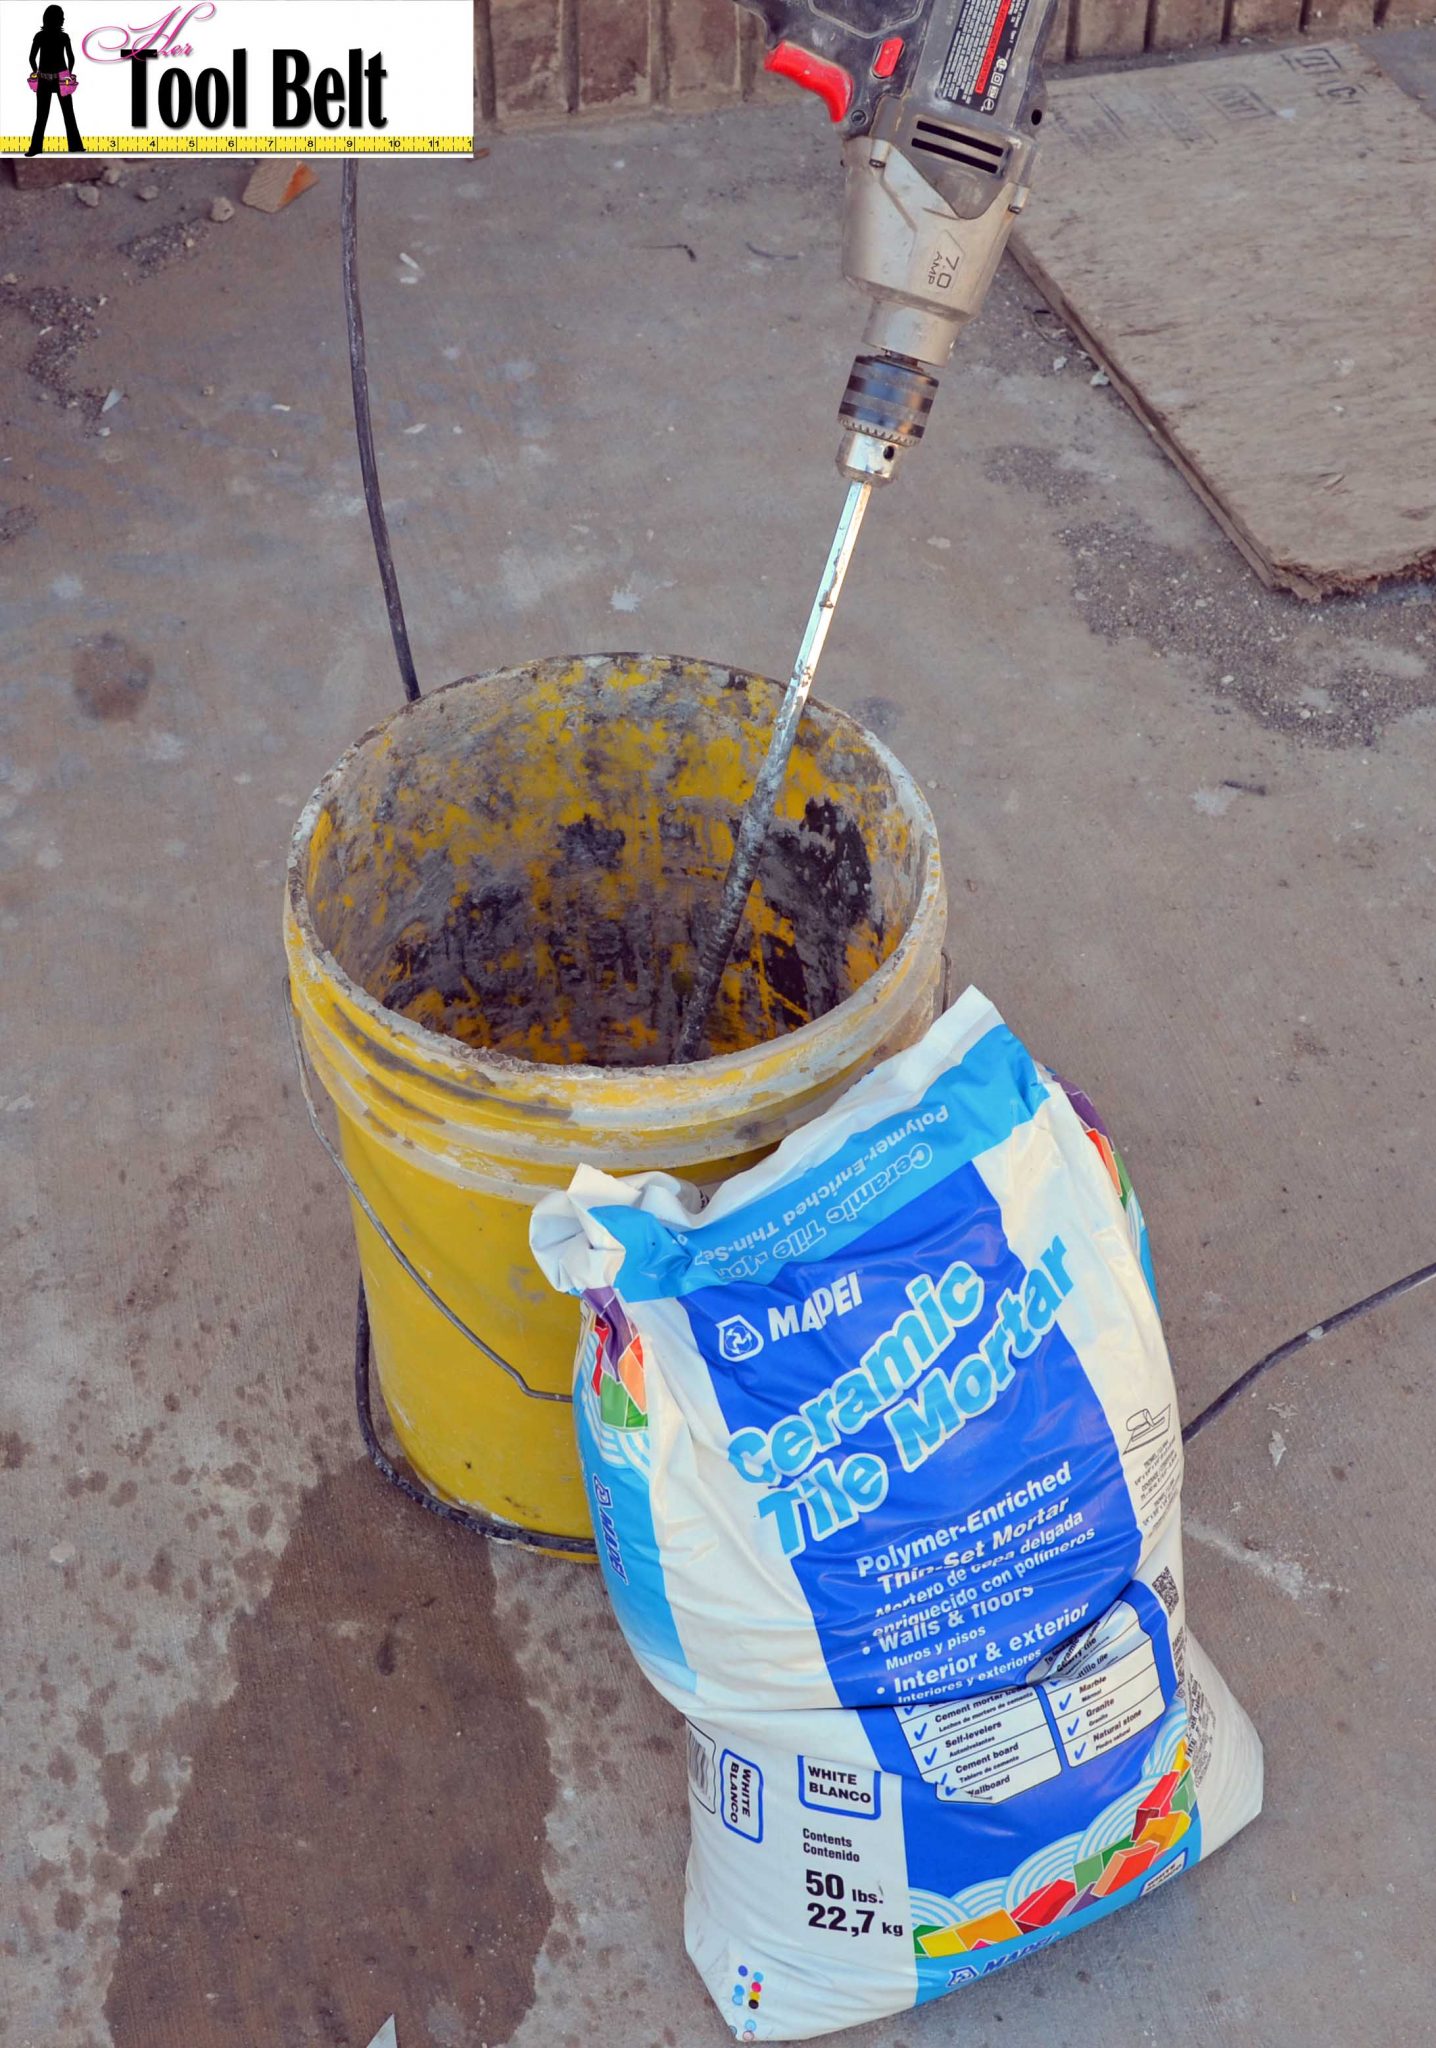
Before laying the cement board, scrape your floors removing high spots, and leftover plaster from the drywall guys, sweep and clean the floor as best you can. For the thinset between the plywood floor and cement board, I use the cheapest thinset I can buy at the hardware store. Mix the thinset in a 5-gal bucket according to the directions on the bag.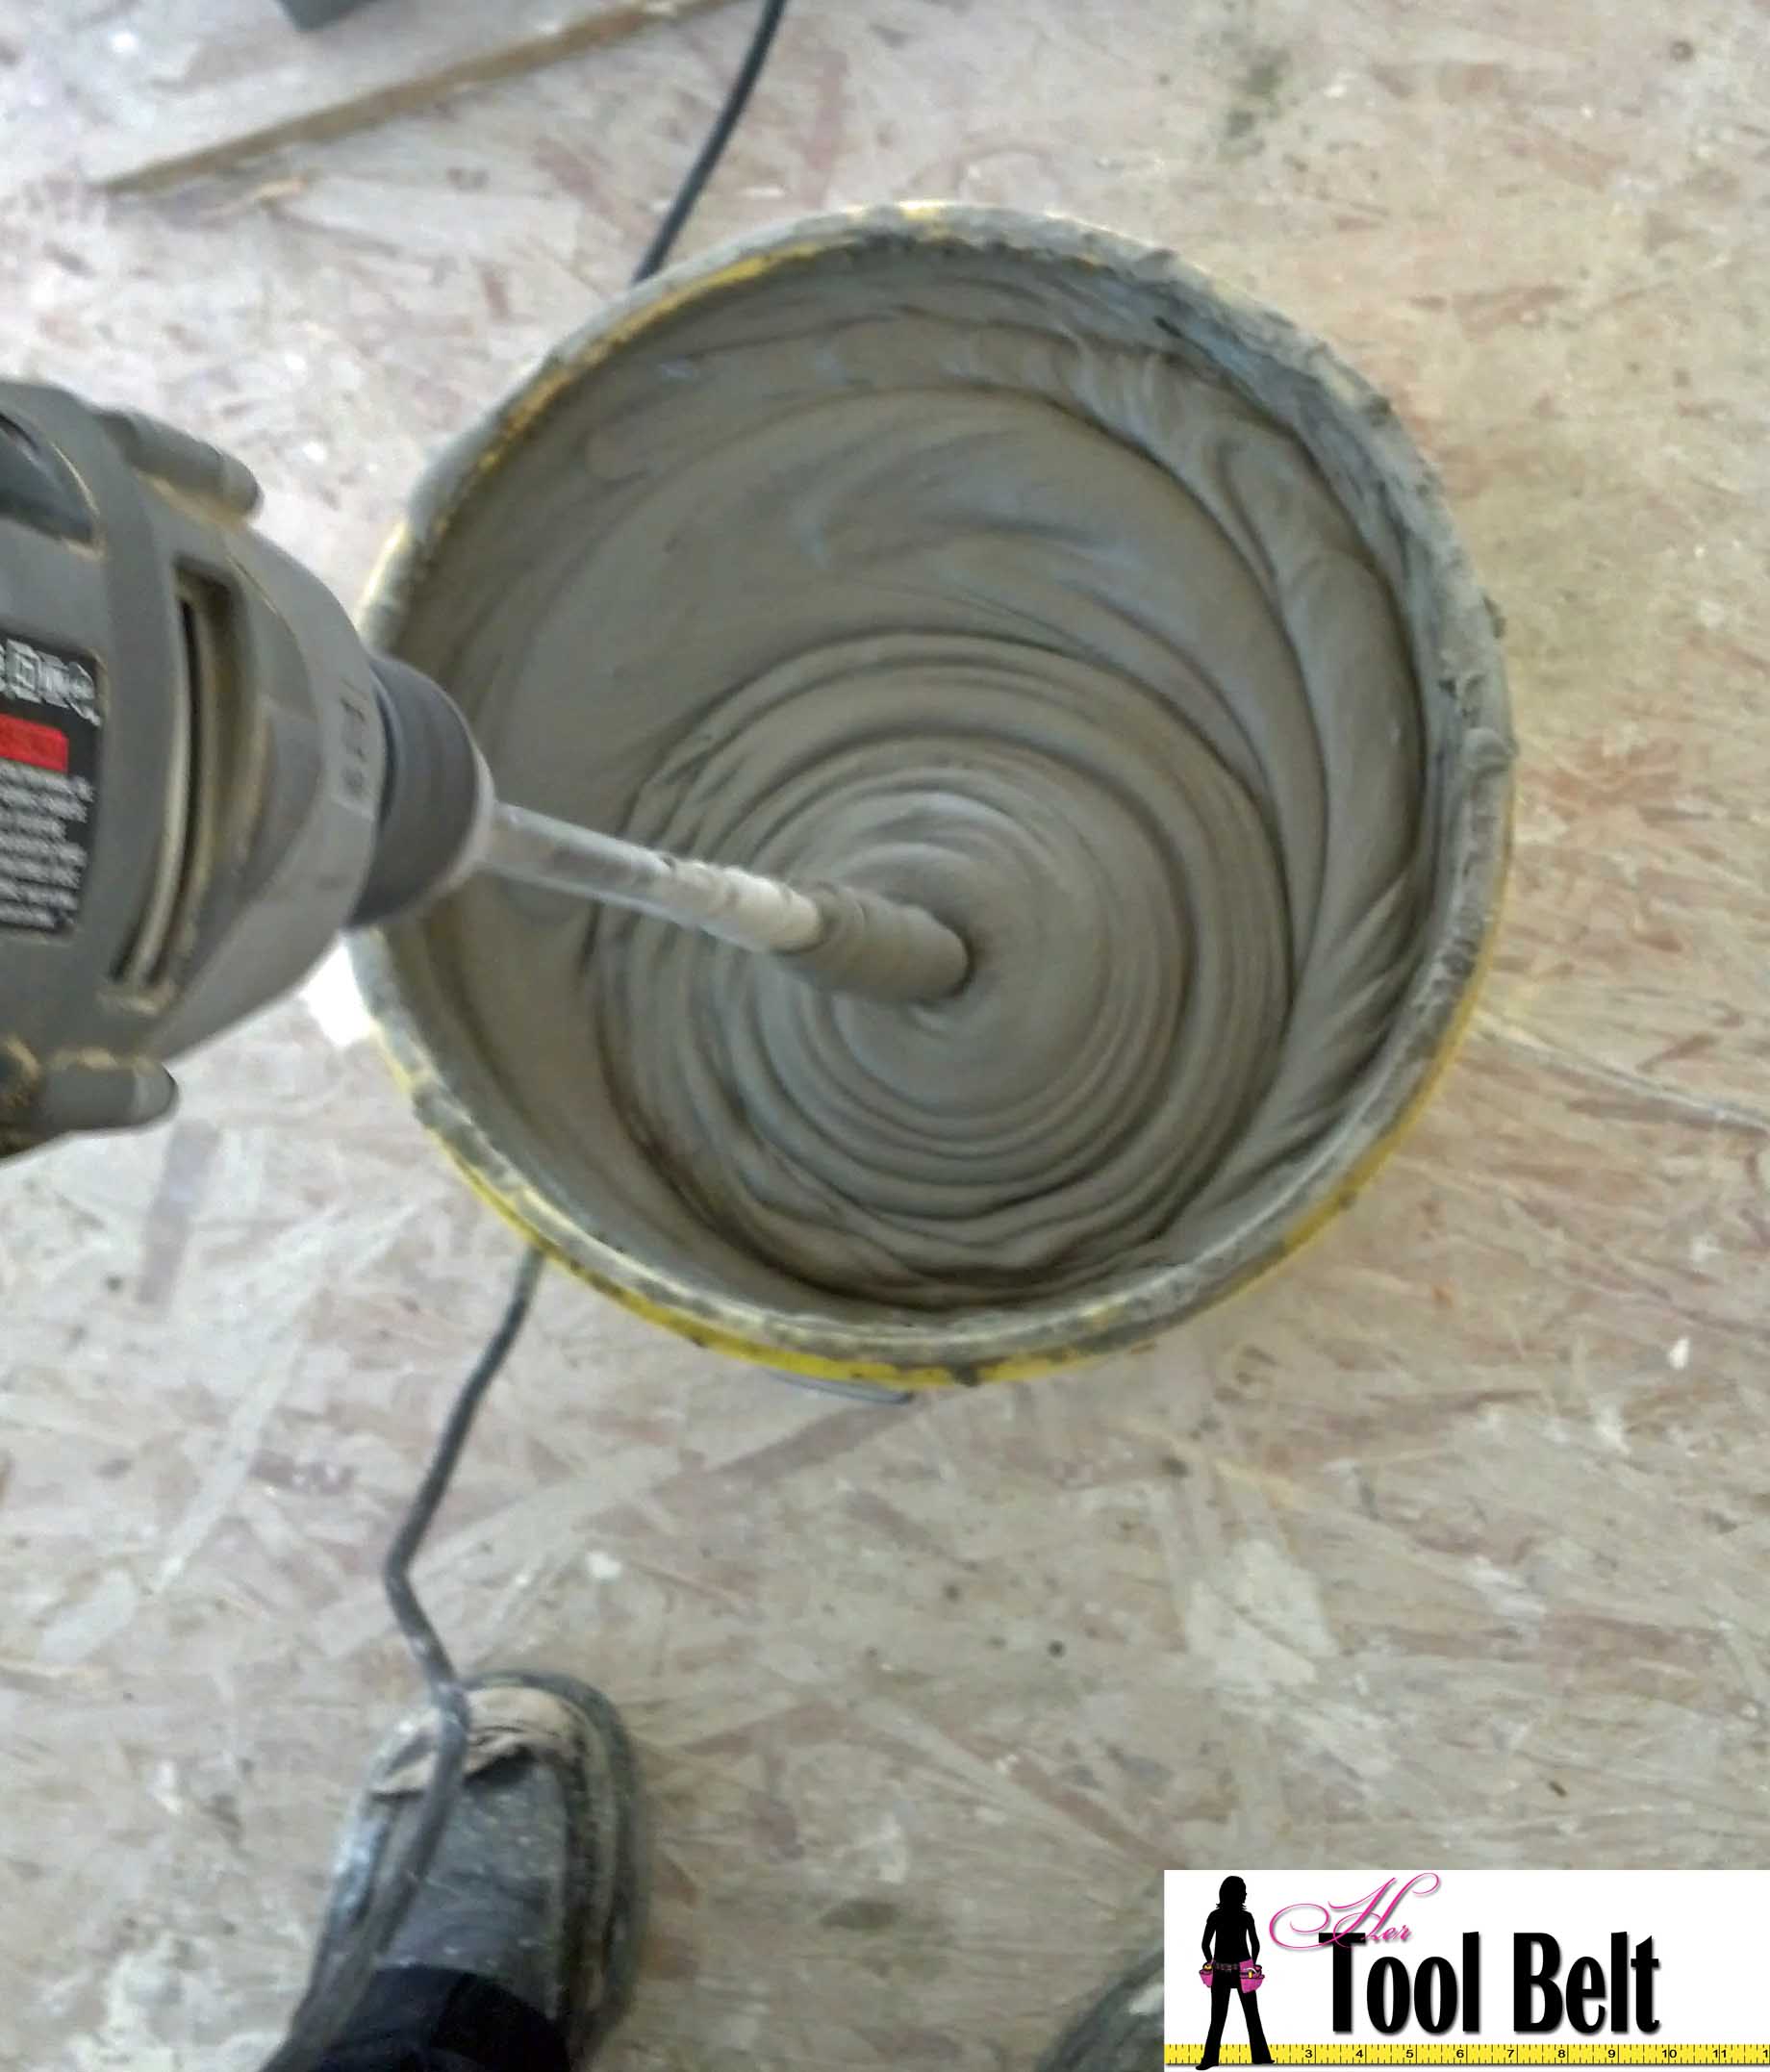
Use the 1/4″x1/4″x1/4″ trowel and spread the thinset out. Hold the trowel at a 45 deg angle on the last pass. Set a piece of hardiebacker on the thinset.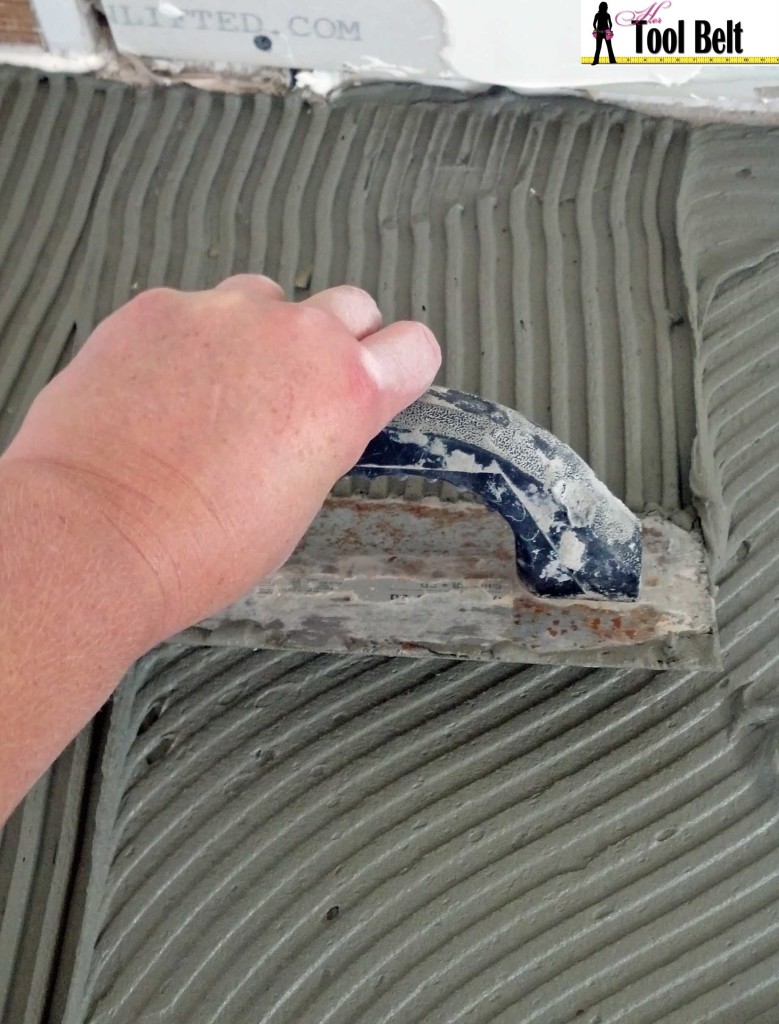
It helps to have a second person for this part. Screw in Rock-on cement screws every 8″, trying to get the screw heads flush with the cement board. I’ve done this with a regular drill, but it is 100% easier with an impact drill. I love the Ryobi’s with the lithium ion batteries from Home Depot.
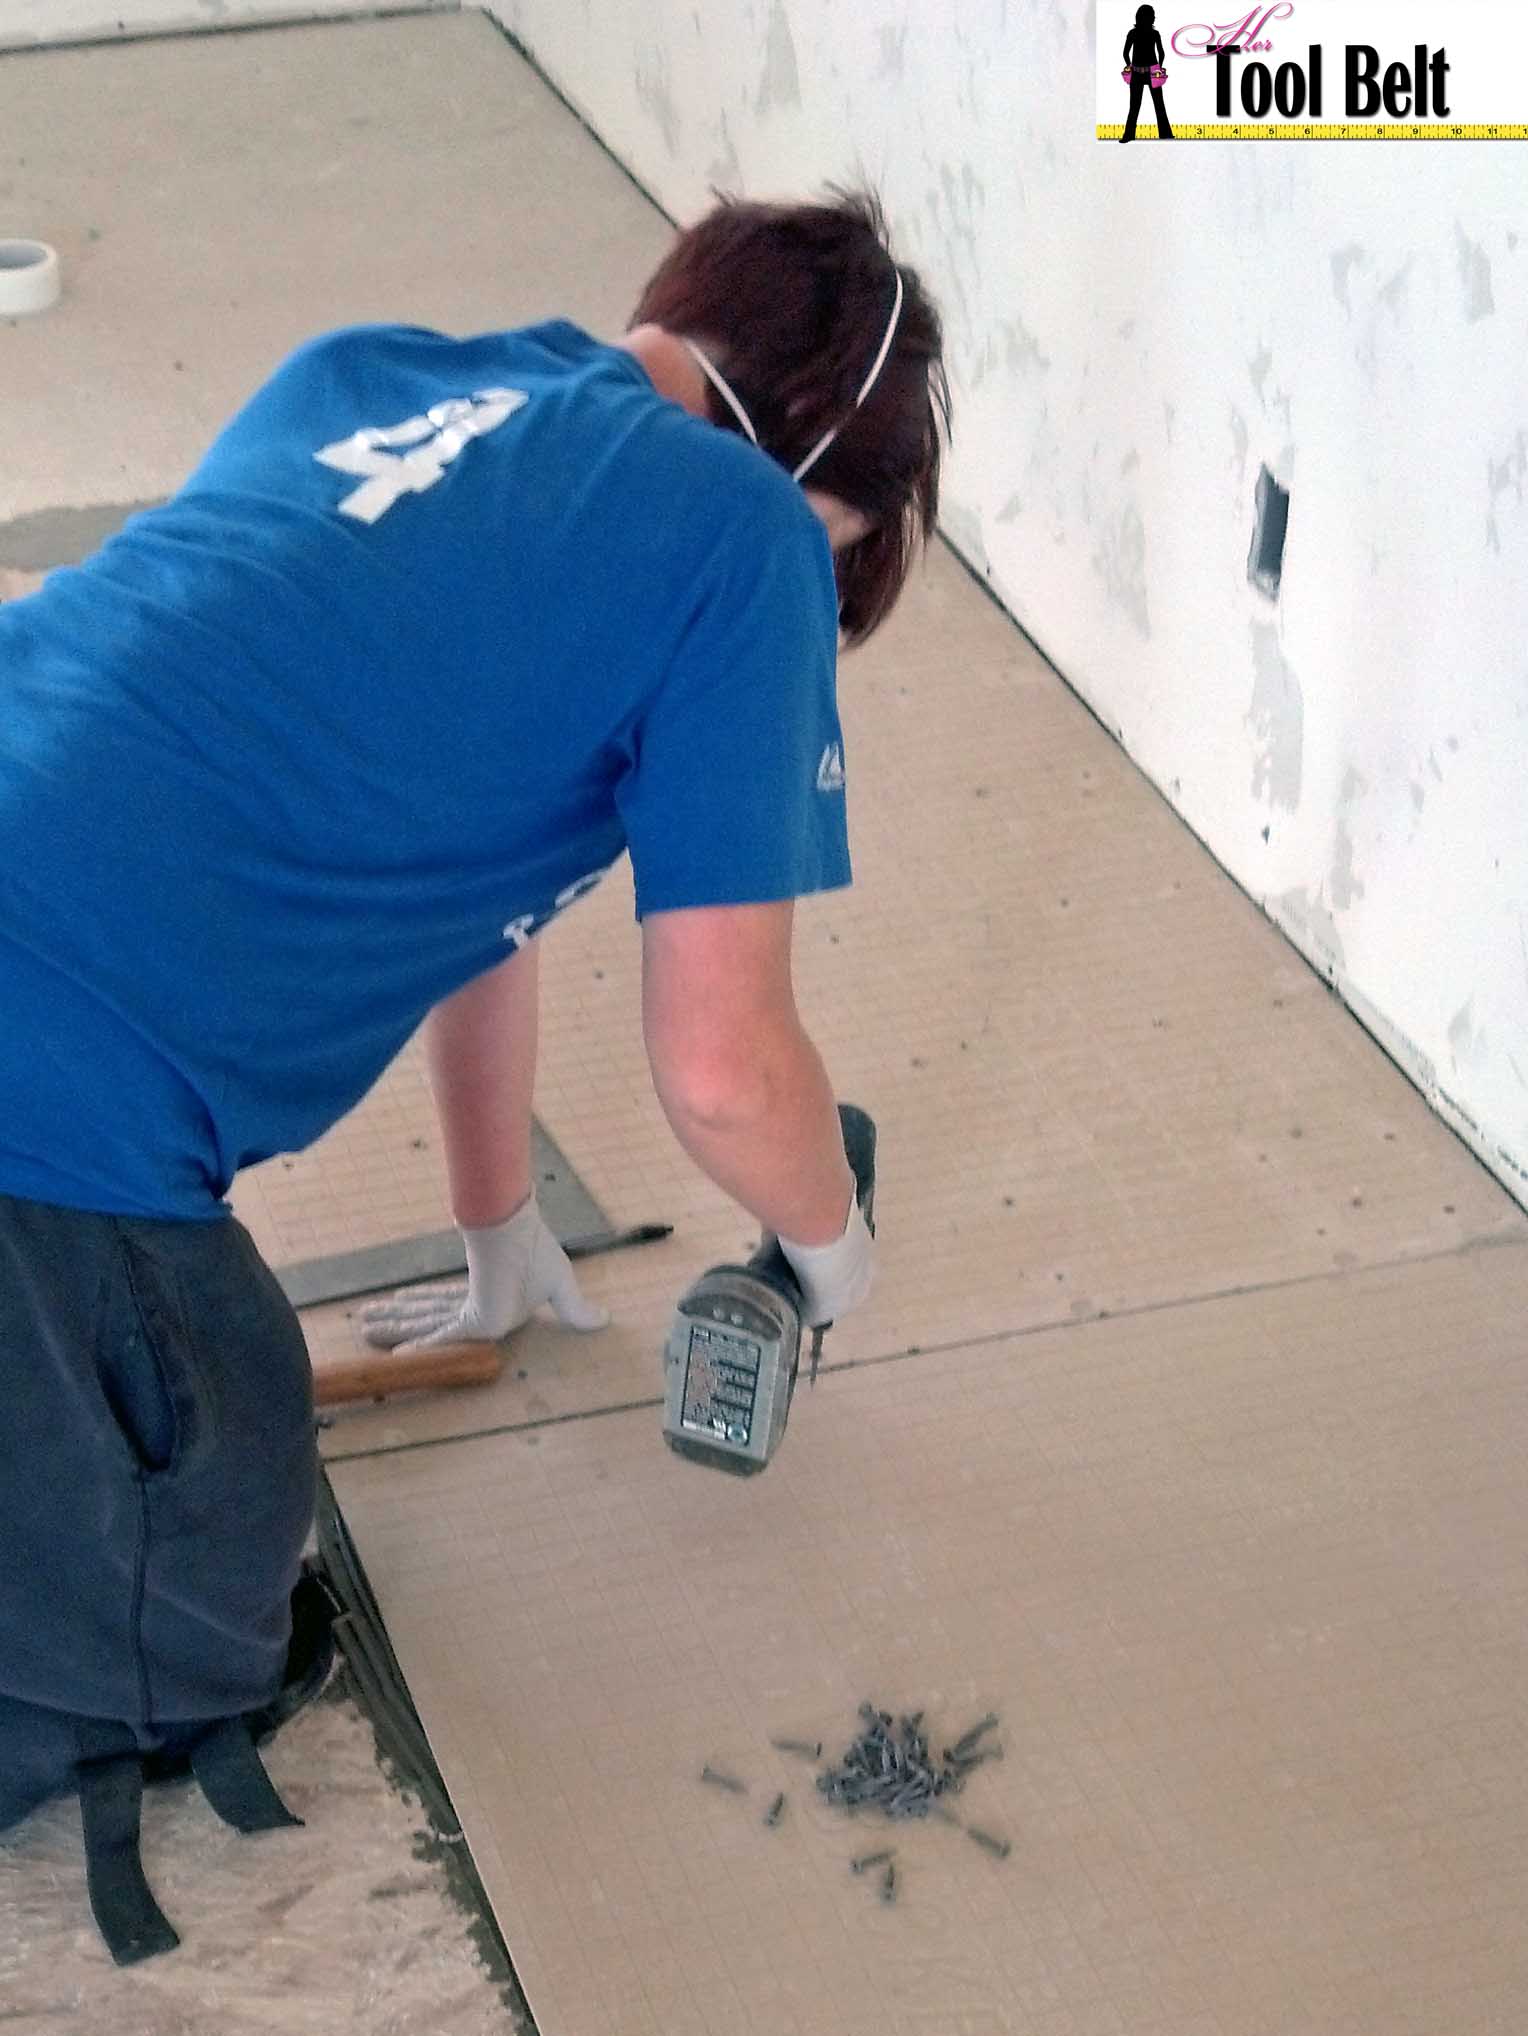
You need to stagger the cement boards when laying them. You should never have 4 corners meet, and never lay a seam of cement board on a seam in the plywood. If this is going to happen, cut your cement board to miss the plywood seam. Leave an 1/8″ or so gap between cement boards and between wall edges.
Continue spreading the thinset, laying cement board and screwing it down until you cover the whole area that will be tiled. The thinset needs to cure for 24 hrs until you start laying tile.
Fill the cement board gaps with thinset, then apply the 2″ glass seam tape over the joint.
Cover the seam tape with thinset, and smooth the joint. Try not to leave high points. For more info about hardiebacker consult the installation guide.
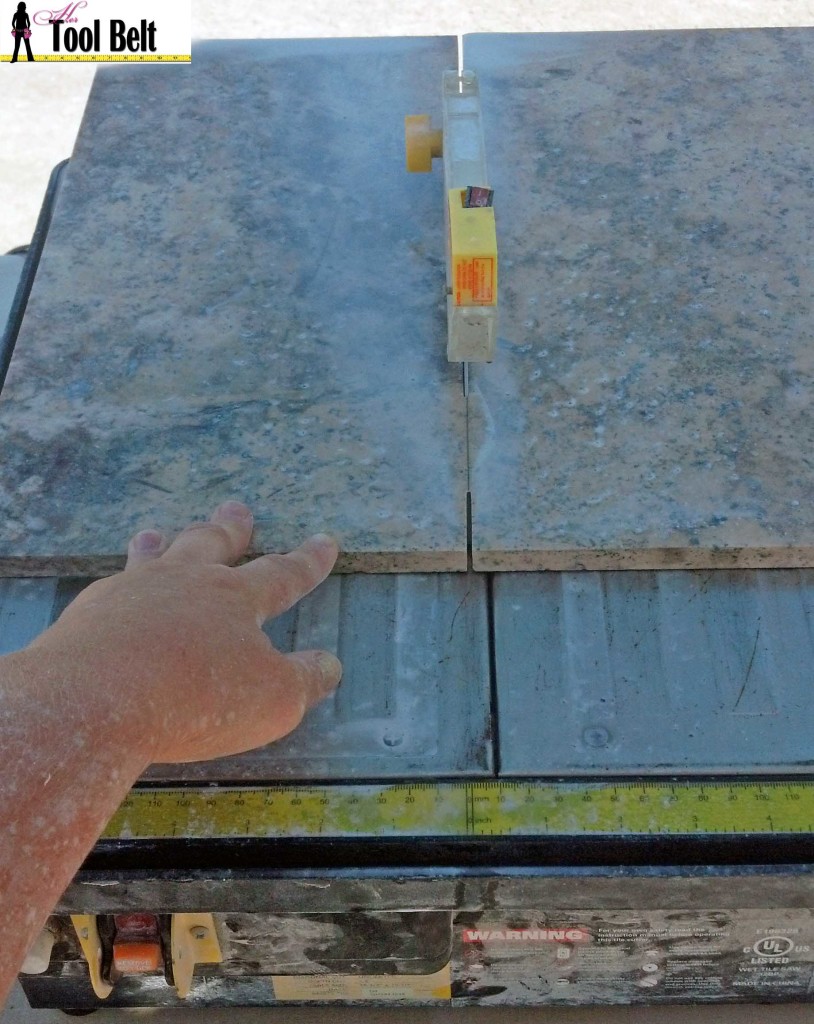
You should clean and seal the travertine with a natural stone sealer. Let the sealer dry according to the instructions. Next there is a lot of cutting to do. Cut each of your tiles in half.
Mark each tile at 8″.
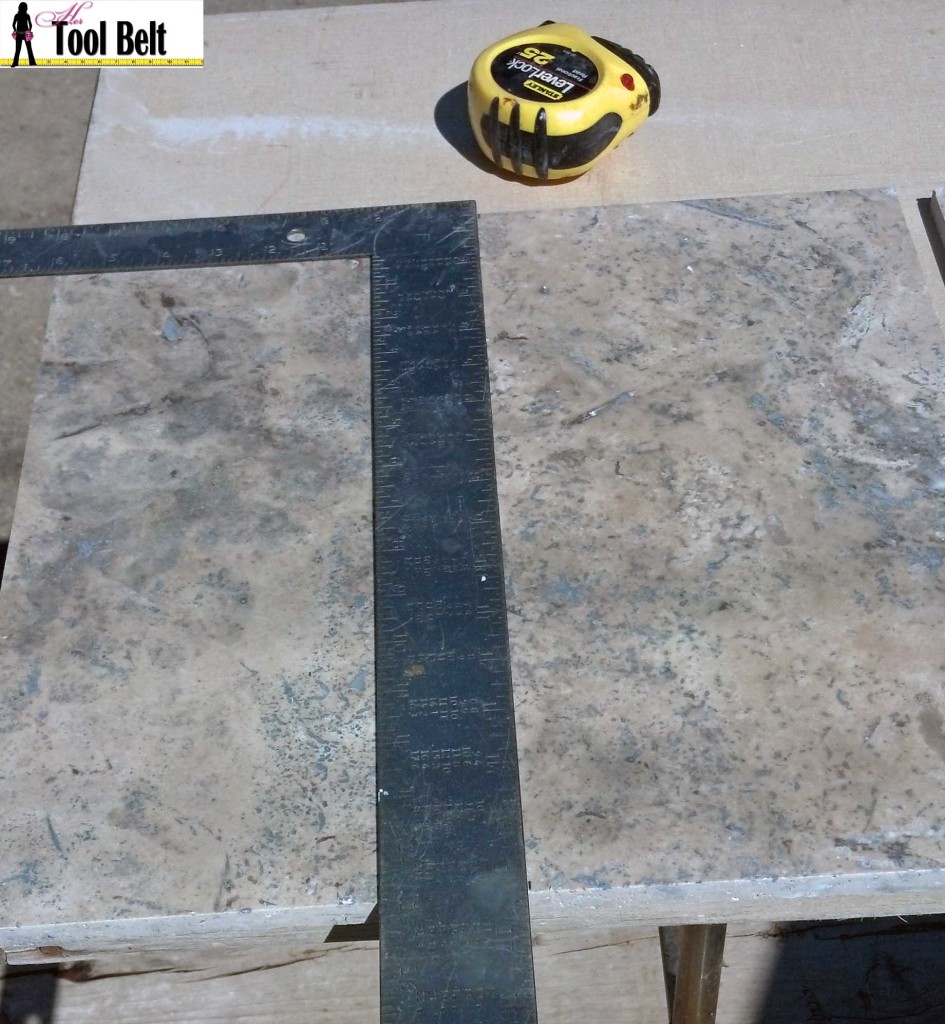
Cut tile in half. To minimize tile break out at the end of the cut, I made a small cut on one side of the tile, then flipped it around to the other side and made the cut along the 8″ marking meeting at the small cut. Rinse the tiles off with water.
Next determine how you want the herringbone laid out in your room. Consider if you need to have whole tiles showing of certain edges in the room, you’ll want to start your pattern there. Herringbone is fun because it looks different in each direction that you view it. Use a chalk line and make gridlines for guidelines to follow as you are setting the tile. Also because these tiles have been cut, they aren’t exactly 8″ x 16″, they are just under 8″ x 16″. So we’ll use the 1/4″ spacers, but at certain grout lines when matching up tile lines, it’ll be a little bit bigger than 1/4″. It’s ok, once grouted it will blend together, and you shouldn’t notice it unless you look close.
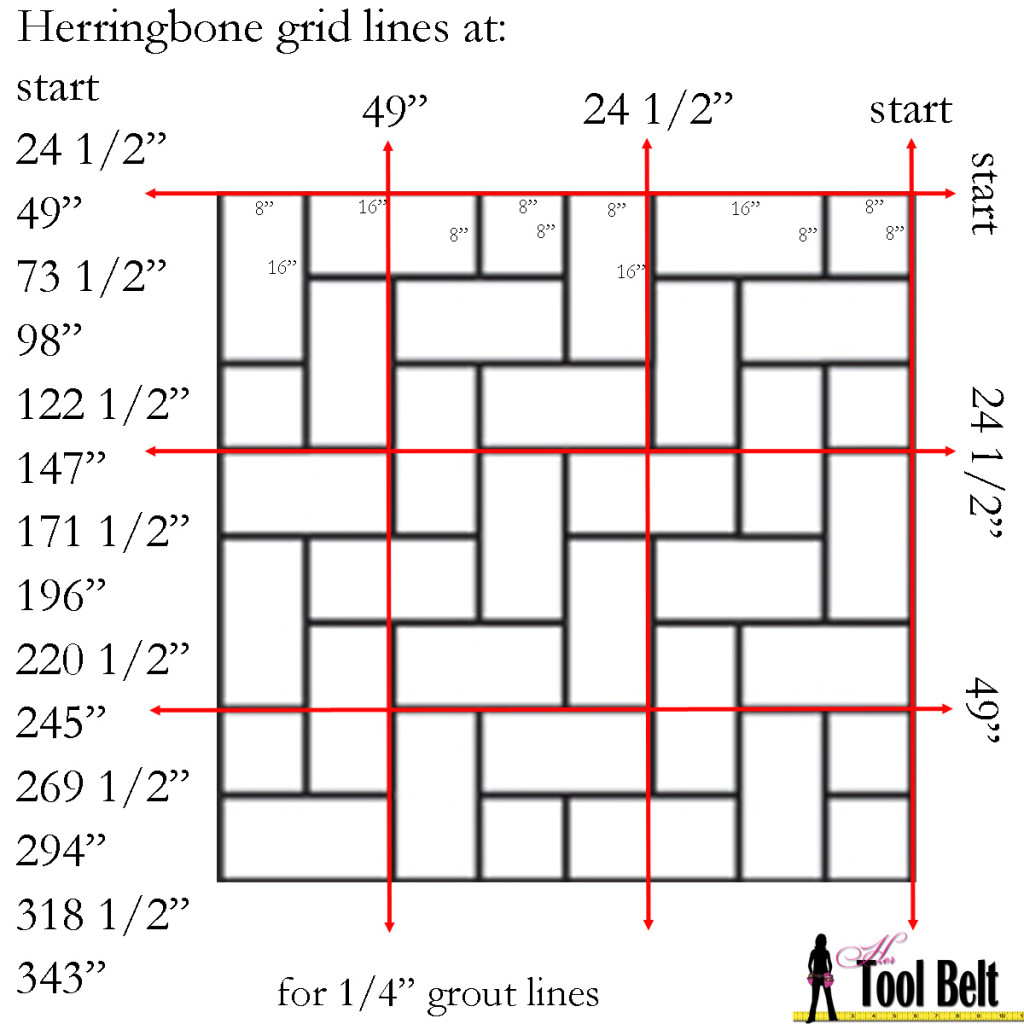
Also if you want to have your herringbone diagonal points run a certain direction, put your guidelines on a diagonal.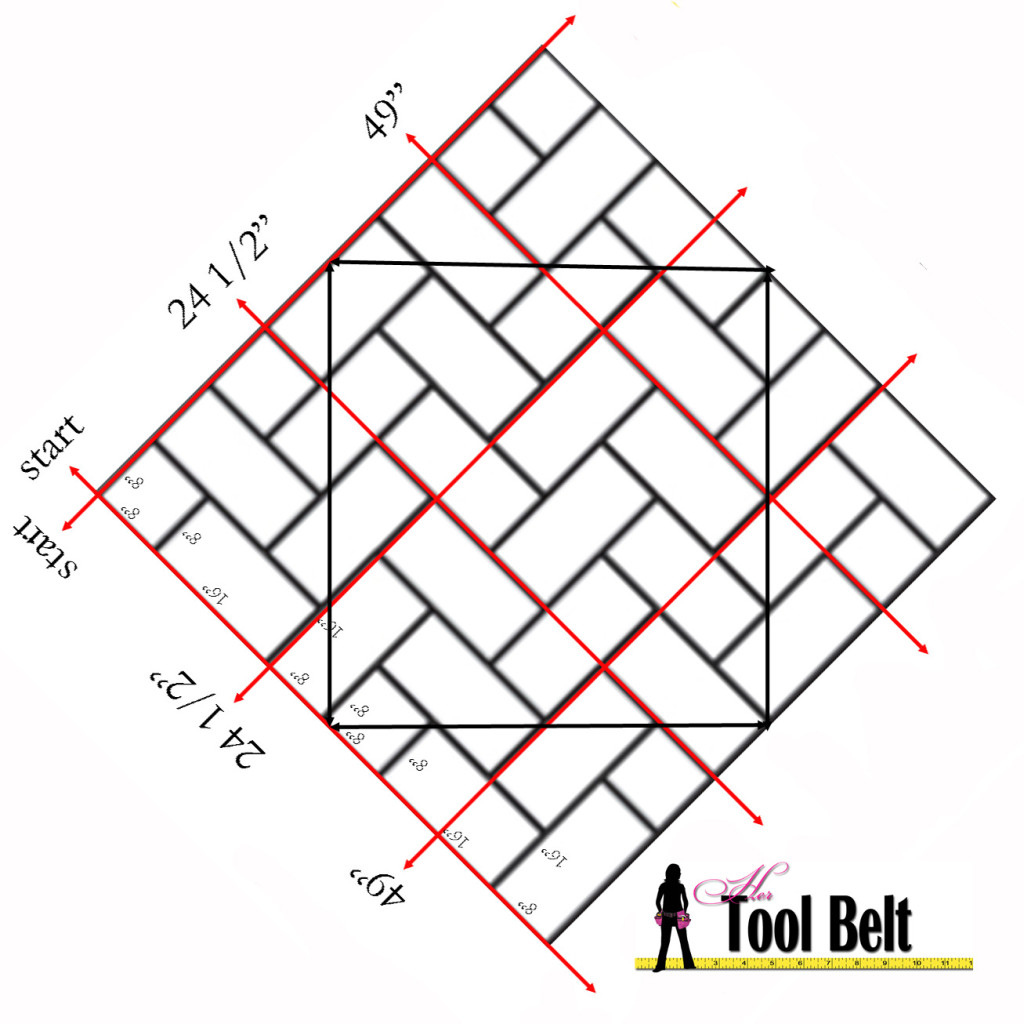
If you want to, dryfit a section of your tile pattern to see how it will fit together.

Look over your cement board floor, scrape any high spots left from the thinset and joint tape. Sweep and clean up dust and dirt on your floor.
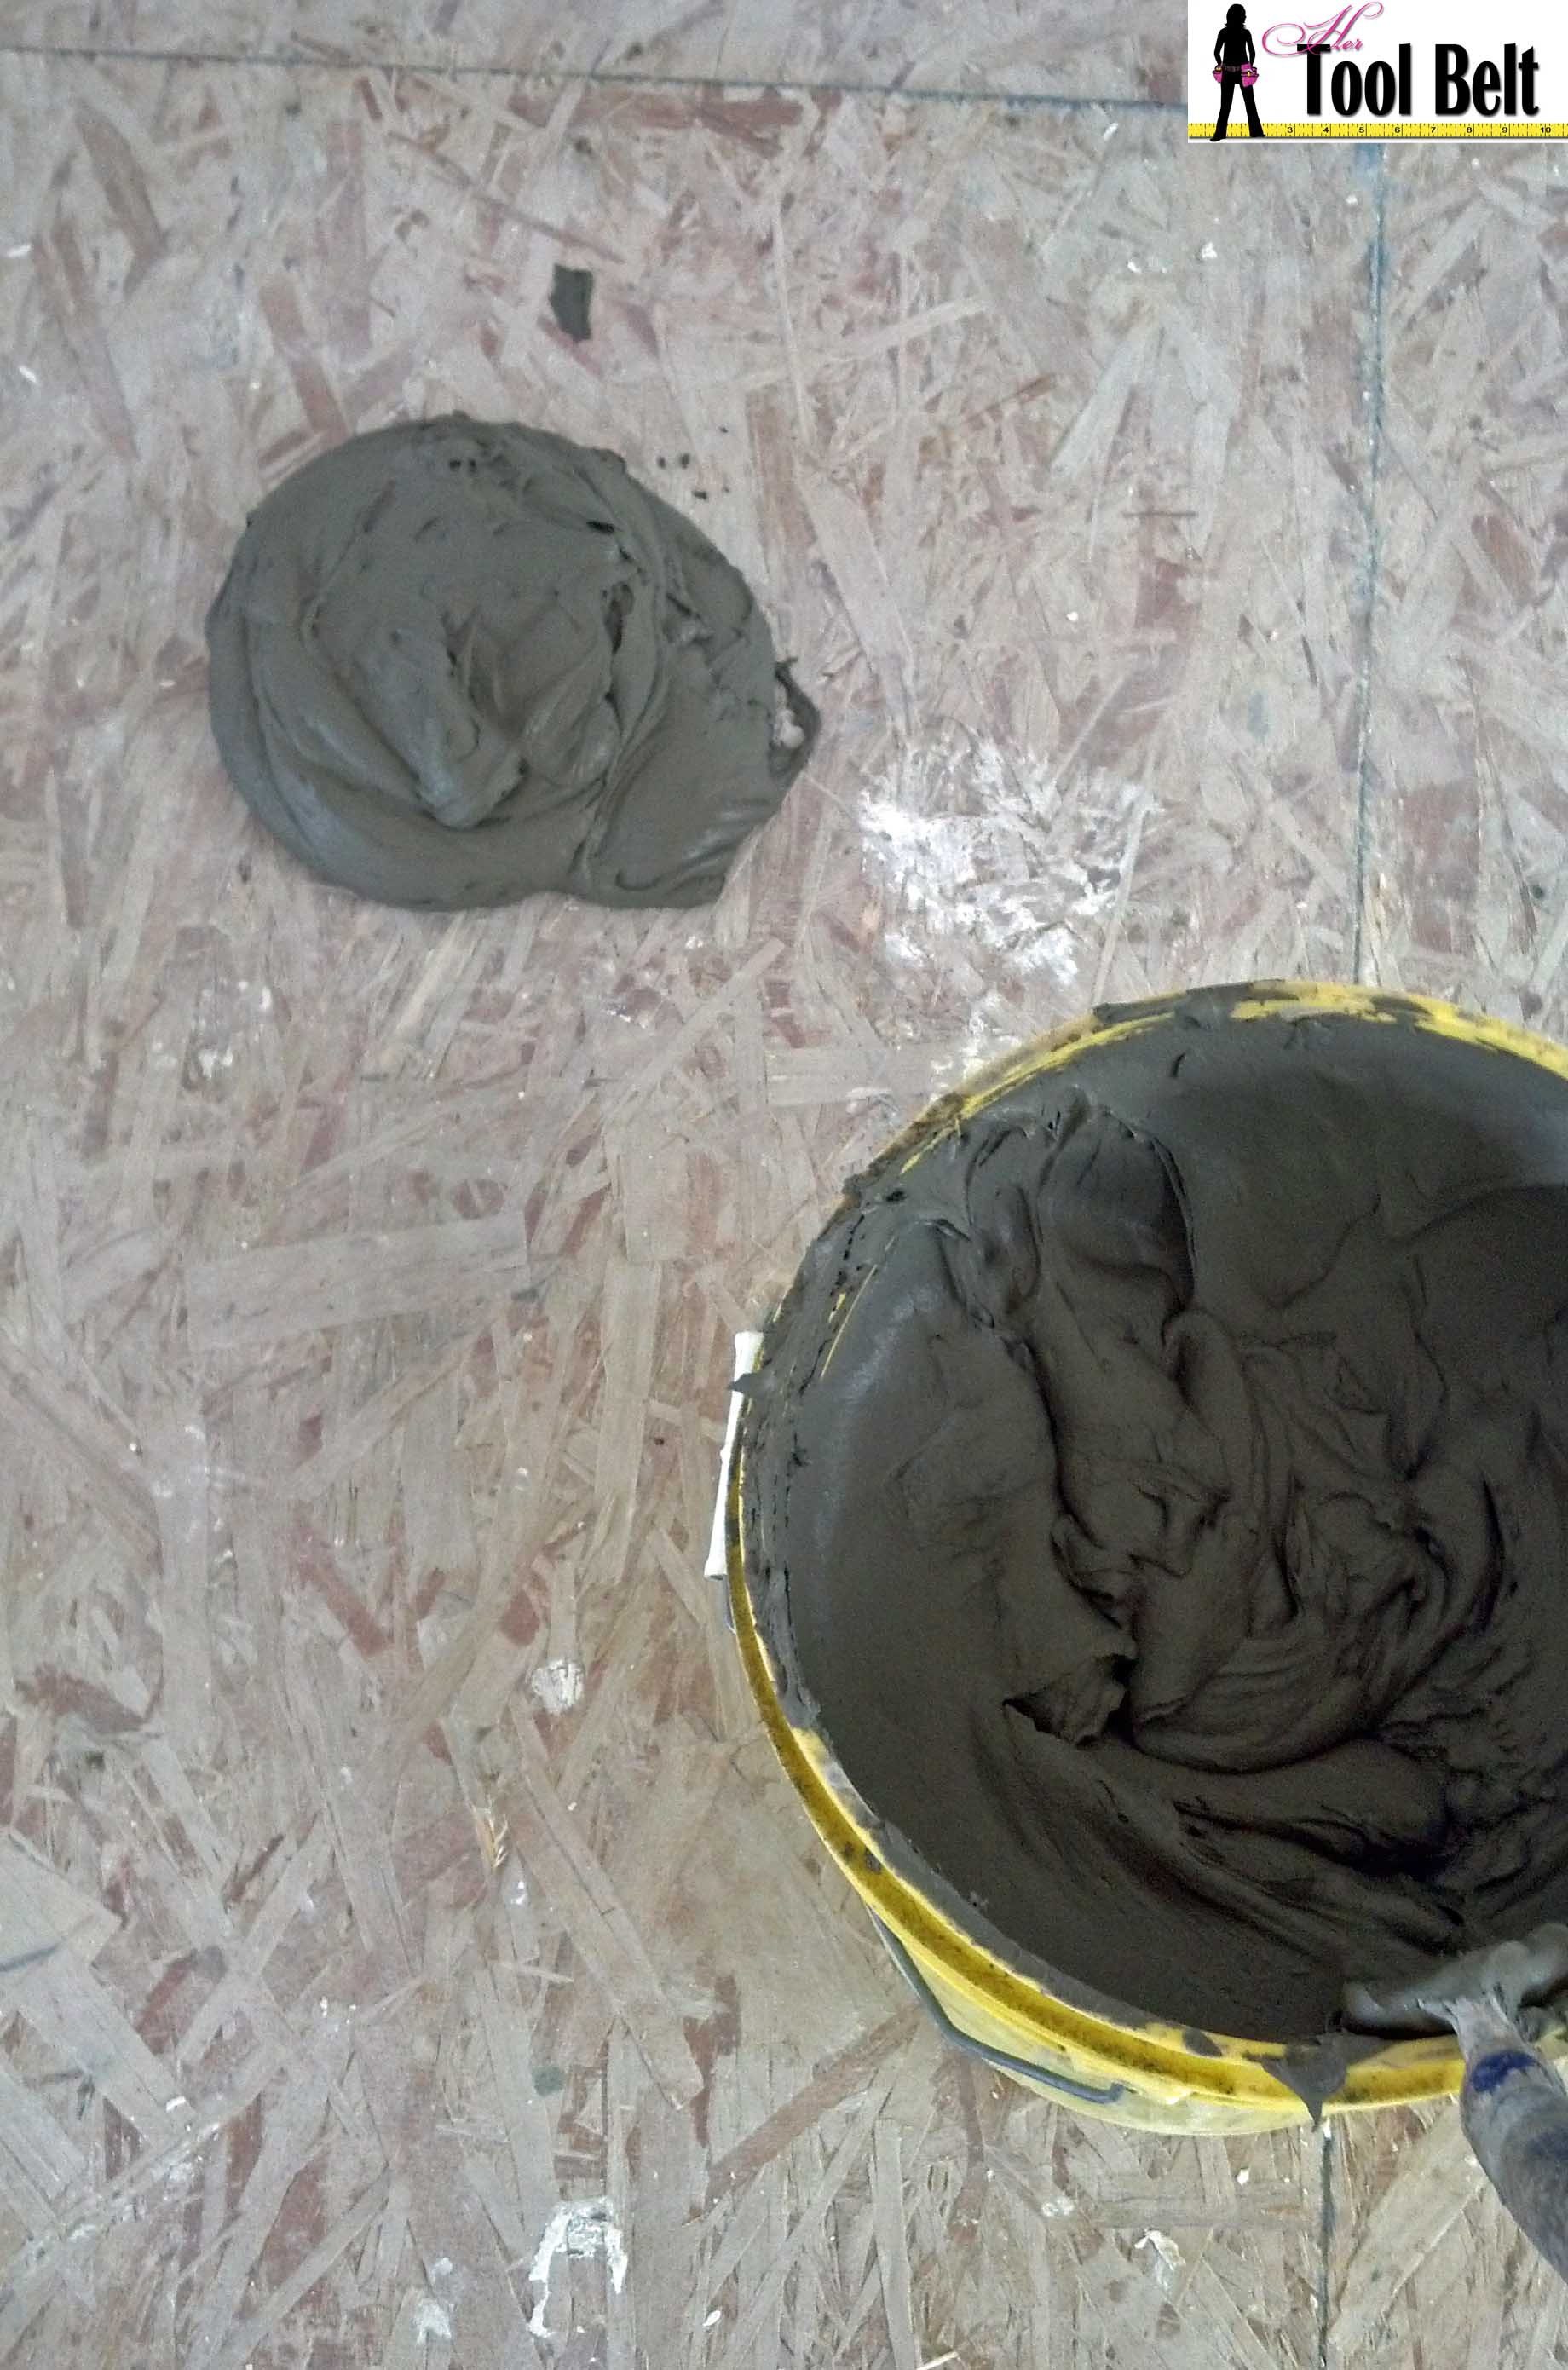
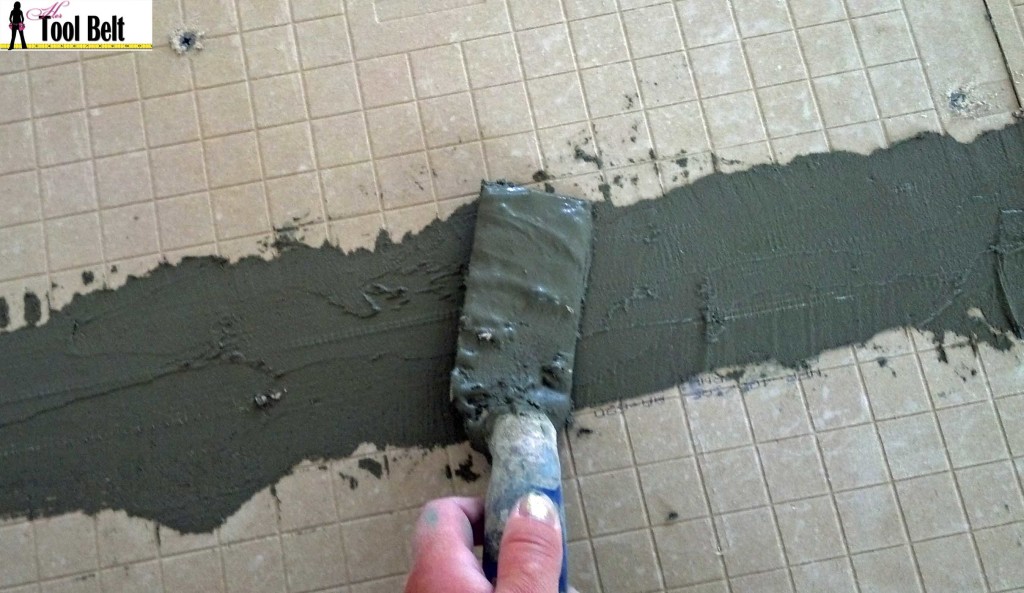
Mix a batch of thinset according to the instructions on the bag. I like to use the Mapei brand of thinset. They sell it at Lowe’s and many tile supply stores. Thinset comes in gray and white. The gray thinset could possible dye your tiles, so if that is a concern then buy the white thinset. The white is a going to be dollar or two more per bag.
Spread the thinset with a 1/4″x3/8″x1/4″ trowel within a grid space. Begin setting the travertine tiles in the pattern. If your travertine tiles are very holey on the backside, it will be easier to keep your tiles level by filling the holes with a very thin coat of thinset. When setting tiles against walls, leave a small joint, make sure the gap is not bigger than the molding that will go on the wall.

Check to see that your tiles are level.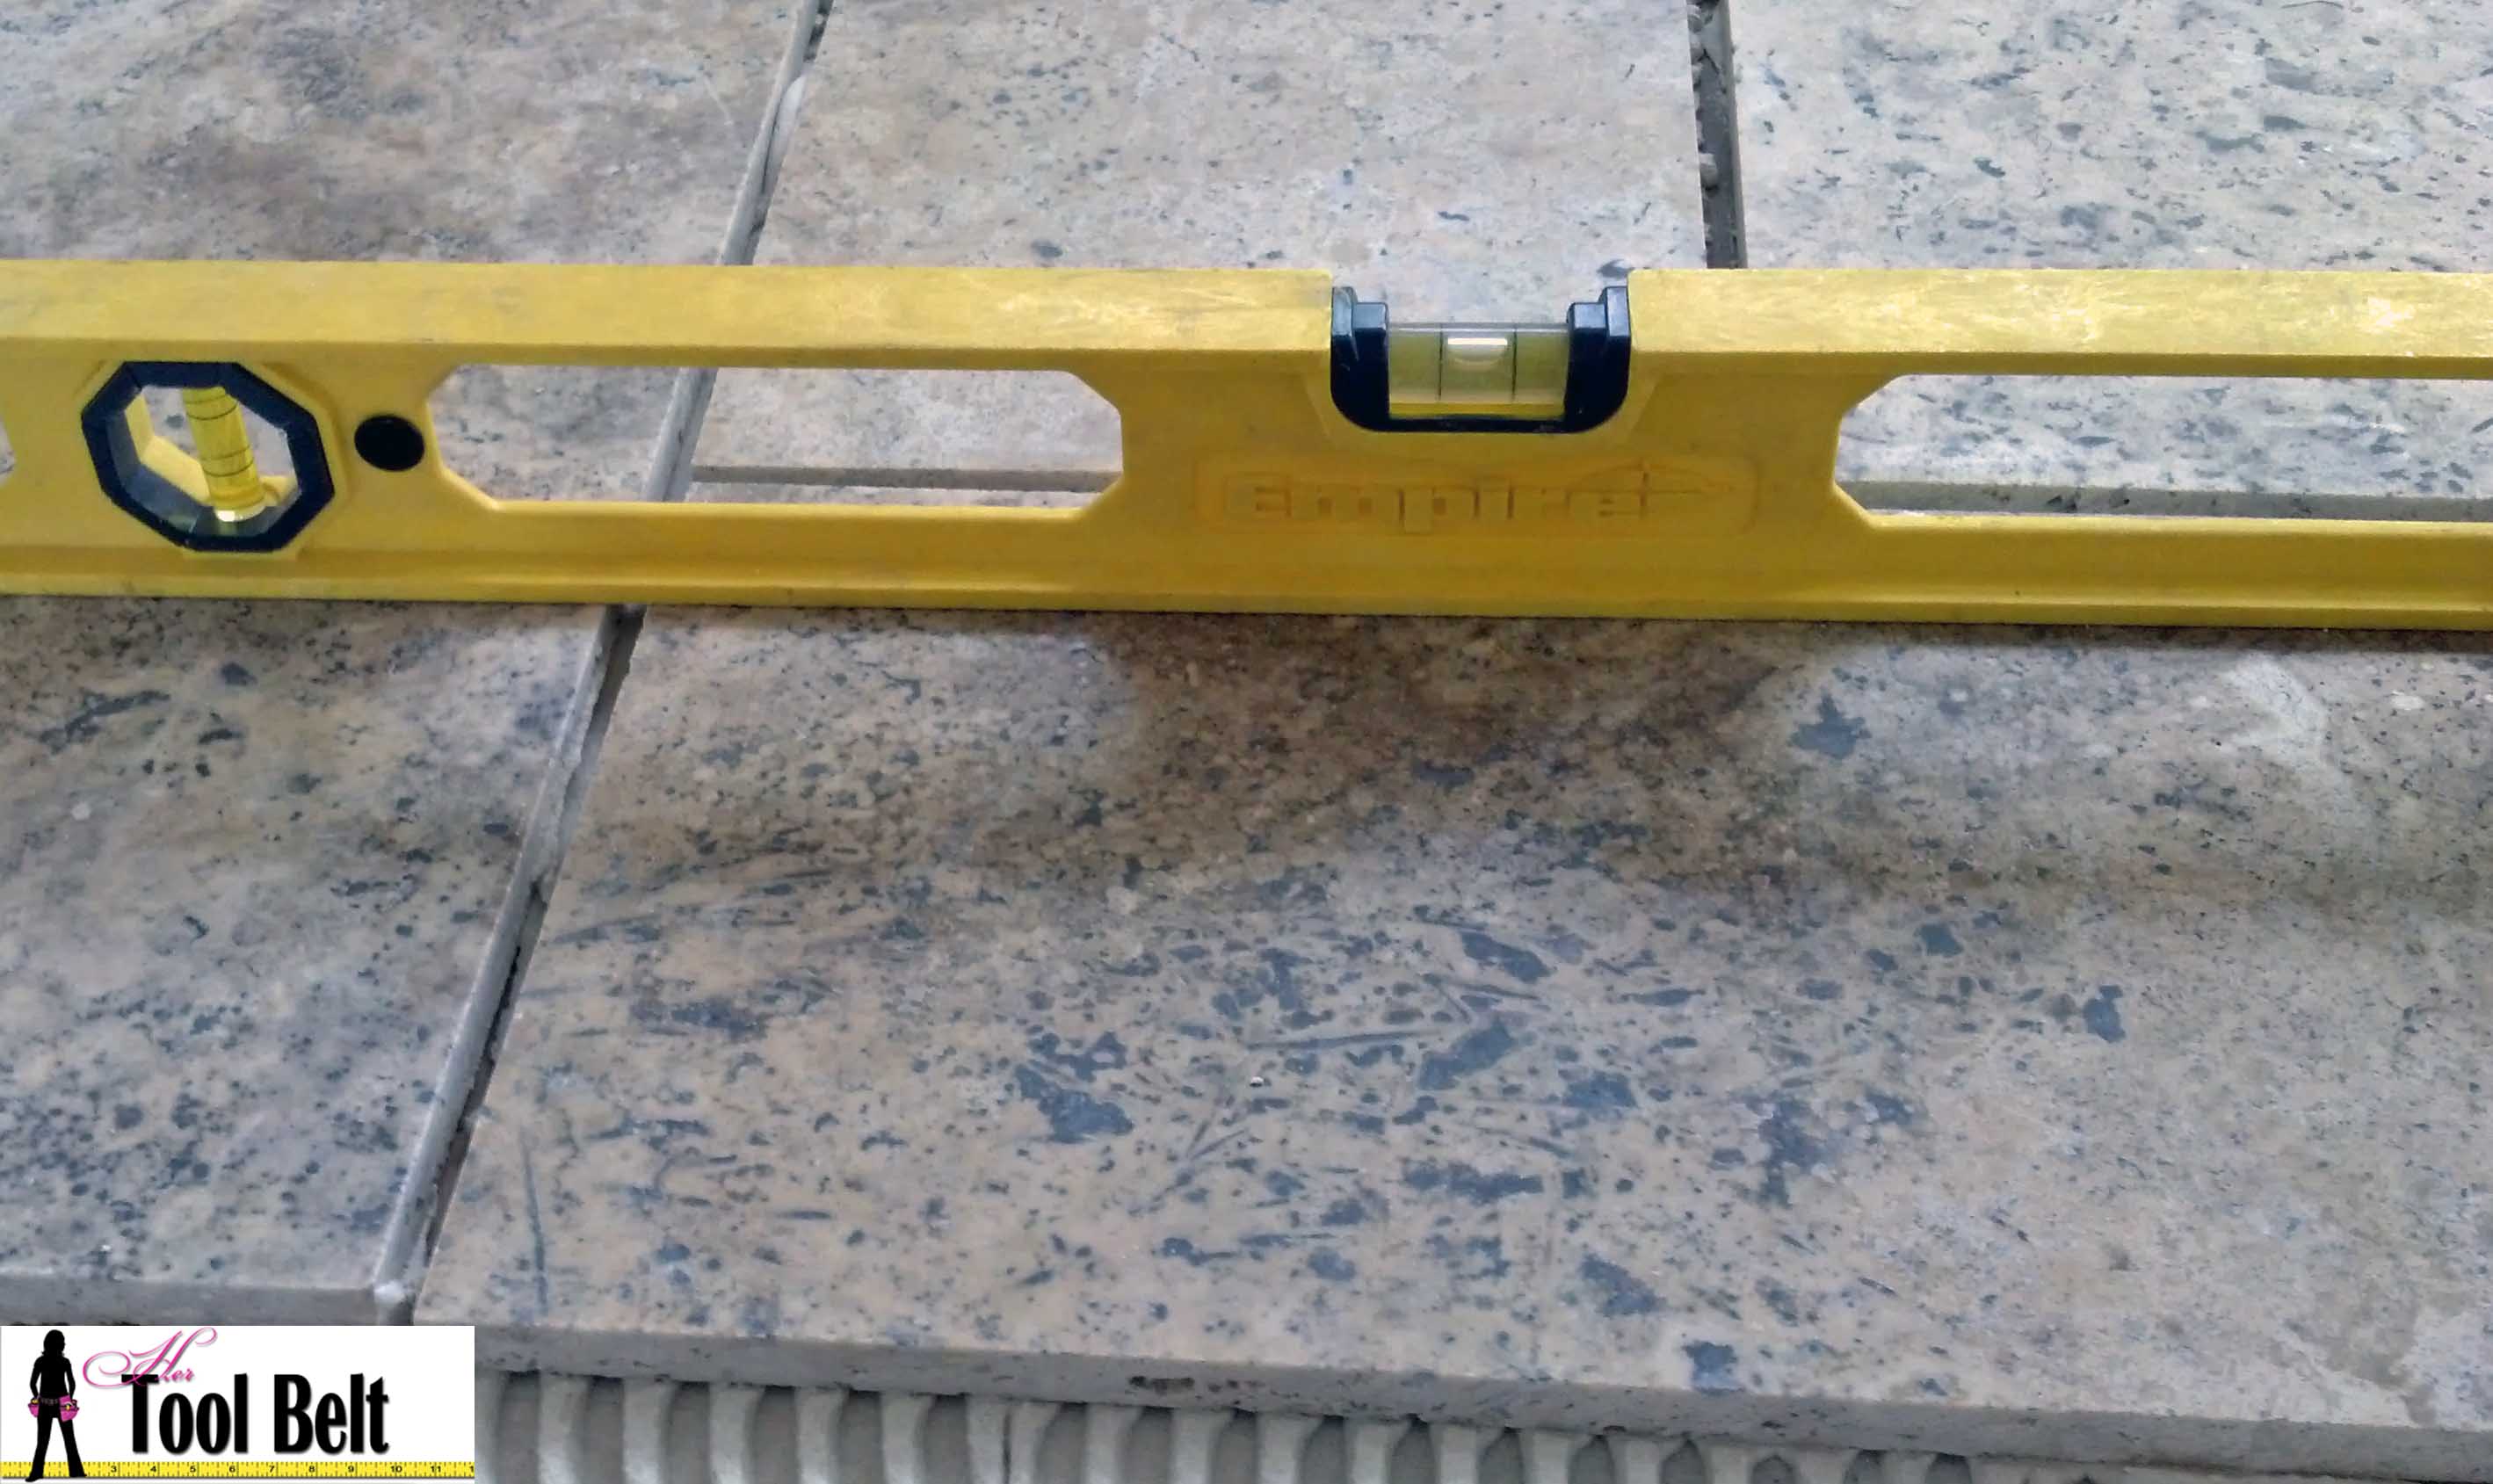
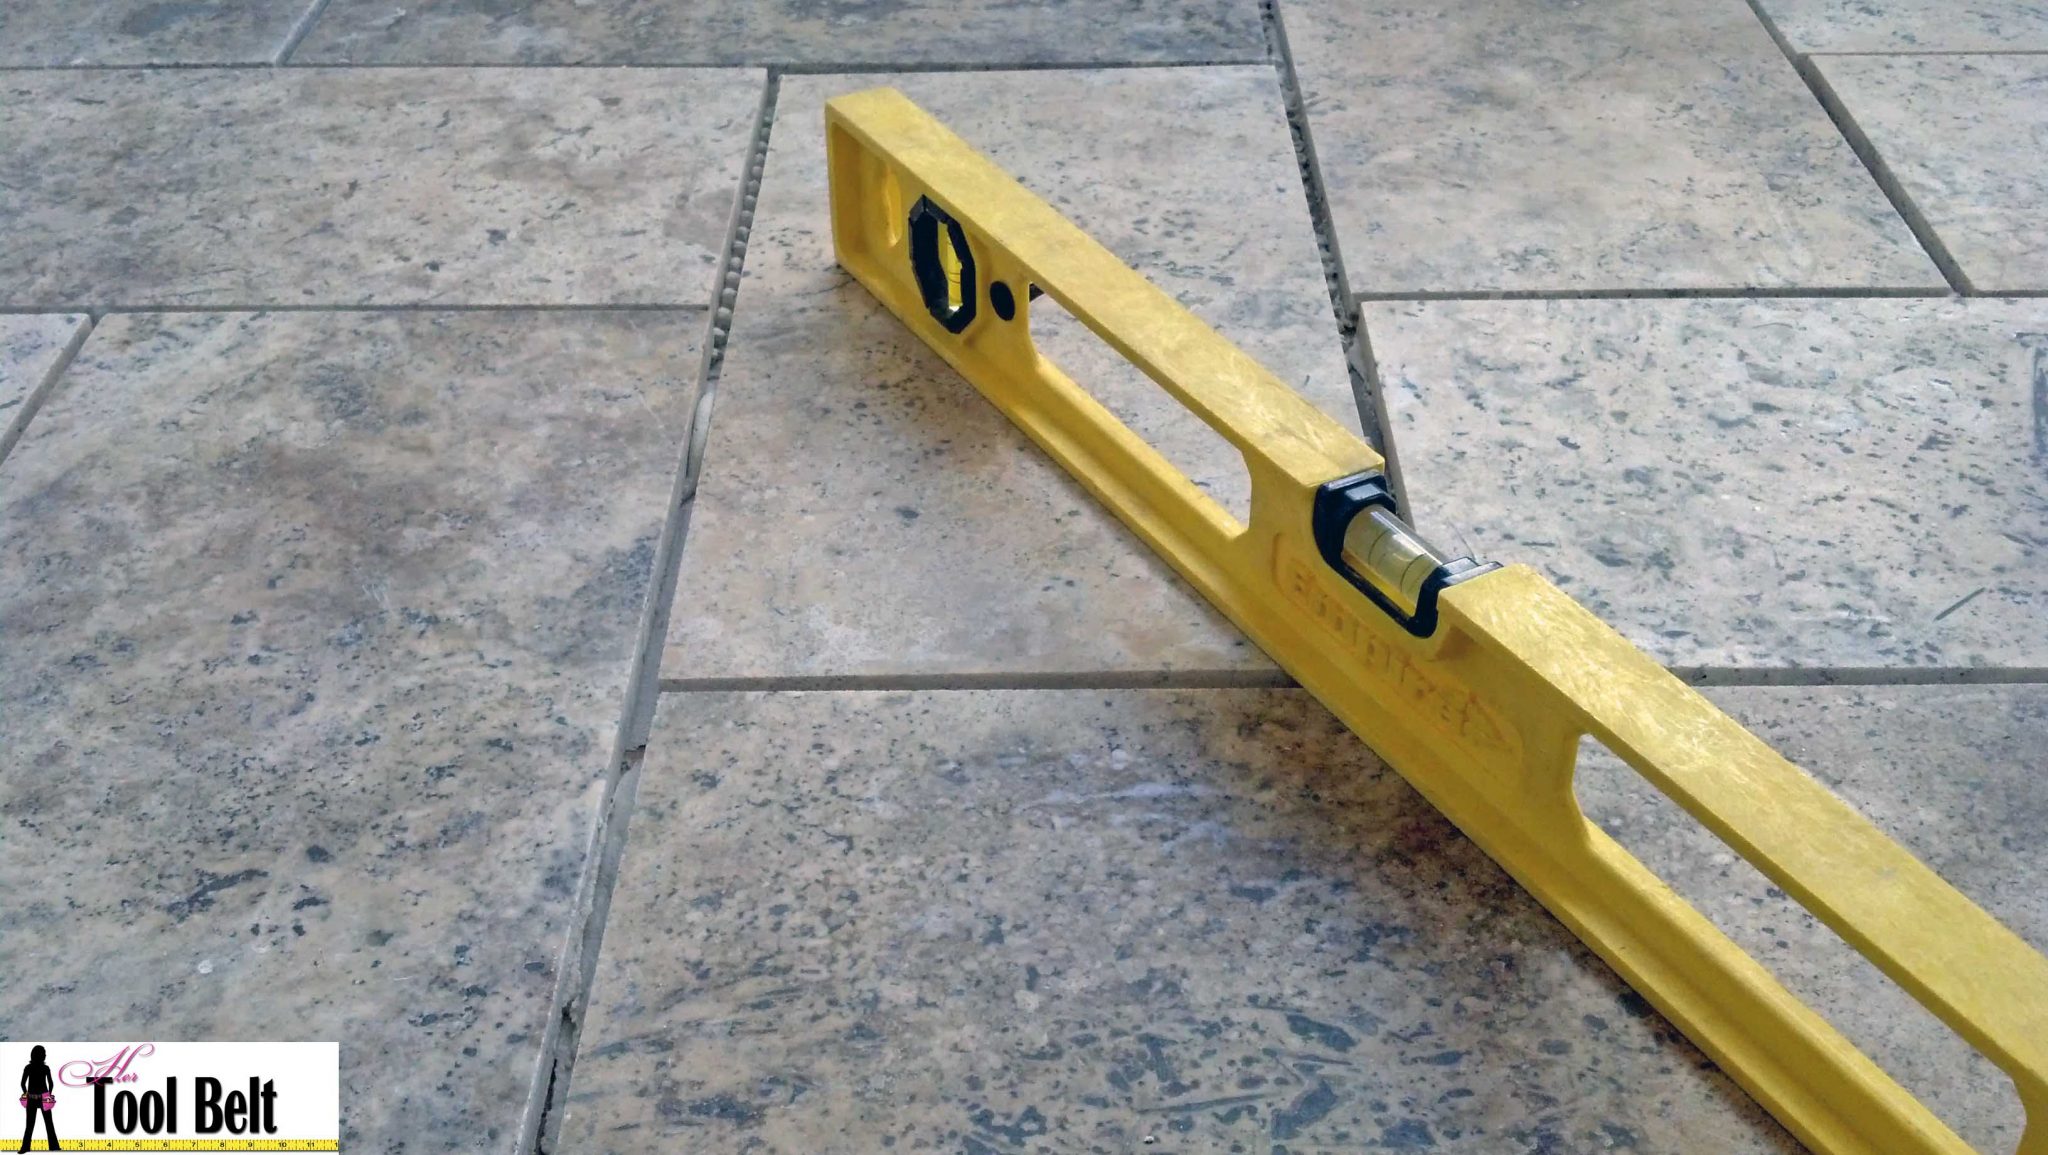
If you have a dipping edge that you can’t get level, sometimes you can lift the edge with your spatula and put a glob of thinset on it, and lay the tile back down and level it.
Continue laying the tiles in the herringbone pattern. As you lay the tiles, your thinset may start getting dry. The thinset it too dry when you lay the tile on the troweled thinset and lift it up, if the thinset doesn’t leave lines and adhere to the tile bottom don’t continue to use it. Make a new batch.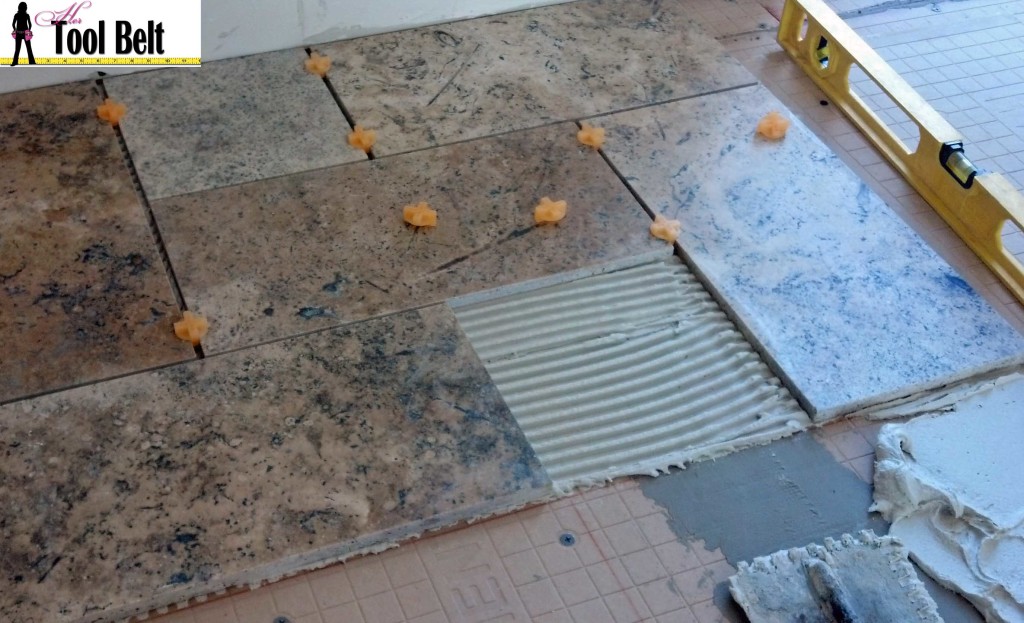
As you go along, and if I have time, I like to save my wall edges and vent/toilet holes until after the main floor is dry. That way I’m not letting my thinset get to dry while I’m making the edge cuts. However you’ll have to wait a couple of days to walk on the drying tiles.
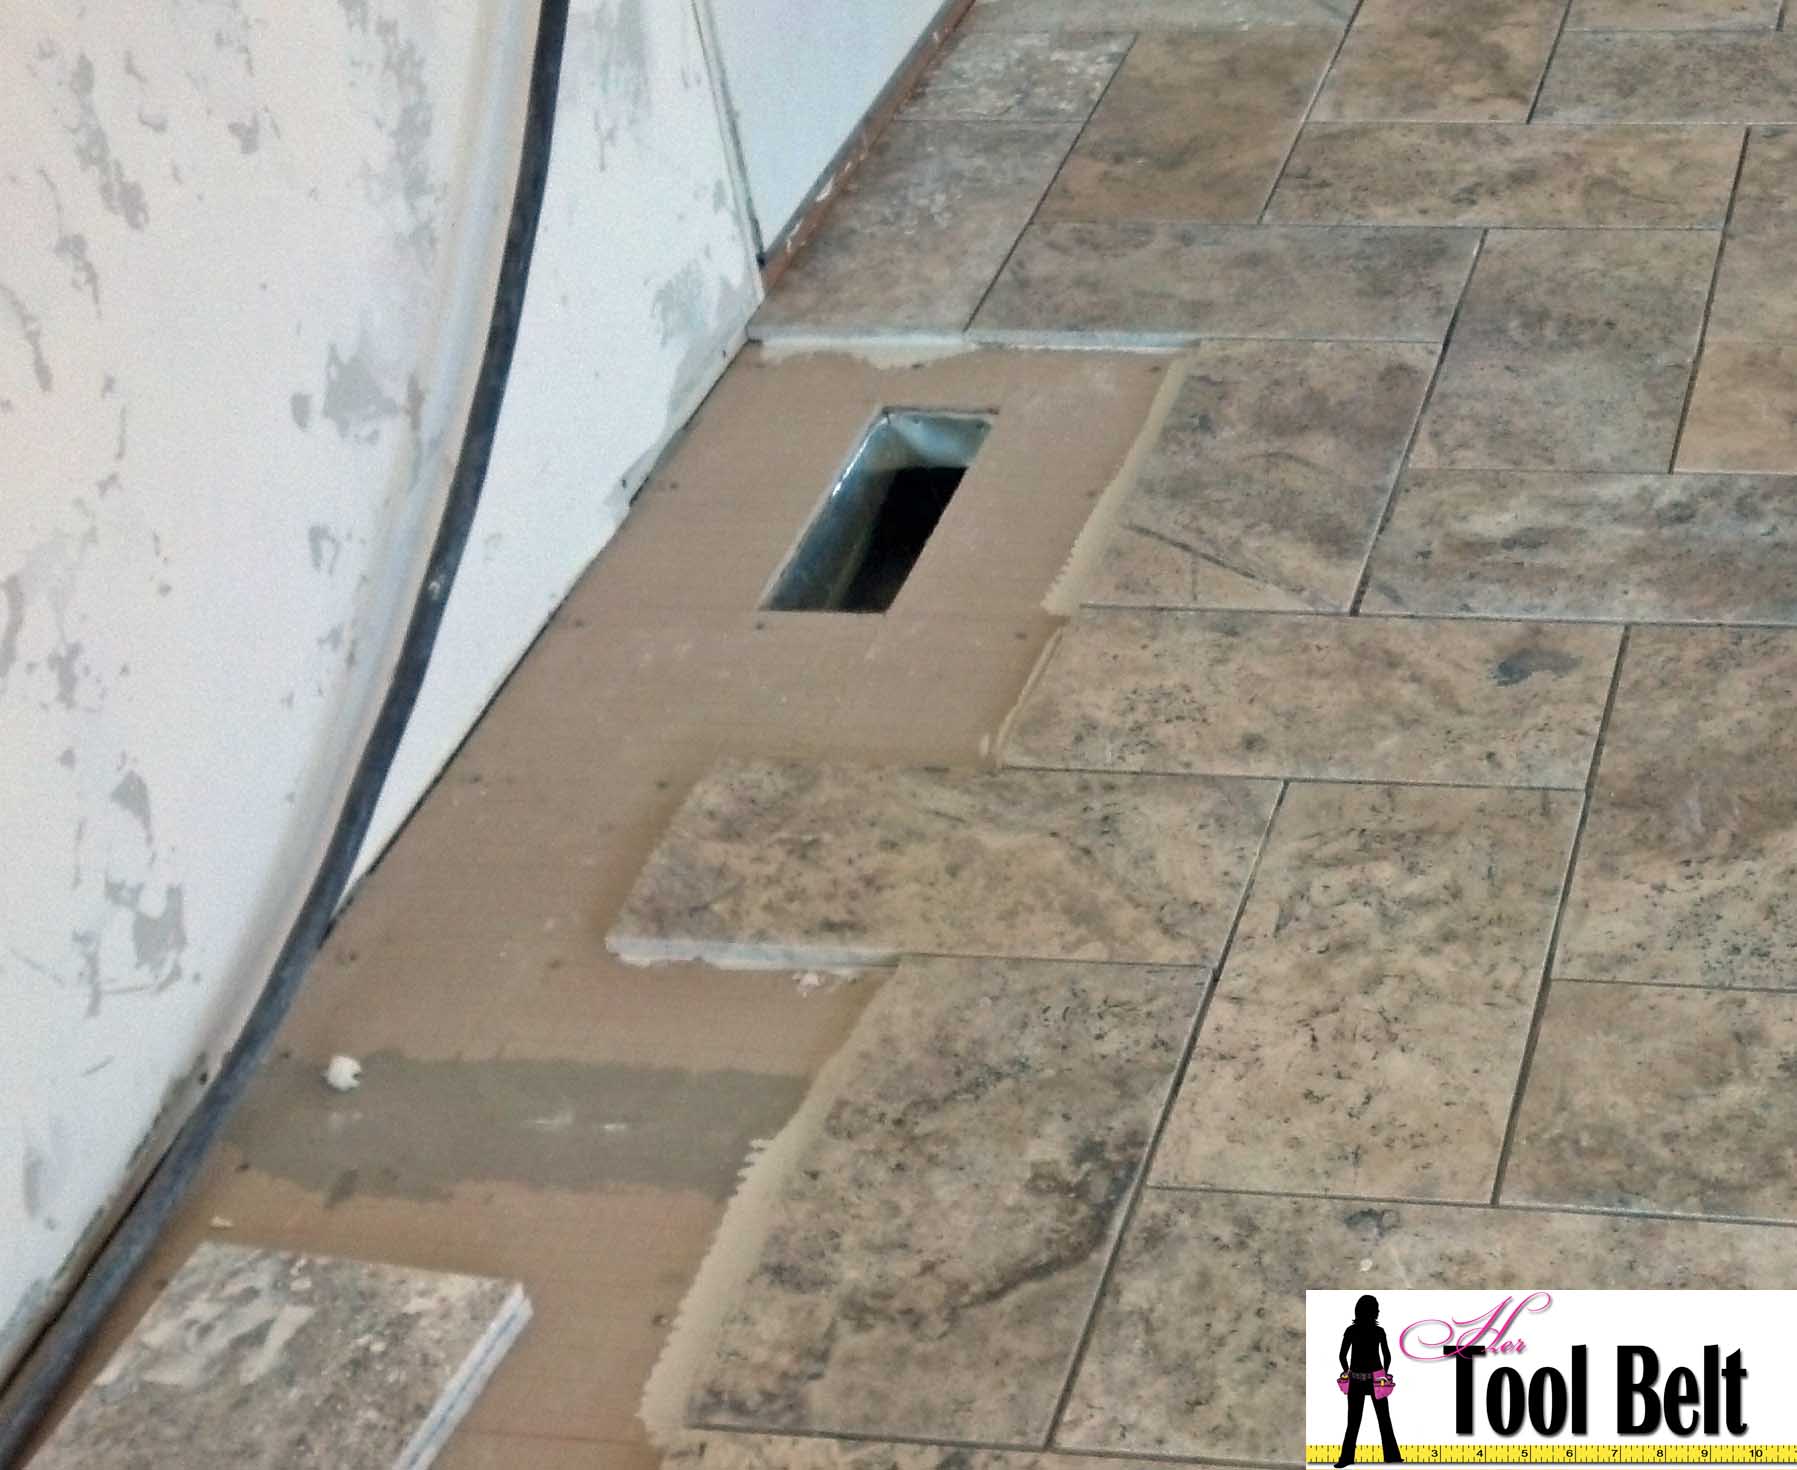
When you are ready to cut holes for vents/toilets etc, there are a few ways to get’er done. If you don’t have to cut the hole inside of a whole tile, you can make multiple cuts (fingers) within the area that needs to be cutout. (this is for 1/2 of a vent hole)
Knock the ‘fingers’ off and they will generally break at the line that each of the cut stopped at. File down the rough edges.
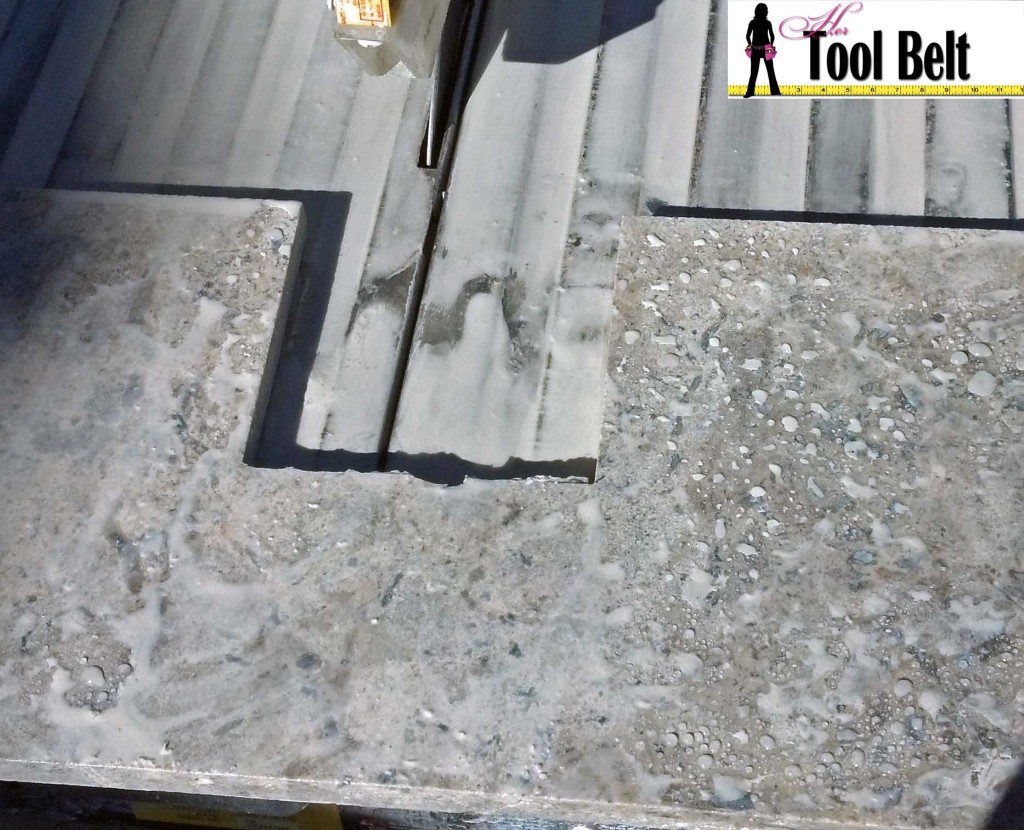
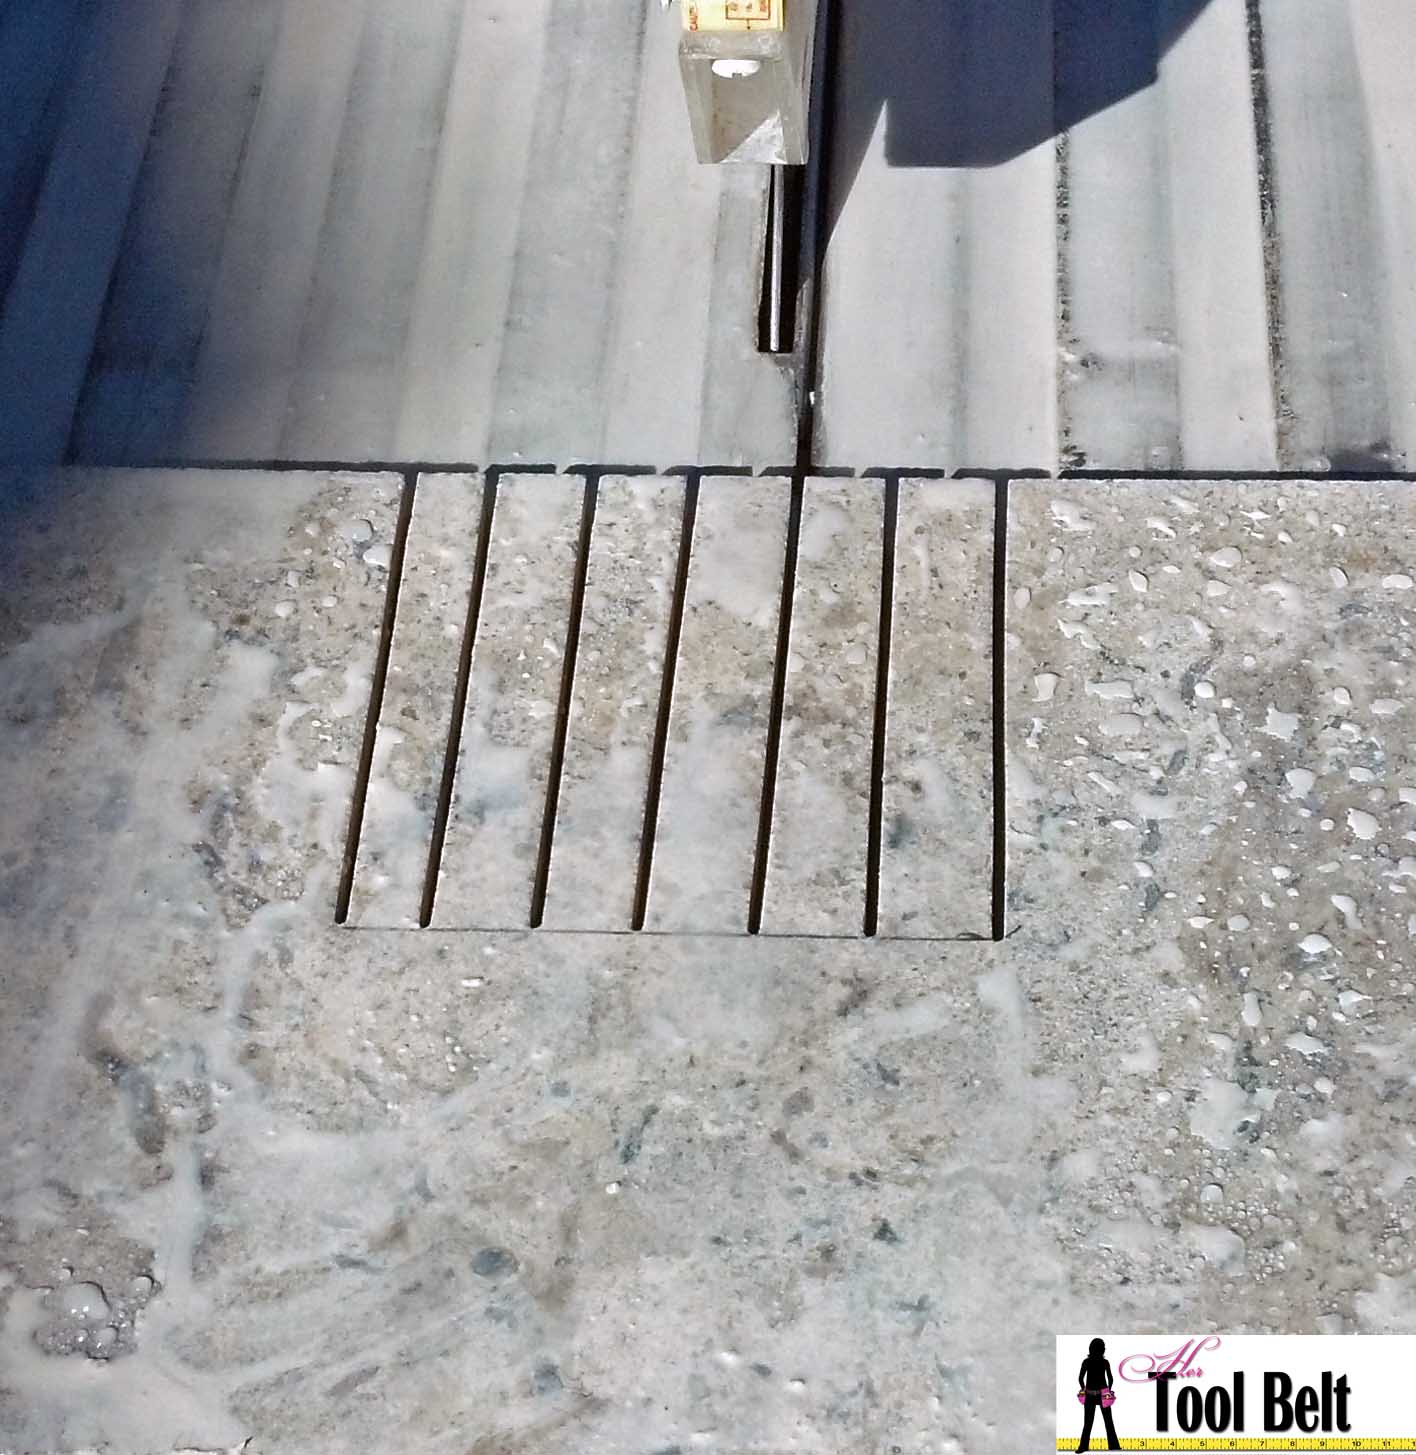
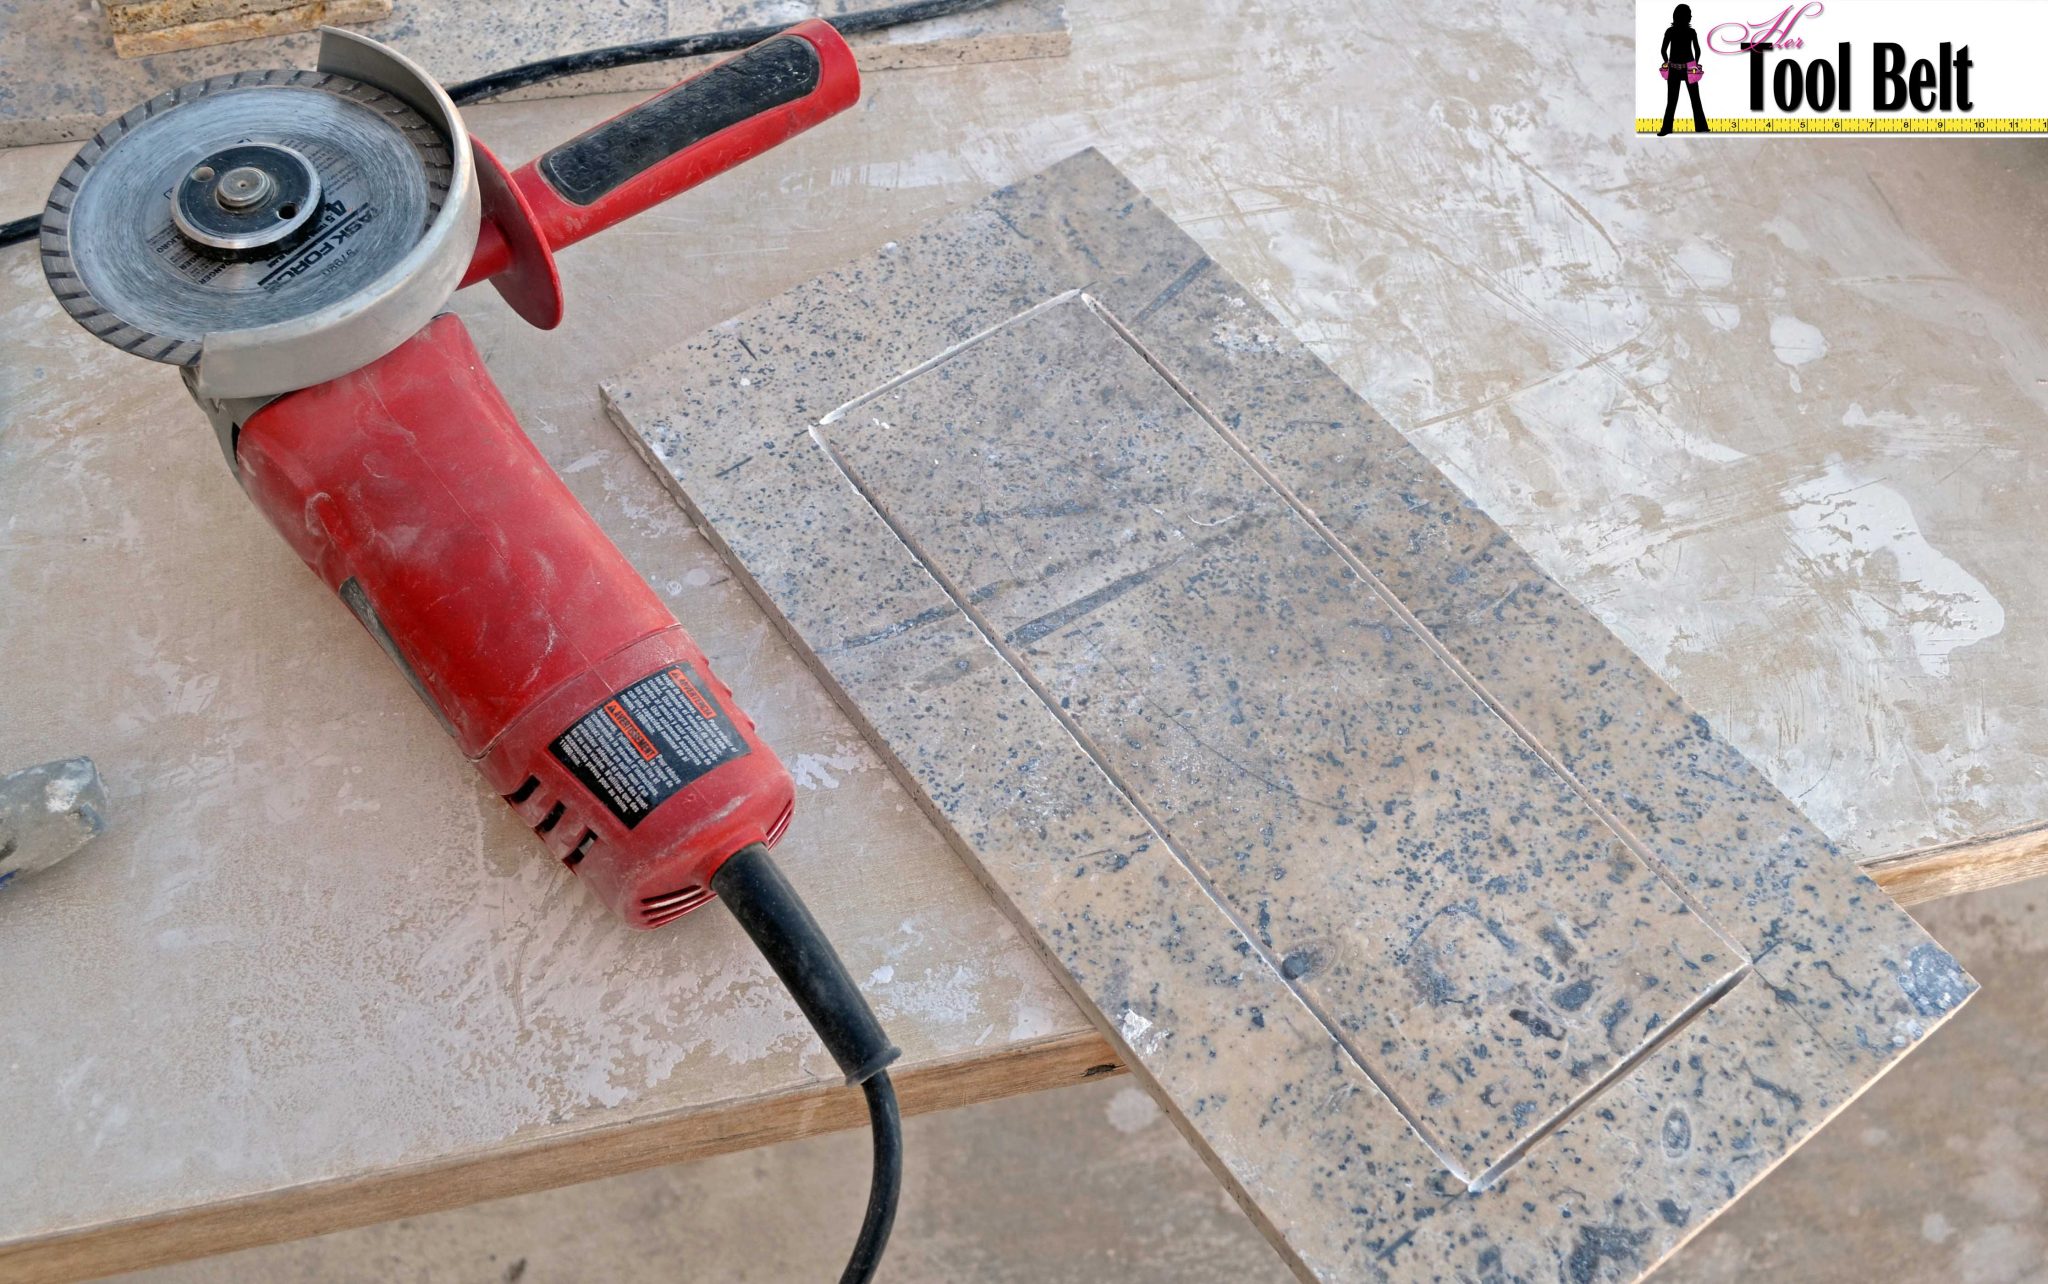
Another option to make a hole cut is with a hand-held grinder and a tile saw blade. Make sure you are wearing safety glasses. This method generally will make nice clean edges.
As you finish your tile, you’ll see the beautiful herringbone pattern and all of this hard labor will be totally worth it. Let the tiles dry/cure for 2 days. Then it’s time to grout.
Grouting is fairly simple. We used Polyblend Linen sanded grout from Home Depot. The general rule of thumb for grout is lines larger than 1/8″ use sanded grout and lines 1/8″ and smaller use unsanded grout. To me, the sanded grout seems to be a little easier to use/spread than unsanded, unsanded seems gooey. Mix the grout according to the instructions on the bag. However I like to do smaller batches of grout, like 1/4 of the bag at a time. When mixed the grout is a pasty texture. Use your spatula or a rubber float and pack the grout into your grout lines between the tiles. The grout bag shows smearing the grout over the whole tile. I don’t do that on big tiles, because it just wastes the grout. Fill the grout line very full of grout. Let the grout lines dry for a while 30 min to 1 hr. Then with your extra large orange grout sponge and a bucket or large bowl of clean water, wipe up the excess grout. Keep wiping until the grout is at the height that you prefer, generally just below the top of the tile. Change your water often and wipe all of the residue from the grout off of the tile. Let the tiles dry for a couple of days. Clean the tiles again really well with water and a sponge. Let the water dry and reapply the natural stone and grout sealer according to the instructions on the bottle.
Once your base molding, cabinets, toilets, etc have been installed. Run a bead of caulking around the room wherever anything permanent (molding, cabinets, etc) is to give is a finished look. The caulking also keeps dirt, mop water, etc out of places that you don’t want it to go.
Now you can spend hours admiring the gorgeous floor that YOU laid and saved thousands of dollars DIY’ing.
Disclaimer: I’m not a professional tile setter, but I’ve done my fair share of tiling. These tips and tricks are what I’ve found work best for me. Always go by the manufacturers directions.
Wow, look at you! You are amazing. It looks great.
You’re a miracle worker Amy!!! Thanks for all the step by step info. Now I can do it myself 🙂