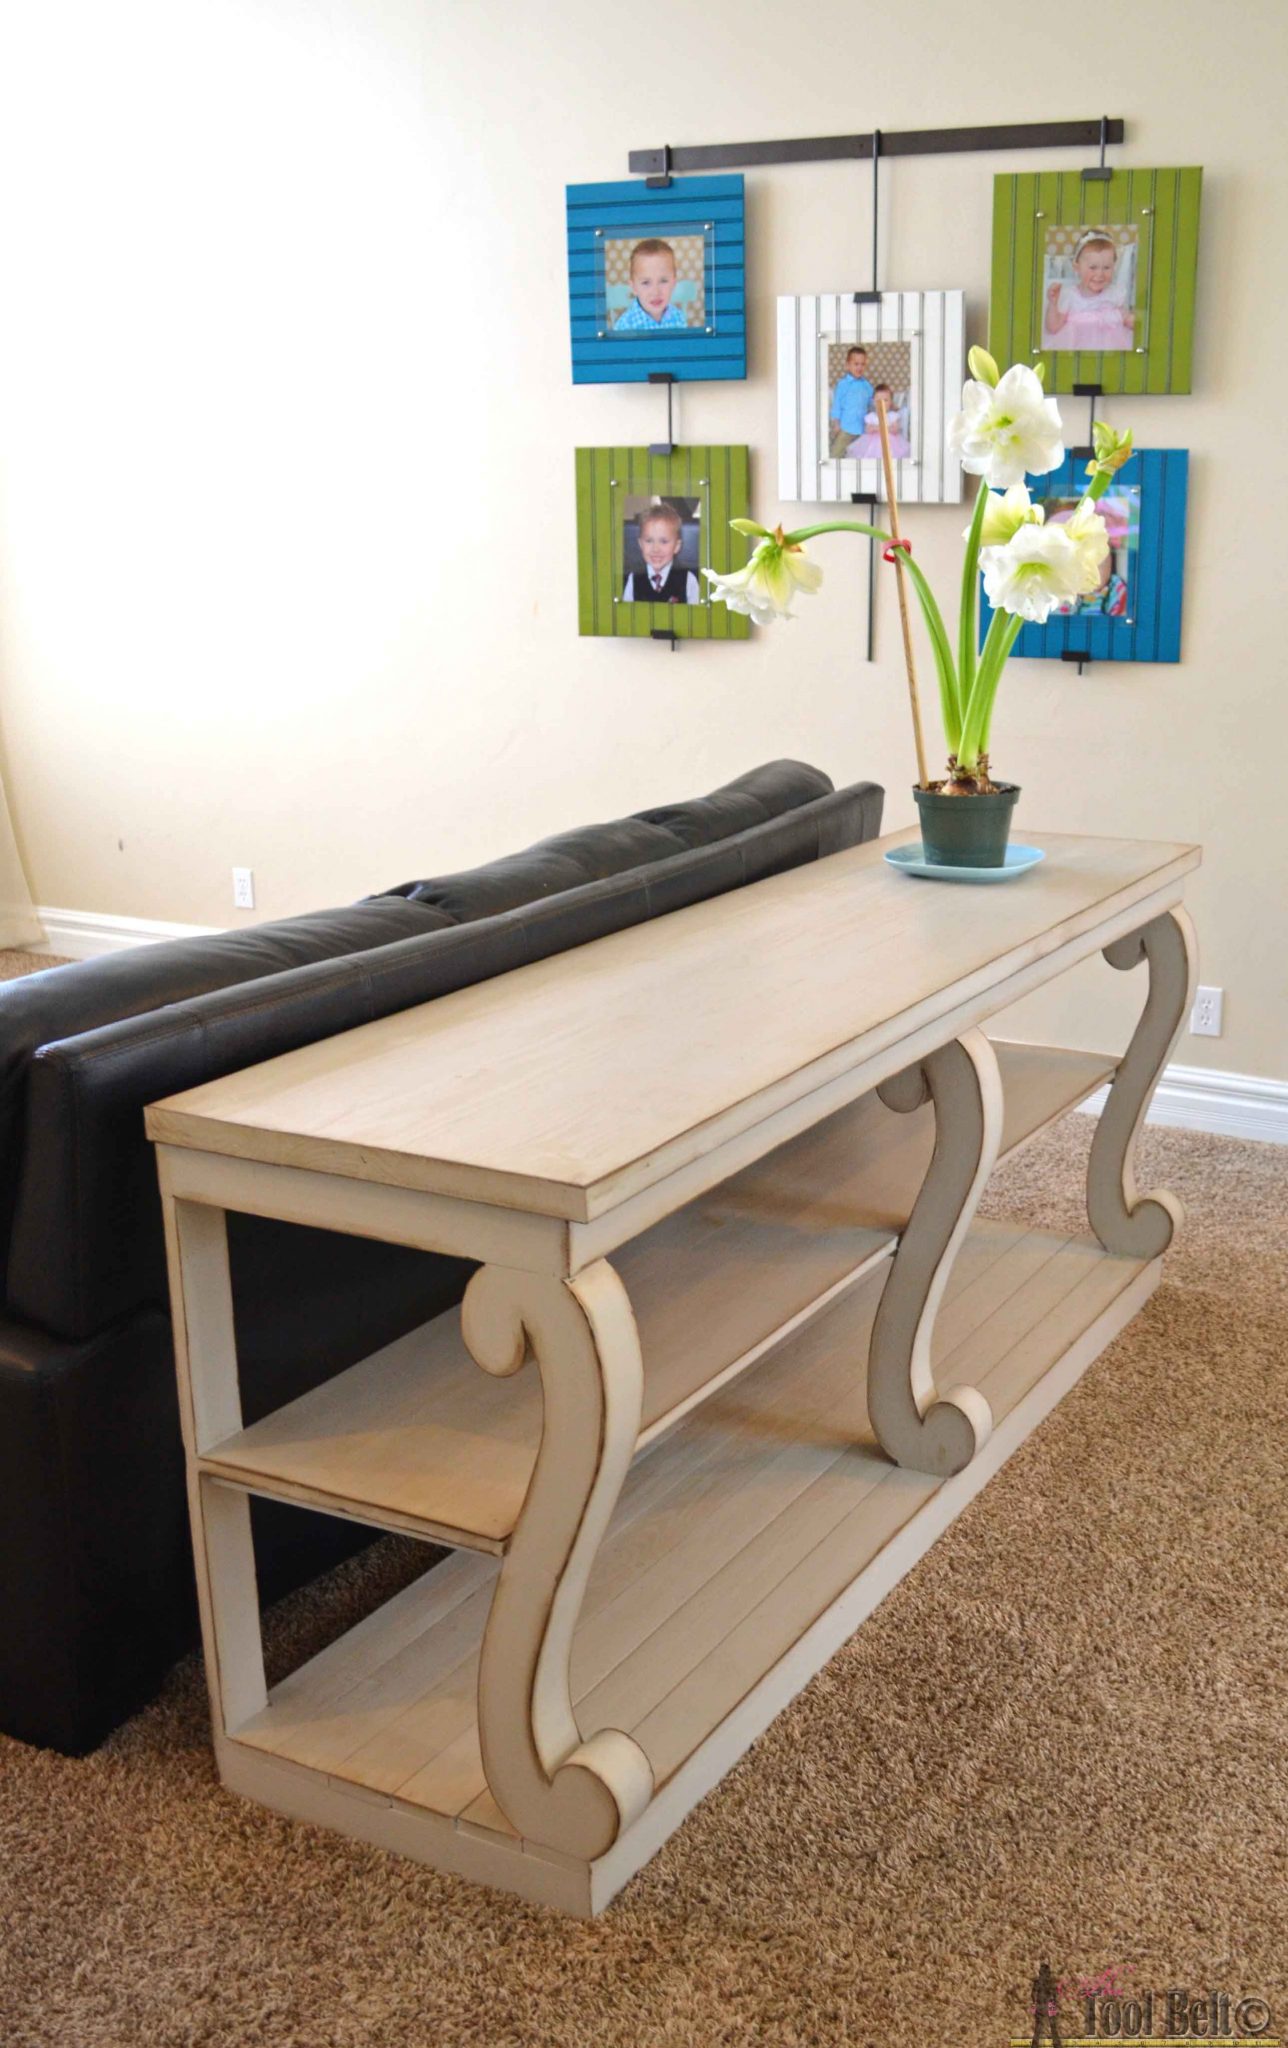
I have enjoyed having these simple bead board frames. They are so easy to interchange an 8×10 photo, and it doesn’t matter whether the photo is landscape or portrait. Here is the simple plan for this frame.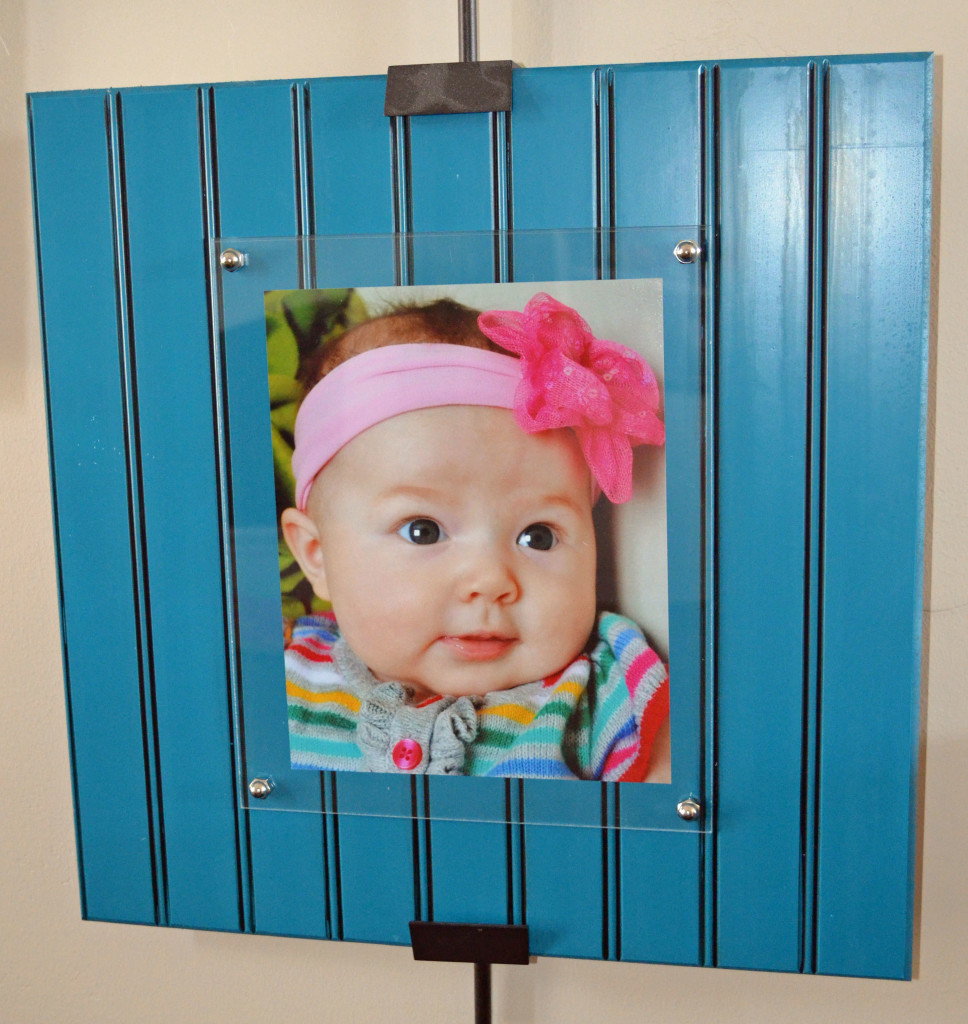
On the Pottery Barn Wall Easel System
Scroll leg console table – free plans
Materials Needed:
- Sheet of bead board
- Sheet of .093” thick acrylic sheet (plexiglass)
- 4 x ¼-20 x 5/8” long bolts
- 4 x ¼-20 acorn nuts
- Spray paint
- Antiquing glaze
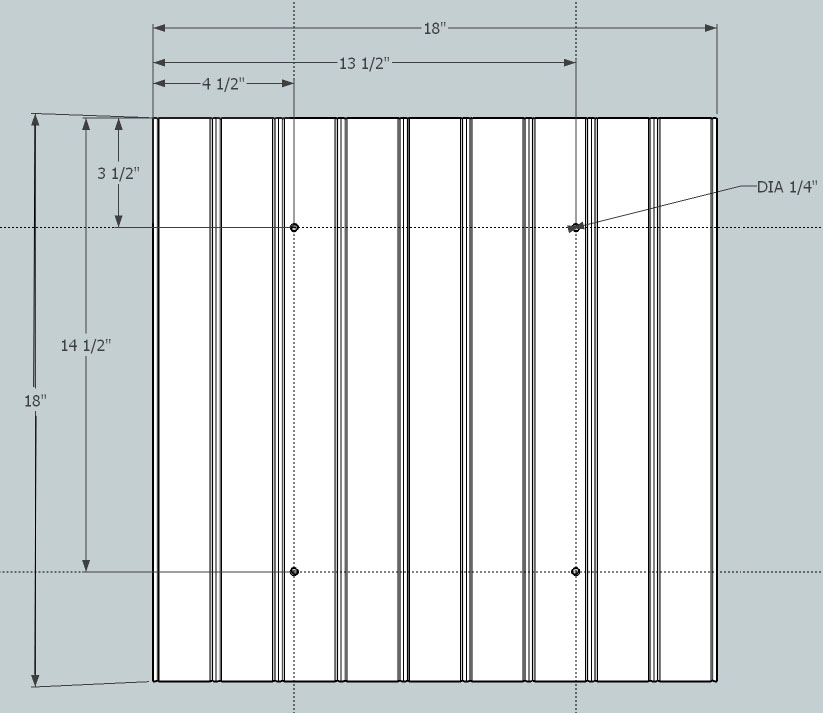
Cut List:
- 18” x 18” bead board
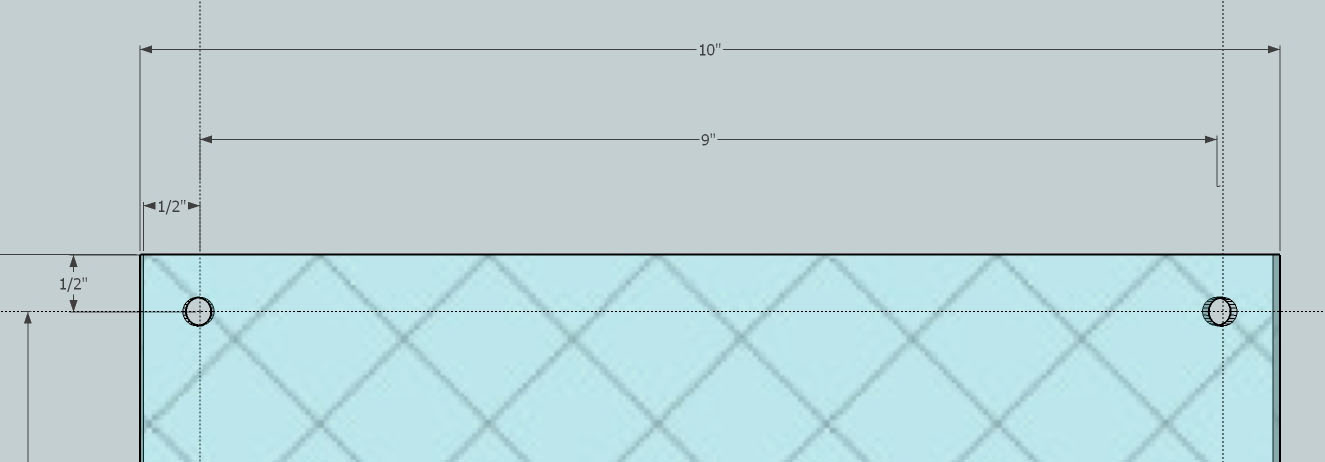
- 10” x 12” acrylic sheet
Instructions:
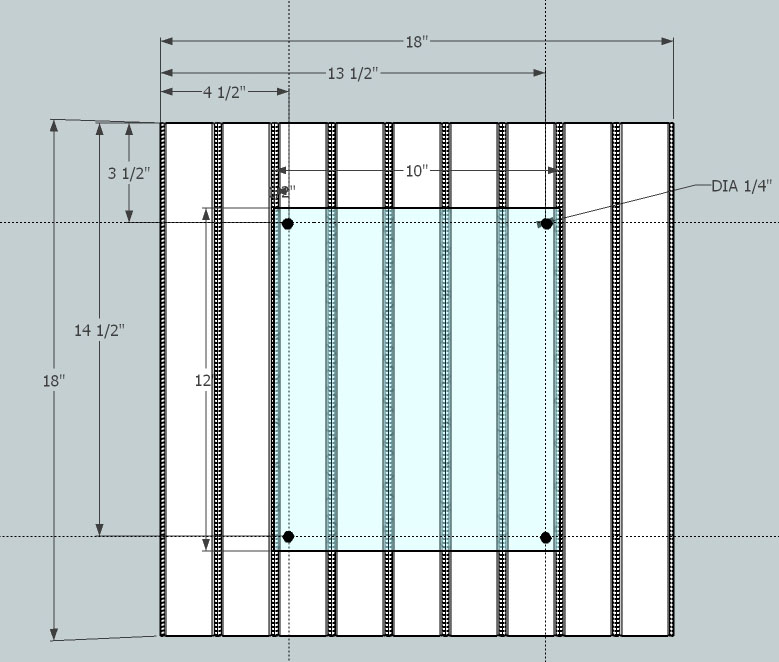
Cut a piece of bead board to 18” x 18”. If you have a router, route a ¼” bevel around the edge of the bead board. If you don’t have a router, you can round over the edge with a sander (or leave it if you’d like). Pick a corner/edge to start all measurements from. Mark the locations for the holes. (See sketch) Drill 4 x ¼” holes.
Cut a piece of acrylic sheet to 10” x 12”. Note: I use a table saw to cut the acrylic. To minimize chipping, tape the cut zone with painters tape or similar. You can also sand the edges of the acrylic to smooth out small chips. Pick a corner/edge to start all measurements from. Mark the locations for the holes. (See sketch) Drill 4 x ¼” holes.

Dry fit the bead board and acrylic together to make sure the holes line up. If the holes are off slightly, drill the holes in the bead board large enough to fit the bolts through.
Prepare the bead board to be painted by removing as much dust/dirt as possible. Spray paint the bead board and allow to dry approx. 24 hrs. Using a sponge brush or similar, paint the antiquing glaze into all the grooves of the bead board. Use a damp paper towel/rag to wipe up excess glaze. Use a dry paper towel/rag to clean up the bead board and any water spots, leaving the glaze where you want it. Allow the glaze to dry.
Assemble the frame by putting the 4 bolts through the holes in the bead board (bolt heads in back). Sandwich an 8×10 photo between the bead board and acrylic. Hand tighten an acorn nut on each bolt.
Printer friendly version: Simple Bead Board Frame
I know this is an old post, so not sure if you will see it or not. I love the mounting hardware for this. I saw a few of them on the wall in the background of another post and was hoping to find out where you got it.
Thanks,
Zach
Hi Zach, I got it on Pottery Barn quite a few years ago. I think it was called a studio wall easel. http://www.potterybarn.com/products/studio-wall-easel/?pkey=e%7Cstudio%2Bwall%2Beasel%7C1%7Cbest%7C0%7C1%7C48%7C%7C1&cm_src=PRODUCTSEARCH||NoFacet-_-NoFacet-_-NoMerchRules