Hi, and welcome to the first day of the 12 Days of a DIY Christmas! I’ve teamed up with 11 builder friends to bring you 12 fun woodworking projects.

I’m excited to see what the others have up their sleeves, but I’ll have to contain my excitement for another day!
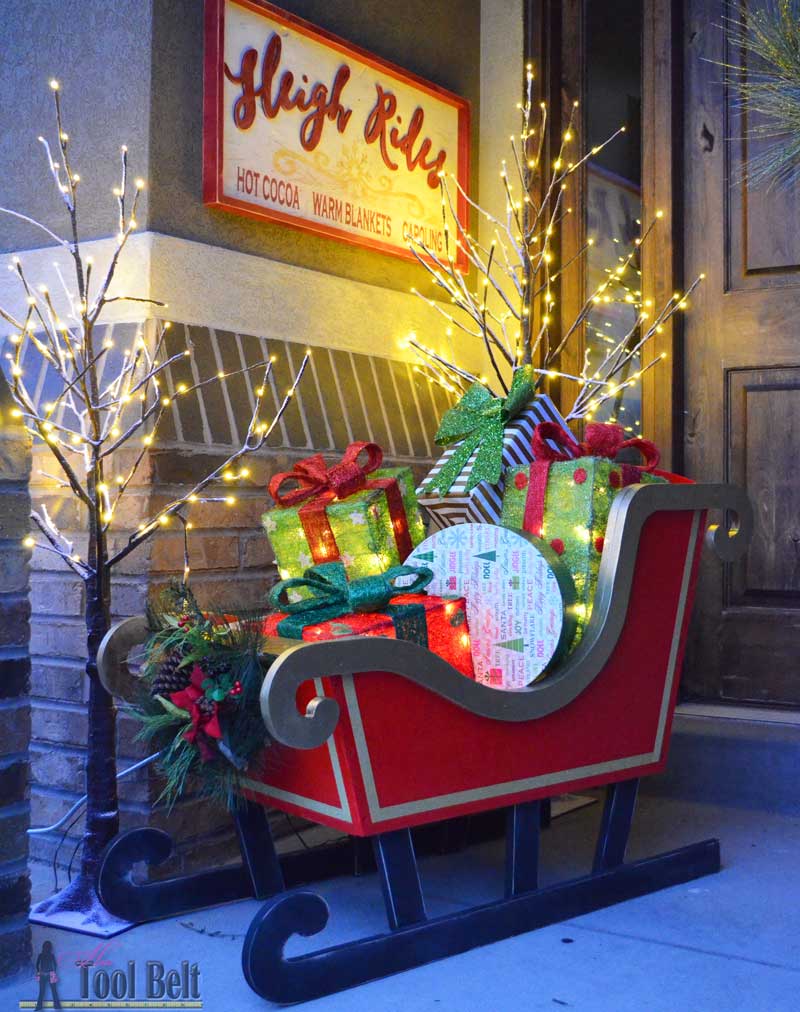
I like to save extra pieces of plywood from projects and use them to make wood signs. I needed a coordinating sign for my Santa Sleigh and Reindeer.
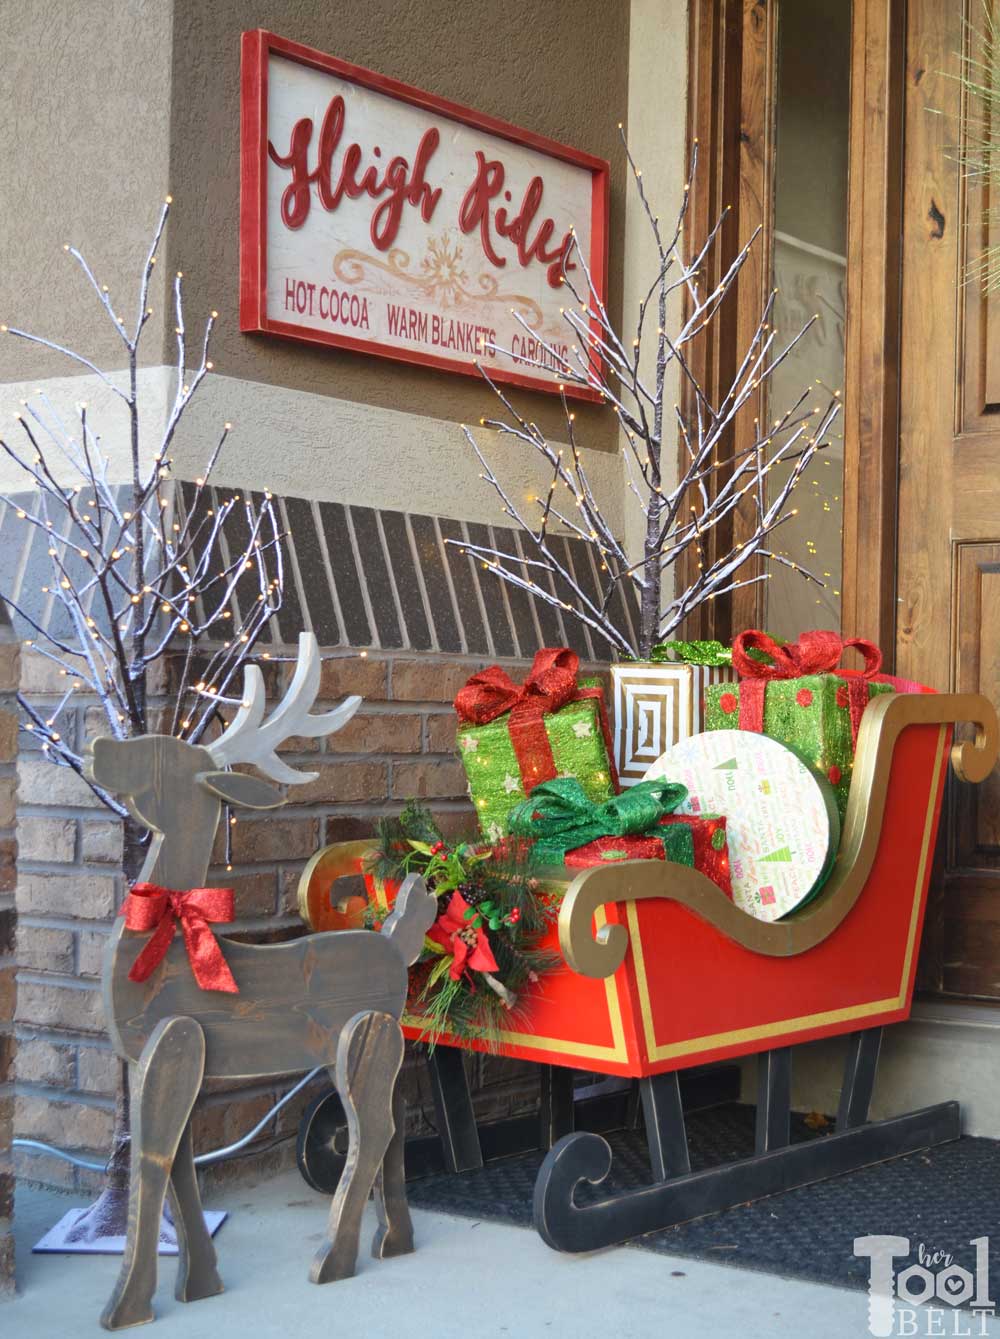
Tutorial for –> Santa Sleigh
Pattern and tutorial for –> wood Reindeer
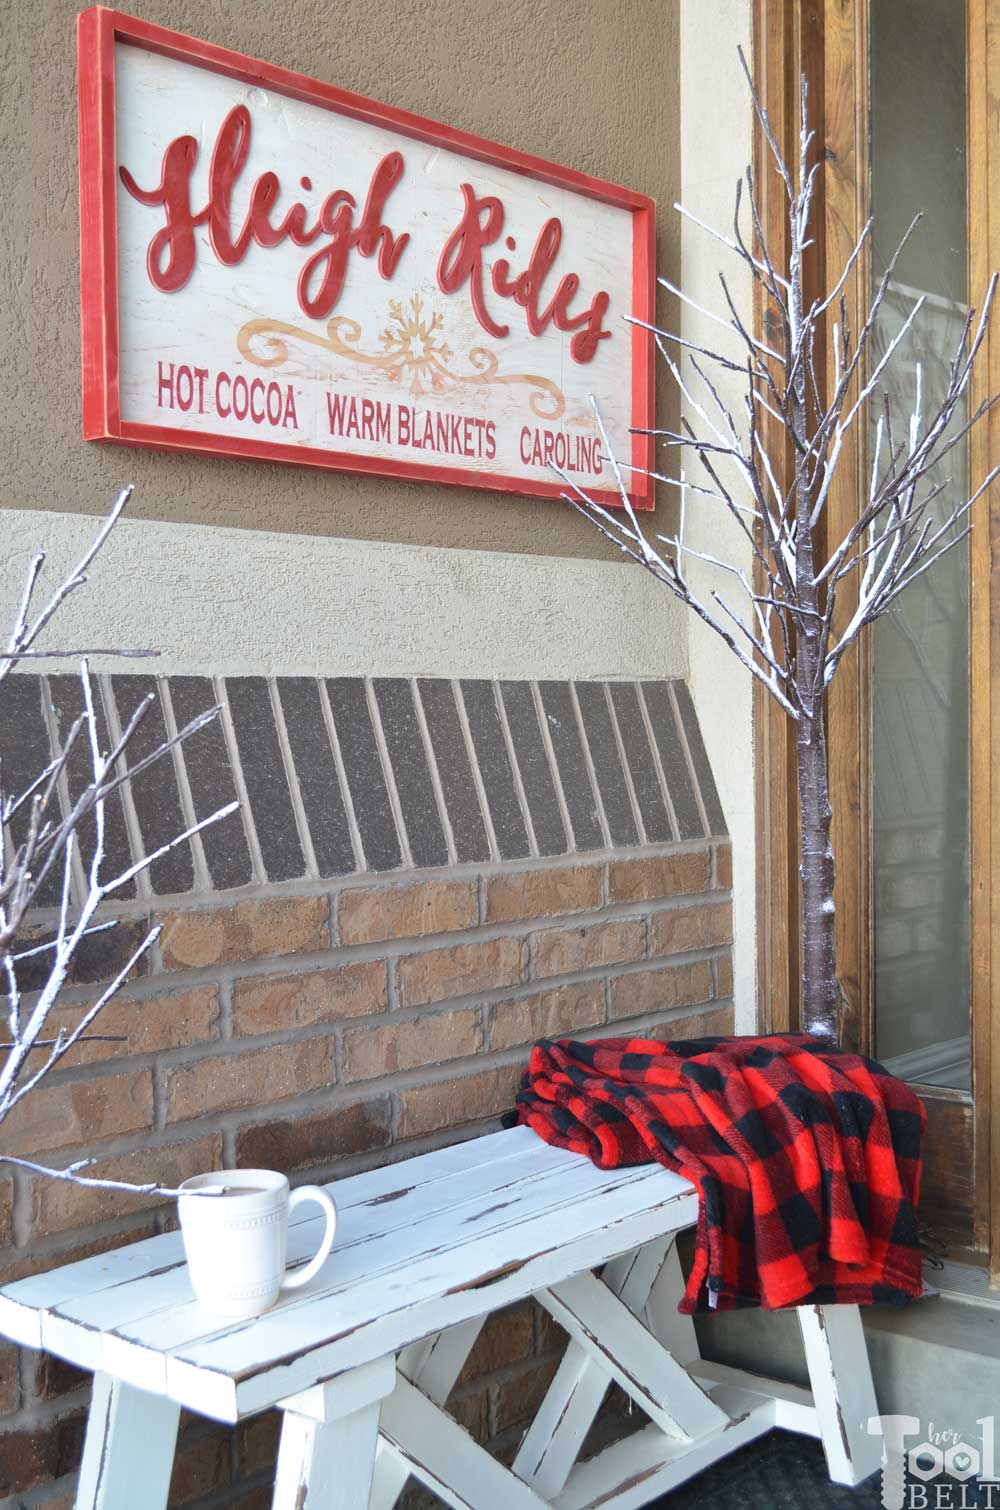
The best thing is that this sign can be used past Christmas throughout the winter season! After Christmas, a cute bench replaces Santa’s Reindeer and Sleigh.
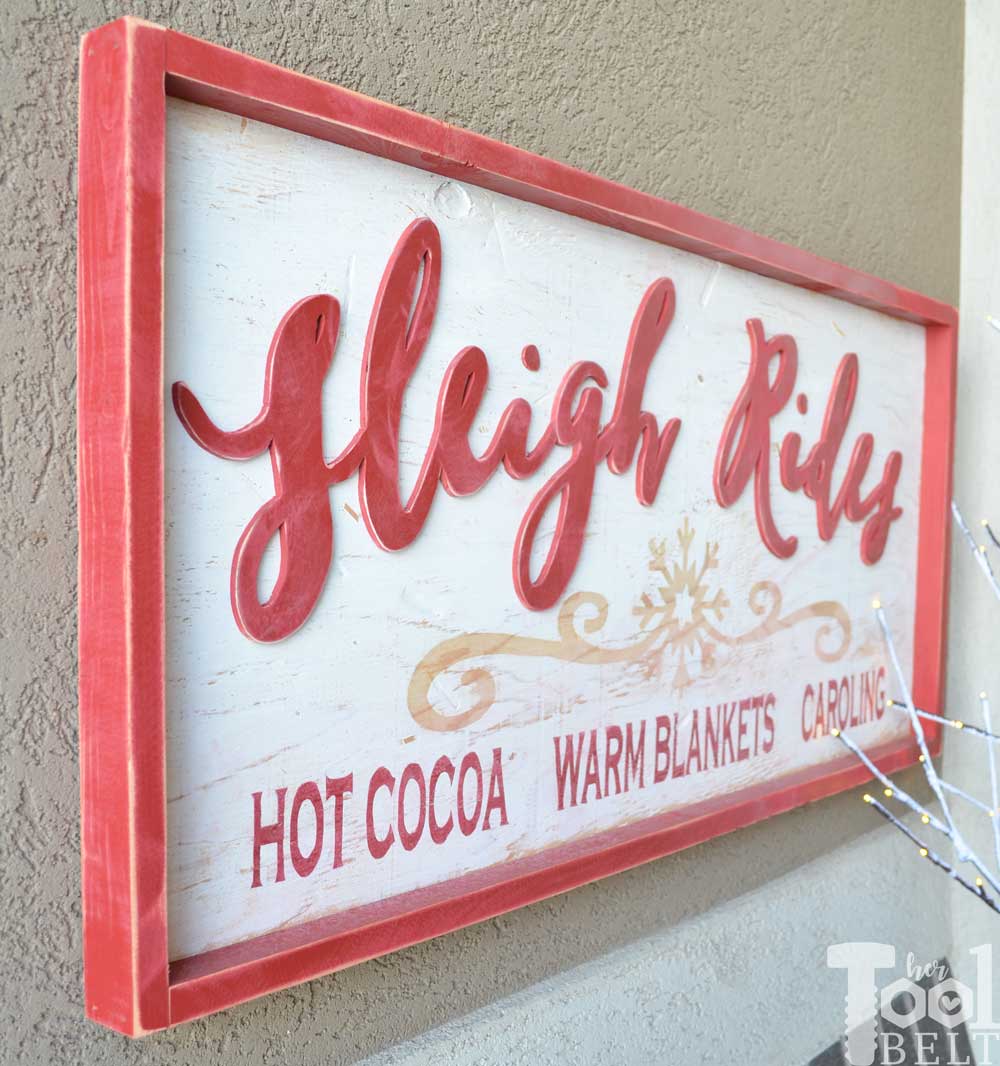
For this farmhouse house sleigh rides wood sign, I cut ‘Sleigh Rides’ out of scrap 1/4″ plywood to make the letters pop a little and give the sign dimension. Cutting out the ‘sleigh ride’ is totally optional, the words can be stenciled/painted onto the sign instead.
See how it’s made:
Please Subscribe
This post contains some affiliate links for your convenience. Click here to read my full disclosure policy.
How to Make a Farmhouse Style Sleigh Rides Wood Sign
Materials
- 2 – 1″ x 2″ x 96″ board
- 1 – 1/2″ plywood – need 16″ x 36″
- 1 – 1/4″ or 5 mm plywood – need about 15″ x 17″ – optional for lettering
- Sleigh Ride can be stenciled onto sign if you don’t want to cut out wood letters
- 18 – 1″ pocket hole screws
- 1 1/4″ brad nails
- wood glue
- sandpaper
- paint – white and red (heritage red)
- vinyl/transfer tape or paper for pattern
- brush
- tape
- picture hanger – optional
- Silhouette or scissors or X-acto knife
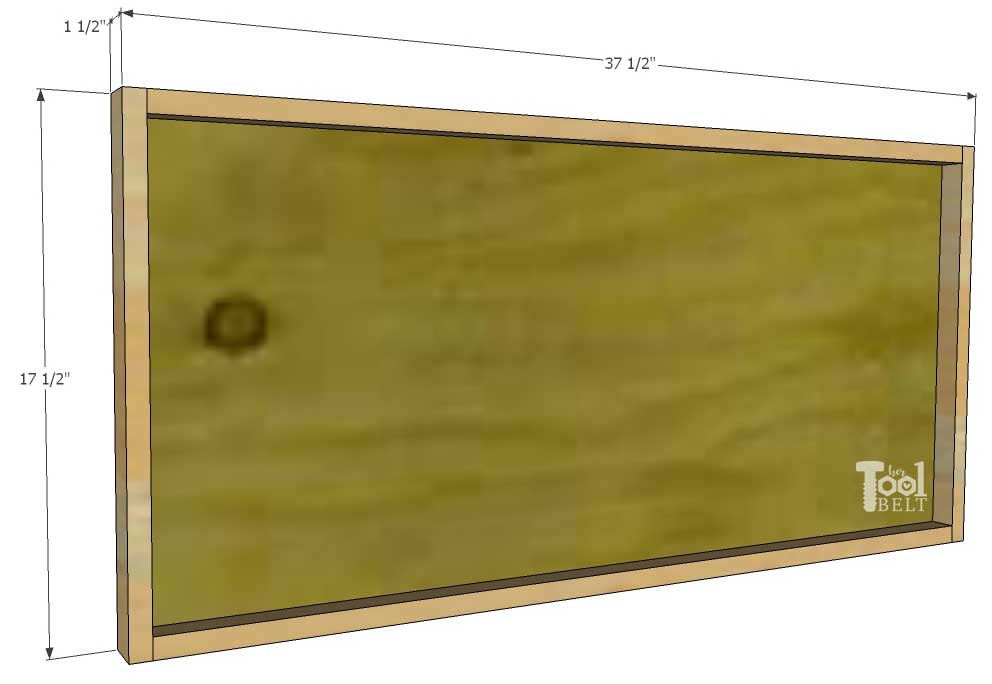
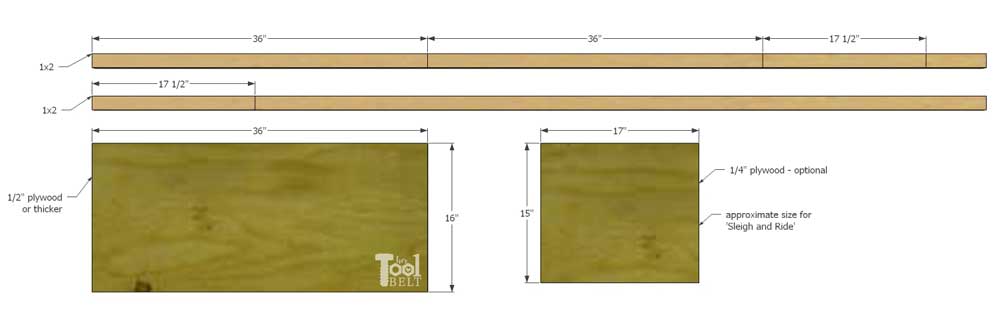
Cut List
- 1 – 1/2″ plywood cut to 16″ x 36″ – sign
- 2 – 3/4″ x 1 1/2″ x 36″ – frame
- 2 – 3/4″ x 1 1/2″ x 17 1/2″ – frame
- 1 – 1/4″ x 15″ x 17″ – ‘sleigh ride’ letters – optional
Cut Diagram
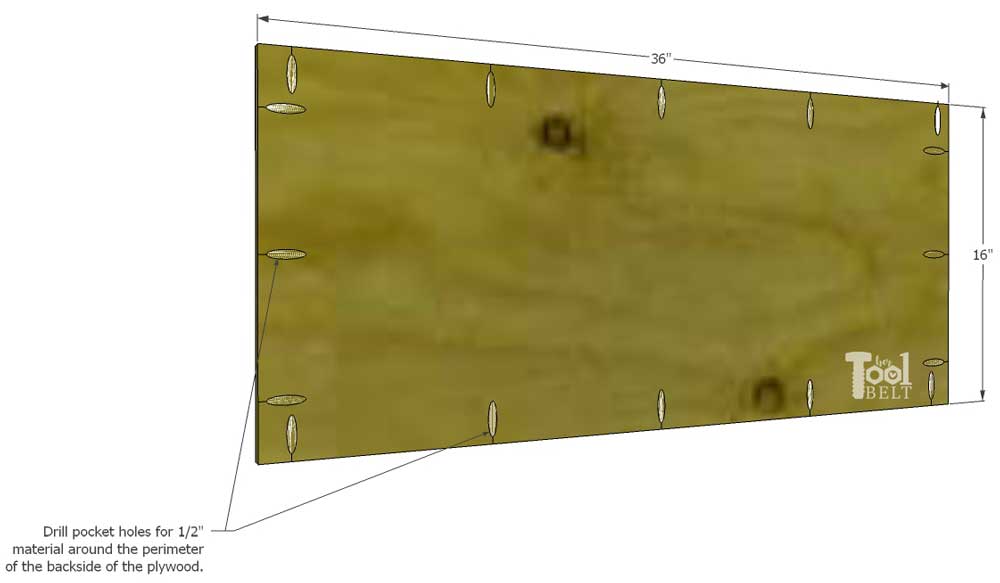
Step 1
Cut out the wood pieces according to the cut list/diagram. Drill pocket holes for 1/2″ material around the backside of the 1/2″ plywood. I do this to hold the frame onto the sign securely and straight. Brad nails thru the frame into the plywood may be sufficient.
Step 2
I have two methods for the pattern:
- Silhouette – If you have a Silhouette cutting machine, you can download the pattern to cut out of vinyl. The pattern is sized for a 12″ x 24″ mat,–> Sleigh & Ride.
- Print – You can print the pattern out on paper, match up the pattern with the alignment lines and tape together. –>Sleigh Rides Pattern on paper
Step 3
Here are a few reference points for where I placed my sign elements.
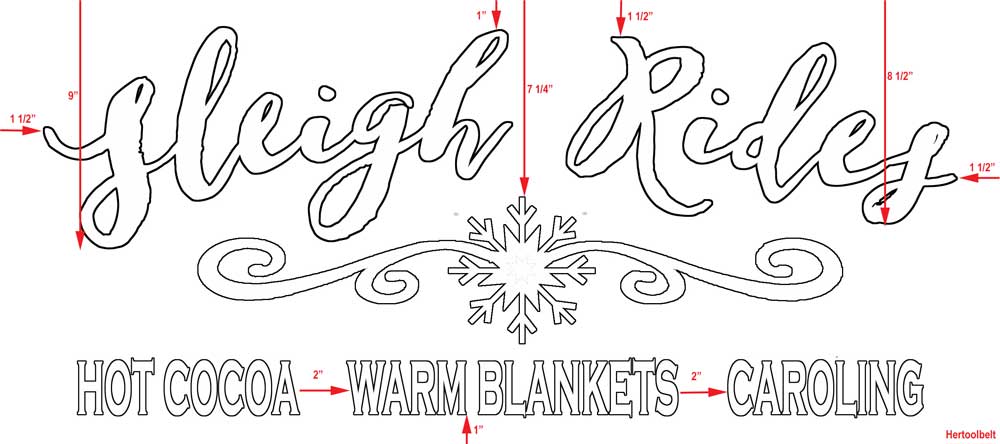
I decided to have the snowflake swirl be bare wood, so I placed that on the sign board first. (Note I realized that I put the swirls upside down on the sign from the way it’s shown in the pattern, you can choose the way you like it.) Then I applied a very light coat of white paint (Behr Ultra Pure White in satin) and let the paint dry. After the paint fully dried, I pulled off the snowflake stencil and distressed the white paint with sandpaper.
Next is to add the bottom words, ‘hot cocoa, warm blankets, caroling’. I centered the words along the bottom, leaving about 2″ between the word sets and about 1″ from the bottom of the sign. I covered the rest of the sign with newspaper and lightly spray painted the words with Rustoleum Heritage Red in satin.
While the paint dried on the sign, I cut out the ‘sleigh rides’ word art on the scroll saw. I often want the words a little chunkier than the font, so I cut about 1/16″ or so outside of the stencil. Once the letters are cut out, I sprayed them and the frame pieces with heritage red paint and let them dry.
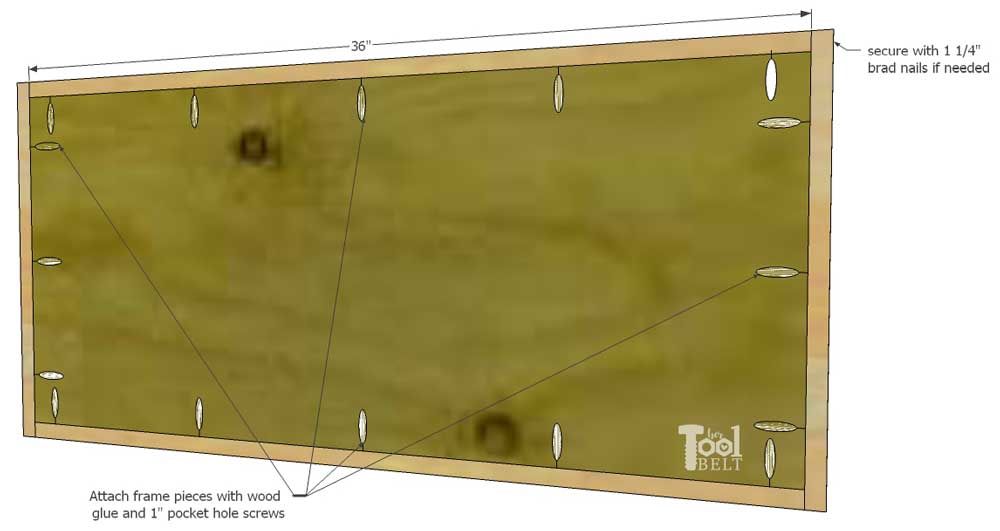
Step 4
Attach the red frame pieces to the sign board. Start by attaching the long 36″ boards to the top and bottom, use wood glue and 1″ pocket hole screws to secure to frame board. Then attach the 17 1/2″ frame pieces to the sides with wood glue and 1″ pocket hole screws, use 1 1/4″ brad nails if necessary to secure the 17 1/2″ ends to the 36″ ends.
I distressed the red frame pieces a little with sandpaper, then used wood glue to attach ‘Sleigh Rides’ onto the sign board.
The Sleigh Rides wood sign turned out fun and perfect for my front porch!
Make sure to check out the rest of the 12 Days of a DIY Christmas. Tomorrow will be the super talented Shara over at Wood Shop Diaries.
12 Days of a DIY Christmas
- Day 1 (Dec 1) – Hertoolbelt
- Day 2 (Dec 2) – Wood Shop Diaries – DIY Christmas Lantern Post
- Day 3 (Dec 3) – Build It Craft It Love It (coming soon)
- Day 4 (Dec 4) – Kim Six Fix – Santas and Trees from Scrap 2×4 Blocks
- Day 5 (Dec 5) – Anika’s DIY Life – Simple Photo Frame
- Day 6 (Dec 6) – The Handyman’s Daughter – Christmas Tree Yard Decor
- Day 7 (Dec 7) – The Painted Key – Christmas Moose Countdown
- Day 8 (Dec 8) – My Love 2 Create – Reindeer Puzzle
- Day 9 (Dec 9) – Hazel + Gold Designs – DIY Decorative Ladder
- Day 10 (Dec 10) – The Created Home –
- Day 11 (Dec 11) – Uncookie Cutter –
- Day 12 (Dec 12) – Handmade with Ashley –
I LOVE your sign Amy! Cutting out the Sleigh Rides part was the perfect touch! Your front porch looks amazing!!
The perfect addition to that cute sleigh and reindeer! Love it, Amy!
Amy, this is awesome! Thanks so much and can’t wait to see the rest of the projects!
I love this Amy!!! Sooo cute!
That sign is absolutely perfect!!! Love the effect of the “sleigh rides” cutout!
Love it! Will your cutouts stay glued? I’ve had bad luck trying to attach wood onto painted or stained surfaces with glue only – it doesn’t seem to last unless it’s bare wood (using titebond).
I haven’t had a problem with this one, but a lot of time’s I’ll add a few brad nails for security.
I always love a good scroll saw project.. this is beautiful. I love the distressing too!
ho ho ho 🙂
Hi Amy!
It’s really cool what you’ve done here, getting everyone into the Christmas spirit.:)
Awesome DIY project! Well done, keep them coming !