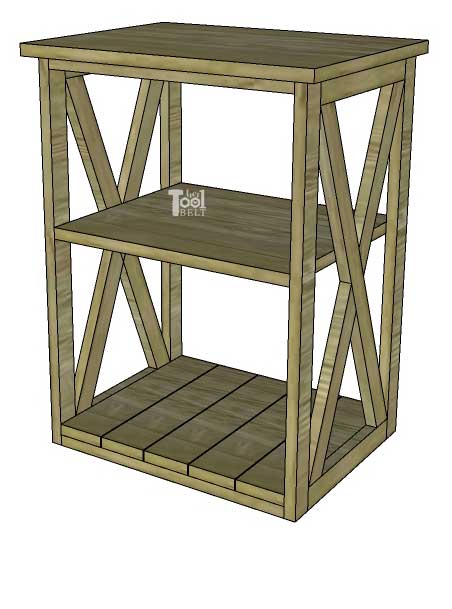
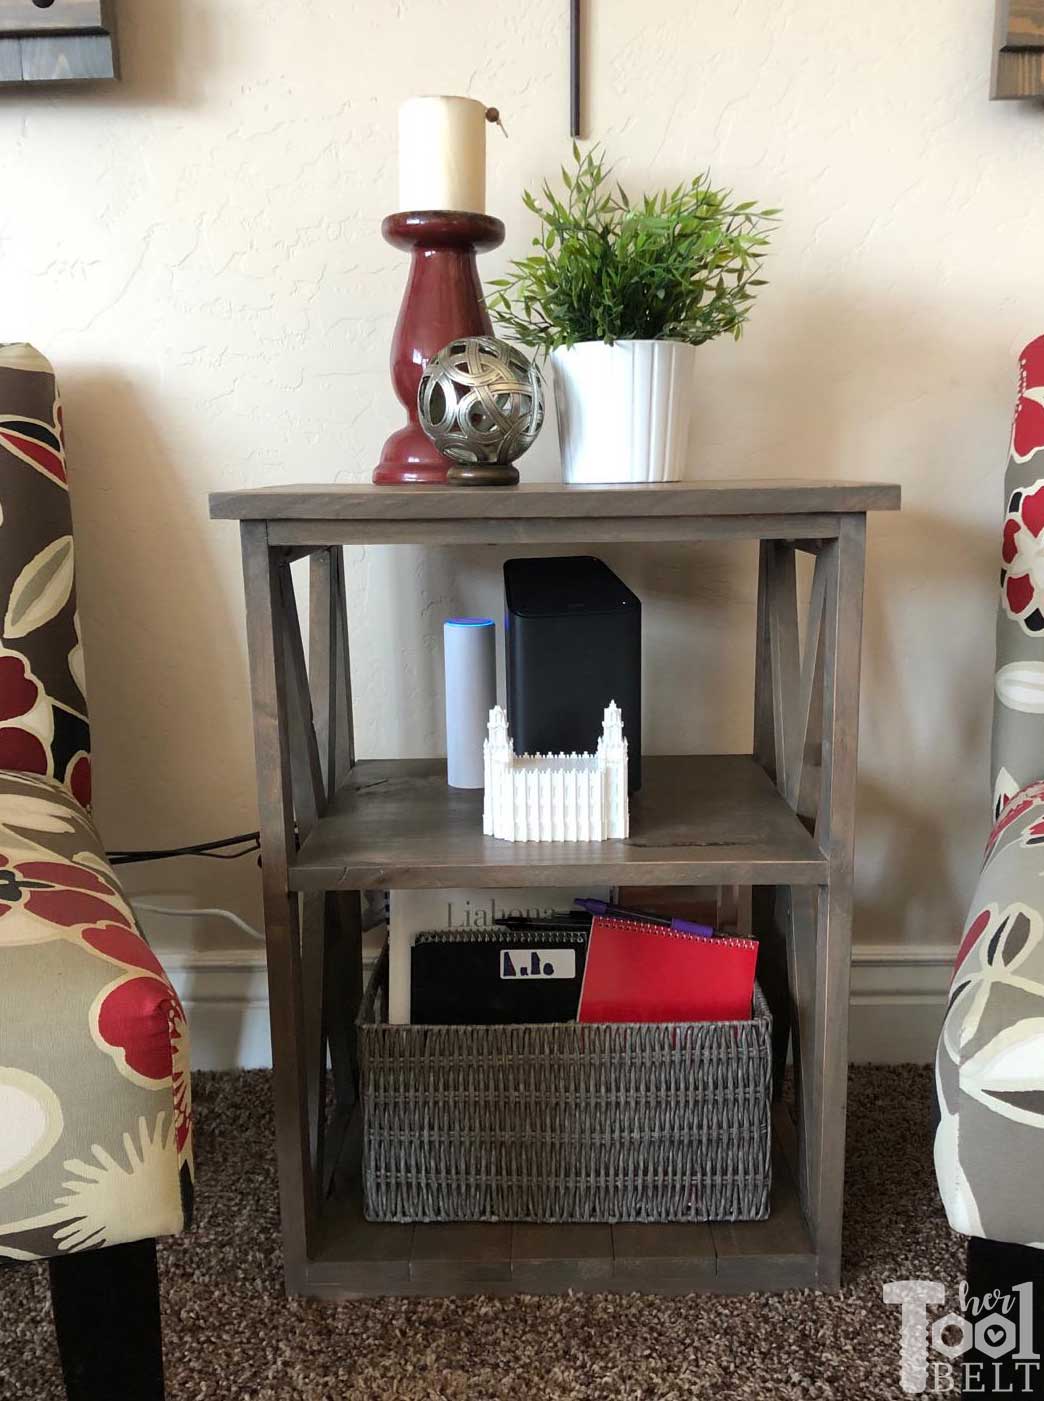
This is a quick little side table with X detail. Stacey is using this side table to hold her Comcast router on the upper shelf and a basket of magazines on the bottom shelf. Although it could be used for whatever you need!
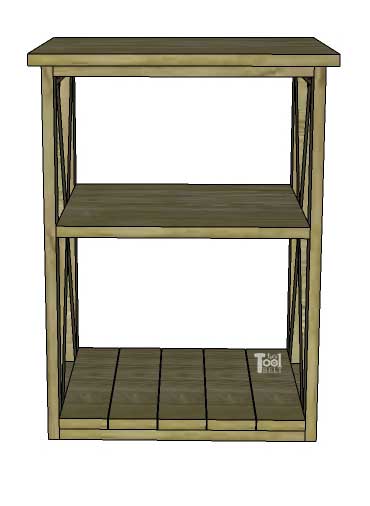
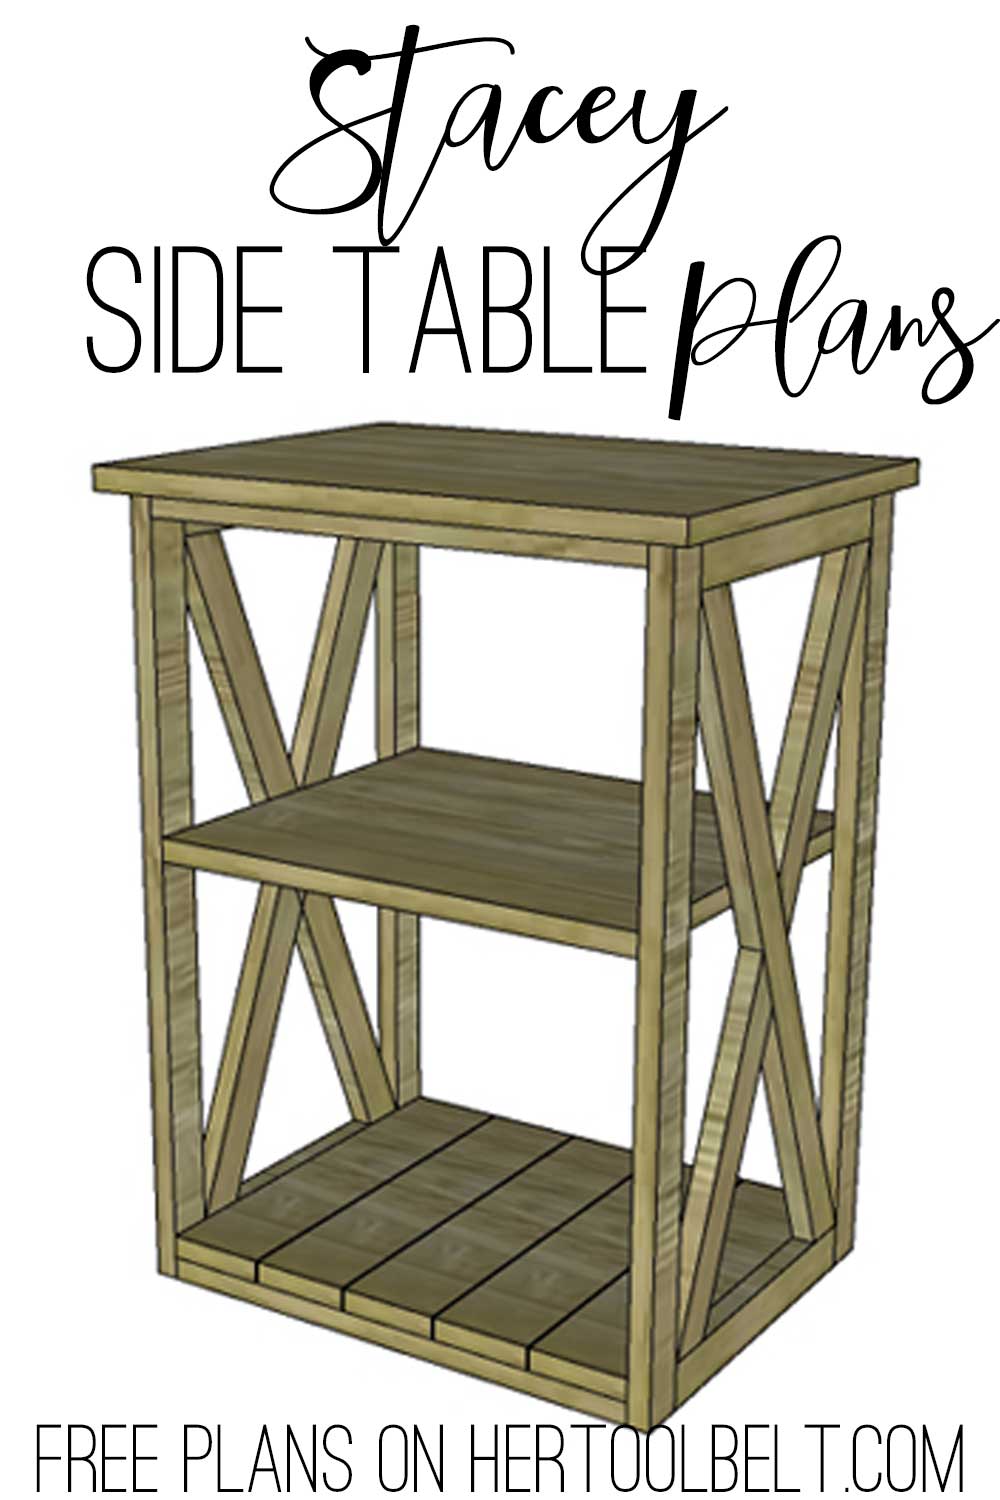
Stacey Side Table front view
How to Build the Stacey Side Table
 Materials
- 1 – 1×8 x 8′ board (actual 3/4″ x 7 1/2-1/4″ wide)
- 1 – 1×4 x 8′ board (actual 3/4″ x 3 1/2-1/4″ wide)
- 4 – 1×2 x 8′ board (actual 3/4″ x 1 1/2″ wide)
- wood glue
- 1 1/4″ pocket hole screws
- 1 1/4″ brad nails
- sandpaper
- wood putty or filler
- stain or paint
- top coat (ie polyurethane)
- The lumber for this side table is approximately $26 (although wood prices are high at the moment). $26 is for common pine boards at Home Depot.
Tools (Suggested)
- Miter saw
- Drill
- Pocket hole Jig
- Brad Nailer
- Sander
- Clamps as needed
- Measuring Tape
- Pencil
Cut List
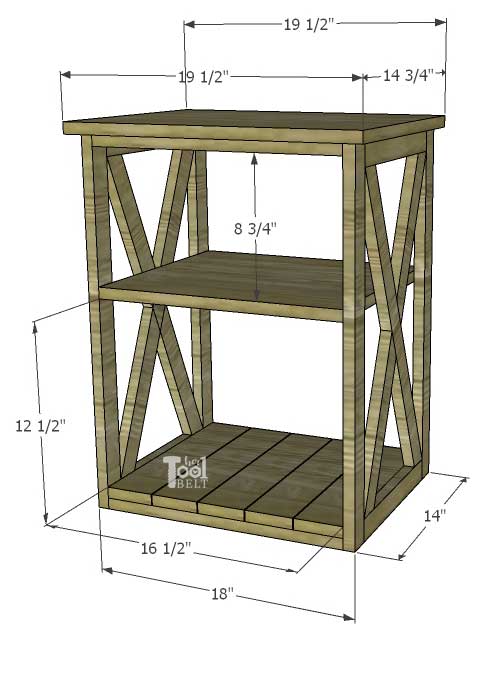
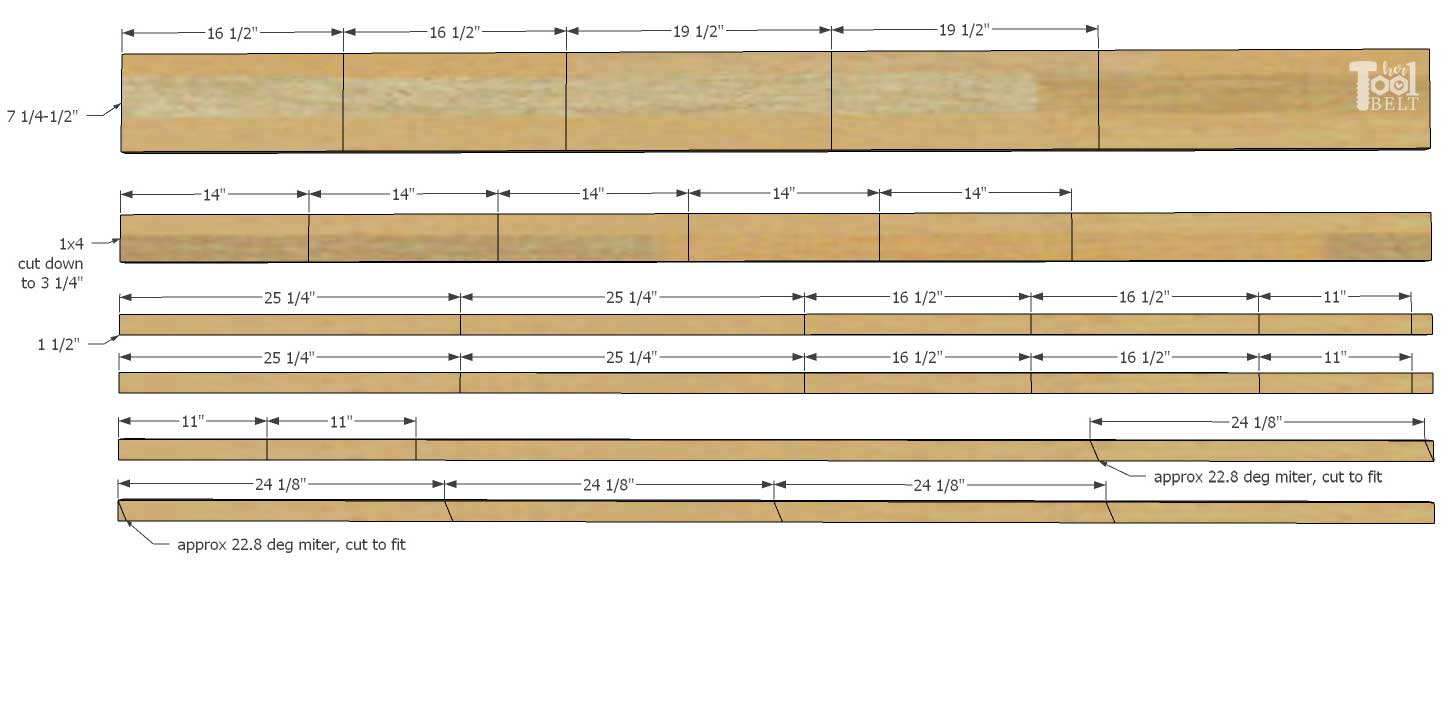
- 2 – 3/4″ x 7″ x 16 1/2″ (1×8 pieces trimmed to 7″ wide)
- 2 – 3/4″ x 7 1/4-1/2″ x 19 1/2″ (1×8 pieces width not critical, the plan uses 7 3/8″)
- 5 – 3/4″ x 3 1/4″ x 14″ (1×4 pieces trimmed to 3 1/4″ wide)
- 4 – 3/4″ x 1 1/2″ x 25 1/4″ (1×2) Legs
- 4 – 3/4″ x 1 1/2″ x 16 1/2″ (1×2)
- 4 – 3/4″ x 1 1/2″ x 11″ (1×2)
- 4 – 3/4″ x 1 1/2″ x about 24 1/8″ with about 22.8 deg miter cut on each end (1×2) – wait to cut these to fit (X pieces)
Cut Diagram
Step 1 – Cut & Assemble Frame
Cut the boards according to the cut list, except wait on the X pieces.
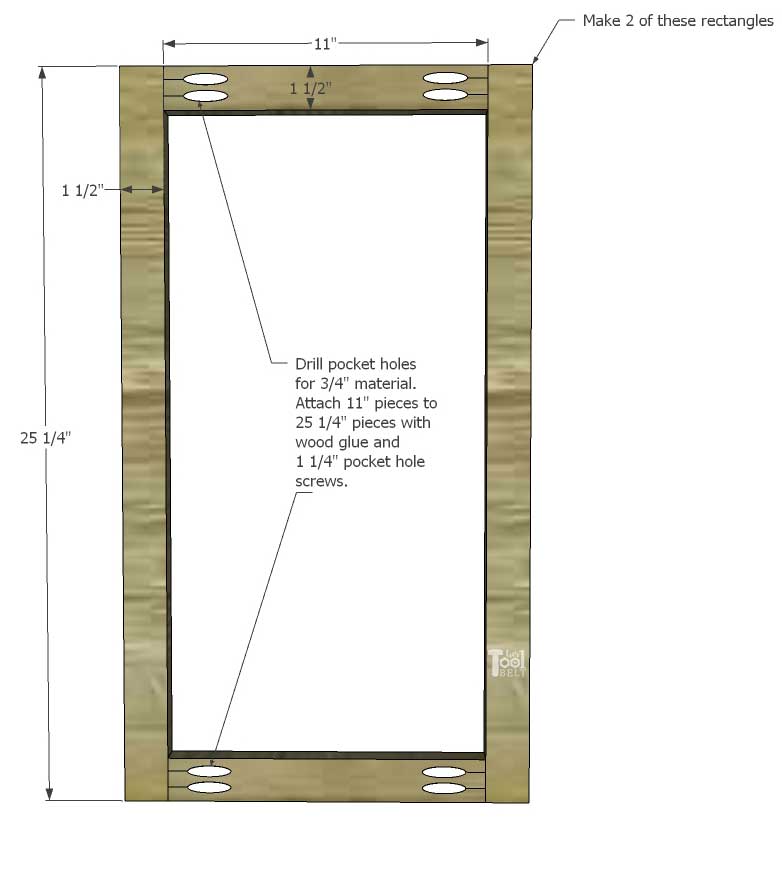
Drill pocket holes for 3/4″ material in both ends of each 11″ pieces. Attach the 11″ pieces to the top and bottom of the 25 1/4″ legs with wood glue and 1 1/4″ pocket hole screws. Repeat to make 2 of these rectangle sides.
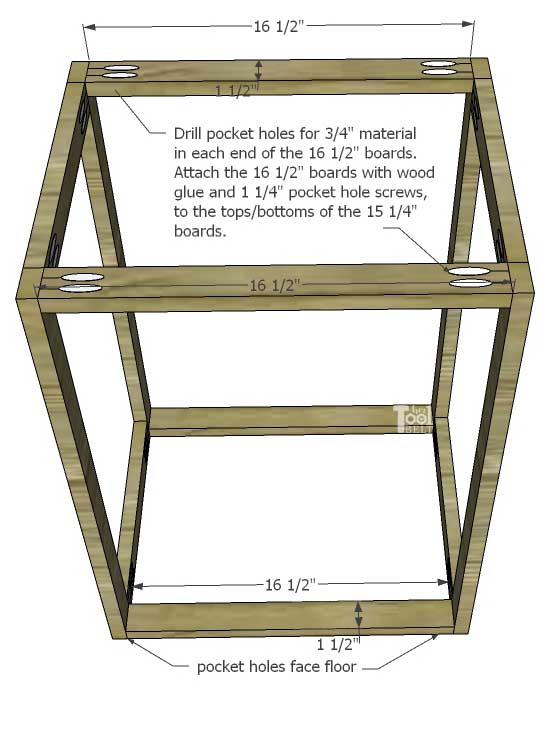
Drill pocket holes for 3/4″ material in both ends of each 16 1/2″ pieces. Attach the 16 1/2″ pieces to the top and bottom of the 25 1/4″ legs with wood glue and 1 1/4″ pocket hole screws.
Note: you want the pocket holes on the rectangle sides to face in, and the pocket holes on the 16 1/2″ pieces to face up on top, and the floor on the bottom.
Step 2 – Assemble Shelf and Top
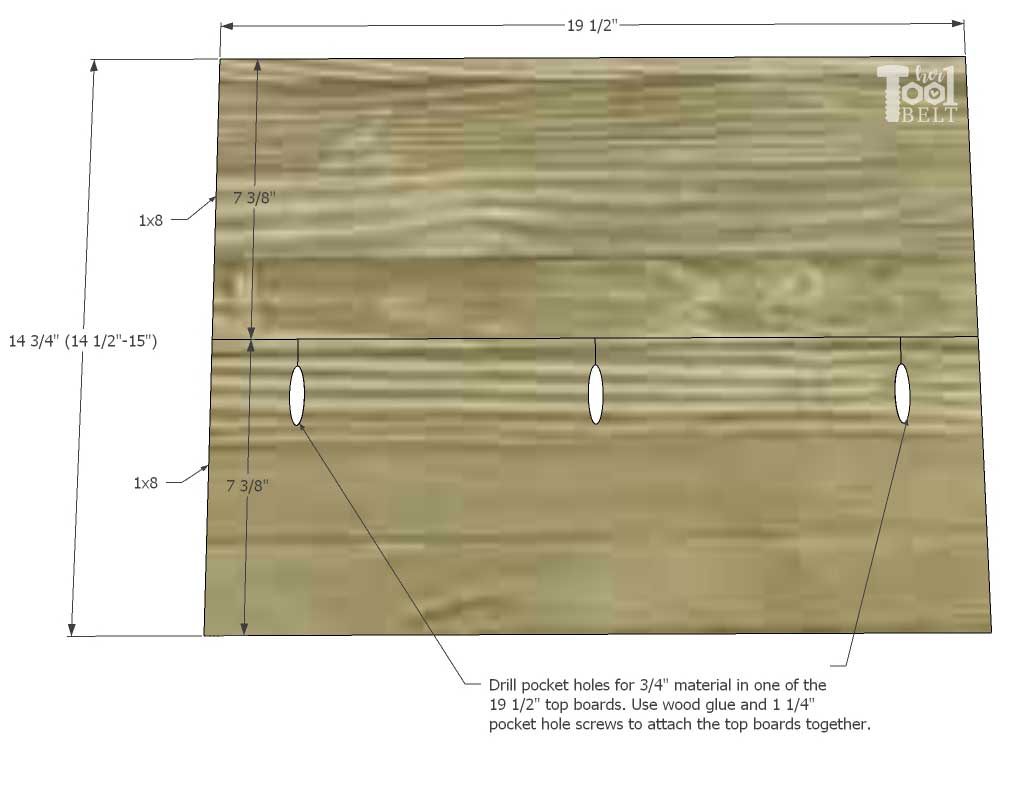
Top
Drill pocket holes for 3/4″ material in one of the 19 1/2″ sides of a top board. Attach the 19 1/2″ top boards together with wood glue and 1 1/4″ pocket hole screws. The total width of the top should be somewhere between 14 1/2″ to 15″. The model uses 14 3/4″, but the width isn’t critical.
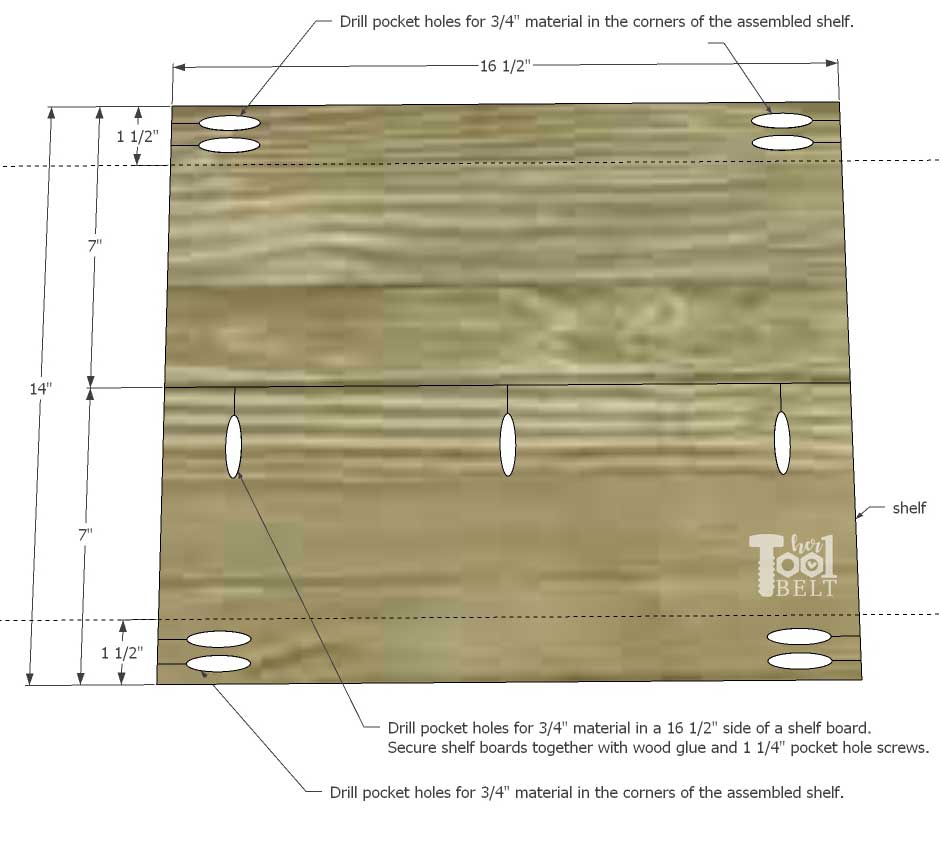
Shelf
Drill pocket holes for 3/4″ material in one of the 16 1/2″ sides of a shelf board. Attach the 16 1/2″ shelf boards together with wood glue and 1 1/4″ pocket hole screws. Trim the shelf board to about 14″ x 16 1/2″, or whatever will fit snuggly within the frame.
Also drill pocket holes for 3/4″ material in each corner of the shelf. Don’t drill pocket holes more than 1 1/2″ from the front or back edge.
Step 3 – Side Table Assembly
It may be easier to turn the frame upside down for this step, or on it’s side.
Measure from the top of the frame (bottom shown here, it’s upside down) 10 1/2″ and mark on each leg. Use wood glue and 1 1/4″ pocket hole screws to attach the shelf to the legs.
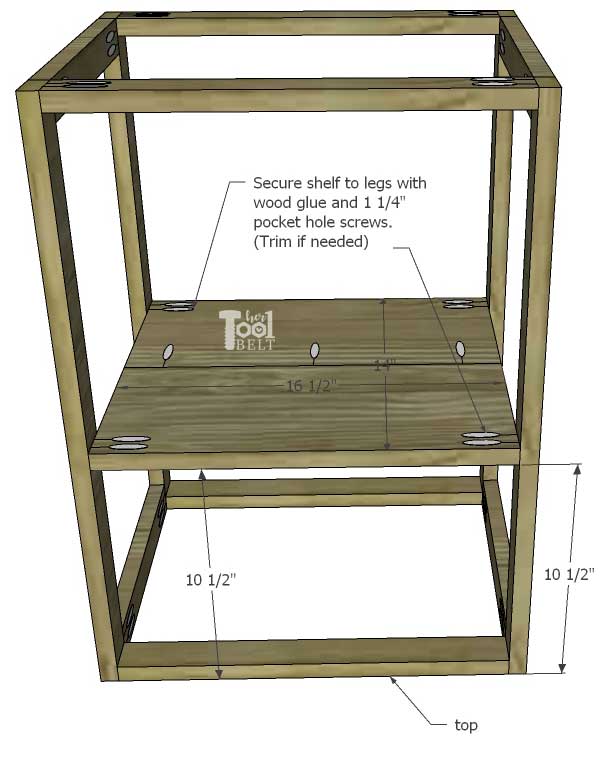
Space the bottom shelf planks (3 1/4″ x 14″) along the bottom of the frame (about 1/16″ gap between the boards). Secure the planks to the bottom with wood glue and 1 1/4″ brad nails, if desired.

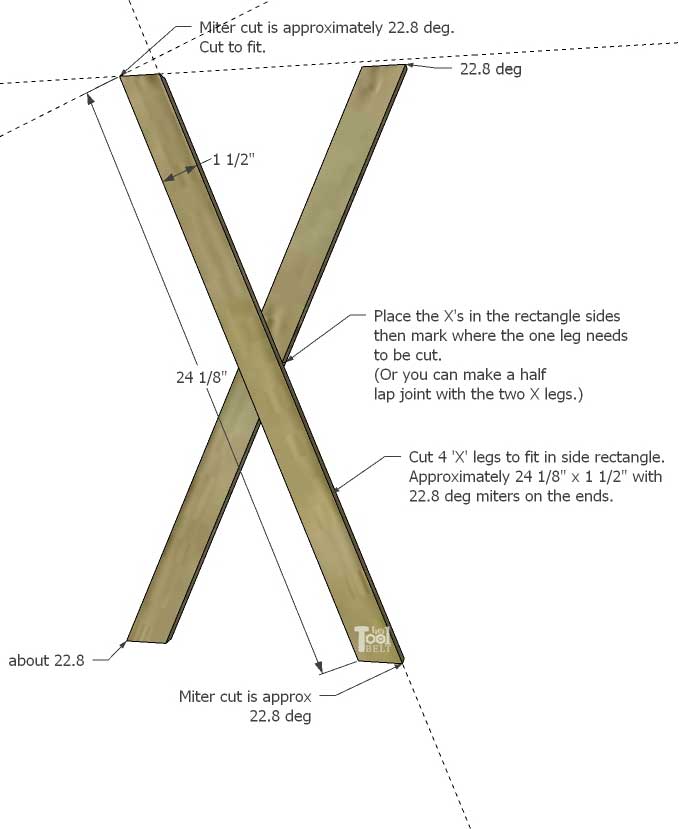
Step 4 – X Detail
Cut to fit each X leg. The X legs will be approximately 24 1/8″ with a 22.8 deg miter on each end. It may be easiest to hold the X leg to the rectangle side and mark where to cut. Then cut to fit.
Then hold two X legs on the side of the table and mark where the one leg should be cut to make X pieces. (Or you could do a half lap joint between the X pieces.)
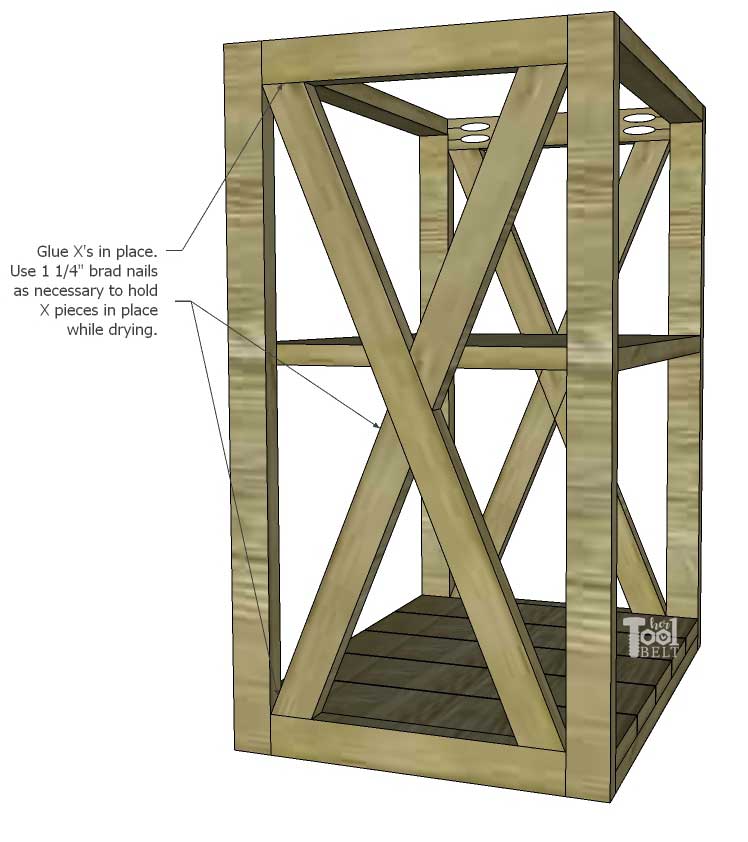
Once the X pieces are cut and fit inside the side rectangles. Use wood glue and 1 1/4″ brad nails, if needed, to secure the X detail in place.
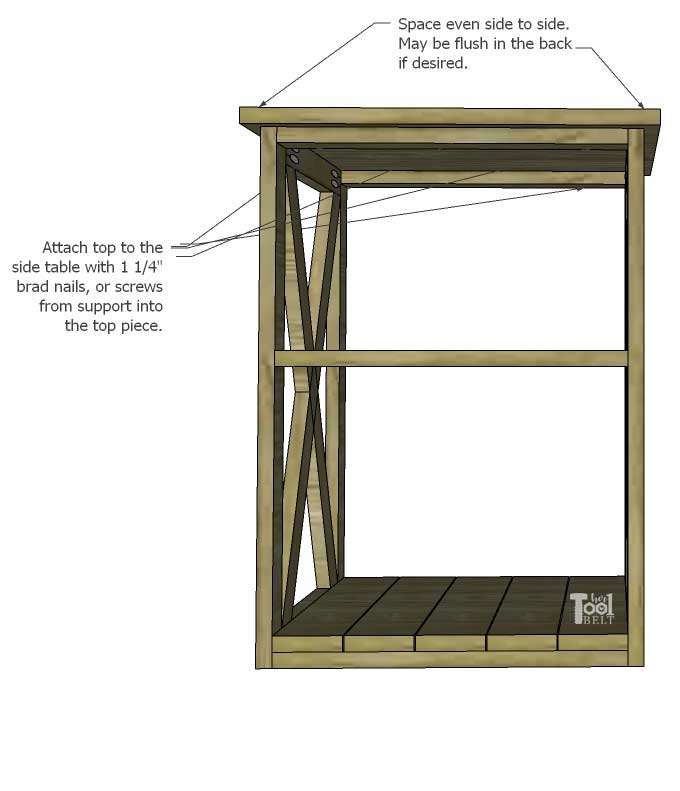
Center the top piece (side to side) onto the frame top. The back of the top can be flush with the back of the frame, or you can have overhang, whichever you prefer. Attach the top to the frame with 1 1/4″ brad nails or screws from the support into the top piece.
Fill any visible pocket holes with plugs or wood filler. Once all of the glue/filler is dry, sand the side table smooth. Paint or stain as desired. Apply a top coat to the stain if desired.
Enjoy you new Stacey Side Table!
Thanks for pinning.
Download the printable PDF –> Here <–
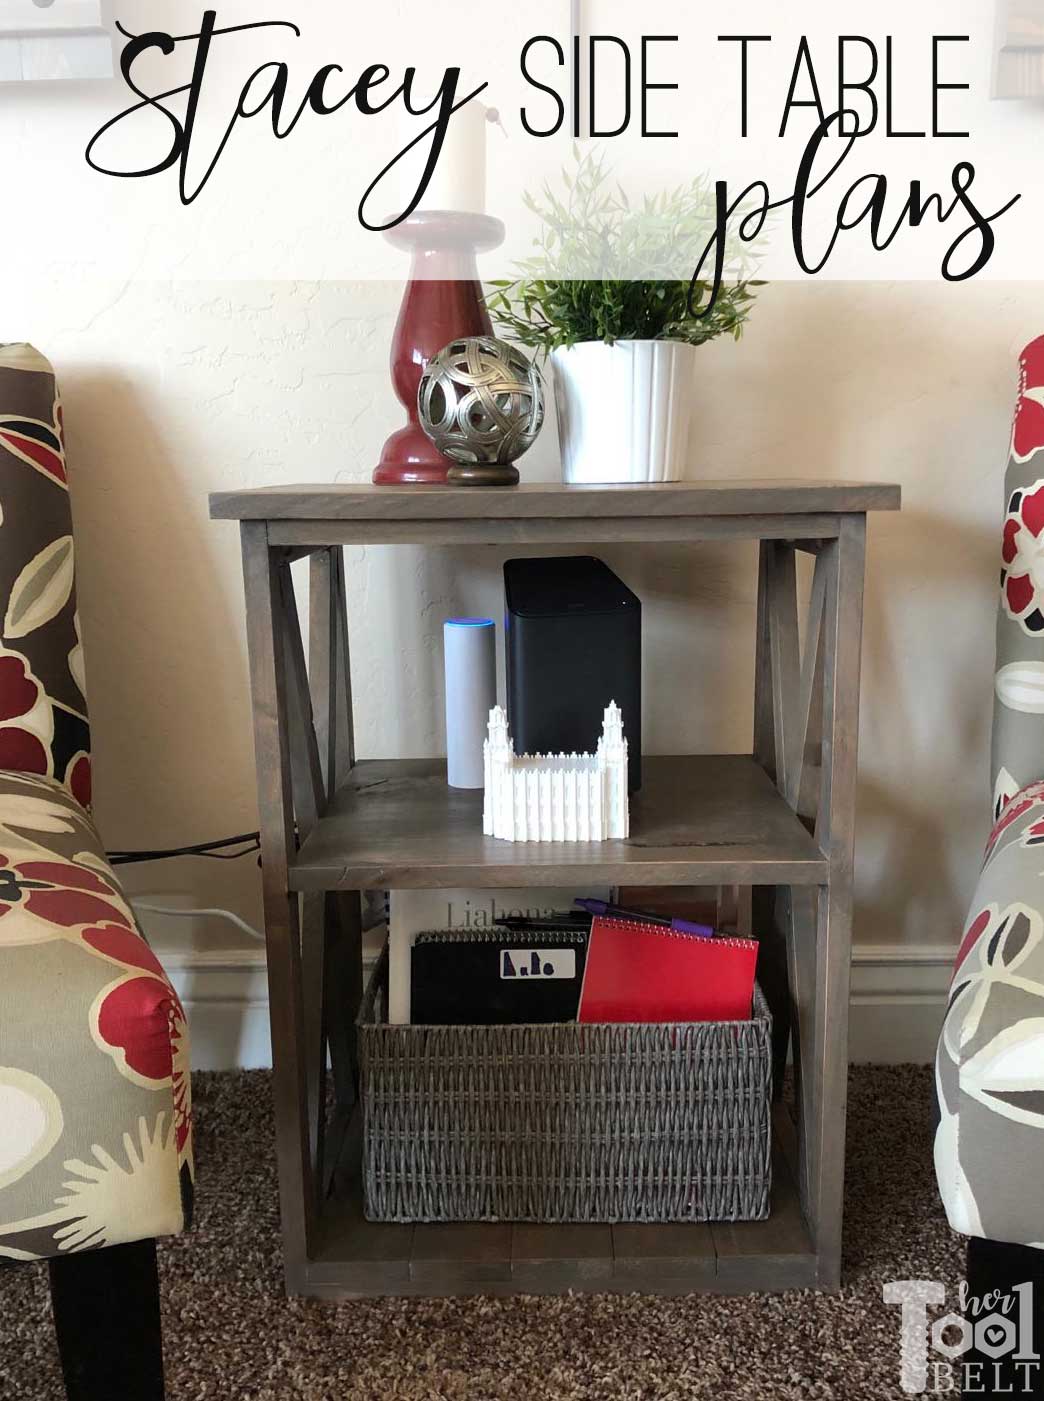
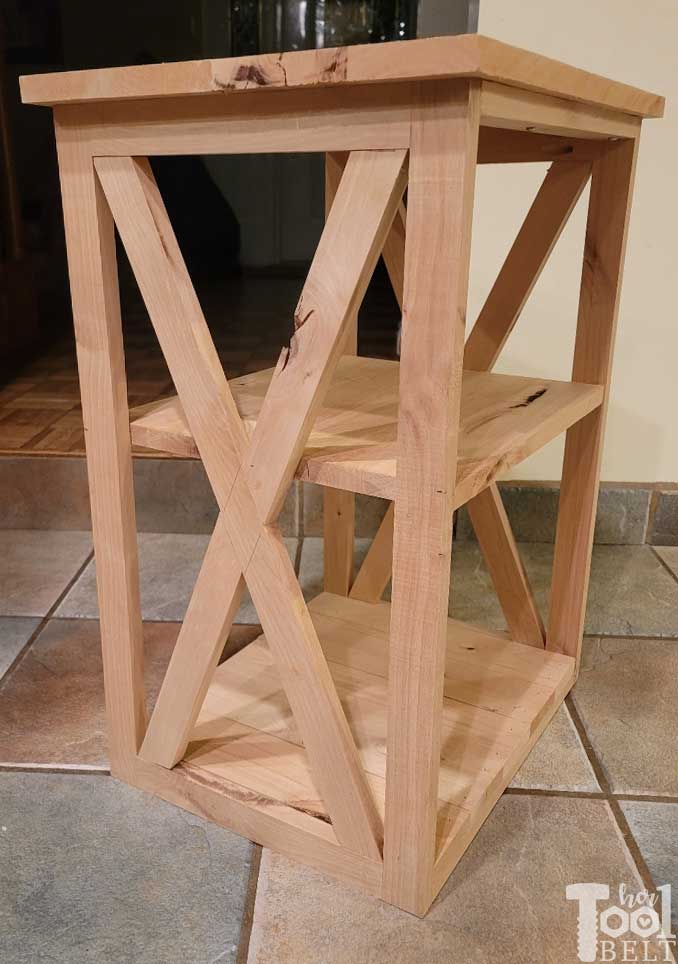
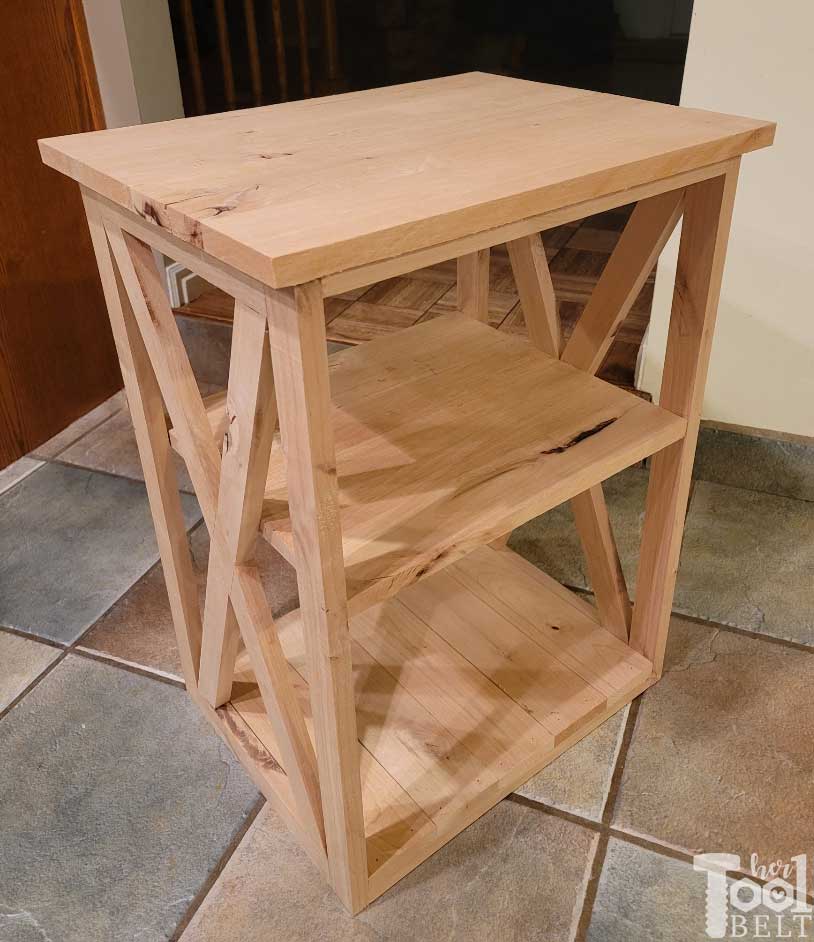 Side table made out of knotty alder.
Side table stained with Briarsmoke.
Leave a Reply