The DEWALT Circular Saw Tool Review is sponsored by The Home Depot. I have been compensated for my time and provided with product (tools). All ideas and opinions are my own. This post contains some affiliate links for your convenience. Click here to read my full disclosure policy.
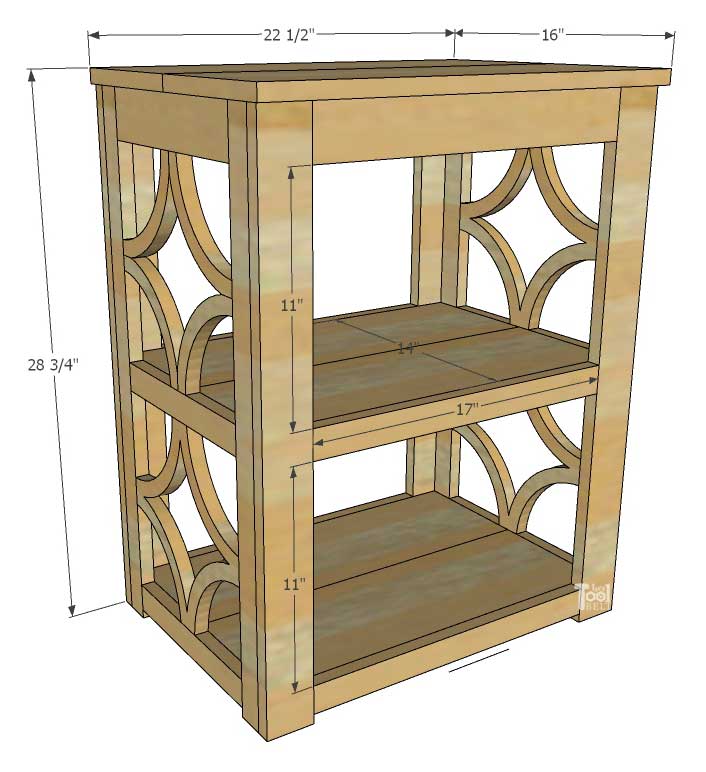
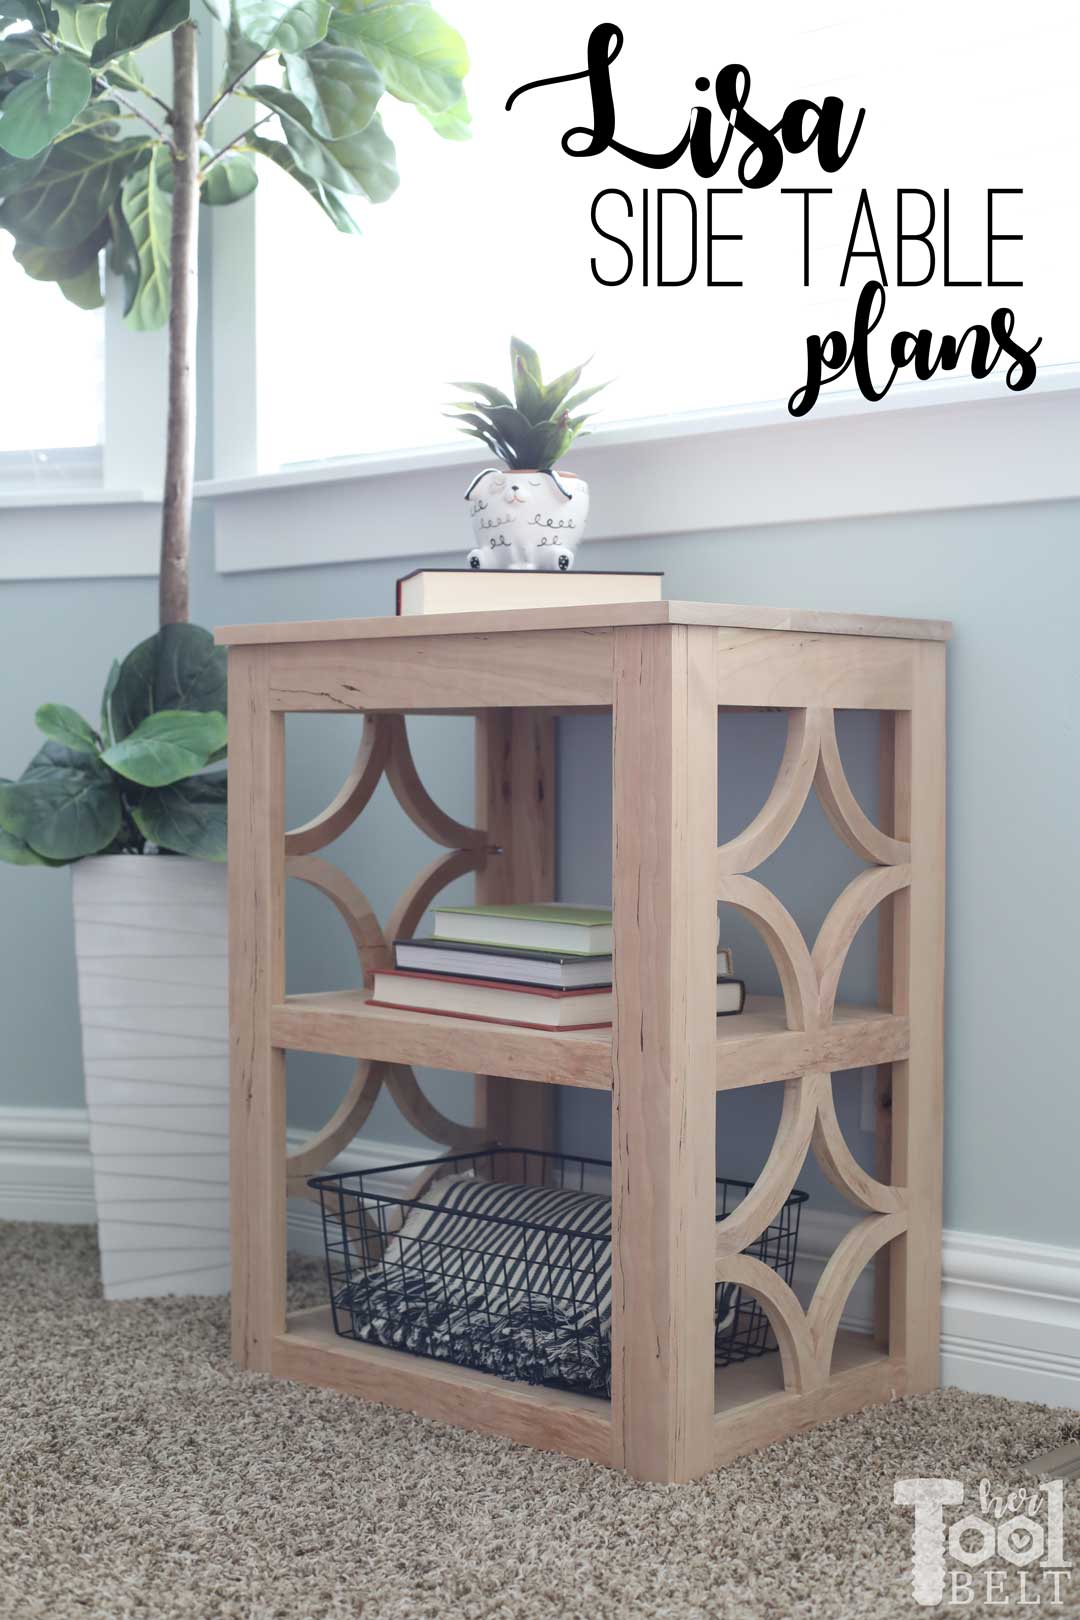
I picked up some fun rustic cherry wood that was on a clearance sale a little while back. With no project in mind, it has been patiently waiting to be turned into something useful and beautiful. I finally decided on a small side table to use up the wood. The side details on the Lisa Side Table are totally optional, but I think they add a lot to the look of the side table.

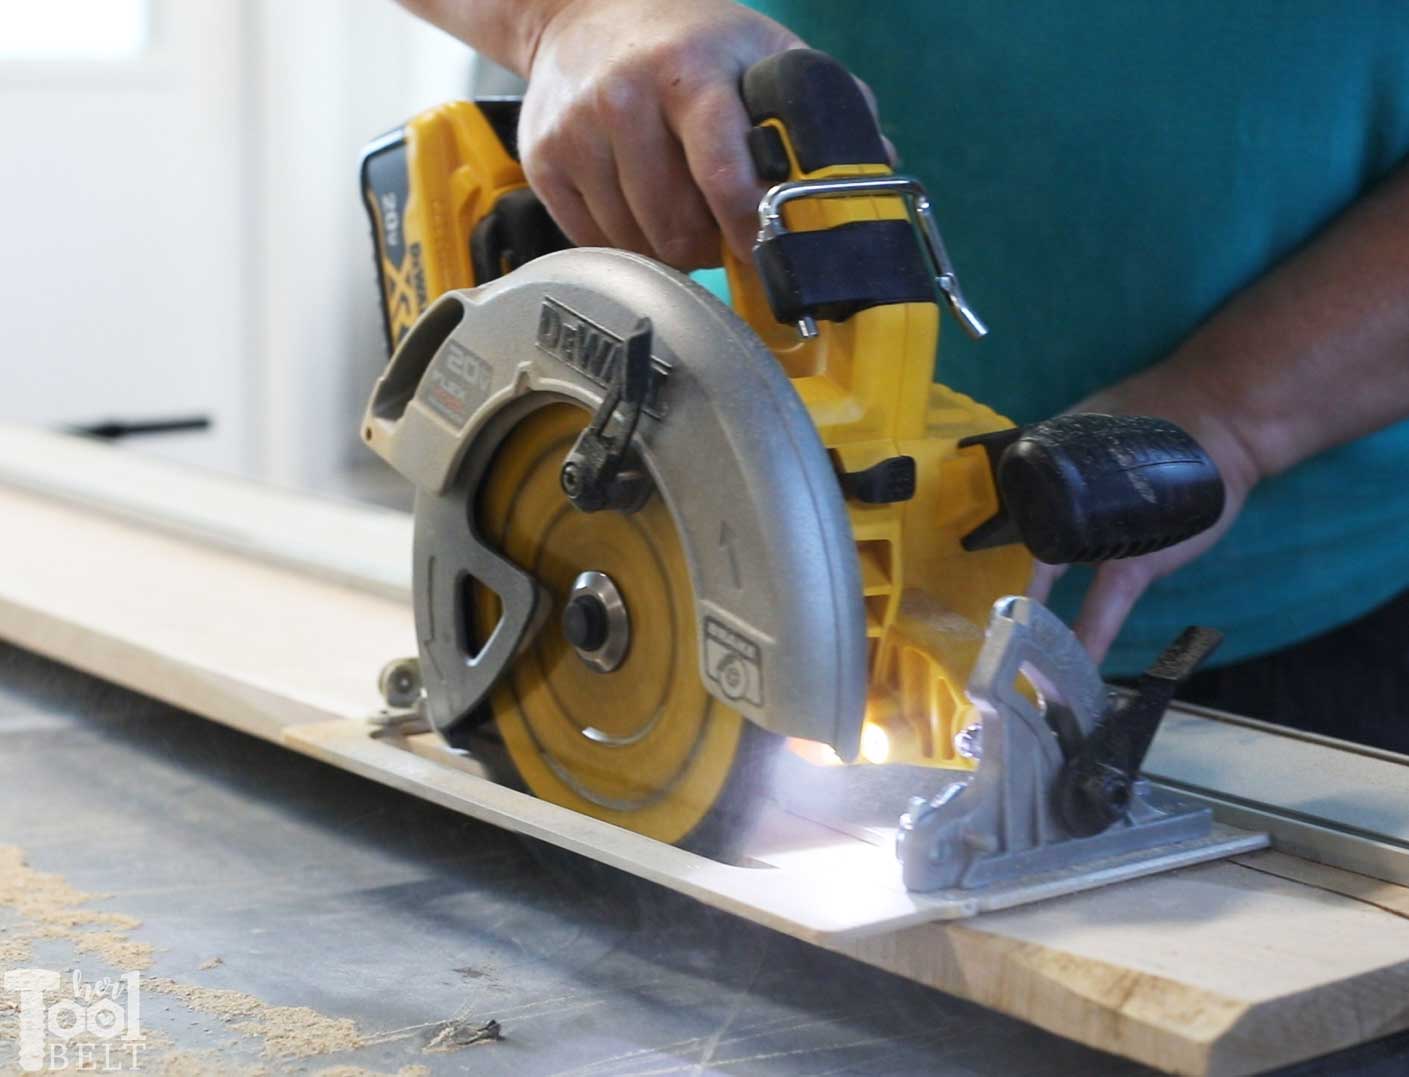
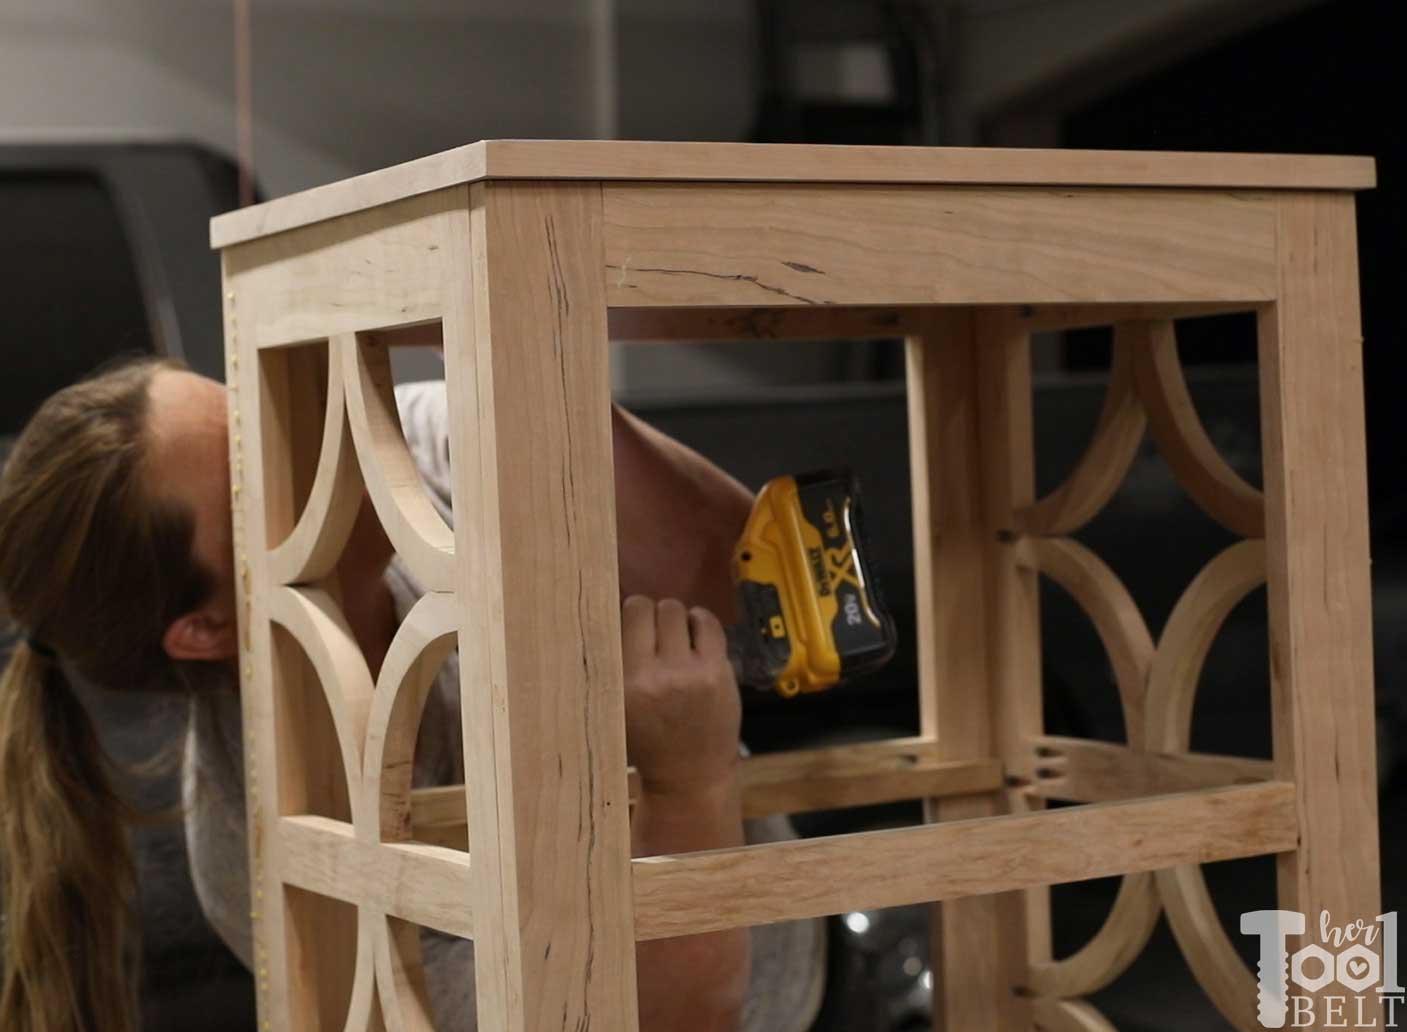
I have been testing out the DEWALT 20 volt circular saw during this build and it has been cutting smooth as butter through the cherry hardwood.
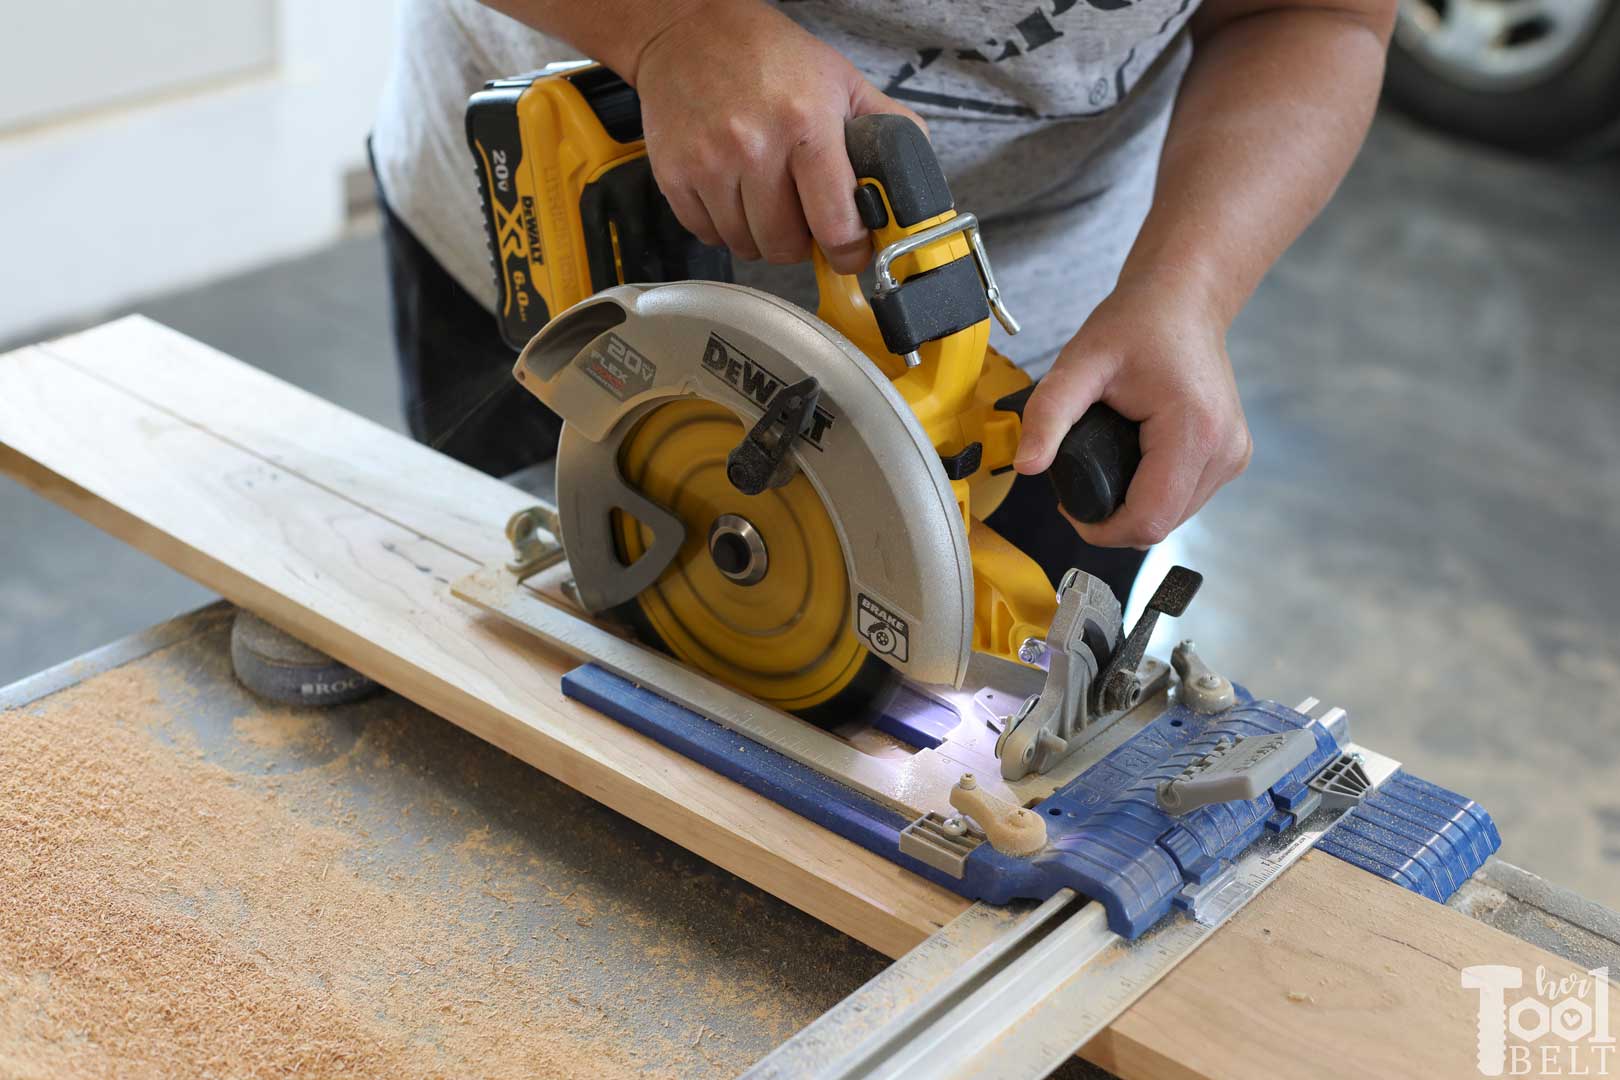
DEWALT 20V Flexvolt Circular Saw
I am reviewing the DEWALT model# DCS573B 20-Volt MAX Circular Saw with flexvolt advantage. Let’s check out some of the features of this DEWALT model:

Features
- Size: 7 1/4″, max depth of cut of 2-9/16 in. at a 90° and max depth of cut of 2 in. at a 45°
- Compatible with all DEWALT 20V MAX and FLEXVOLT batteries.
- It has an electric brake stops the blade after the trigger is released.
- The circular saw includes on board storage of blade changing tools.
- With 5,500 rpm, the saw has not problem cutting through hardwoods and softwood.
- Check out more at Home Depot –> link here <–
Please Subscribe
Building the Lisa Side Table
Materials List
- 2 – 1×8 x 8′ boards
- 2 – 1×3 x 8′ boards
- 3 – 1×2 x 8′ boards
- 1 1/4″ pocket hole screws
- wood glue
- sandpaper
- 1 1/4″ brad nails
Cut List
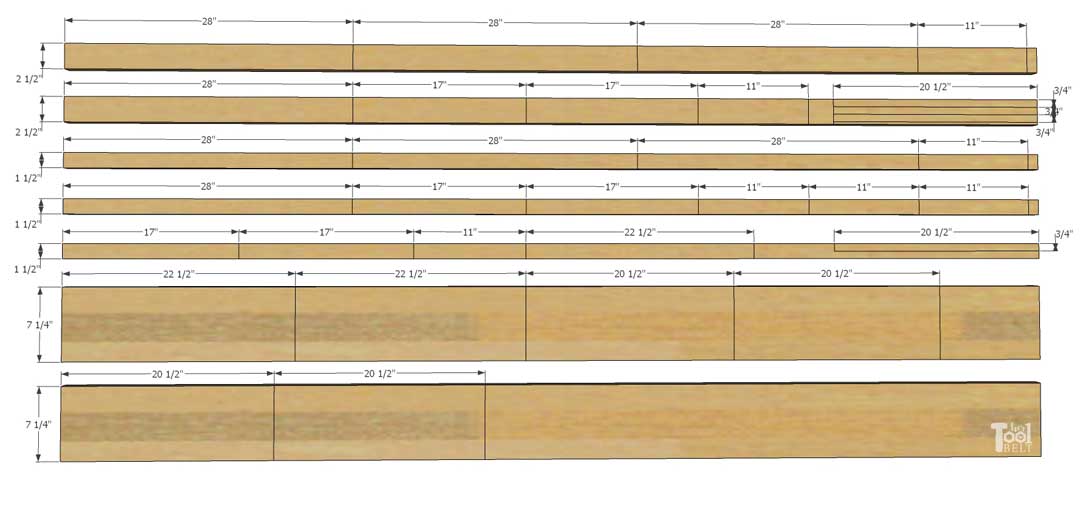
- 4 – 3/4″ x 2 1/2″ x 28″ – front and back legs (stiles)
- 4 – 3/4″ x 1 1/2″ x 28″ – side legs (stiles)
- 2 – 3/4″ x 2 1/2″ x 17″ – upper front and back (rails)
- 2 – 3/4″ x 2 1/2″ x 11″ – upper side (rails)
- 4 – 3/4″ x 1 1/2″ x 17″ – front and back shelf supports (rails)
- 4 – 3/4″ x 1 1/2″ x 11″ – side shelf supports (rails)
- 2 – 3/4″ x 7 1/4″ x 22 1/2″ top
- 1 – 3/4″ x 1 1/2″ x 22 1/2″ top
- 4 – 3/4″ x 7″ x 20 1/2″ – shelves
- 4 – 3/4″ x 3/4″ x 20 1/2″ – ledges (optional)
- 16 – Trim pieces
Cut Diagram
Tools Used
- DEWALT Circular Saw
- Sander
- Scroll Saw
- Drill
- Brad Nailer
- Measuring Tape
- Straight Edge Guide
- Rip Cut
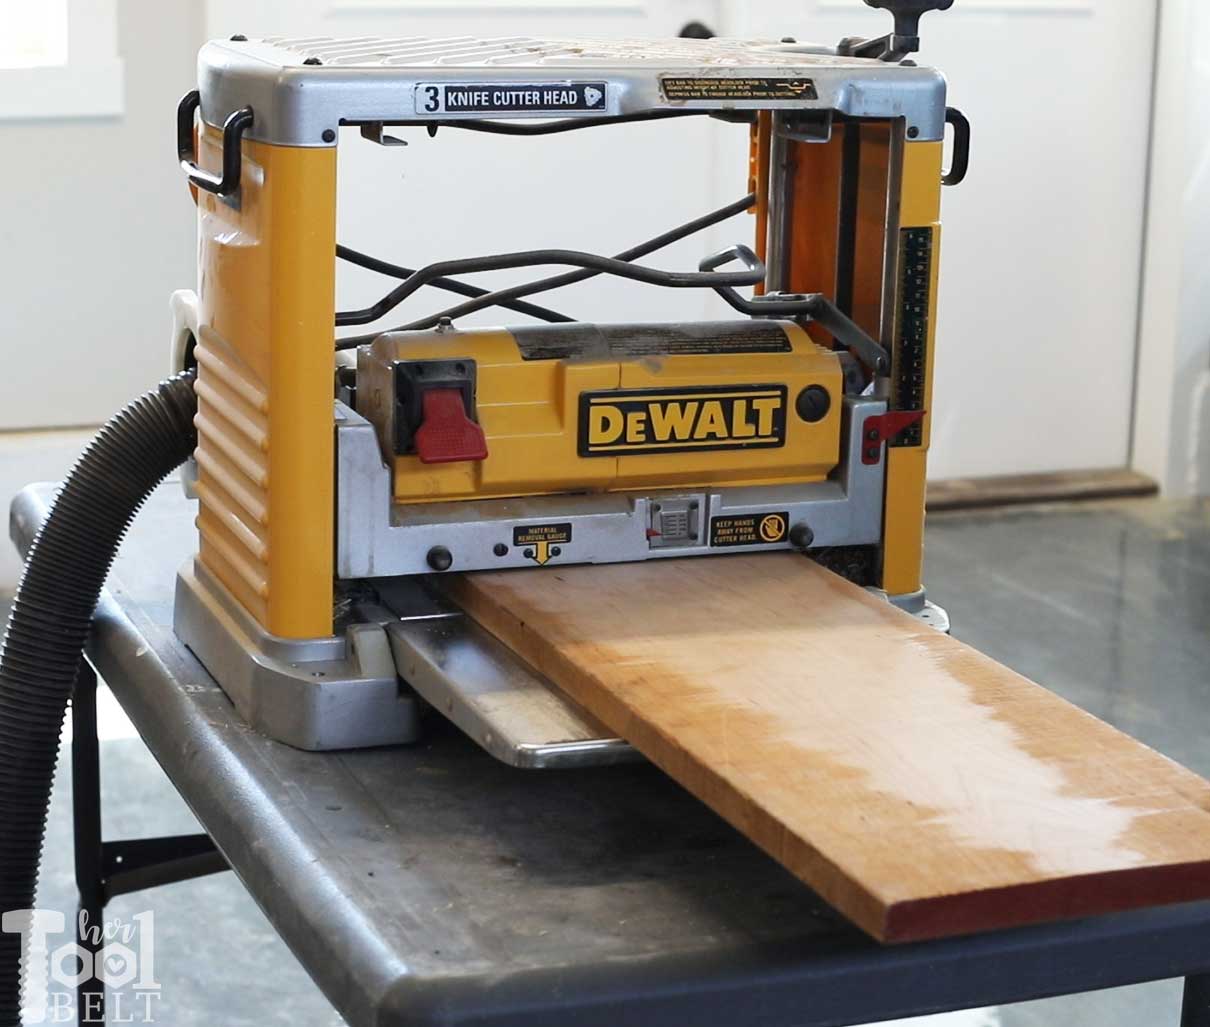
- Planer – for rough sawn wood
- Clamps
Step 1 – Prep Wood
This step is needed with random width hardwoods. If using dimensional lumber from the store, step 1 can be skipped.
I planed the cherry wood down to the nominal wood working thickness of 3/4″.
Now that the boards are all flat and 3/4″ thick, time to get a straight edge to cut from. I used a straight edge guide and used the circular saw to trim an edge of the boards straight.
Then I used the rip-cut to rip the boards down to the correct widths.
Step 2 – Cut and Glue
Cut the board lengths according to the cut list.
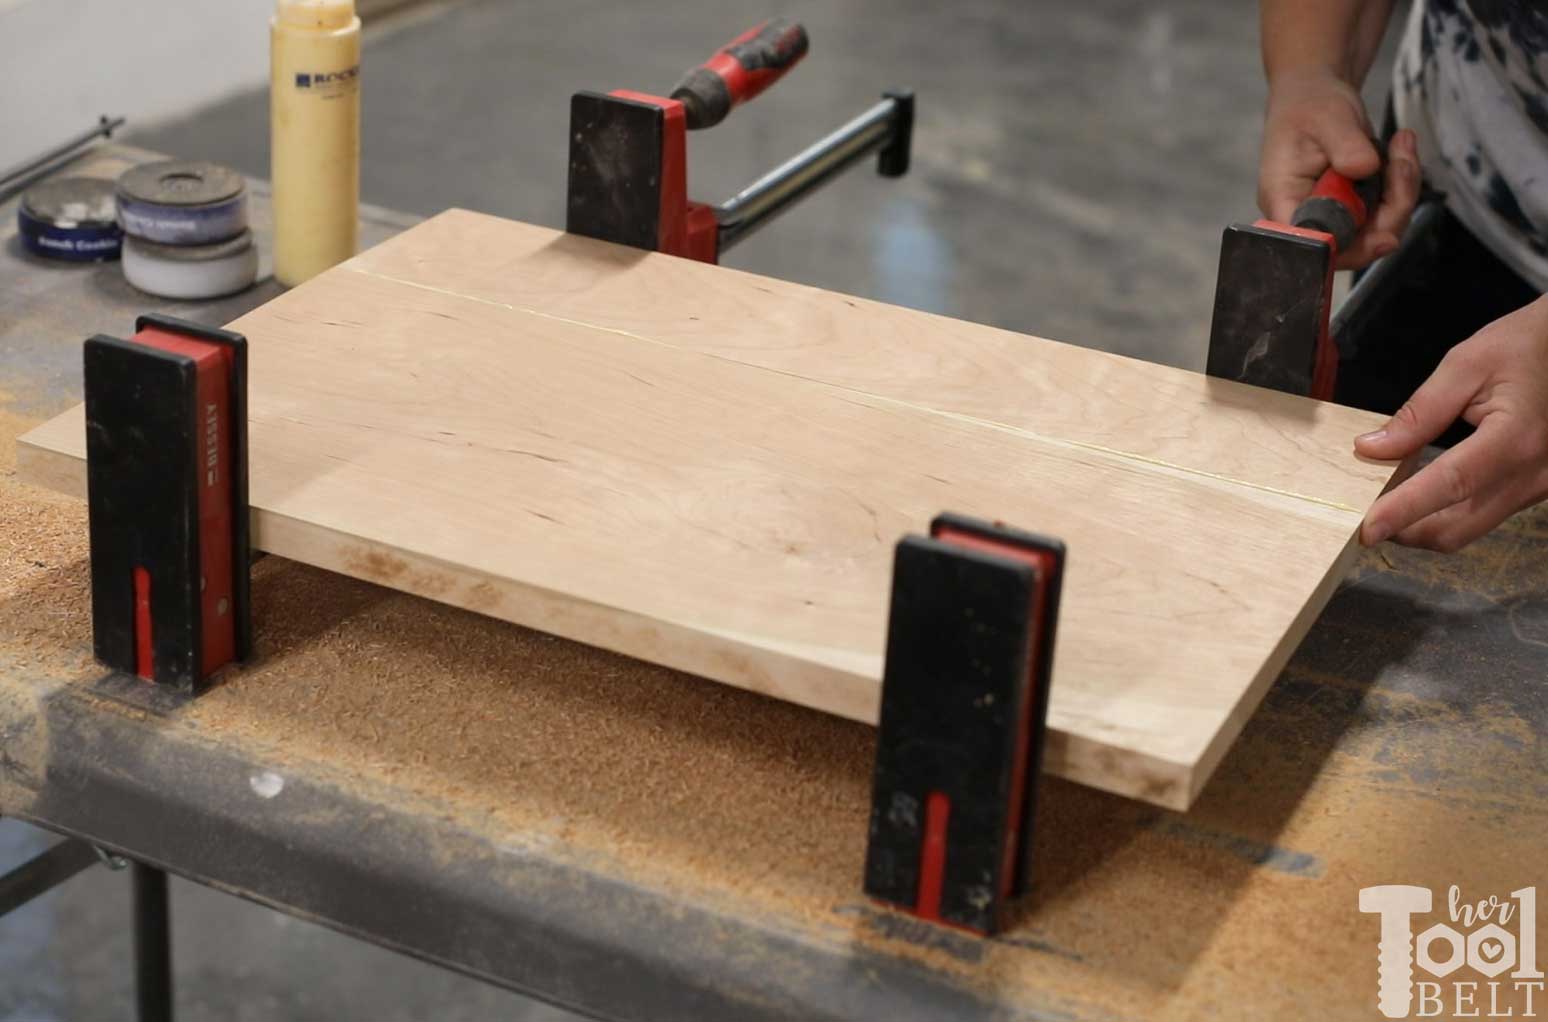
Glue the top pieces together along the 22 1/2″ edges, and glue 2 sets of shelves together along the 20 1/2″ edge.
- Top dimensions: 16″ x 22 1/2″
- Shelf dimensions: 14″ x 20 1/2″
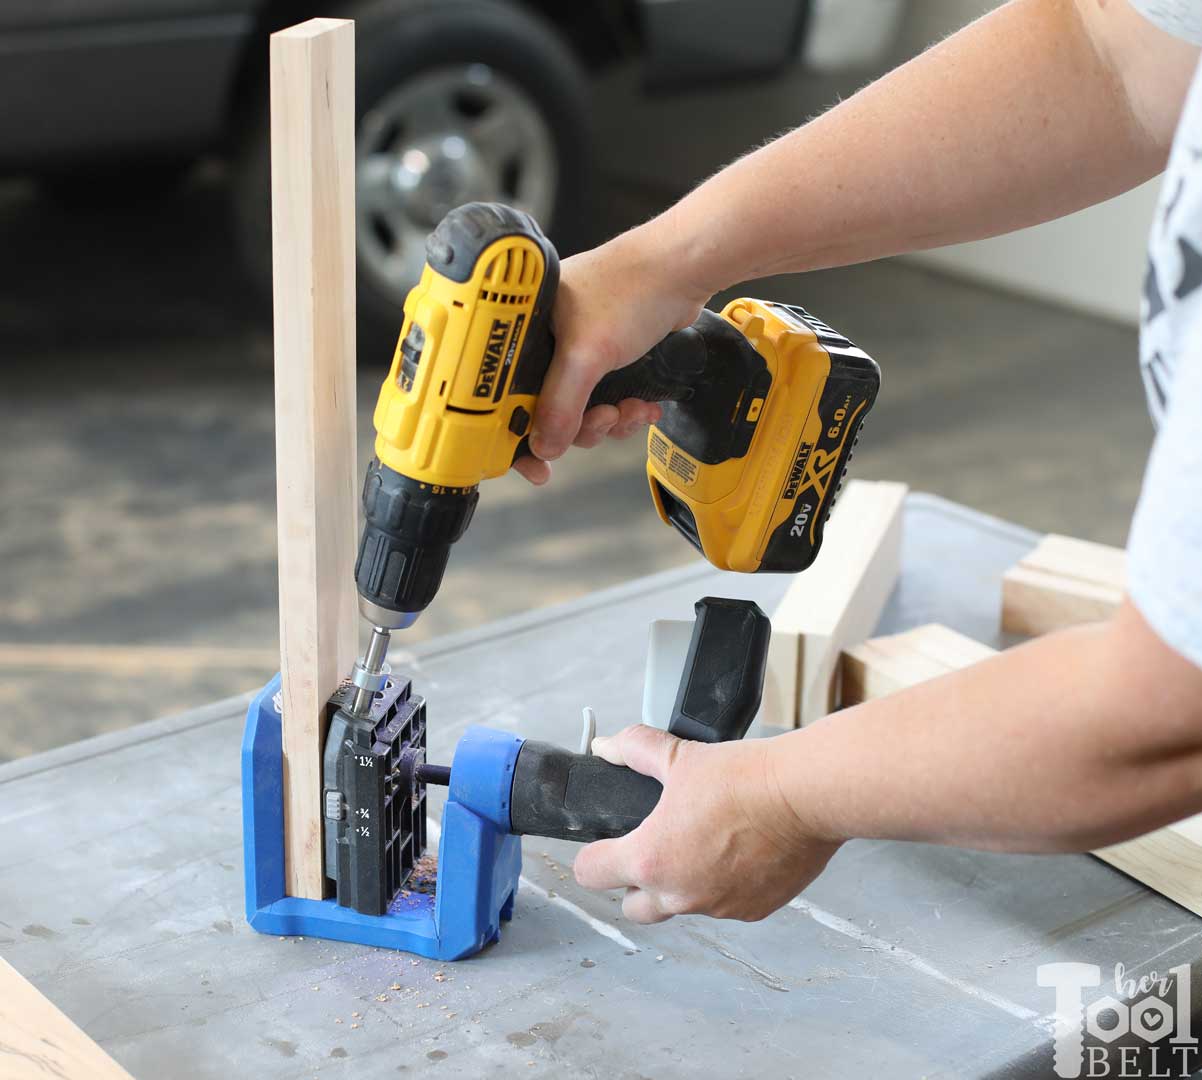
Drill pocket holes
- In each of the 11″ and 17″ pieces, drill pocket holes in each end.
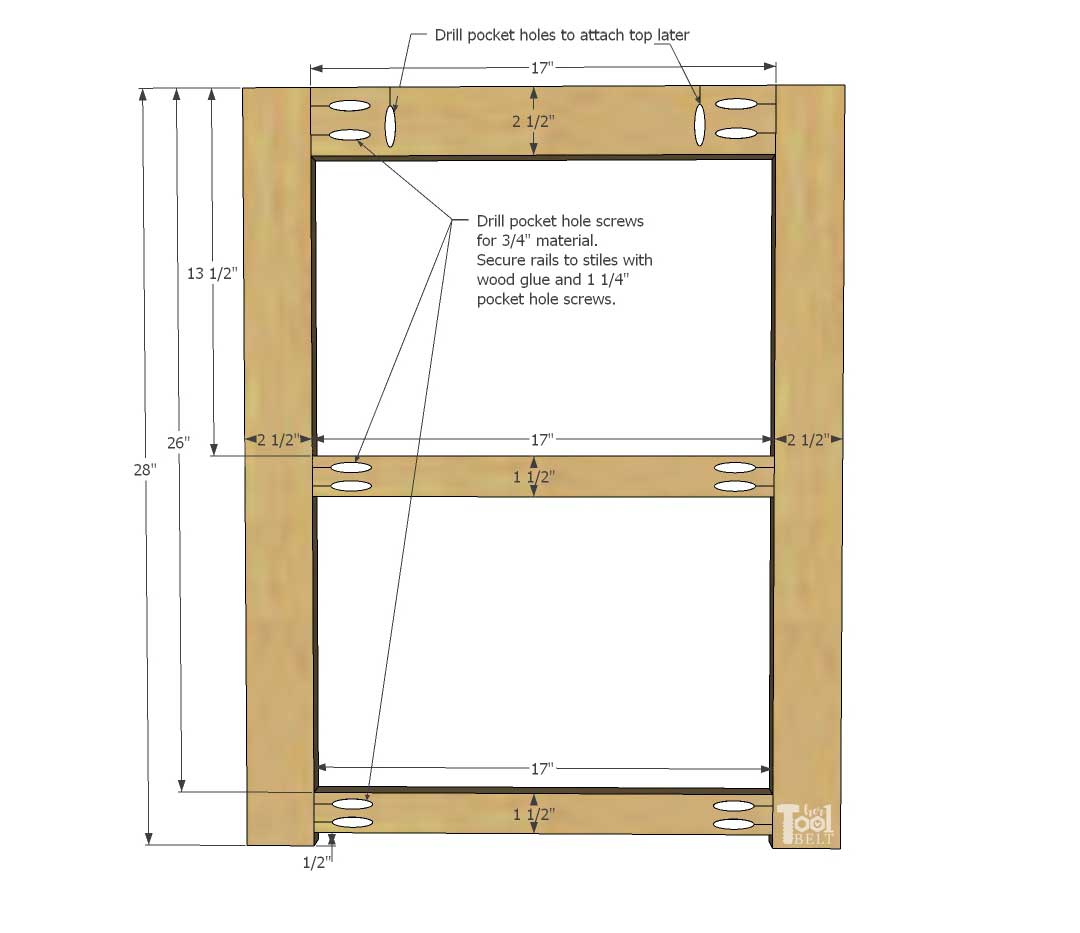
- The ‘upper’ pieces, drill pocket holes to attach the top later.
- In the Side Legs, drill pocket holes along one long edge (about 5 or more spaced evenly).
Build the front and back face frames with the 2 1/2″ wide legs and 17″ long pieces. The upper piece is flush with the tops of the legs. The middle shelf starts 13 1/2″ from the top and the lower shelf starts 26″ from the top (leaves 1/2″ gap from the bottom).
Repeat for the side face frames.
Build the side face frames with the 1 1/2″ wide legs and 11″ long pieces. The upper piece is flush with the tops of the legs. The middle shelf starts 13 1/2″ from the top and the lower shelf starts 26″ from the top (leaves 1/2″ gap from the bottom).
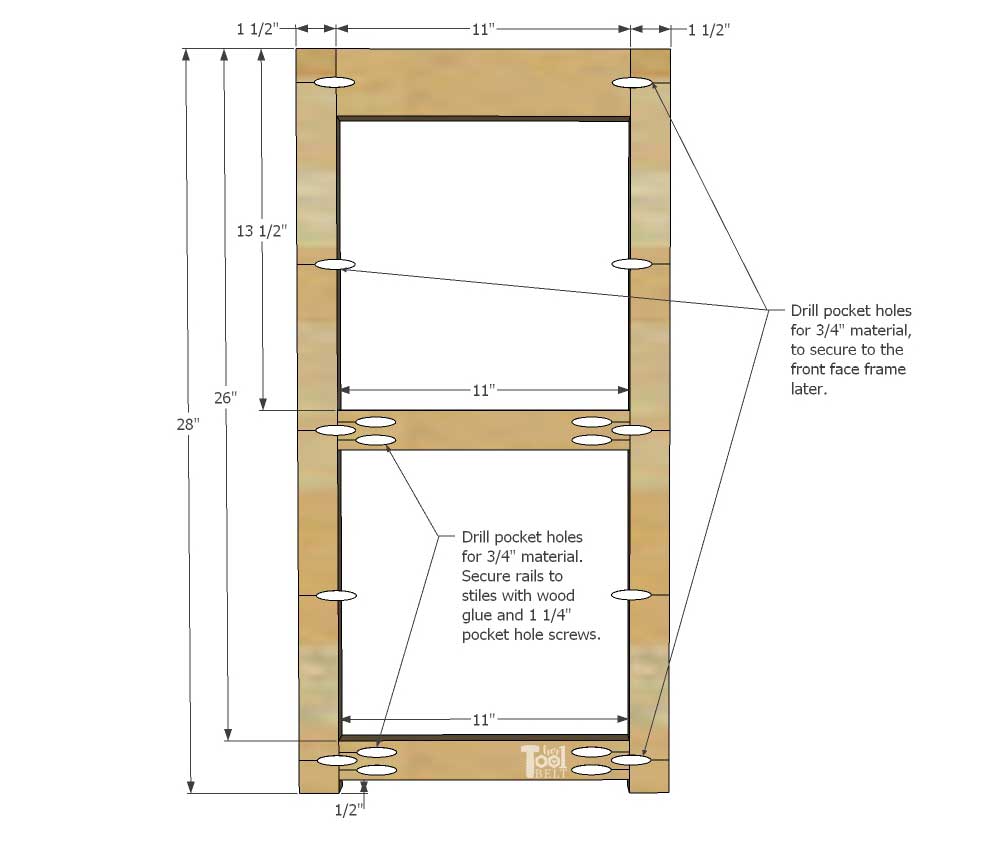
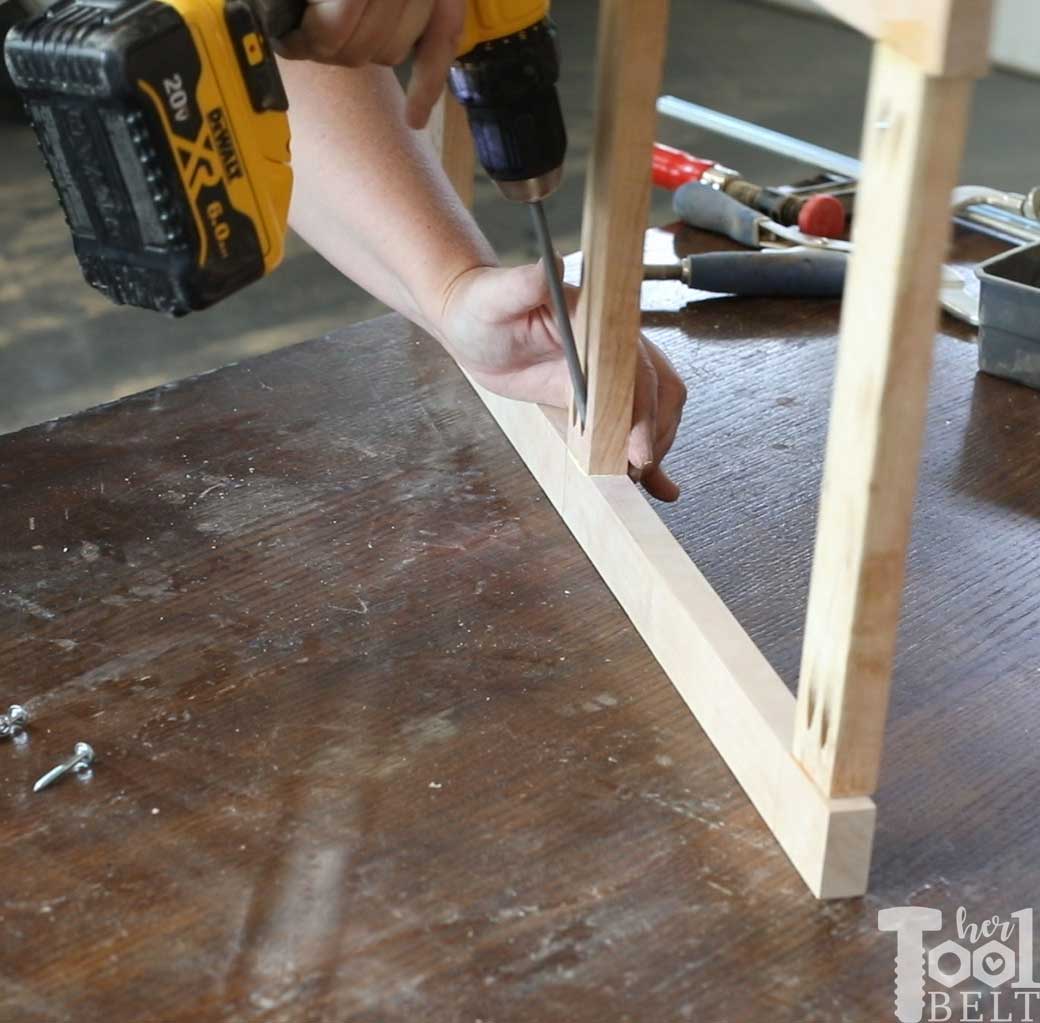
I used wood glue and 1 1/4″ fine thread pocket hole screws to assemble the 4 face frames.
Step 3 – Detail Trim
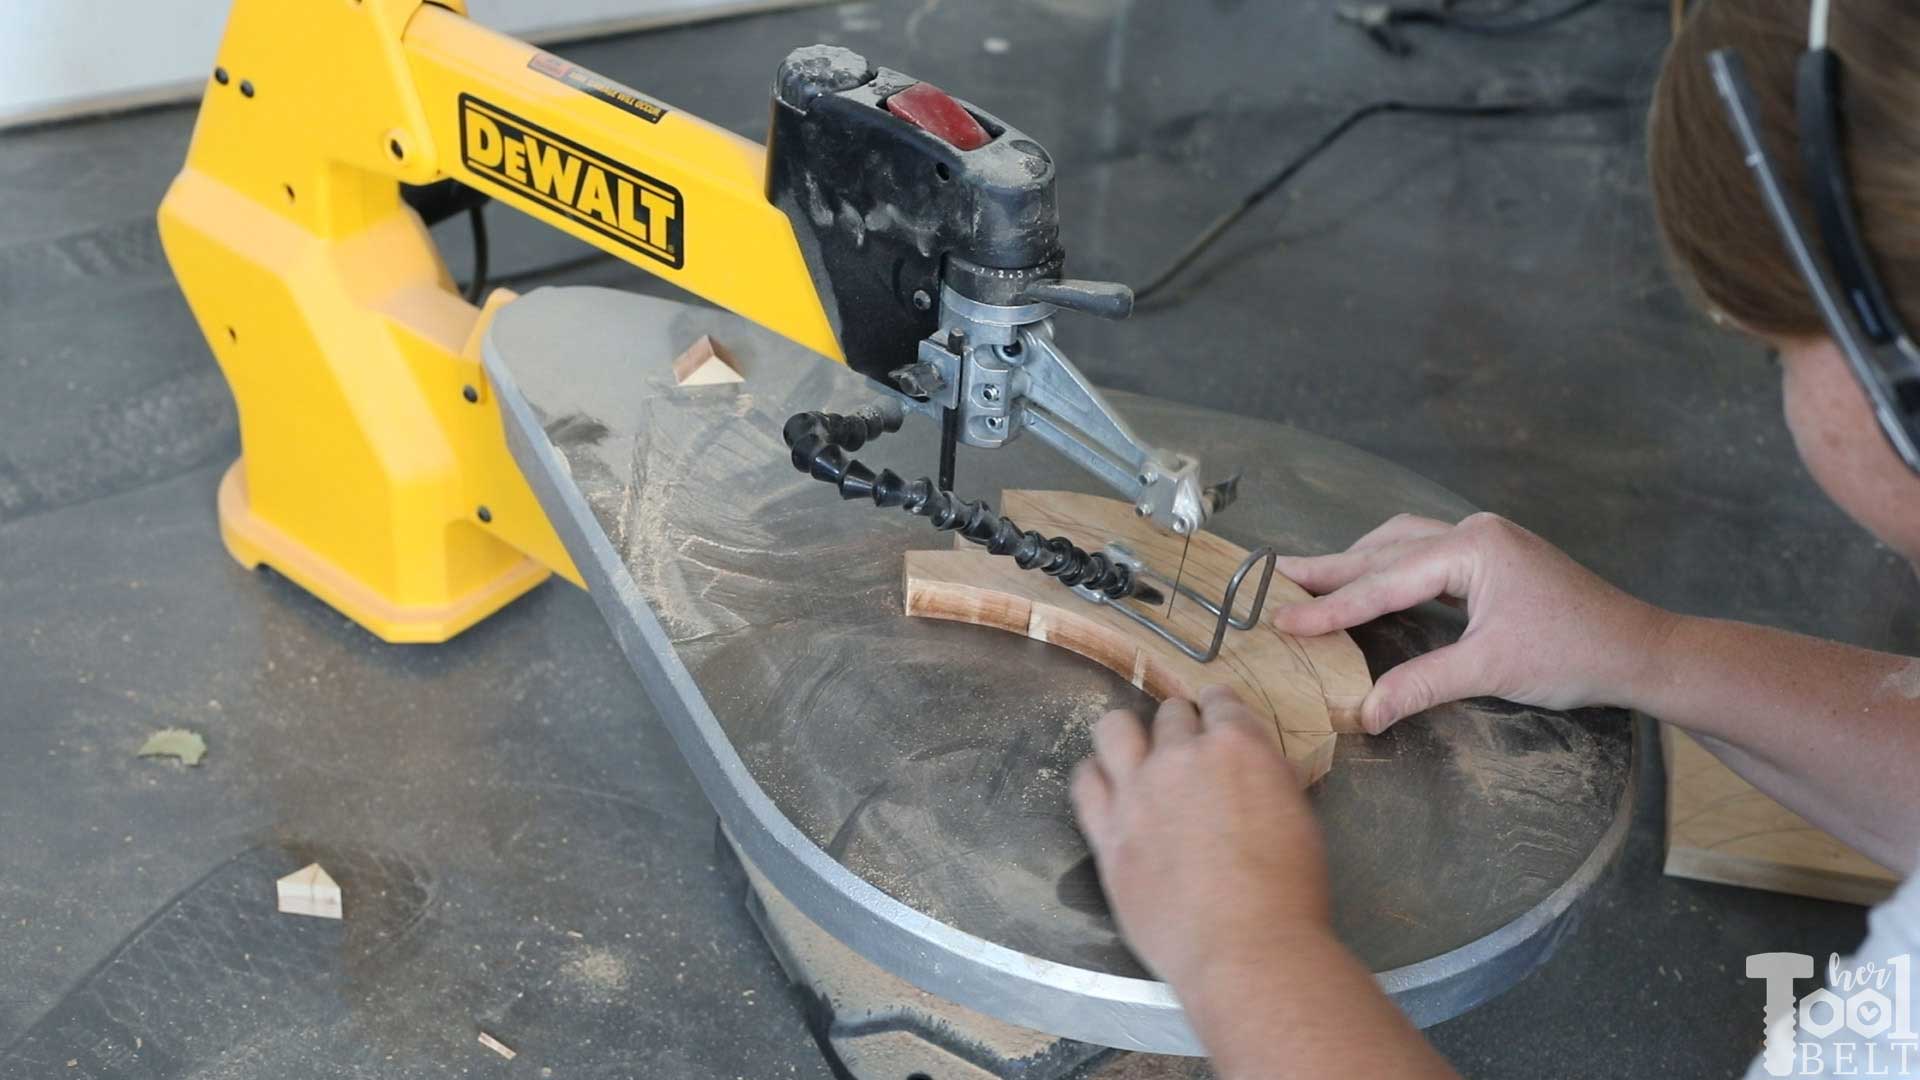
The side details are optional. I used the scroll saw to cut out 16 pieces.
You can download the Ornamental Detail Trim template –> Here <– Make sure to print it at 100%, not ‘fit to page’.
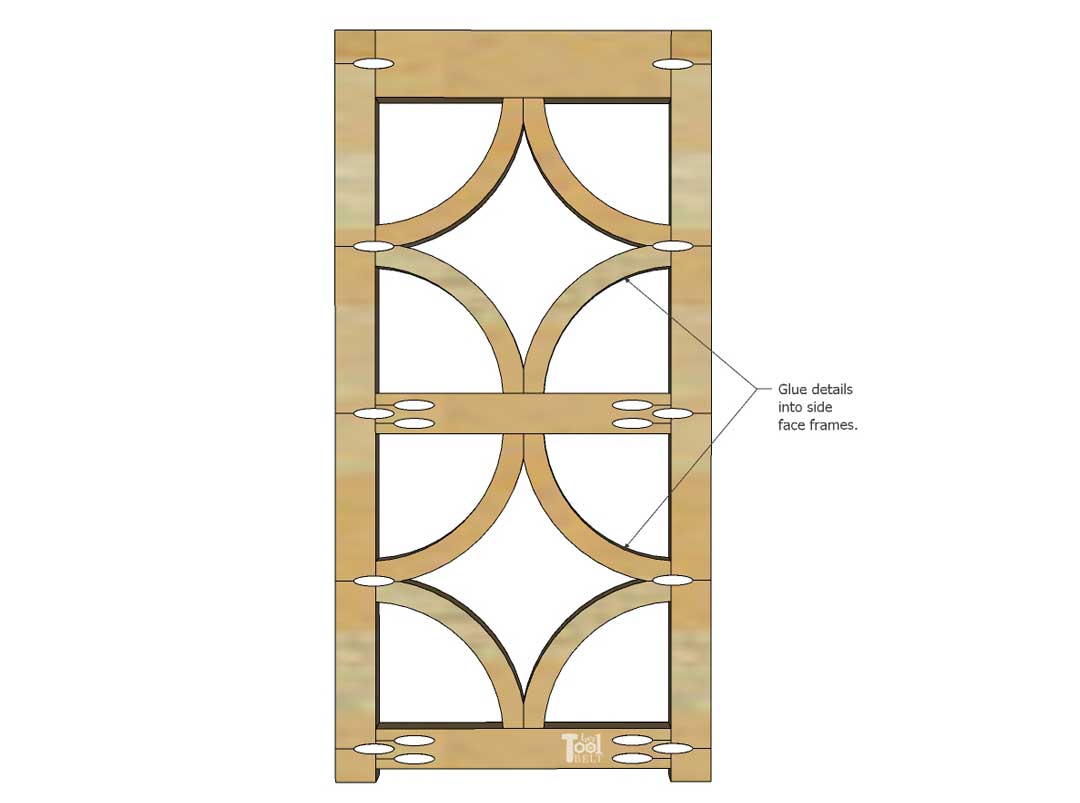
The trim details didn’t fit as perfectly the first time as I hoped. I had to sand and trim the pieces to fit. Then I glued the trim details into the side face frames.

Once all of the glue has dried, I sanded all of the pieces smooth.
Step 4 – Side Table Assembly
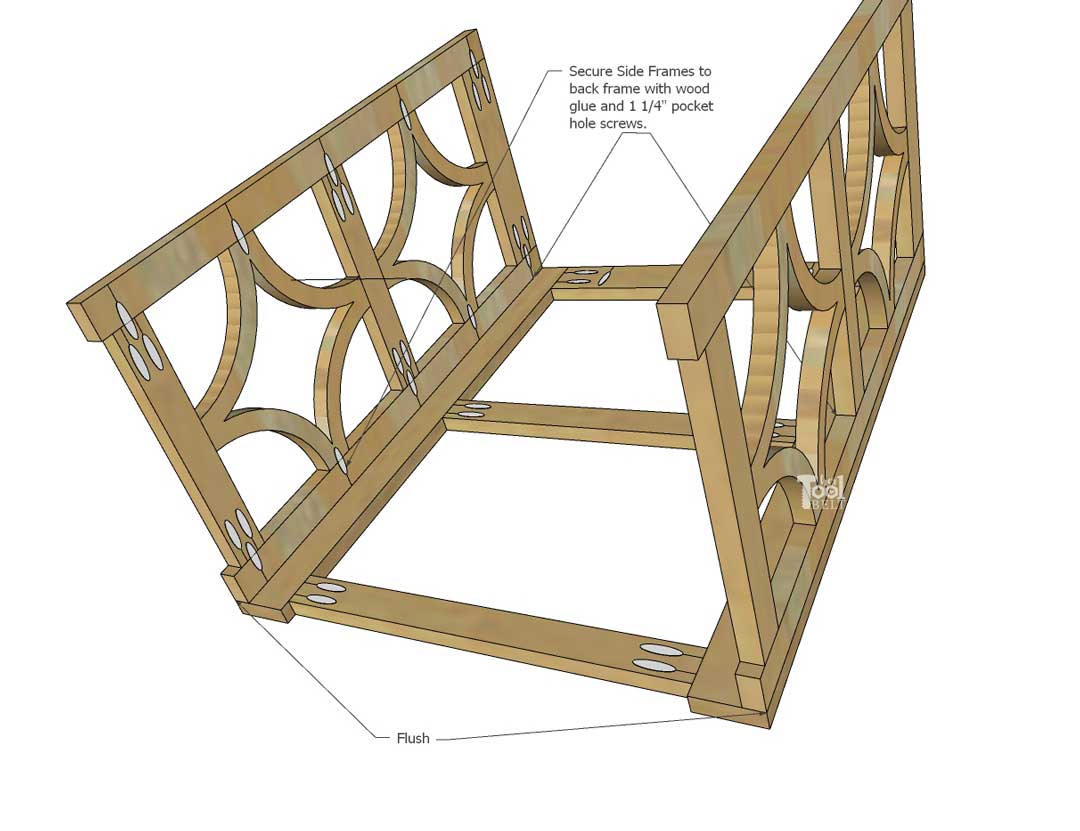
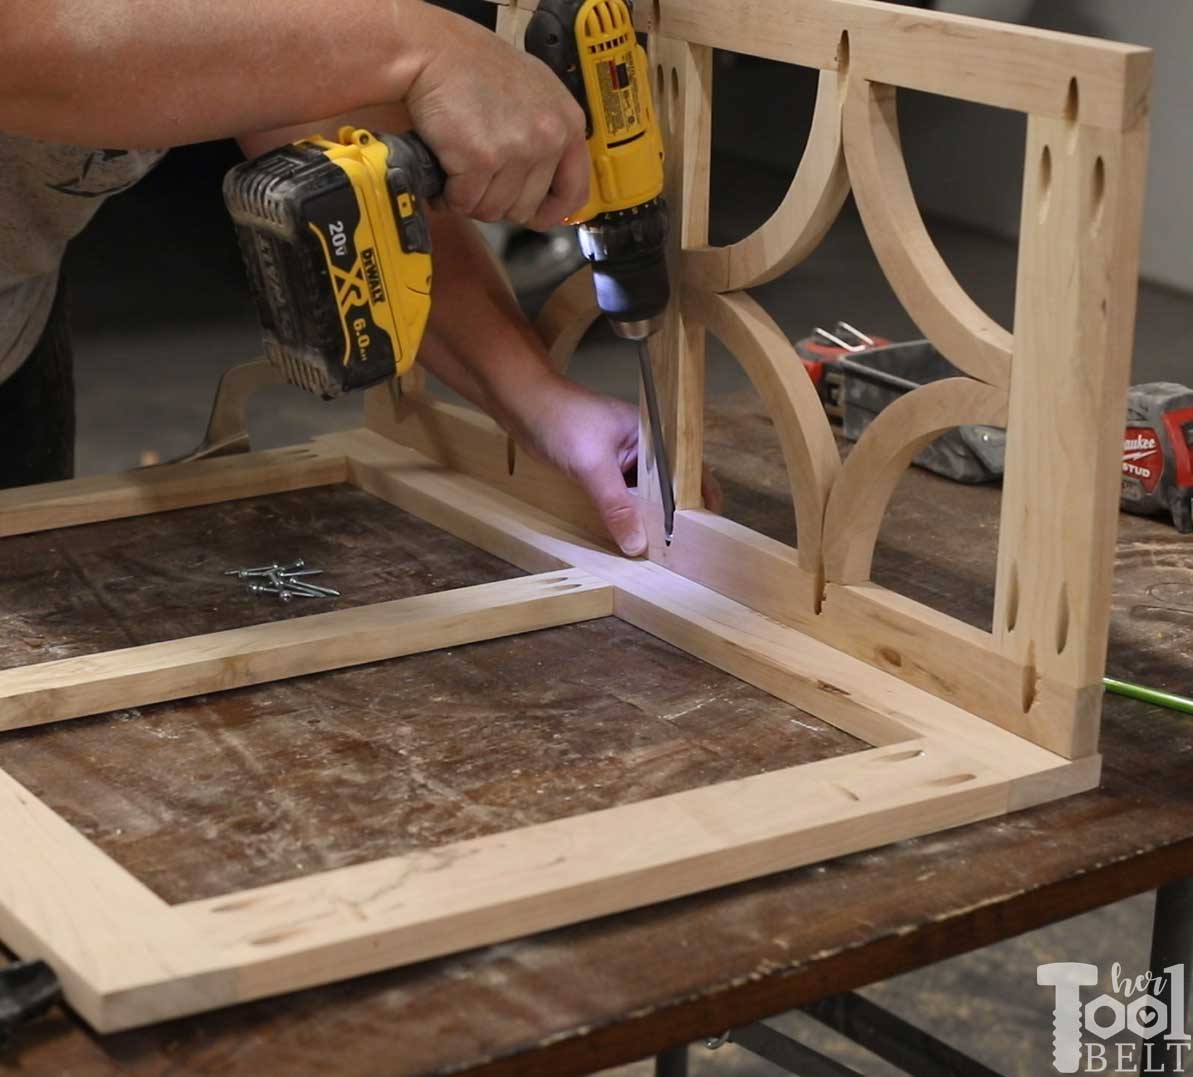
The side face frames are attached to the back face frame. I used wood glue and 1 1/4″ fine thread pocket hole screws.
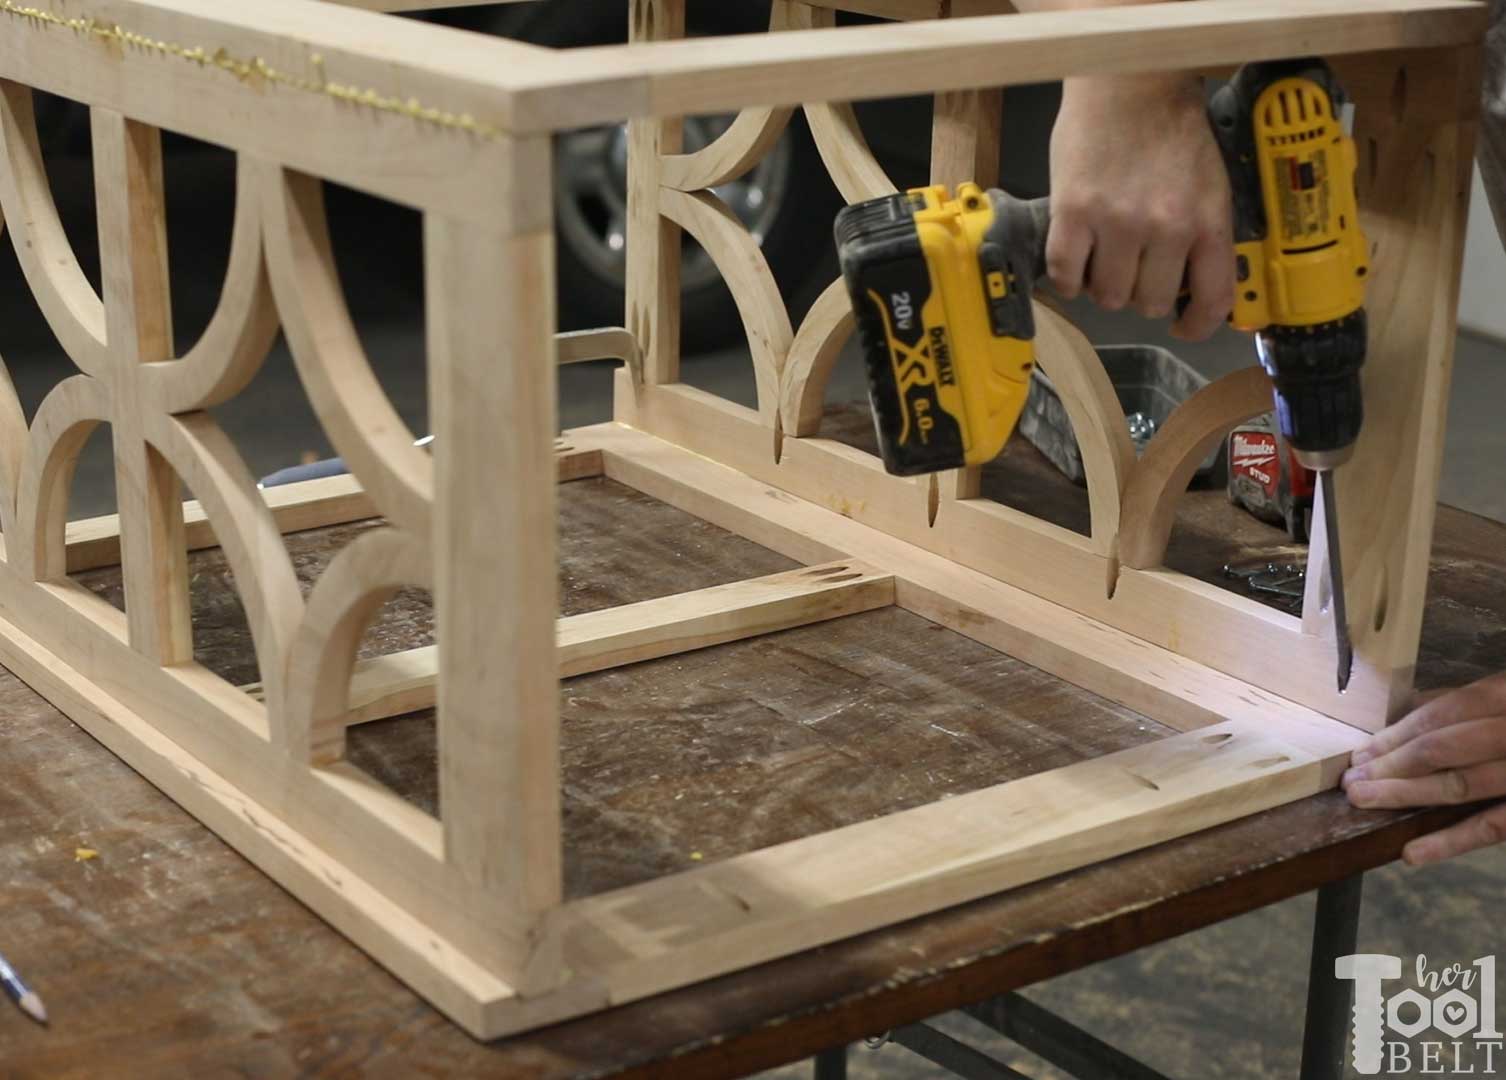
The side face frames are then attached to the front face frame. I used wood glue and 1 1/4″ fine thread pocket hole screws.
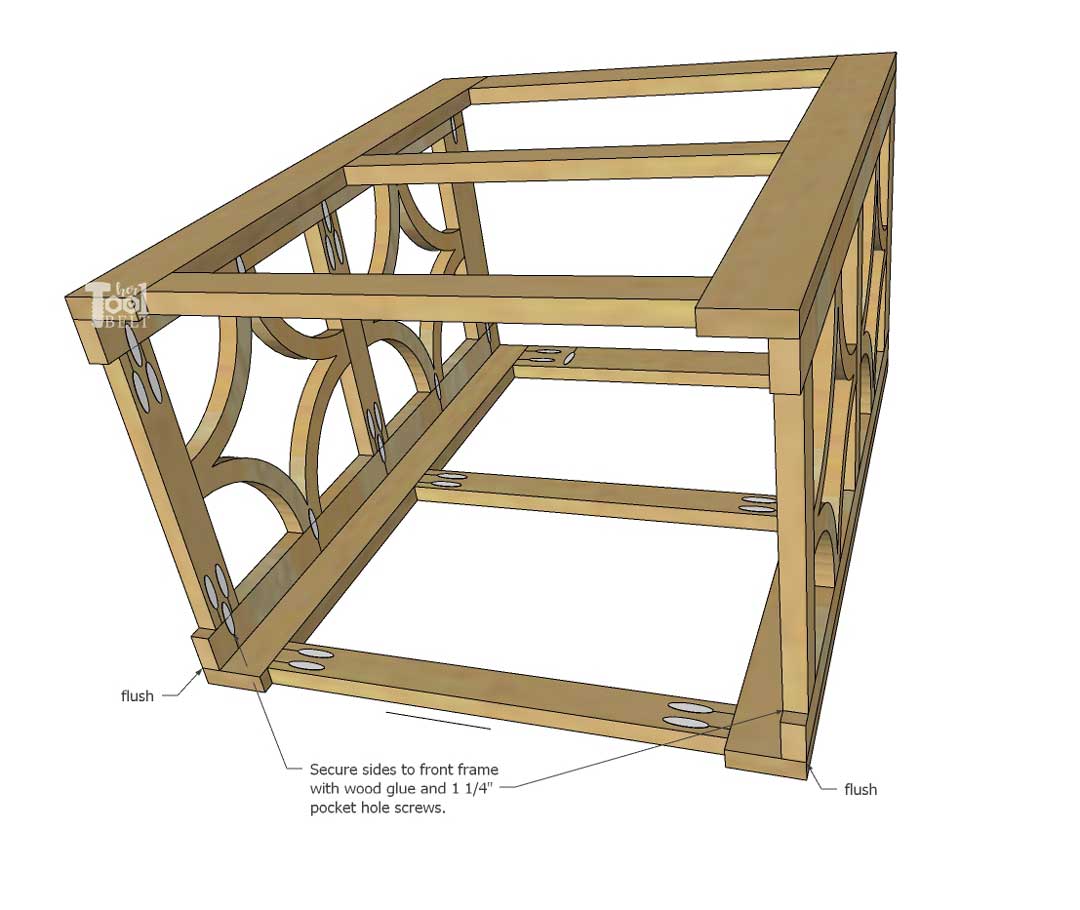
The side assemblies should be flush with the outside edge of the front and back face frames.
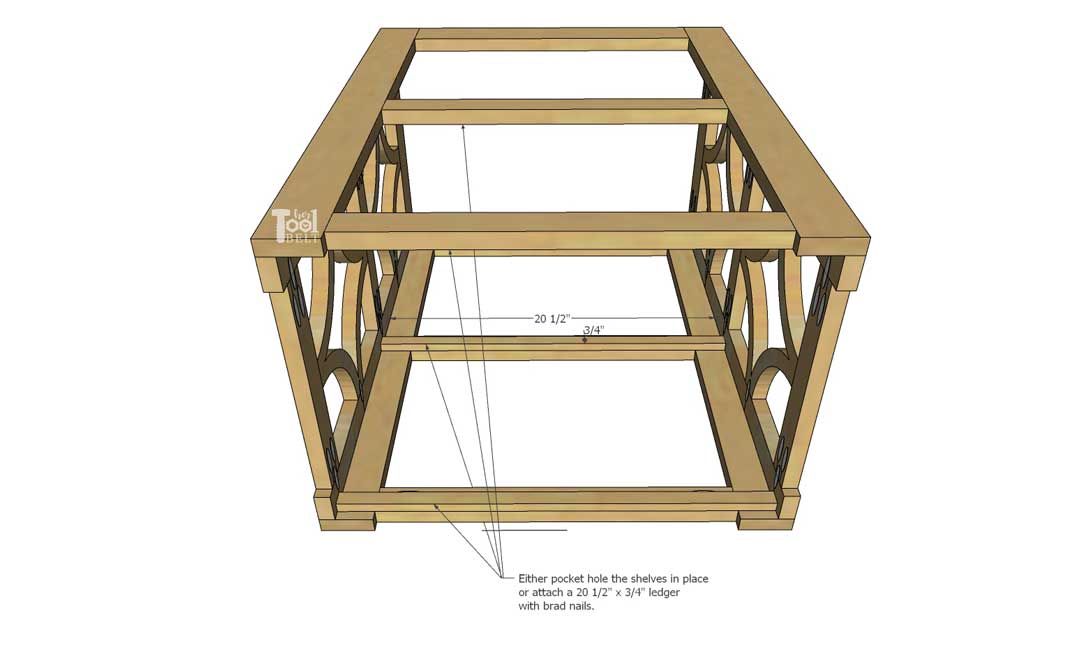
Shelf Support
The shelves can be attached to the frames with pocket hole and pocket hole screws, or ledgers can be attached to the rails to support the shelves.
I attached 3/4″ x 3/4″ x 20 1/2″(or a little less) to the rails (flush with the bottom), securing with 1 1/4″ brad nails.
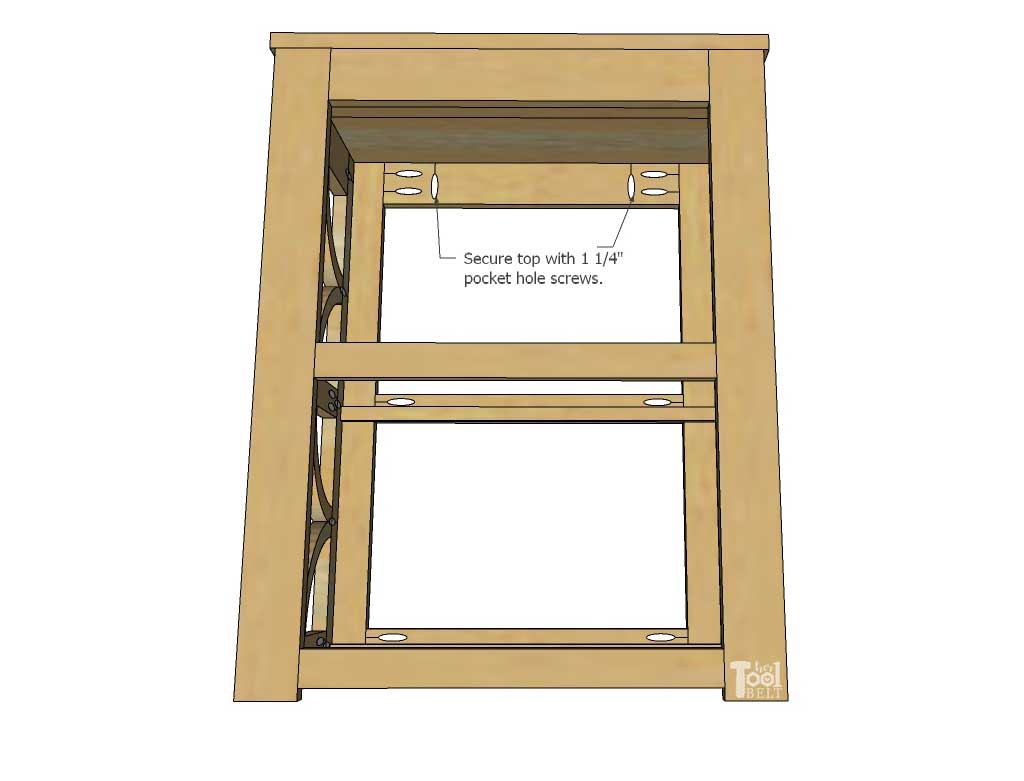
I centered and attached the top with 1 1/4″ pocket hole screws, making the back of the top flush with the back of the side table.
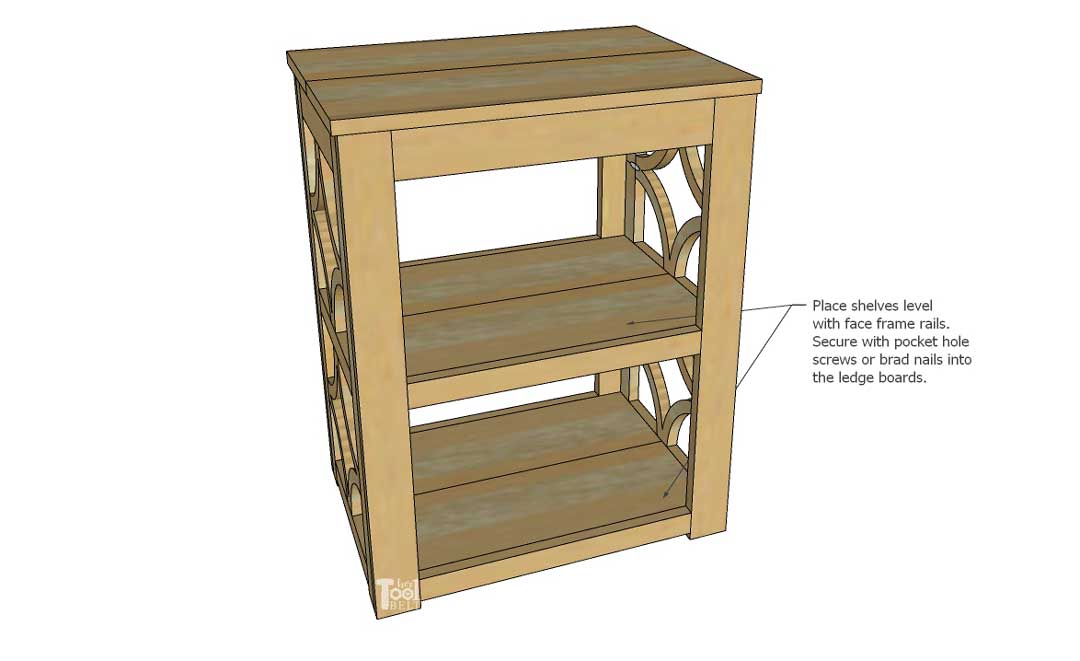
Finally I placed the shelves on the ledges, they can be tacked into place with brad nails. Alternately, the shelves can be secured in place with pocket holes/screws.
Step 5 – Finish
Sand all of the wood smooth, and apply your favorite finish to the wood.
Download –> The Lisa Side Table Building Plans – Here <–
Thanks for pinning!
“I acknowledge that The Home Depot is partnering with me to participate in the Tool Review Program. As a part of the Program, I am receiving compensation in the form of products and services, for the purpose of promoting The Home Depot. All expressed opinions and experiences are my own words. My post complies with the Word Of Mouth Marketing Association (WOMMA) Ethics Code and applicable Federal Trade Commission guidelines.”
Leave a Reply