Today is the day, it’s time for the Virtual Party, WaHoo!!!
A few friends have virtually gathered to share some ideas about how you can customize the upcoming Home Depot DIY Workshop project: Wooden Door Mat
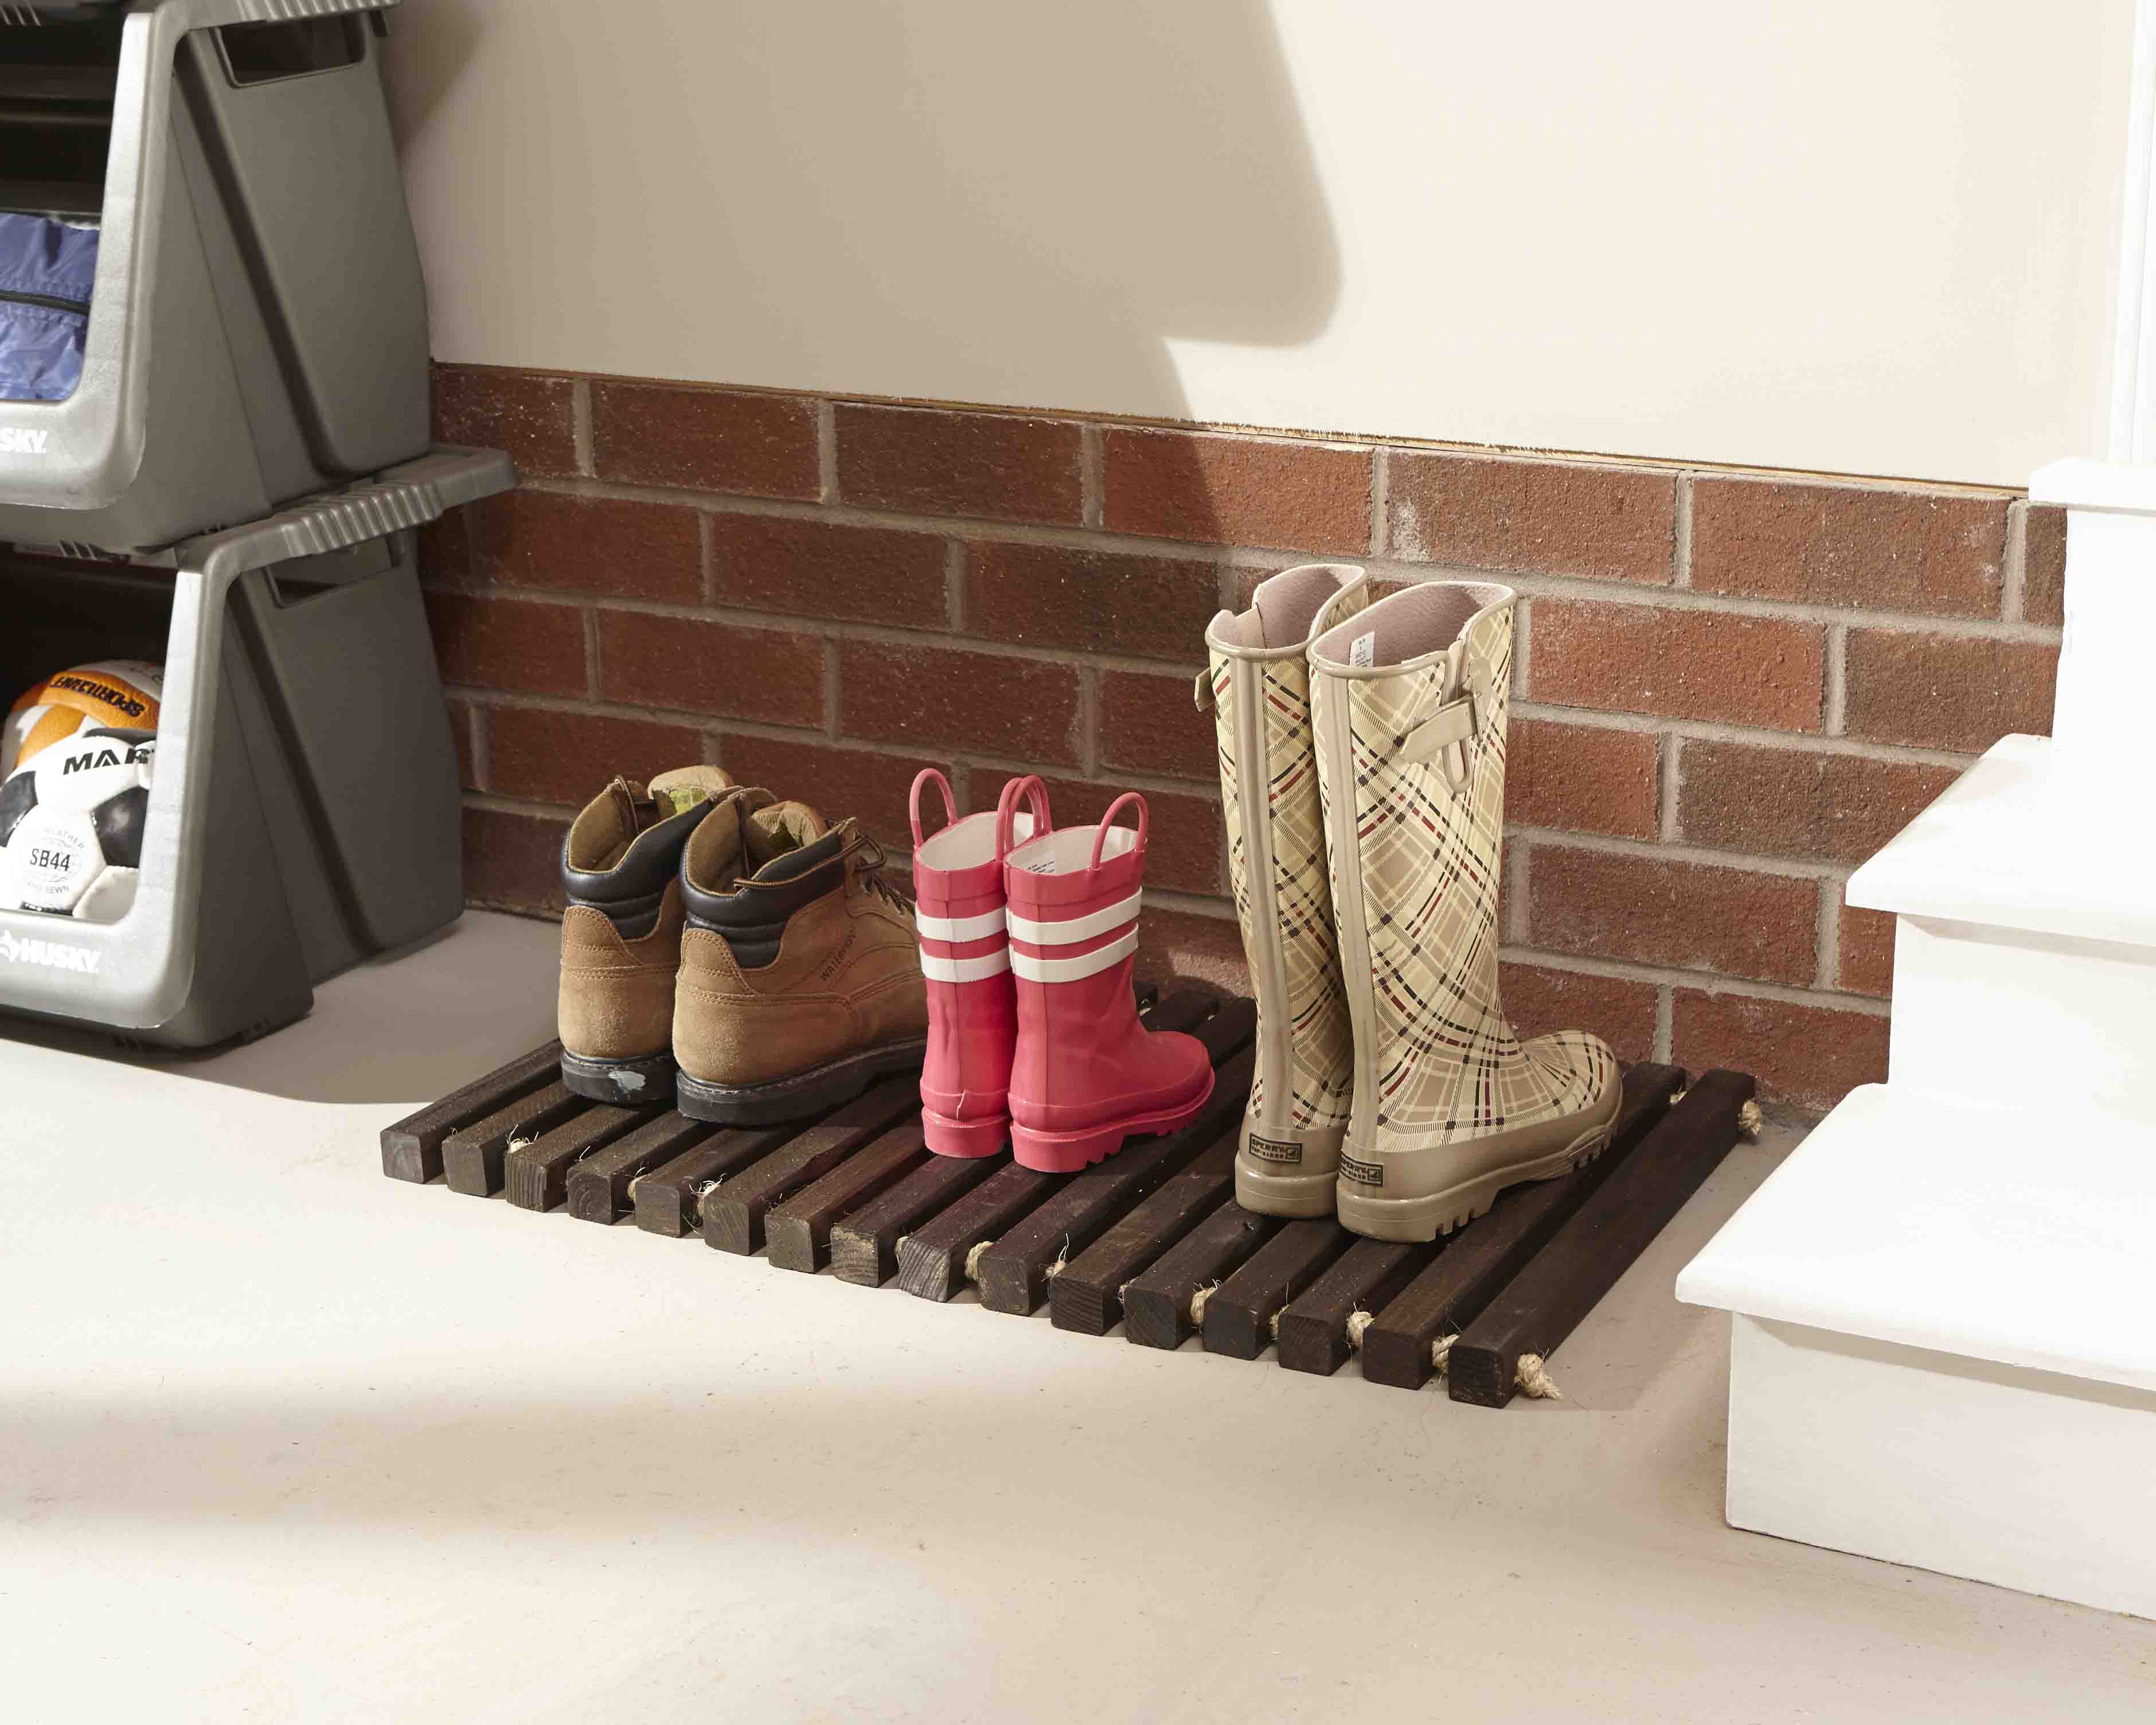
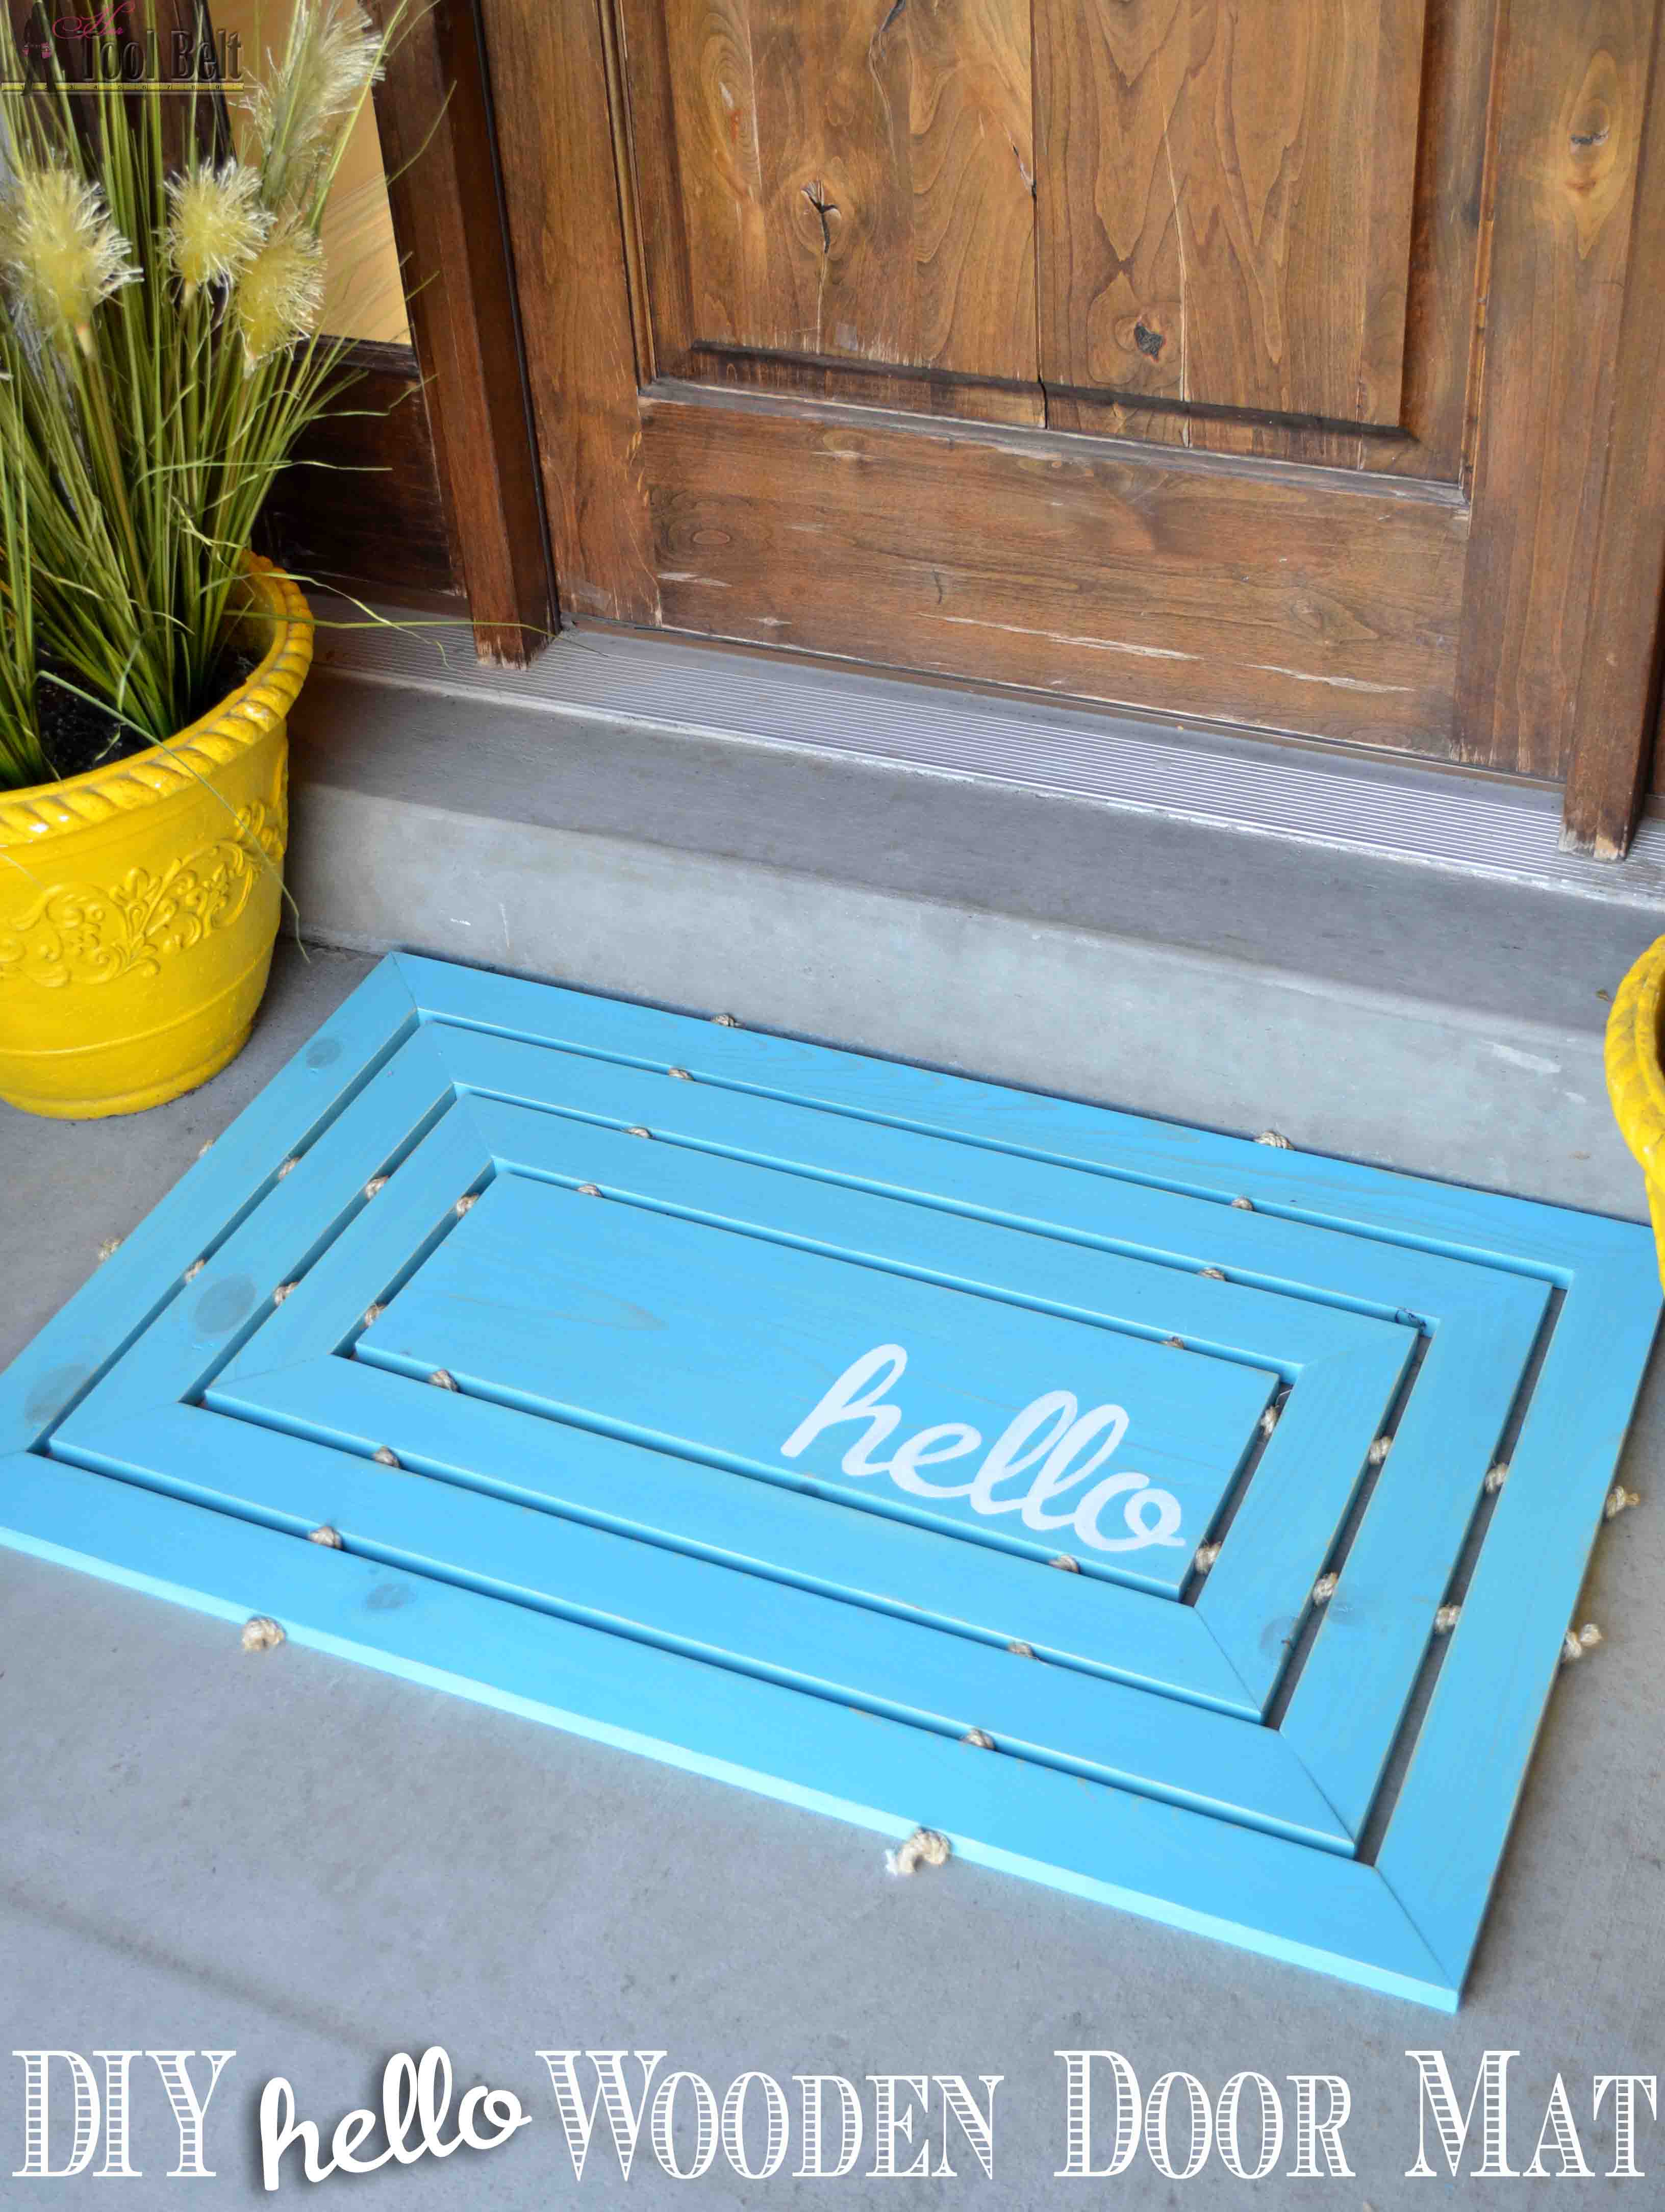
A wooden door mat is a durable and inexpensive project perfect for spring-time, keep all that mud outside!
Register for the Free Workshop
Make sure to get registered to attend the free workshop at your Home Depot on Saturday, March 26 at 10 am! ——> Register Here
The Home Depot offers Workshops at all of their locations for do-it-yourselfers of all ages and experience levels.
- There are three types of Workshops offered – Do-It Yourself (DIY), Do-It-Herself (DIH) and Kids.
- Customers can learn how to build décor projects, how to make easy home repairs and how to operate tools through demonstrations and step-by-step instructions.
- Visit Home Depot to learn more.
Go to the workshop to learn how to build this great door mat. Then build one at home and customize it for your space! Share your project creations with hashtag #DIYWorkshop
I decided to make my customized mat a nice cheery color, aqua (of course 🙂 ) to brighten up my dreary brown porch.
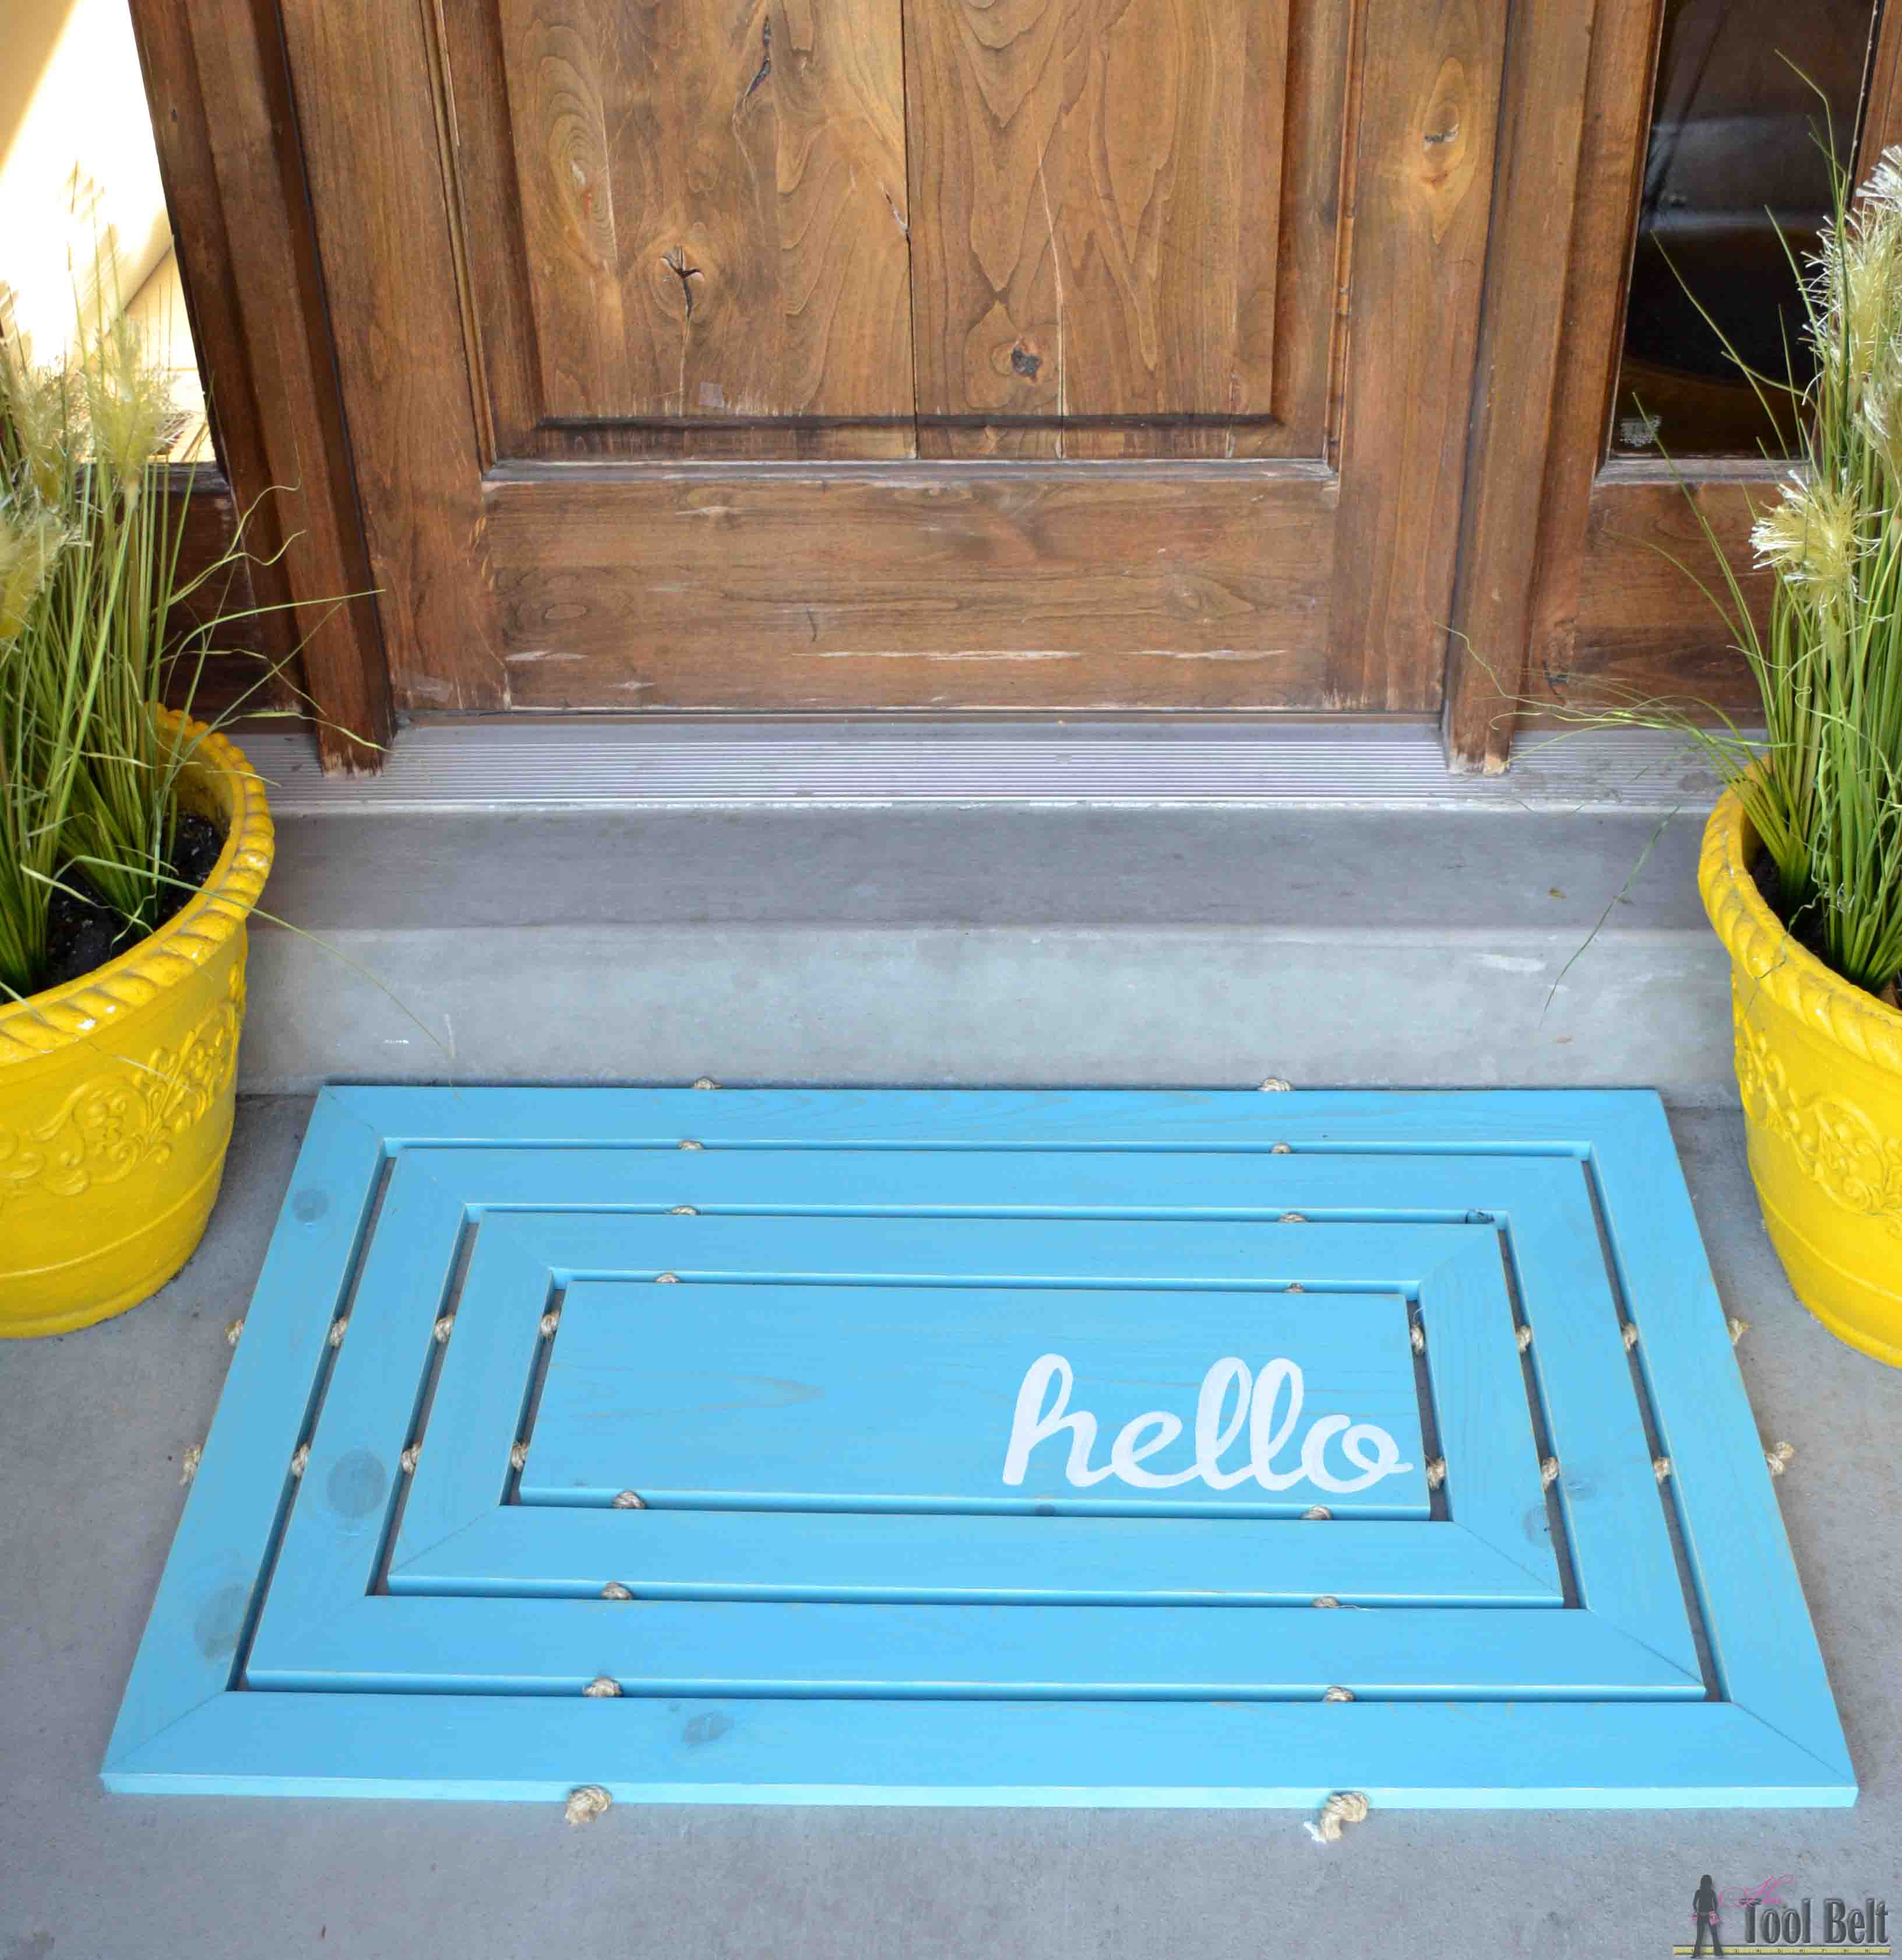
How to Build a Hello Wooden Door Mat
My front porch is fully covered, so I chose to make my wooden door mat out of pine. If your porch is more exposed to the elements, consider using cedar, it is more weather resistant than pine.
Materials
- 4 – 1″ x 3″ x 8′ boards (actual dimensions 3/4″ x 2 1/2″)
- 1 – 1″ x 10″ x 6′ board (actual dimenstion 3/4″ x 9 1/4″)
- 1/4″ x 50′ natural sisal rope
- 1 1/4″ pocket hole screws
- wood glue
- Rustoleum/Varathane Vintage Aqua stain
- white paint
- top coat (polyurethane)
- sandpaper
- painters tape – optional
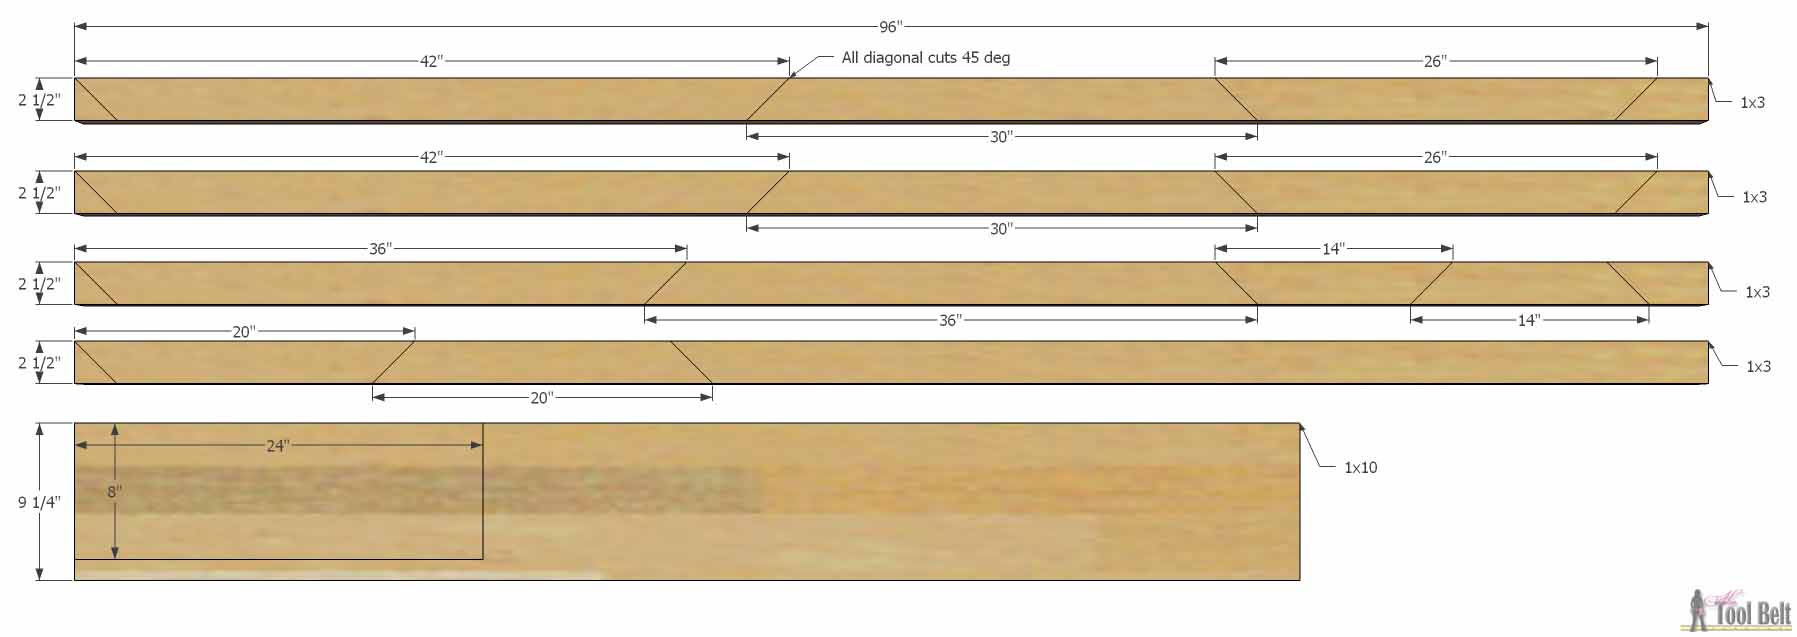
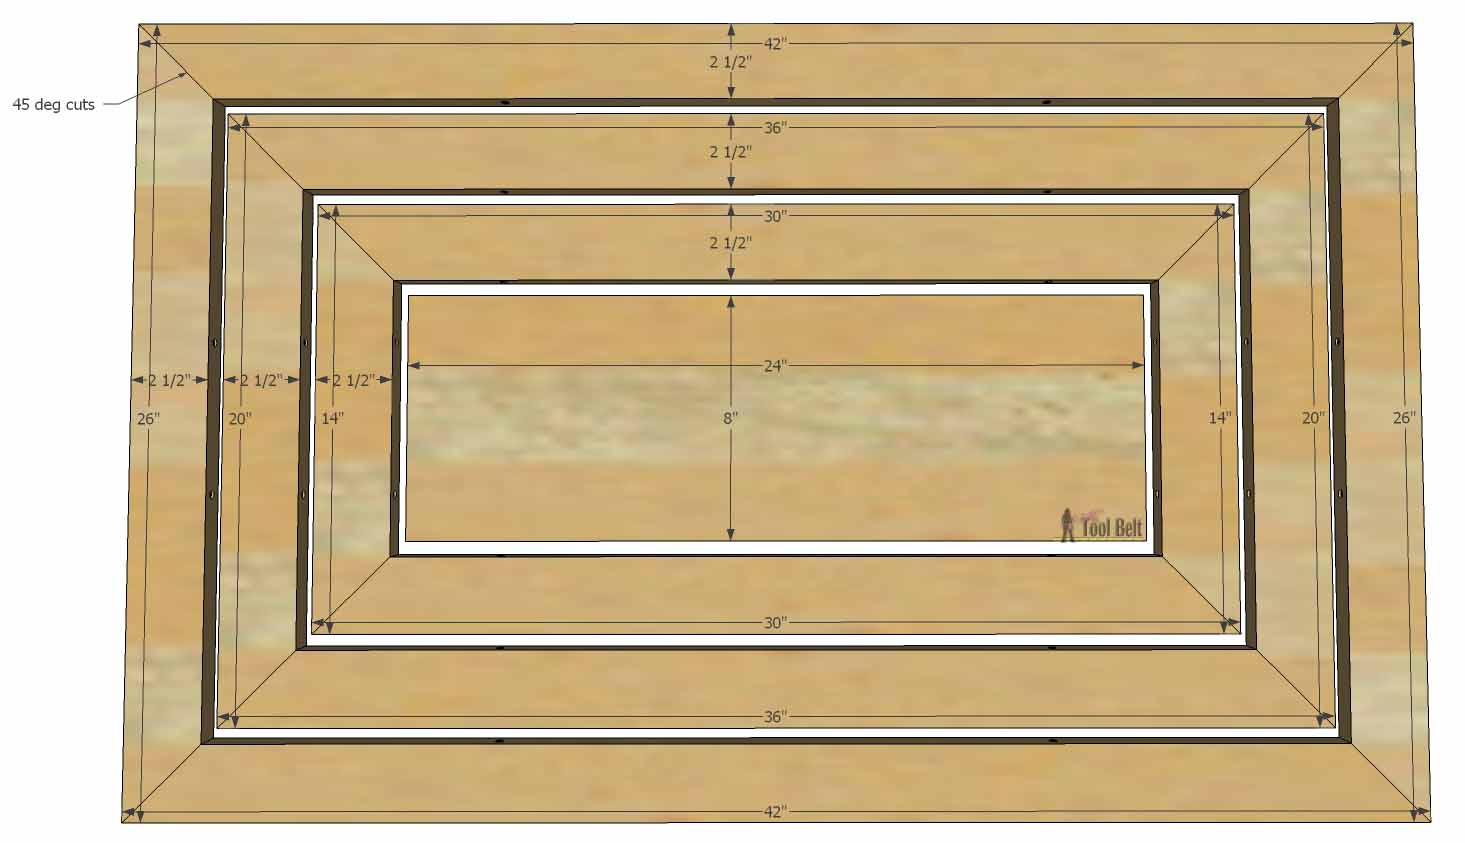
Cut List
- 2 – 3/4″ x 2 1/2″ x 42″ (45 deg miter on each end)
- 2 – 3/4″ x 2 1/2″ x 36″ (45 deg miter on each end)
- 2 – 3/4″ x 2 1/2″ x 30″ (45 deg miter on each end)
- 2 – 3/4″ x 2 1/2″ x 26″ (45 deg miter on each end)
- 2 – 3/4″ x 2 1/2″ x 20″ (45 deg miter on each end)
- 2 – 3/4″ x 2 1/2″ x 14″ (45 deg miter on each end)
- 1 – 3/4″ x 8″ x 24″
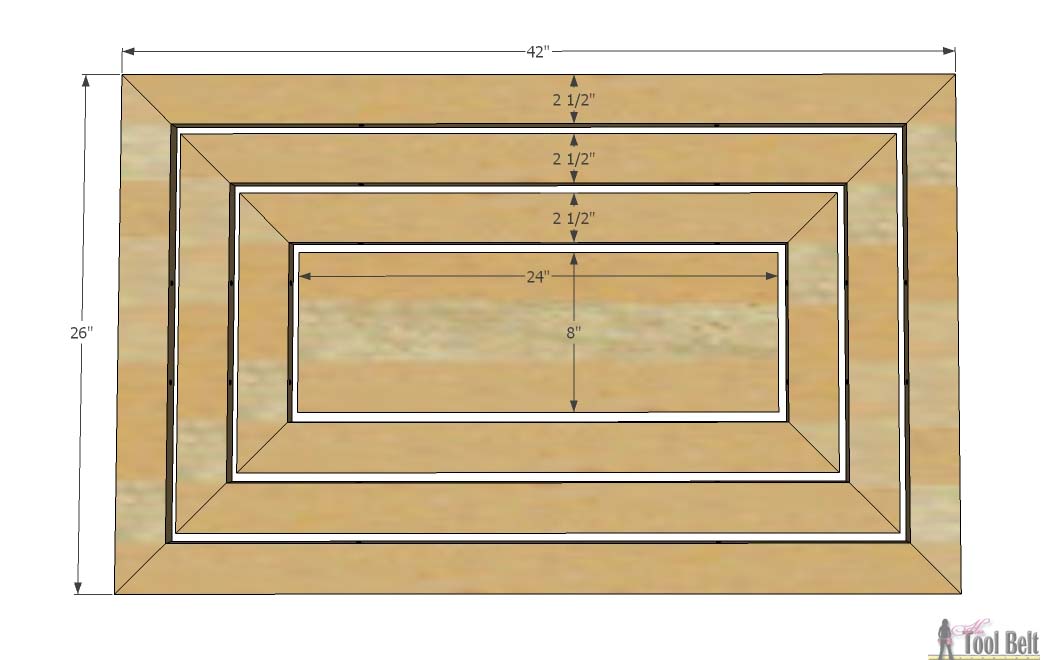
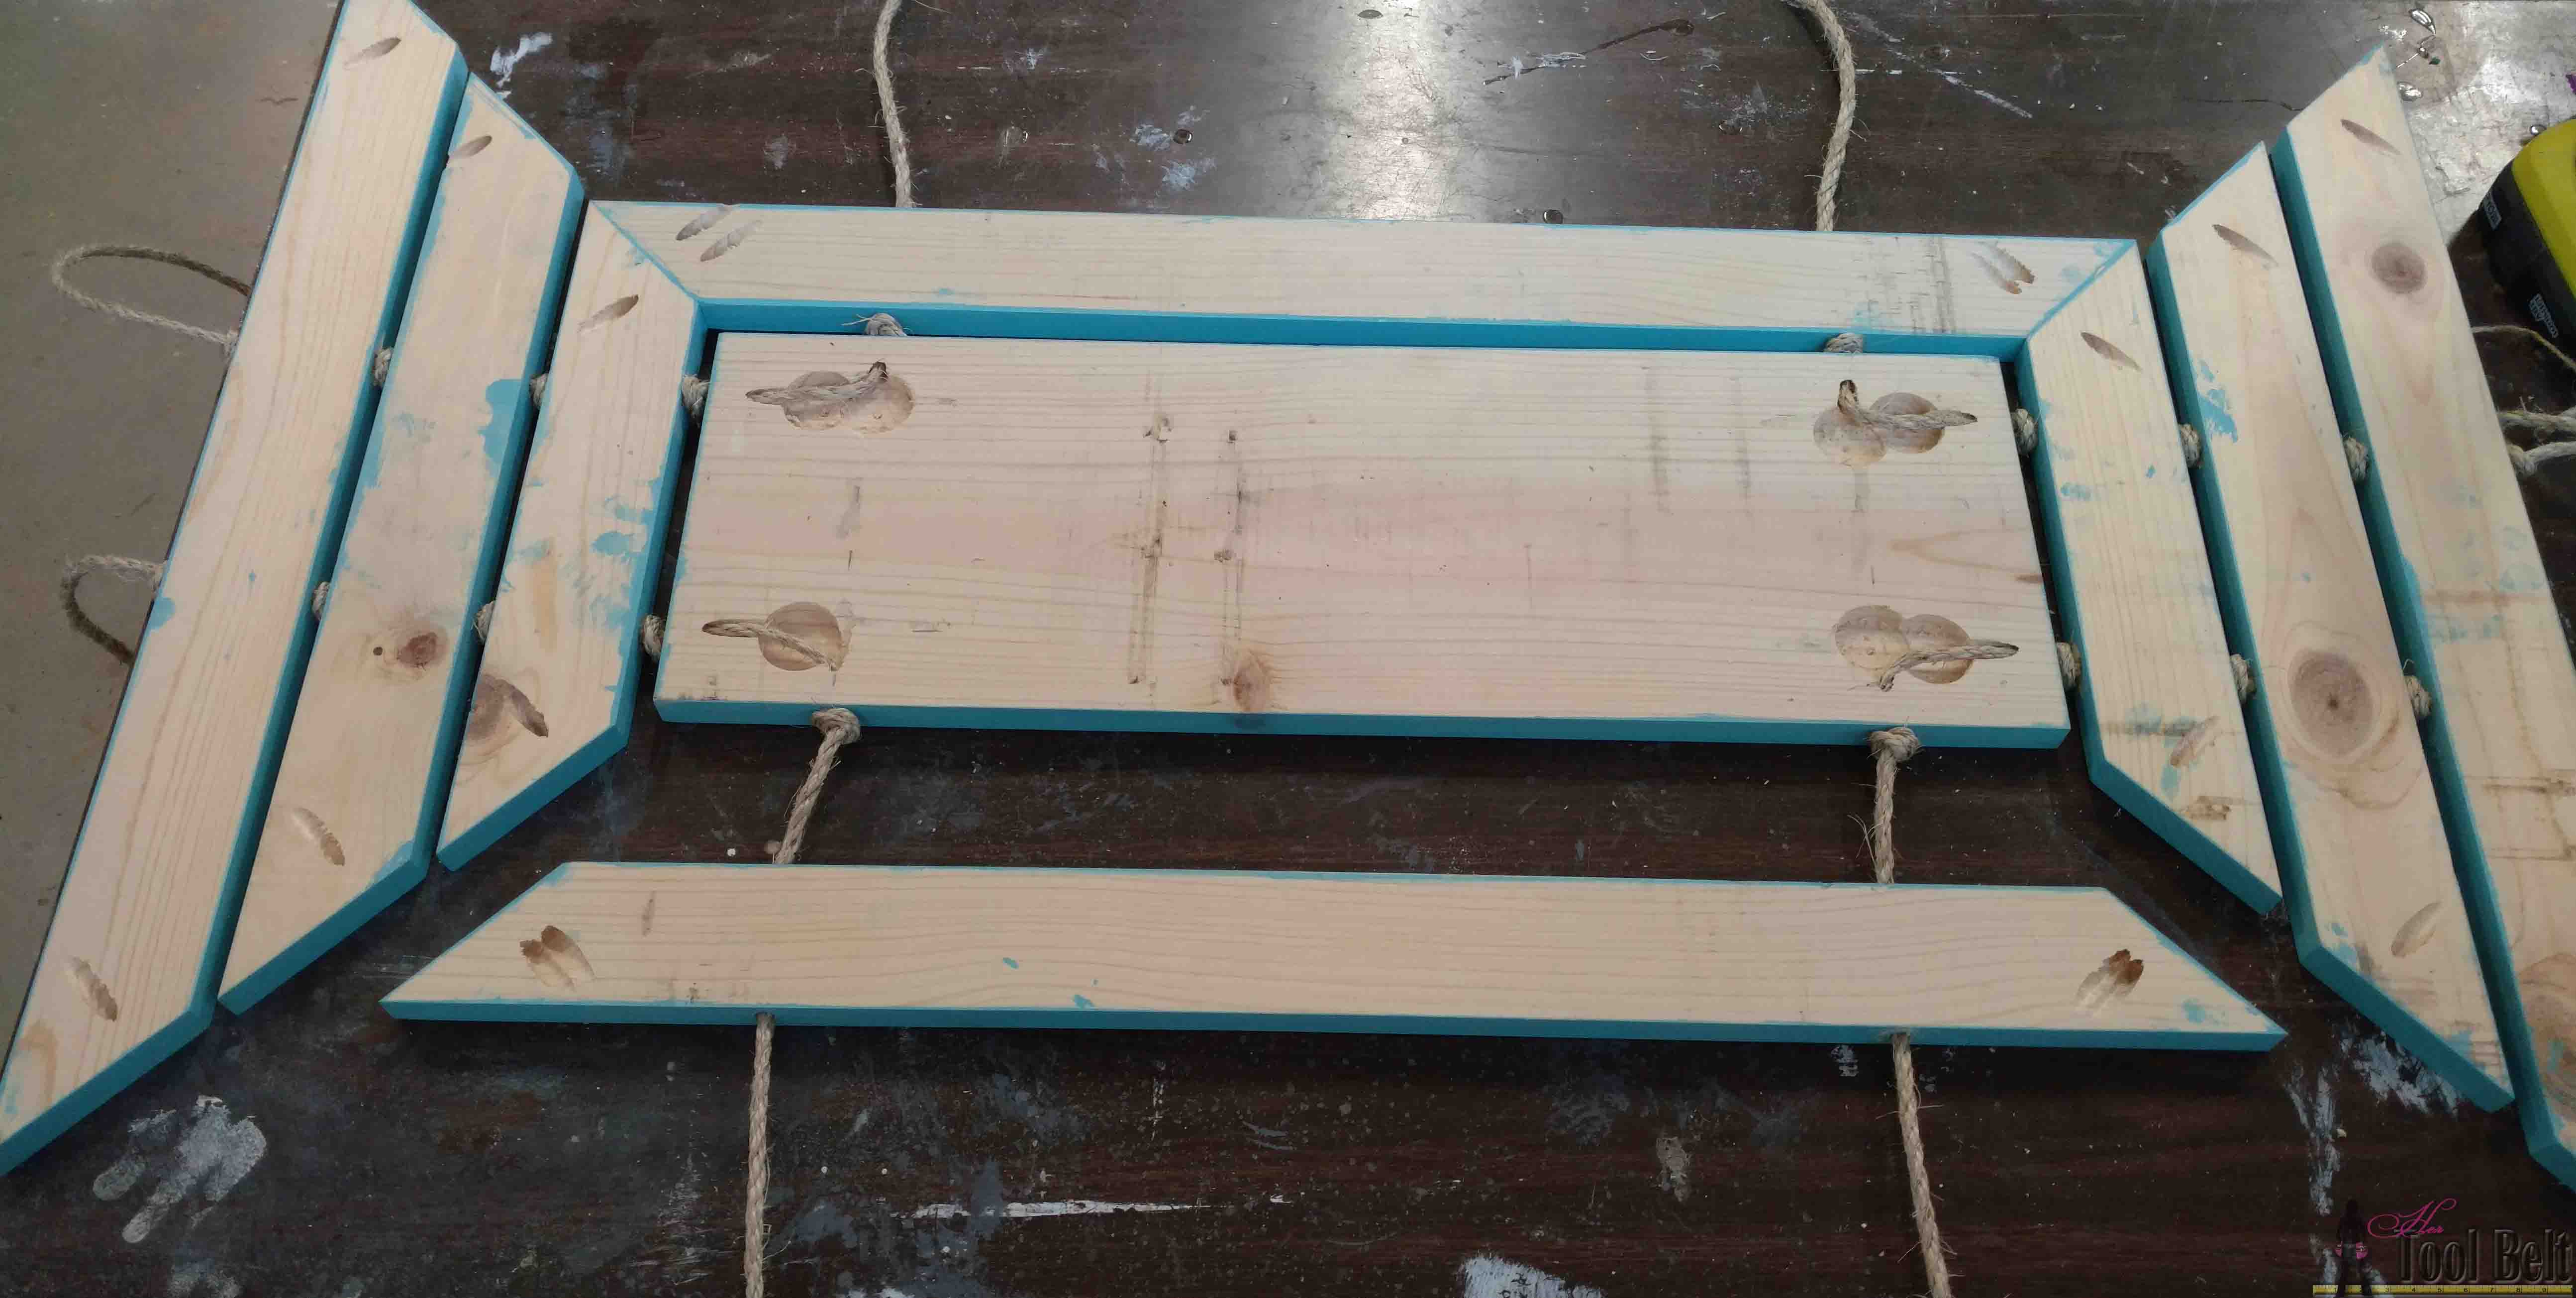
Hello wood door mat layout. Each of the mitered pieces will match up to make a corner, and each slat has a 1/2″ space between for a tight knot.
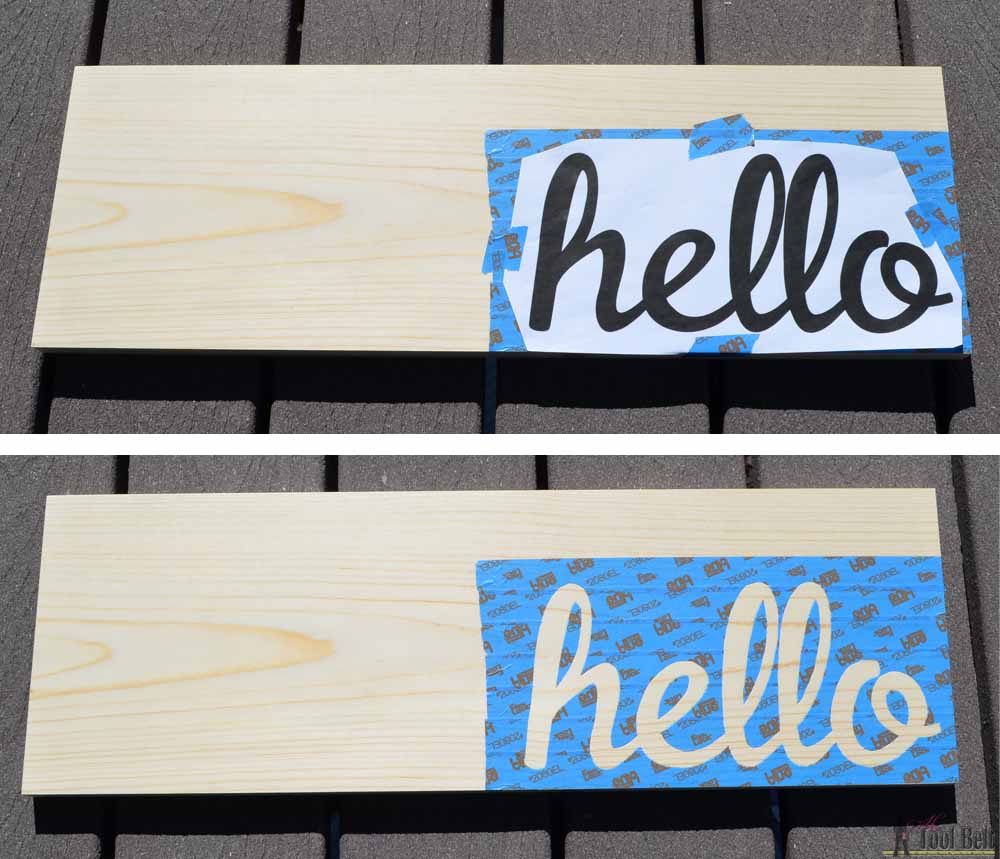
My initial plan for the hello was to clear coat the hello before staining, hoping that the raw wood would peak through. However the hello didn’t end up being as defined as I anticipated, so I painted it white. Here is a printable template of the hello Hello wordart.
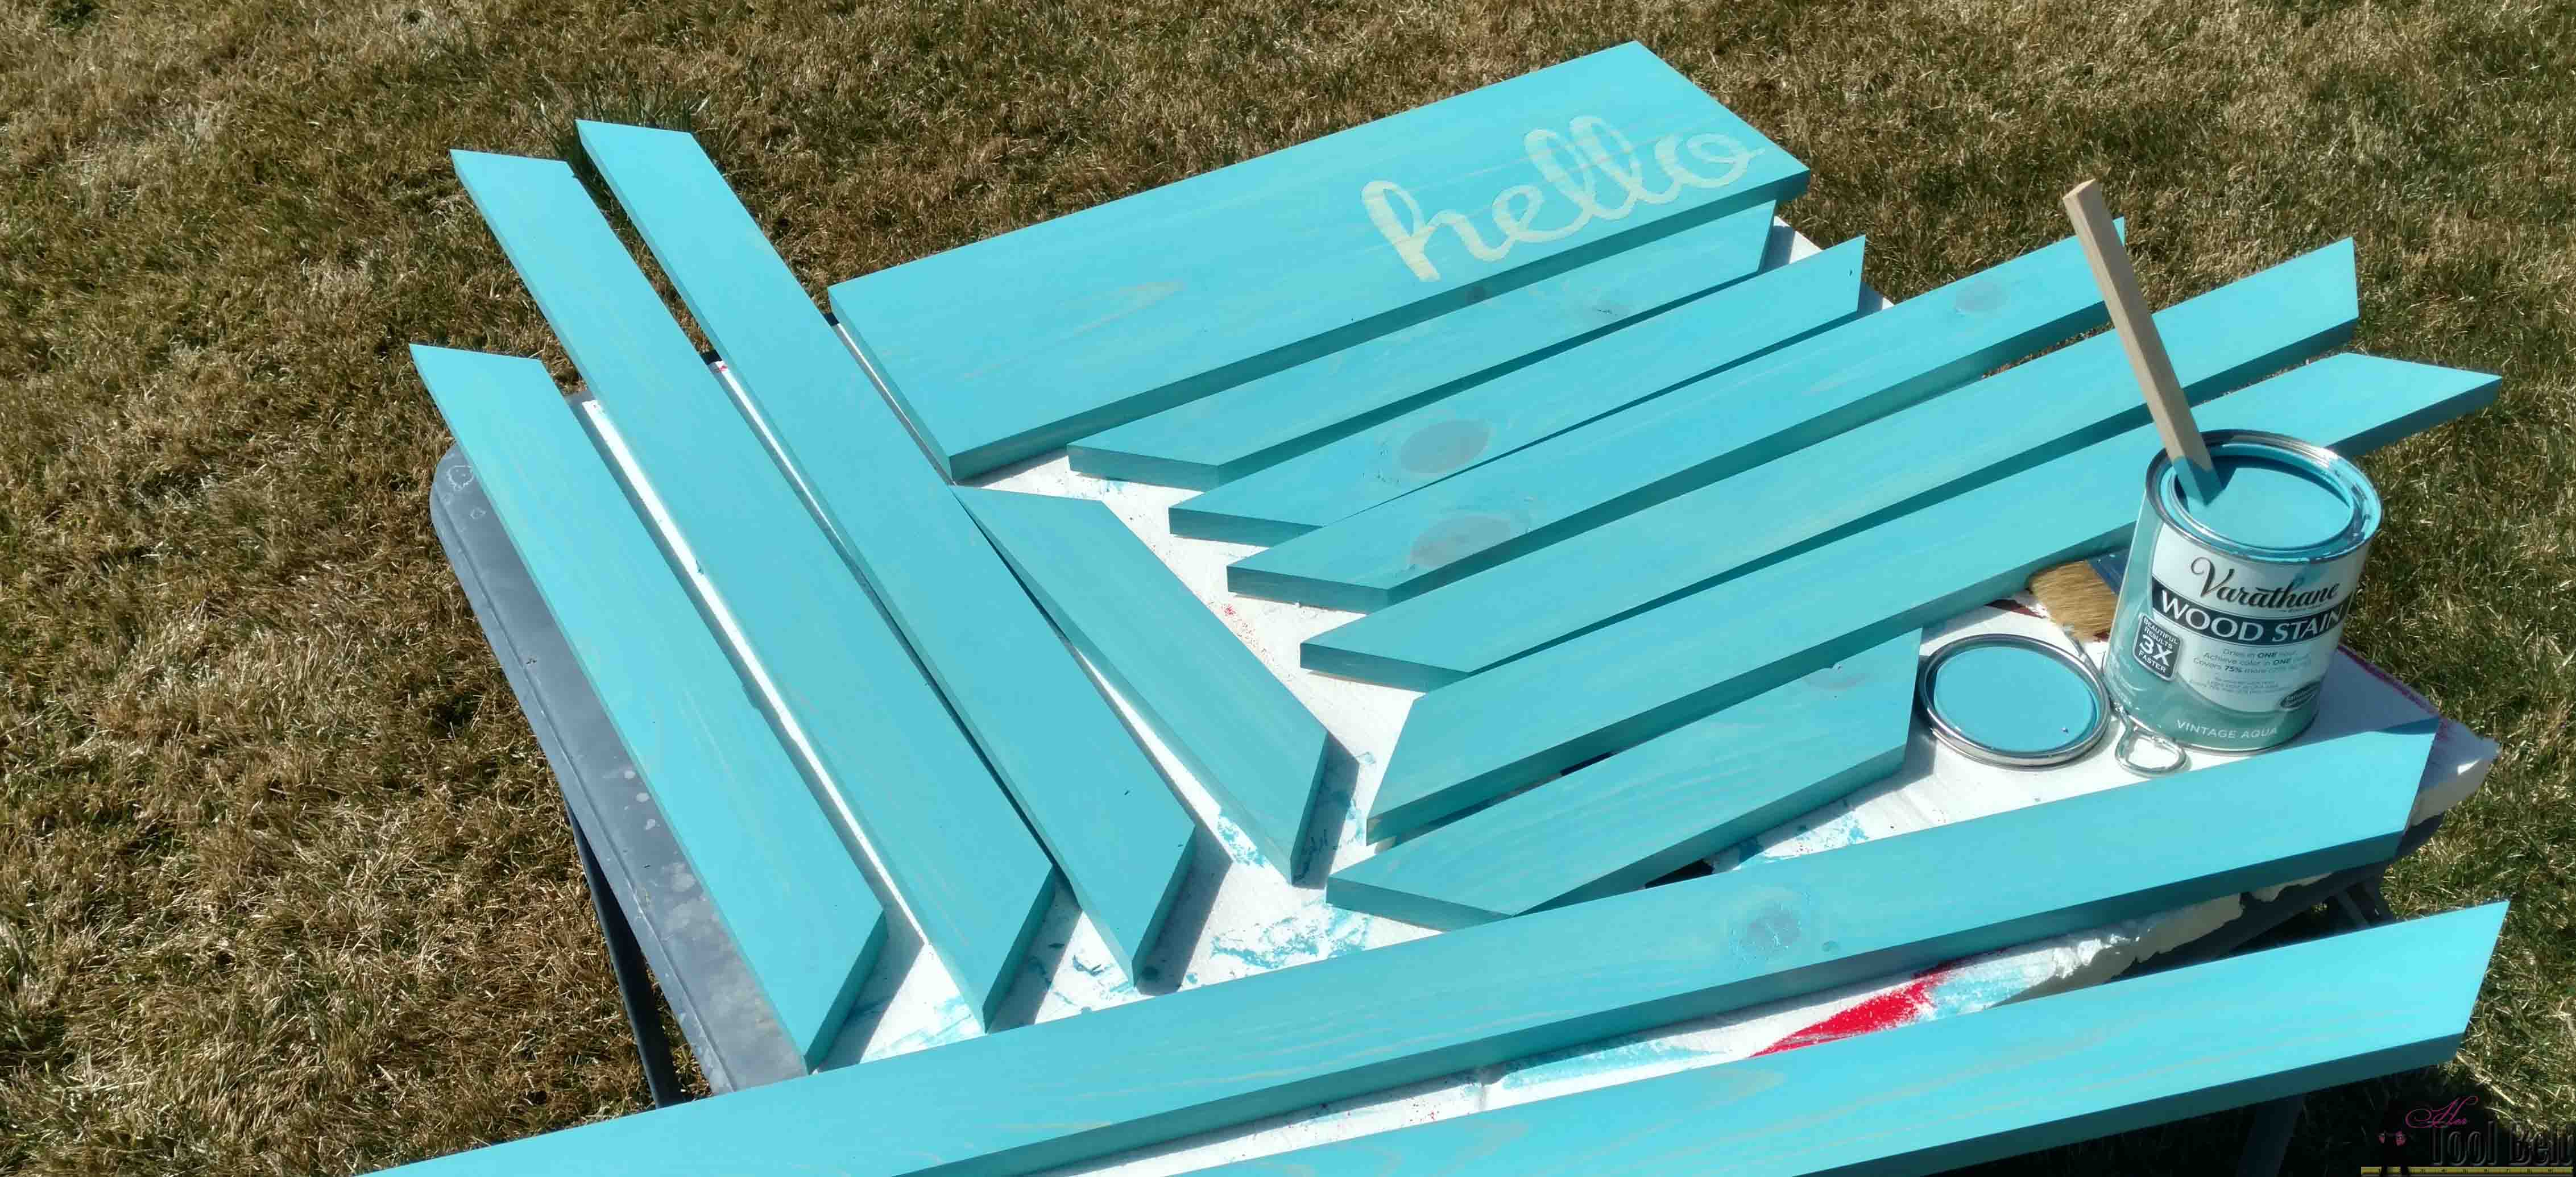
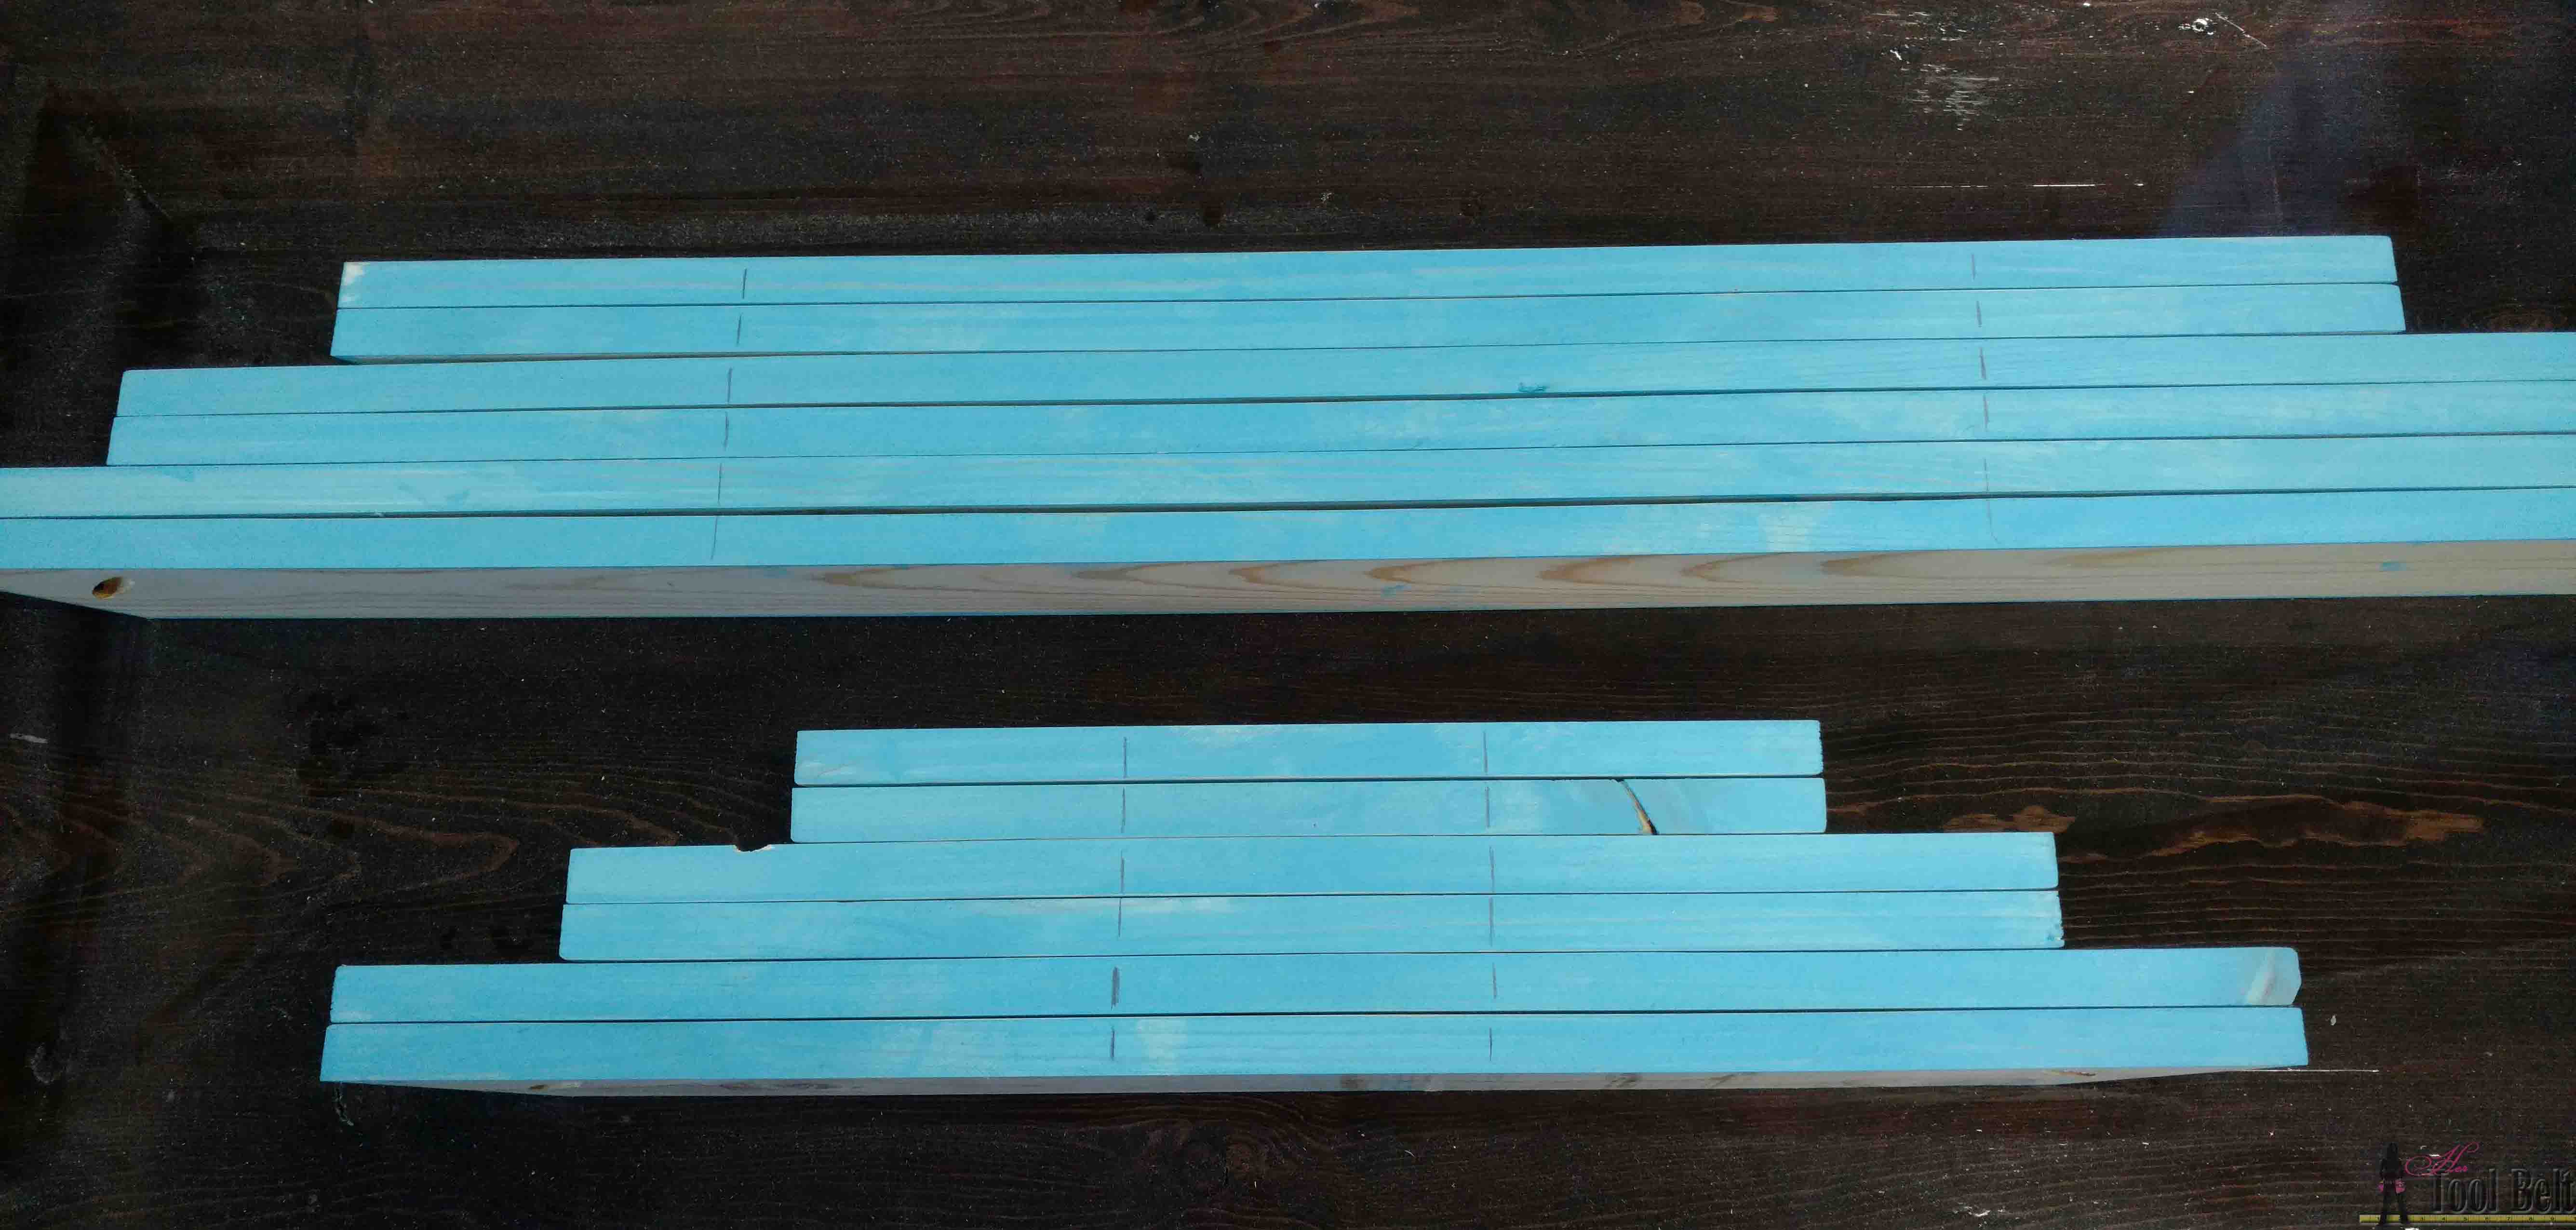
Make all of the cuts for the wooden door mat. Sand all of the boards smooth. I stained all of the boards before assembly. I used Varathane Vintage Aqua, the color turned out really fun. Let the stain dry, approx 1 hour. To help protect the wood and finish, apply a few coats of polyurethane.
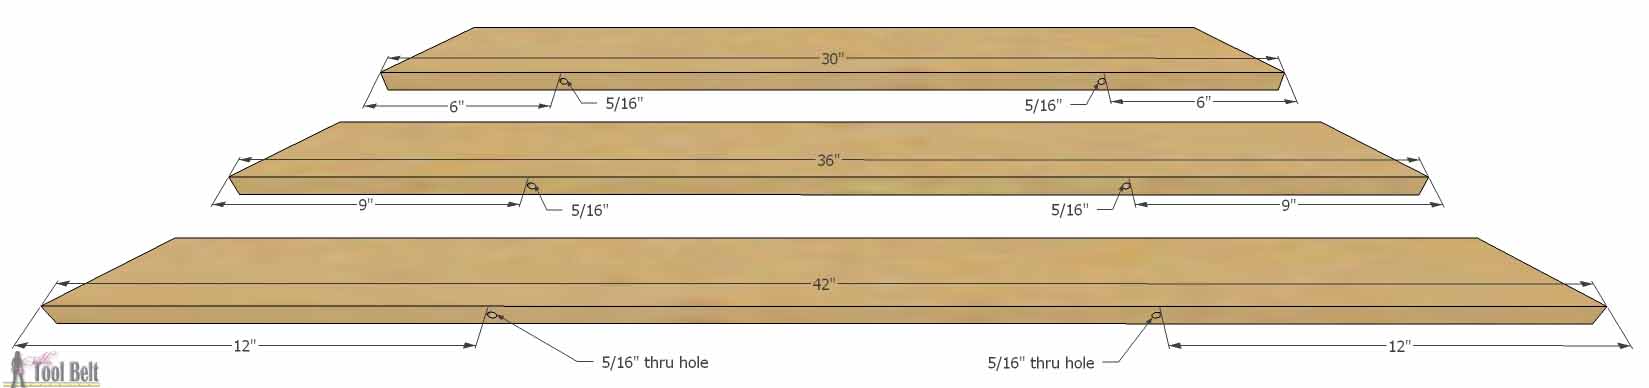
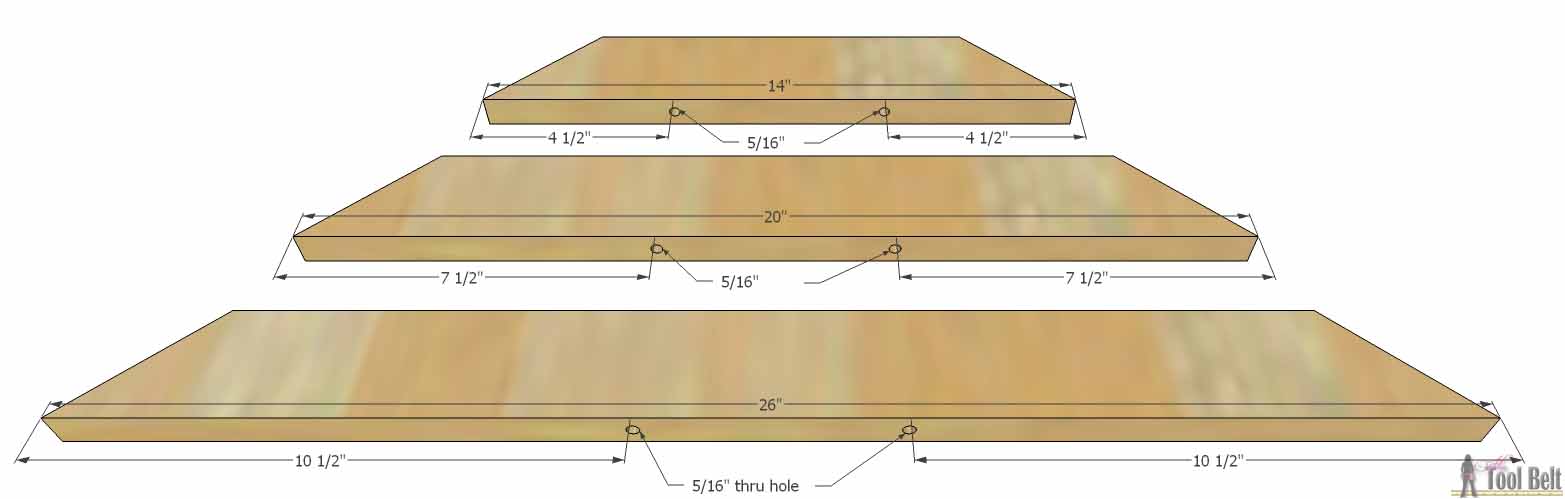
Drill 5/16″ thru holes in each of the slats. Use the following diagram to mark the hole placement. This will keep the rope in a straight line.
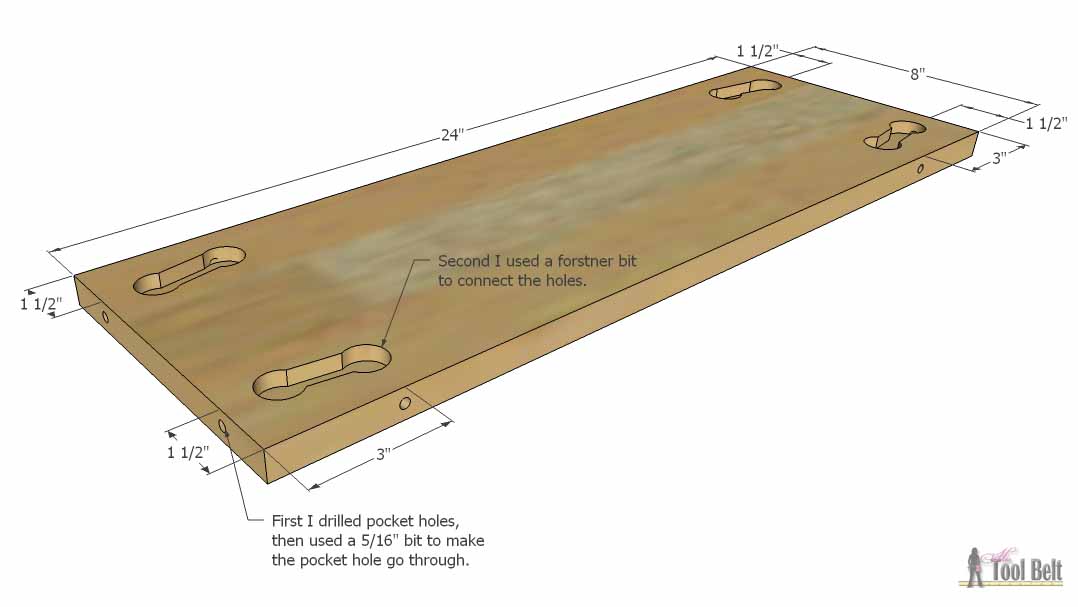
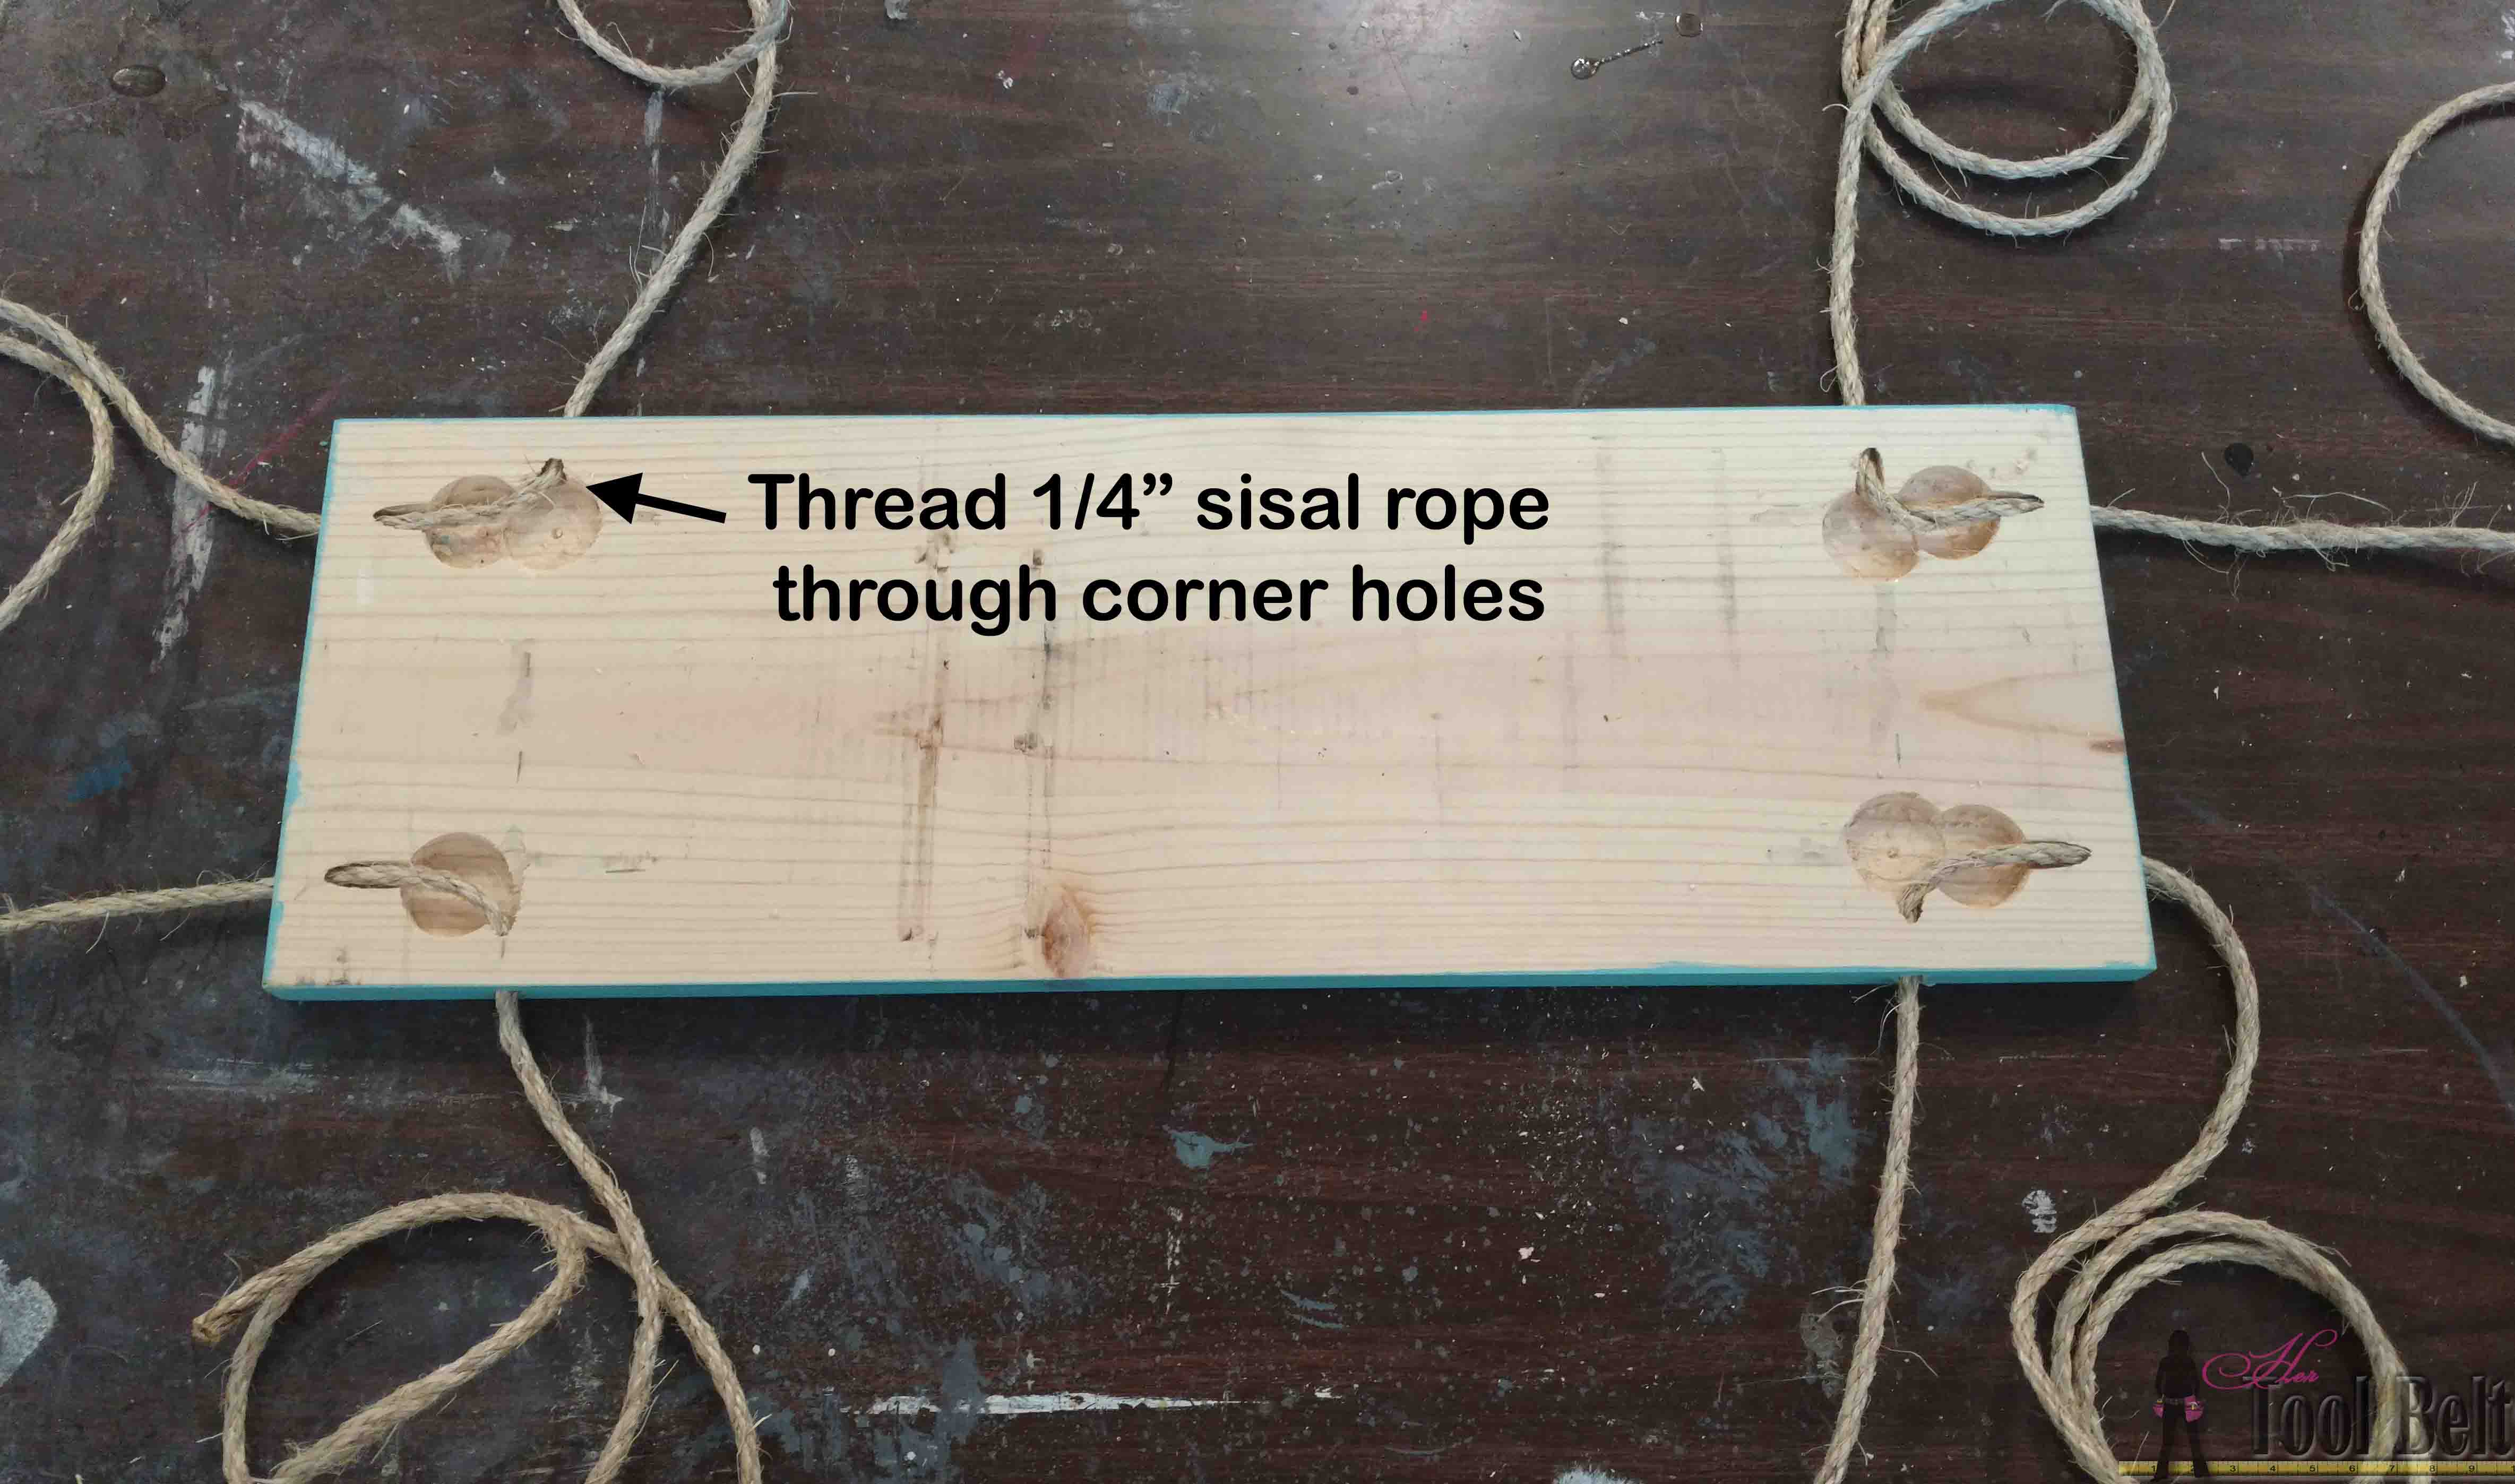
For the center rectangle, I started off drilling pocket holes at the locations the where the rope comes out. I used a 5/16″ bit to make the pocket hole a thru hole. Finally I used a 1″ forstner bit to make room for a knot. Then I realized I didn’t need a knot and connected the corner holes for the rope.
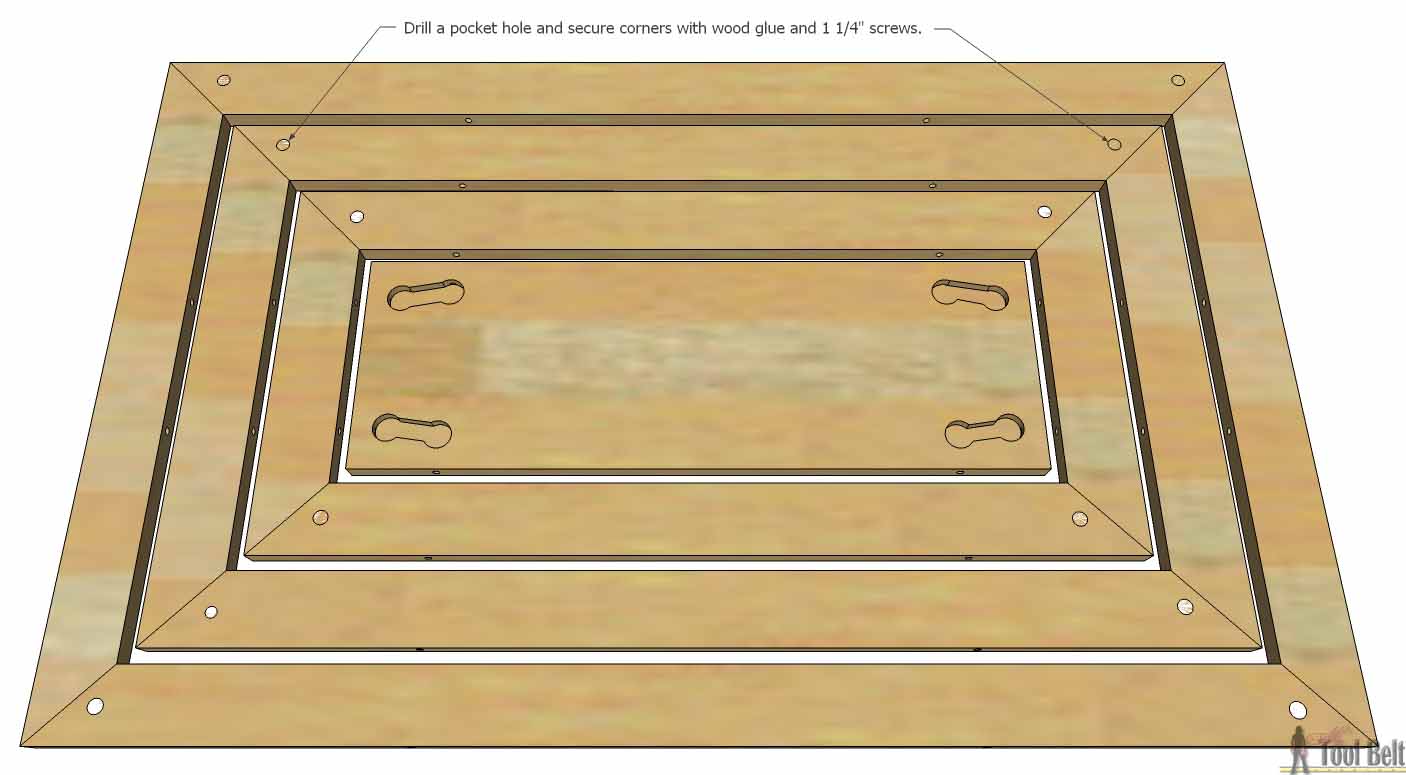
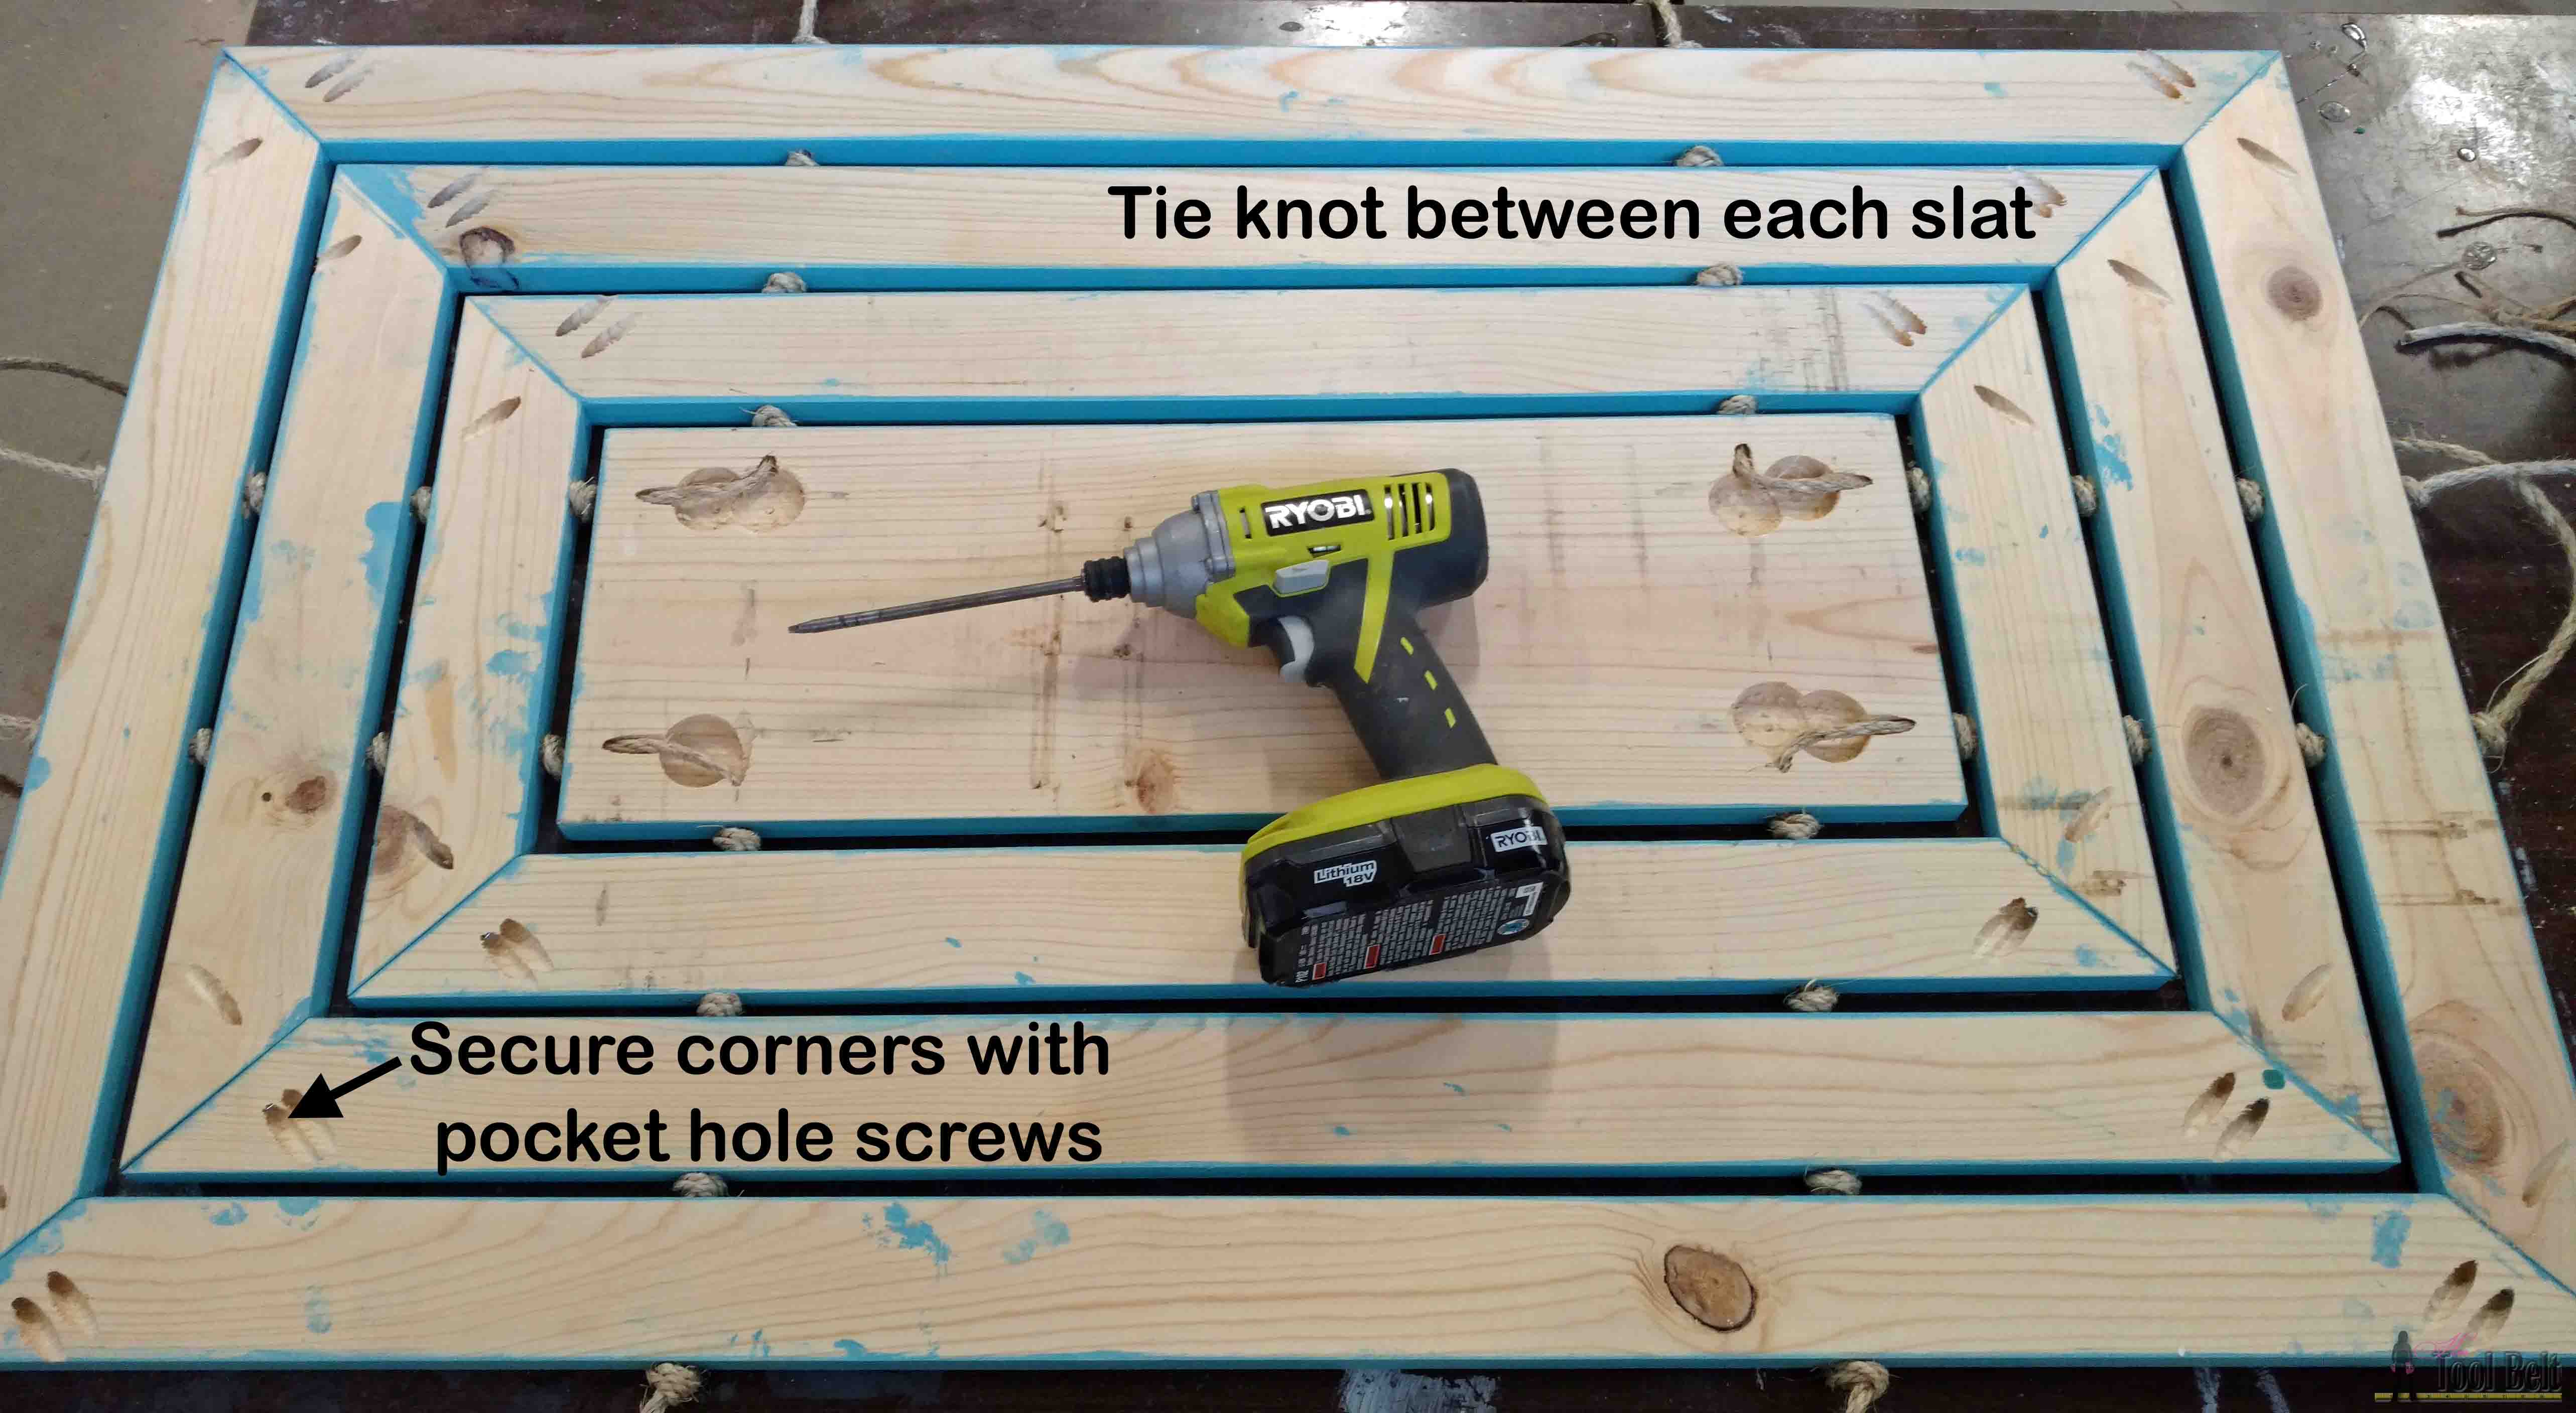
Drill a pocket hole in each end of the 42″, 36″ and 30″ boards, this will help keep the corners tight when assembled.
I cut 4 pieces of rope about 5′ long each and threaded one into each corner. It helps to put a little tape on the end of the rope pieces for threading.
Tie a knot in each of the ropes tight against the wood. I first assembled the short side. Knot – slat – knot – slat – knot – slat – knot. I added the long side pieces one at a time, securing the corners with wood glue and a 1 1/4″ pocket hole screw as I went. (Note: I got a little carried away with my pocket holes, you should only need one in each corner 🙂 ).
When finished cut off the excess rope around the edges. I left about 1″ out from the knot.
All assembled.
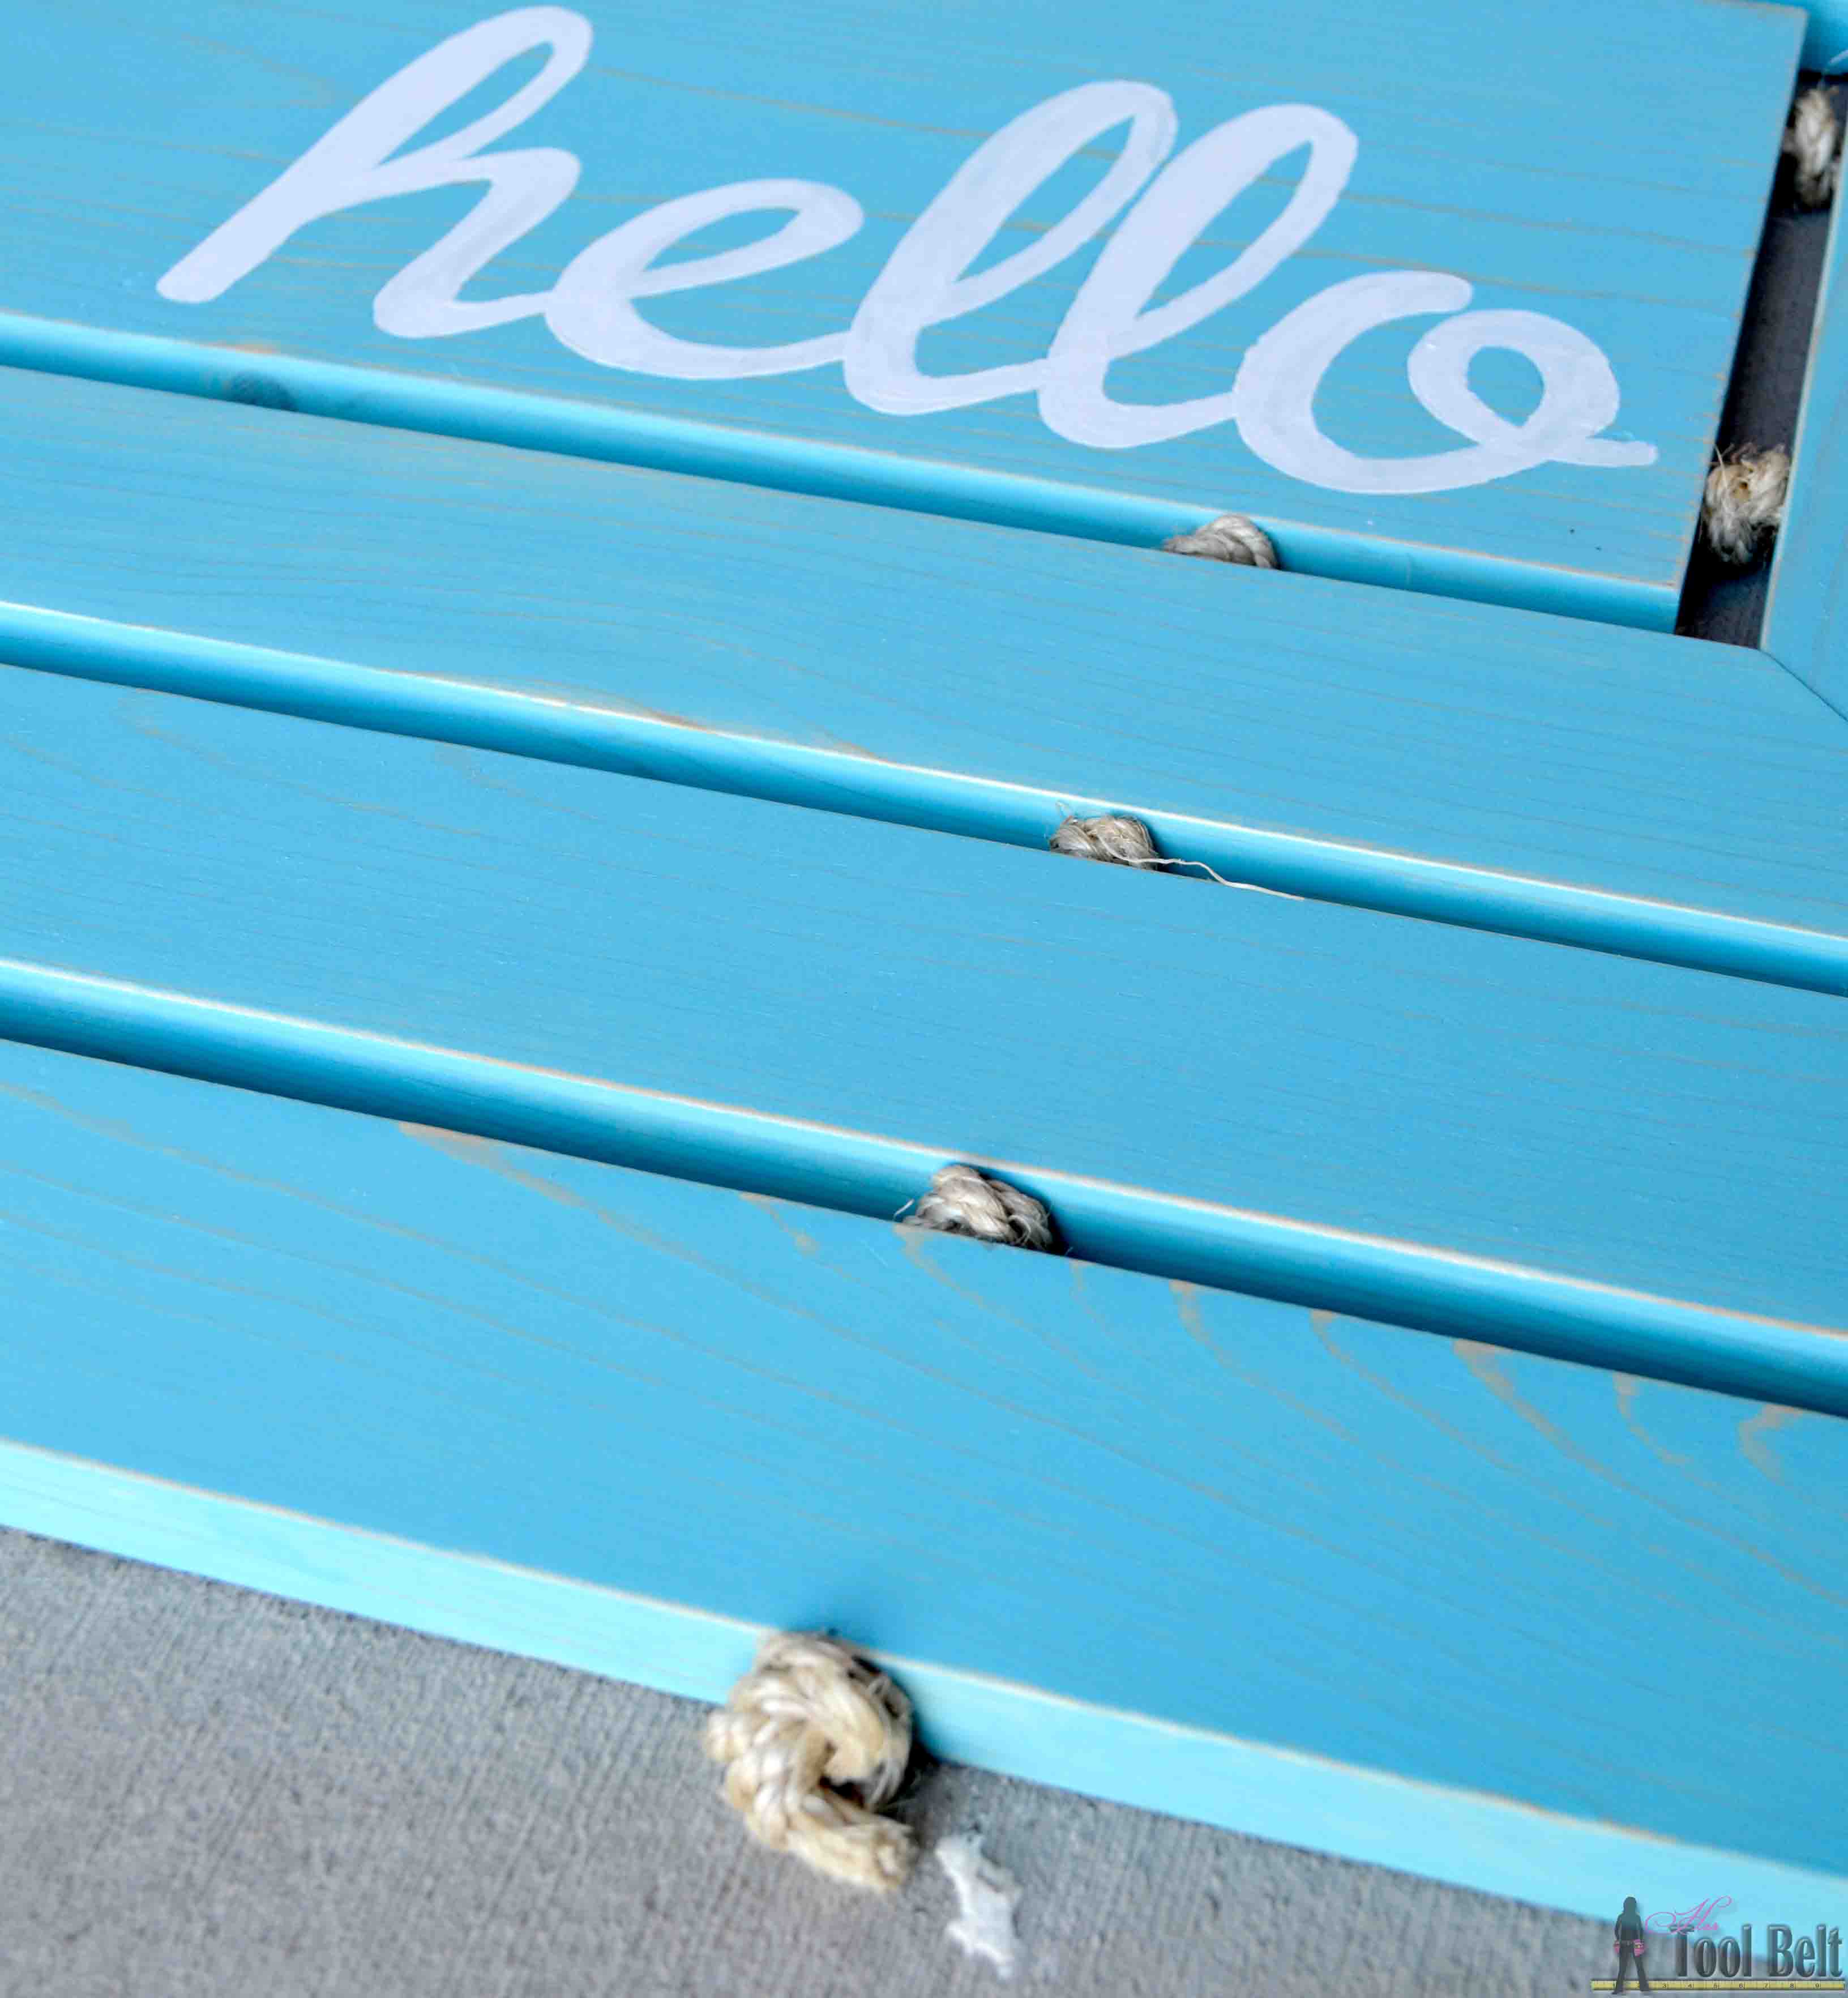
I love how it turned out, it definitely brightens up the entry.
Check out more custom wooden door mats, there are some pretty neat ones!
- Build Basic / Sawdust 2 Stitches / My Love 2 Create / Her Toolbelt / Addicted 2 DIY
- House of Wood / Shades of Blue Interiors / Place of My Taste / Bower Power Blog / Making Home Base
- That’s My Letter / Ciburbanity / Brooklyn Limestone / Wills Casa / The Bold Abode
- Fix This Build That / Glued N Screwed / Build It, Craft It, Love It / DIY Huntress / Sawdust To Sequins
- Remodelando La Casa / The Batchelor Way / The Kim Six Fix / Heathered Nest / Creatively Living
Thanks to the Home Depot for sponsoring this project, all opinions and ideas are my own!
linked to Savvy Southern Style
What a statement piece for your front porch! I love the color!
It is gorgeous, Amy! And thanks for the tip on how you connected the holes in the middle. That’s genius!
Thanks! It was a bit of a duh moment, if I would’ve thought about it before drilling I could’ve made it look nicer 🙂
Cutest door mat EVER!!!! I so love it, it turned out awesome Amy!
This is so cute! I love the hello and the way the mat flows out from that! Super cool idea!
Love this! I’ve been racking my brain on a great doormat idea and then I saw this. Visiting from Lou Lou Girls.
This would have stumped me! The hole stringing idea is genius 🙂
xo – kb
Very neat idea! This is one of my favorites!
I love your version of the wooden door mat. This was such a fun project!
Your mat turned out so awesome, Amy! I love how you always think outside of the box. Can’t wait to see you next month! 🙂
Hello cute lady! I’m stopping by to let you know that you’re cute door mat will be featured at our party tonight! Woo Hoo! Pinned and tweeted I hope to see you tonight, so we can party with you again! Lou Lou Girls
Thank you so much for the feature!
SO FUN. This was one of my faves from the party! Super unique!
Thanks Heather!
This is such a neat doormat! Great instructions too.
I love this project idea! It’s so pretty and welcoming for your guests.
Amy,
Your wooden door mat is perfect for my lake home in MI. When I make mine I will share it on your facebook page, Of course, mine will have a twist from me built in but, will be inspired by you.
Happy Creating,
Karen Marie
Thanks Karen, I can’t wait to see what you do with it!
Is the door mat still in use? How does it look like right now? Cheers, Alexander
I moved it to my garage entrance and it still looks great. The stain is a little worn around the board edges.