• Home
  • Project Gallery
  • About me
    • Disclosure
    • Disclaimer
  • Blog

Her Tool Belt

DIY furniture plans, crafts, and home improvement tutorials to empower you!

  • Free Woodworking Plans
    • Bathroom Furniture
    • Bedroom Furniture
    • Entry
    • Family Room Furniture
    • Garage
    • Kitchen furniture
    • Laundry Room
    • Mudroom Furniture
    • Organization
    • Outdoor Furniture
  • Home Decor
    • Upcycle
  • Crafts
    • Holiday
  • Home Improvement
    • Cleaning
    • Fix IT
    • Paint
    • Tile
  • Tool Reviews
  • Tool Time Videos

3rd Day of Christmas – Stacked Felt Christmas Tree Ornament

December 3, 2013 by Amy Leave a Comment

On the 3rd day of Christmas hertoolbelt sent to you, 3-tier felt tree, a sweater owl and mini-mittens on a little wooden tree.

I saw this stacked felt Christmas tree on a friend’s tree last year.  I thought it was so cute, I had to make one for my tree.  The method is very simple, descending felt circles, stacked and sewn together.  The work is a little bit tedious, but the outcome is worth it!Stacked Felt Christmas Tree Ornament, printable pattern

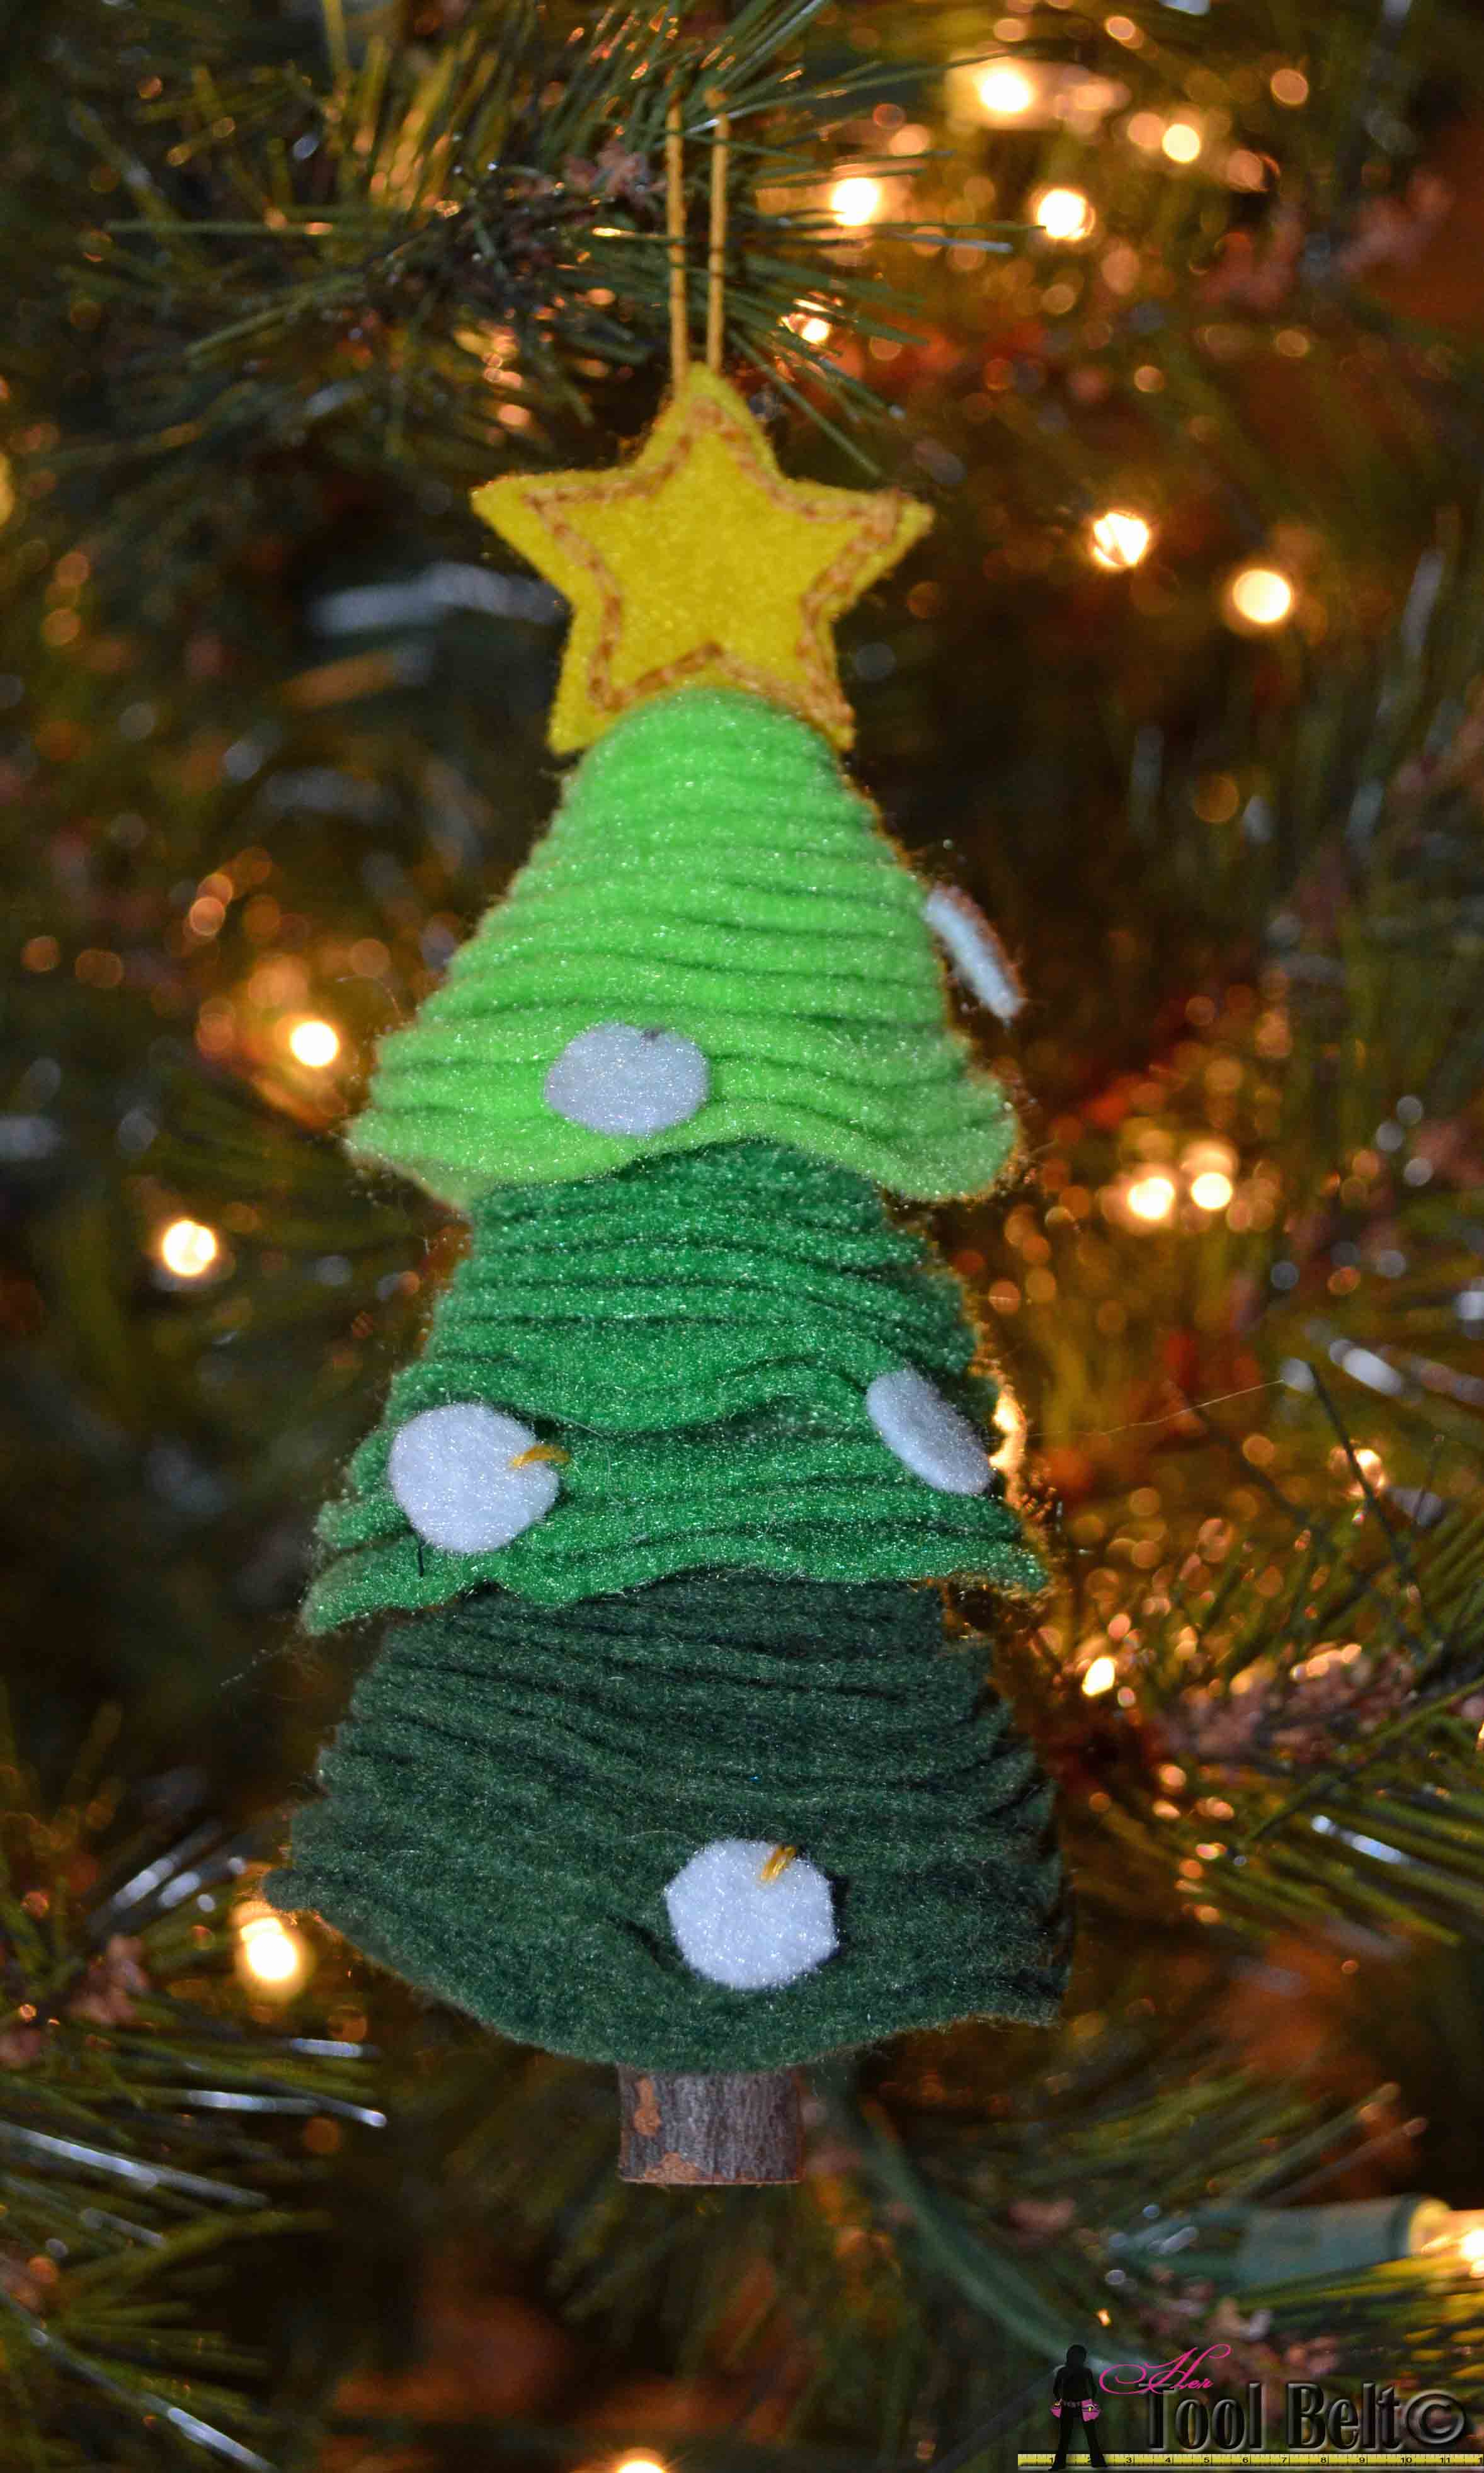
Print and cut out the pattern felt stack ornament.  I find it easiest to have the pattern on cardstock, so the circles are stiff as I cut around them and the felt.  Pick the tree colors of felt that you want to use.  For your base tier, cut out a felt circle of each size 2 ½” down to 1”, you will have 13 circles.  Stack your felt circles in order.  For the middle tier, cut out a circle of each size 2 ¼” down to ¾”, you will have 13 circles.  Stack your middle tier felt circles in order.  For the top tier, cut out a circle of each size 2” down to ½”, you will have 13 circles.  Stack your top tier felt circles in order.

For the star, cut out 2 stars from a yellow felt and stitch the 2 stars together.  I used a chain stitch (Bucilla embroidery stitch diagram) with golden floss, but use whatever you prefer.

Hopefully you have some twigs sitting around outside.  Pick a twig that is about ½” diameter and cut it to about 1” long.  If you have a drill, drill a small hole through the twig about ¼” from the top.  If you don’t have a drill, another option would be to hot glue the tree trunk on after you’ve assembled the tree.

Tree assembly:  I used 4 strands of embroidery floss (use whatever you have on hand).  Using a needle, thread through the tree trunk, leaving excess floss at the end.  Make sure your base tier is stacked in a nice cone shape; hold the base stack together and starting on the large circle side run the needle through the center of the felt stack.  Repeat for the middle and top tiers.  Next run the needle through the middle of the star sandwich, leave a loop of thread at the top of the star and run the needle back down through the star and tree.  Adjust the spacing of the tree and star pieces, the felt pieces should be loosely sitting on each other.  Tie a square knot with the end of the floss through the tree trunk.  Cut out 5 or 6 (½” circles) out of white felt. Hot glue or stitch the white ornaments onto the tree.

And there you have it, a super cute handmade Christmas tree ornament.

Merry Christmas

Check out the 4th Day of Christmas

Peppermint candy ornament green stripe


Related

Filed Under: Crafts, Holiday Tagged With: Christmas, christmas tree, handmade, handmade christmas, ornament, stacked felt

Attention: Any do-it-yourself project involves risk of some sort. Your tools, materials, and skills will vary, as will the conditions at your work site. Hertoolbelt LLC will not assume any responsibility or liability for damages or losses sustained or incurred in the course of your project or in the use of the item you create. Always follow the manufacturer's operating instructions in the use of tools, check and follow your local building codes, and observe all commonly accepted safety precautions.

Leave a Reply Cancel reply

Your email address will not be published. Required fields are marked *

This site uses Akismet to reduce spam. Learn how your comment data is processed.

Search Her Tool Belt

Follow Me!

  • Bloglovin
  • Email
  • Facebook
  • Instagram
  • Pinterest
  • RSS
  • Twitter
  • YouTube

Top Posts & Pages

Left Offset Bathroom Vanity

Check out more projects

Copyright

Thank you for wanting to share my work! No need for my permission to pin my work or to feature 1 or 2 pictures with full watermarks intact that link back to the original project. Please do NOT copy tutorials.

Disclosure & Privacy Policy

Disclaimer

Copyright © 2025 · Magazine Pro Theme on Genesis Framework · WordPress · Log in

This website uses cookies to improve your experience. We'll assume you're ok with this, but you can opt-out if you wish.Accept Read More
Privacy & Cookies Policy

Privacy Overview

This website uses cookies to improve your experience while you navigate through the website. Out of these, the cookies that are categorized as necessary are stored on your browser as they are essential for the working of basic functionalities of the website. We also use third-party cookies that help us analyze and understand how you use this website. These cookies will be stored in your browser only with your consent. You also have the option to opt-out of these cookies. But opting out of some of these cookies may affect your browsing experience.
Necessary
Always Enabled
Necessary cookies are absolutely essential for the website to function properly. This category only includes cookies that ensures basic functionalities and security features of the website. These cookies do not store any personal information.
Non-necessary
Any cookies that may not be particularly necessary for the website to function and is used specifically to collect user personal data via analytics, ads, other embedded contents are termed as non-necessary cookies. It is mandatory to procure user consent prior to running these cookies on your website.
SAVE & ACCEPT