My Mom’s friend picked up this fun modern wooden wall tree at West Elm last year. My Mom has wanted one ever since. The Wooden wall tree is no longer available at West Elm, but it’s not too hard to recreate. I made a few adjustments with building materials that are readily available at the hardware store.

You’ll need:
- ½” plywood (1/2” Sande 2’x4’ sheet @ Home Depot was $16.18)
- ¼” plywood (1/4” Sande 2’x4’ sheet @ Home Depot was $9.06)
- 20-24 ½” shoulder hooks (Grainger $2.48/20 hooks https://www.grainger.com/product/Shoulder-Hook-1WBK5?functionCode=P2IDP2PCP)
- 5/8” brad nails
- ¾” brad nails
- Wall hanger
- Wood glue
There were a few options of cheaper plywood, but I went with the Sande because the wood coloring between the ½” and ¼” was the most similar. You don’t have to use the square shoulder hooks like West Elm, you can substitute with a cup hook. You can make 5-6 wooden wall trees with the 2’x4’ sheets of plywood.
This tree is fun to make, although there are quite a few tapers/angles. When cutting my branches, I wanted to keep the wood grain going straight through the branch, instead of on a diagonal, so I cut a slight angle on both sides of each branch piece. Not sure that it matters, but that’s how I wanted it to look.
First from the ½” Ply wood:
Cut a piece that is 1 1/8” x 36” long. This is the main tree trunk. Also if you plan on making multiple trees, cut more trunks (5 to 6) before you cut the sheet smaller for the branches. Next make these cuts along what is left of the width of your sheet. 12 1/8”, 8 ¾”, 6 ¼”, 4 ½”.
From the ¼” plywood cut a pieces along the width (2’) of the board that are 2 ¾”, 4 3/8”, and 6 3/8”.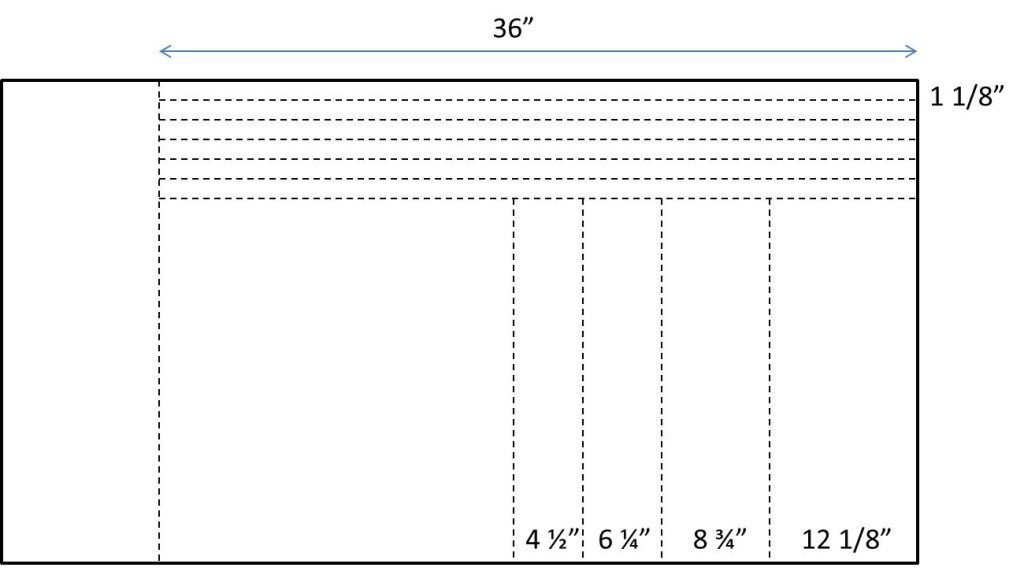
Now we are going to make a lot of angled cuts. Make sure as you are cutting along that you have enough board to hold onto so that you are safely making the cuts, we don’t want to lose any fingers!
For each of these cuts, I have set up to make angled cut on each side of the branch. Your angle doesn’t have to be right on, close enough will work. Each branch has a fat end of 1” and a thin end of ½”, but the angle is different depending on the length of the branch. 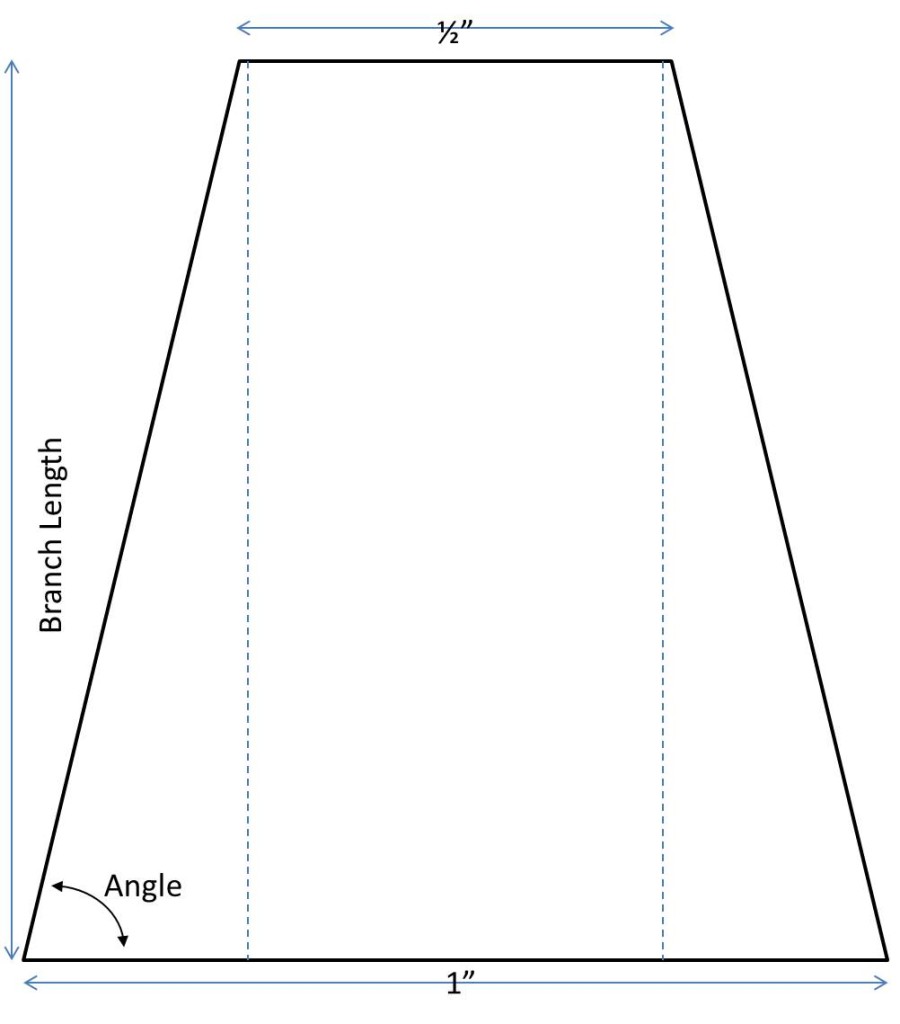 Here is a table of the number of branches to cut of each length with the corresponding angle. I cut mine with the table saw, but a miter saw will work great too.
|
Branch Thickness |
Branch Length |
Angle |
Quantity |
|
½” |
12 1/8” |
88.8 degrees |
4 |
|
½” |
8 ¾” |
88.3 degrees |
2 |
|
½” |
6 ¼” |
87.7 degrees |
2 |
|
½” |
4 ½” |
86.8 degrees |
1 |
|
¼” |
6 3/8” |
87.8 degrees |
5 |
|
¼” |
4 3/8” |
86.7 degrees |
8 |
|
¼” |
2 ¾” |
84.8 degrees |
5 |
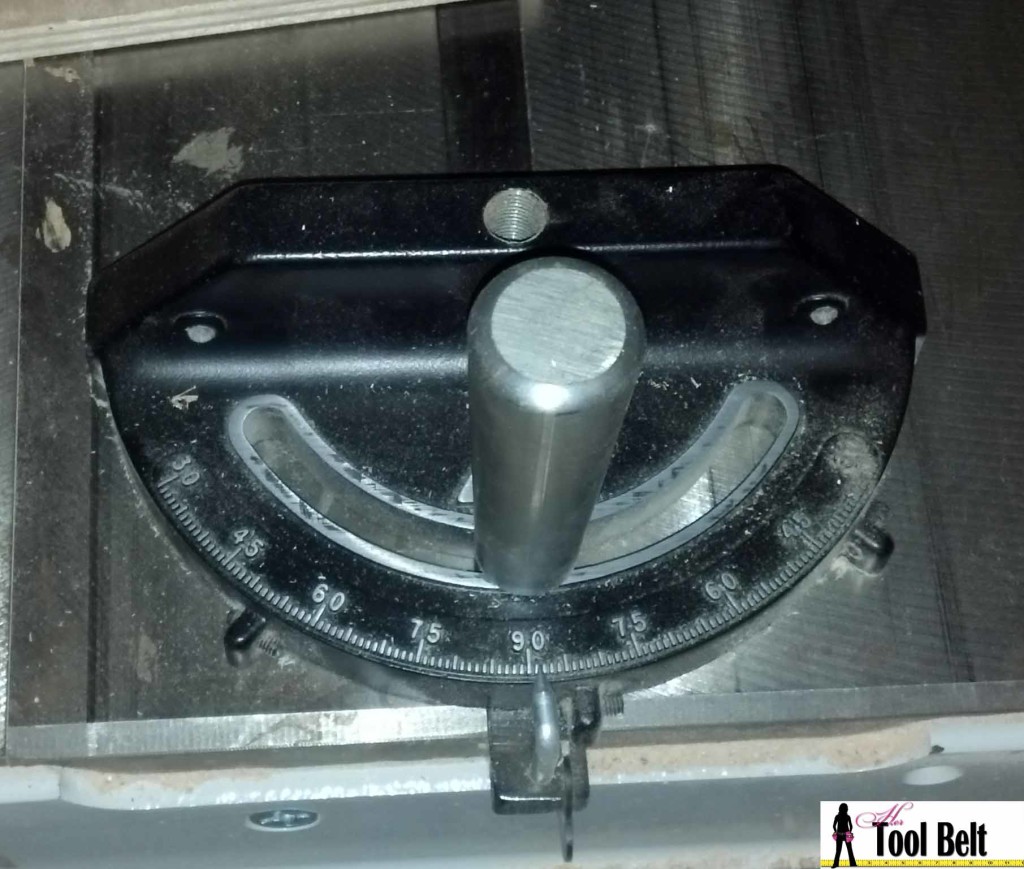
Set your first angle and trim the edge of the board.
 Switch to the same angle on the other side of the 90 degree mark.
 Measure and mark 1″ and make the cut.
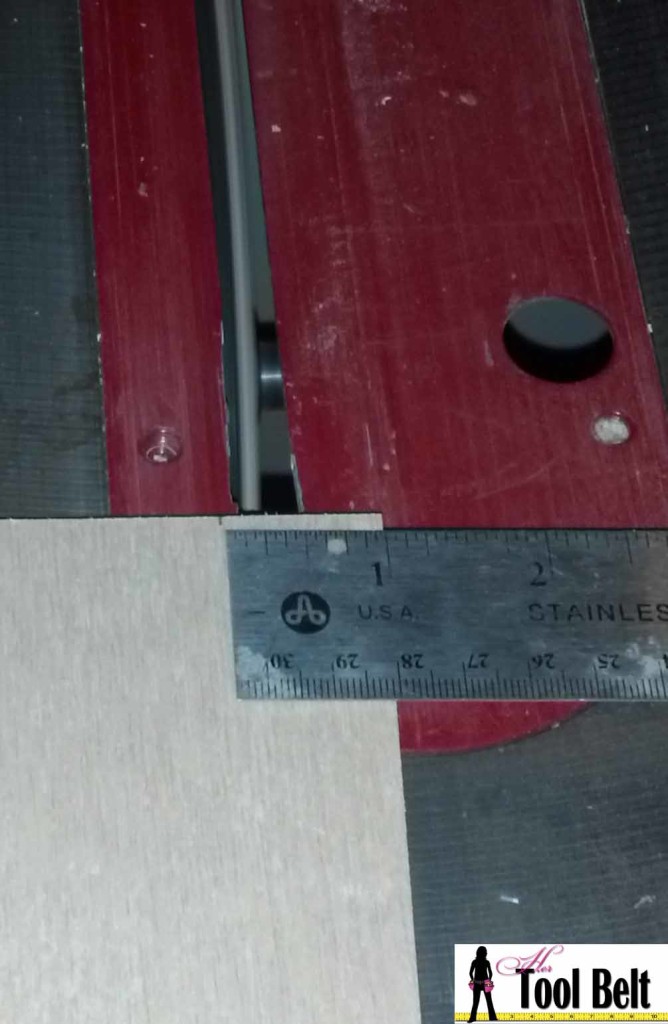 Switch the angle back to the other side of the 90 degree mark. Measure over 1/2″ and make the cut.

Repeat back and forth until you have the # of branches you need for each size.
Now the tricky part is done, great job!!! Lightly sand the branch edges. West elm put a bevel on the fat end of each branch, you can do that with a sander if you’d like.
Next we attach the small ¼” thick branches to the larger ½” thick branches. Here are the approximate branch locations. Secure each small branch onto its respective large branch with a dab of wood glue and 3 or so 5/8” brad nails.
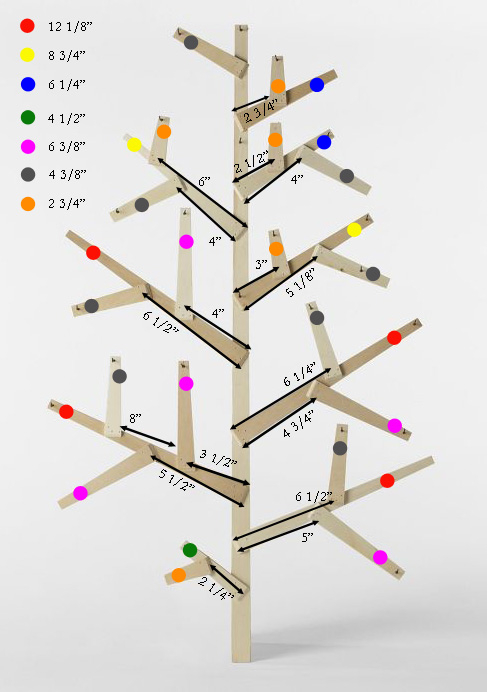
 Then attach the large branches to the tree trunk. Here are the approximate large branch locations. Secure each large branch onto the trunk with a dab of wood glue and ¾” brad nails.

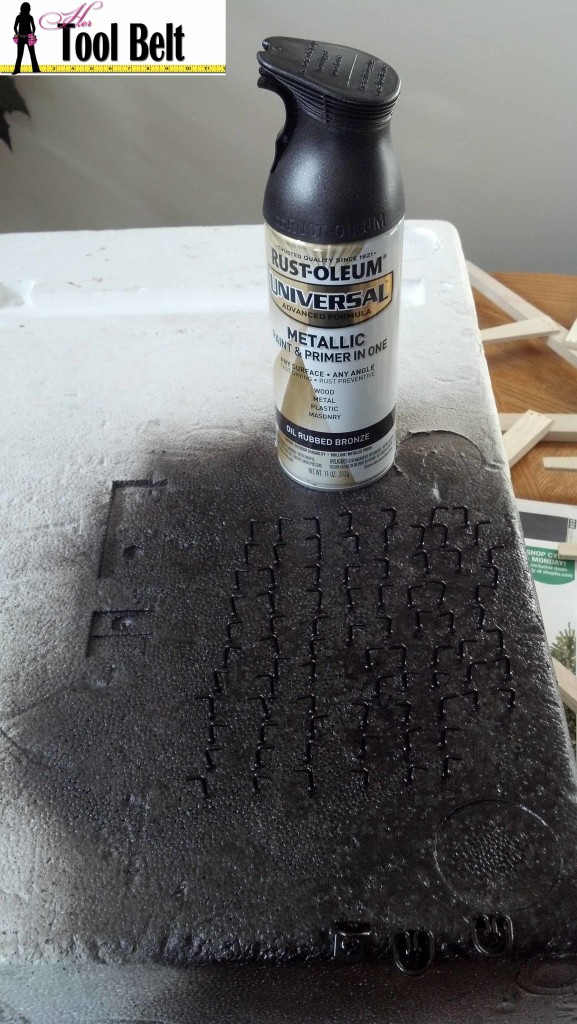
The shoulder hooks that I bought for the tree were gold. I decided to spray paint them oil rubbed bronze, I love the rustoleum brand. I also spray painted my hanger to match. Locate on your tree where you’d like the hook. Drill pilot holes for the hooks. I used 3/32” bit. Dip your hook threads in a little wood glue and screw a shoulder hook into each hole. Drill a pilot hole for the hanger and attach that to the top of the tree.
 Now you’re finished, cute isn’t it! Have fun decorating your tree, might make a cute advent calendar too!


[…] Amy from Her Tool Belt came to the rescue when her mom wanted a wooden wall tree that was no longer available from West Elm. She knew it would be easy to recreate with plywood and a few other items from the hardware store. If you love it as much as I do, you’ll be happy to know that Amy drew up free woodworking plans detailing all the cuts and angles for you. Amy says you can get about five or six trees from the plywood, so you might as well make some for friends and family as gifts while you’re at it! […]