Super Chunky X Table Plans and Tool Review is sponsored by The Home Depot. I have been compensated for my time and provided with product. All ideas and opinions are my own. This post contains some affiliate links for your convenience. Click here to read my full disclosure policy. During this build, I’ll be reviewing the Ridgid MegaMax, Diablo blades, Bosch drill bits and Makita Subcompact circular saw and will share my thoughts on these tools.
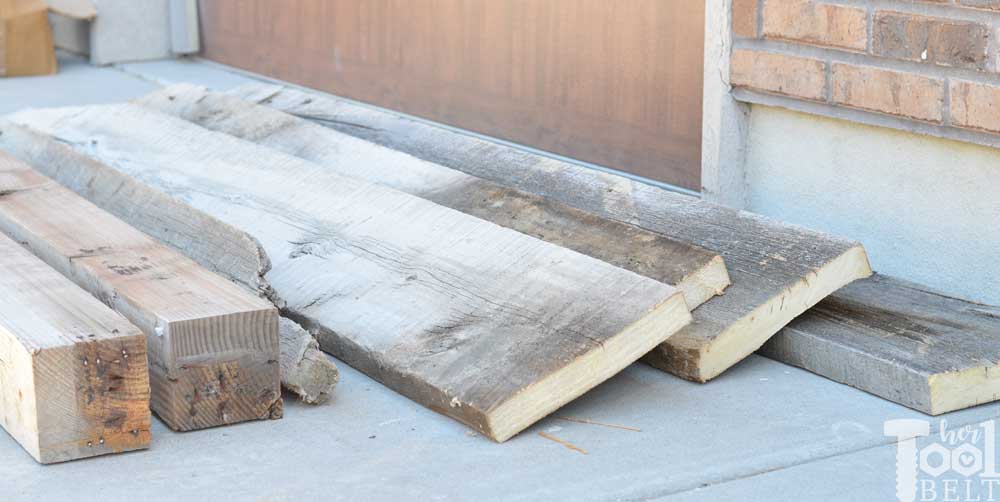
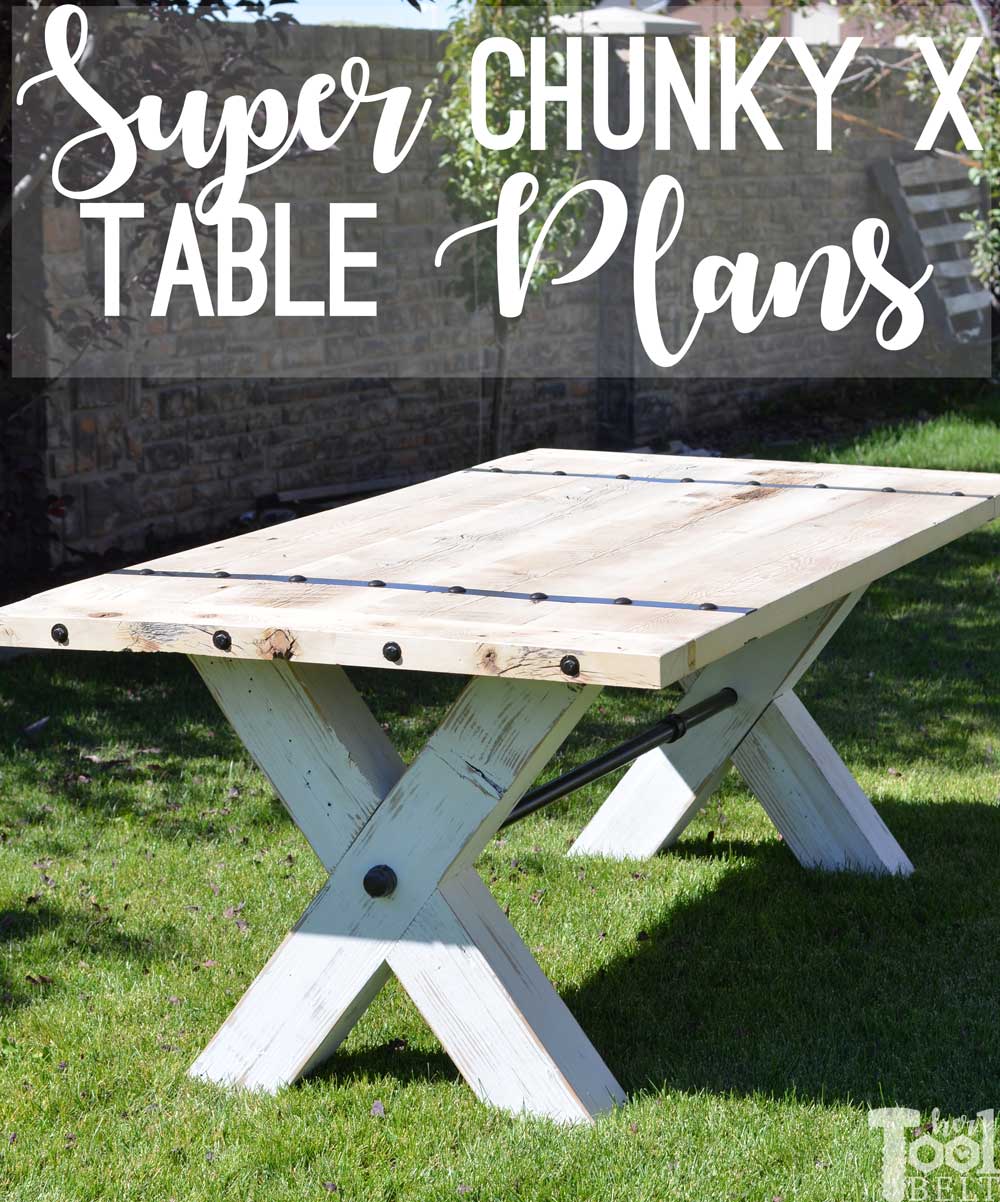
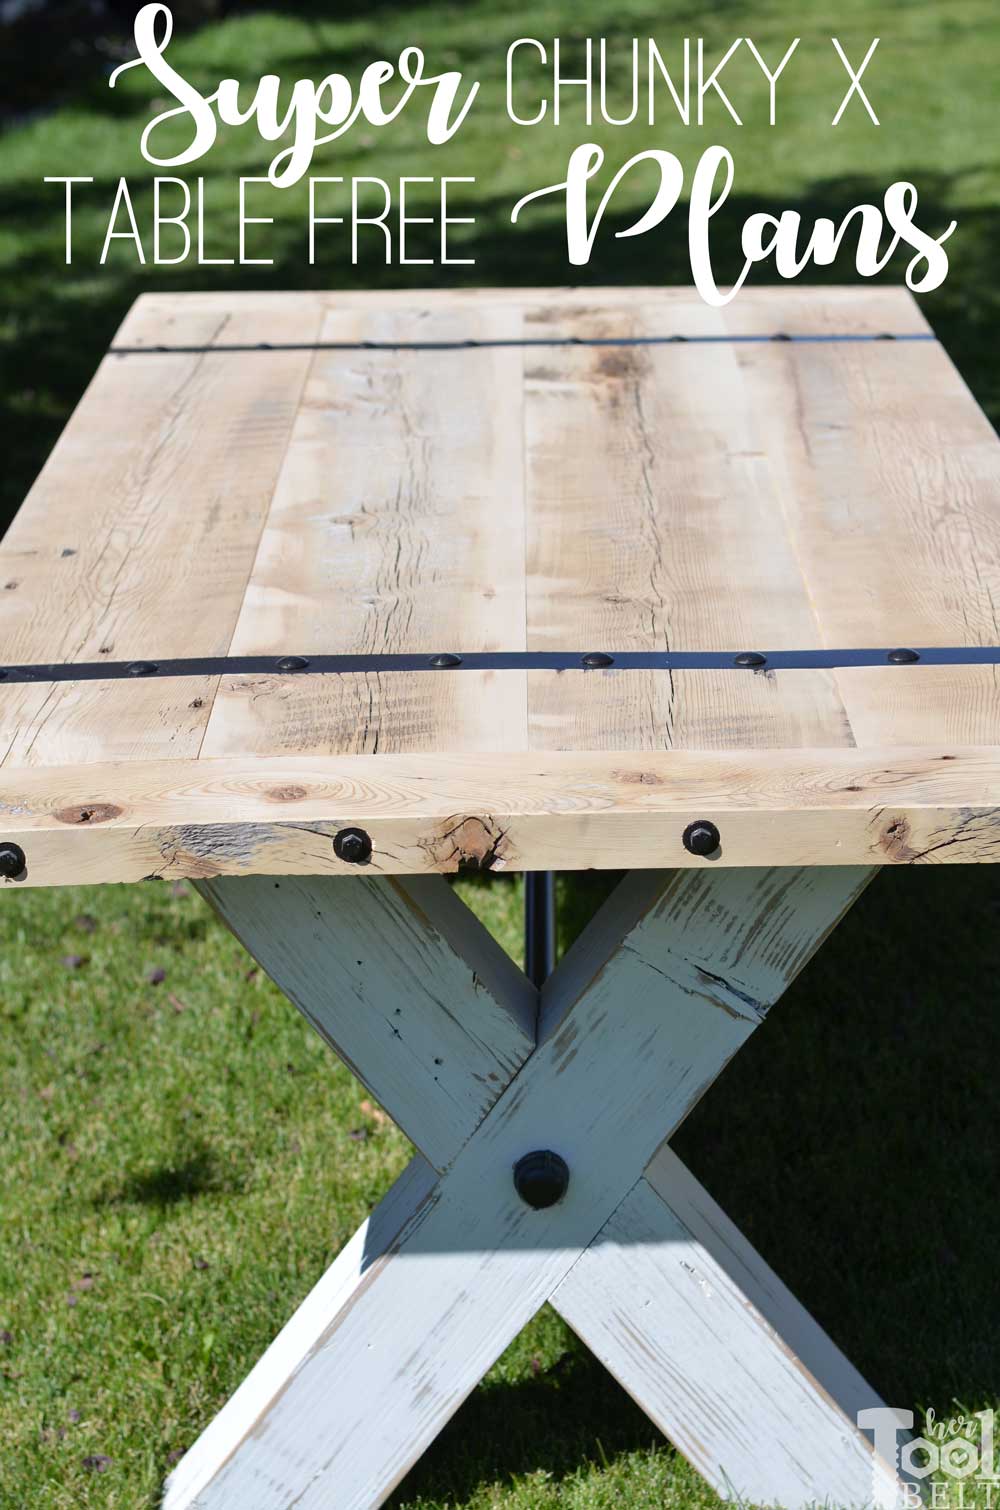
I have been planning a few projects for my outdoor space. I feel like I’ve been thinking about them forever, but extra time for building after my day job is limited. With the weather cooling down, it’s a great time to get outside and make time to build. Today’s project is for a Super Chunky X leg table that I’ll be using outdoors. Of course it can be used indoors too. All of my wood for this chunky X leg table is reclaimed. The table top is reclaimed barnwood that I’ve been saving from Remo’s Barn that I took down a few years ago. The super chunky 6″x6″ posts for the legs are the ones I had to remove from my deck and replace. This table was almost free to build, since all the wood was reclaimed. However I decided to add a bunch of metal accents for fun, we’ll see if they are worth the $$$.
This post might seem complicated because of all of the deviations I made for metal accents. The actual table build is pretty simple.
How to Build a Super Chunky X Table
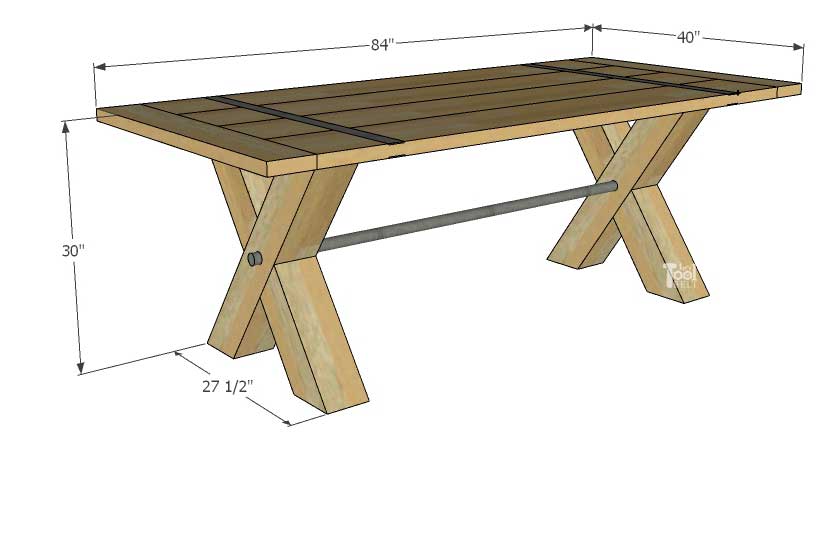 Materials (7 foot long x 40 inches wide table)
- 4 – 2″ x 12″ x 8′ boards (actual dimensions in store 1 1/2″ x 11 1/4″)
- 1 – 2″ x 6″ x 8‘ board (actual dimensions in store 1 1/2″ x 5 1/2″)
- 2 – 6″ x 6″ x 8′ posts (actual dimensions in store 5 1/2″ x 5 1/2″) (a 4×6 could be substituted for the 6×6)
- 1 – 1″ x 66″ Black Metal Pipe – cut to size – A much cheaper alternative to the pipe is a 2×4 with pocket holes into the X legs.
- 2 – 1″ metal pipe caps (if pipe is used)
- wood glue
- sandpaper
- 2 1/2″ pocket hole screws (or alt dowels, bisquits, domino, etc)
- White paint
- Top coat for outdoors
- Optional Metal Accents – I spent about $100 on the metal pieces for the table.
Tools Used
- Makita Circular Saw (18 v)
- Diablo Circular Saw Blades (rough or fine) and Reciprocating Saw Blades (clean wood, salvage or metal)
- Miter Saw (nice to have, but not required)
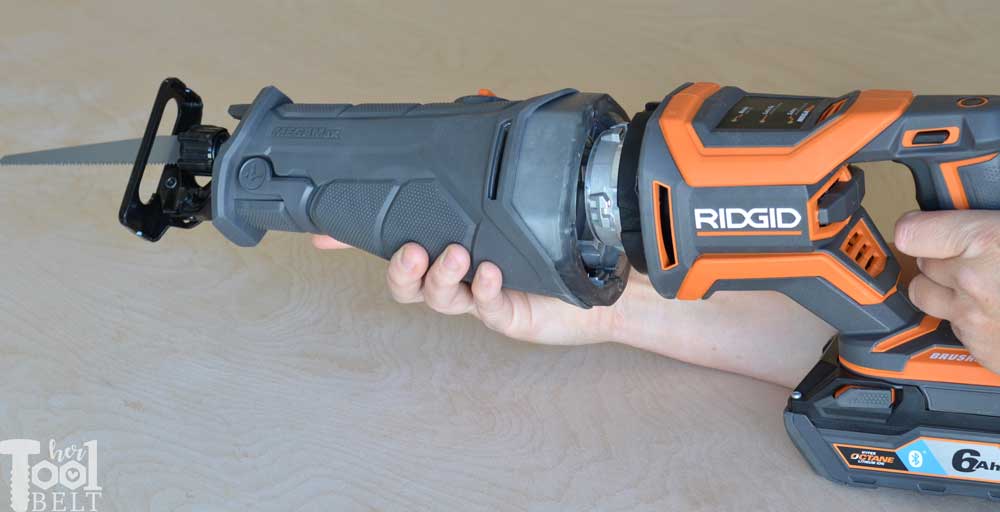
- Ridgid MegaMax Base + reciprocating saw and 90 deg drill and Octane battery
- Drill
- Sander
- Pocket hole jig
- Bosch spade bits
- Forstner bit
- Clamps
- Radio for entertainment 🙂
- Planer for the barnwood
- Router for the metal inlay – optional
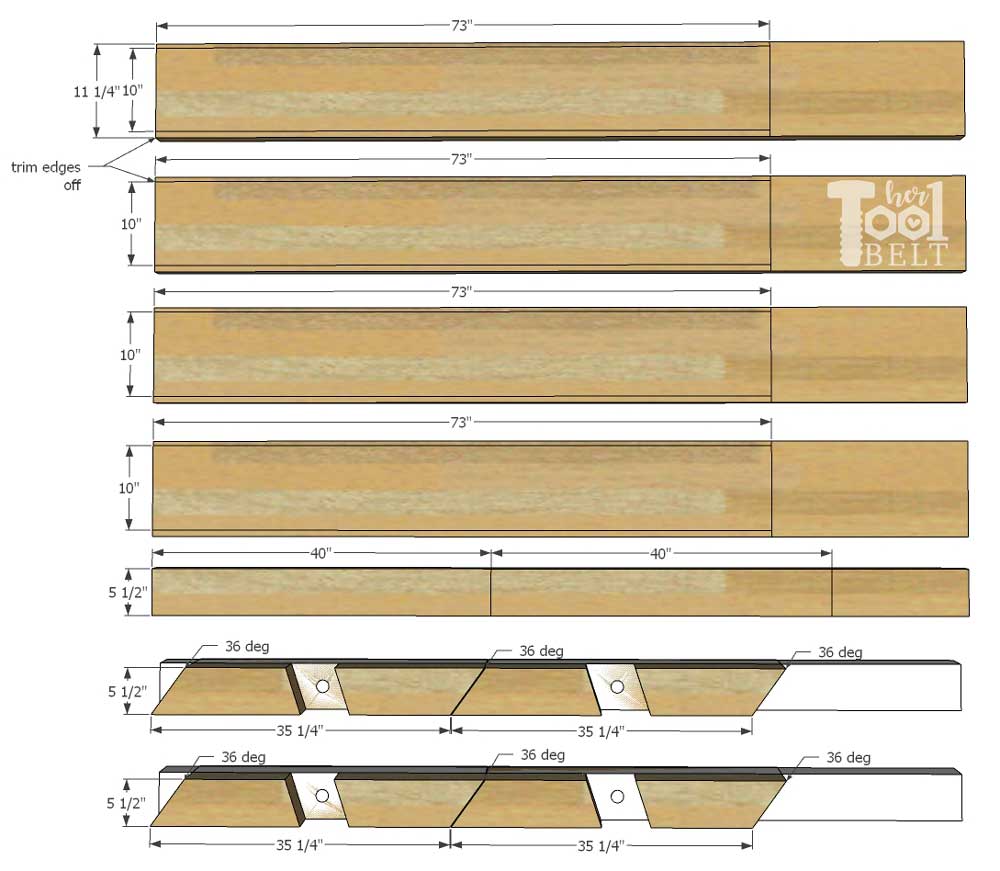
Cut List
- 4 – 1 1/2″ x 10″ x 73″ (2×12)
- 2 – 1 1/2″ x 5 1/2″ x 40″ (measure table and cut to length to fit table width)
- 4 – 5 1/2″ x 5 1/2″ x 35 1/4″ on a 36 deg angle (see diagram)
Cut Diagram
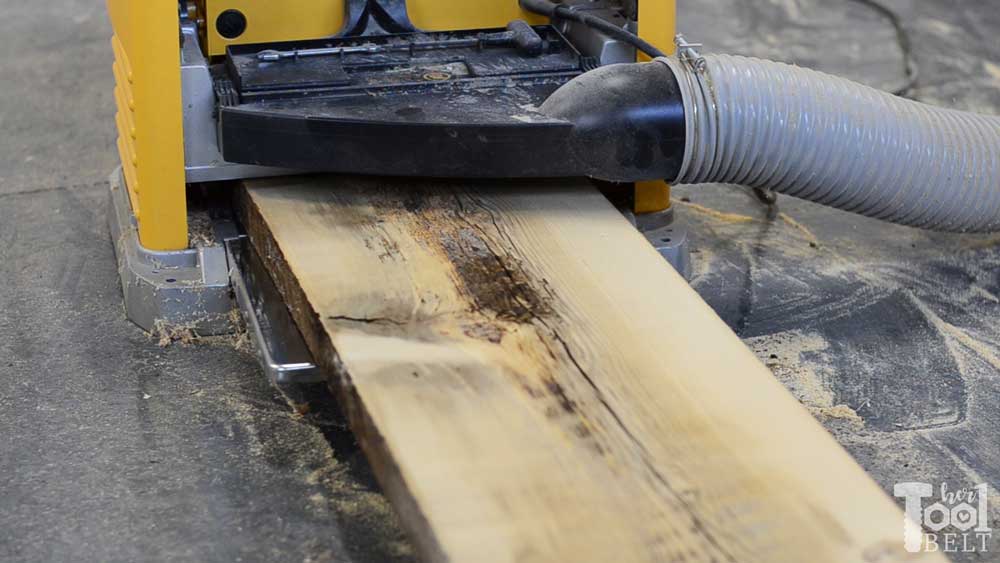
Reclaimed wood prep
Since the reclaimed wood that I’m using for the top is really rough, I decided to plane it down smooth-ish. I couldn’t get it too smooth because once the planer was cutting the whole flat board width, it would overload. So I got what I got…and it left me some good character in the wood.
If working with reclaimed wood, make sure to inspect your boards are remove any metal, nails or foreign debris before cutting it.
Step 1 – Cut and Build Table Top
If you are using 2×12’s for the table top, you have a few options.
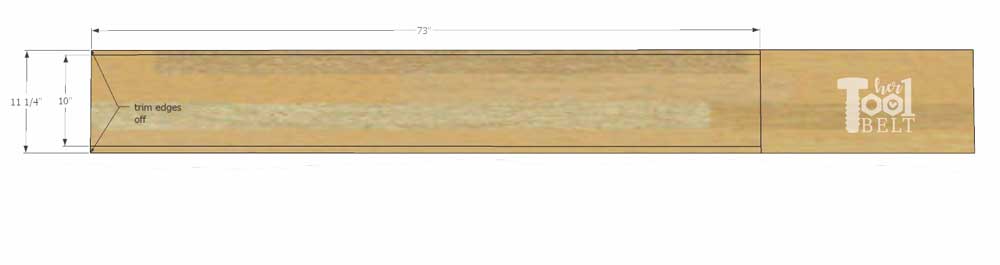
- Cut off the rounded edges of the board and trim the width to 10″, so when you glue the boards together the top is flat and flush.
- Leave the rounded edges on the board (table width would change to around 45″), you’d have a groove where the boards meet and it would be a more pronounced ‘Plank’ look.
Either way will be fine and it’s totally up to the look you’re going for. The instructions assume you are trimming the boards to 10″ wide.
Use a circular saw and straight edge to trim off the ’round edge’ of the 2×12 (about 1/4″). Measure over to the other side 10″ and use a circular saw and straight edge to cut the other edge. (Alternate tool is a table saw)
Cut the board length to 73″.
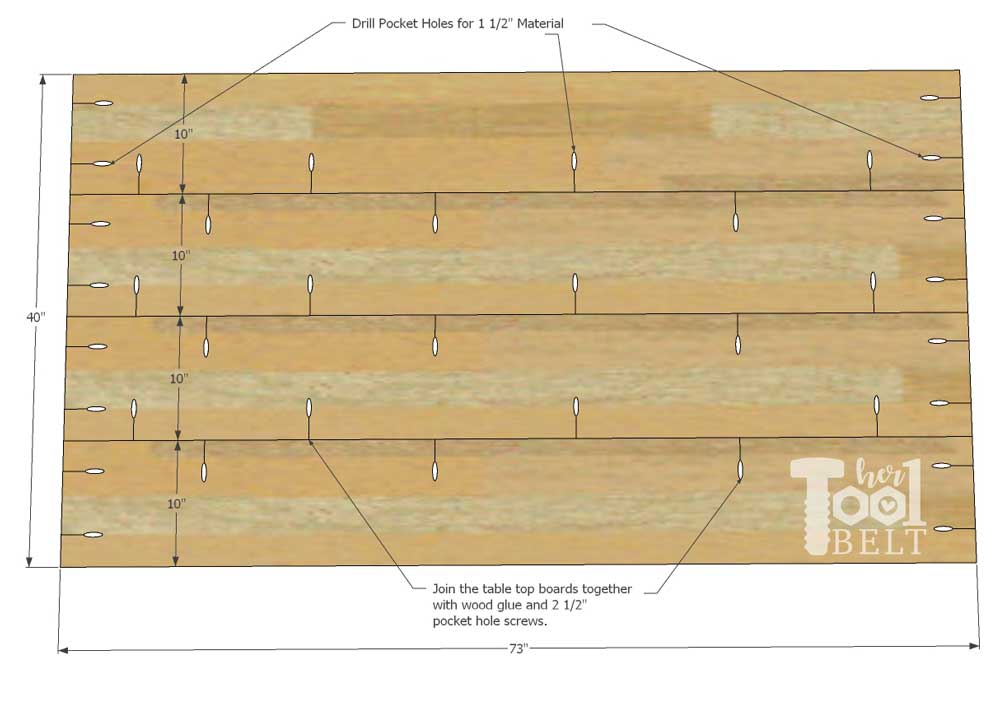
Use a pocket hole jig and drill pocket holes for 1 1/2″ material along the 10″x73″ board edges and a couple of pocket holes on the ends. Use wood glue and 2 1/2″ pocket hole screws to join the 4 – 10″ x 73″ table top boards together.
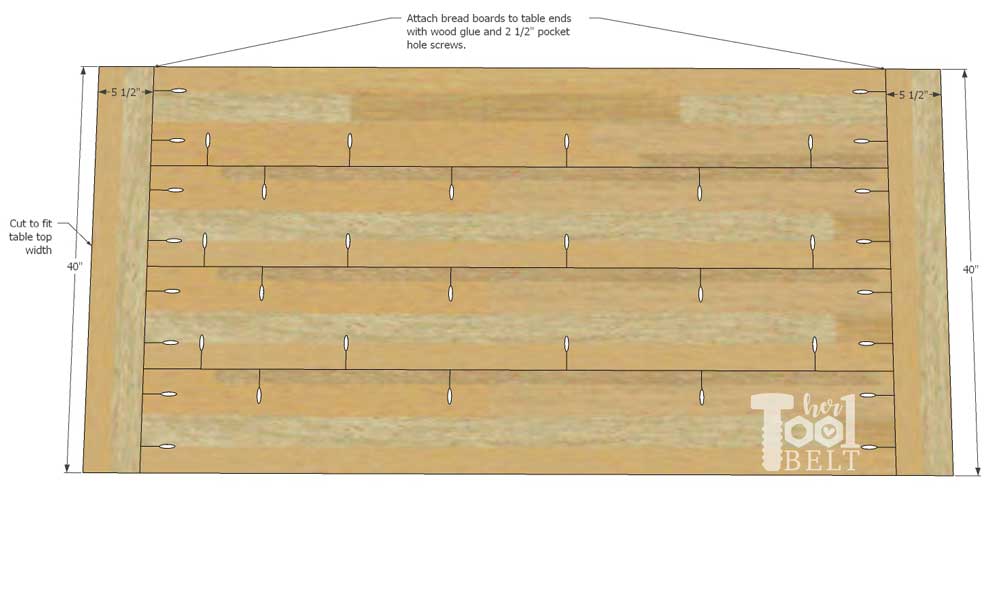
Cut the 5 1/2″ bread board to the width of the table top (about 40″). Use wood glue and 2 1/2″ pocket hole screws to attach the bread boards to the ends of the table top.
Lay the table top on a flat surface and let the glue fully dry.
A few deviations on my table – Cutting Table Top Boards
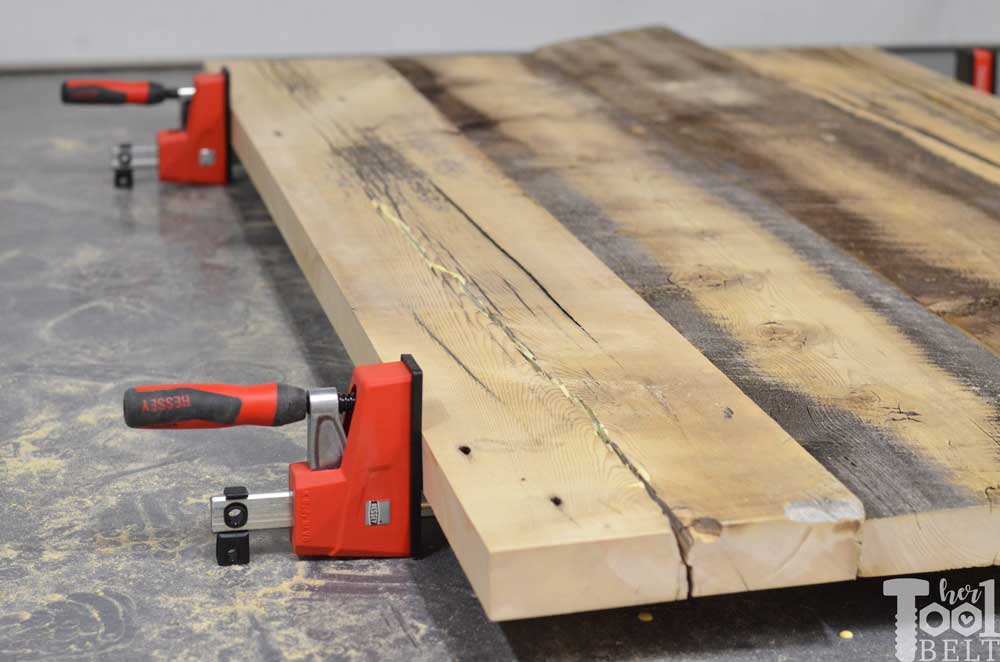
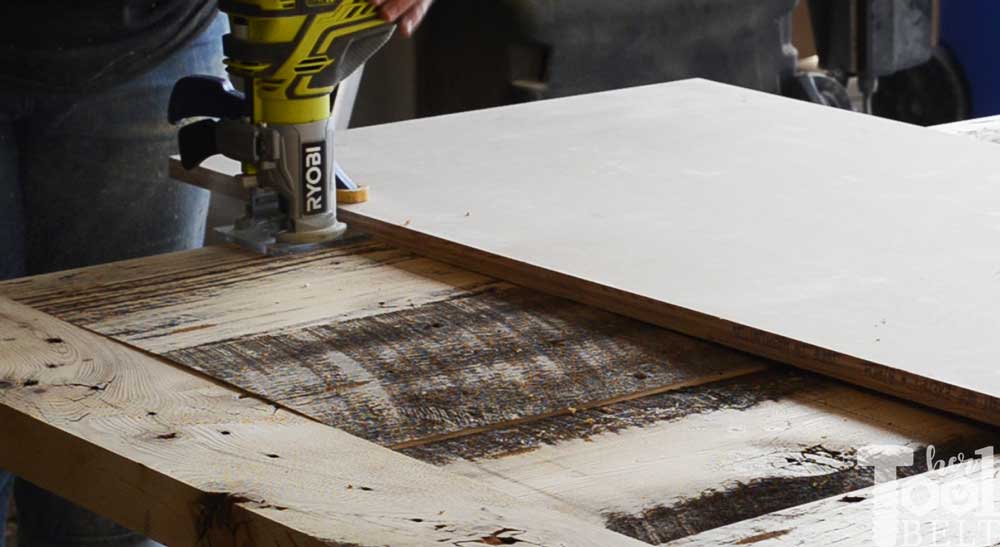
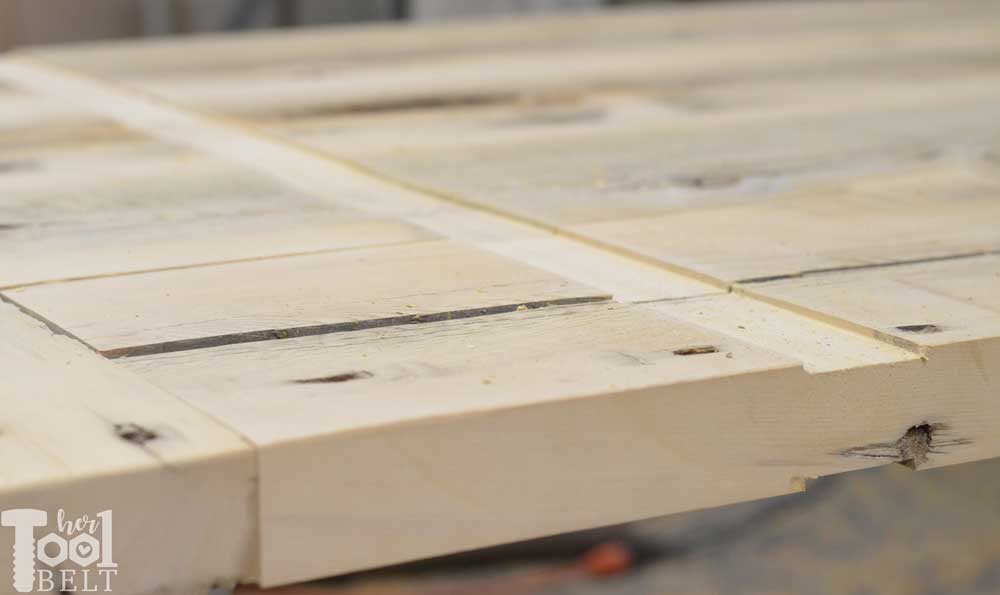
I cut all of my boards to approximately 80″ long, because I wanted to cut them to 73″ all together after they are glued up. One step that I needed to do was cut the side edges off of the top boards to get straight edges.
I wanted the boards to meet flat-ish and flush. I did this by clamping a straight edge (piece of plywood to the barnwood slab) and using a circular saw to cut a nice straight edge. Then I measured over 10″ and cut the other side, making 2 nice straight and parallel edges.
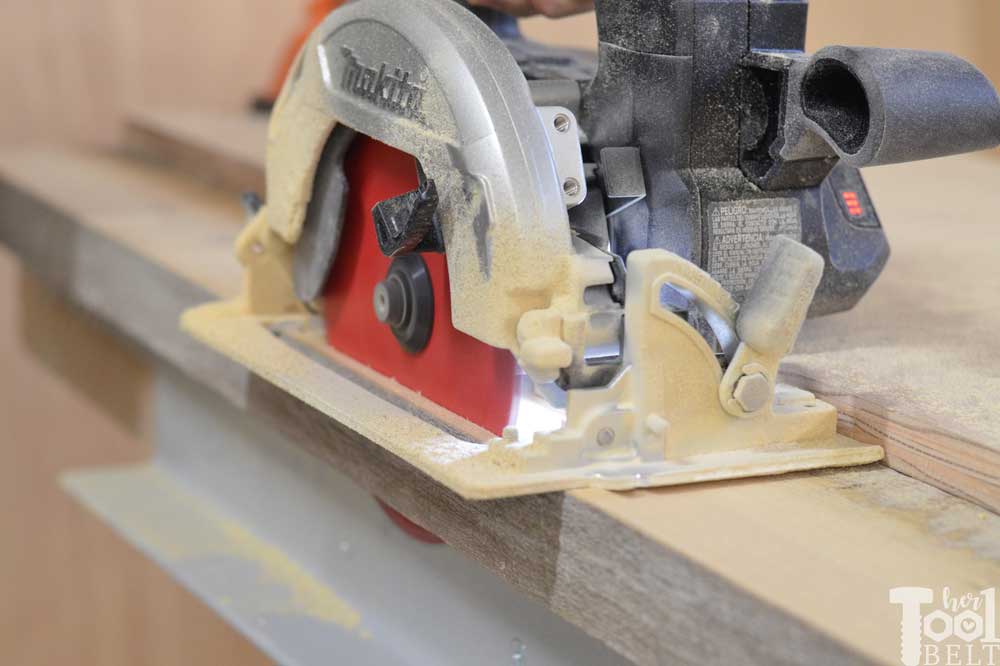
I’m reviewing the Makita subcompact 18 v circular saw, and it did a fantastic job cutting 2″ pine when paired with Diablo’s Demo blades. The subcompact is light weight, only 6.4 lbs and smaller than the other Makita circular saws. It’s a comfortable saw to use and comes with an attachment for dust collection, hopefully I can try that out soon!
Once I cut the 4 table top boards to be 10″ wide, I glued them together. I’m using the flat bar and bolts to secure my table top together, but normally I would use 2 1/2″ pocket hole screws to secure my table top boards together.
After the glue dried, I cut all of the boards to 73″. Then I used 2 1/2″ pocket hole screws and wood glue to attach the 5 1/2″ bread boards on the end.
Step 2 – Building the Chunky X Legs
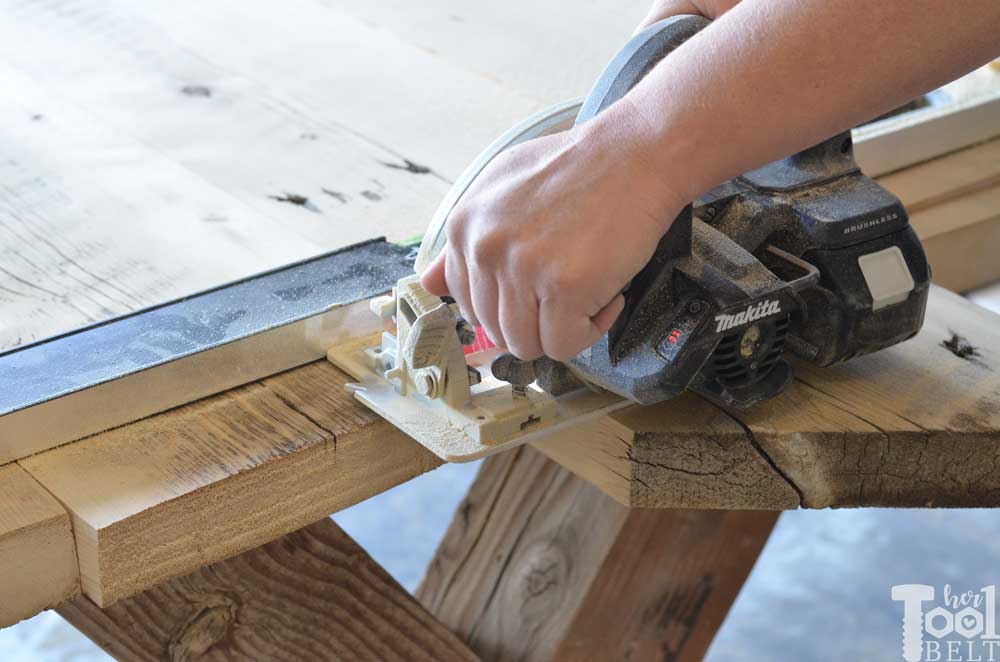
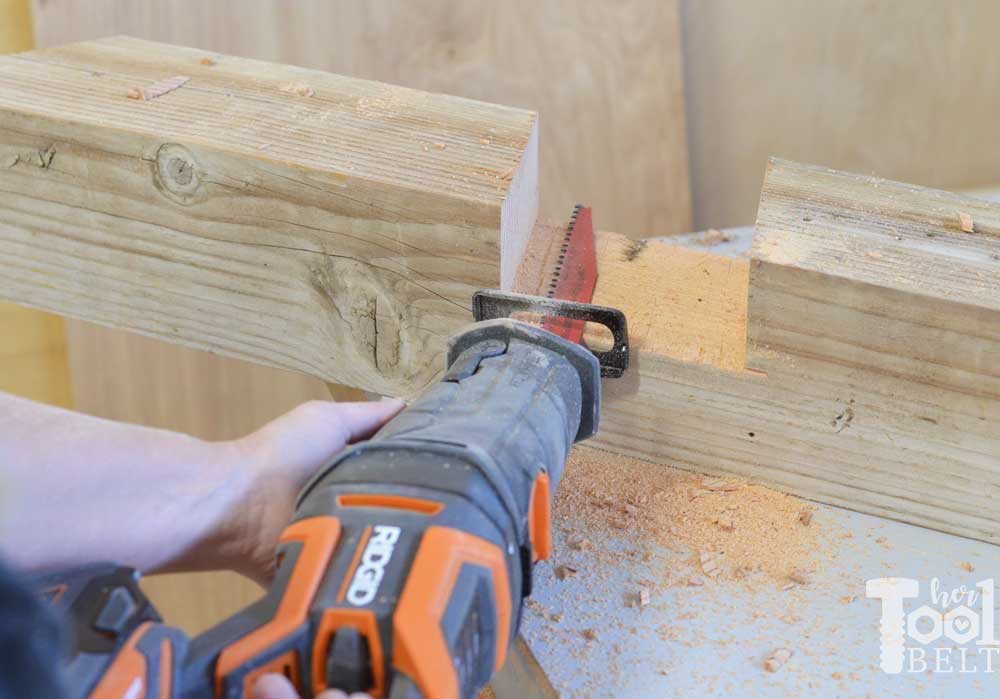
Cutting 6×6 posts can be a little tricky. A 12″ miter saw can’t quite cut through it, but you can turn the post over and finish the cut. A circular saw should be able to get about 1/2 way through the post and a reciprocating saw can be used to finish the cut if necessary.
Cutting posts with the circular saw
To make the measurements easy, I made the X angle 36 degrees. Assuming the post width is 5 1/2″, measure up 4″ and draw a line to the corner. This will be a 36 deg angle.
Cut 4 – 35 1/4″ legs with 36 deg miters on each end, as shown.

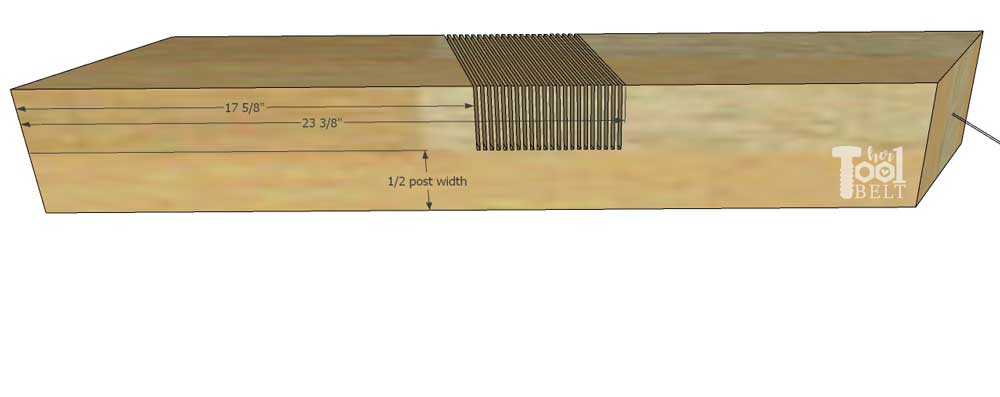
Now we need to cut the half lap joint for the X, all of the legs will be cut the same direction.
From the bottom point measure up 17 5/8″ and 23 3/8″. From the other bottom corner measure up 11 7/8″ and 17 5/8″. Connect the lines and these are where the half lap joint needs to go. Set your circular saw to half the width of your post (approximately 2 3/4″ if your post is 5 1/2″ thick). Make lots of passes then remove the extra wood with a chisel or reciprocation saw.
Repeat for each leg.
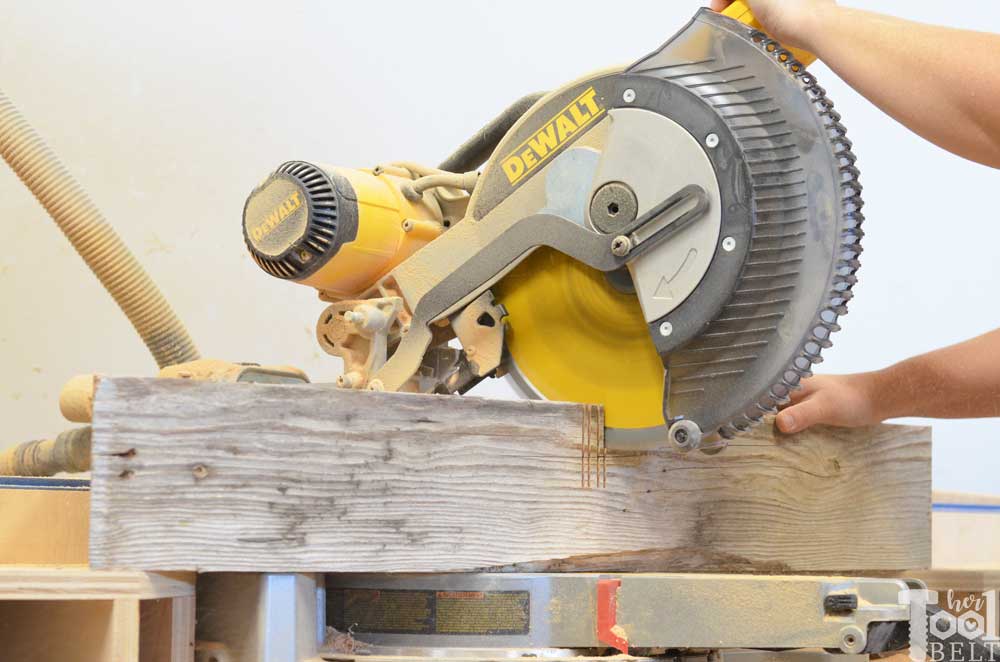
Cutting posts with the miter saw
Set the miter saw angle to 36 deg and cut 4 legs 35 1/4″ long. (You may need to turn the posts over to finish the cuts.)
Set the miter saw angle to 18 deg. Measure up 17 5/8″ and 23 3/8″ from the bottom point. Set the miter saw depth stop to 1/2 the leg thickness (approximately 2 3/4″ if your post is 5 1/2″ thick). Make a ton of cuts between 17 5/8″ and 23 3/8″. Make sure the cut angle direction is the same as on the diagram below.
Remove the extra wood with a chisel or reciprocation saw. Repeat for each leg.
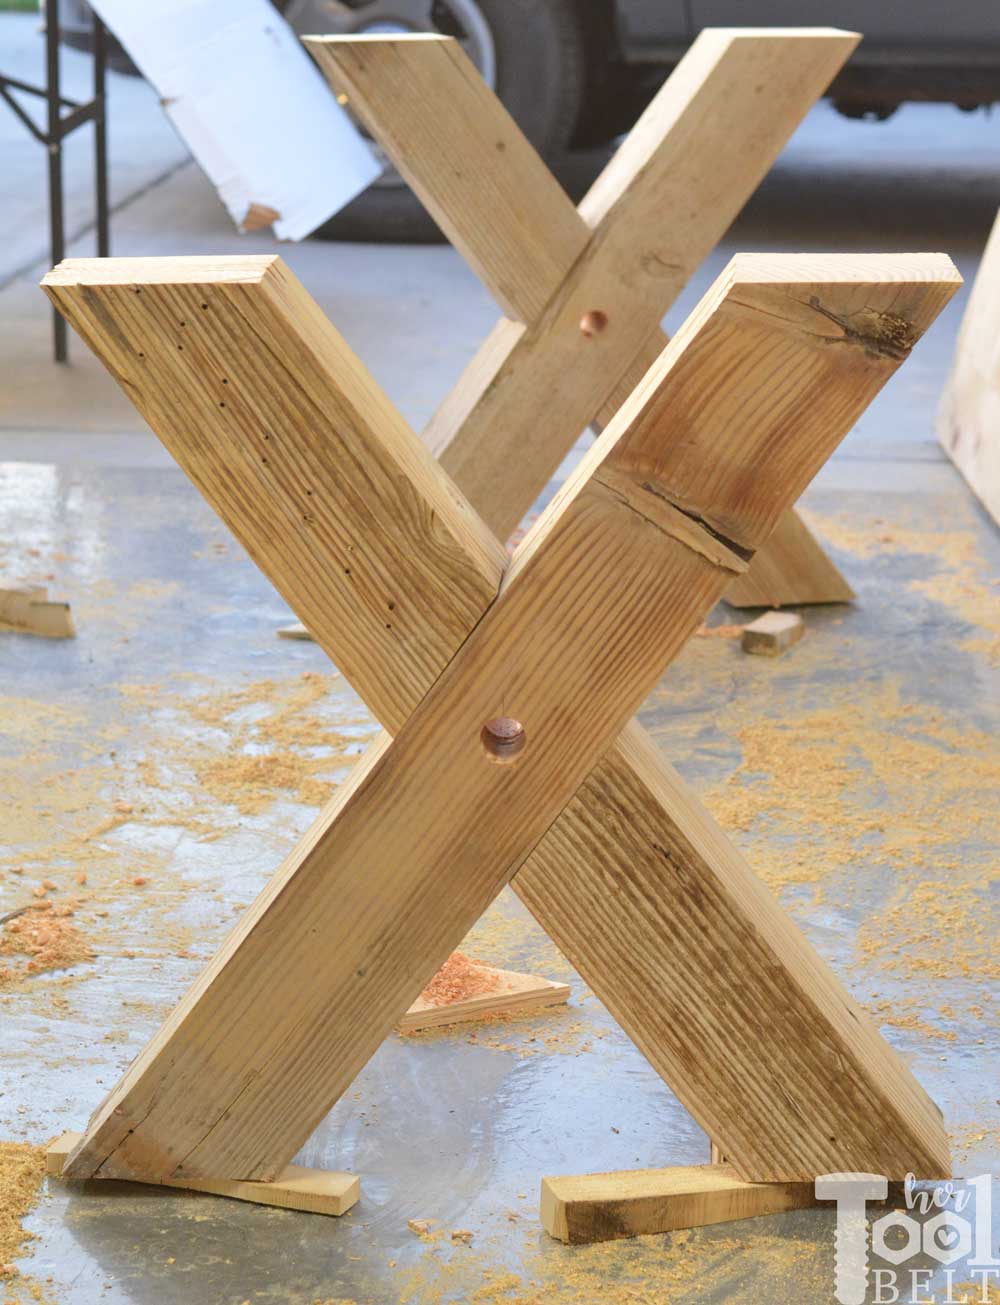
X Leg Assembly
Lay one leg on top of the other, interlocking the lap joint. Trim the posts as needed. Just in case there are any variances in the legs, I always kept the bottom point I measured from as the bottom of the leg. Use wood glue and secure each X together.
2×4 Bridge
If you don’t want to use the pipe, cut a 2×4 to 53″ and drill pocket holes in each end. Secure the 2×4 to the center of the X’s with 2 1/2″ pocket hole screws.
Pipe Bridge
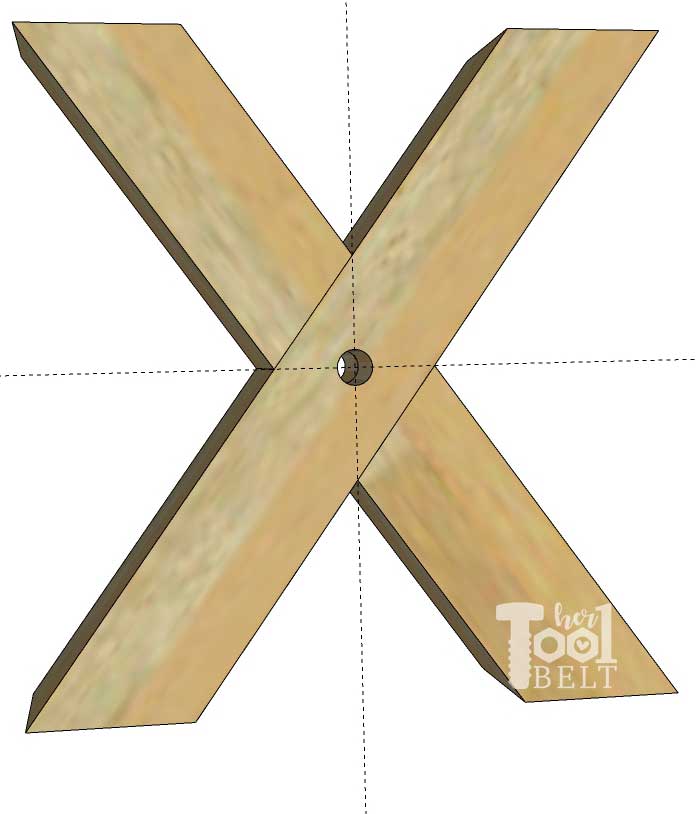
If you plan on using the metal pipe as the bridge, measure the pipe outer diameter and drill a thru hole into the center of the X. I used the MegaMax 90 deg drill attachment and that worked fantastic.
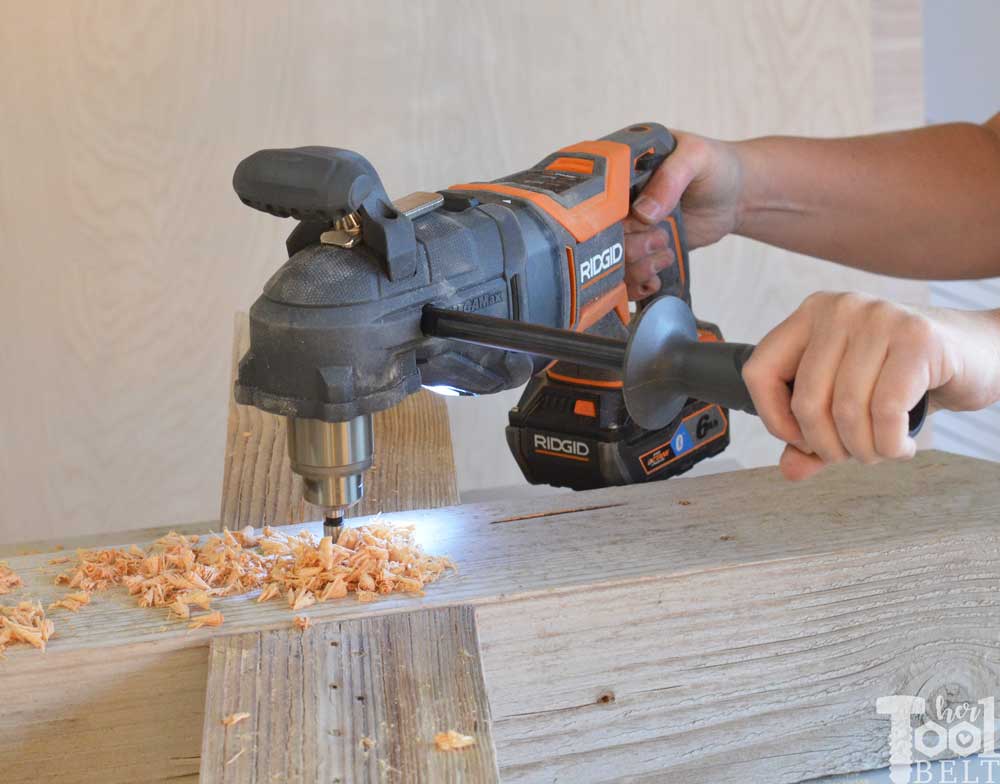
The Ridgid MegaMax is super cool, I love the concept and am rooting for this tool. The idea is you have one motor base, and can interchange the head attachments. Right now they have the 90 deg angle drill, reciprocating saw and rotary hammer. So you can have the function of 3 tools at a fraction of the price. It’s great for tools that are handy, but you don’t need all of the time. The MegaMax runs best on the new 18v octane battery (with bluetooth technology), but will work with any Ridgid 18v batteries.
Assembled X’s
Step 3 – Finishing the Table
Remove any excess glue and fill holes, cracks or blemishes with wood filler if desired. Sand the table top and legs with sandpaper, finishing in the direction of the wood grain with 120 grit or finer. Paint or stain the table and legs as desired. Apply a top coat (like polyurethane) to the table.
I painted my legs white and distressed them. I’m leaving my top natural for now with just a coat of polyurethane.
To assembly space the X legs out and run the pipe thru the holes. Thread the pipe cap on the ends of the pipe. Center the table top on the X’s and run some 2 1/2″ screws through the tops of the X’s into the bottom of the table top. (You can drill pocket holes in the X legs if you want or use 90 deg metal brackets to secure the legs to the top.)
Step 4 – Adding Metal Accents to the Super Chunky X Table
Inlay Metal Bar and Bolts
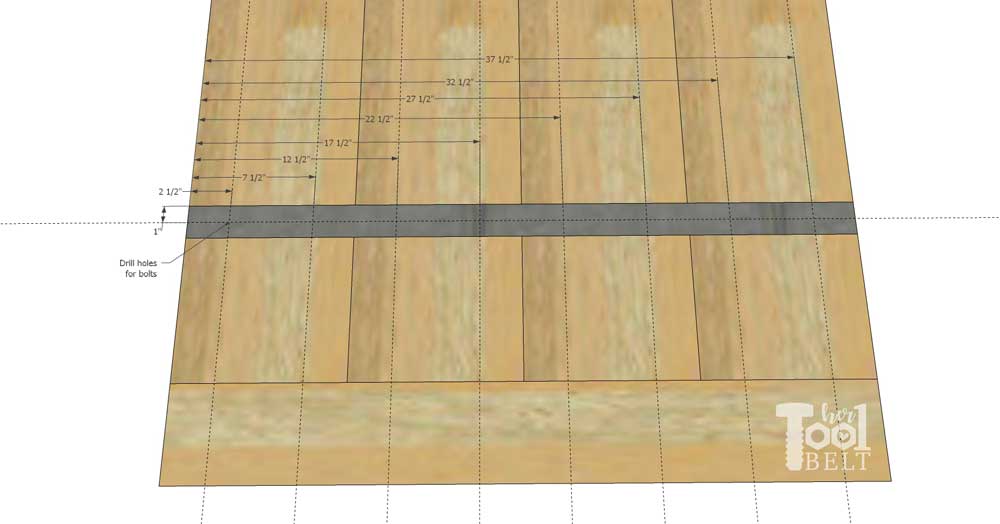
I measured from the table top ends 14″ and 16″, then I offset a straight edge so my router would route along the 14″ line (or 16″), for my router and straight bit the offset was 1 3/8″. I used a straight bit in a router set 1/8″ deep and routed the lines into the table top.
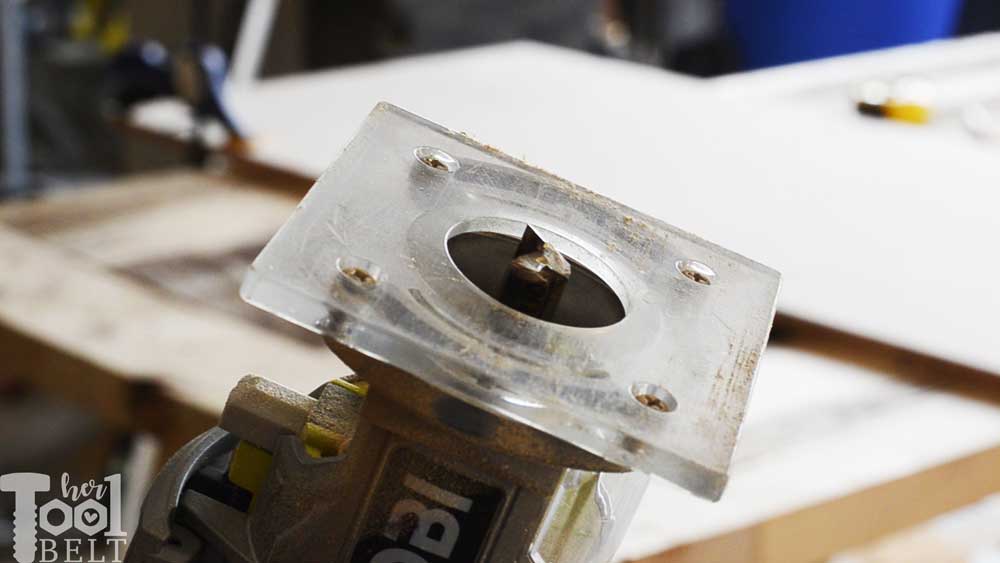
Set up.
I routed these grooves on both the top and bottom of both ends of the table top.
Then I drilled holes for the bolts at 2 1/2″, 7 1/2″, 12 1/2″, 17 1/2″, 22 1/2″, 27 1/2″, 32 1/2″, 37 1/2″.
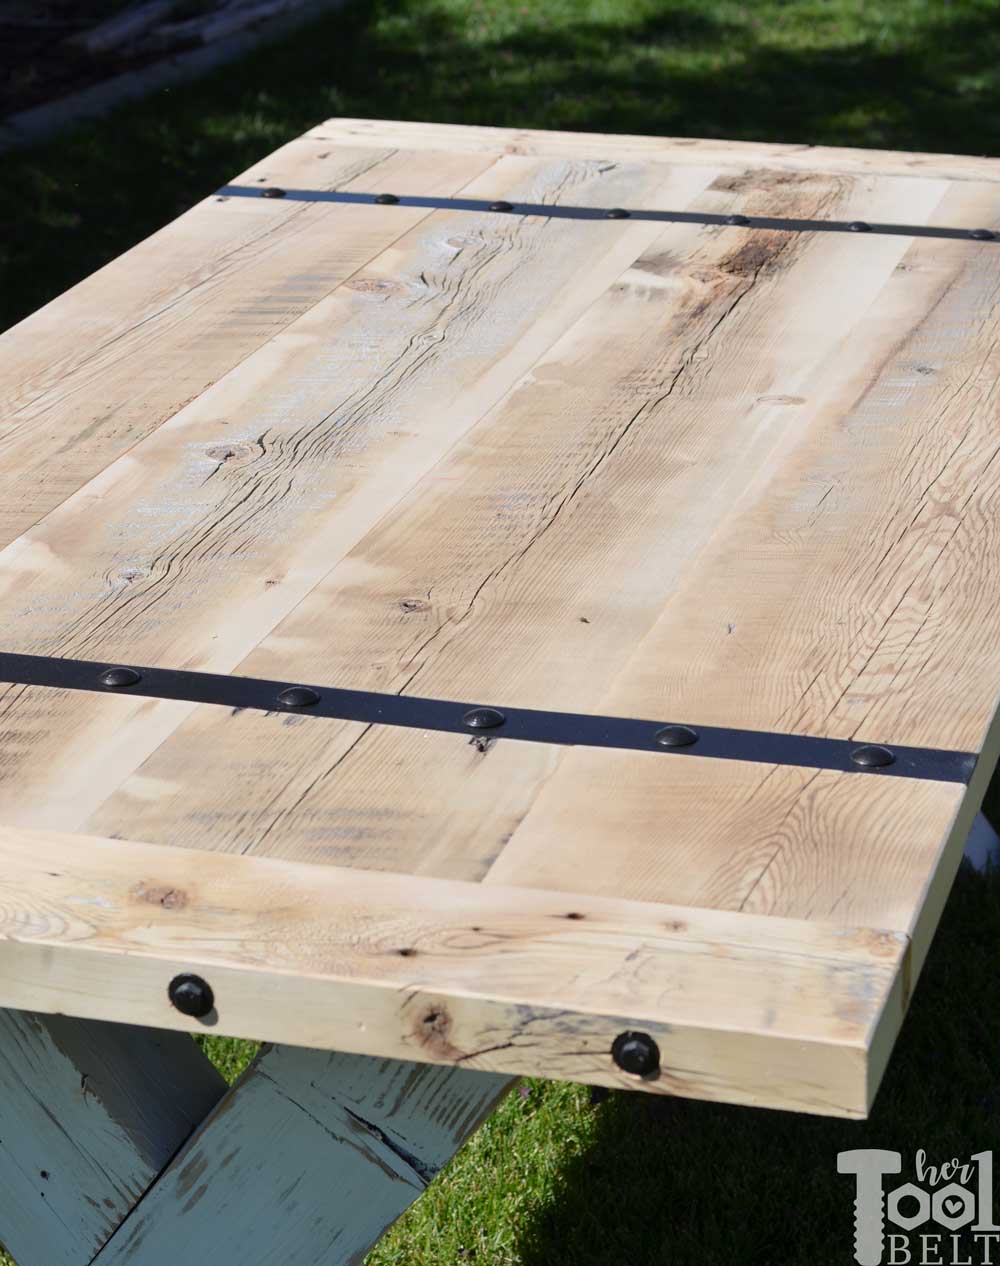
What do you think? Is it worth the extra effort and cost? Now that I’m done, I’d say yes…not sure I’d say the same thing when I was working on it though. 🙂
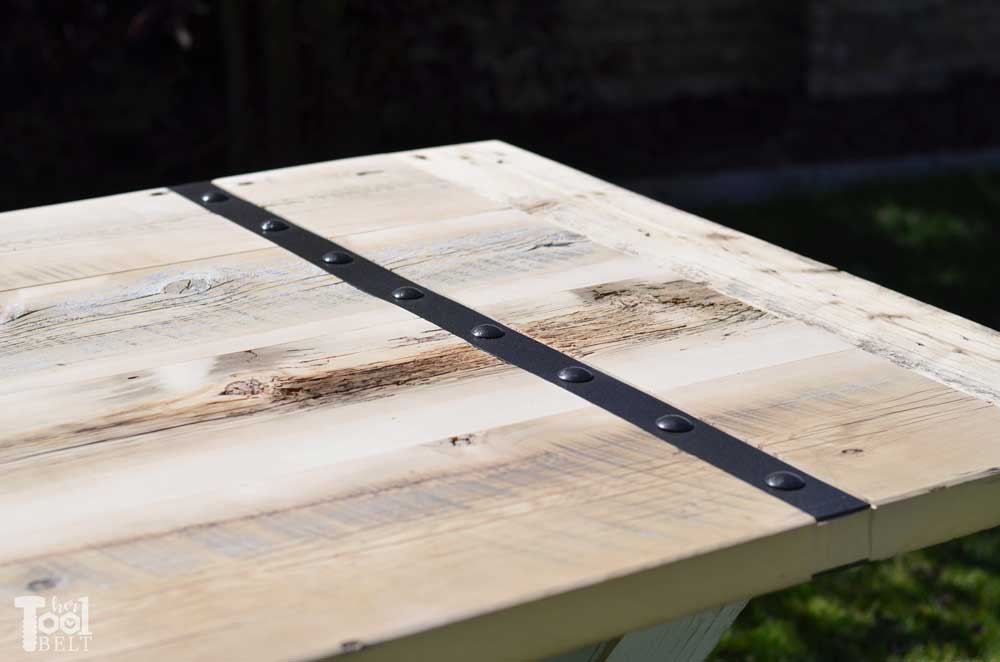
Bolts on the Table Ends
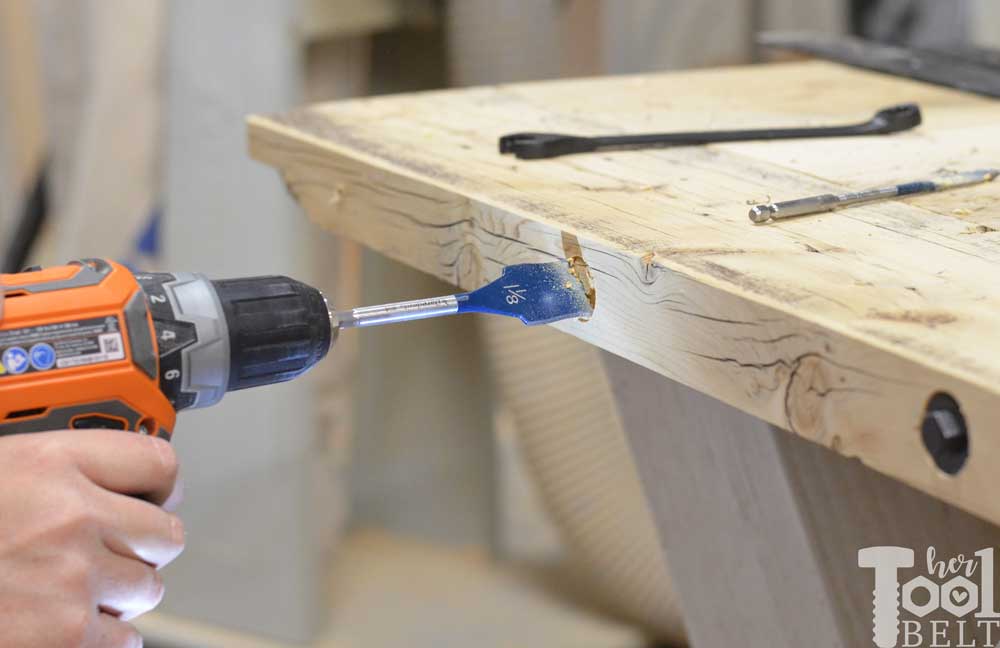
I added 4 – 3/8″ x 1″ lag screws + 1/2″ washers to the ends of the table top. I drilled 1/4″ pilot holes for the screws at 5″, 15″, 25″ and 35″.
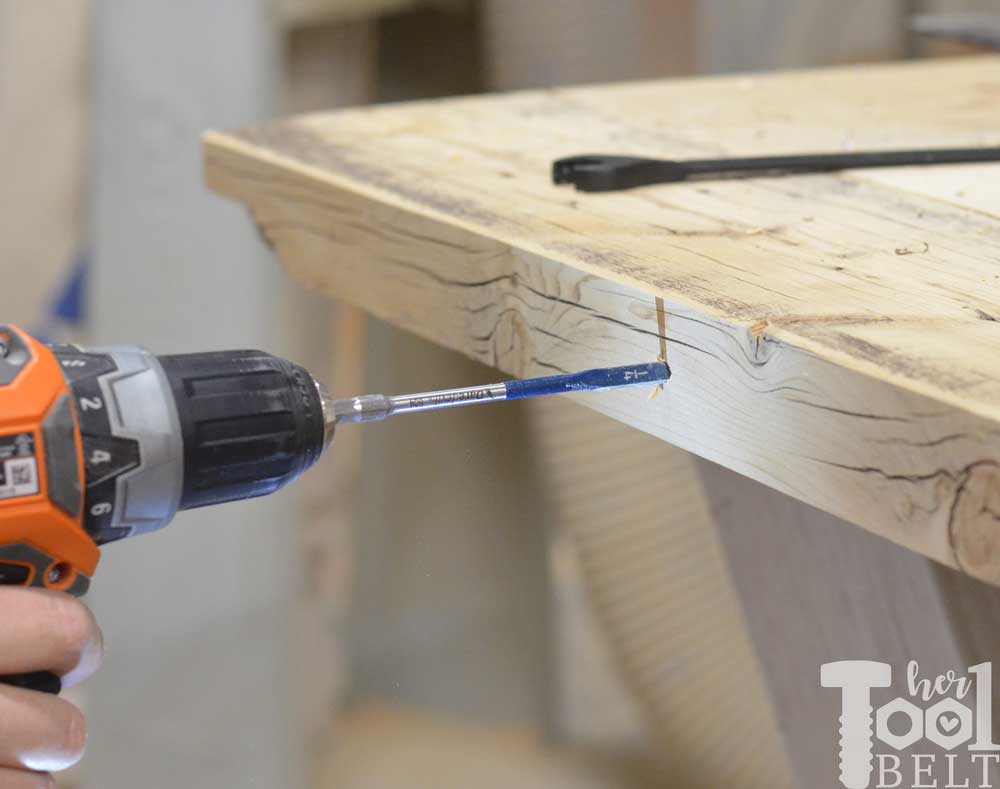
These Bosch spade bits will eat your wood for lunch, they are powerful. To reduce wood tare out, I went in reverse to score the circle in the wood. Then I wend forward with a 1 1/8″ spade bit to remove enough material to inlay the washer.
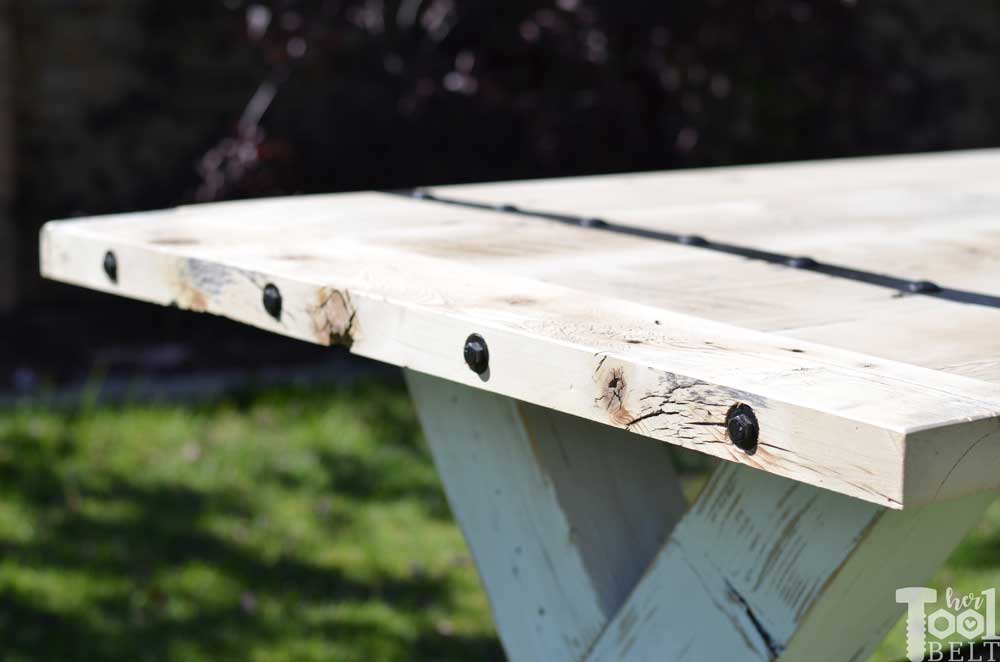
 Use a 9/16″ wrench to secure the 3/8″ lag screws into the pre-drilled holes.
I love how these turned out, and it was an easy add.
Thanks for pinning!
“I acknowledge that The Home Depot is partnering with me to participate in the Tool Review Program. As a part of the Program, I am receiving compensation in the form of products and services, for the purpose of promoting The Home Depot. All expressed opinions and experiences are my own words. My post complies with the Word Of Mouth Marketing Association (WOMMA) Ethics Code and applicable Federal Trade Commission guidelines.”
Leave a Reply