This DIY backyard fire pit post has been sponsored by Home Depot. I have been compensated for my time and provided with product(tools). All ideas and opinions are my own. This post contains some affiliate links for your convenience. Click here to read my full disclosure policy.
Summer projects are in full swing around here and I have quite a list that I’d like to accomplish this summer. My outdoor DIY list mostly consists of projects in my forgotten sad corner of the yard. My spring was packed with work, activities, youth camp, family gatherings and a whole lot of rain (for Utah 😉 ). Back at the end of April, I finished my redwood pergola, which we love! Now it’s time to mark the next project off my outdoor list!
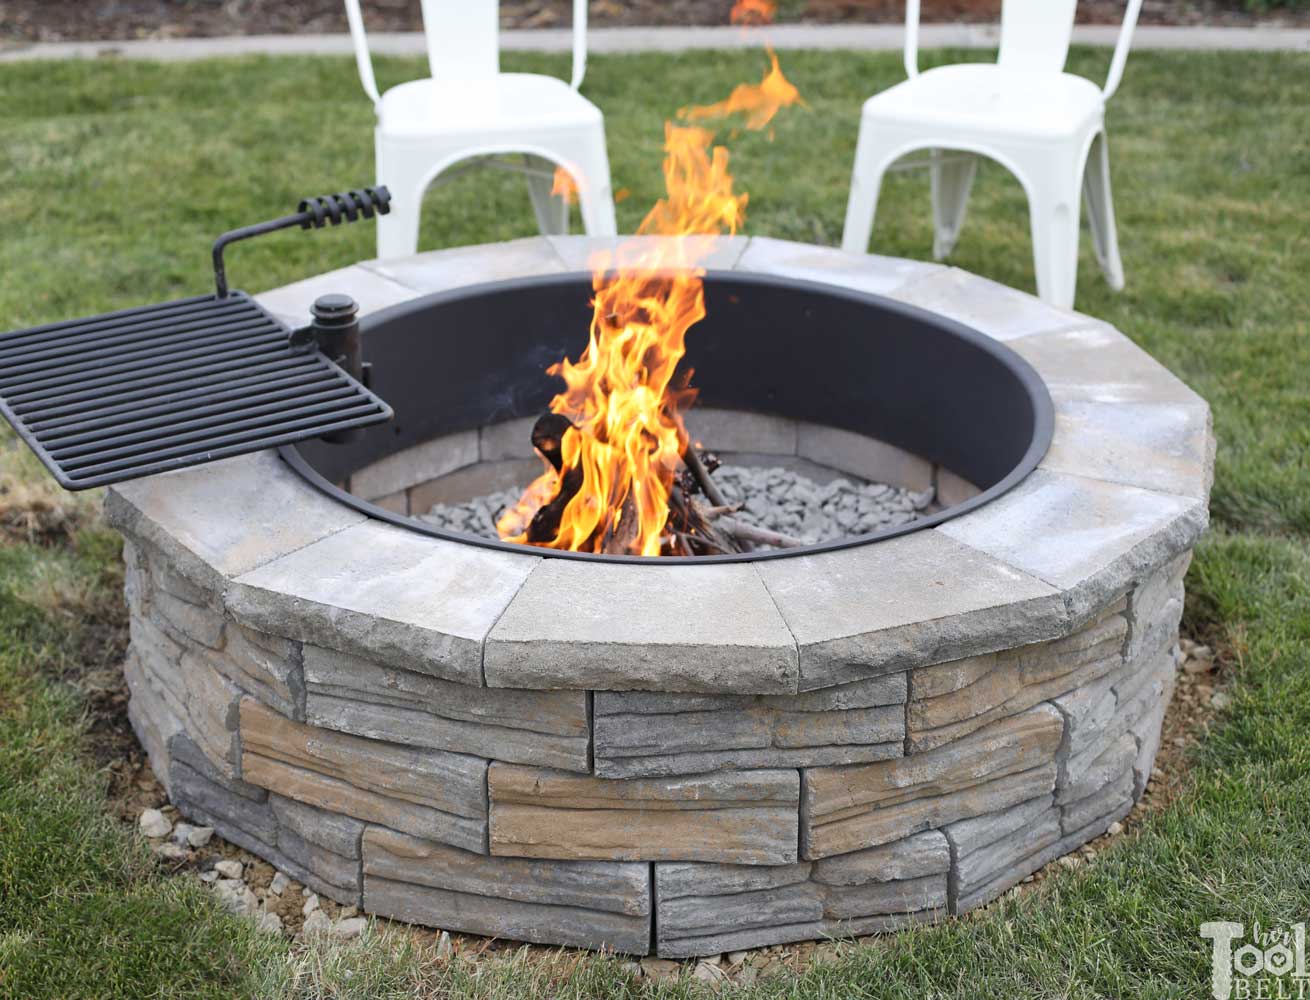
I have been wanting to make a permanent backyard fire pit, I actually bought a 36″ fire ring 3 years ago (hangs head in shame 🙂 ). We love to cook dutch oven dinners by the fire and the kids love roasting marshmallows for s’mores (or seeing how big they can blow up their marshmallow!) The ring I bought has a little grill that pivots over the fire. I think my big hangup on getting the fire pit done was choosing the location. Now that I have the big pergola in place, and I’ve moved the kid’s playhouse, I’m starting to picture the space in my head. Around the firepit, I want to do a circular paver patio next.
Choosing the Materials for the DIY Backyard Fire Pit
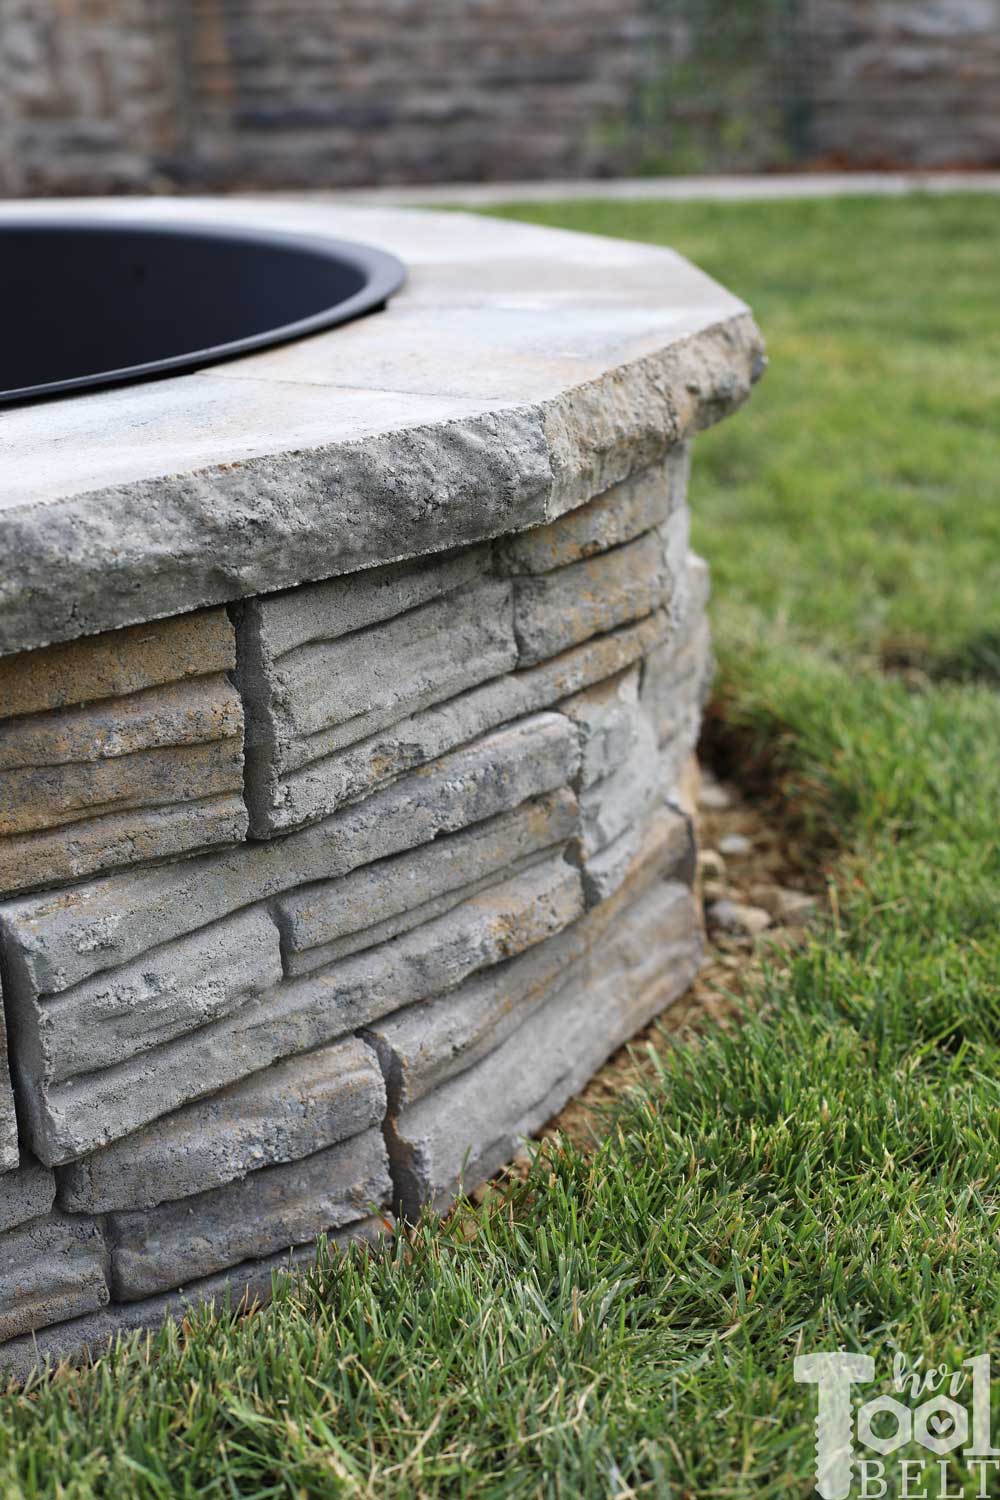
Since I already had the 36″ fire ring, I headed down to Home Depot to see what blocks were available to make the fire pit. There were a variety of blocks to choose from, but I decided to go with the Oldcastle wall blocks, I thought the rock texture on the front would go well with my cement fence. If I didn’t have the fire ring already, I think I would have ordered a kit. There are a variety of different fire pit kits to choose from.
Fire Pit Materials
- 1 – 36″ fire ring
- 39 – Oldcastle Victorian Blend Wall Block
- 14 – Oldcastle Victorian Blend Wall Cap
- 2 – Concrete Adhesive
- 8 – Paver base
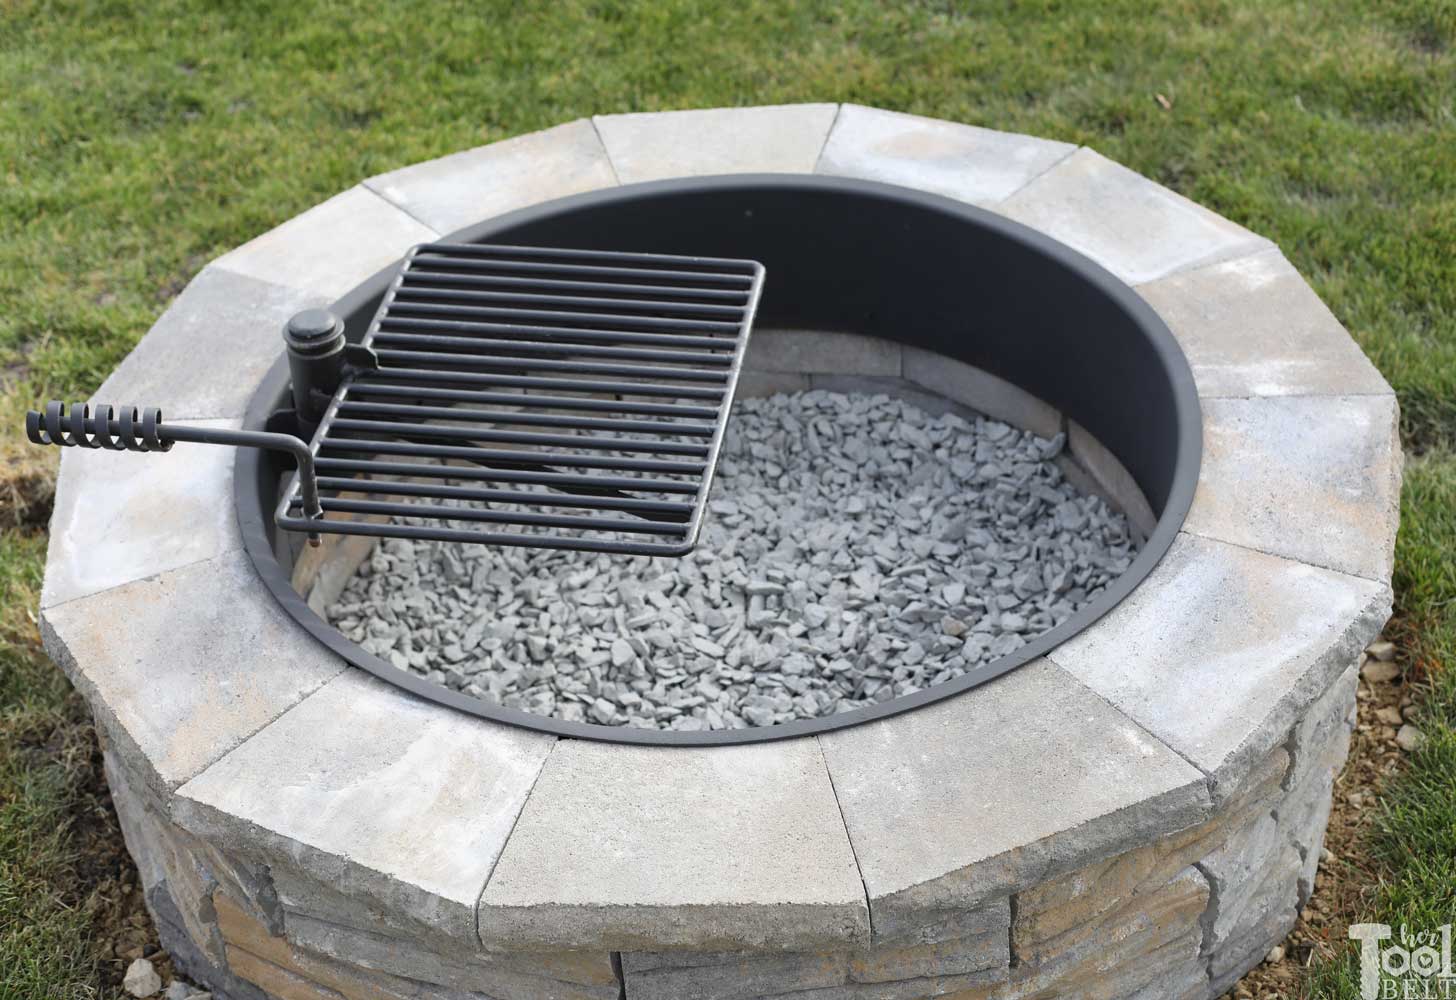
- 4 – Granite Rocks – or lava rocks, for inside the fire pit
- I also used High Temperature spray paint to restore my rusty fire ring
- spray paint – to mark the circle
- string
- block templates for 36″ inside diameter fire ring –>firepit block templates download <– Note: Make sure your printer settings are on 100%, not fit to page.
Tools Used for the Fire Pit
- shovel
- wheelbarrow
- tamper
- caulk gun
- level
- circular saw , batteries and masonry blade – to cut the blocks, if needed
- gloves
- hammer – for the string stake
Cutting the Blocks
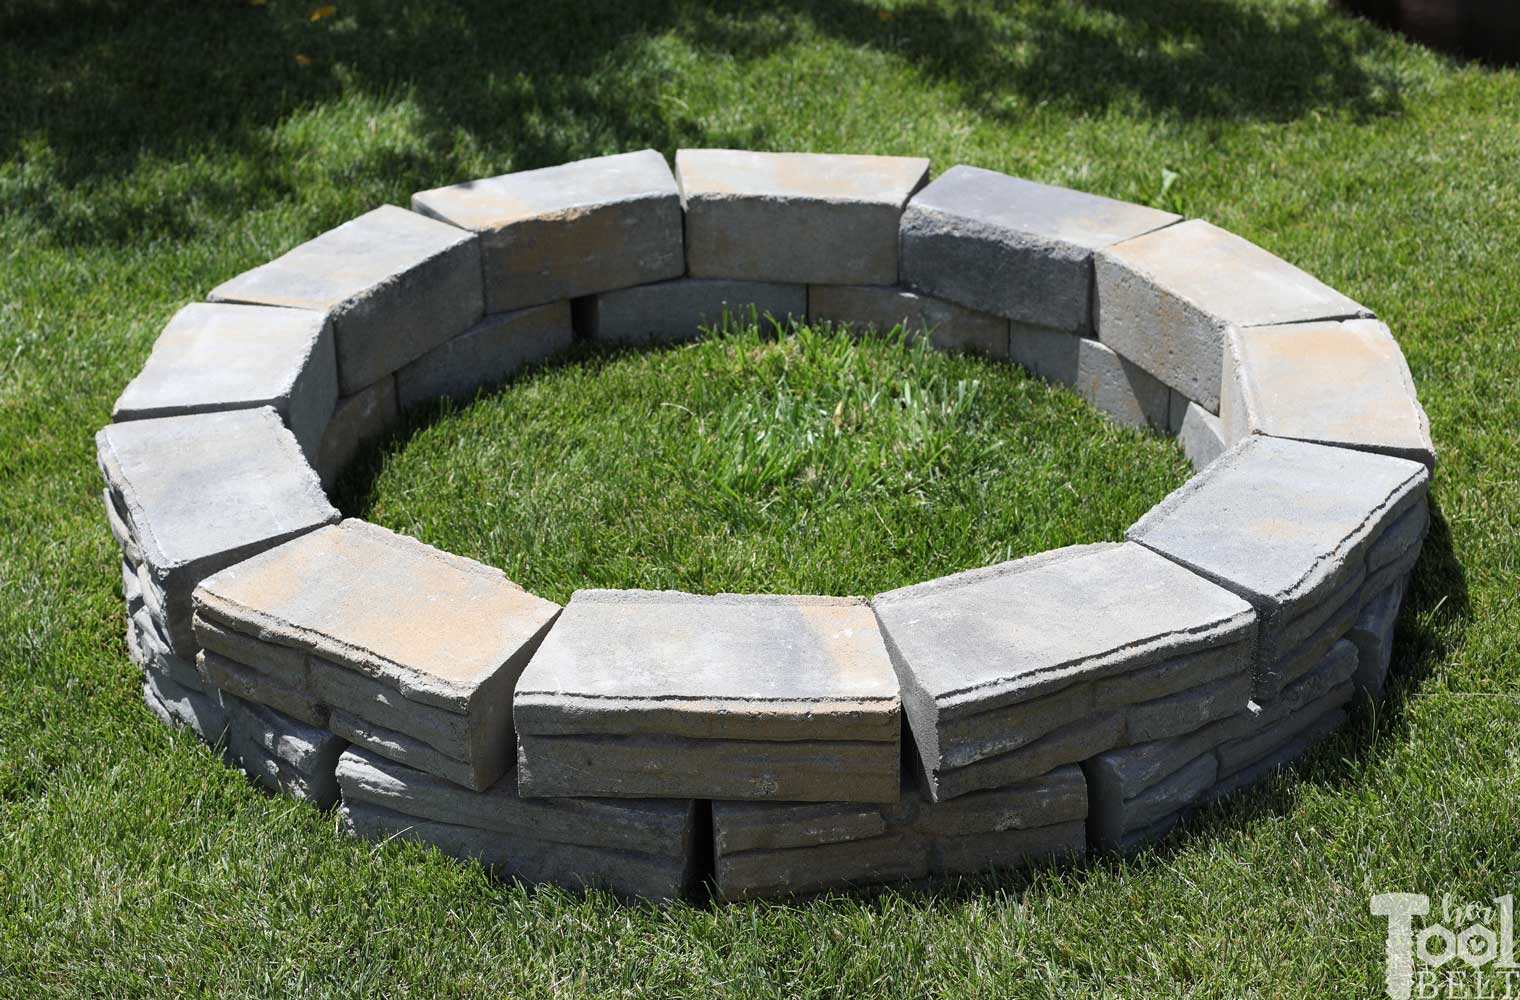
I set the wall blocks out in a circle around my 36″ fire ring. Being placed in a 36″ inside diameter circle made the outside of the blocks have a large gap that I didn’t really like. Also the lip on the back of the blocks (for when creating a wall), made the blocks recess back farther than I’d like.
Trial circle
So I decided the best thing to do was spend a few hours cutting the blocks down to the correct angle for my circle. (I used Sketchup to help me get the correct angle and spacing for the trapezoidal blocks.)
First I cut the lip off.

Then used my firepit block templates to trace the new angles for the blocks.
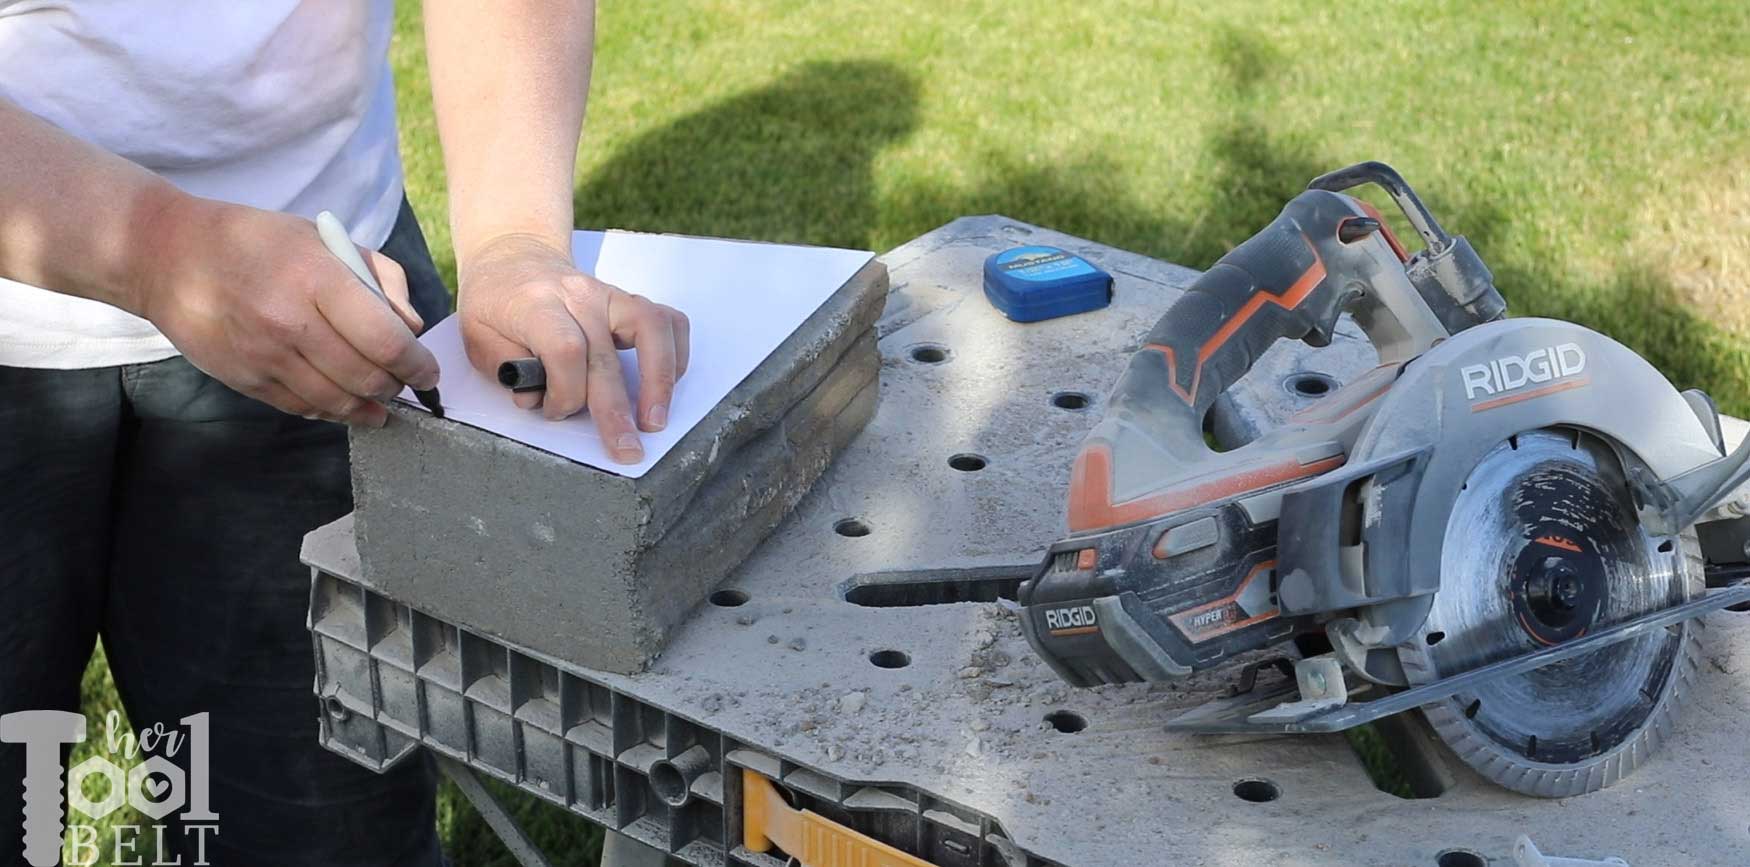
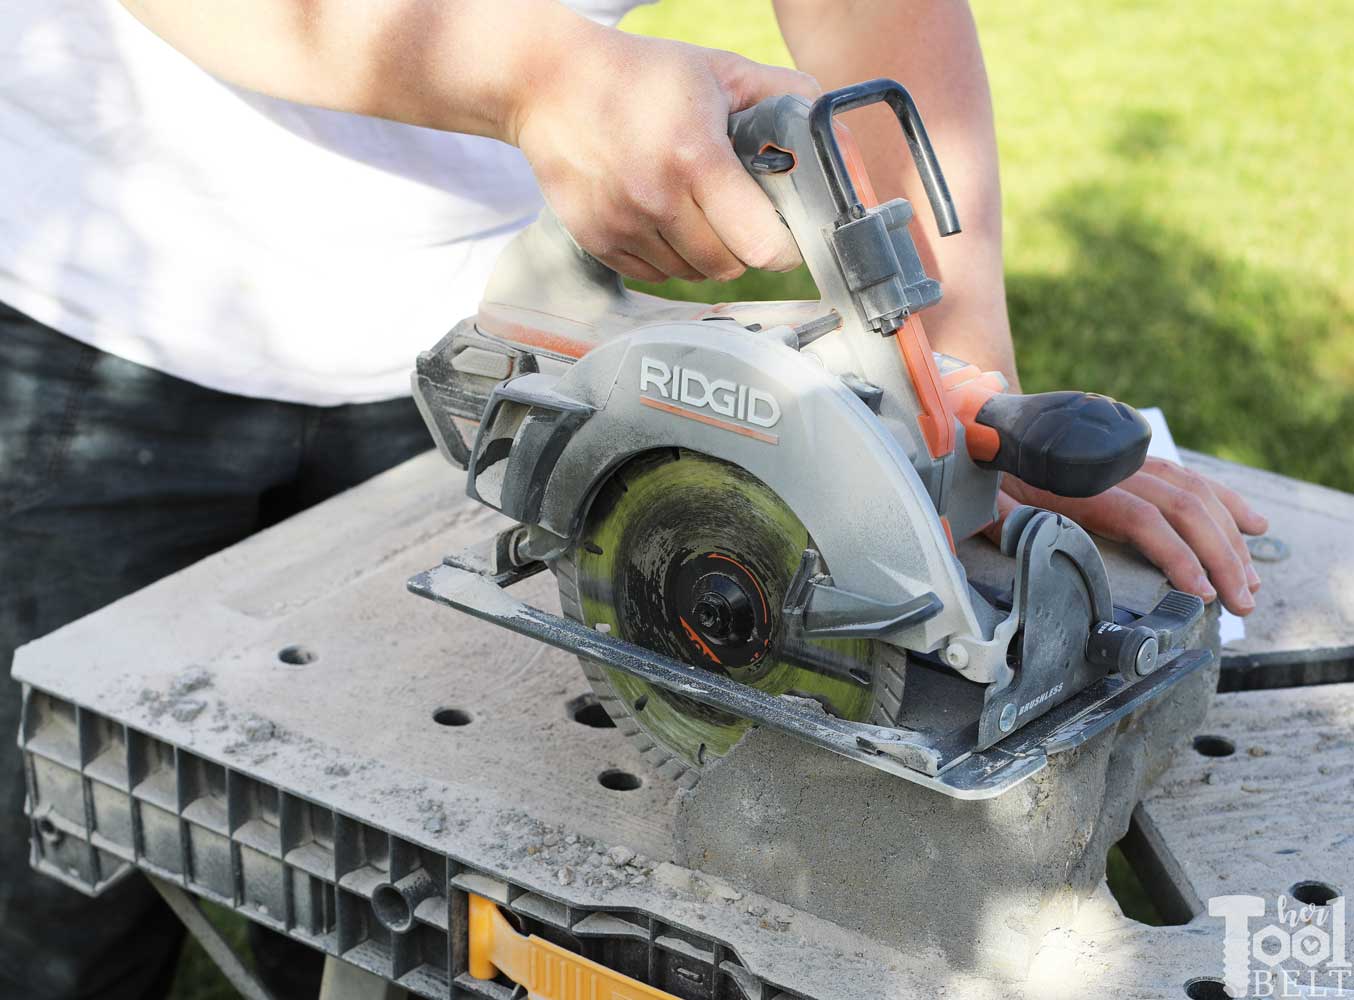
I bought a 7″ masonry blade and put it on my circular saw, the Ridgid circular saw comes with an on-board blade wrench to make changing the blade easy and convenient. Cutting all of the blocks really wasn’t that bad, but it took 5-6 hours. For the wall blocks, I had to do 2 passes on each side because the blade isn’t deep enough to go through the block all at once.
I have been reviewing this Ridgid Octane circular saw with a brushless motor. It is a workhorse and worked like a champ with all of these tough masonry cuts.
I probably could have had the fire pit done in about 4 hours if I didn’t have to cut my blocks to fit the way I wanted them too.
Prepping the Ground
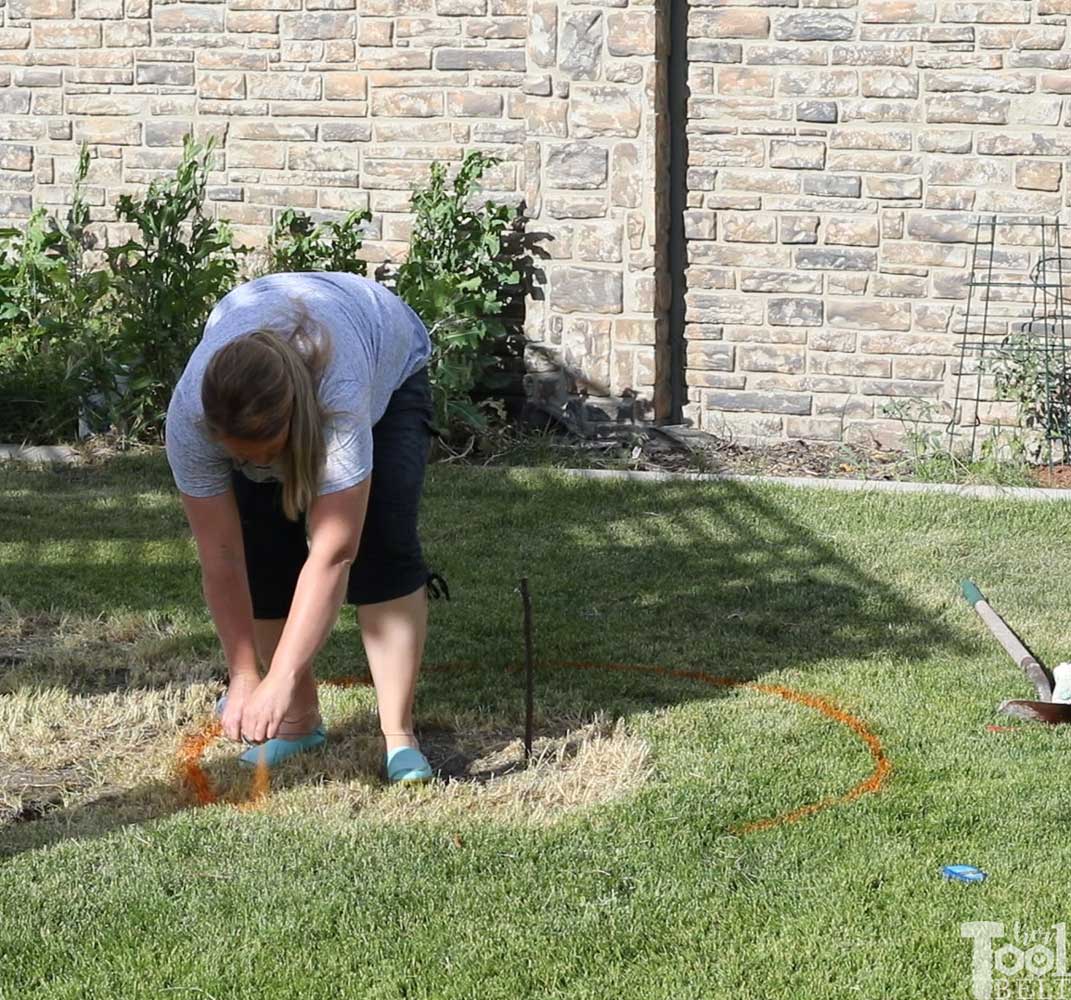
When I had my test block circle laid out I measured the outside diameter of the blocks and needed a space just over 52″ in diameter. I placed a string around a stick and painted a circle at about 27″ out from the circle, this gave me a 54″ diameter circle…and a little wiggle room.
Then I dug out the grass and dirt to about 6-7″ deep.
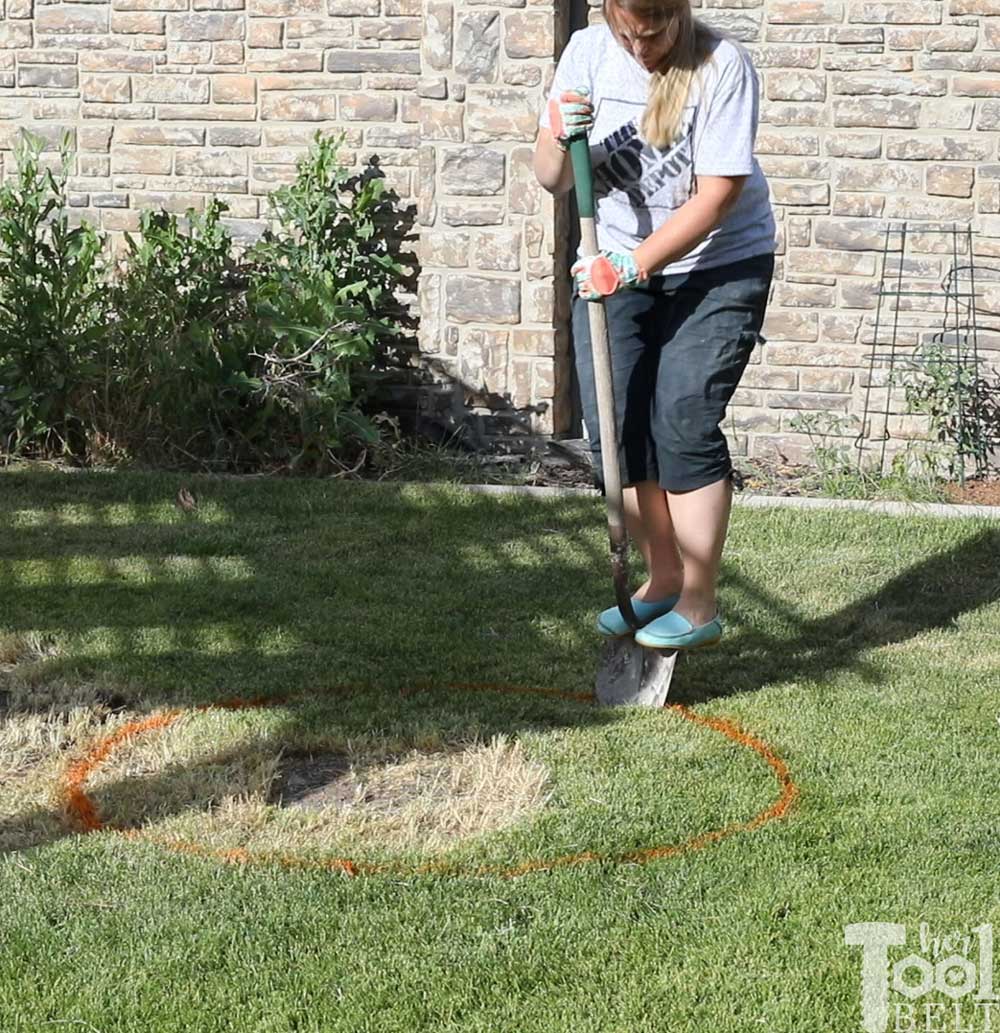
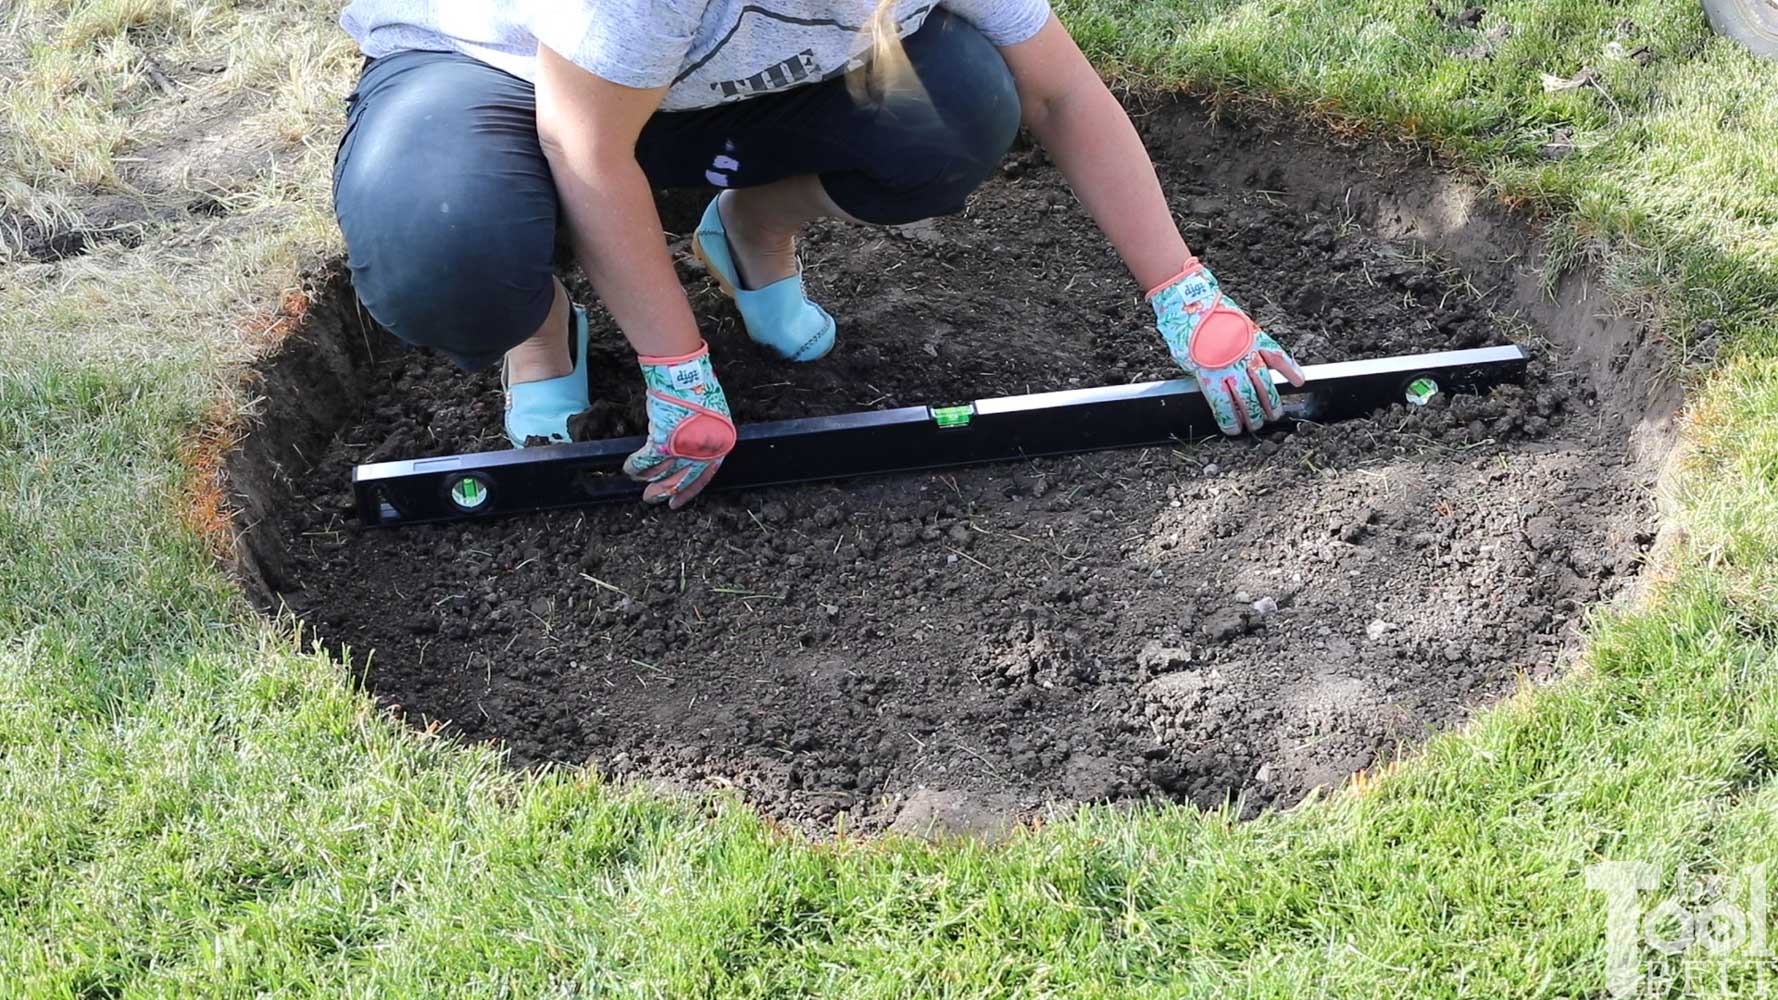
I tried to somewhat level the hole at this point, then I tamped the dirt down.
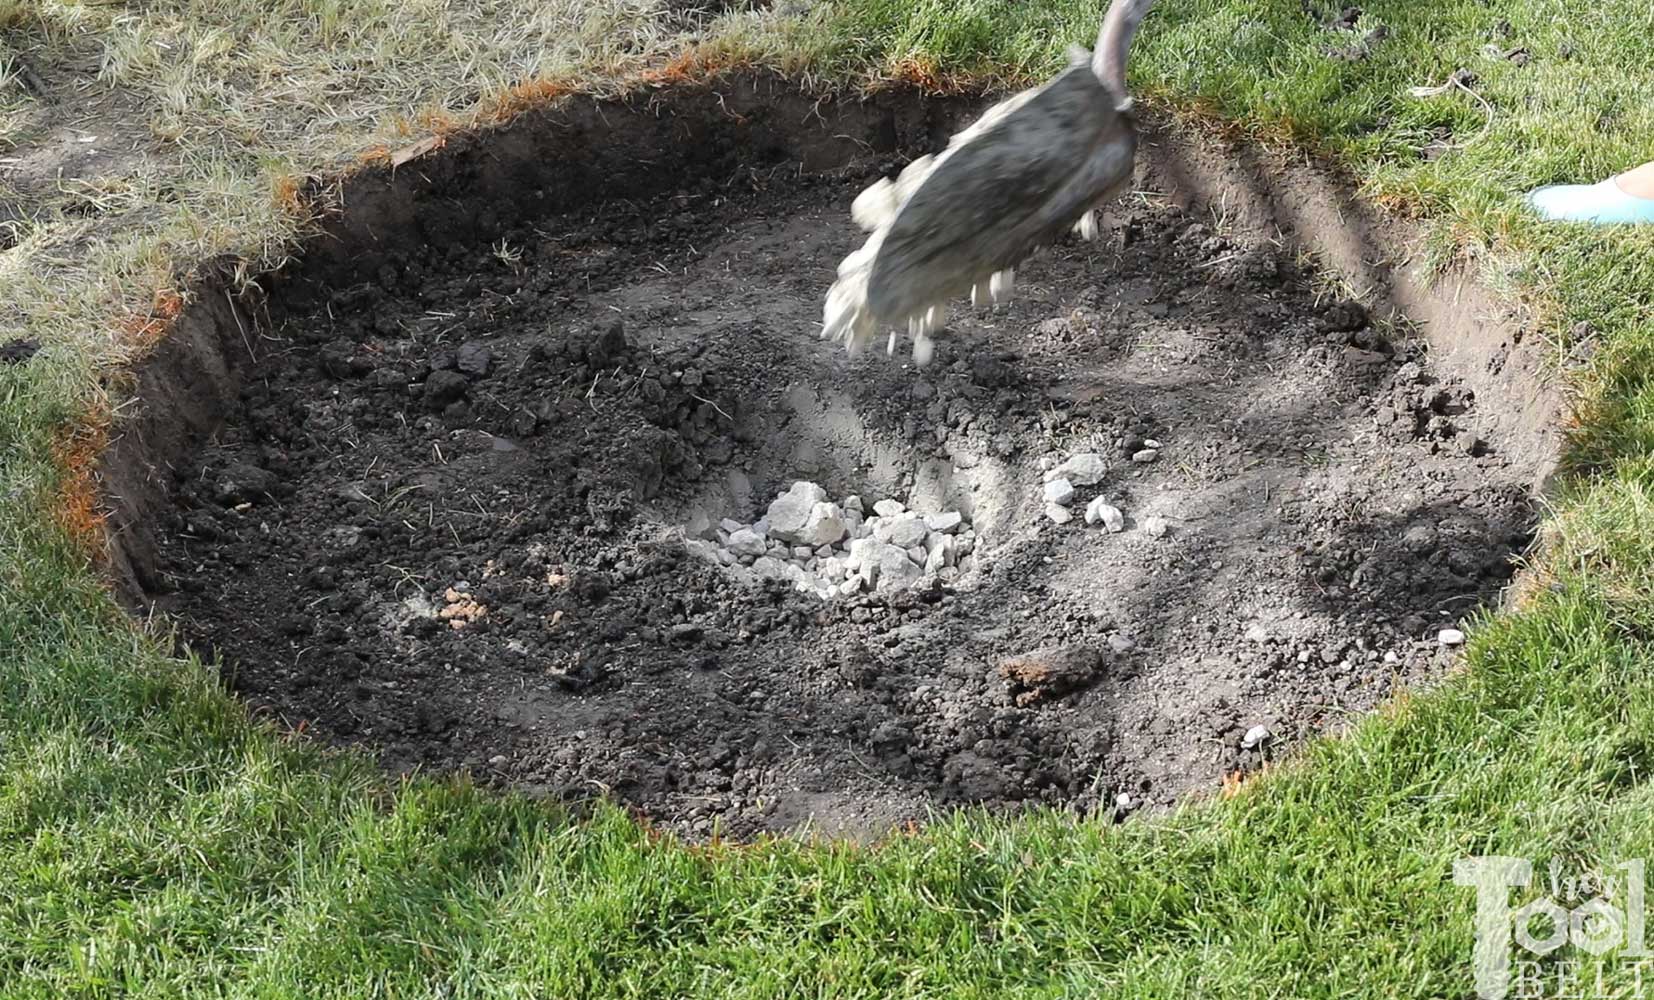
This area of my yard is the low point, and sometimes it gets really wet. I dug a 12″ deep hole right in the middle and filled it with gravel to help with drainage.
The next step is to spread paver base in the hole 1″-2″ at a time and compact the base down with a tamper.
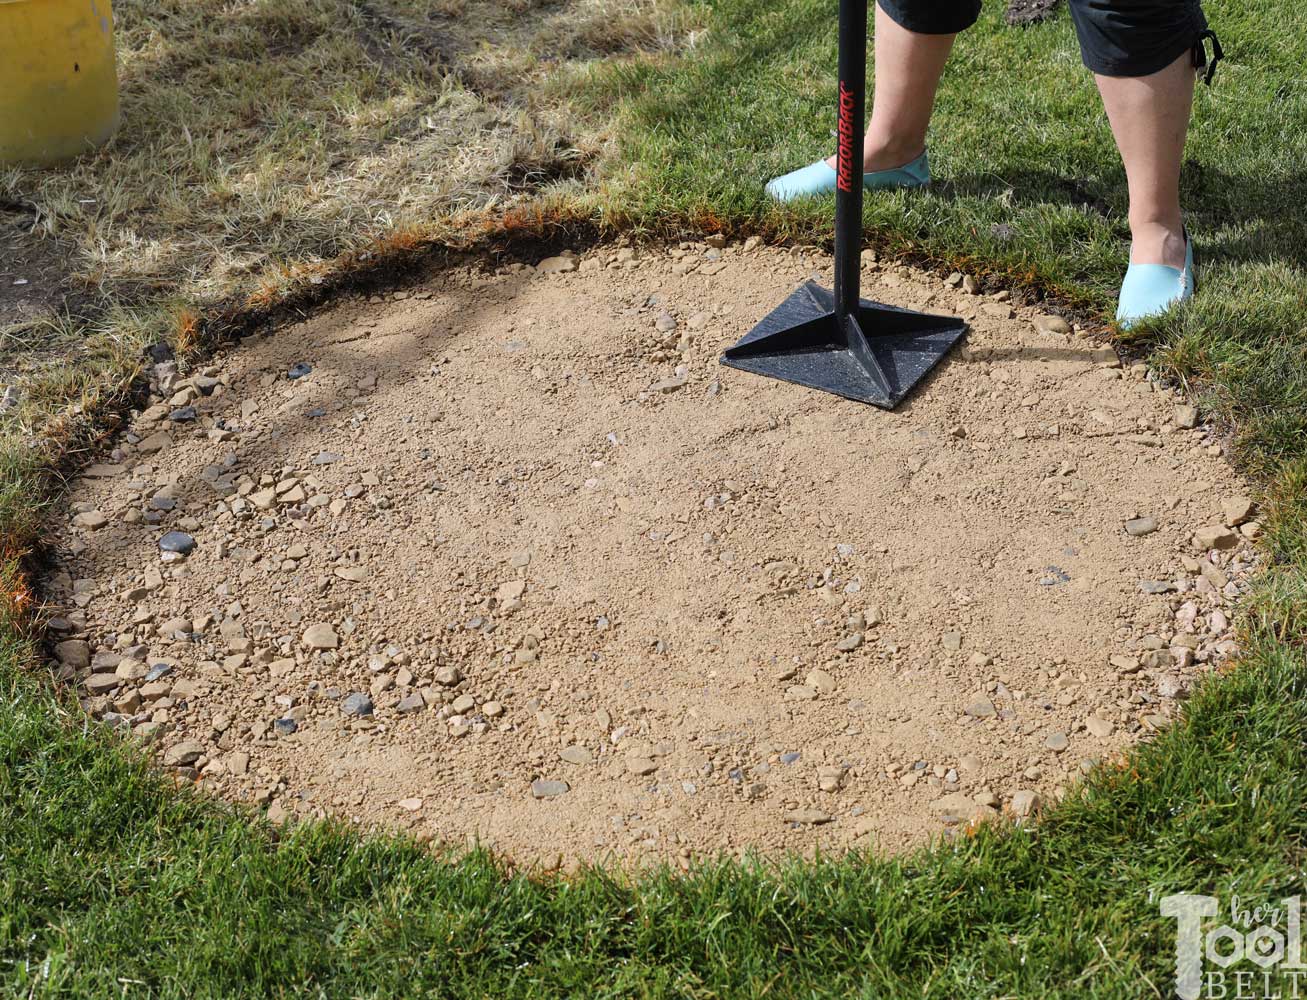
(Note: I had some old concrete from a bad sidewalk that I saved for base, I used that for my first few layers, then added the bagged paver base on top.)
Add 1″-2″ more paver base and tamp, etc until you get the height of base you want to start the first row of blocks. I put the first row of blocks 1″-2″ below the surface.
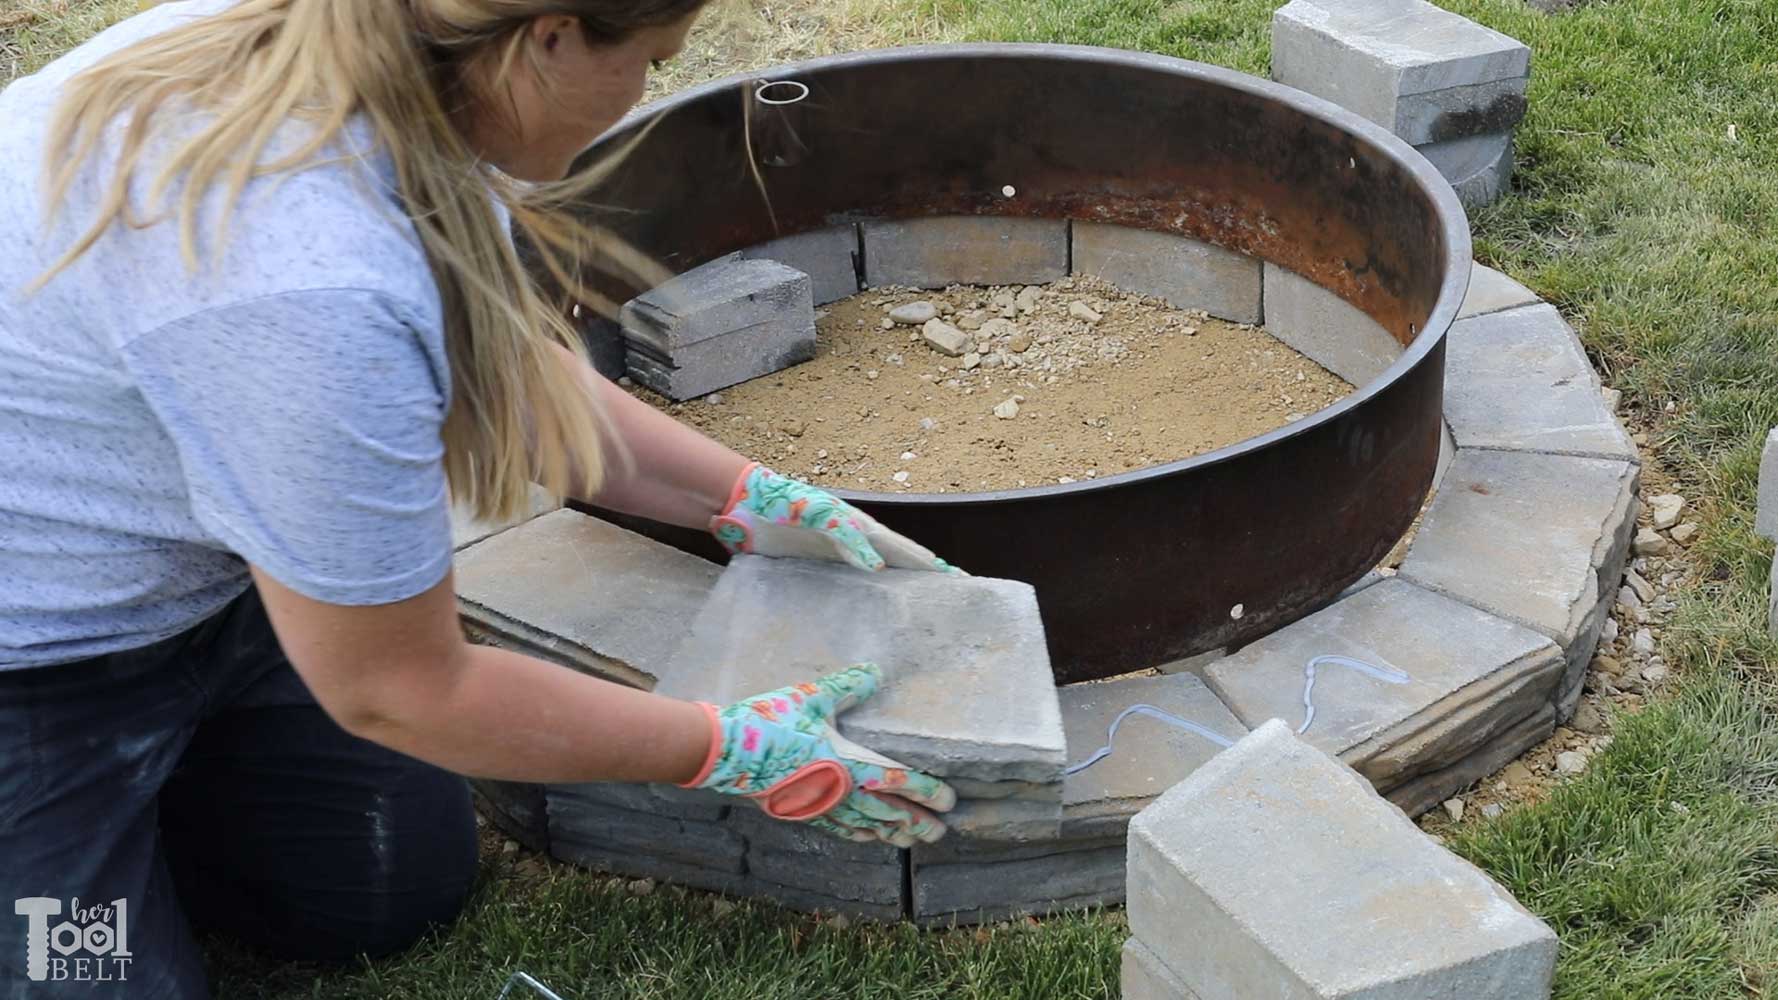
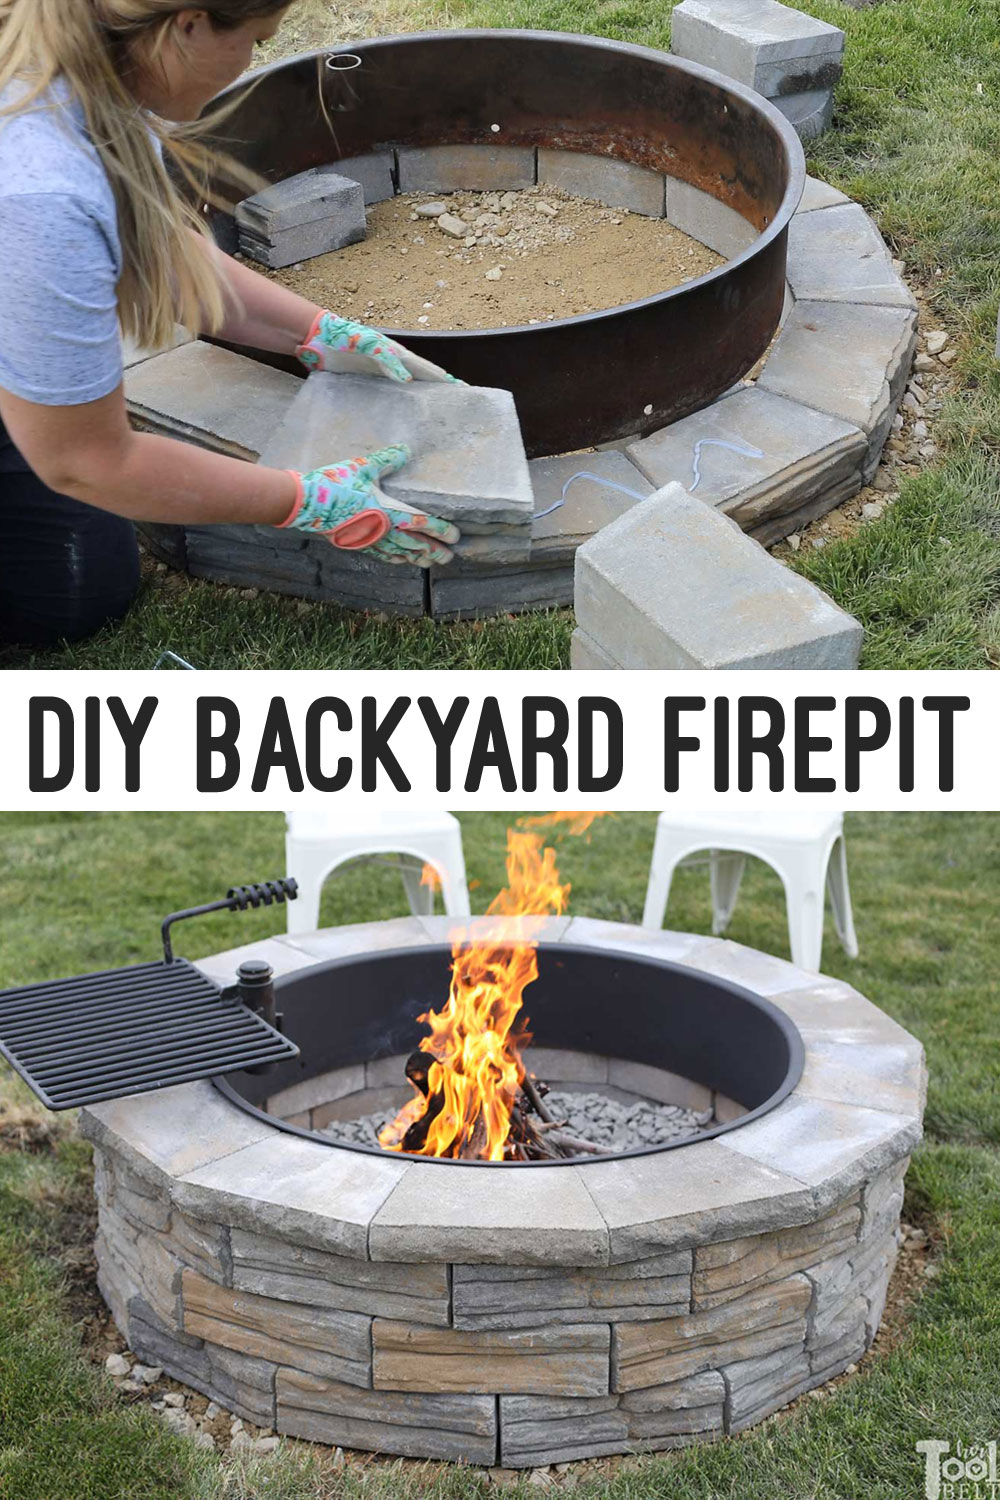
Laying the Fire Pit Blocks
To start laying the blocks, I first placed the fire ring centered on the paver base. Then I placed the first row of blocks all around the fire ring. On the 13th block, I had to cut it to fit.
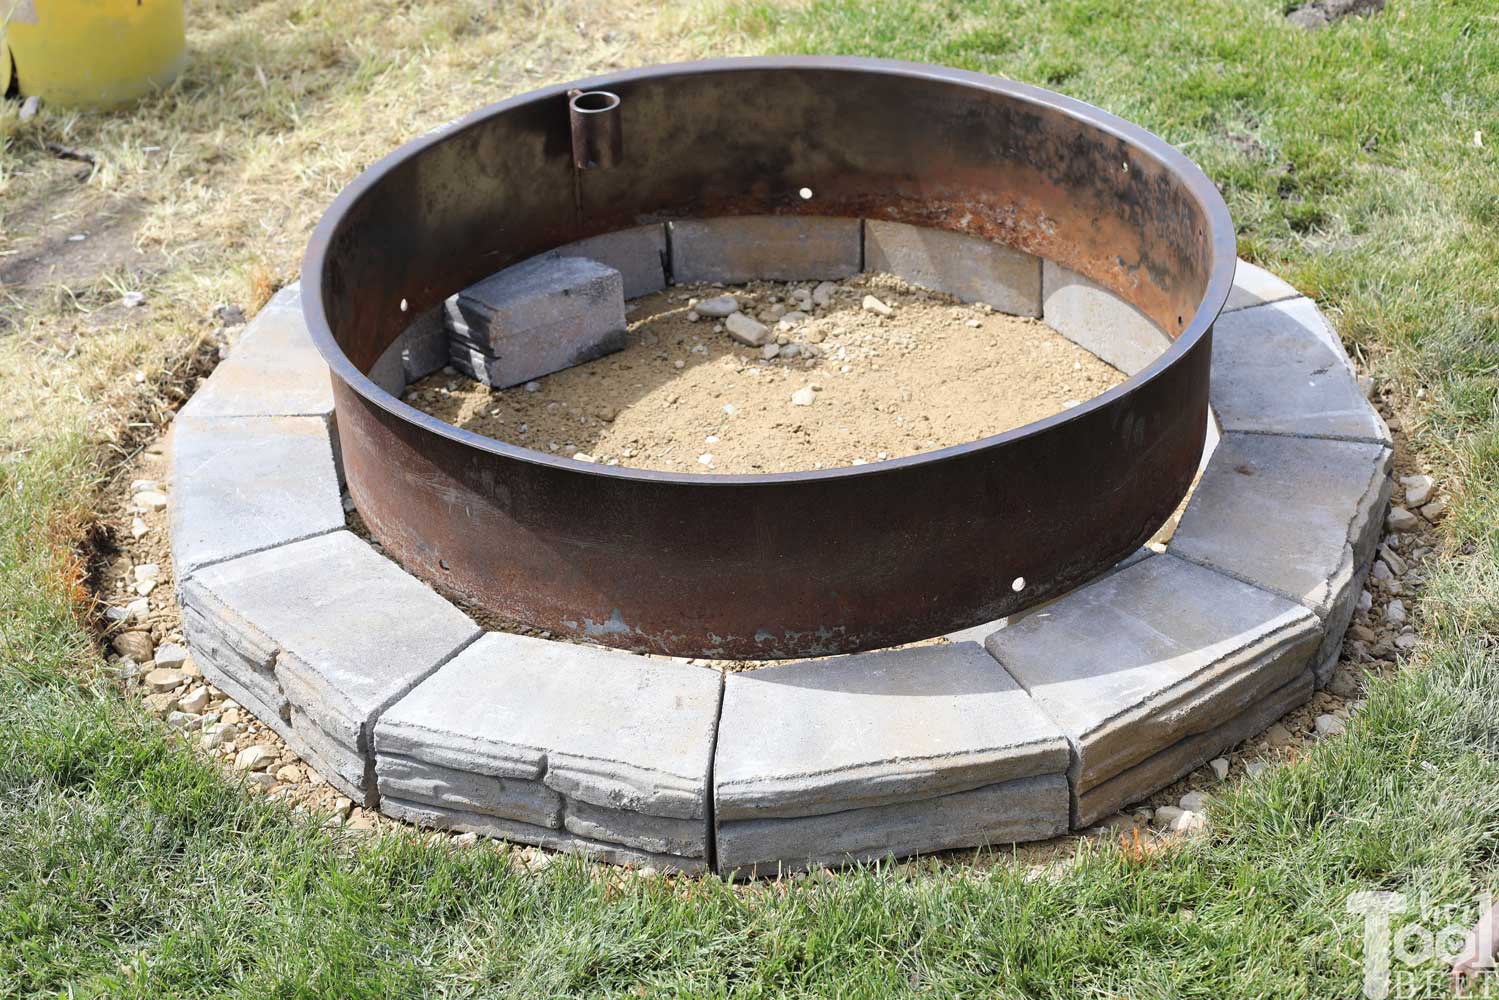
I removed the fire ring and used a 4′ level to try and level the first row of blocks the best that I could. A little base was removed or added here and there to get a pretty level first row.
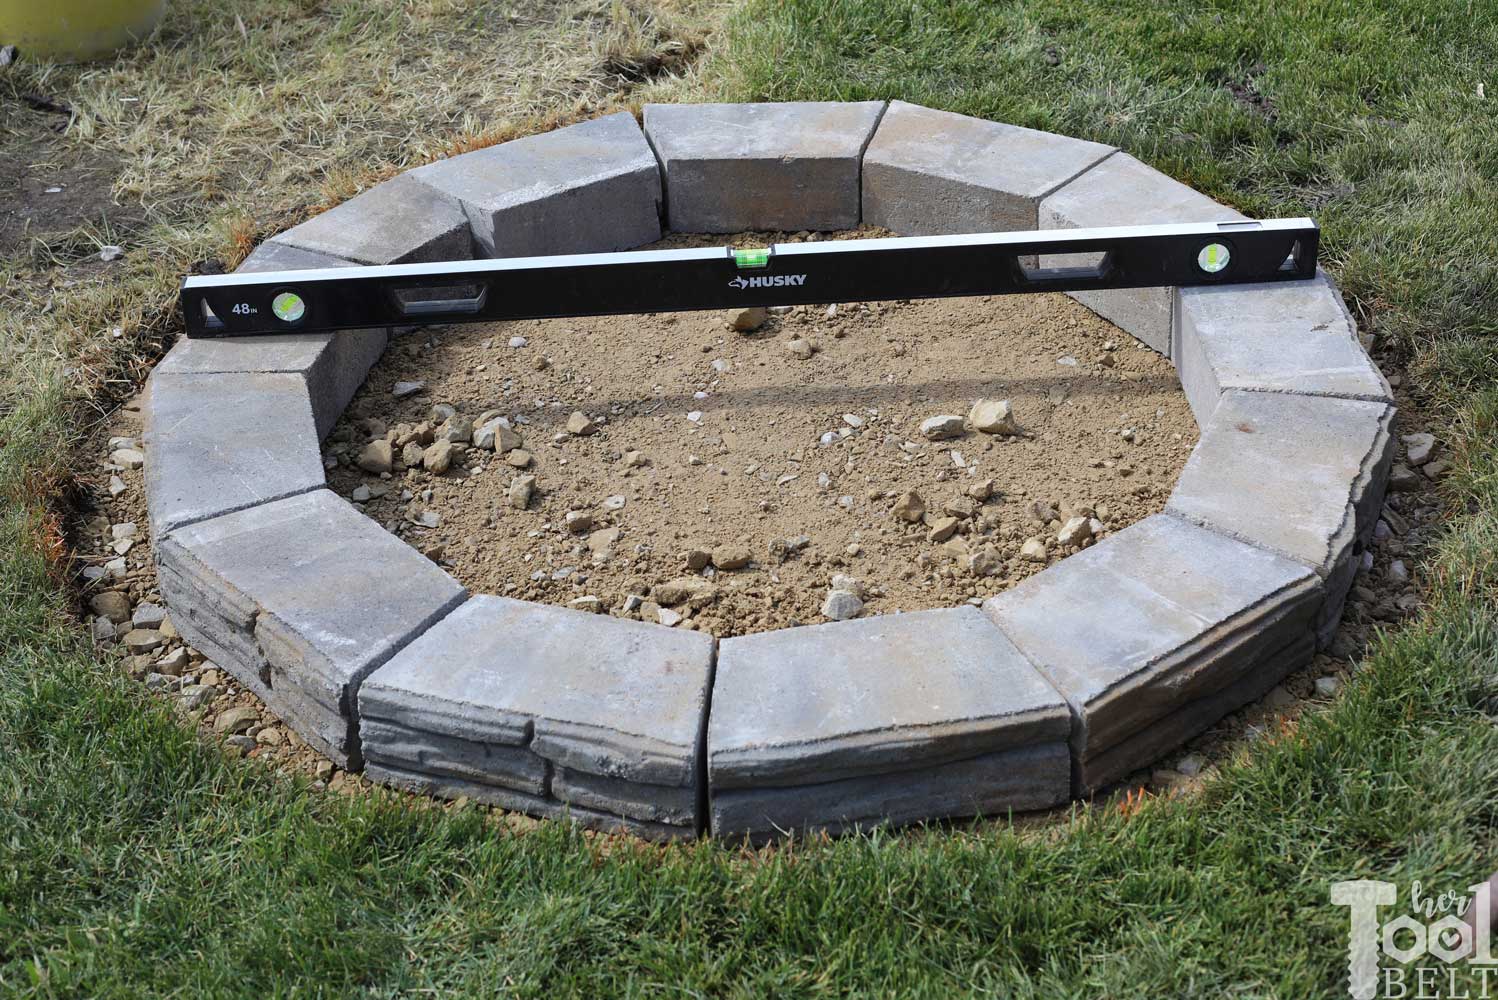
In between rows I used masonry adhesive spread in a squiggly pattern on top of the blocks. This adhesive is spread using a caulk gun and it is very stiff, lots and lots of squeezing.
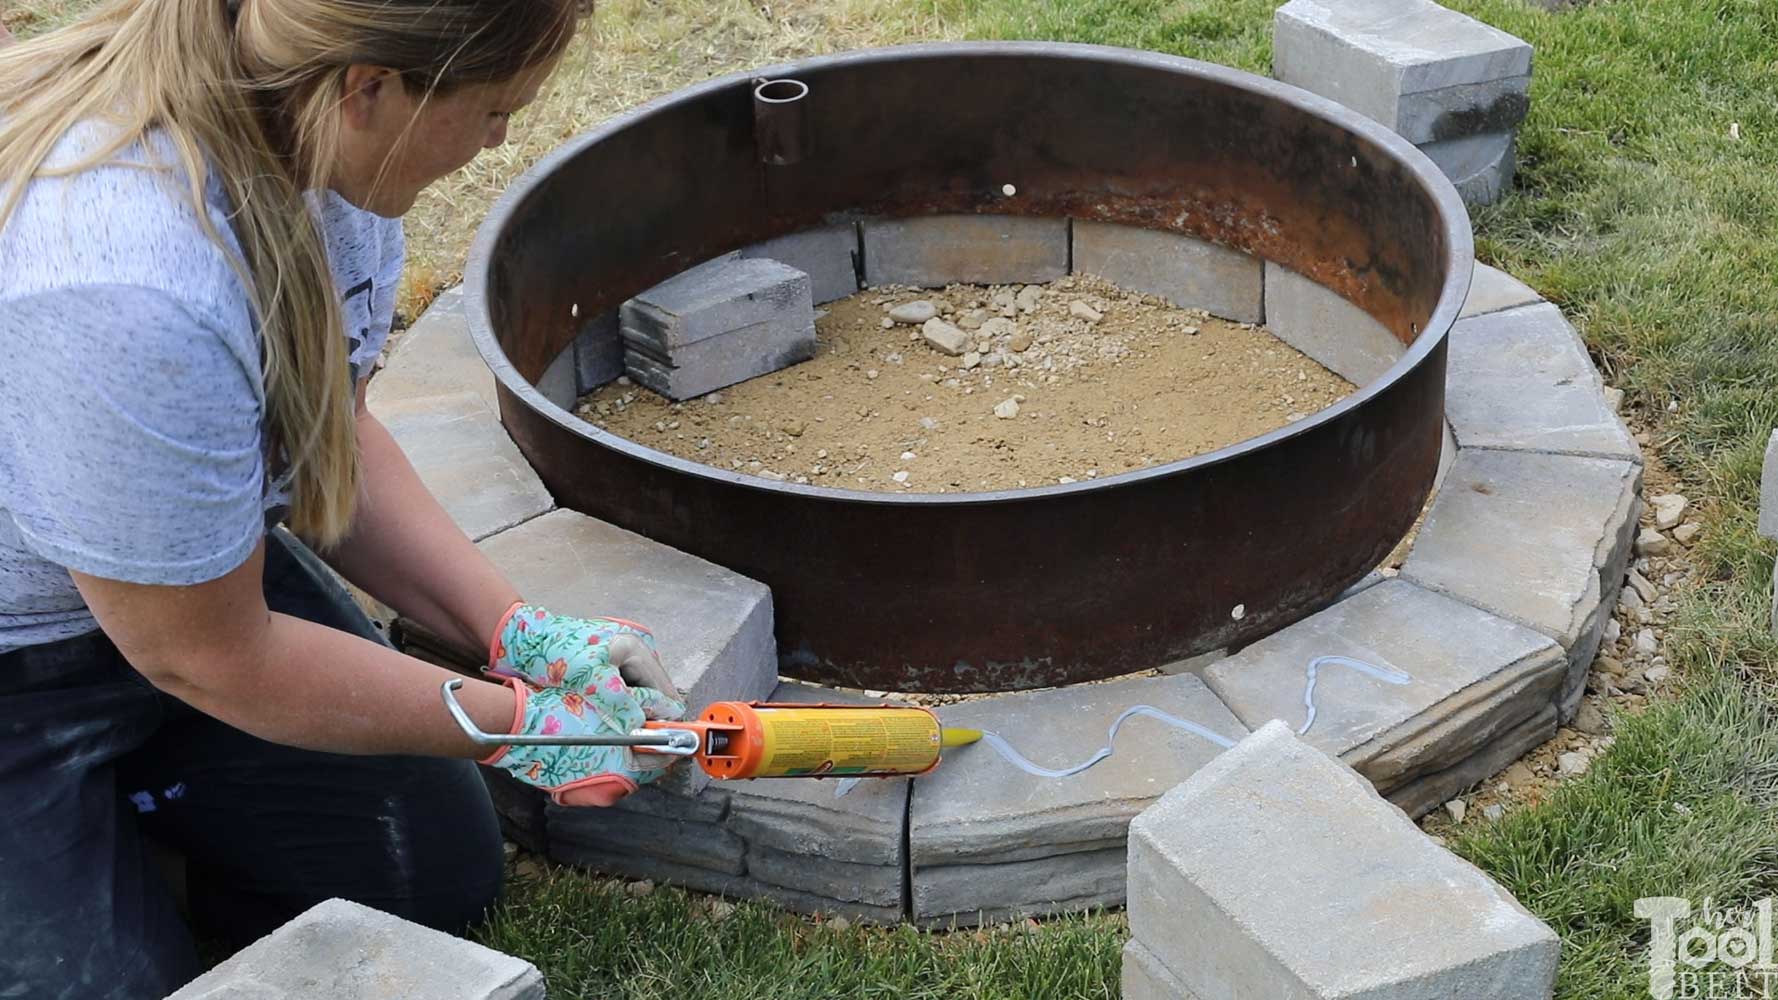
I staggered my second row and again my third row, spreading masonry adhesive in between the layers. I left the fire ring in the middle as a guide.
 These Digz Signature Hi-Dex gloves really saved my hands while digging and handling the cement blocks. They are nice because they have leather reinforcement on the palms/fingers and a stretchy back to make them very comfortable. They are easy to work in, super cute and machine washable!
Finally I added my wall caps for the top, I used Sketchup again to give me the best angles for the trapezoids. You can download my block and top patterns for a 36″ ID circle here firepit block templates. (Note: when printing, make sure your printer settings are 100%, not ‘fit to page’.)
The glue needs to dry for a few hours.
Fire Pit Finishing Touches
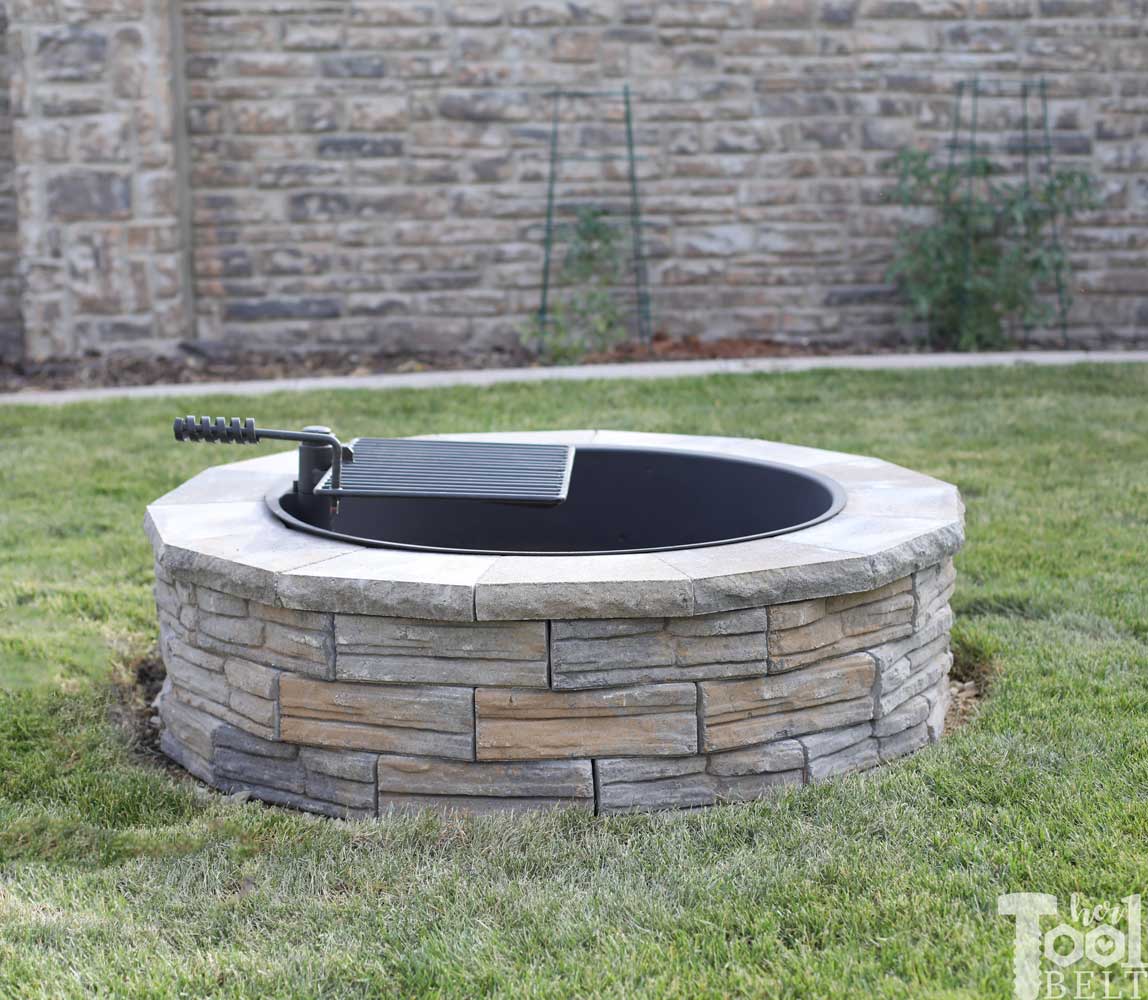
Finally I added granite rocks inside the fire pit and we were ready to rock and roll! I love how it turned out and am super excited to put it to good use.
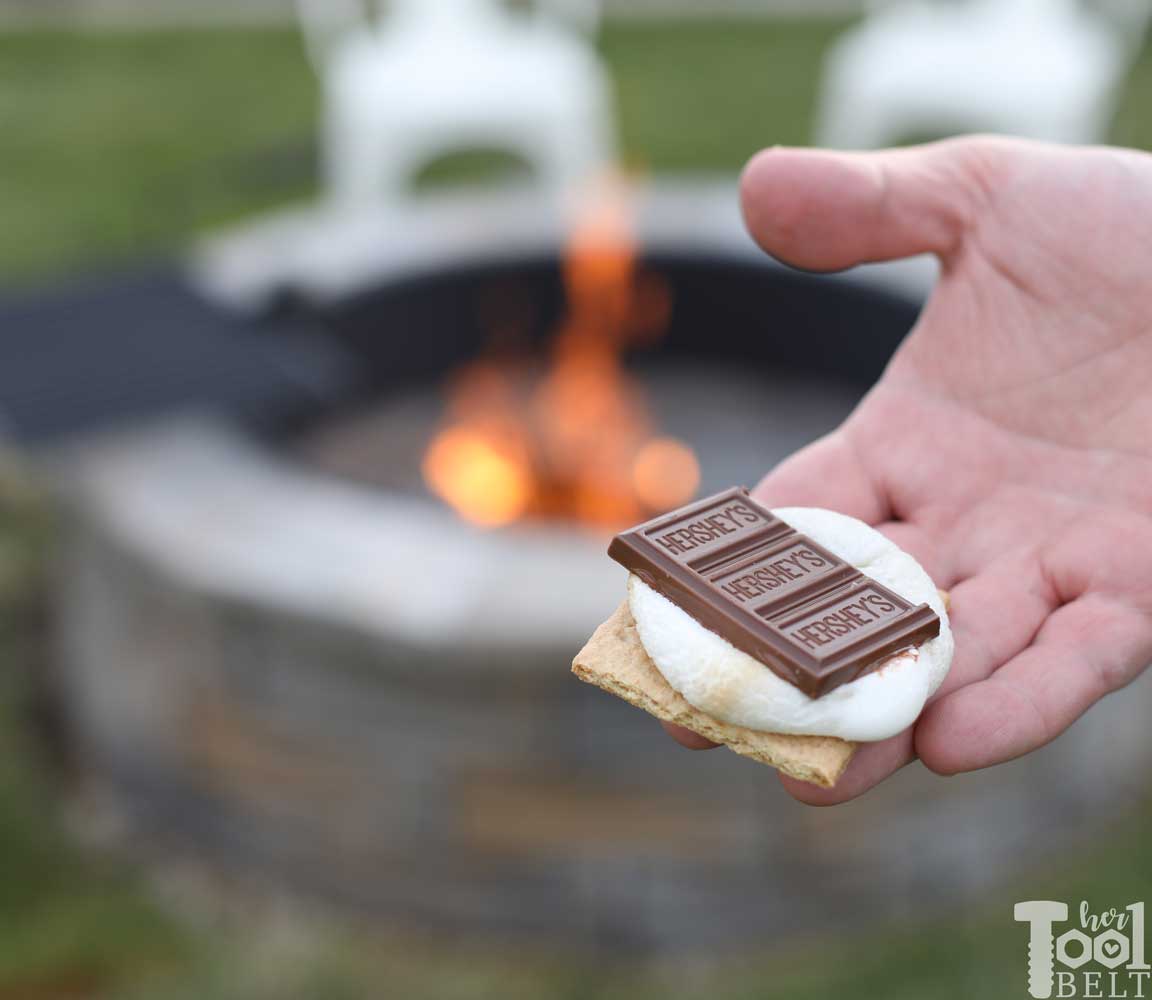
The kid’s roasted some marshmallows,
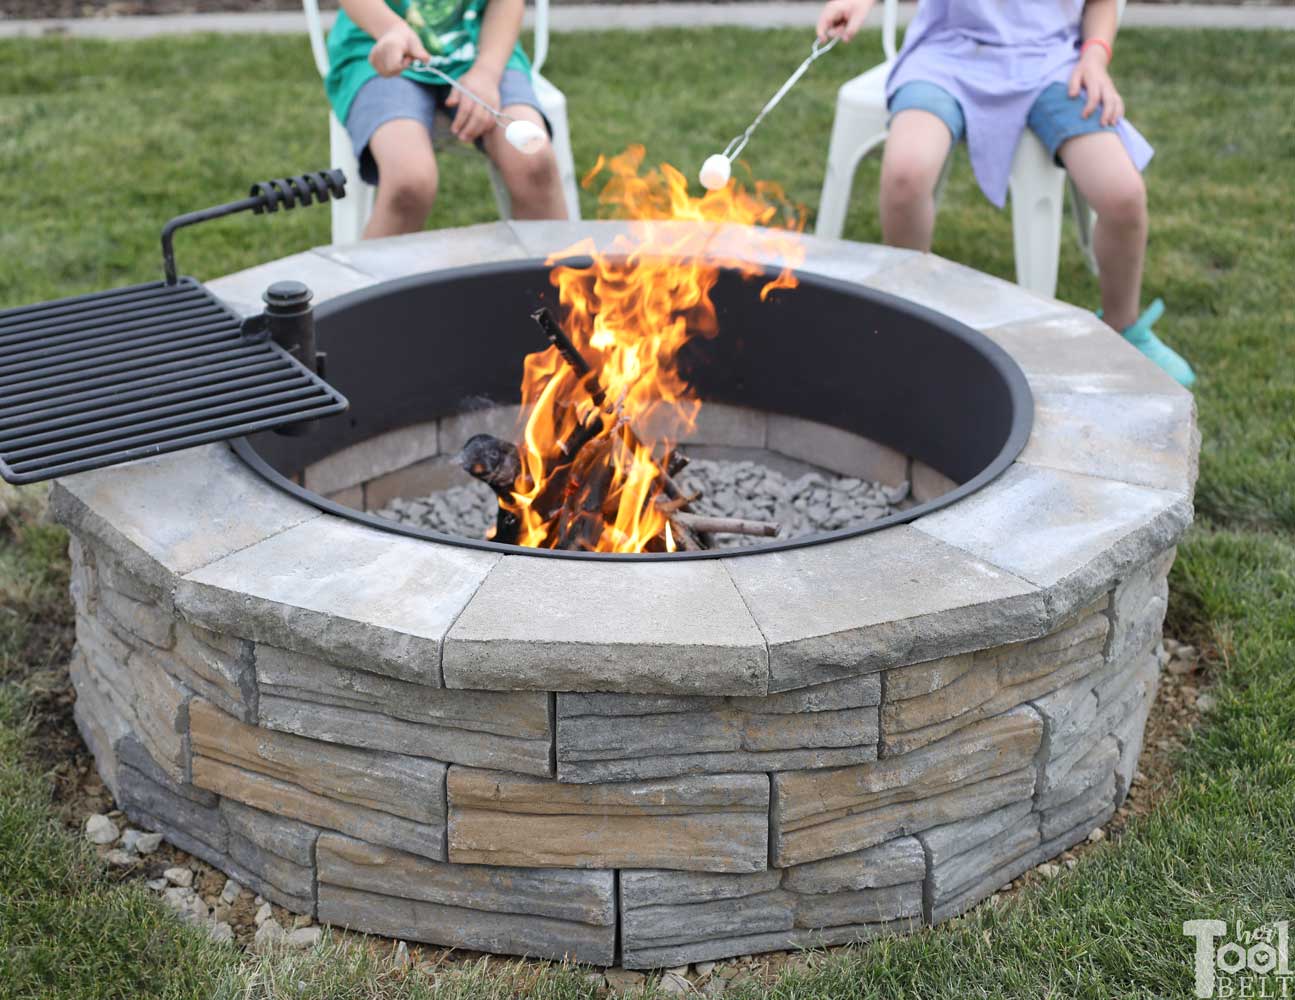
and we made some pretty tasty s’mores!
Now I can’t figure out why I waited so long to build the permanent fire pit.
Thanks for pinning!
“I acknowledge that The Home Depot is partnering with me on this outdoor DIY project. I am receiving compensation in the form of products and services, for the purpose of promoting The Home Depot. All expressed opinions and experiences are my own words. My post complies with the Word Of Mouth Marketing Association (WOMMA) Ethics Code and applicable Federal Trade Commission guidelines.”
Mood Board for space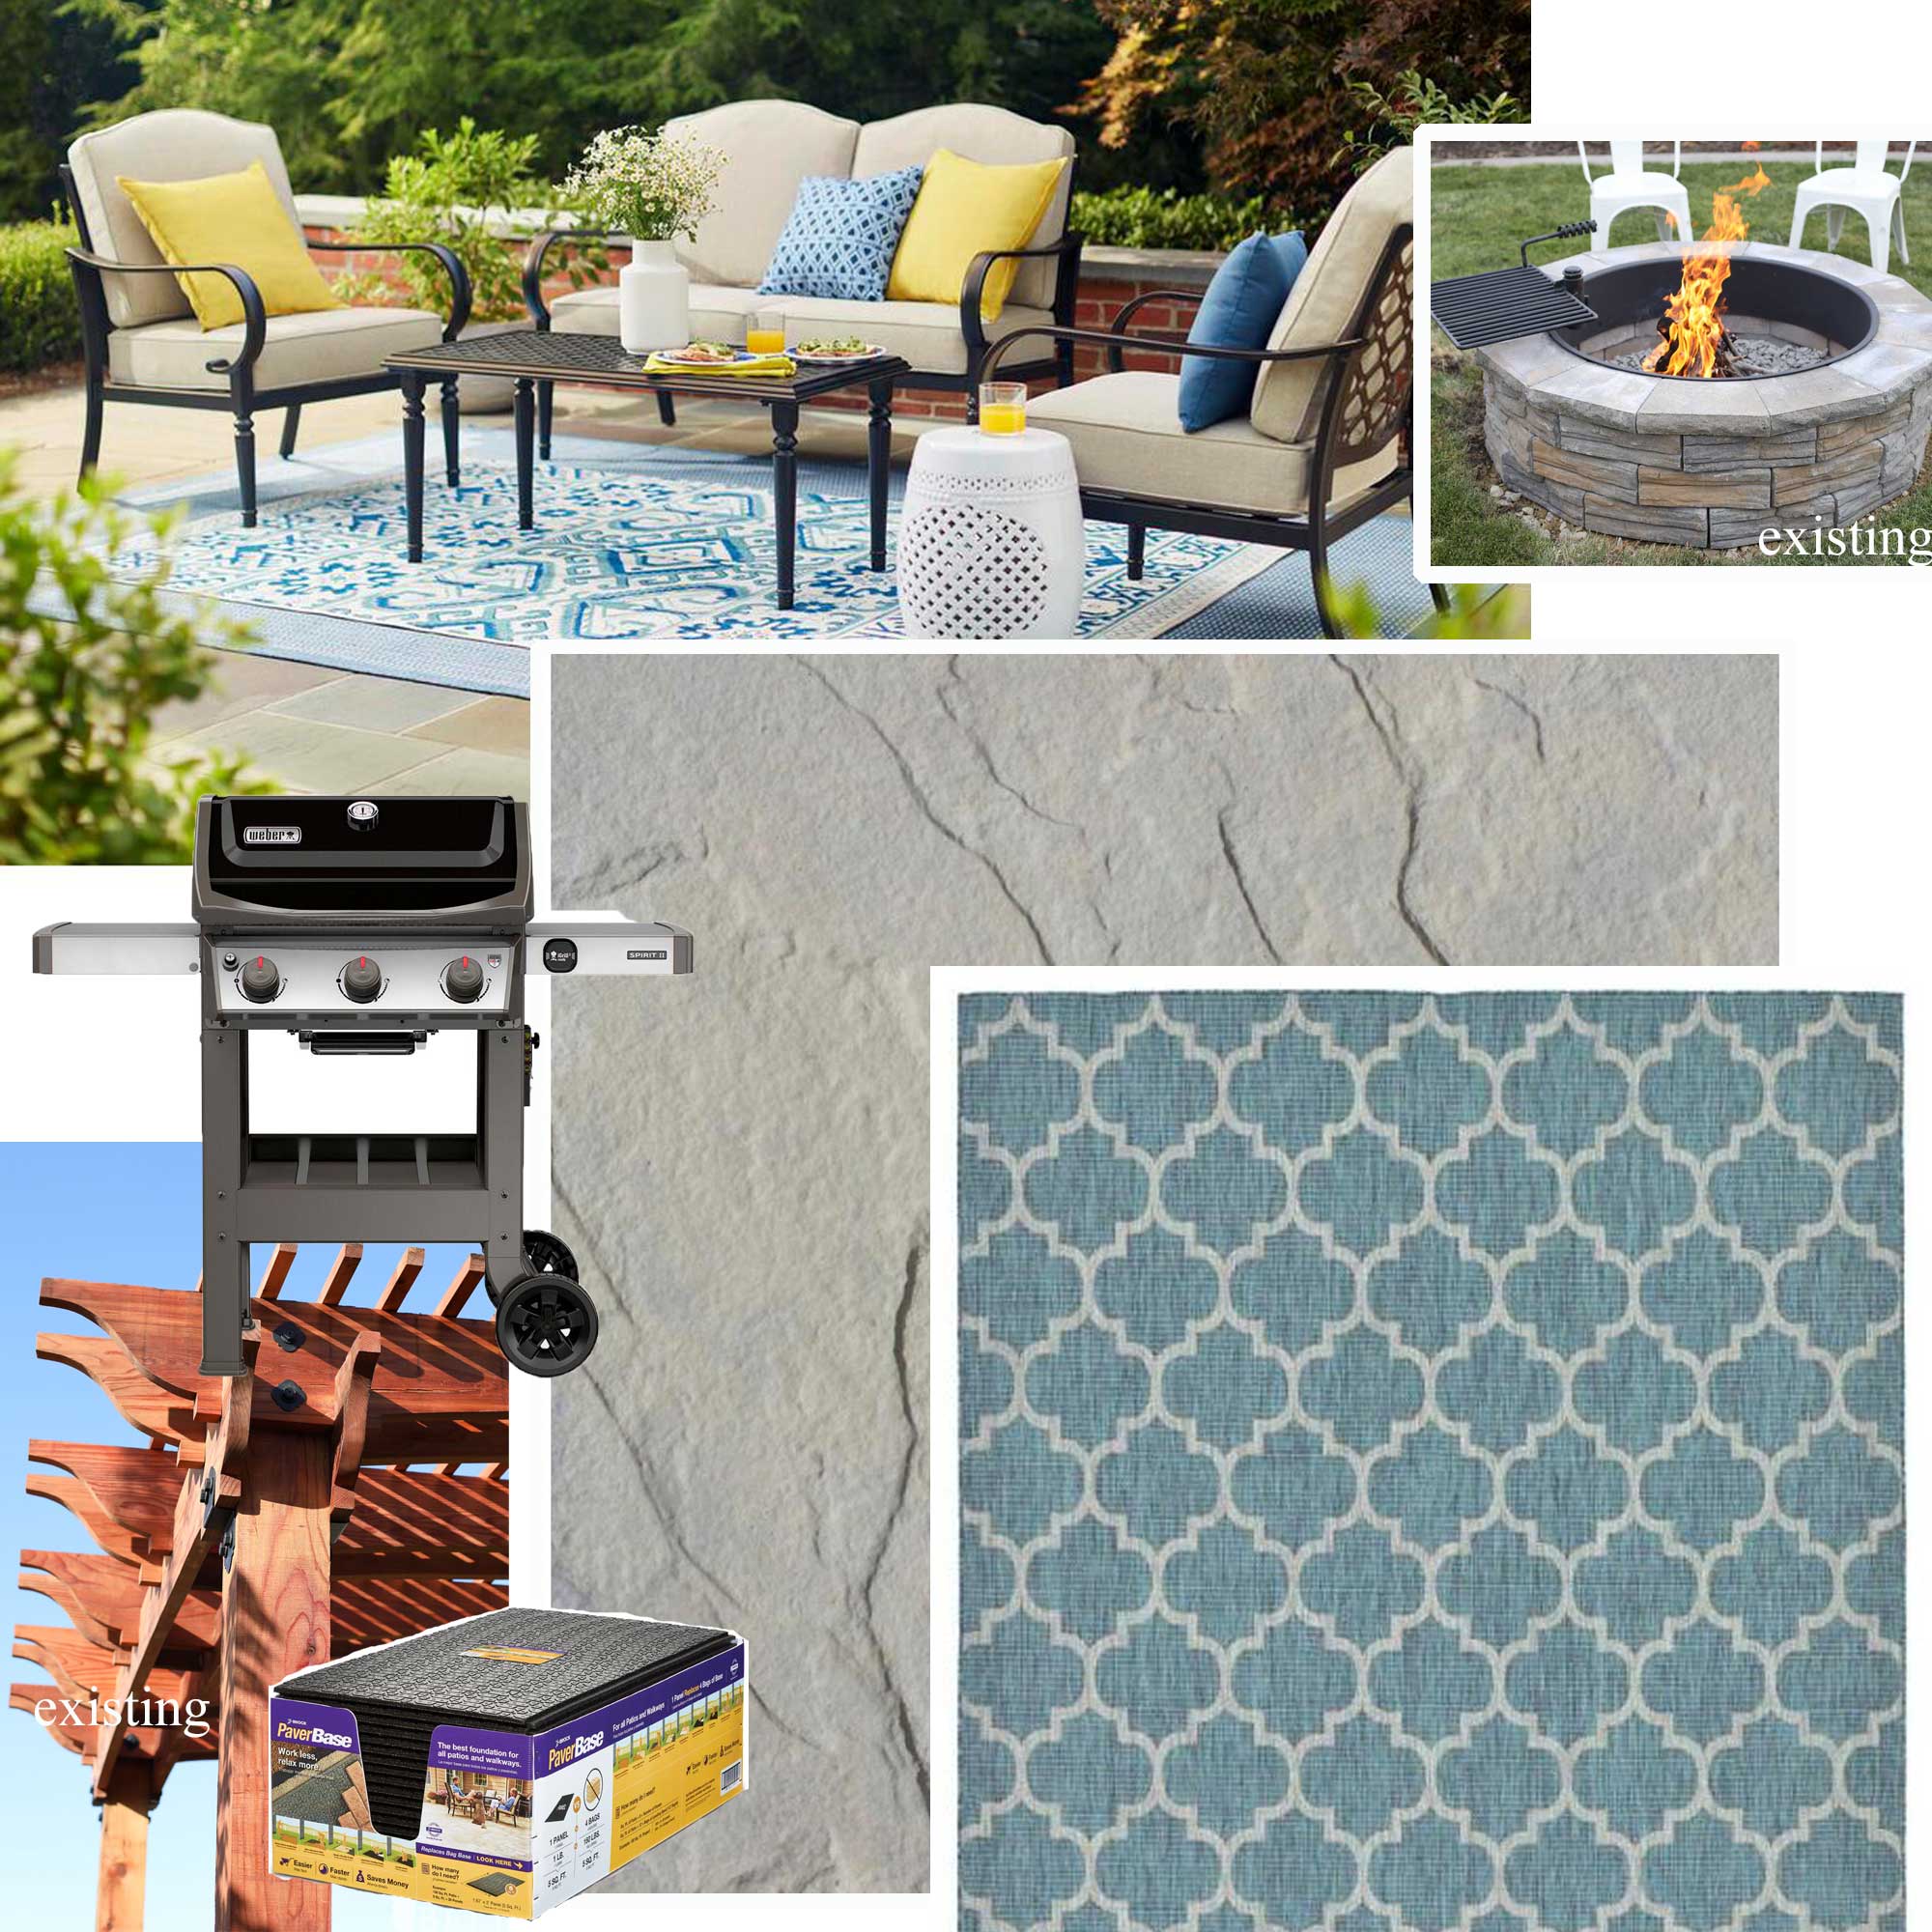
Beautiful, I would love to make something like that!
Amazing work!! Looking for more from you.
AMY, i love this firepit! It’s awesome. Where should I look to find a steel firepit ring?
Thanks, Sheryl
I got mine here https://amzn.to/3cRQ05X
Wow this is a beautiful fire pit! Thank you for sharing this. I definitely want a fire pit like on my patio! I’m going to show this to my local handyman and see if he can build me one! 🙂
Can you provide a link where you found the swing-over cooking grate? Thanks and awesome build!
I got this Titan one here: https://amzn.to/3cRQ05X