This post is sponsored by The Home Depot. I have been compensated for my time and provided with product. All ideas and opinions are my own. This post contains some affiliate links for your convenience. Click here to read my full disclosure policy.
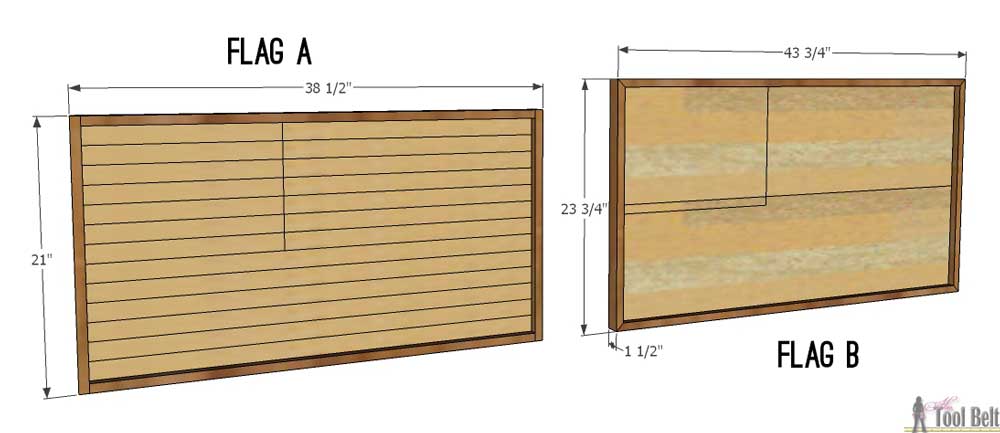
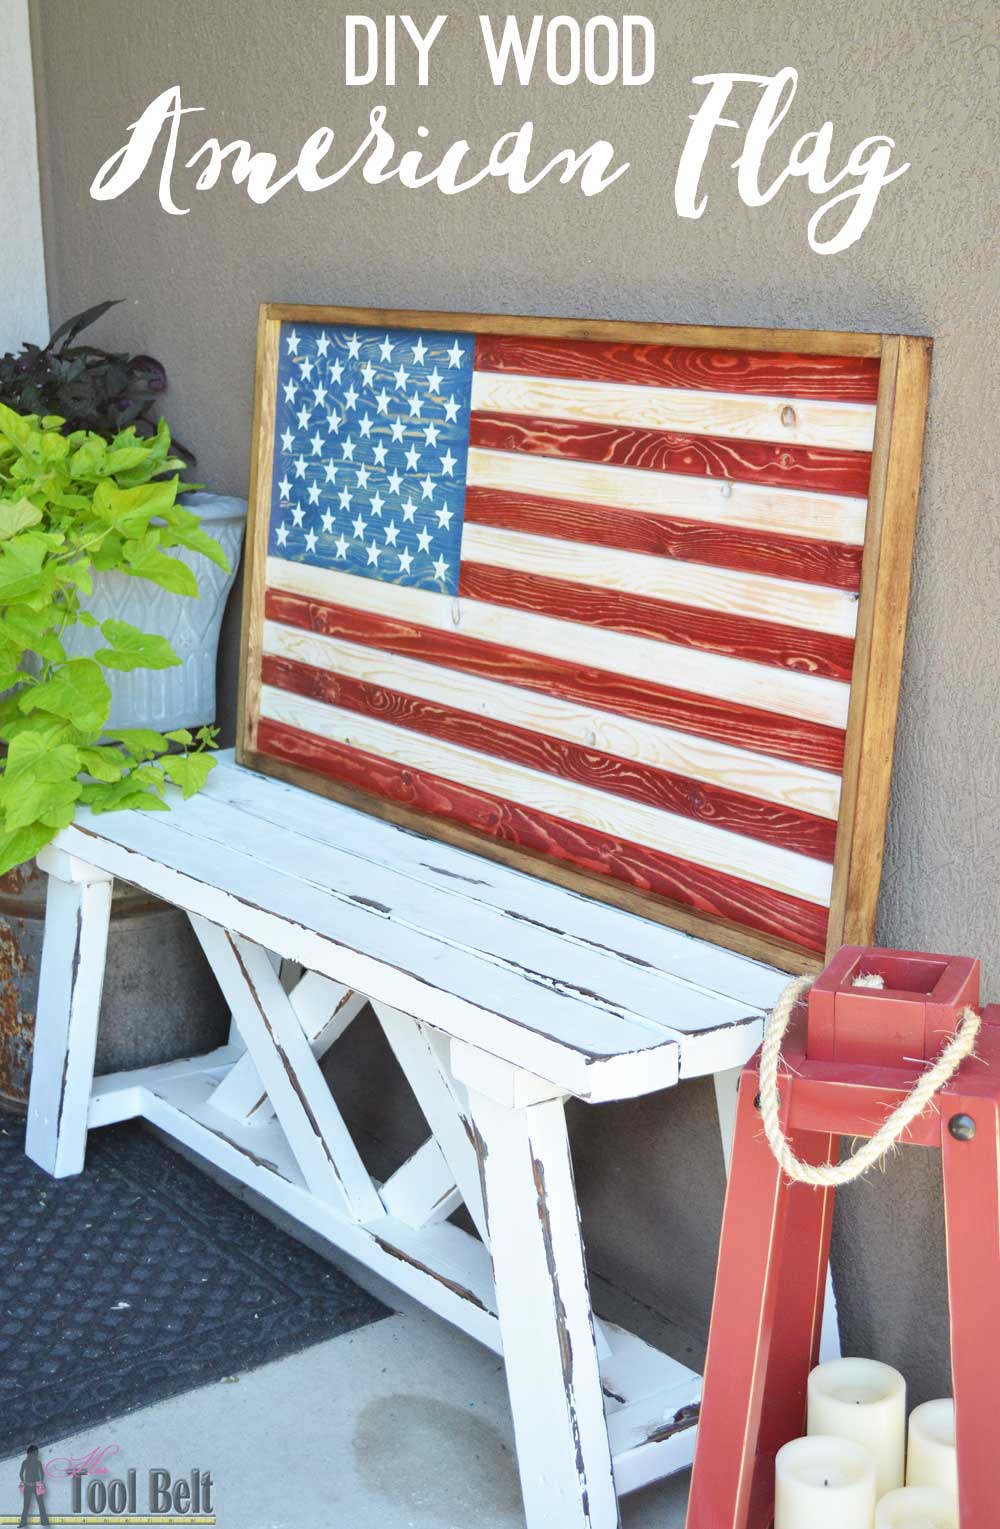
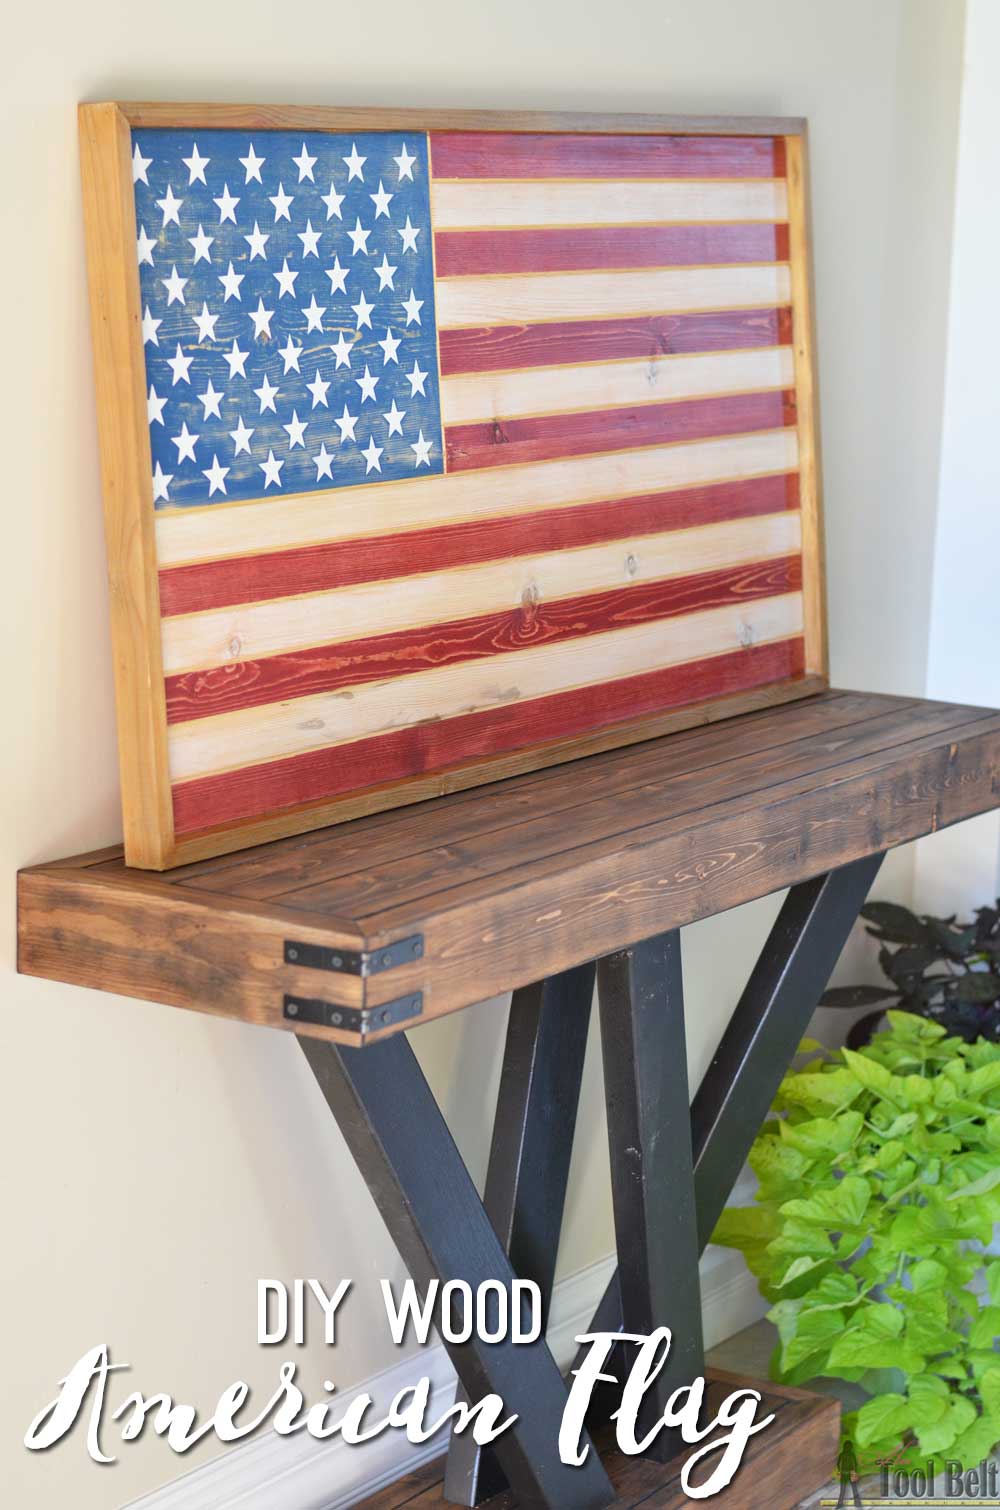
It is creeping up to July and I wanted to add some patriotic decor to my front porch to celebrate the 4th of July. I love the look of the big wood flag and thought it would be a nice statement piece. Also my husband’s boss is retiring from the air force base and we thought it would fun to give him one too. I had two ideas on how to tackle the project, one way was to use slats for each of the stripes, the other a solid board with the stripes routed in. These flags stay true to the traditional flag dimensions.
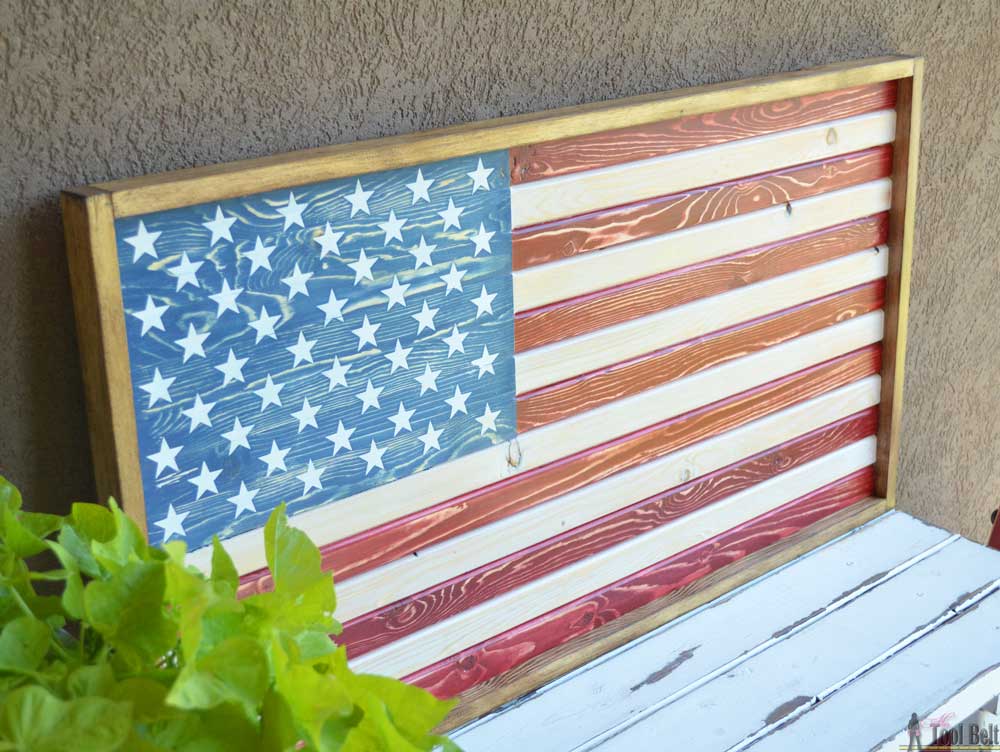
Flag made with 13 slats
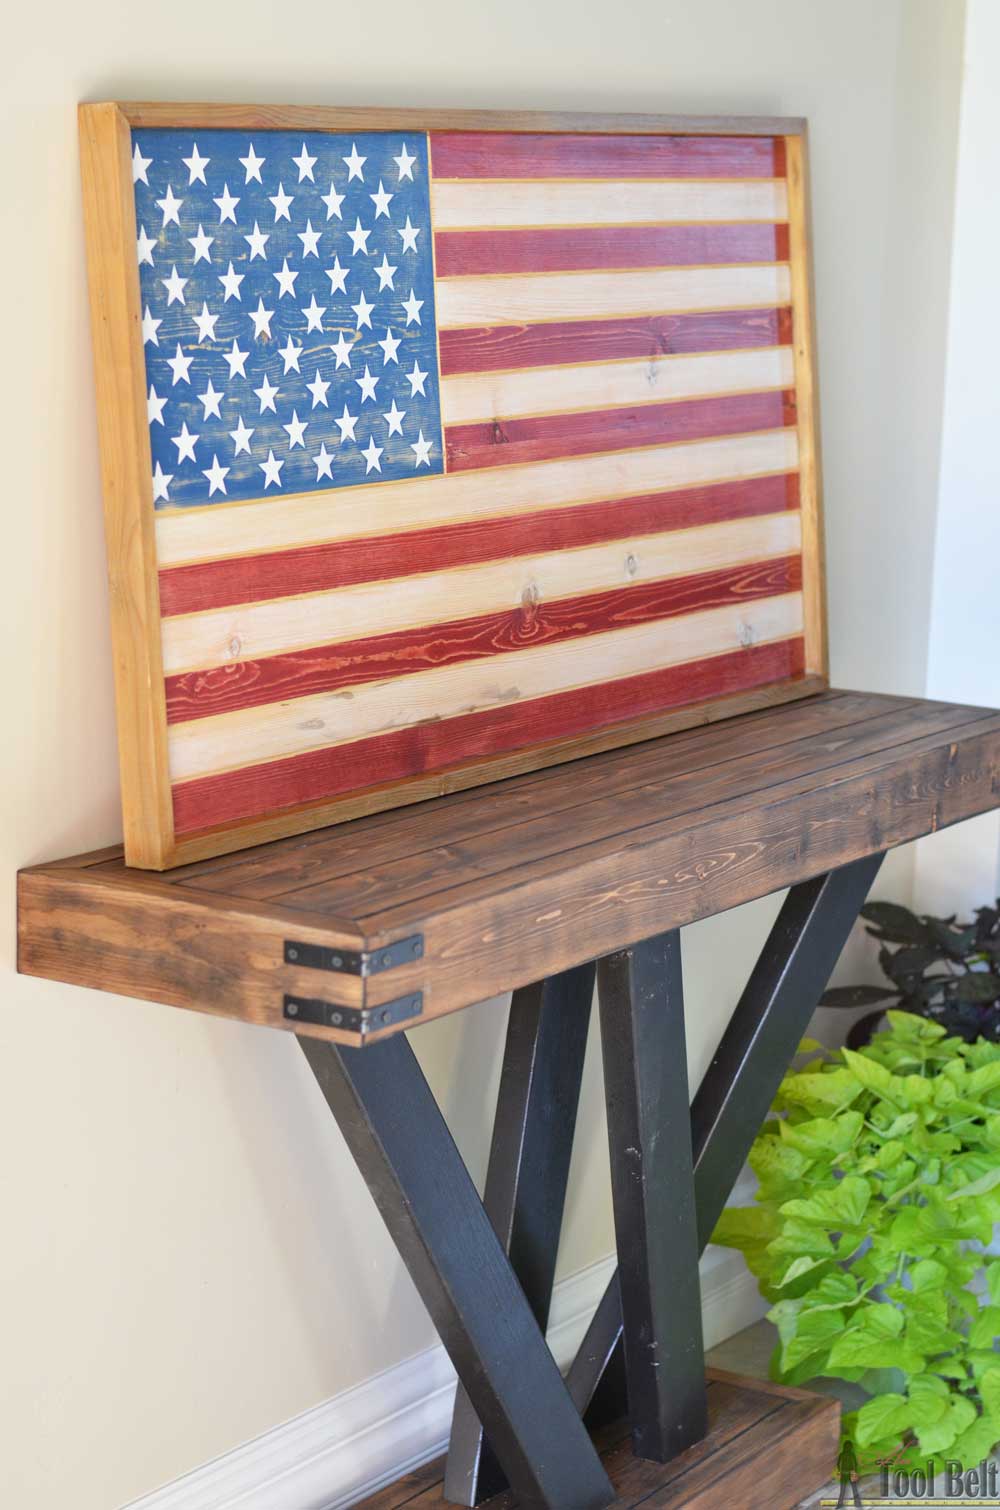
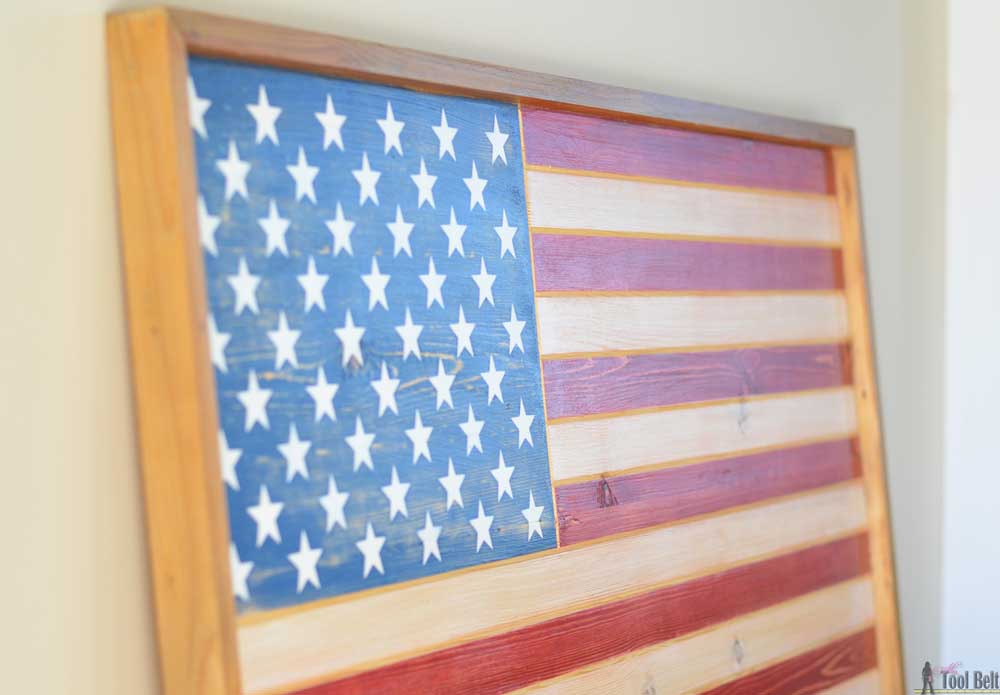
Flag with routed stripes
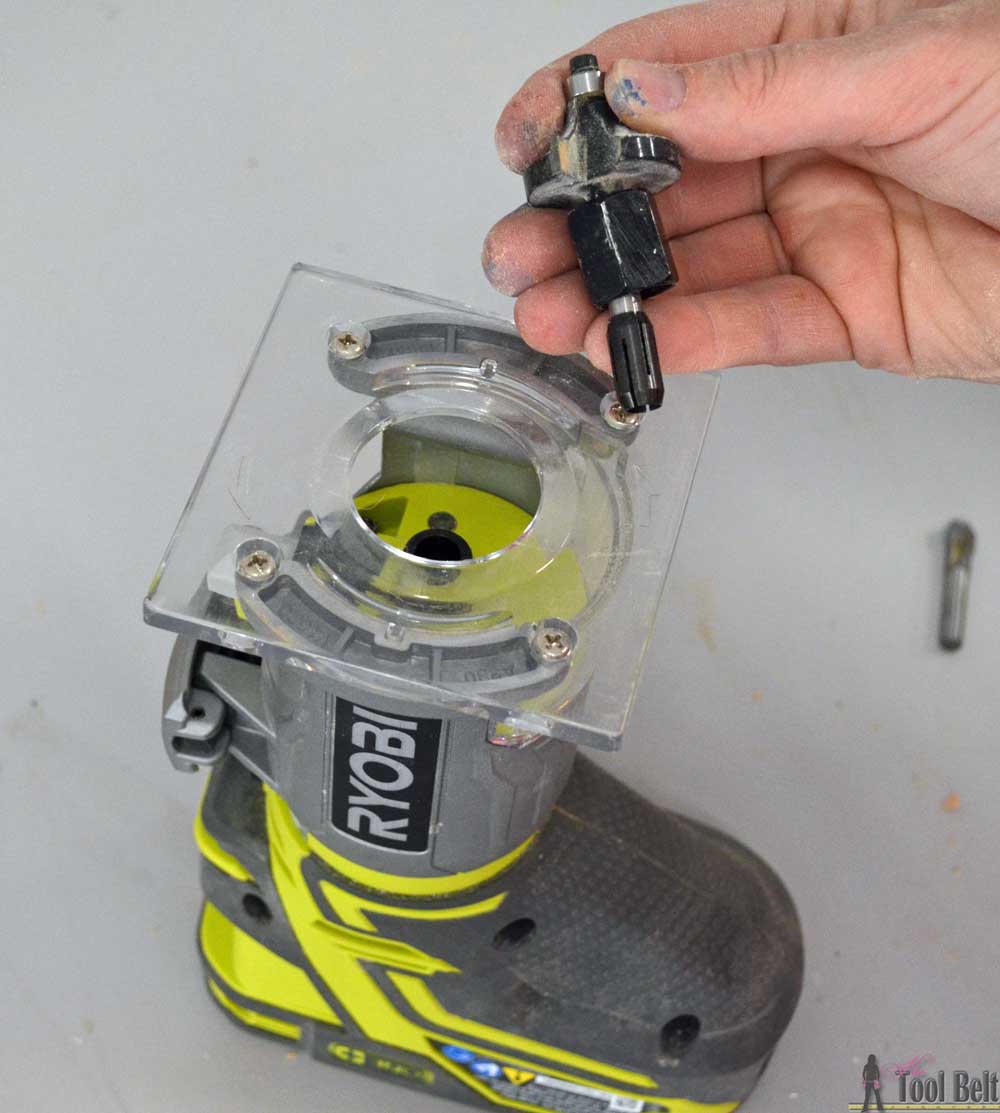
This build will be featuring the new Ryobi trim router. Going cordless is a little bit frivolous, but it sure is sooo nice and convenient. I only have a few plugs in my garage, I really like grabbing my cordless tools so I don’t have to drag the extension cord everywhere.

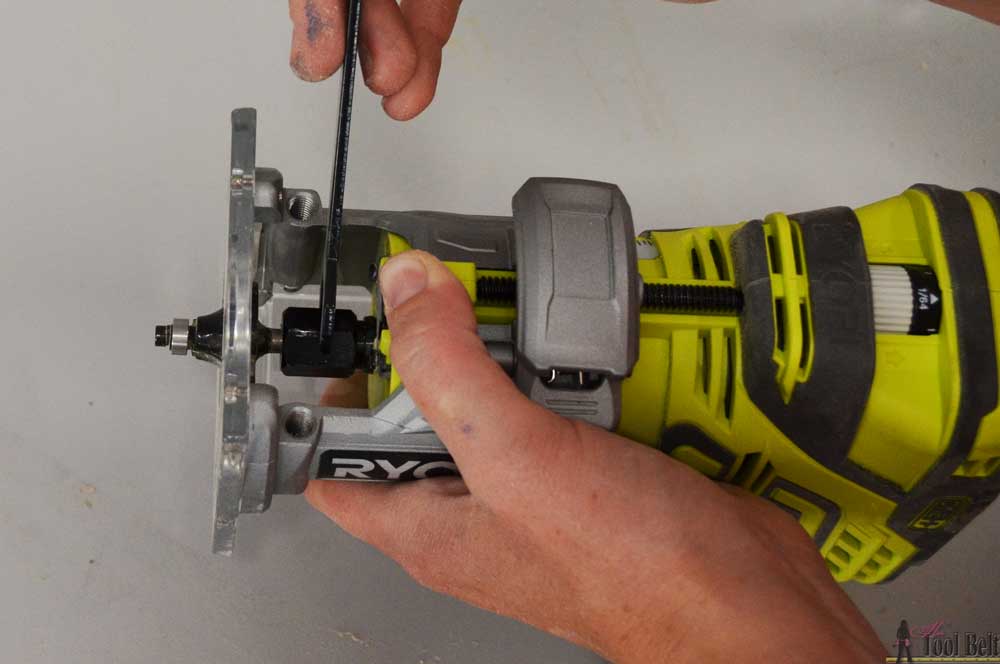
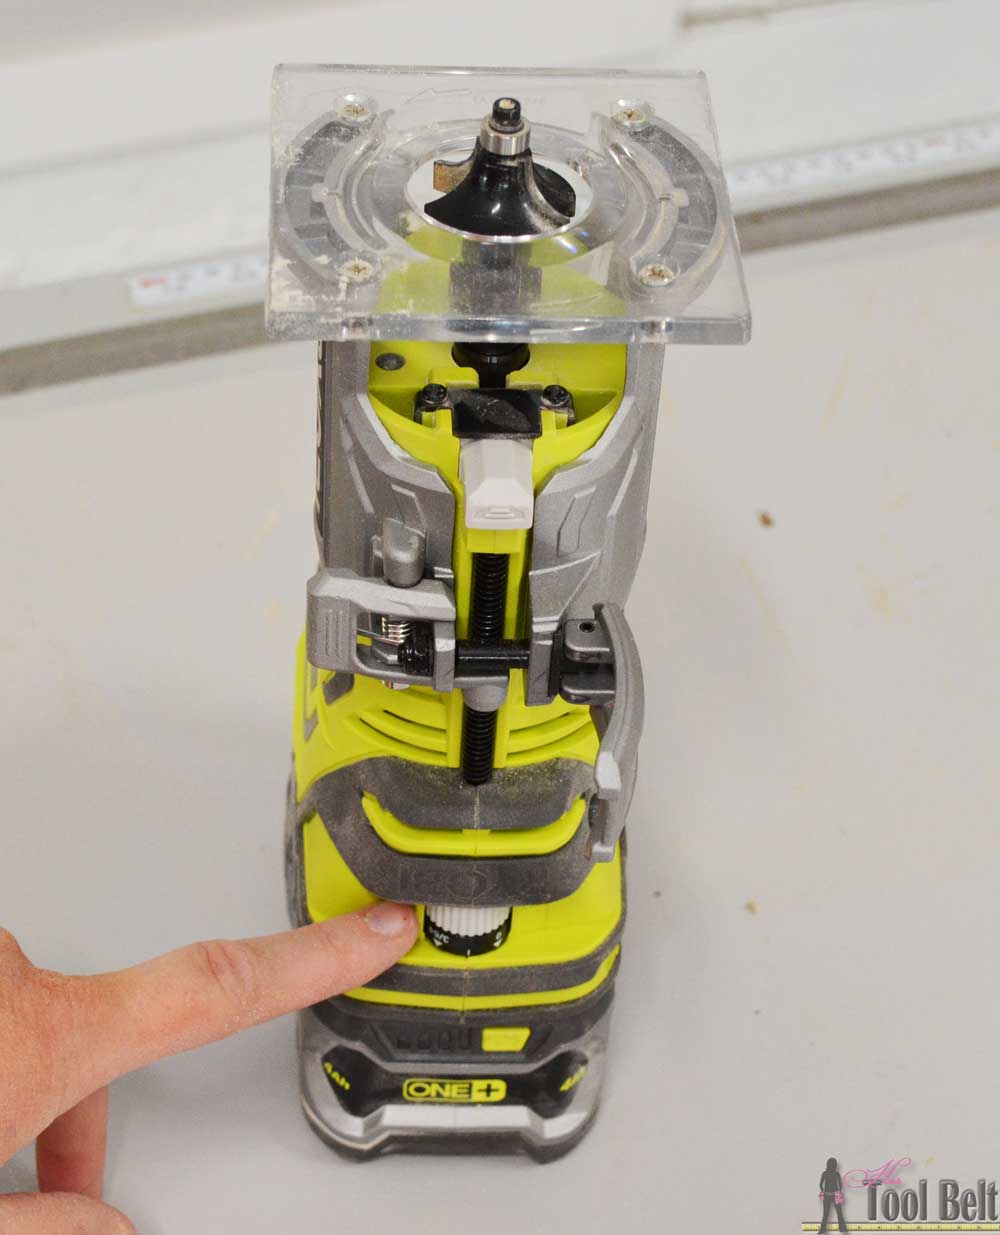
The trim router is made for trimming edges for laminate counter top installation. It’s also great for adding details to projects using router bits. Like I did on my Portable LEGO Totes. It is easy to use also. To change the bit, push the gray ‘brake’ button down and unscrew the collet nut (where the router bit goes). Place the nut then collet sleeve on the shaft of the router bit.
Place that back in the hole and tighten the collet nut. (Righty tighty – lefty loosey)
To change the height of the router bit showing, flip the latch open and use the dial knob to raise and lower the bit. Then flip the latch back in place.
Snap a battery on and it’s ready to go. When you run out of battery, it has a soft shut down. If you forget to switch the power off and replace the battery, it won’t automatically start again. You have to switch the power off and back on for it to go. That’s a good safety feature!
The Ryobi trim router is a fun little tool and a great asset to add detail to projects. It was easy to use on both flag designs.
Flag A has 13 – 1×2 slats for the stripes and Flag B is 2 – 1×12 pieces with stripes routed into the wood. Both flag dimensions are for traditional flag proportions.
How to Make a DIY Wood Flag
I’ll break up the post to build Flag A first, then how to build Flag B.
Wood Flag A
Materials
- 8 – 1″ x 2″ x 8′ boards (actual size 3/4″ x 1 1/2″) –
- #10 biscuits or 1 1/4″ pocket hole screws.
- 1 1/4″ brad nails
- wood glue
- sandpaper
- red stain
- white stain or white wash with paint
- blue stain
- white paint
- stain for the frame (I used golden oak, antiqued with Kona)
- top coat, I used satin finish
- Approximate lumber cost $9 – (I purchased 4 – 1×4 furring strips and ripped them down to 1 1/2″ wide.)
Cut List
- 15 – 3/4″ x 1 1/2″ x 37″ (2 are for the frame)
- 2 – 3/4″ x 1 1/2″ x 21″ (cut to fit)
Step 1
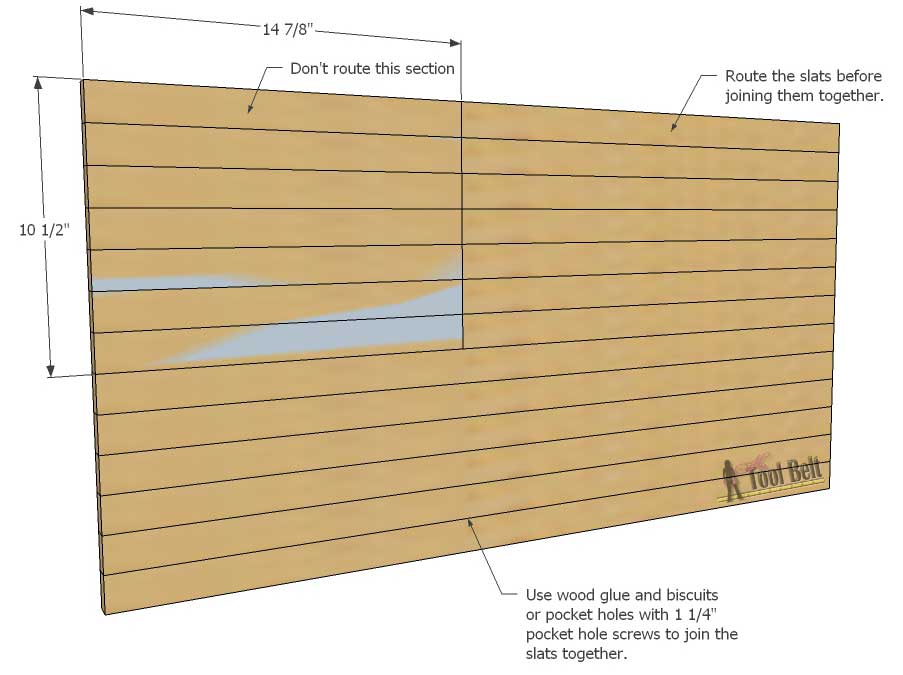
On 7 of the 37″ pieces, measure and mark over 14 7/8″. Don’t route this section, this will be for the stars. Use a round over bit and route the slats to give it a round edge.
Routed boards
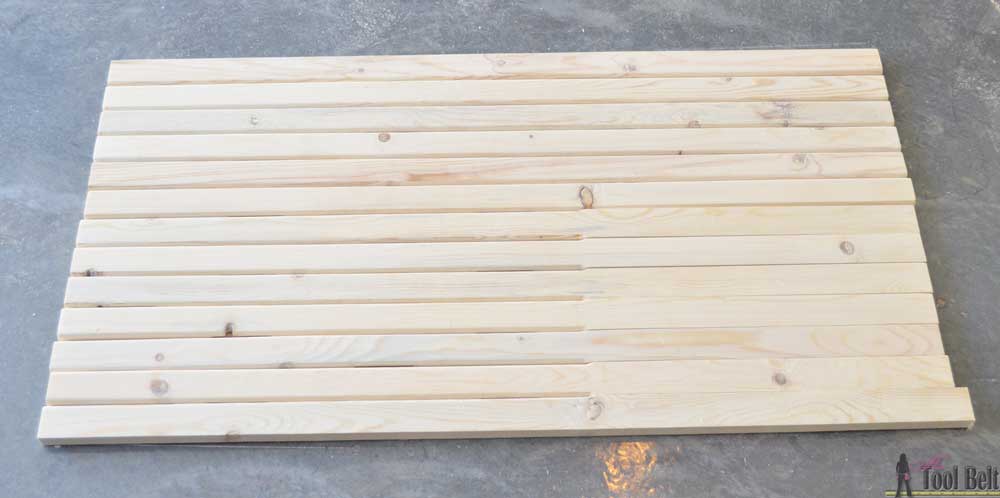
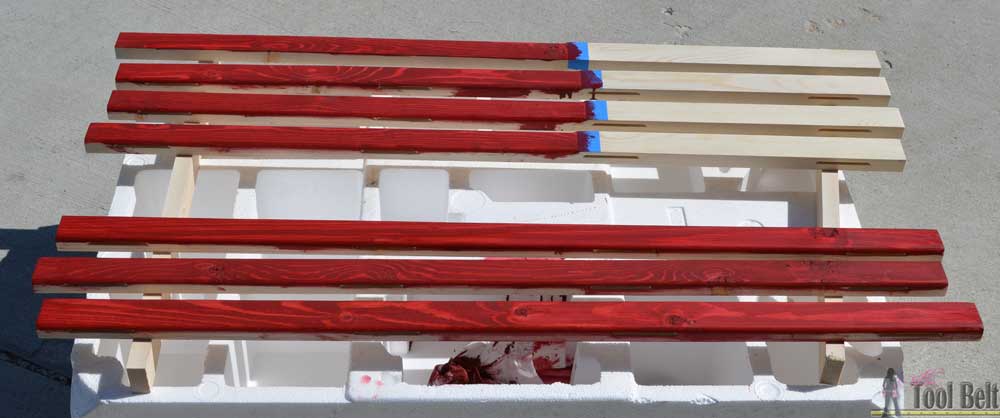
Sand each board with 120-150 grit paper. I stained the 7 boards red and white washed the 6.
Step 2
If you are using a biscuit joiner, cut the places for the biscuits on each slat. I alternated between 4 and 3 biscuits per joint so they wouldn’t line up. If using a Kreg pocket hole jig, drill holes for 3/4″ material. Use wood glue and your joining method to join together each slat. Line up one edge perfectly, then after the glue has dried, you can trim the other edge straight.
Step 3
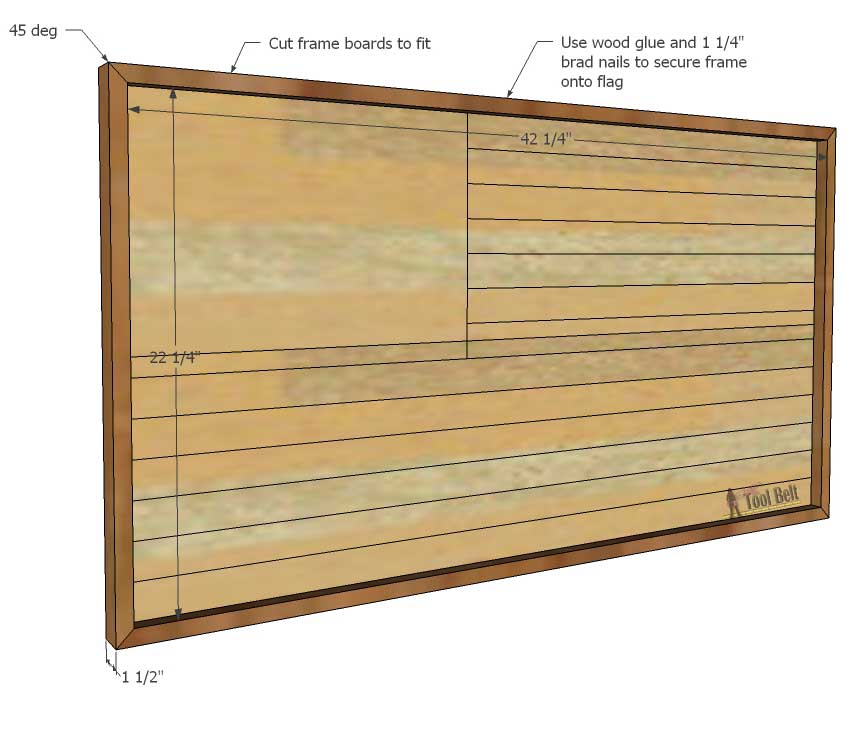
Use wood glue and 1 1/4″ brad nails to secure the top/bottom frame piece onto the flag.
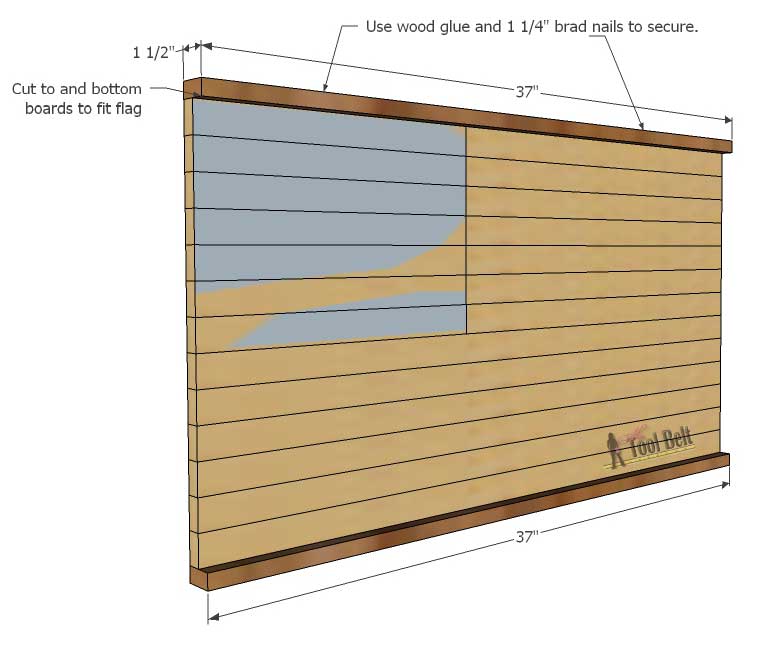
Cut the side frame pieces to fit, and use wood glue and 1 1/4″ brad nails to secure in place.

Step 4
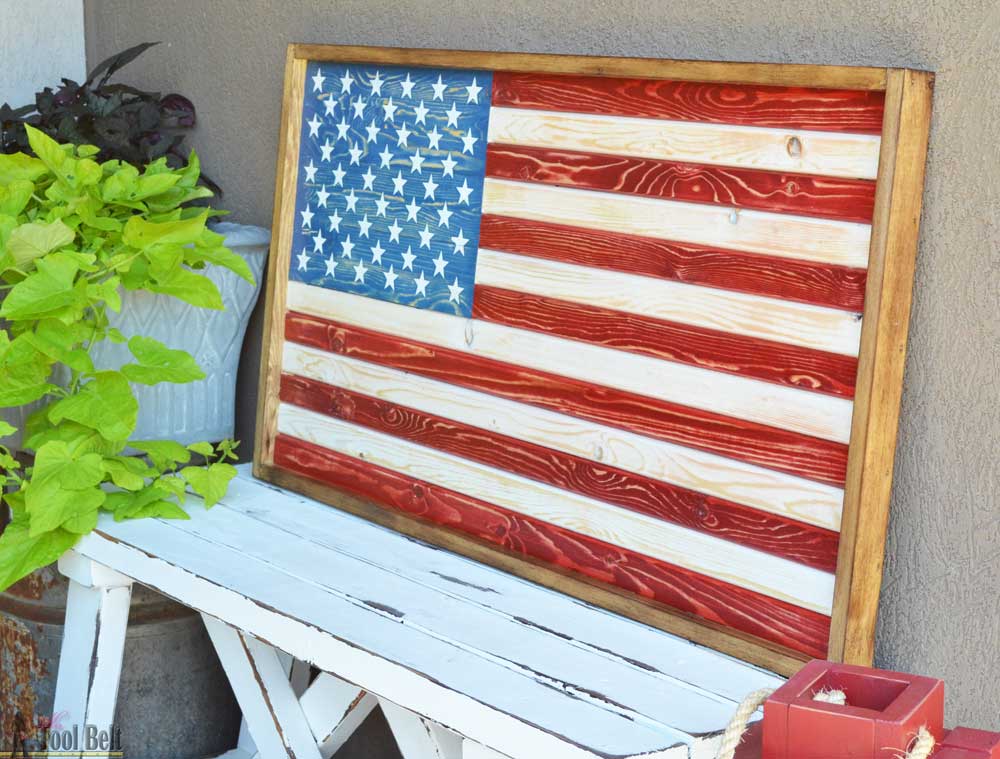
Stain the frame, I rubbed on a light coat of golden oak and dry brushed a little kona to antique it. I used a corner cat sander to distress the paint/stain on the body of the flag. To paint the stars I used my Silhouette to cut out the vinyl template. Here is the free template – 50 stars template flag A. I used the negative space of the vinyl, then painted the stars on and removed the vinyl. Finally I added a quick coat of polyurethane in satin.
It turned out really fun.
Then bench and lantern are DIY too.
Wood Flag B
Materials
- 1 – 1″ x 12″ x 8′ board (actual size 3/4″ x 11 1/4″)
- 2 – 1″ x 2″ x 8′ boards (actual size 3/4″ x 1 1/2″)
- #10 biscuits or 1 1/4″ pocket hole screws.
- 1 1/4″ brad nails
- wood glue
- sandpaper
- red stain
- white stain or white wash with paint
- blue stain
- white paint
- stain for the frame
- top coat, I used satin finish
- Approximate lumber cost $22
Cut List
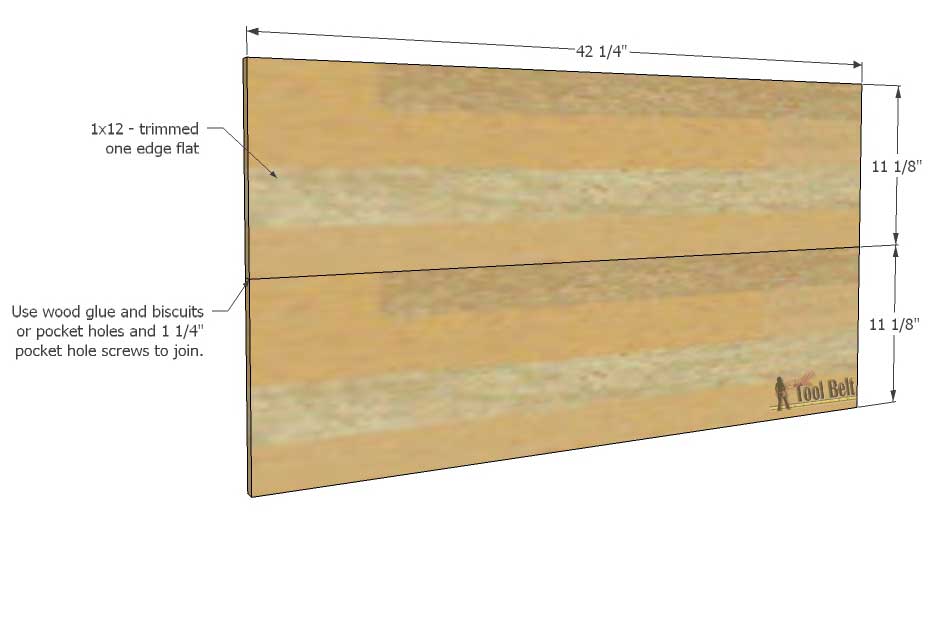
- 2 – 3/4″ x 11 1/8″ x 42 1/4″ – I trimmed the sides of the 1×12 to 11 1/8″ so I could have a straight edge to join together.
- 2 – 3/4″ x 1 1/2″ x about 43 3/4″ with 45 deg miter cuts on each end (cut to fit)
- 2 – 3/4″ x 1 1/2″ x about 23 3/4″ with 45 deg miter cuts on each end (cut to fit)
Step 1
Cut the 1×12 into the two pieces and join them together with wood glue and biscuits or pocket holes with 1 1/4″ screws.
Step 2
Mark the location for the blue block and for the stars. The stripes are suppose to be 1.71″ wide for this size of wood. You’ll just have to do your best guess since the tape measure is in 1/16″ markings.
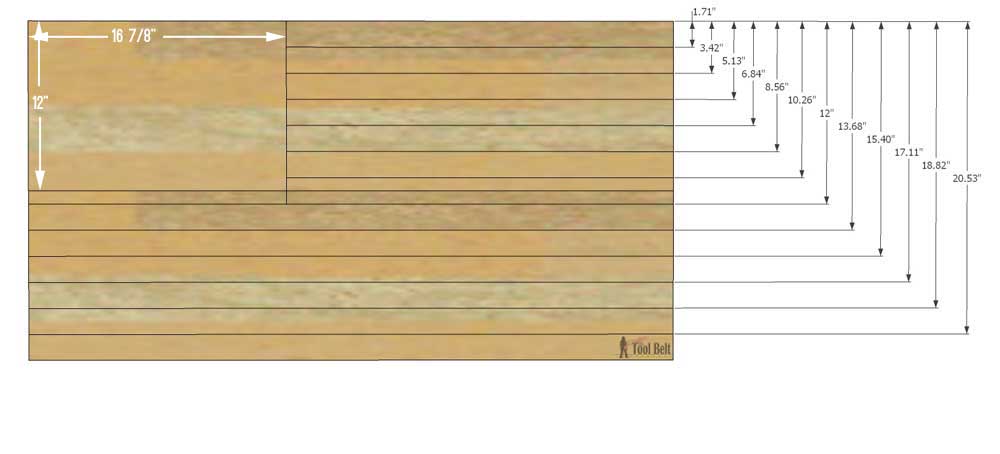
Tape the areas for the red stripes.
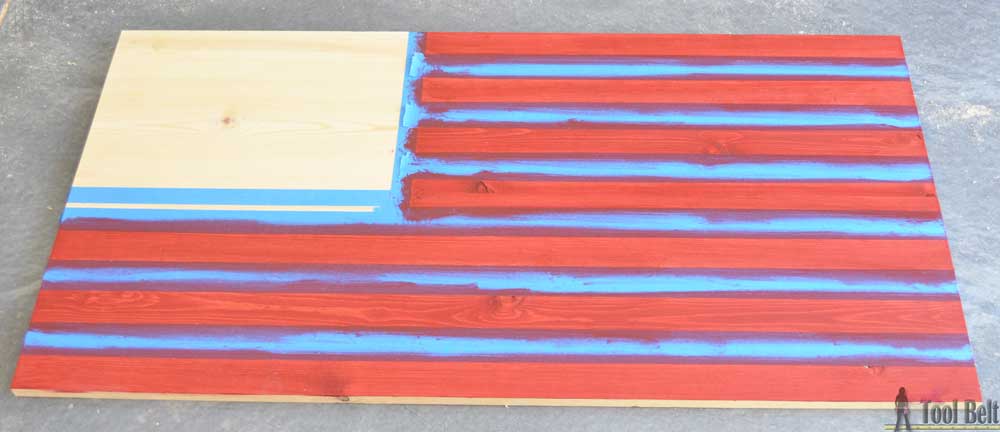
Once the red stain has dried, move the tape for the white. It’s ok if there is a little bleeding, the V-groove bit will remove it. Then stain the blue.
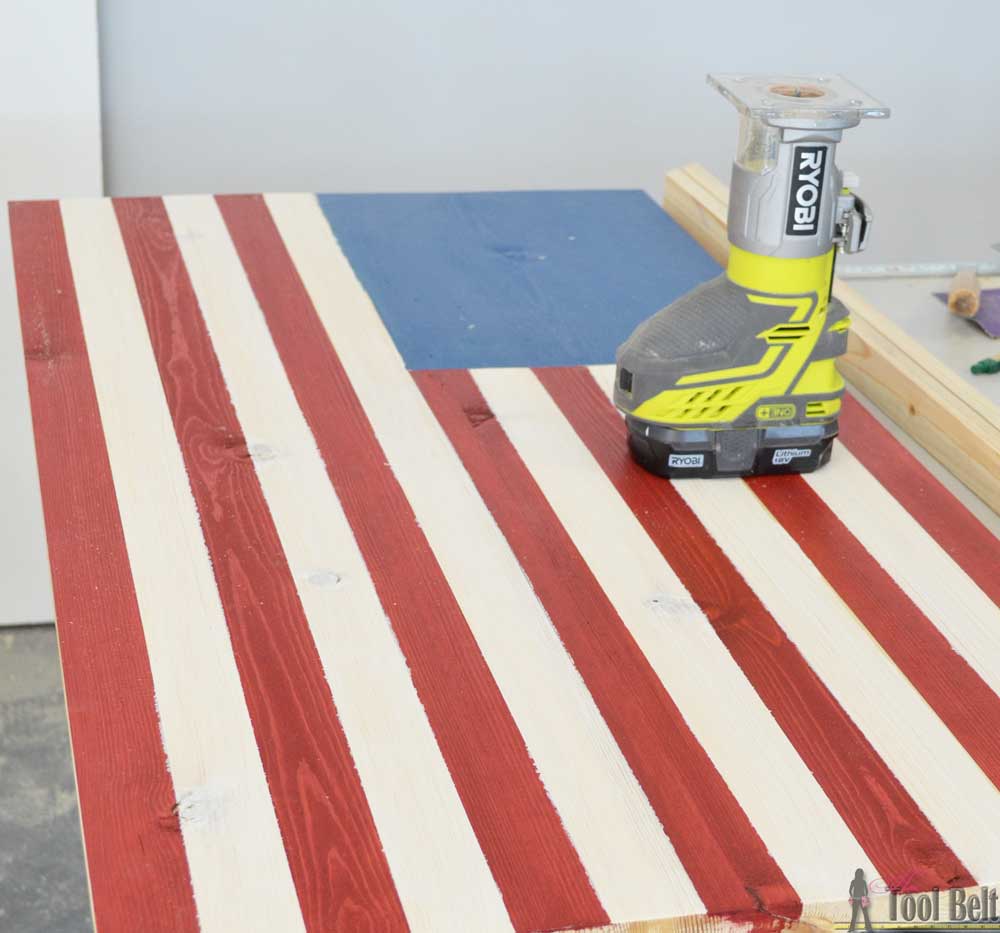
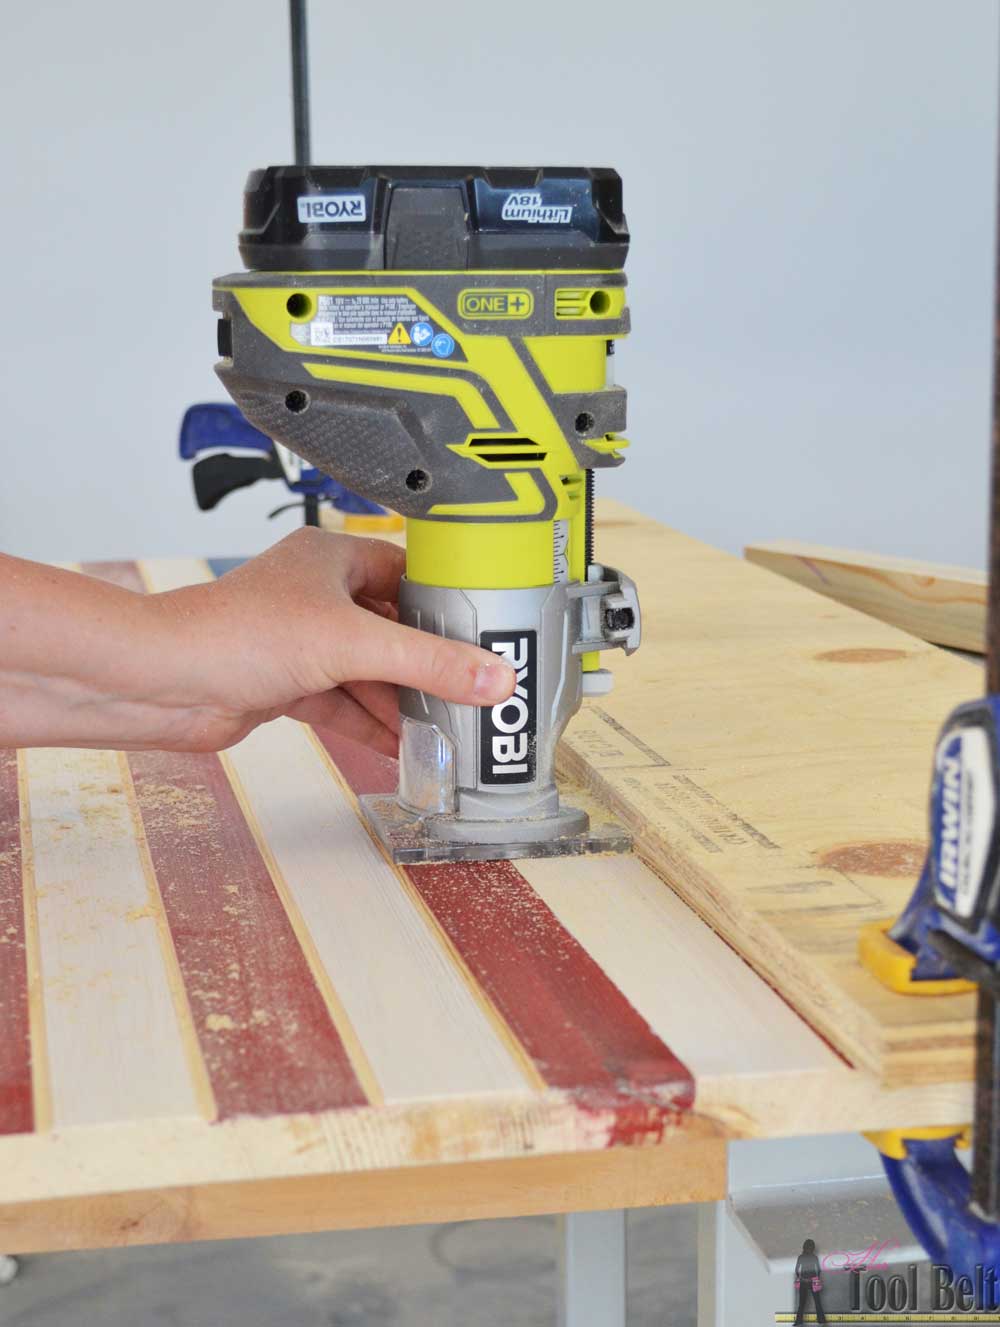
Step 3
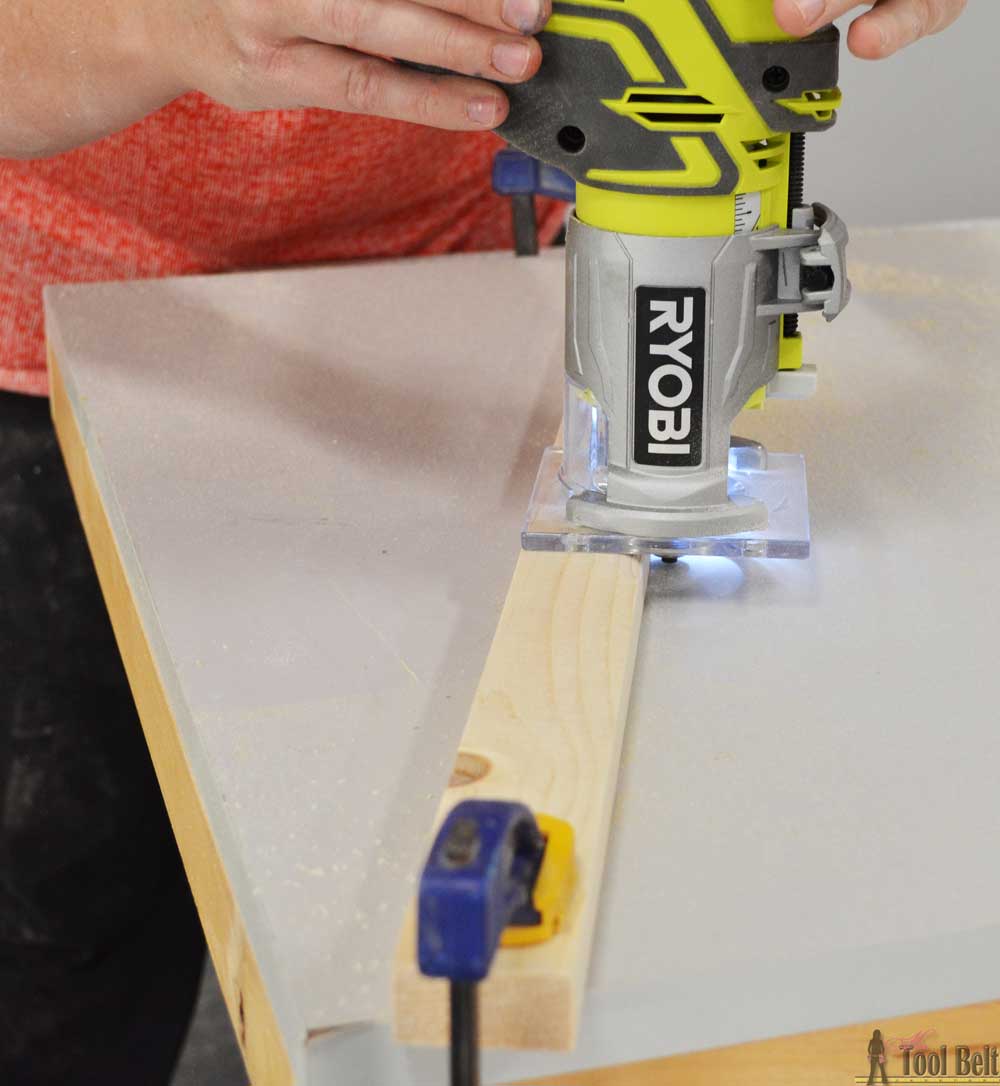
Place a V grooving bit in your router and use a straight edge to offset 1 3/4″ from the stripe line. (That is how far the router bit tip is from the clear router guide edge.) Route each line and around the blue block.
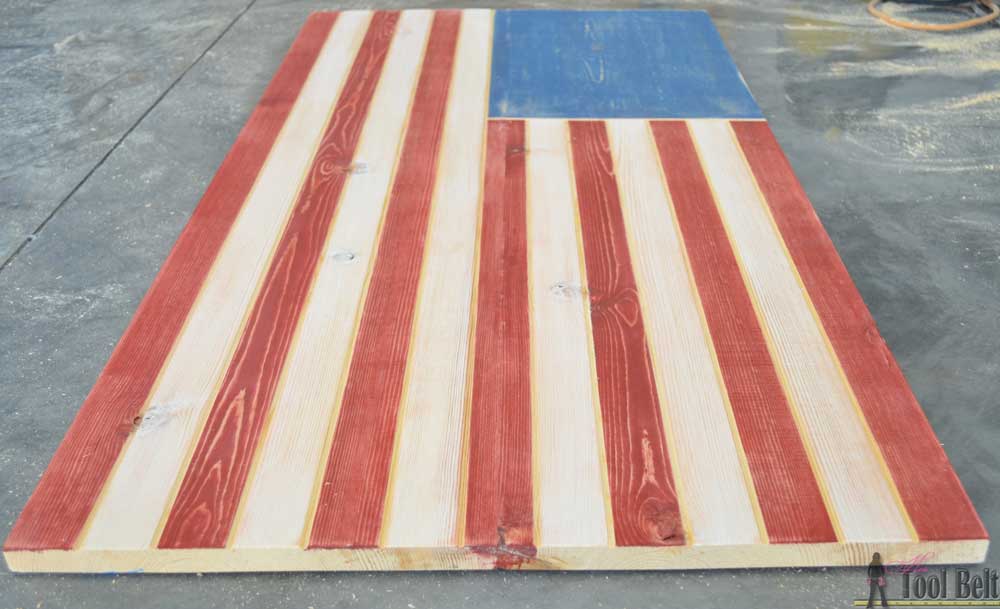
Here’s the wood flag after routing.
Step 4
To build the frame, measure each side and cut the 45 from the inside measurement. Use wood glue and 1 1/4″ brad nails to secure the frame to the flag.
I used a corner cat sander to distress the paint/stain on the body of the wood flag.
v
Step 5
To paint the stars I used my Silhouette to cut out the vinyl template. Here is the free template – 50 stars template flag B. I used the negative space of the vinyl, then painted the stars on and removed the vinyl. Finally I added a quick coat of polyurethane in satin.
What do you think? How would you do your wood flag sign?
“I acknowledge that The Home Depot is partnering with me to participate in the Tool Review Program. As a part of the Program, I am receiving compensation in the form of products and services, for the purpose of promoting The Home Depot. All expressed opinions and experiences are my own words. My post complies with the Word Of Mouth Marketing Association (WOMMA) Ethics Code and applicable Federal Trade Commission guidelines.”
This is SO neat. That tool is intriguing too! I need to get to Home Depot and stock up on some tools but I think I barely missed Ryobi Days! Cool project Amy!
Awesome project ! I really like the grooves between the stripes, it’s a really nice finishing touch.
Love them both but I think I’m partial to B. Great use of the router too. You always come up with the best projects.
For the stars download, is there another way to get this. For some reason it won’t download for me.