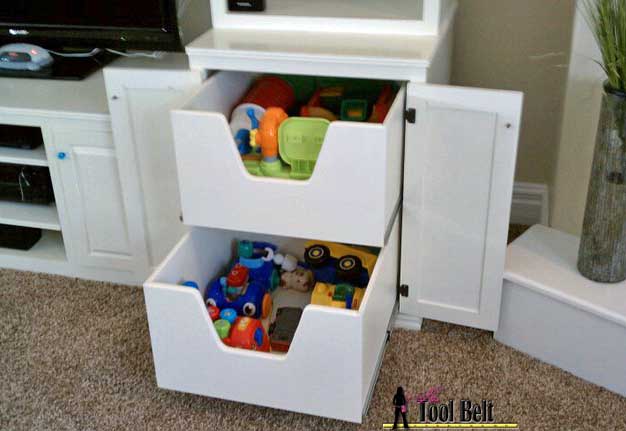
 This is part 2 of the PB media center build. We first built the TV Console for the PB media center. Now we are onto the cabinets and toy box (my kids favorite part :-))
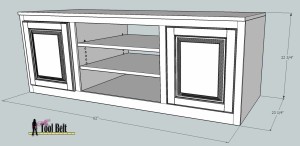
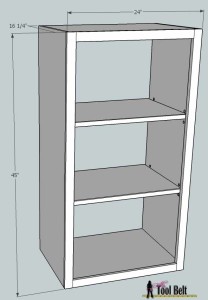
Media Center: Cabinets
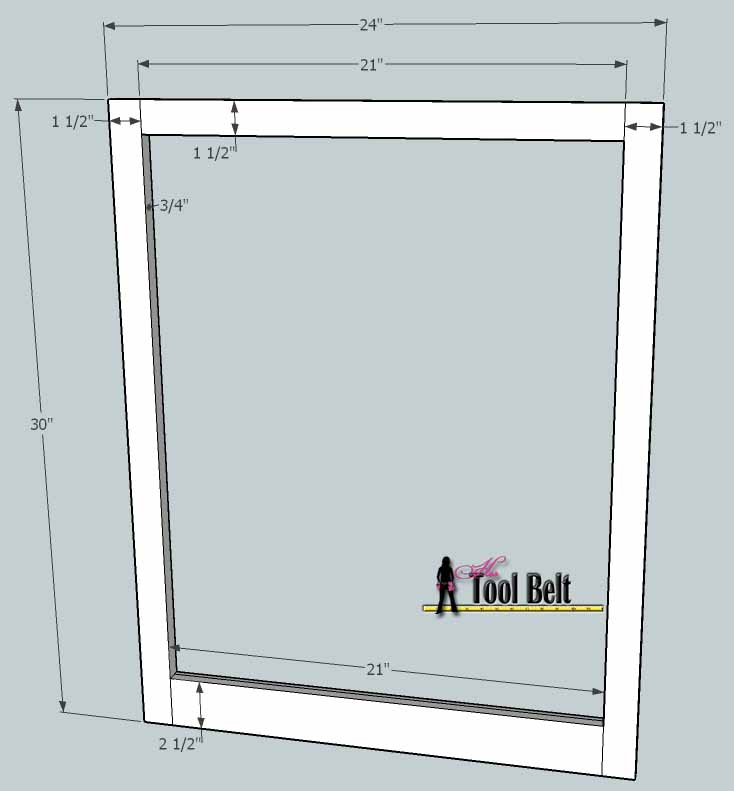
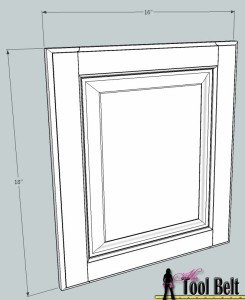
Face Frame
 The media center has 2 cabinets. Repeat these instructions for the 2nd cabinet.
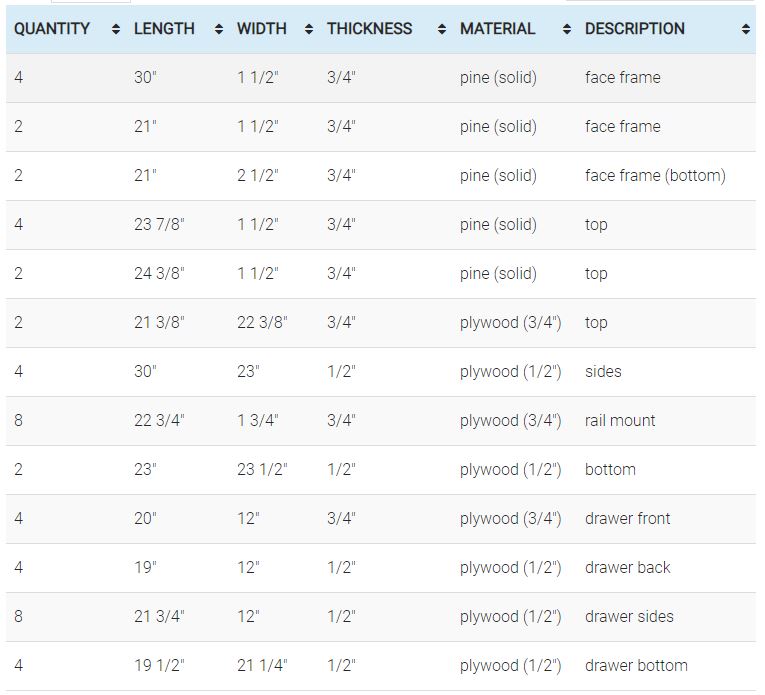
Cut all of the solid wood pieces according to the cut list. Make the marks for how you are going to join each piece together according to the diagram. For face frame joints, I use a biscuit cutter. Other common methods to join are 2 dowels (with a doweling jig) or mortise and tenon. You could also do a kreg pocket jig, however you need to be careful when using screws and dado grooves. You don’t want to hit a screw with your saw or router. You could install the screws after you dado cut the boards.
Apply glue to each joint and clamp the face frame together. Check to make sure your face frame is square. An easy way to check that is measuring corner to corner & the other corner to corner, they should measure the same if your rectangles/squares are square. Adjust as necessary. Allow the glue to dry.
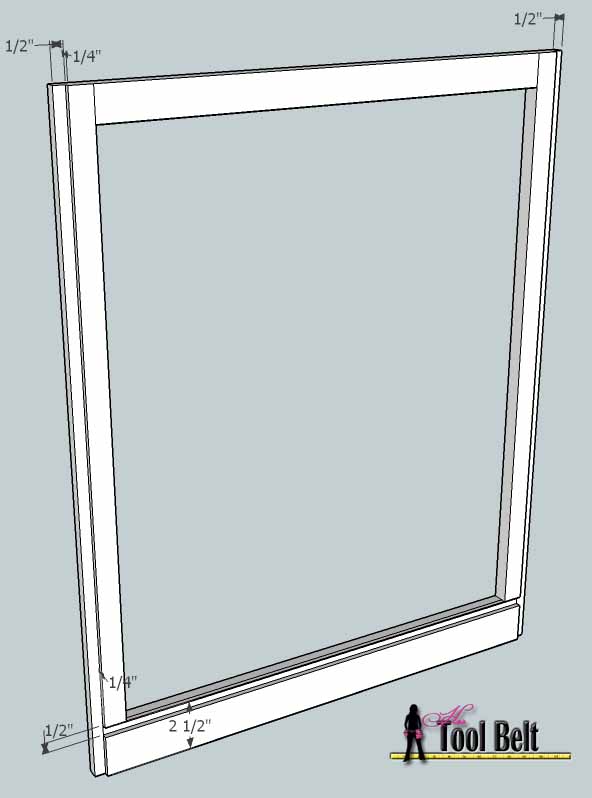
Once the glue is sufficiently dry, the next step is to make dado cuts. If your face frame has a better side, keep that for the front. The dado cut is a groove we cut out to fit the plywood sides onto the face frame, it makes a strong joint. Each dado is going to be 1/4″ deep. Make a dado cut 1/2″ wide for the sides of the cabinet, flush with the outside of the face frame. Make a dado cut 1/2″ wide at 2″ to 2 1/2″ from the bottom for the bottom shelf of the media center.
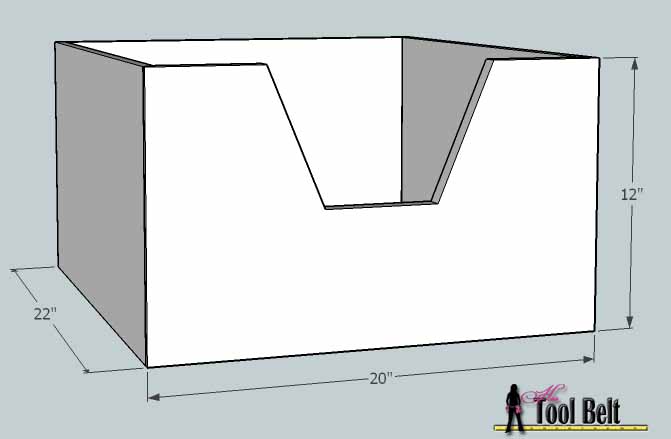
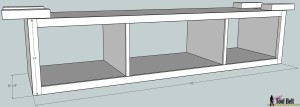
Cabinet body
 (Note: This diagram is if you plan on routing a nice edge on the front and side. If you decided to pieces of molding on the edges, you can cut a piece of 3/4″ plywood 24 1/4″ x 23 3/4″ and add molding to the front and outside edges of the top.)
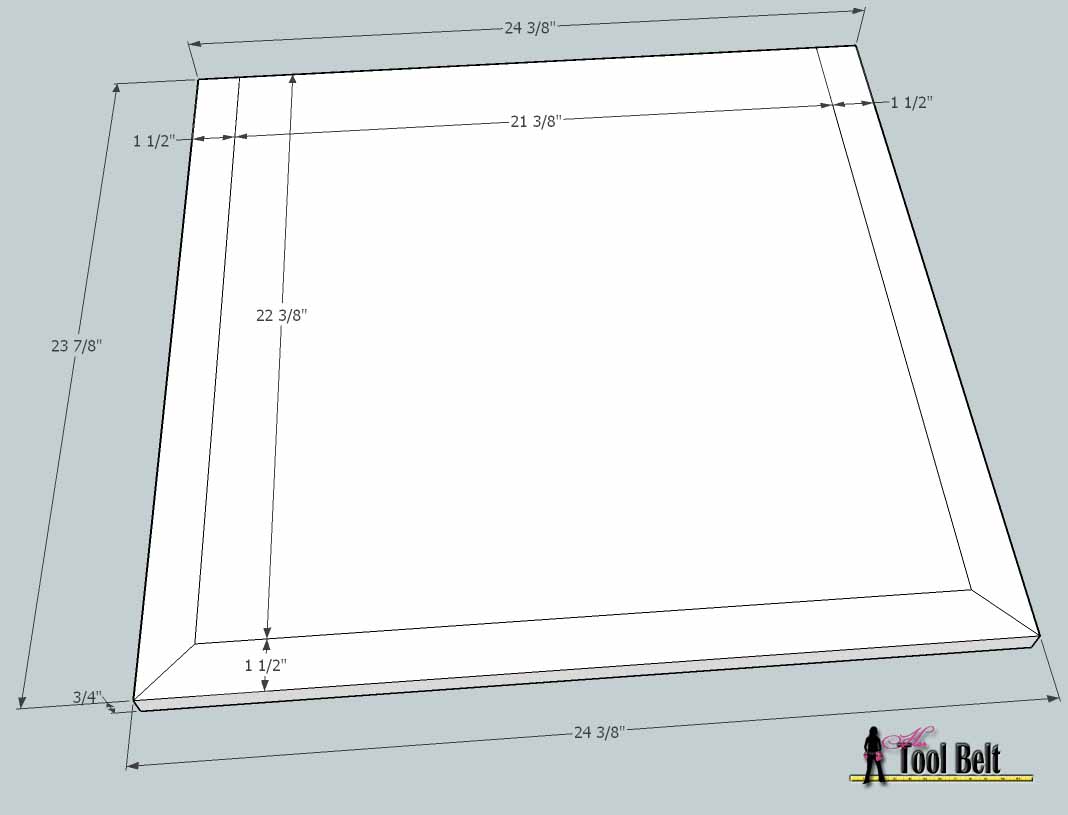
Cut a piece of 3/4″ plywood that is 22 3/8″ x 21 3/8″, for the cabinet top. Cut 2 pieces of solid pine that are 23 7/8″ x 1 1/2″ x 3/4″, one end cut at a 45 deg angle, as shown. Cut a piece of solid pine that is 24 3/8″ x 1 1/2″ x 3/4″, two ends cut at a 45 deg angle, as shown. Join the 3 solid edge pieces to the top plywood using your preferred joining method. Glue and clamp the pieces and allow the glue to dry sufficiently.
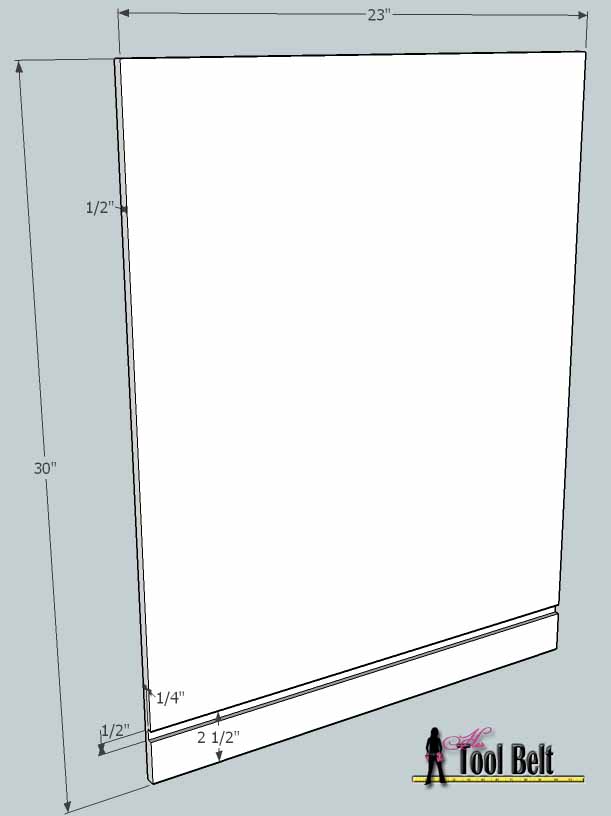 Cut 2 pieces of 1/2″ plywood that are 30″ tall x 23″ wide, these are the cabinet sides. Make a dado that is 1/2″ wide and 1/4″ deep between 2″ and 2 1/2″ on one side. Repeat for the other side piece.
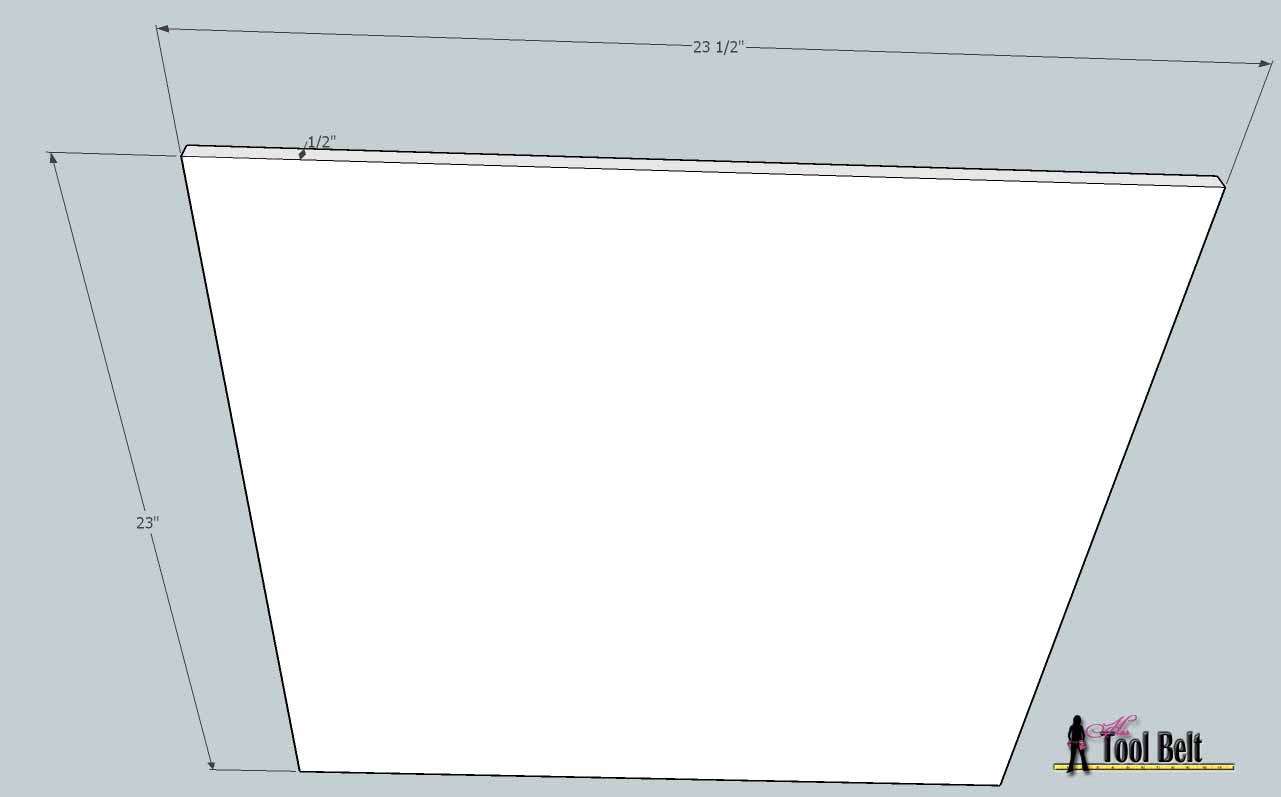 Cut a piece of 1/2″ plywood that is 23 1/2″ x 23″ for the cabinet bottom.
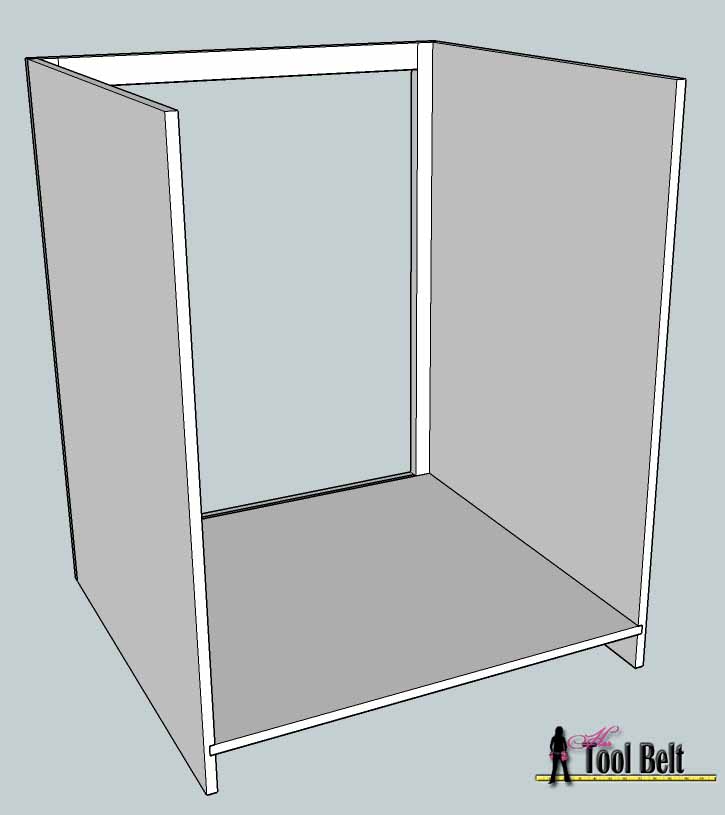
Cabinet Assembly
When I assemble cabinets, I like to glue the joints and put them together then use a 1″ – 1 1/4″ brad nail or finish nail to go through the plywood into the face frame where we dado’d. Sometimes the back of the cabinet will have a little extra play, so I’ll cut spacers to keep the back dimensions the same as the front. I also use clamps to hold it together while the glue dries. On this first assembly do not assemble the top.
 Assemble the cabinet by applying glue in the joints, clamp together and allow to dry. Add nails as necessary.
Once the glue has dried, add kreg pocket joints that go through the top inside face frame and a couple places on the inside face of the sides to secure the top into place. For the top, make the back edge flush with the back of the cabinet and flush with one of the sides (that will be the side where the TV is, make sure to make the other cabinet mirror to this one.) Secure the top onto the cabinet.
If you’d like, add a piece of molding along the front bottom and outer side of the cabinet. Remember to do the mirror image to the other cabinet. Cut the molding piece to be flush with the side of the cabinet and place it flush with the bottom.
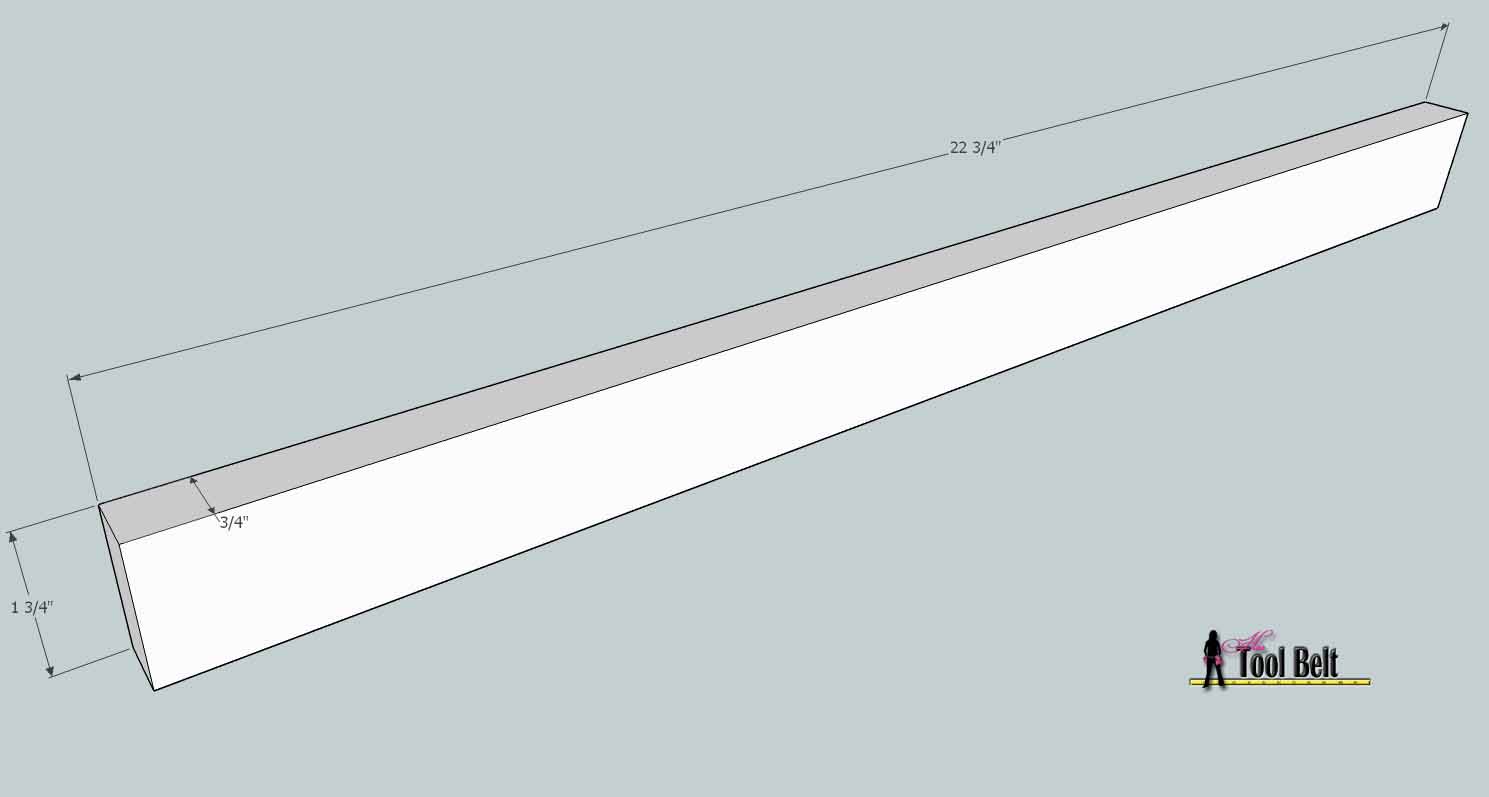
Cut 4 rail support pieces from 3/4″ plywood that are 22 3/4″ x 1 3/4″. Drill 2 or 3 countersink holes along the length of each rail support.
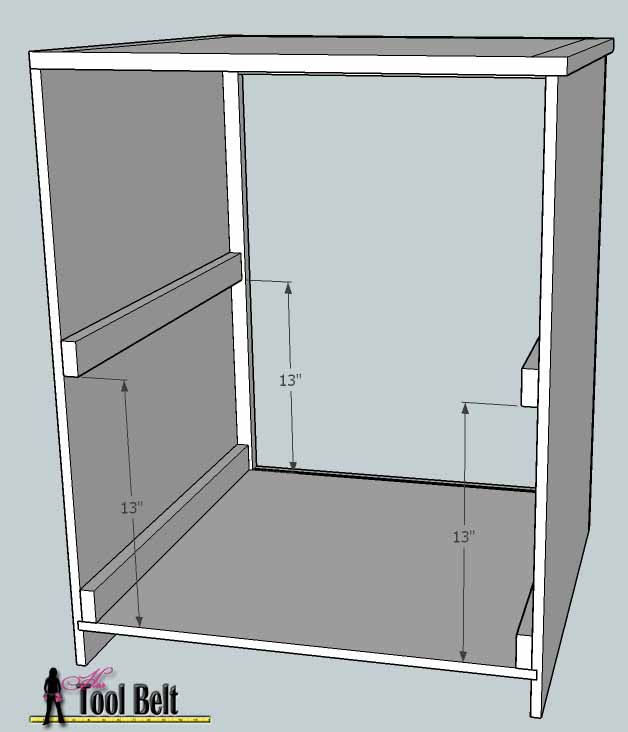 Use 1″ grabber screws and glue and mount the rail supports to the cabinet.
Try and mount the rail supports as parallel as possible, it will make the drawer slide installation easier later.
Drawers
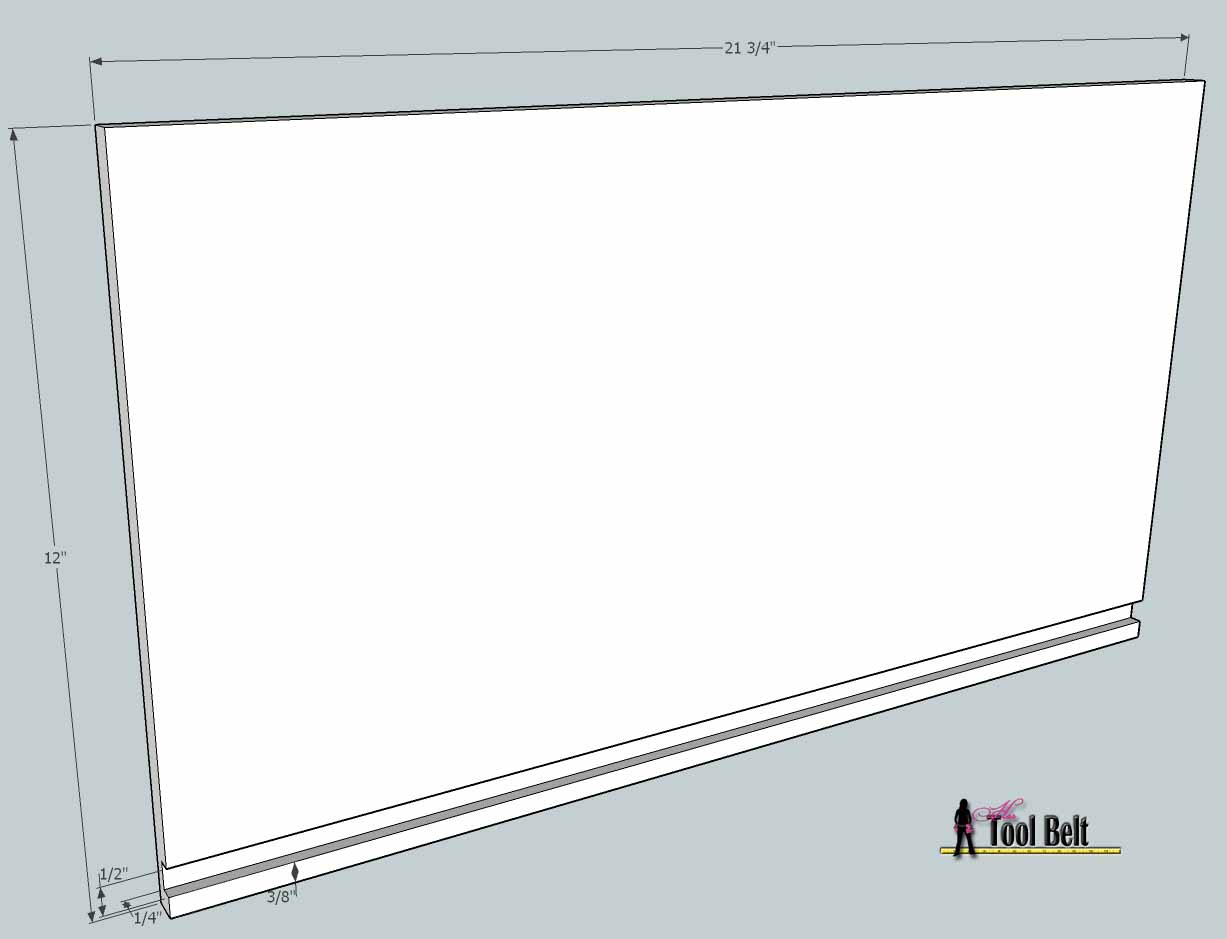
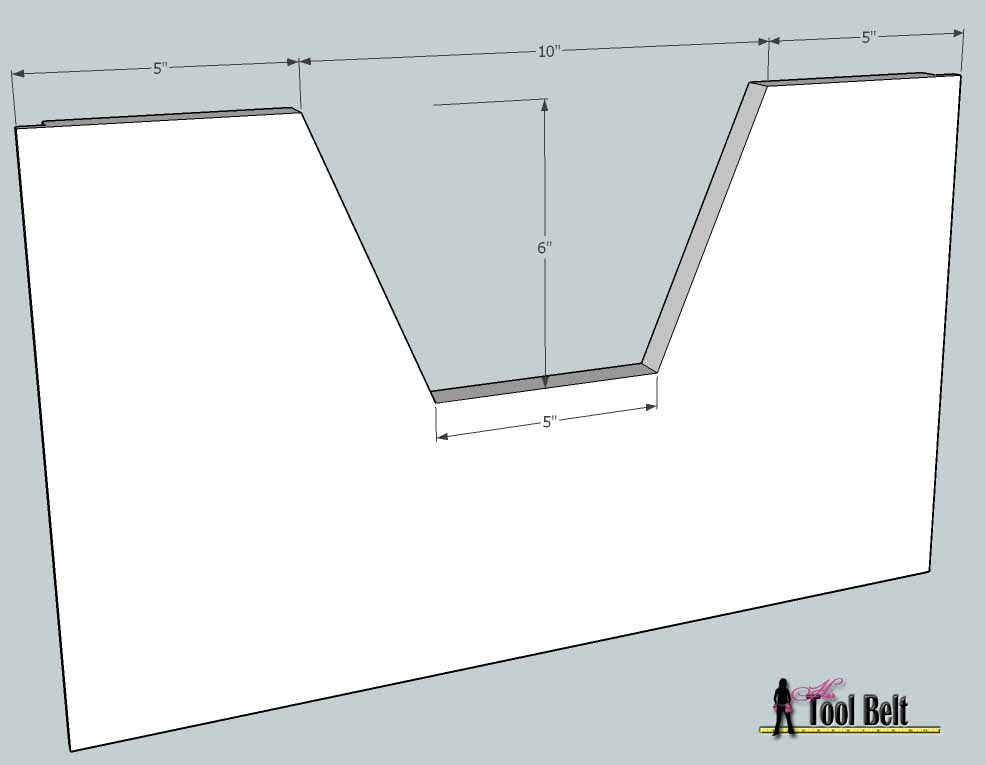 Cut 4 pieces of 3/4″ plywood that are 20″ x 12″ for the drawer fronts. Sketch out cuts for the hand pull cut-out according to the diagram. Measurements are approximate, I’d suggest rounding the corners. Cut out the hand pull area. Round the edges along the hand pull with a 1/4″ round over bit or with a sander.
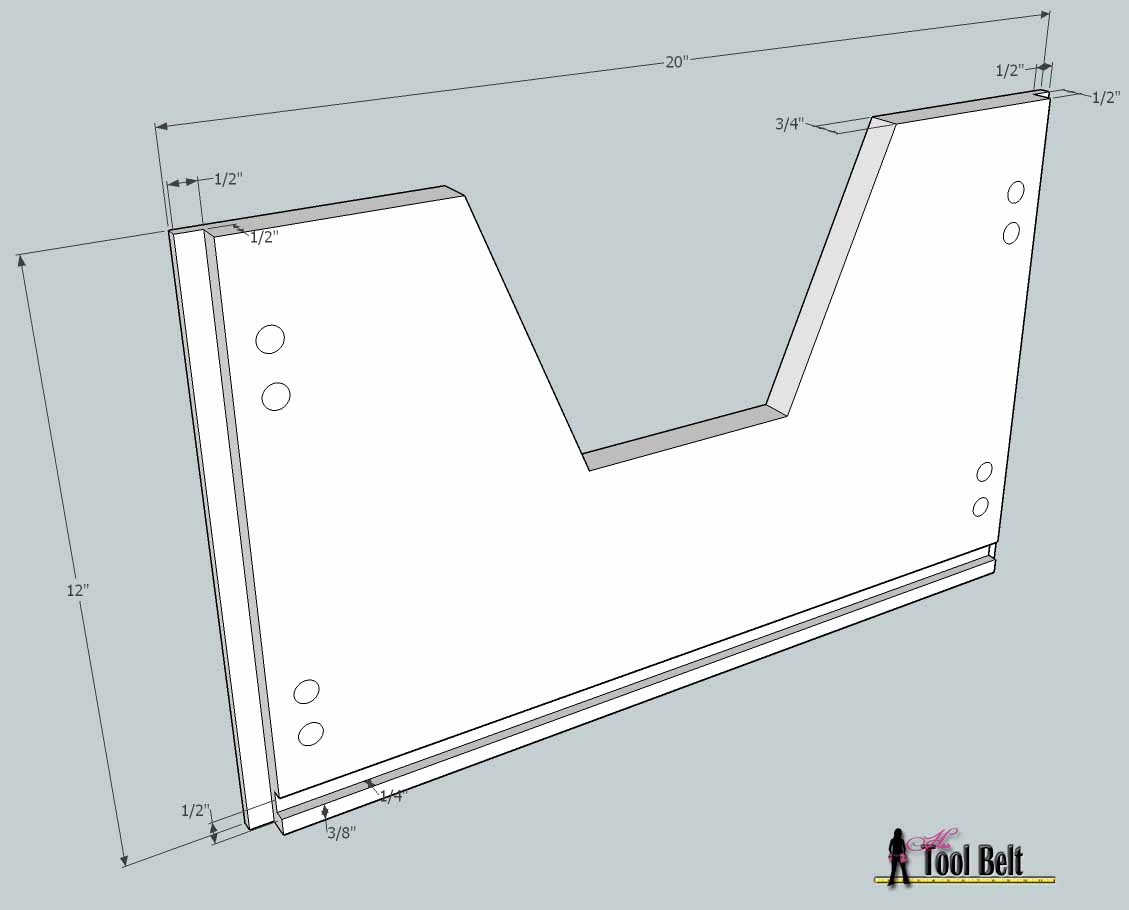 On the backside of the drawer front, make a 1/2″ deep dado cut 1/2″ wide for the sides of the drawer, flush with the outsides of the drawer front. Make a 1/4″ deep dado cut 1/2″ wide at 3/8″ to 7/8″ from the bottom for the bottom of the drawer.
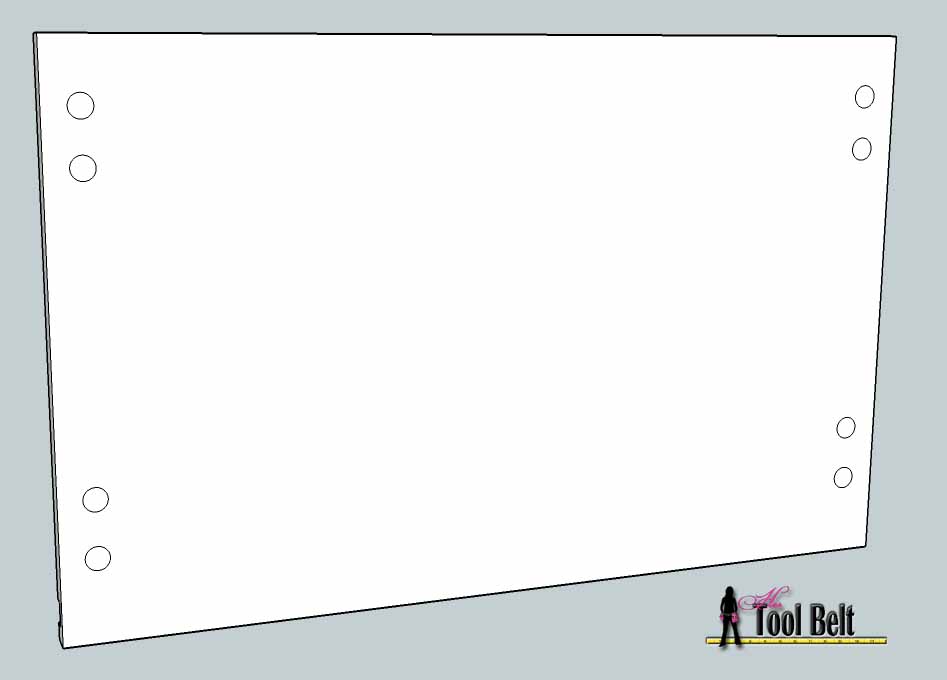
Make Kreg pocket holes for added drawer strength (set for 1/2″ material thickness), as approximately shown in the diagram.
Cut 8 pieces of 1/2″ plywood that are 21 3/4″ x 12″ for the drawer sides. Make 1/4″ deep dado cut 1/2″ wide at 3/8″ to 7/8″ from the bottom for the bottom of the drawer.
 Cut 4 pieces of 1/2″ plywood that are 19″ x 12″ for the drawer back. Make 1/4″ deep dado cut 1/2″ wide at 3/8″ to 7/8″ from the bottom for the bottom of the drawer.
Make Kreg pocket holes in the back of the drawer back for added drawer strength (set for 1/2″ material thickness), as approximately shown in the diagram.
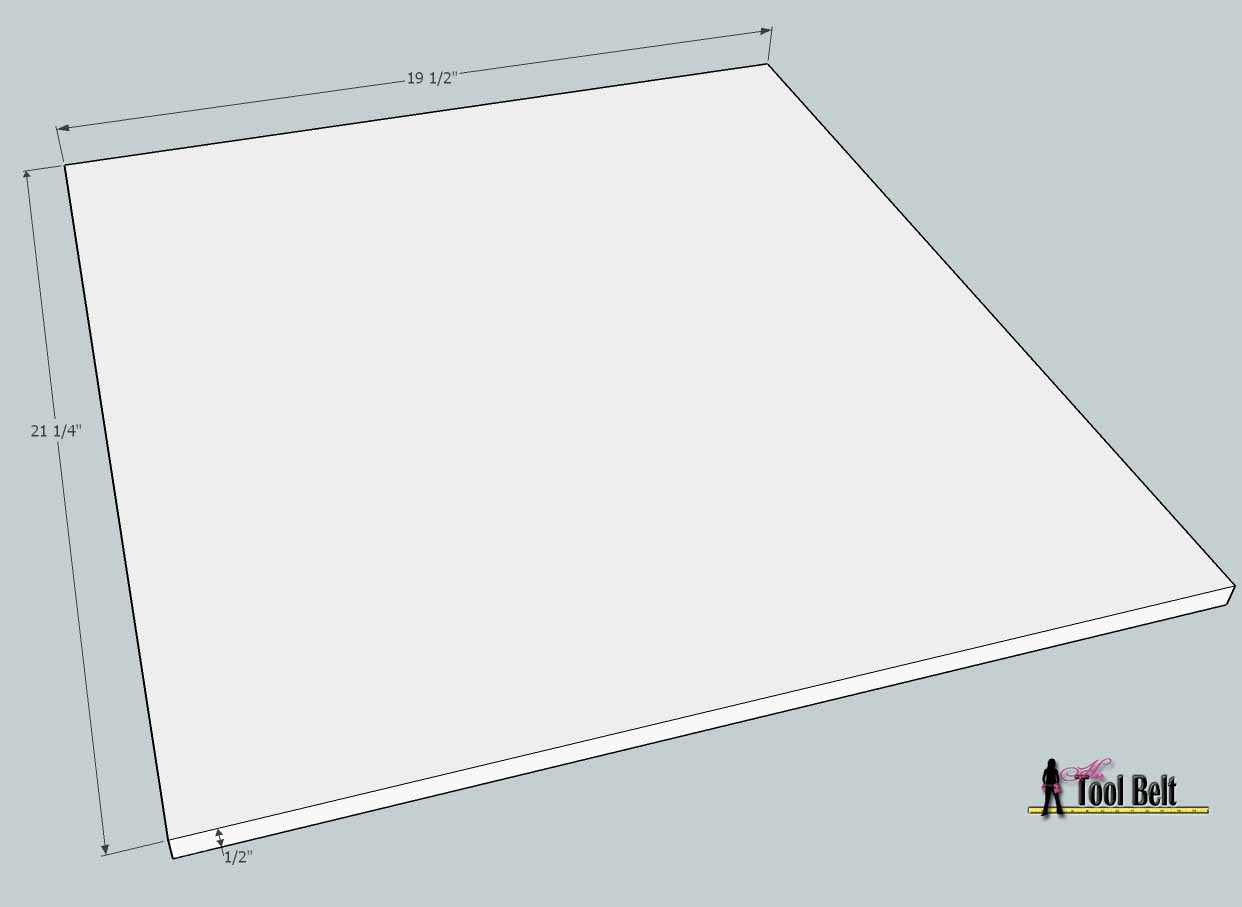 Cut 4 pieces of 1/2″ plywood that are 21 1/4″ x 19 1/2″ for the drawer bottom.
 Assemble the drawer by applying glue in the joints, clamp together and add nails as necessary.
 Secure the drawer together by adding Kreg screws into the back of the drawer front and drawer back. Allow the glue to sufficiently dry.
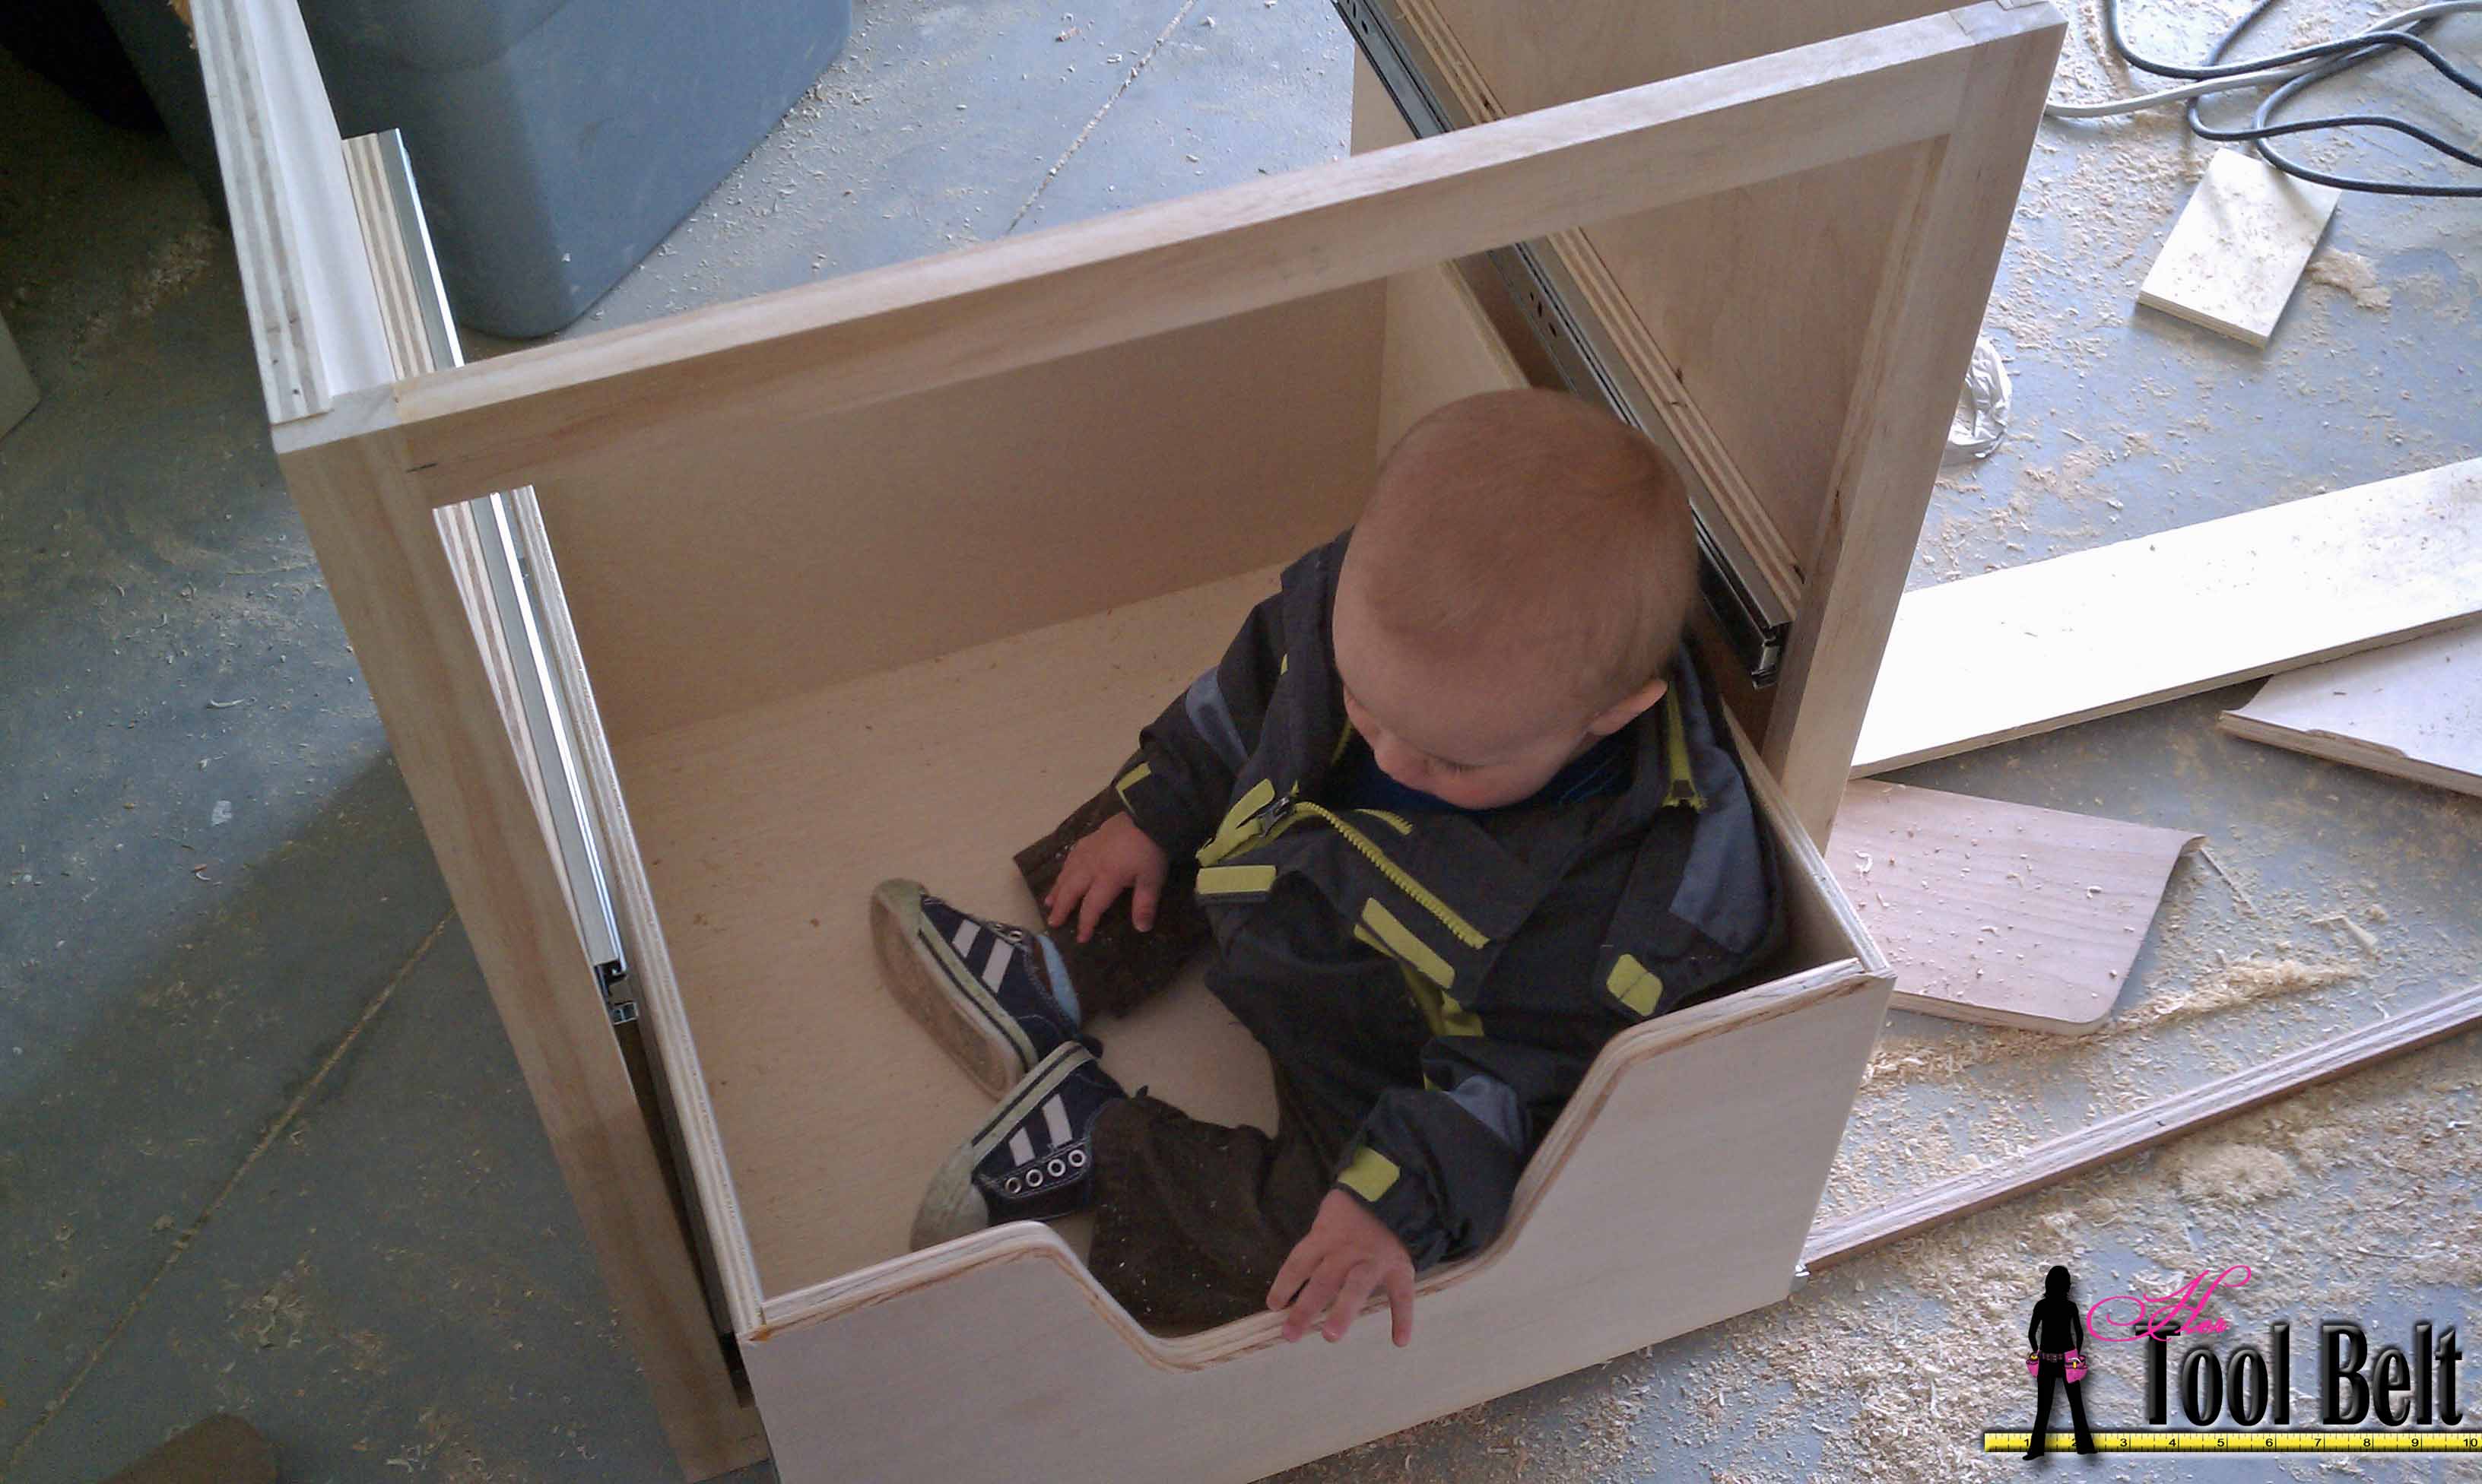
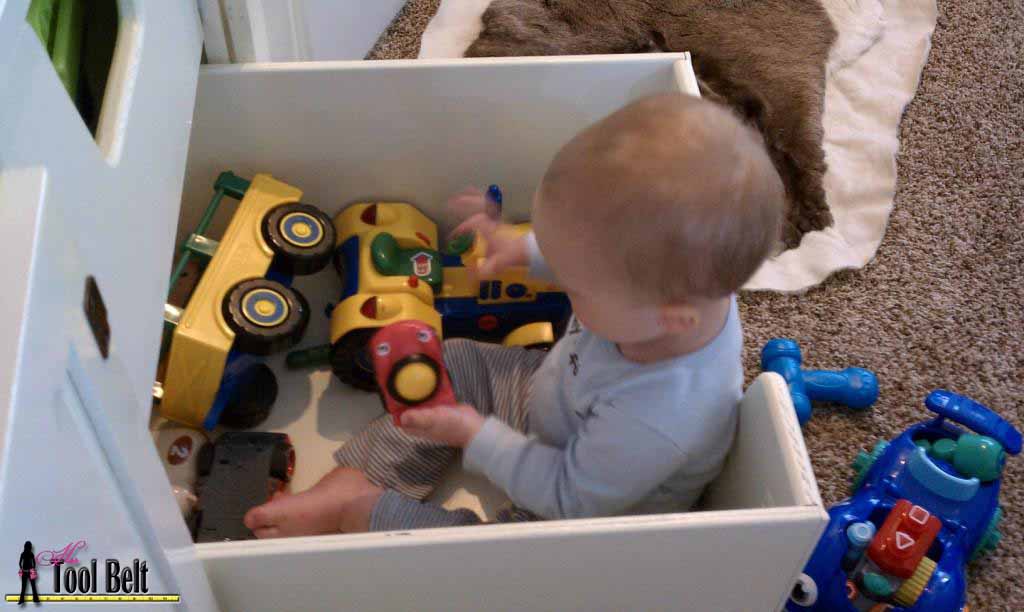
Have your quality control helper test it to make sure it is acceptable.
Finish Work
Next fill any holes or gaps with filler. If you are painting, go ahead and use spackle or joint compound (for your walls). If you are staining, use the proper wood filler. Let the filler dry then sand the cabinet, make sure to get any excess glue and filler smooth. End sanding your project with 120 -150 grit sand paper. Remove excess dust. If painting, prime the cabinets and drawers and allow to dry. If staining, use wood preconditioner and stain as you like.
Once the primer is dry, apply the paint and let dry.
For the finish coat, coat pieces with 1-2 coats of polycrylic (it dries crystal clear). And let dry sufficiently.
Drawer Slides
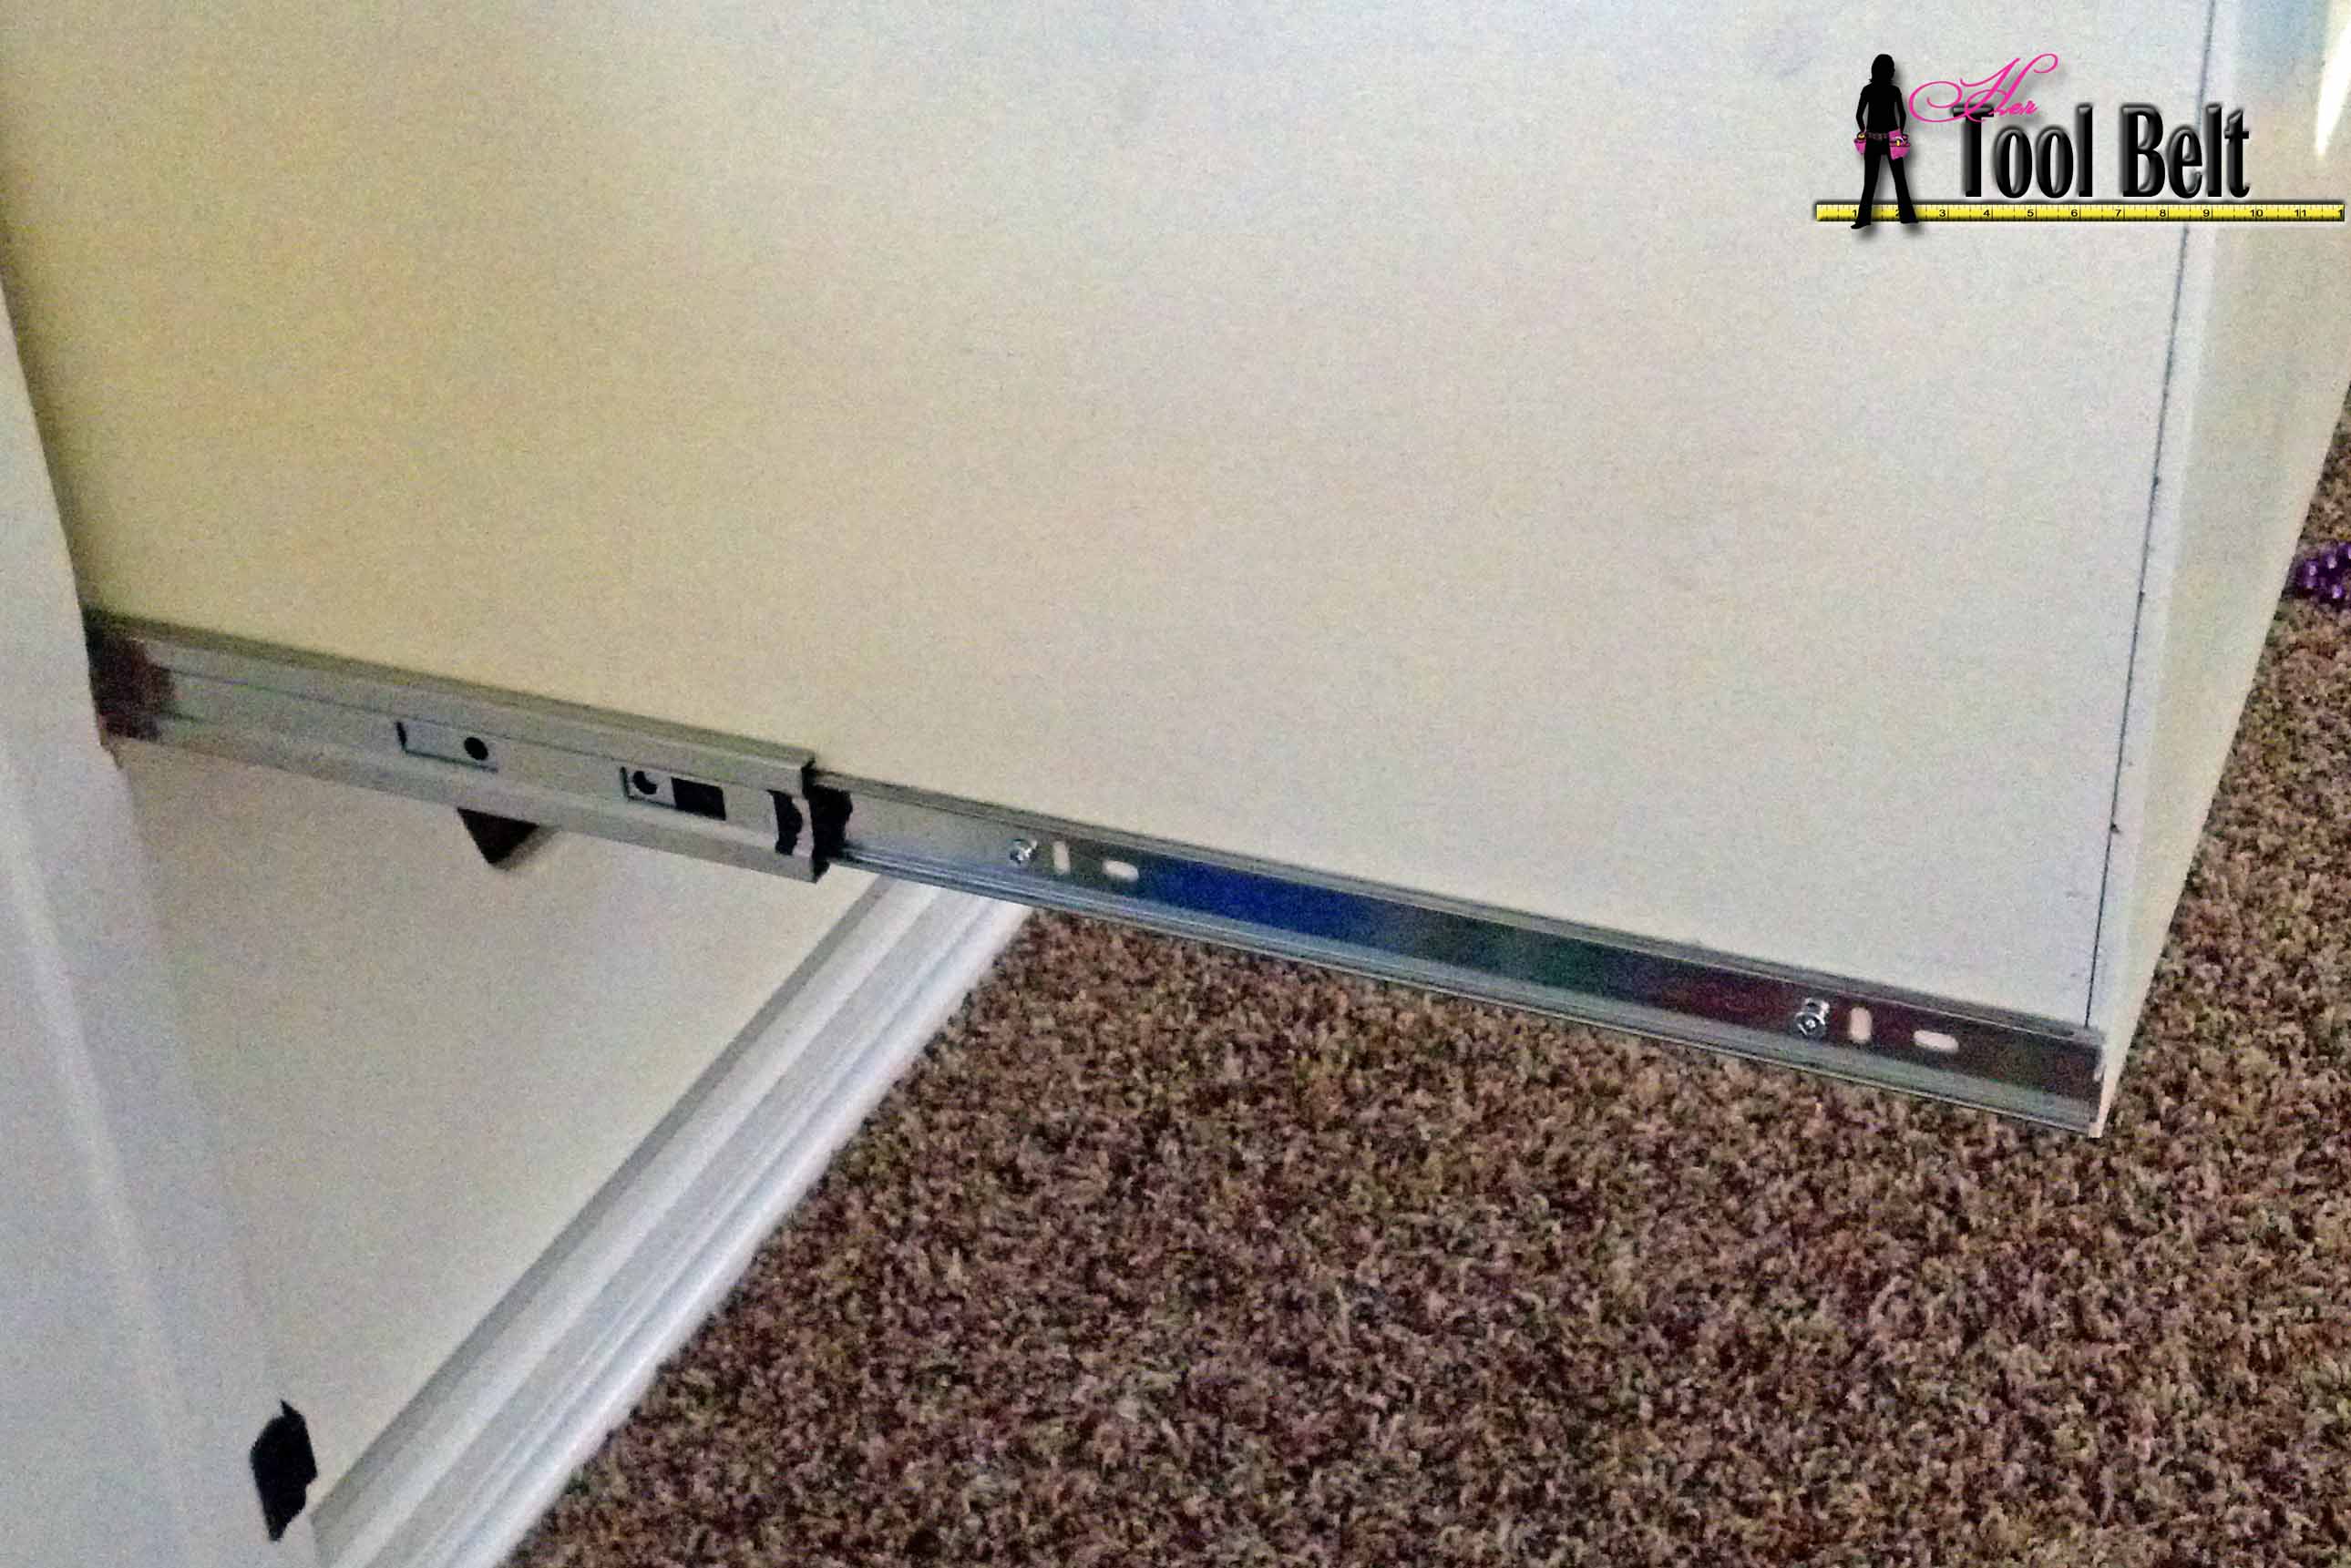 I like to use ball bearing Full Extension drawer slides, they are rated for around 100 lbs. For this cabinet I used 22″ full extension slides available at Home Depot.
Separate the drawer slides and mount the non-bearing pieces along the bottom of the drawer sides with screws. Make sure that the drawer slides on each side of the drawer will be parallel. If they are crooked, your drawers will not function properly.
Mount the bearing side of the drawer slides on the rail supports in the cabinet. Make sure that the drawer slides on each side of the drawer will be parallel. If they are crooked, your drawers will not function properly.
We are done with the cabinets, except for the doors which we will tackle a little later.
Happy Building! I hope you enjoy building this media center plan.
Click for plans to the other components of the media center:
[…] cabinet & drawers […]