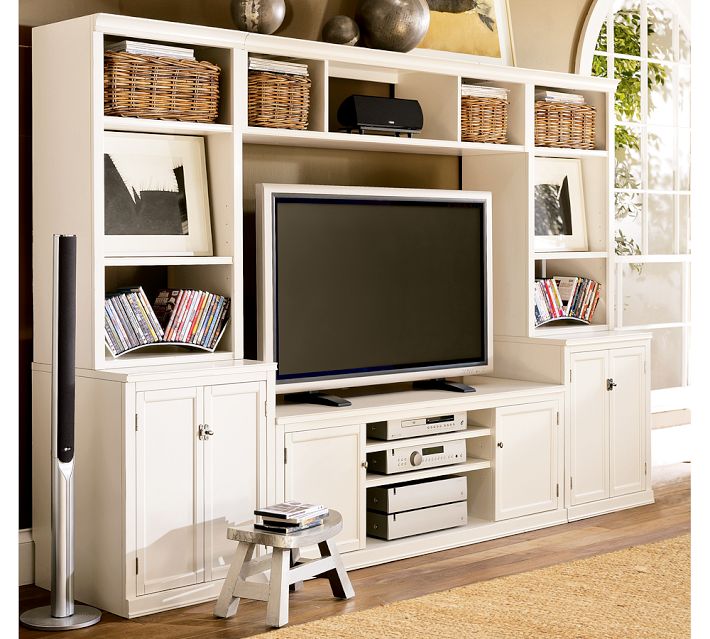
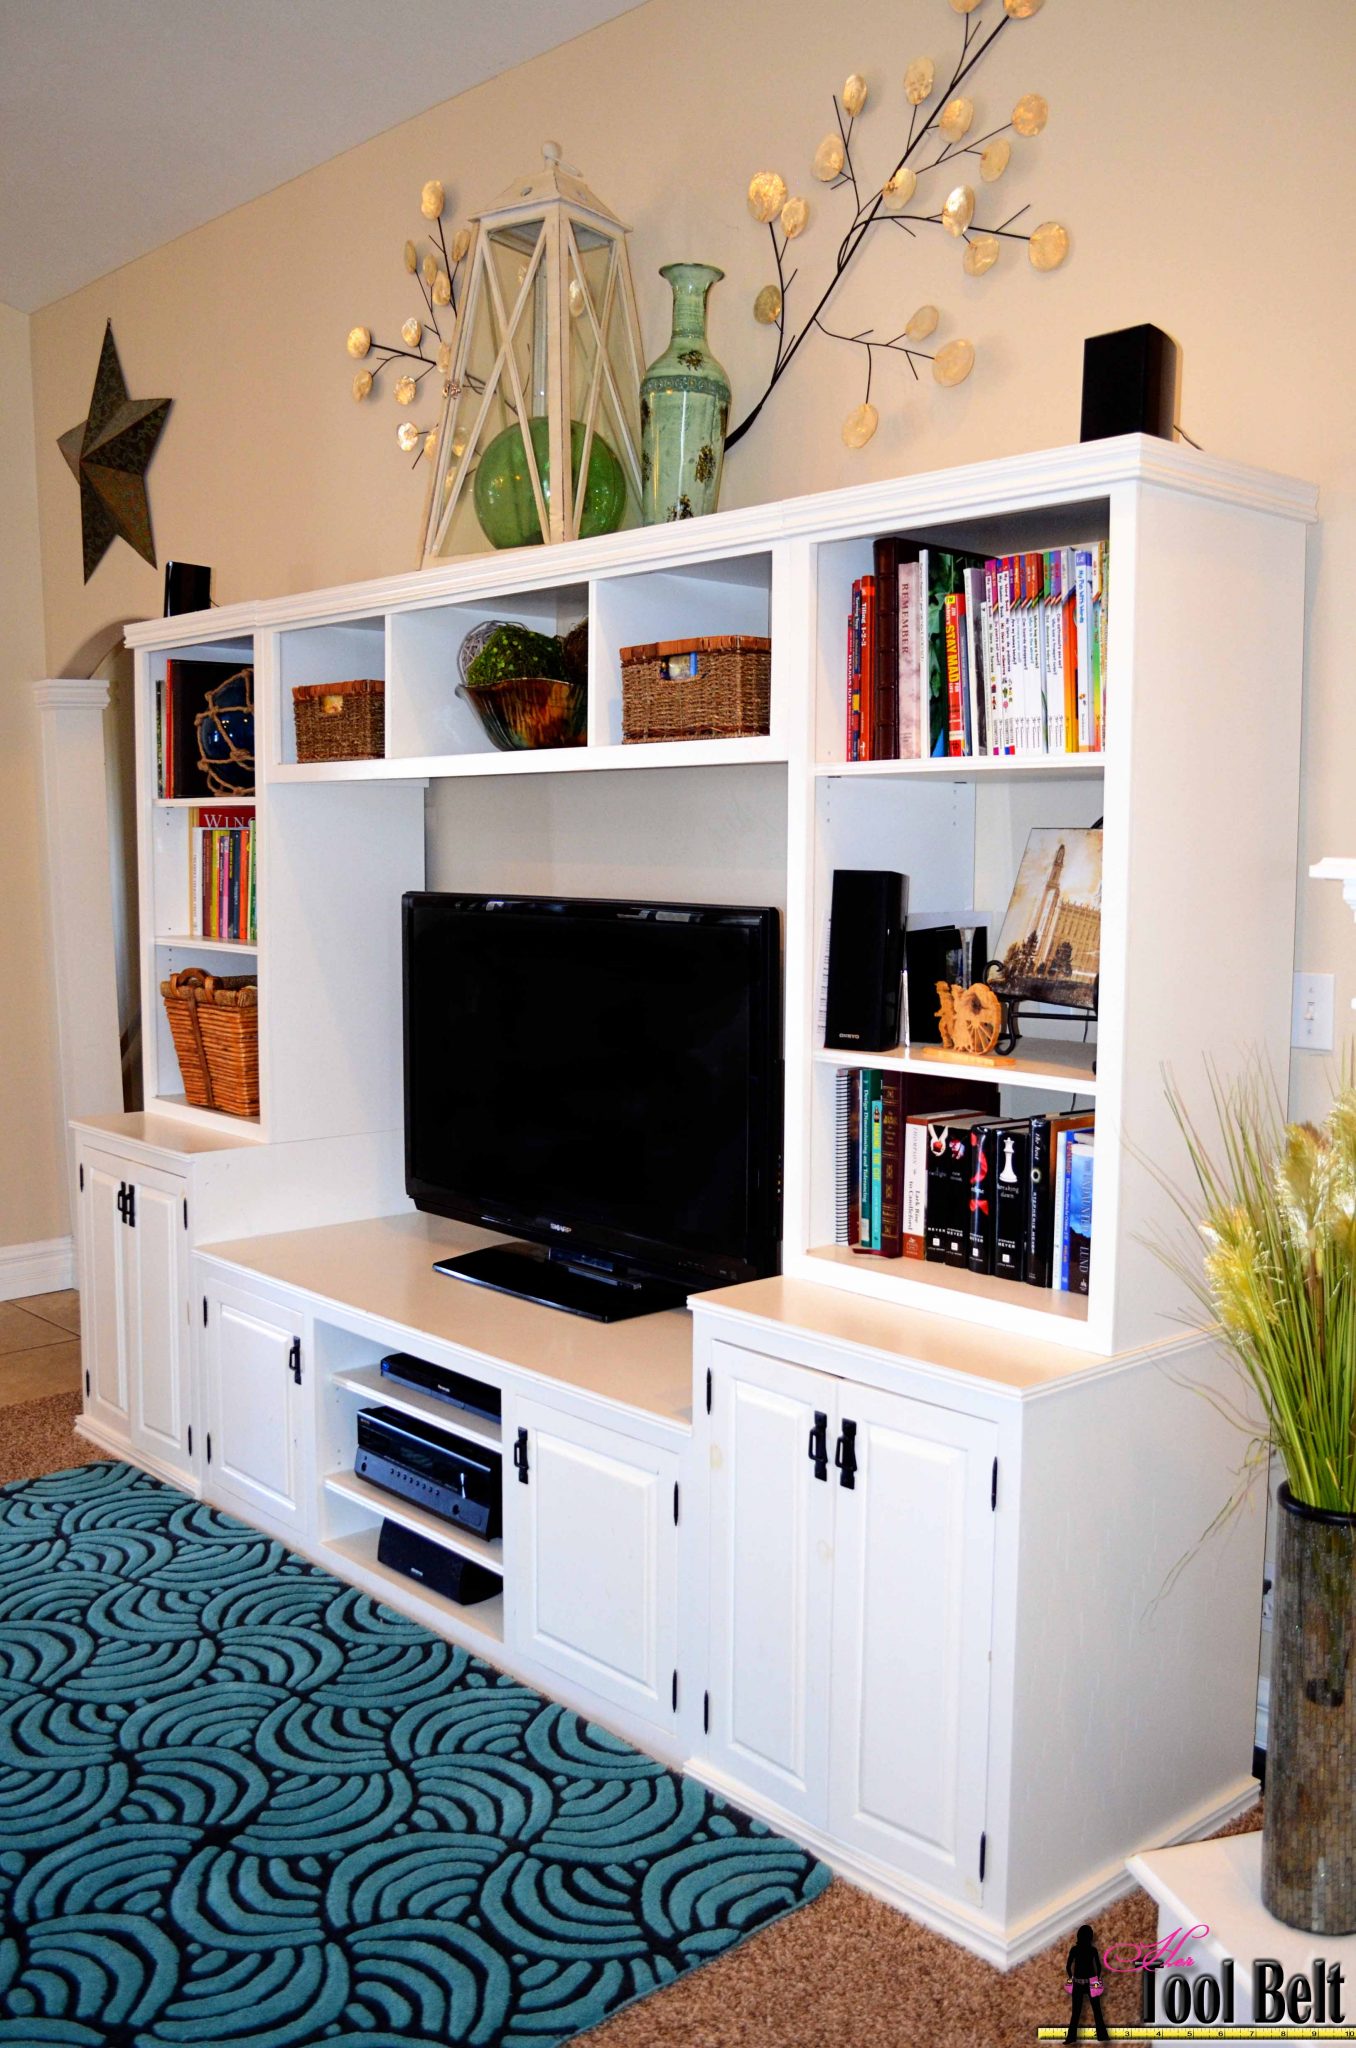
I built this entertainment center a few years ago, it was so long ago that it was before the days of Pinterest. Do you remember those days? Dog-eared magazines, bookmarked websites and real physical folders with ideas in them, holy cow what did we ever do before pinterest? 🙂 One day I was perusing through my Pottery Barn magazine and saw this beautiful media center. I do love Pottery Barn and buy things from them, but I can’t stomach their furniture prices, because I know I can make it for less. This media center was listed for $2799, and it cost me approximately $300 to build it myself.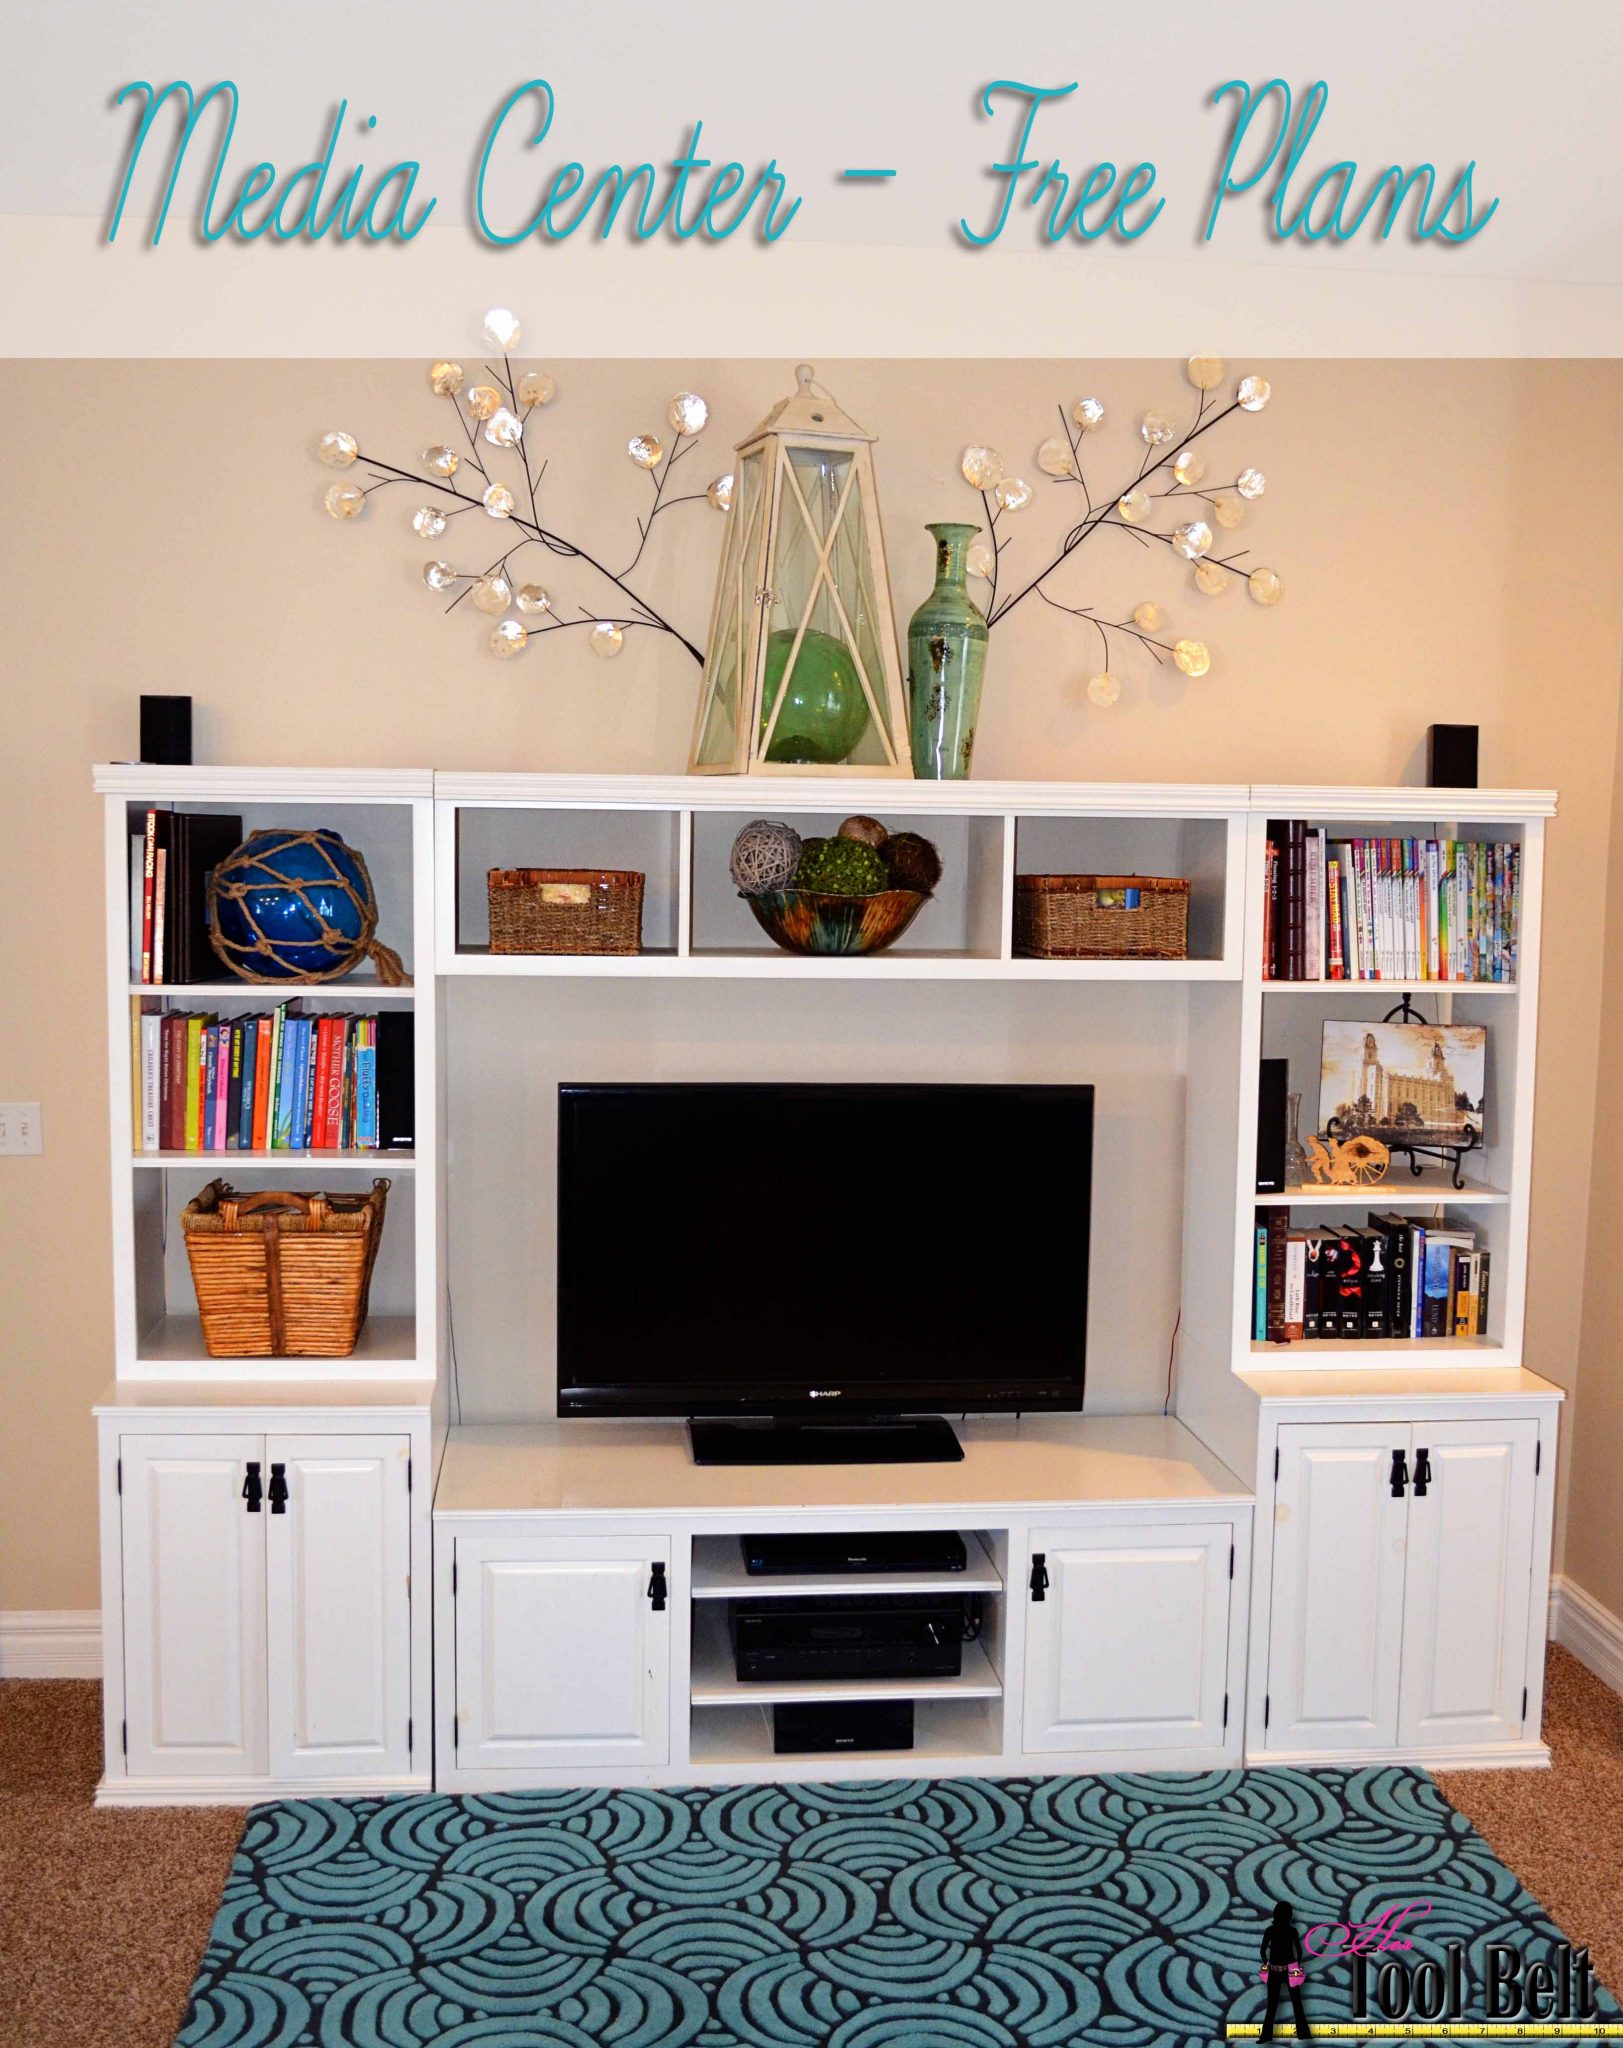
A look at the inspiration.
I was in major need of an entertainment center and toy storage. I had this super nice neighbor that was out of the young kid toy stage and gave me all of her awesome old toys. My little boy was in heaven…and I had a major storage issue.
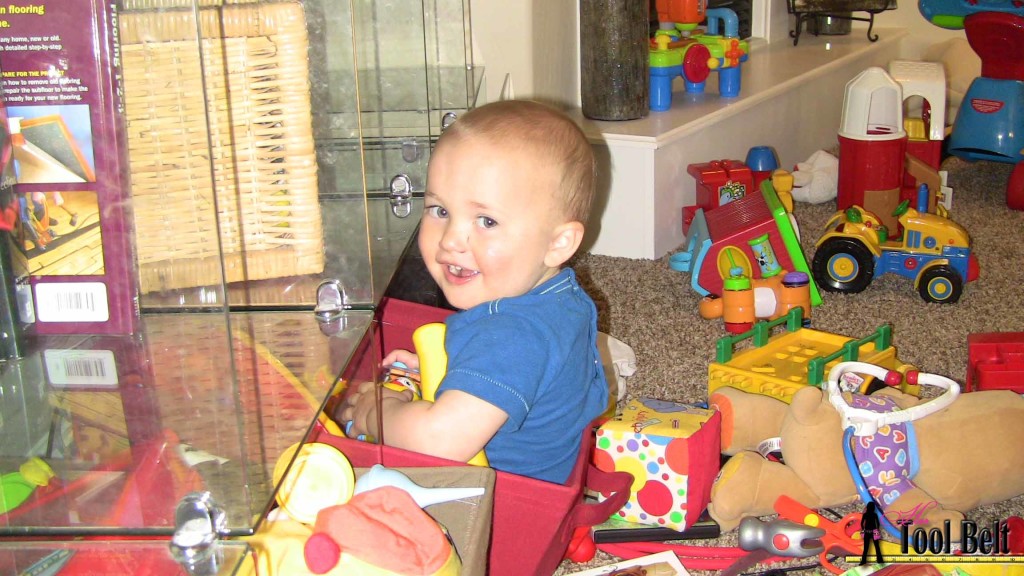
The solution that I came up with was to add 2 deep drawers in each side cabinet. I love it and so do the kids.

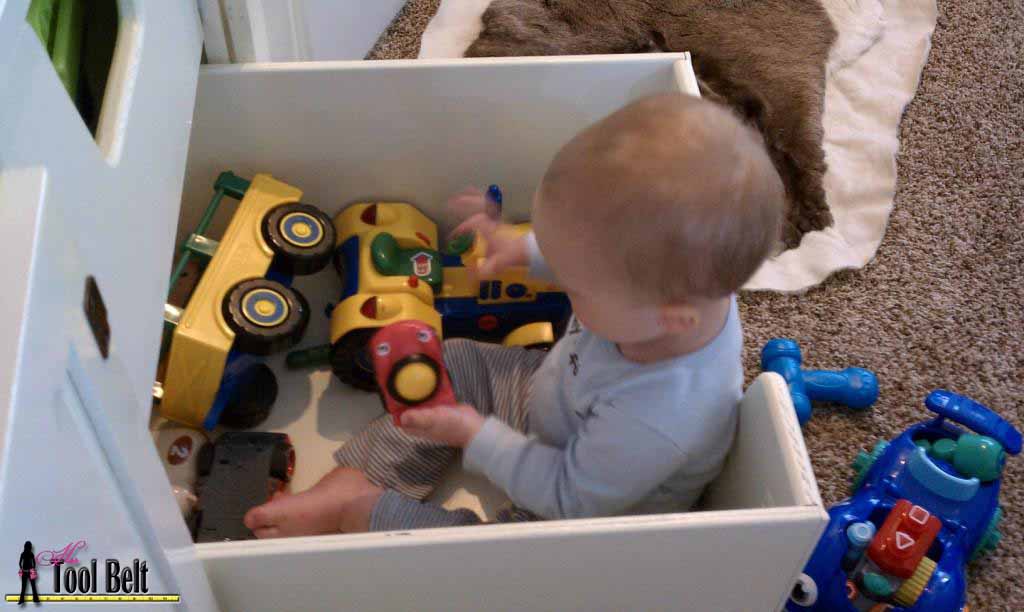

Even years later, baby sister loves to play in the drawers.
I’m going to break down the media center build into separate posts, so it isn’t one ridiculously long post. First up is the TV console. I painted mine, so I used cheaper wood to build it. The solid wood is pine and the plywood is birch all from Home Depot. The sap in the pine has changed the white paint color, so if building this again, I would fork over a few more bucks and use poplar. If you’re thinking about staining it, I would go with something like alder. Alder stains very well, the birch plywood also stains very well. I also like using maple and cherry. Cherry is beautiful and more pricey, of course.
Media Center: TV Console
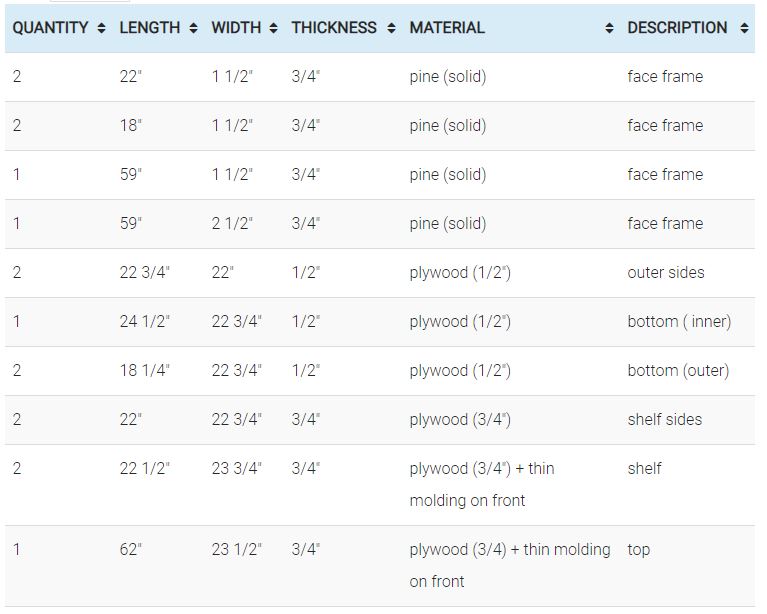
Face Frame
Cut all of the solid wood pieces according to the cut list. Mark the placement of the two inner stiles (vertical pieces) on the top and bottom long pieces. Then make the marks for how you are going to join each piece together according to the diagram above. For face frame joints, I use a biscuit cutter. Other common methods to join are 2 dowels (with a doweling jig) or mortise and tenon. You could also do a kreg pocket jig, however you need to be careful when using screws and dado grooves. You don’t want to hit a screw with your saw or router. You could install the screws after you dado cut the boards.
Apply glue to each joint and clamp the face frame together. Check to make sure your face frame and inner rectangles are square. An easy way to check that is measuring corner to corner & the other corner to corner, they should measure the same if your rectangles/squares are square. Allow the glue to dry.
Once the glue is sufficiently dry, the next step is dado cuts. If your face frame has a better side, keep that for the front. The dado cut is a groove we cut out to fit the plywood sides onto the face frame, it makes a strong joint. Each dado is going to be 1/4″ deep. Make a dado cut 1/2″ wide for the outer sides of the TV console, flush with the outside of the face frame. Make a dado cut 1/2″ wide at 2″ to 2 1/2″ from the bottom for the bottom shelf of the media center. Make two 3/4″ wide dado cuts flush with the inner sides of the center rectangle, see diagram.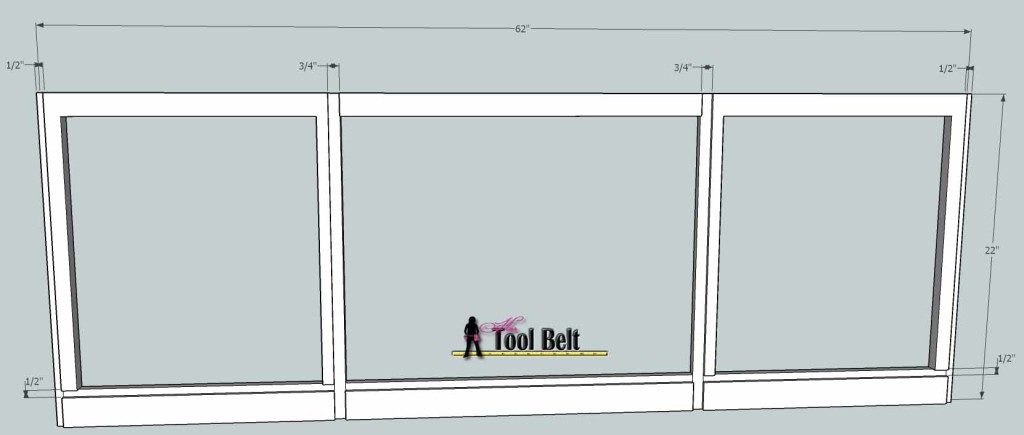
1/2″ plywood
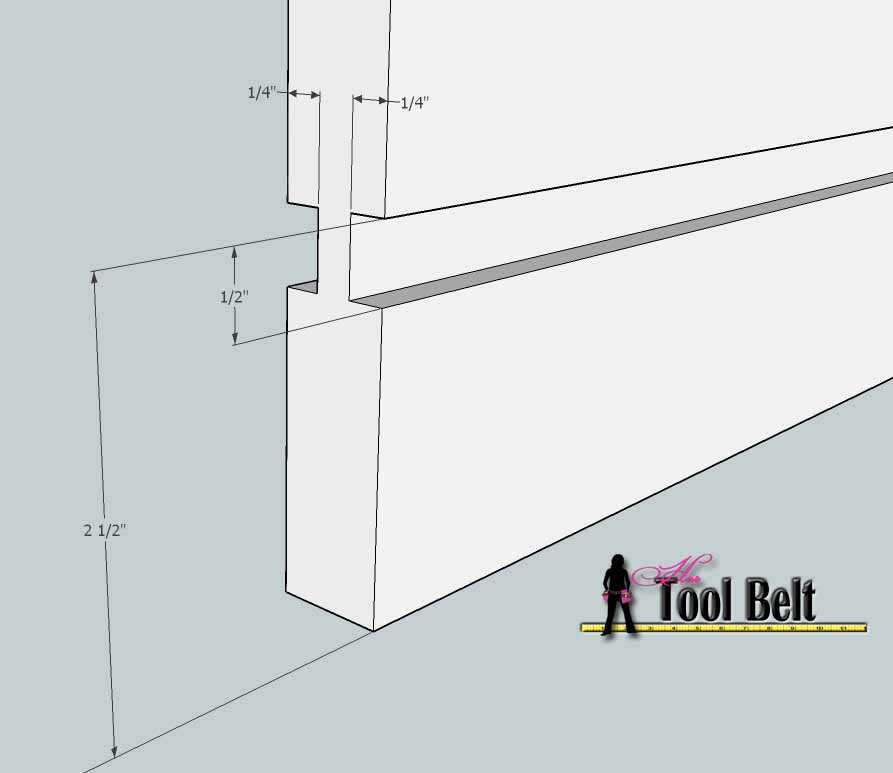
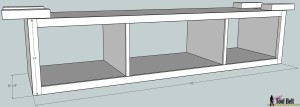
Cut 2 pieces that are 22 3/4″ wide x 22″ tall x 1/2″ thick. Cut a dado 1/2″ wide x 1/4″ deep between 2″ and 2 1/2″ from the bottom. These are the 2 outer sides of the console.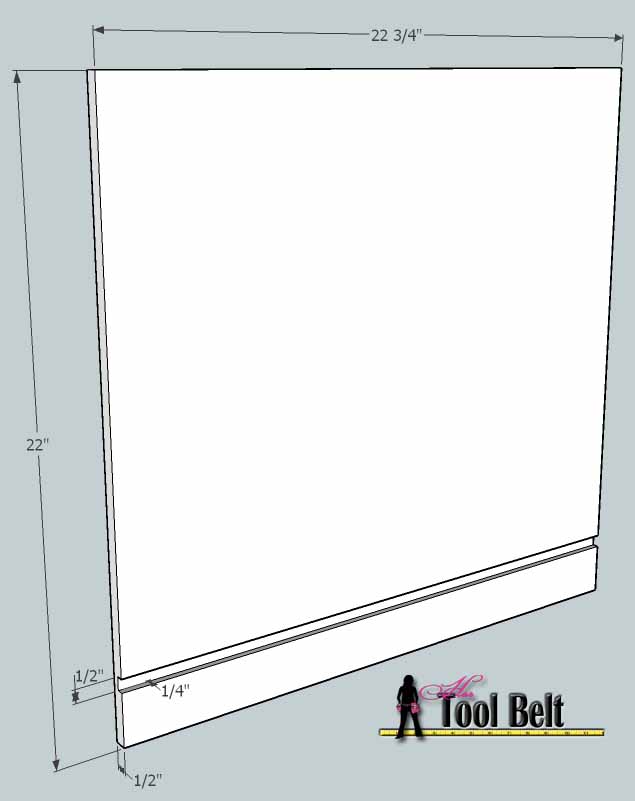
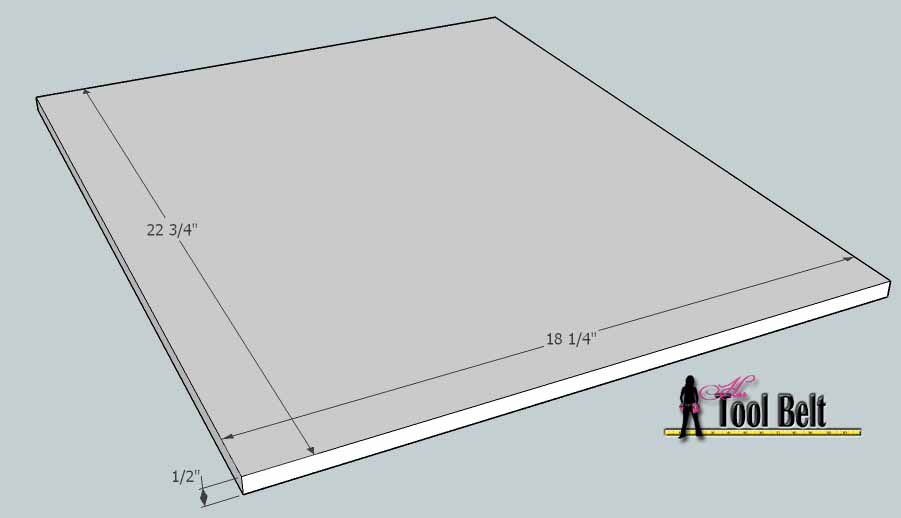
Cut 2 pieces that are 18 1/4″ wide x 22 3/4″ long x 1/2″ thick. These are the bottom pieces for the outer 2 cabinet compartments.
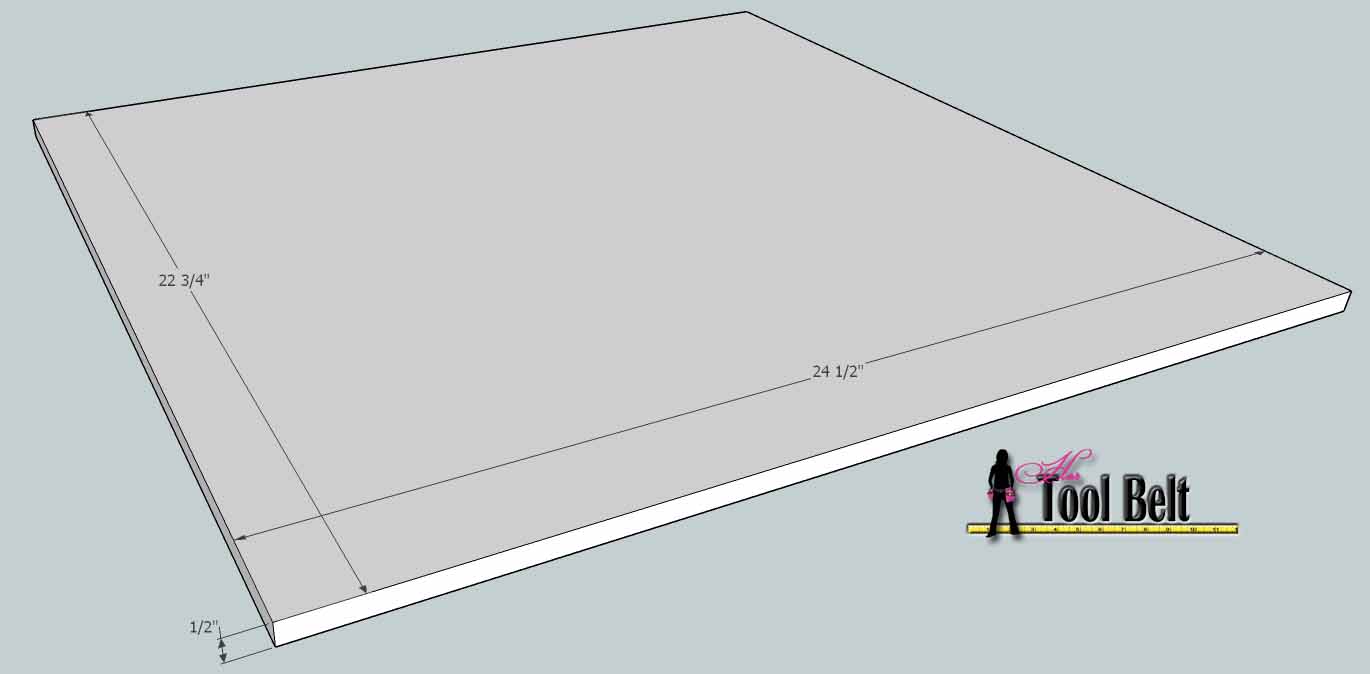
Cut a piece that is 24 1/2″ wide x 22 3/4″ long x 1/2″ deep. This is the bottom for the center shelf area.
3/4″ plywood
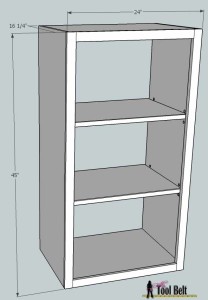
Cut 2 pieces that are 22 3/4″ wide x 22″ long x 3/4″ thick. Make a dado that is 1/2″ wide and 1/4″ deep between 2″ and 2 1/2″ on both sides.
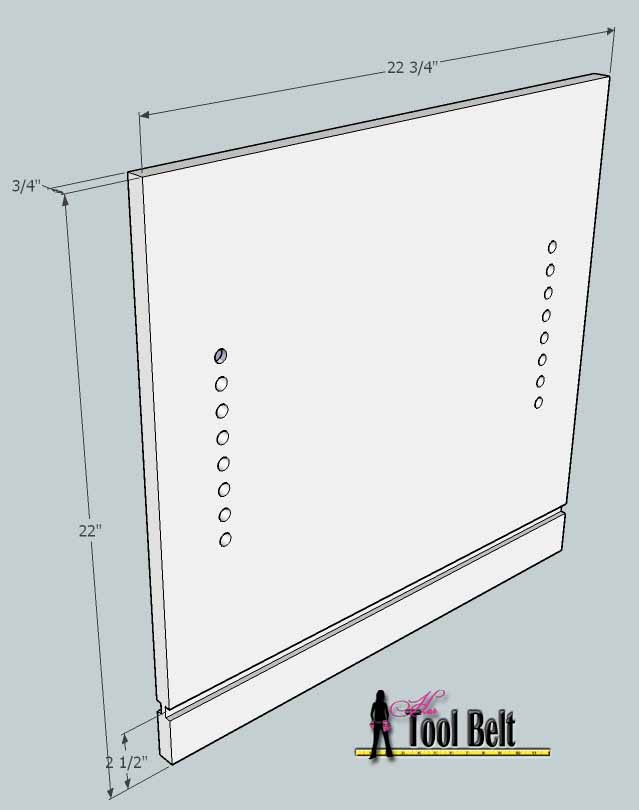
You can make shelf adjustment holes now or later. The average shelf peg is 1/4″ diameter and 1/2″ long, I’d put the series of holes 2-3″ in from the side. Remember to do the mirror image on the other piece.
Cut 2 pieces that are 22 1/2″ wide x 23 3/4″ long x 3/4′ thick. You’ll want to add a thin piece of molding or solid wood to the front, so you have a nice finished edge to show.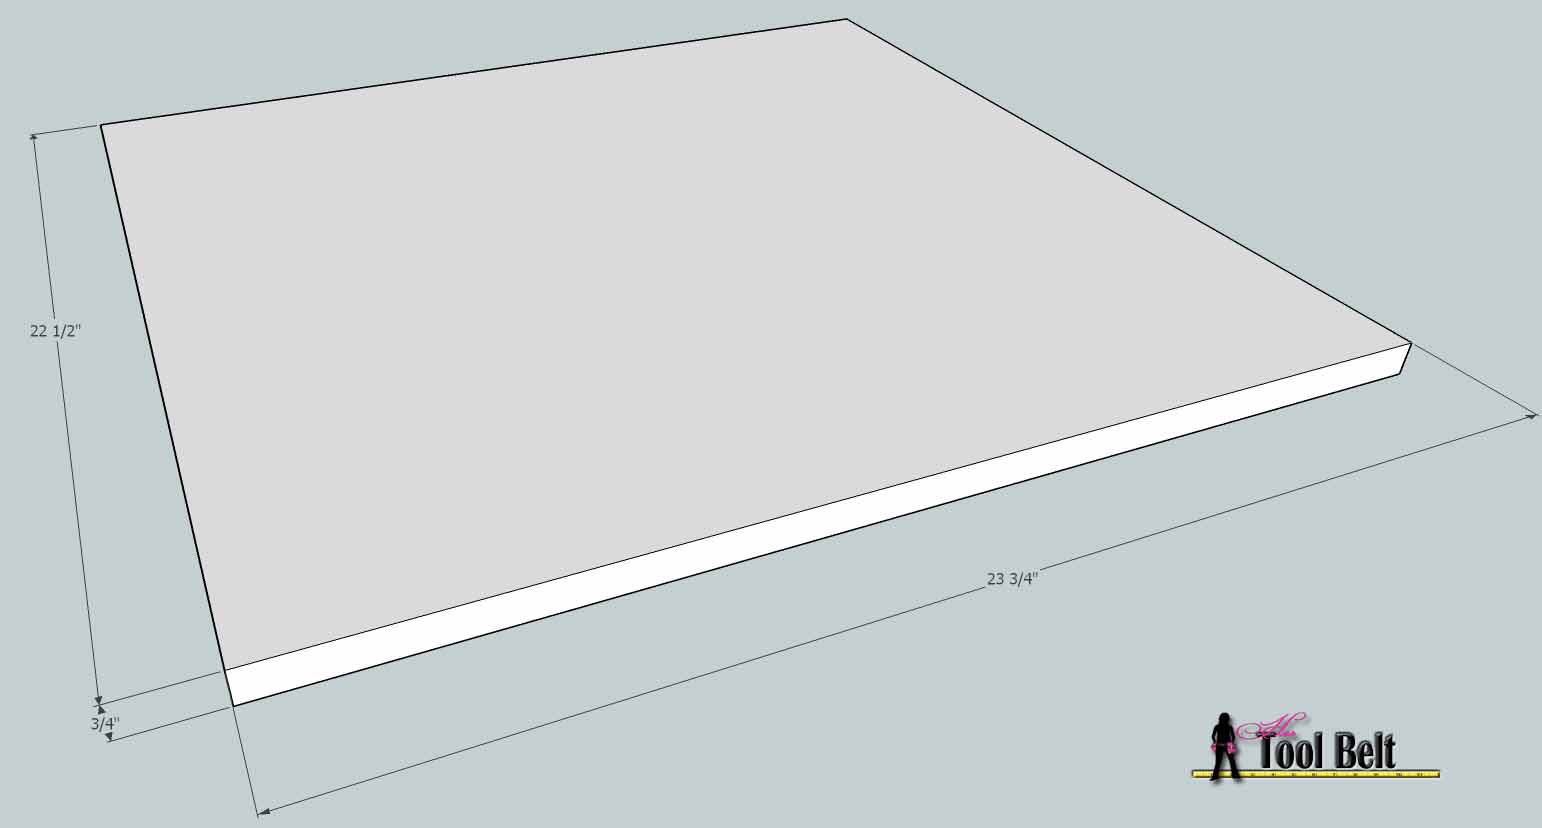
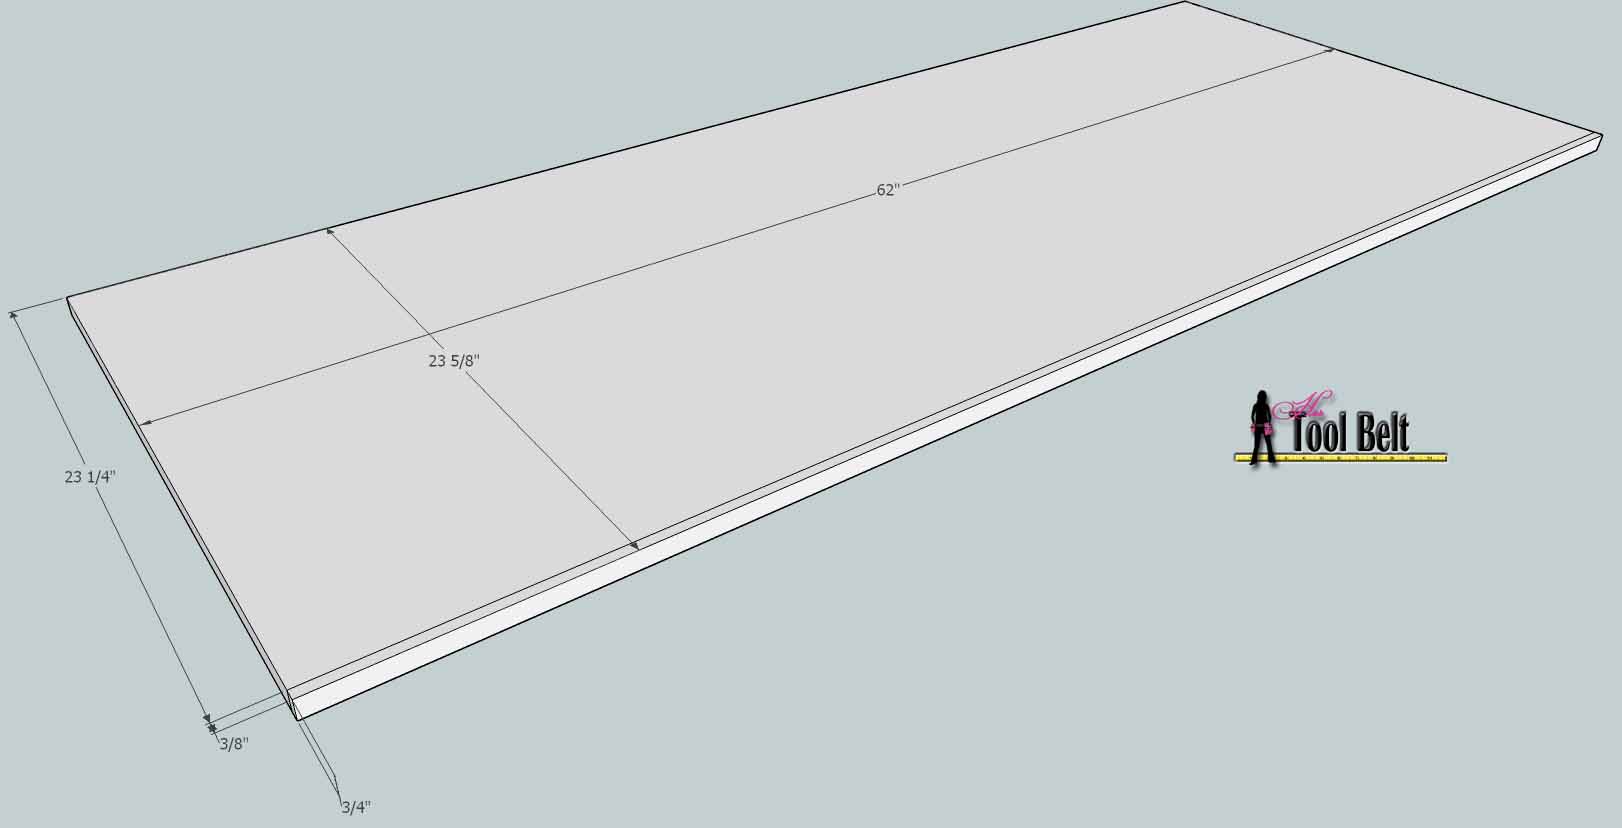
Cut a piece that is 62″ long x 23 1/4″ wide x 3/4″ thick. You’ll want to add a thin piece of molding or solid wood to the front, so you have a nice finished edge to show.
Assembly
When I assemble cabinets, I like to glue the joints and put them together then use a 1″ – 1 1/4″ brad nail or finish nail to go through the plywood into the face frame where we dado’d. Sometimes the back of the cabinet will have a little extra play, so I’ll cut spacers to keep the back dimensions the same as the front. I also use clamps to hold it together while the glue dries. On this first assembly do not assemble the top.
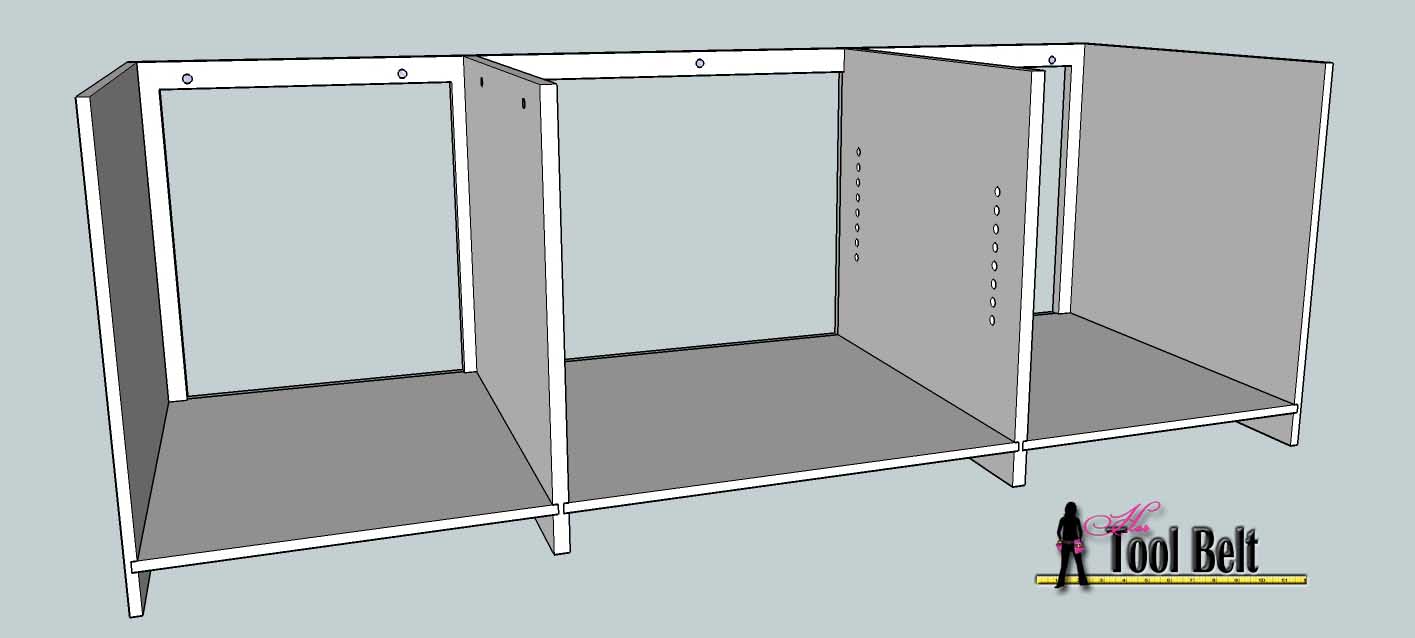 Assemble the TV console applying glue in the joints, clamp together and allow to dry. Add nails as necessary.
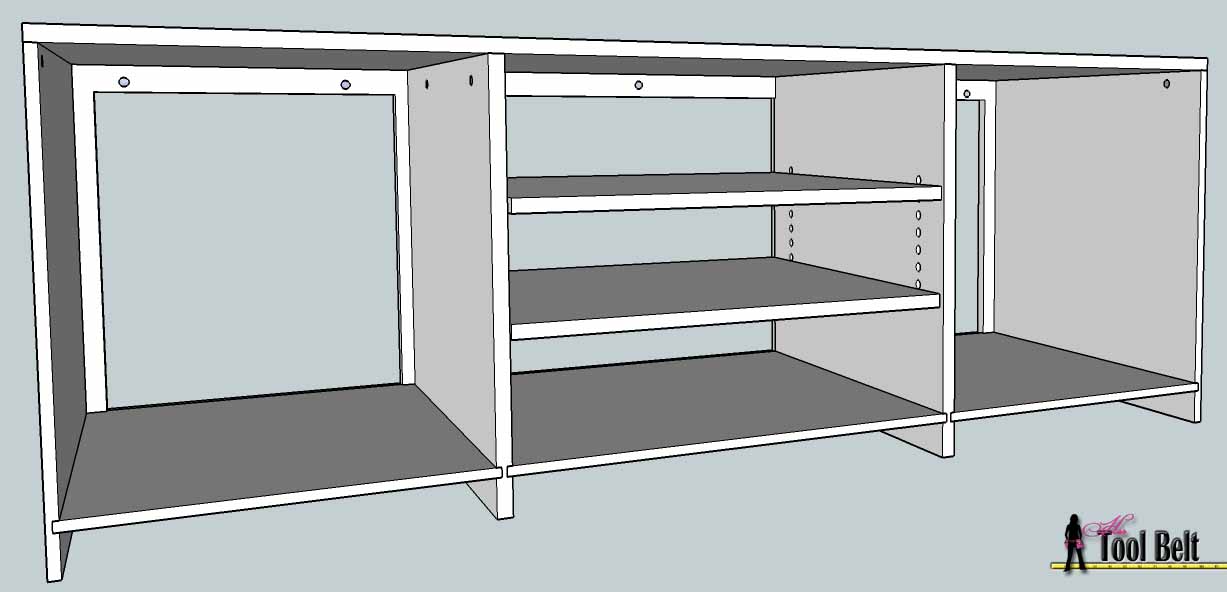
Once the glue has dried, add kreg pocket joints that go through the top inside face frame and some of the ply wood to secure the top into place. For the 3/4″ plywood pocket holes, make those on the side of the plywood that will be hidden with the door.
If you’d like, add a piece of molding along the front bottom. Cut the molding piece to be flush with the side of the cabinet and place it flush with the bottom.
Finish Work
Next fill any holes or gaps with filler. If you are painting, go ahead and use spackle or joint compound (for your walls). If you are staining, use the proper wood filler. Let the filler dry then sand the tv console, make sure to get any excess glue and filler smooth. End sanding your project with 120 -150 grit sand paper. Remove excess dust. If painting, prime the tv console and allow to dry. If staining, use wood preconditioner and stain as you like.
Once the primer is dry, apply the paint and let dry.
For the finish coat, I made a horrible mistake and put regular polyurethane on the white paint…and it turned yellowish. It dries with an amber hue. Huge bummer. I had to sand it all down and use what I should have in the first place…polycrylic it dries crystal clear.
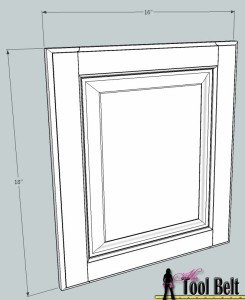
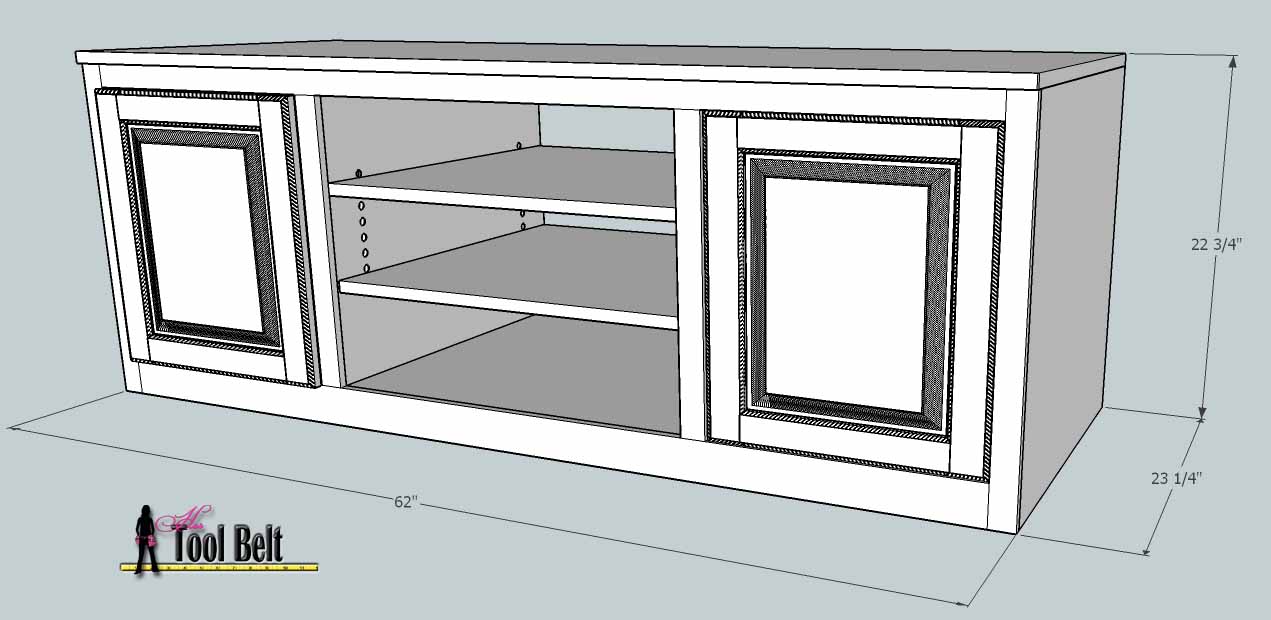 We are done with the TV console, except for the doors which we will tackle a little later.
Happy Building! I hope you enjoy building this media center plan.
Click for plans to the other components of the media center:

Pin for later:
Linked to: DIY’ers
Amazing work. Thank you for sharing it with us. 🙂
Great website and plans! Thanks for sharing. Could you do a tutorial on how to use a router and its table. I have one but I just can’t figure it out on my own.
You bet, what brand is your router table and router?
tooo freakin’ cute!! and so affordable too. well done! I am preparing a round up of 12 diy entertainment center and included your project in my post
I just finished building this entertainment center! It took me about 2 months of my evening and weekends to complete. Part of that was I have a family and for some reason they expect some of my free time. Anyway, it turned out great! I wish there was a way to share a picture of it. It cost way more than $300 to build, mostly because wood costs a lot right now and we went with high quality Sherwin Williams Emerald Urethane Trim Enamel paint which was $70 a gallon. I also didn’t have a lot of the tools I needed so I bought those. Wood was about $600, paint and primer $300, tools for the job including a router, router table, and paint sprayer $500. So overall it cost about $1,500! But now I have everything I need to build anything so I’m excited about that. The plans were great except for you called out 1/2″ plywood on the sides of the cabinets but from your pictures it’s clear you used 3/4″. This became important when my drawer slide spacers ended up not being thick enough for the slides to clear the face frame. I had to add another piece of plywood onto the spacer and then sand them down to be the right thickness for the drawers. Other than that everything went great. Thanks!
Just checking this out. Plans look pretty good. Good to see the dimensions of all the pieces but I didn’t see a bill (List) of materials to buy. Did I miss something?