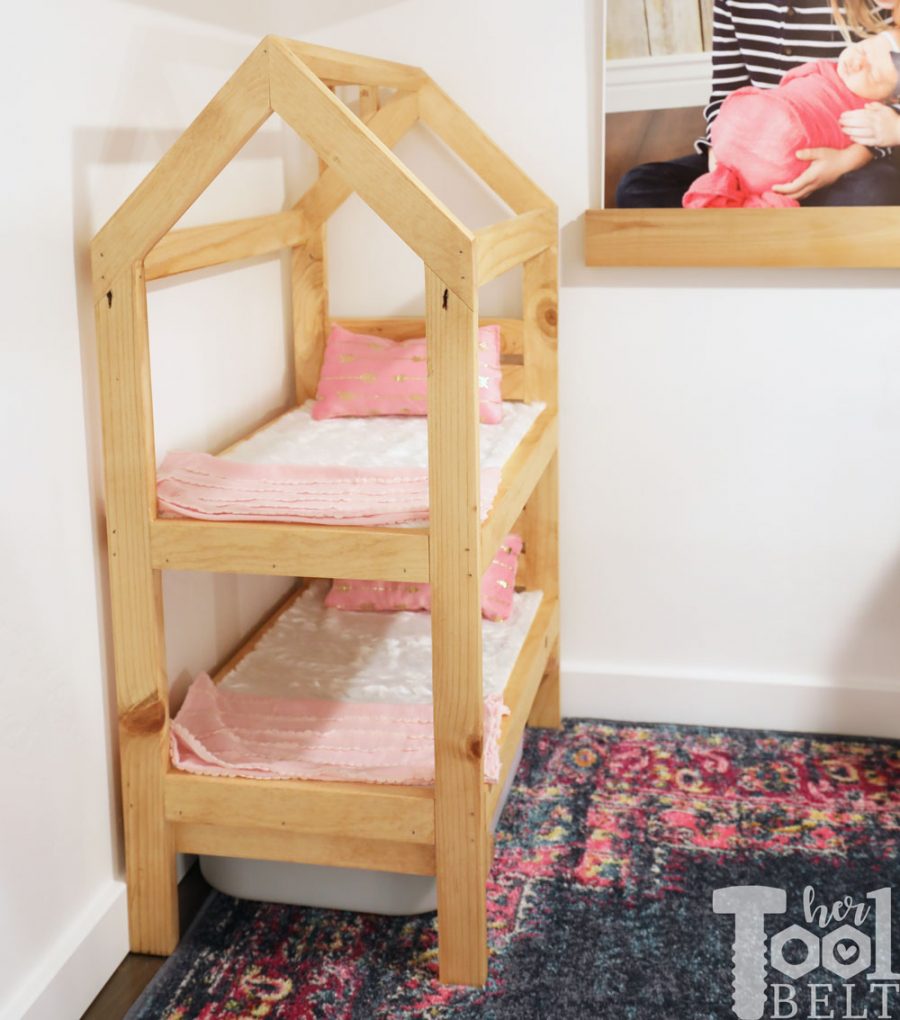
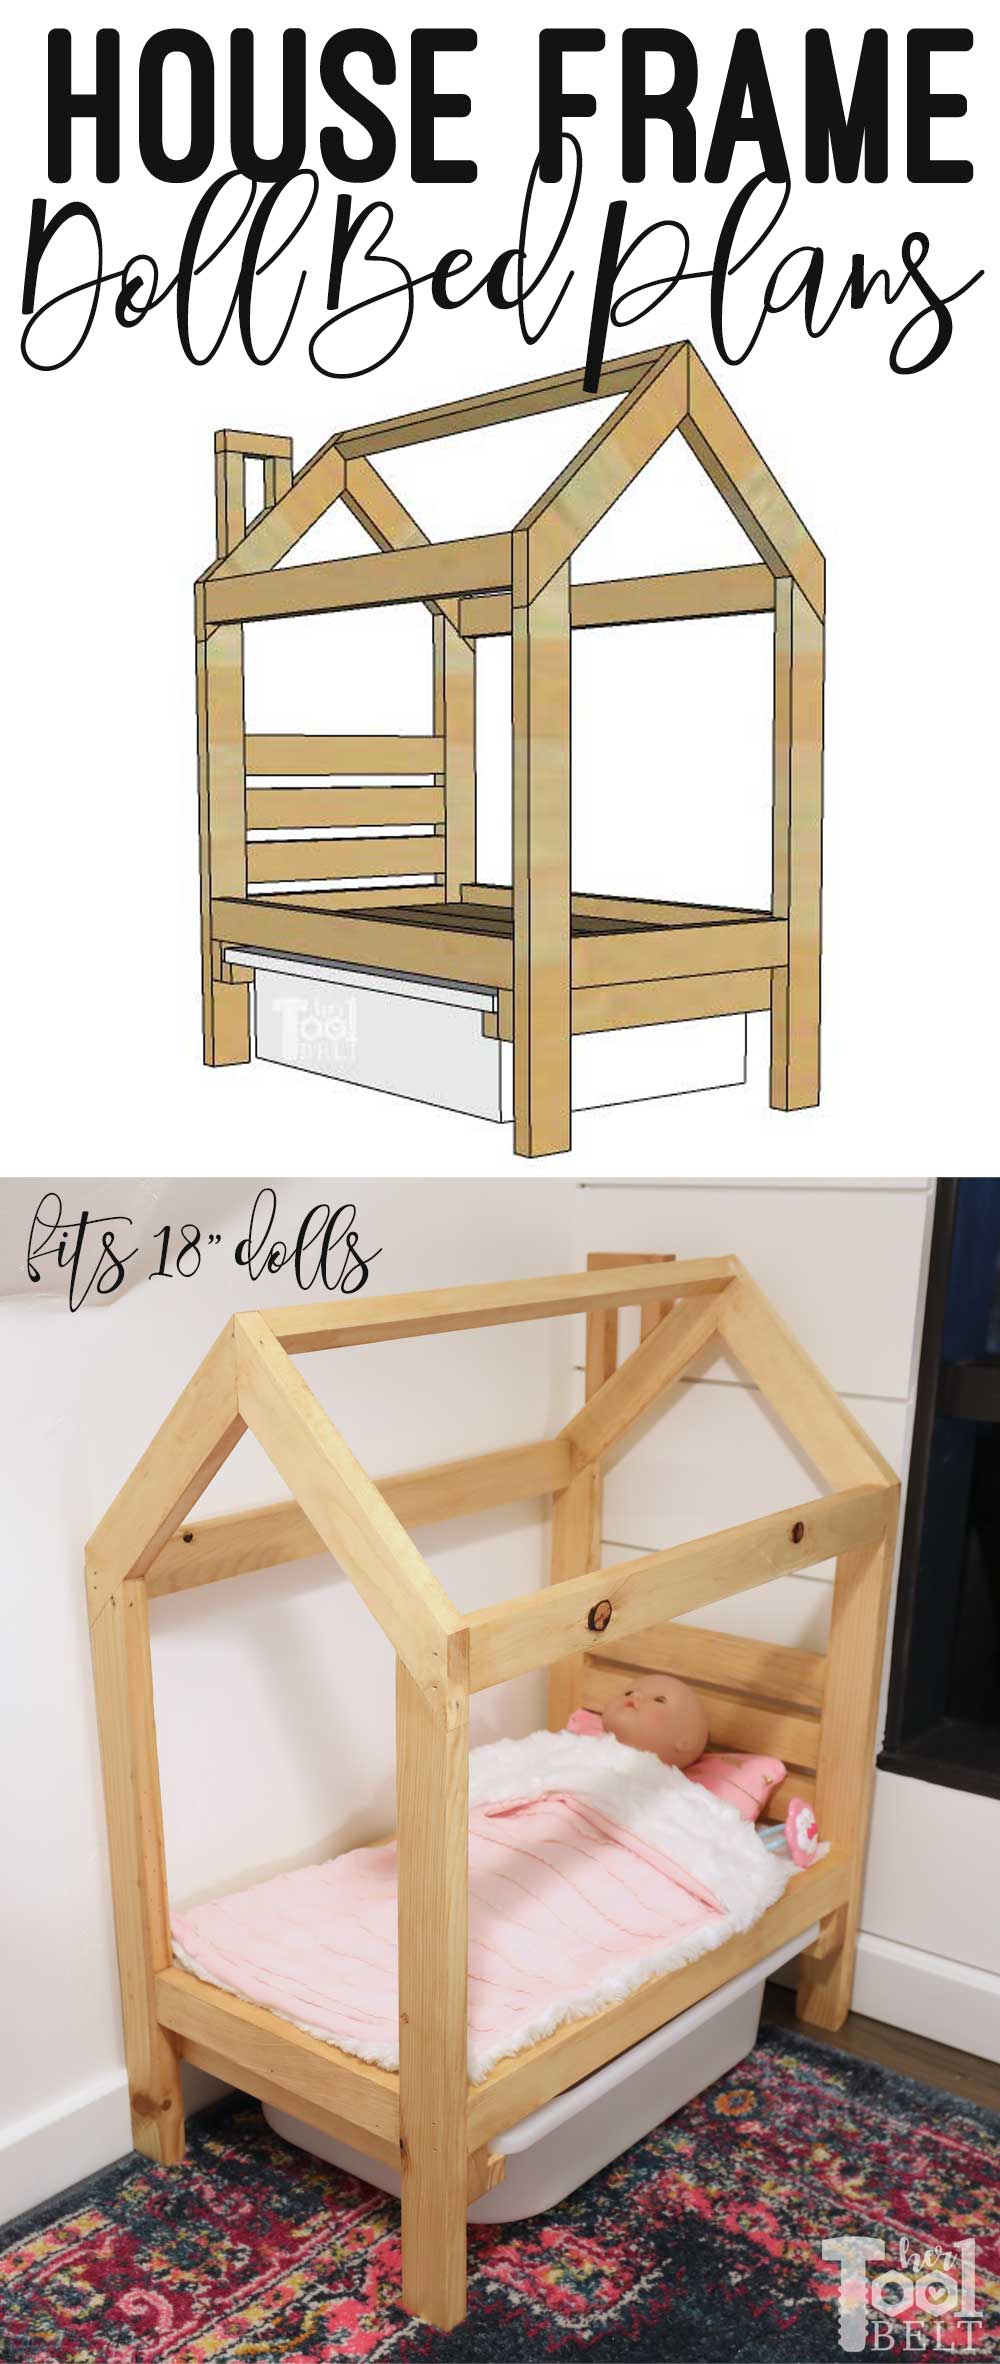
I love cute mini house projects. This house frame doll bed is a perfect children’s gift idea and a great way to use up scrap wood! When I made the kid’s a tinyhouse playhouse in the basement, I knew I had to make a doll bed and doll bunk bed that looked like a little house! It was only fitting.
House frame doll bed that fits 18″ dolls.
When it comes to dolls and stuffed animals, we are always in need of more storage. So I added little supports under the bed for a pull out IKEA Trofast bin ($3). It’s a totally optional feature.
If you want the House Frame Bunk Bed plans head –> here <–
This post contains some affiliate links for your convenience. Click here to read my full disclosure policy.
How to Build a House Frame Doll Bed
(fits 18″ dolls)
Materials
- 3 – 1 x 2 x 8′ boards (actual dimensions 3/4″ x 1 1/2″)
- 1 – 1 x 4 x 8′ boards (actual dimensions 3/4″ x 3 1/2″)
- 1×4’s can be substituted by a 10 1/2″ x 18 1/2″ plywood
- If you don’t have a way to rip down wood to 3/4″ x 3/4″ – you can buy 2 square dowels. 2 – 3/4″ x 3/4″ x 36″
- wood glue
- 1 1/4″ brad nails (or screws if you prefer)
- 2″ brad nails
- sandpaper
- finish – I used Varathane Golden Pecan and top coat
- 1/2″ foam – for the ‘mattress’ I used 1/2″ foam cut to 10 1/2″ x 18 1/2″ – optional
- fabric
- IKEA Trofast bin for storage – optional
Approximate price of lumber is – $7
Tools Used
 |
 |
 |
 |
 |
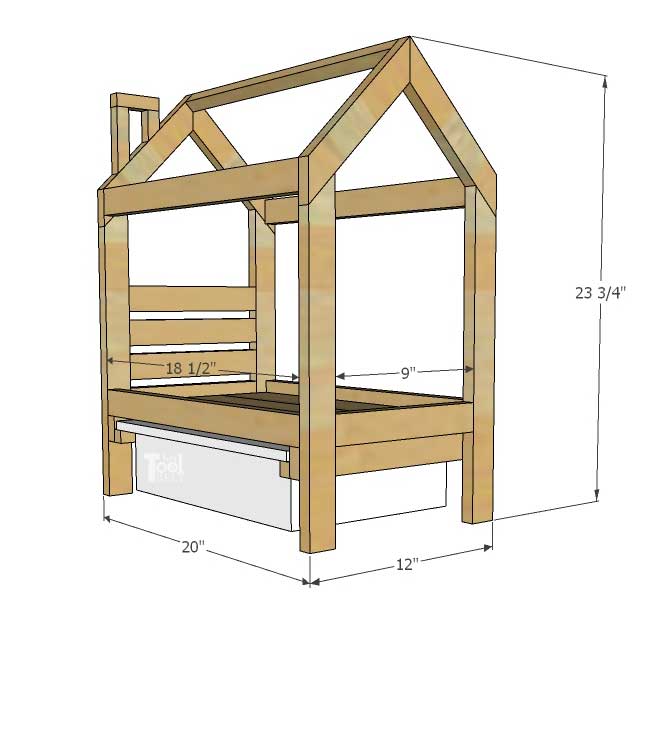
Cut List
- 4 – 3/4″ x 1 1/2″ x 17 1/8″ (one end cut at a 45 deg miter) (legs – 1×2)
- 4 – 3/4″ x 1 1/2″ x 18 1/2″ (rails – 1×2)
- 5 – 3/4″ x 1 1/2″ x 9″ (headboard/braces – 1×2)
- 4 – 3/4″ x 1 1/2″ x 8 1/2″ (both ends cut at a 45 deg miter) (roof – 1×2)
- 2 – 3/4″ x 1 1/2″ x 12″ (mattress support – 1×2)
- 2 – 3/4″ x 3/4″ x 12″ (storage support – 1×2 cut down to 3/4″ or square dowel) optional
- 1 – 3/4″ x 3/4″ x 3 7/8″ (one end cut at a 45 deg miter ) (chimney – 1×2 cut down to 3/4″ or square dowel) optional
- 1 – 3/4″ x 3/4″ x 1 7/8″ (one end cut at a 45 deg miter ) (chimney – 1×2 cut down to 3/4″ or square dowel) optional
- 1 – 3/4″ x 3/4″ x 2 3/4″ (chimney – 1×2 cut down to 3/4″ or square dowel) optional
- 1 – 3/4″ x 3/4″ x 18 1/2″ (roof rail – 1×2 cut down to 3/4″ or square dowel)
- 3 – 3/4″ x 3 1/2″ x 18 1/2″ (1×4) or 1 pieces of 10 1/2″ x 18 1/2″ plywood
Cut Diagram
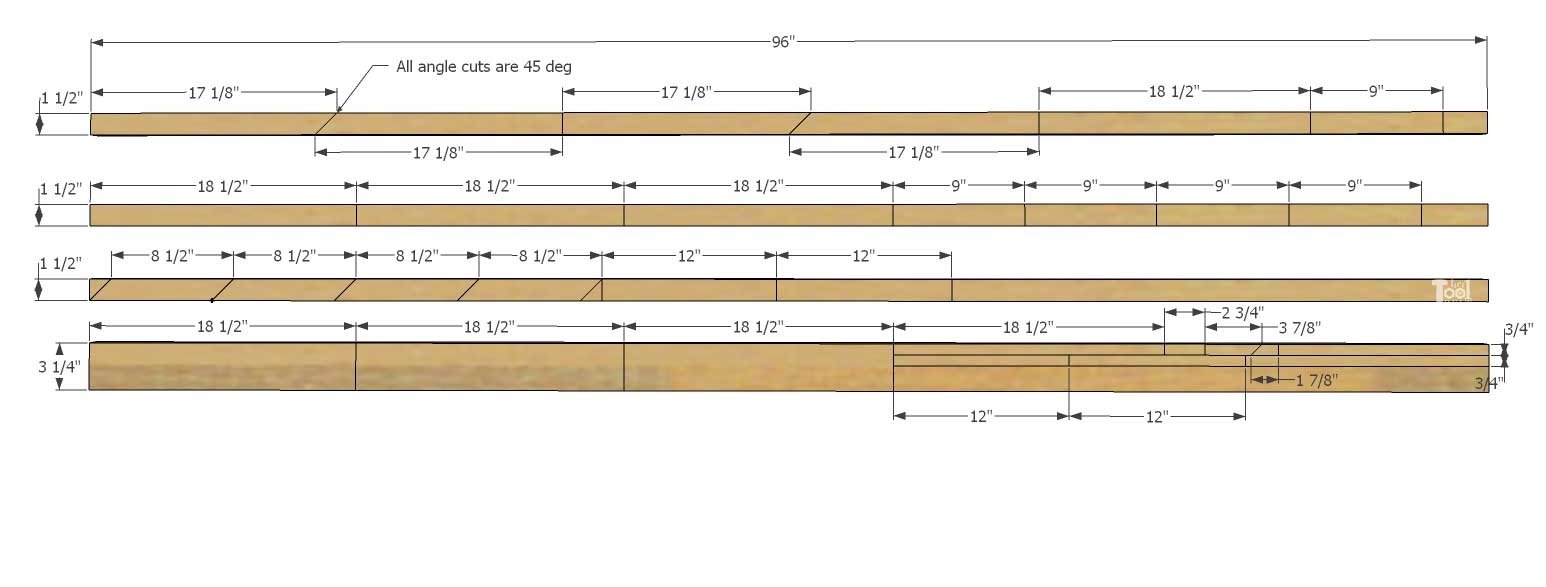
Make all of the cuts according to the cut list.
To assemble this house bed I used wood glue and brad nails, if you’re more comfortable with pocket holes, that’s great too.
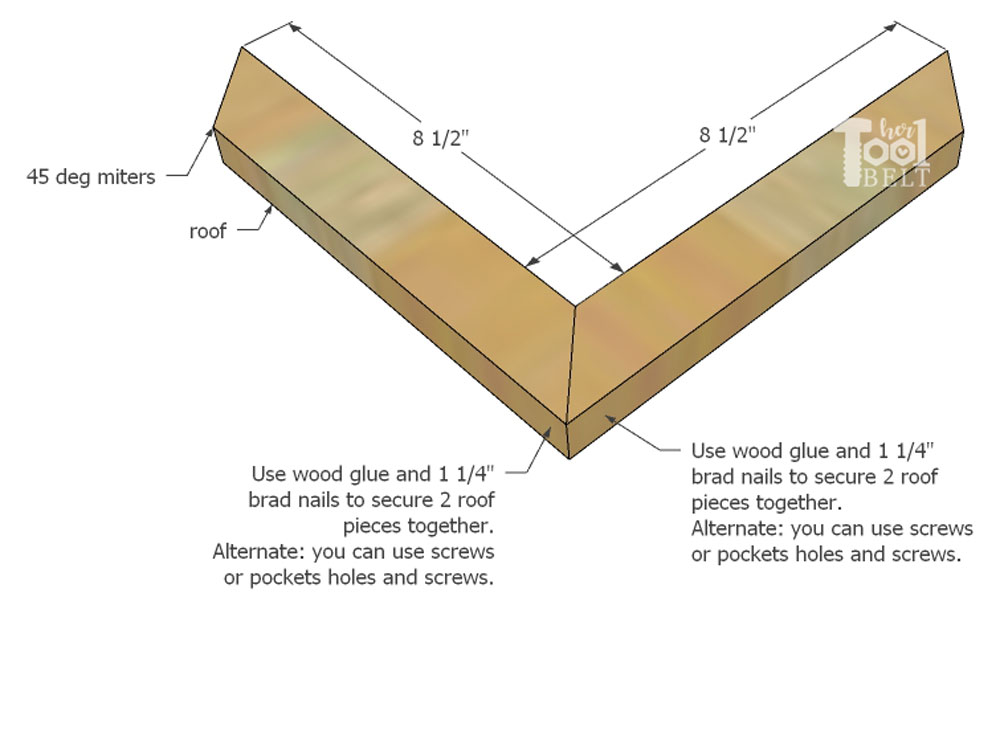
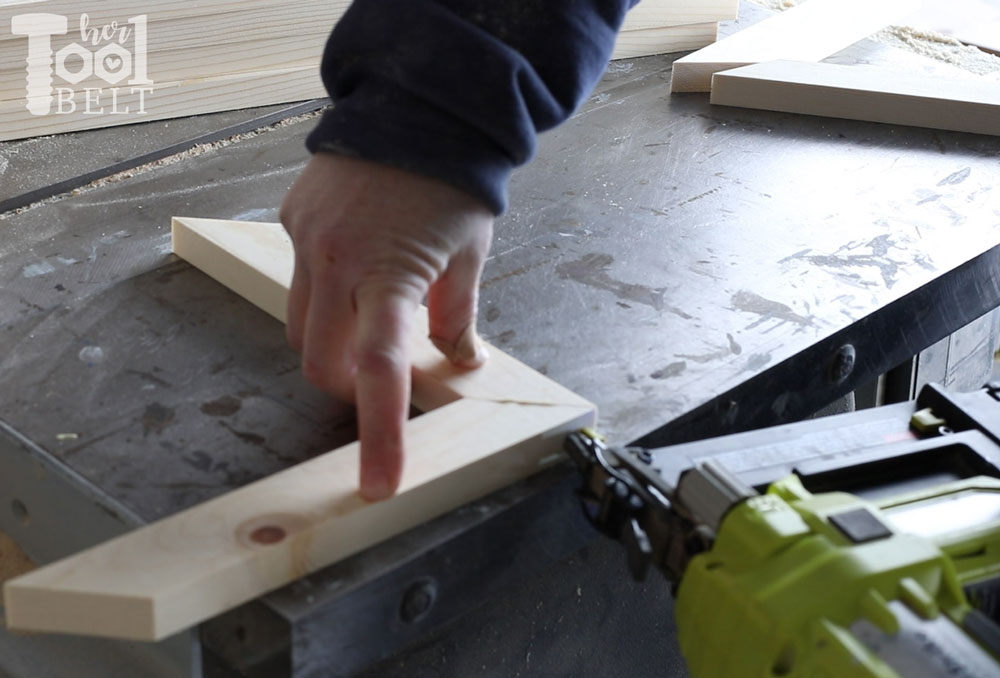
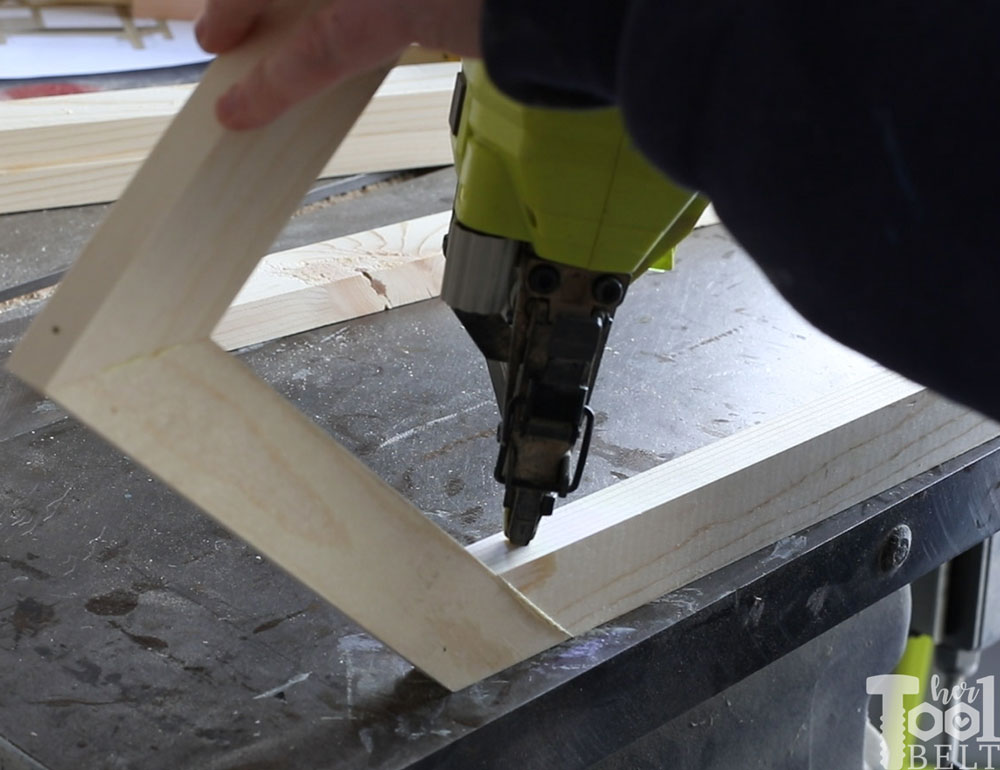
Assemble Roof
Use wood glue and 1 1/4″ brad nails to attach 2 – 8 1/2″ roof pieces together. Repeat for the other roof peak.
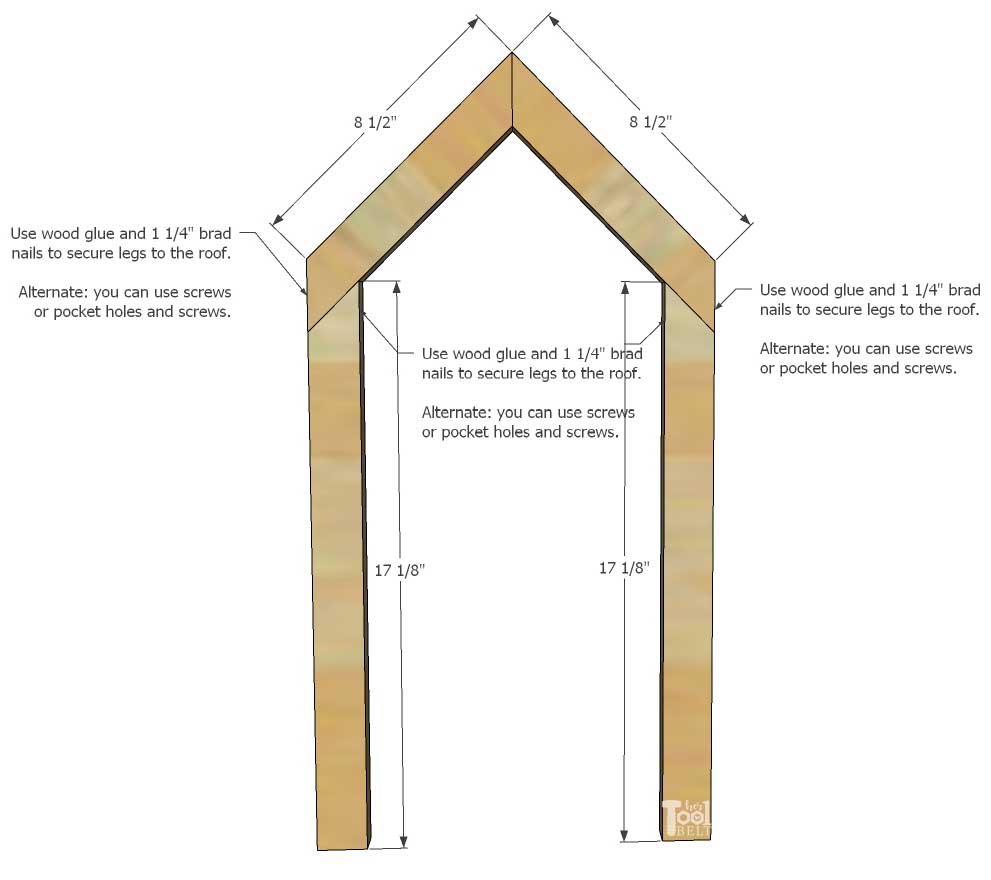
Assemble headboard and foot board
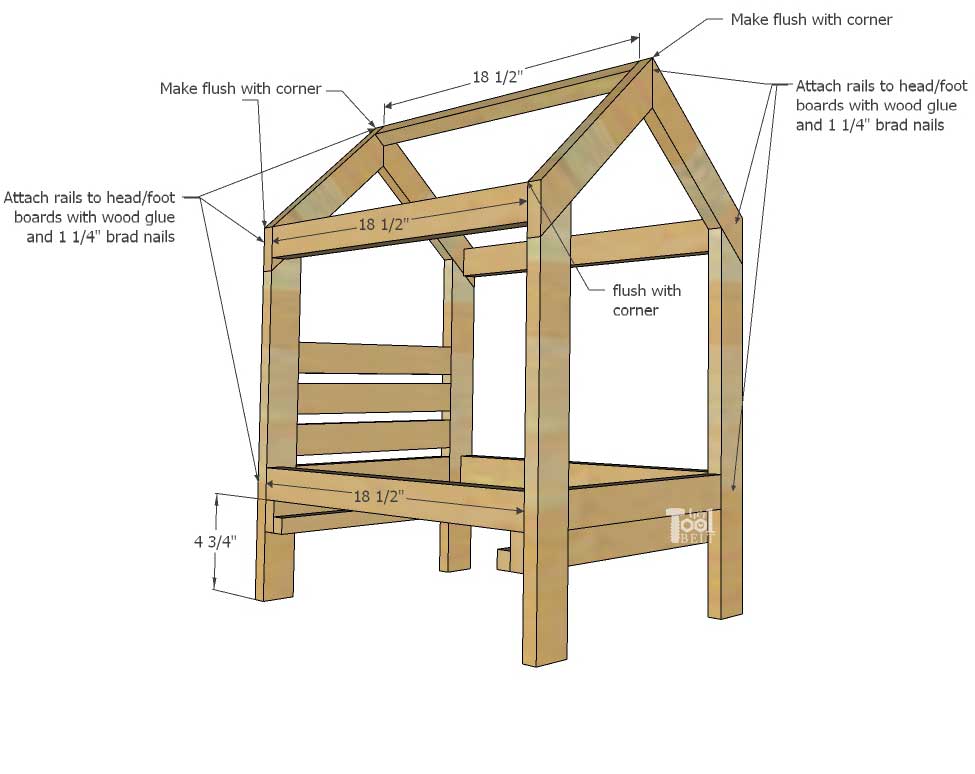
Attach a 17 1/8″ leg with wood glue and 1 1/4″ brad nails to each roof bottom. See picture for orientation. The leg outside edge will be flush with the roof miter cut.
Repeat for other roof and set of legs.
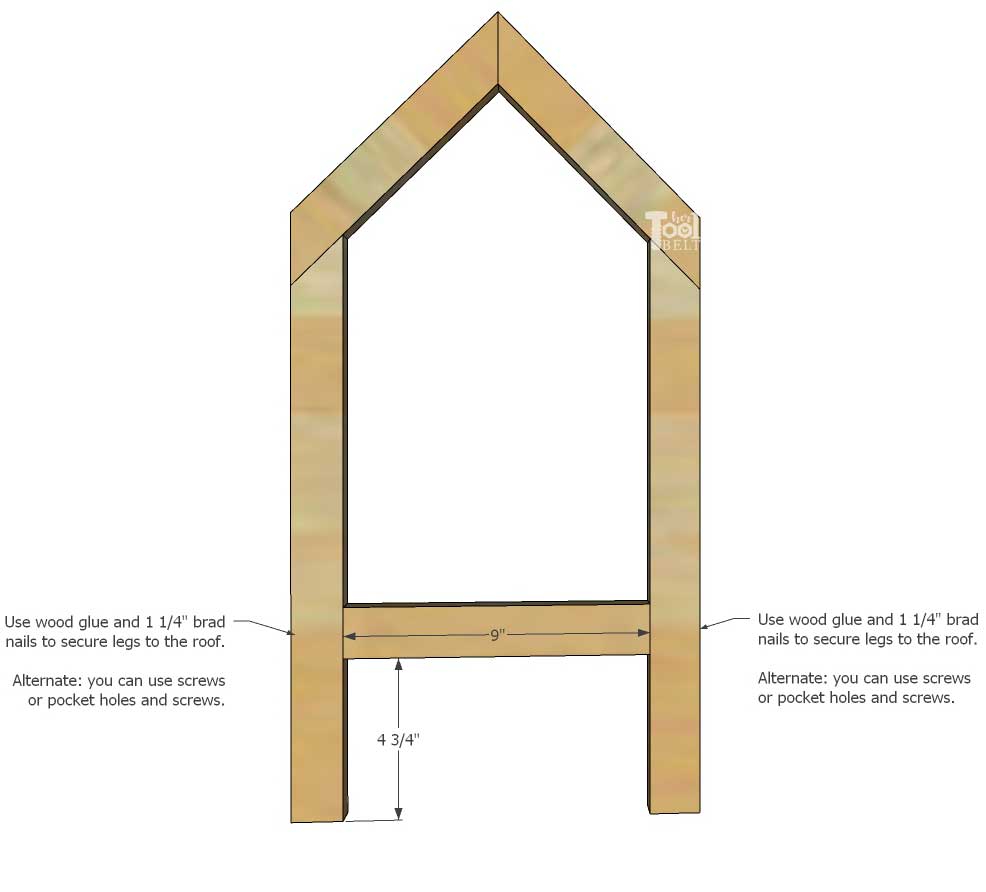
Foot board
From the bottom of the legs, mark up 4 3/4″. Secure a 9″ brace between the legs with wood glue and 2″ brad nails. You don’t have to use brad nails if you want to clamp it and wait for the glue to dry.
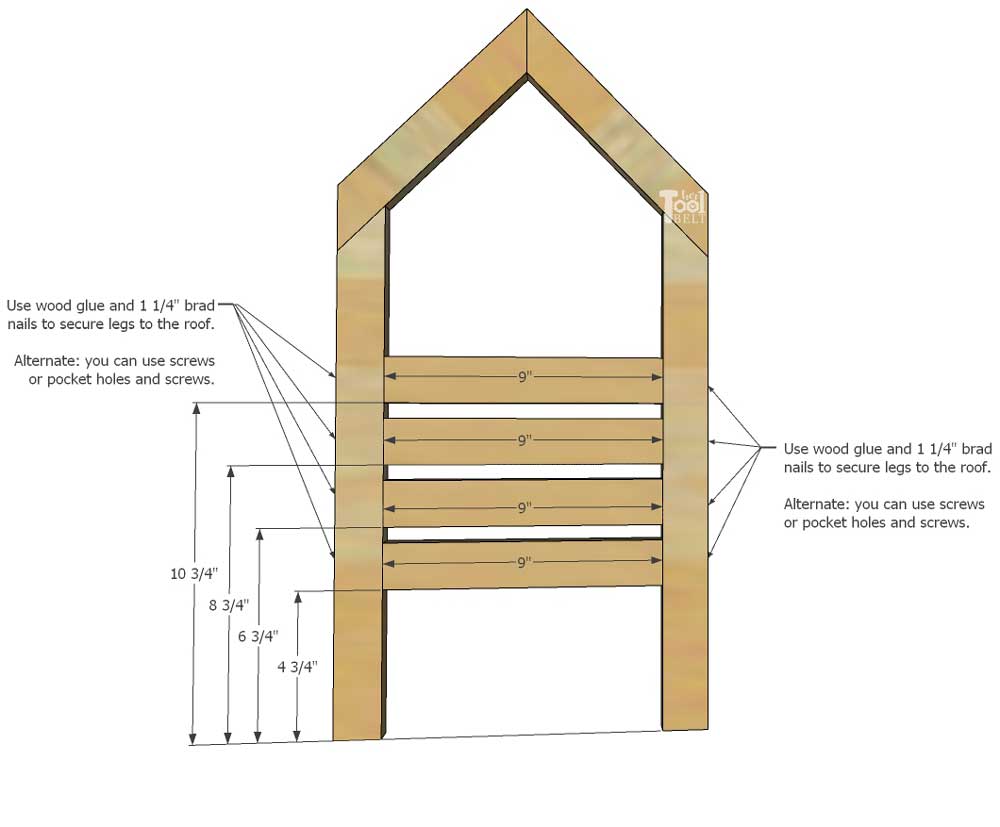
Headboard
The head board has more 9″ braces to make it look more like a headboard. From the bottom of the legs, mark up:
- 4 3/4″
- 6 3/4″
- 8 3/4″
- 10 3/4″
Secure a 9″ brace between the legs at each mark with wood glue and 2″ brad nails. You don’t have to use brad nails if you want to clamp it and wait for the glue to dry.
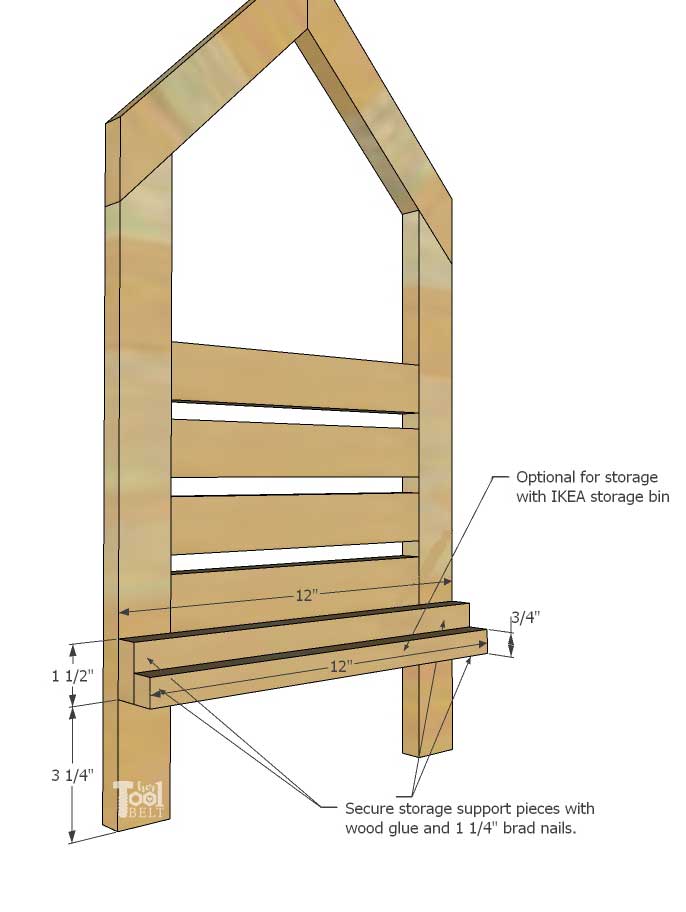
On both the head and foot boards mark up 3 1/4″ from the leg bottoms. Attach a 12″ mattress support with wood glue and 1 1/4″ brad nails.
For the storage bin option – place the bottom of the 3/4″ x 3/4″ x 12″ flush with the bottom of the 1 1/2″ x 12″ piece. Secure with wood glue and 1 1/4″ brad nails.
Attach the Rails
On both the head and foot boards, mark up 4 3/4″ from the leg bottoms. Attach a 18 1/2″ rail between the head and foot boards at 4 3/4″ and at the leg top corner with wood glue and 1 1/4″ brad nails. Also attach the 3/4″ square x 18 1/2″ roof rail in the roof peak.
(Note this picture is from the bunk bed version, but gives you the idea.)

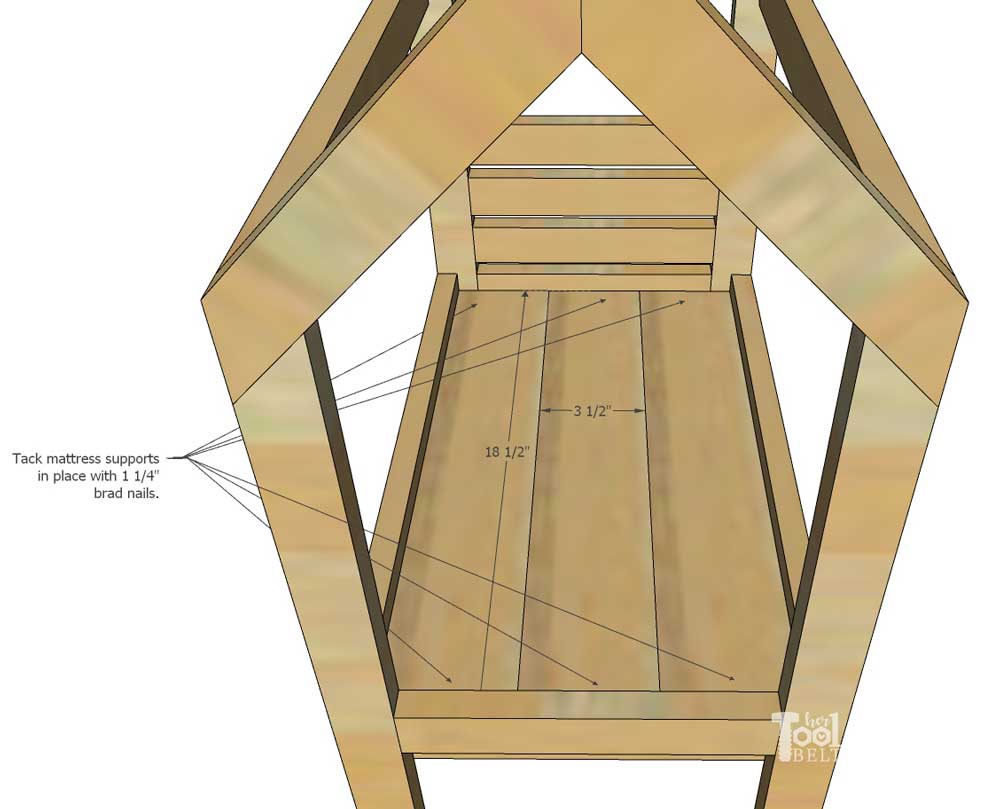
For the bed slats you can use 1×4’s or plywood. You may need to trim the pieces to fit between the head/foot boards and rails. Secure boards with wood glue and 1 1/4″ brad nails.
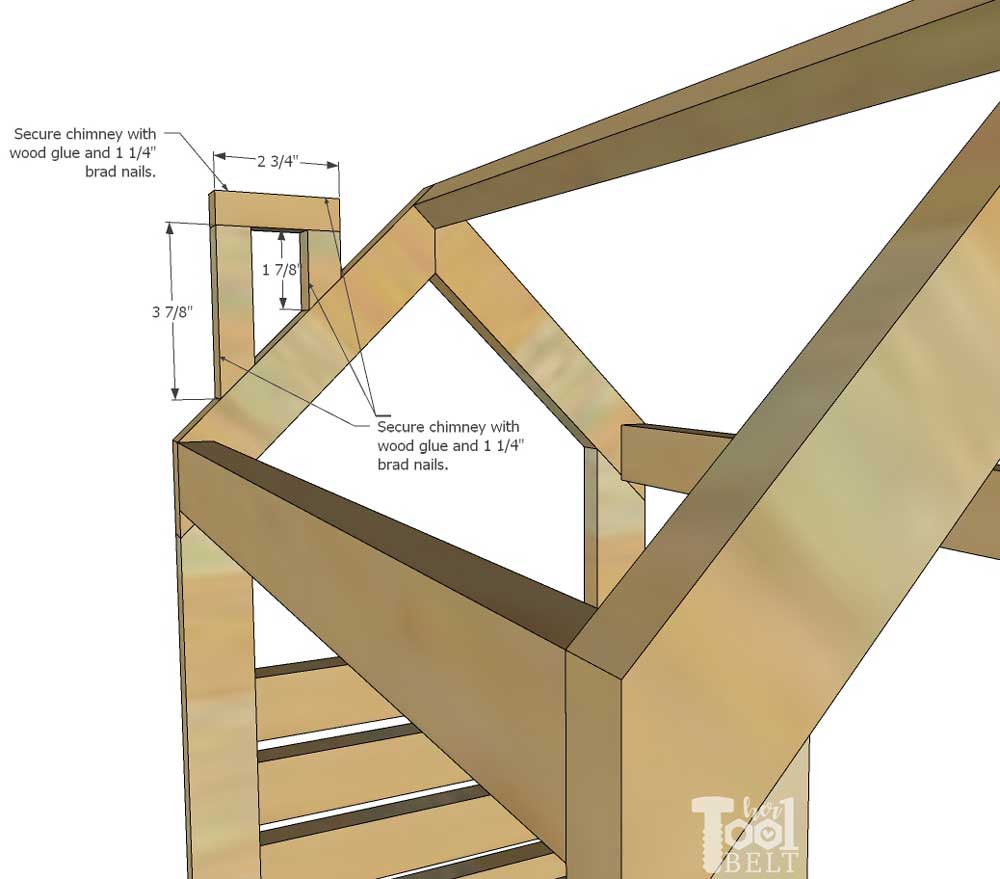
Add the Chimney
The chimney is an optional feature. The placement doesn’t really matter, anywhere along the roof line is fine (it’s also cute on footboard). Use wood glue and 1 1/4″ brad nails to secure the 2 3/4″ square to the 3 7/8″ and 1 7/8″ pieces. Then attach the chimney to the roof with wood glue and 1 1/4″ brad nails.
Add the Trofast bin, if wanted.
Finish
I sanded the house bed smooth with 120 grit sand paper. Then I stained the doll bed with golden pecan and let it dry. Once the stain is dried, it’s protected with a coat of polyurethane.
My sewing skills are non existent, so I cut 1/2″ foam for the mattress and hot glued white minky material onto it. It works, and the dolls don’t complain much 🙂
Download free plans here –> House Doll bed plans <–
Leave a Reply