The tiling has begun…
We are in week 2 of the Jeffrey Court All-star Challenge hosted by Jeffrey Court along with Behr Paint and Frog Tape. This week has been all about getting the bathroom floor tiled! I only crossed one item off of my To-Do list, but I feel good about it. It was a big task.
Voting begins today and goes through July 12th at 11:59 pm EST. You can vote once per day. If you have a minute, I would sure love your vote.
Vote HERE
missed week 1? check it out here.
Installing Cement Board (Hardiebacker)
Materials Used
Tools Used
- 1/4 x 1/4 Square trowel
- Spatula
- Husky Knee Pads*
- Milwaukee Impact Driver*
- Bucket
- 1/2″ Drill (heavy drill)
- Thinset mixing paddle
- Bosch Laser Level* or Chalk-line*
- Ridgid shop vac
- Utility knife to cut the hardiebacker
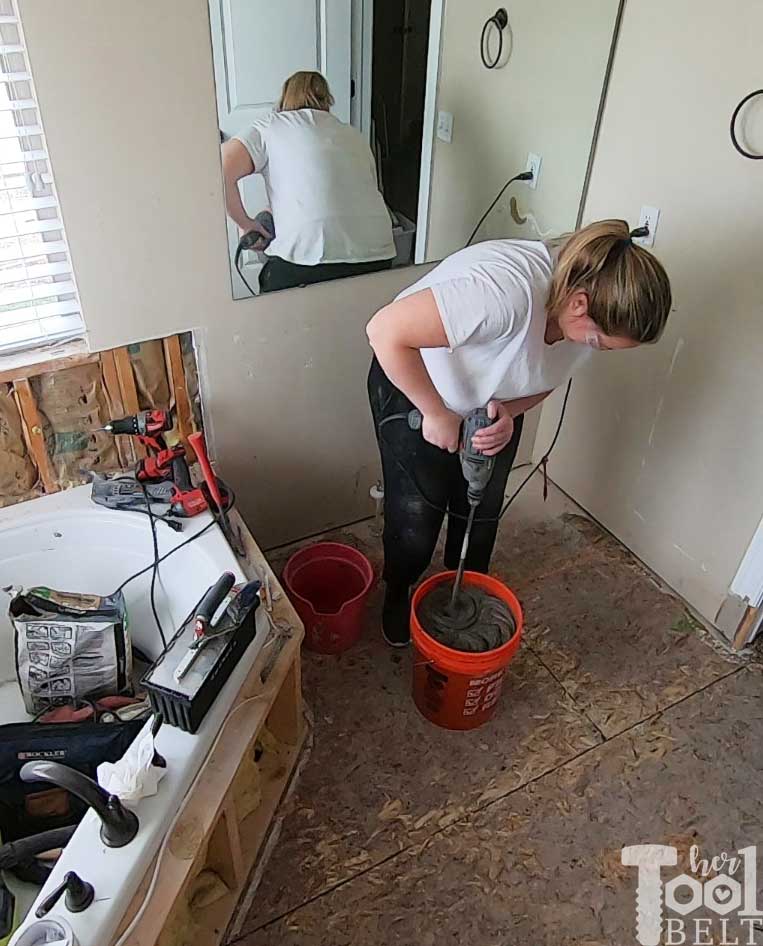
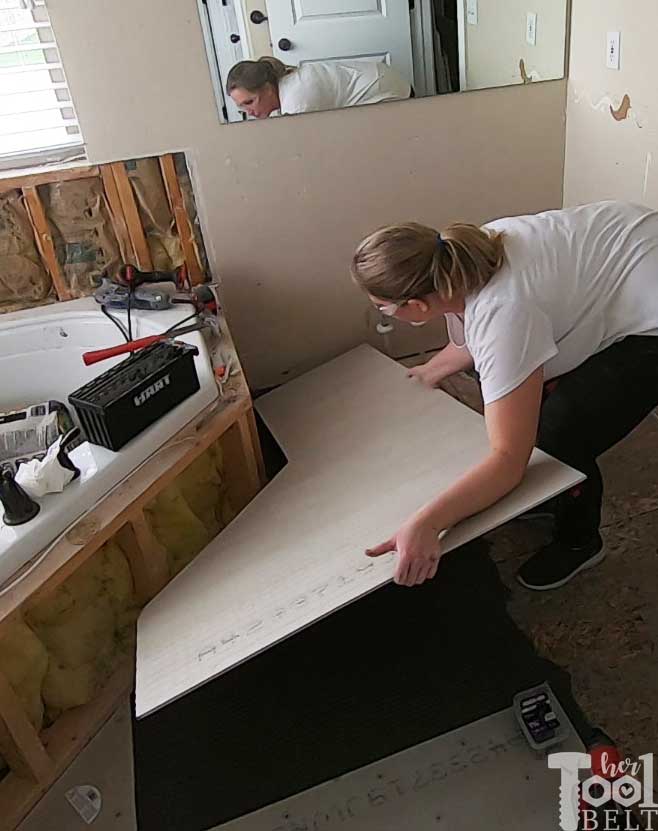
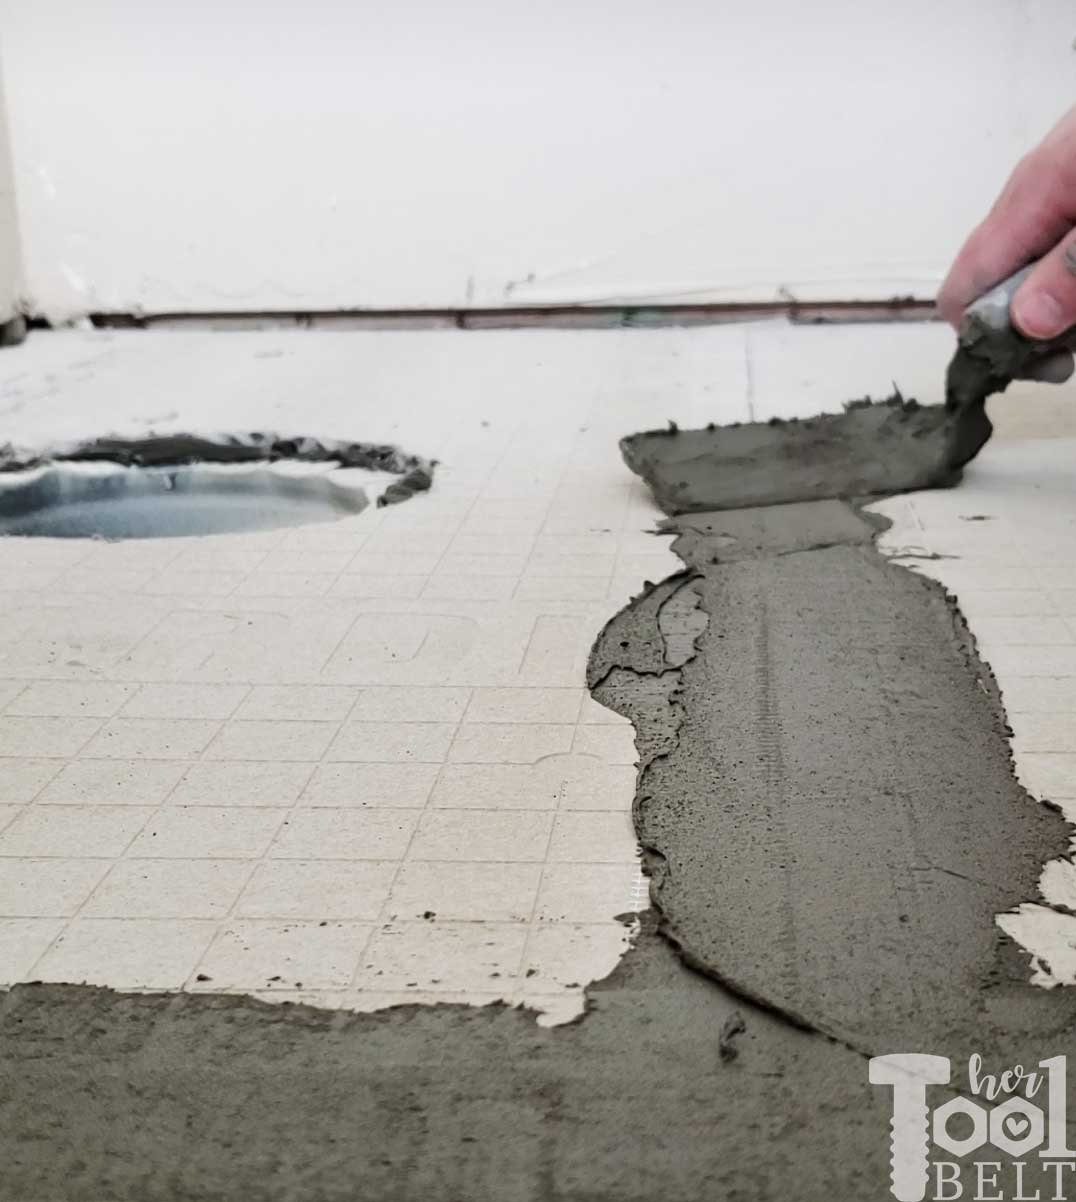
A good system for DIY’ers to get a good solid base for tile is with mortar (thinset) and cement board. My bathroom is small and a complex shape, so I precut out all of the hardiebacker cement board so it would be ready to lay all at once. I mixed up a batch of mortar with a 1/2″ drill, thinset mixing paddle and followed the directions on the bag.
Once the thinset was ready, I used the 1/4 x 1/4 square notch trowel to spread the mortar.

Then I laid the cement board on top.
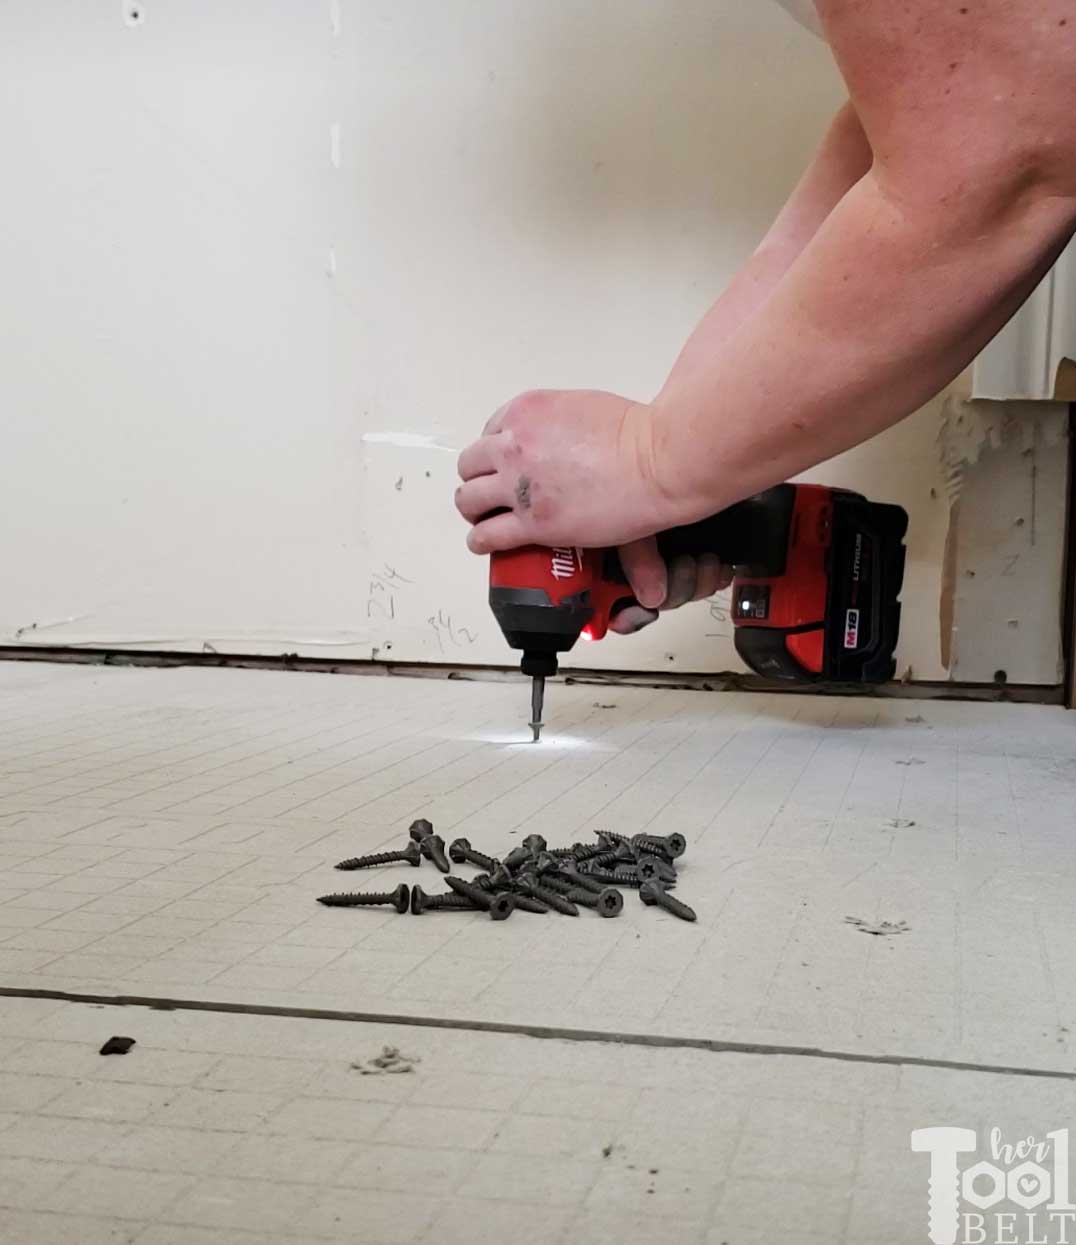
I secured the cement board down with rock-on screws every 10″-12″. The easiest way to install the rock-on screws thru cement board is with an impact driver. The impact driver really takes out the effort on drilling through cement board. Making sure the screw heads are just below the surface of the cement board.
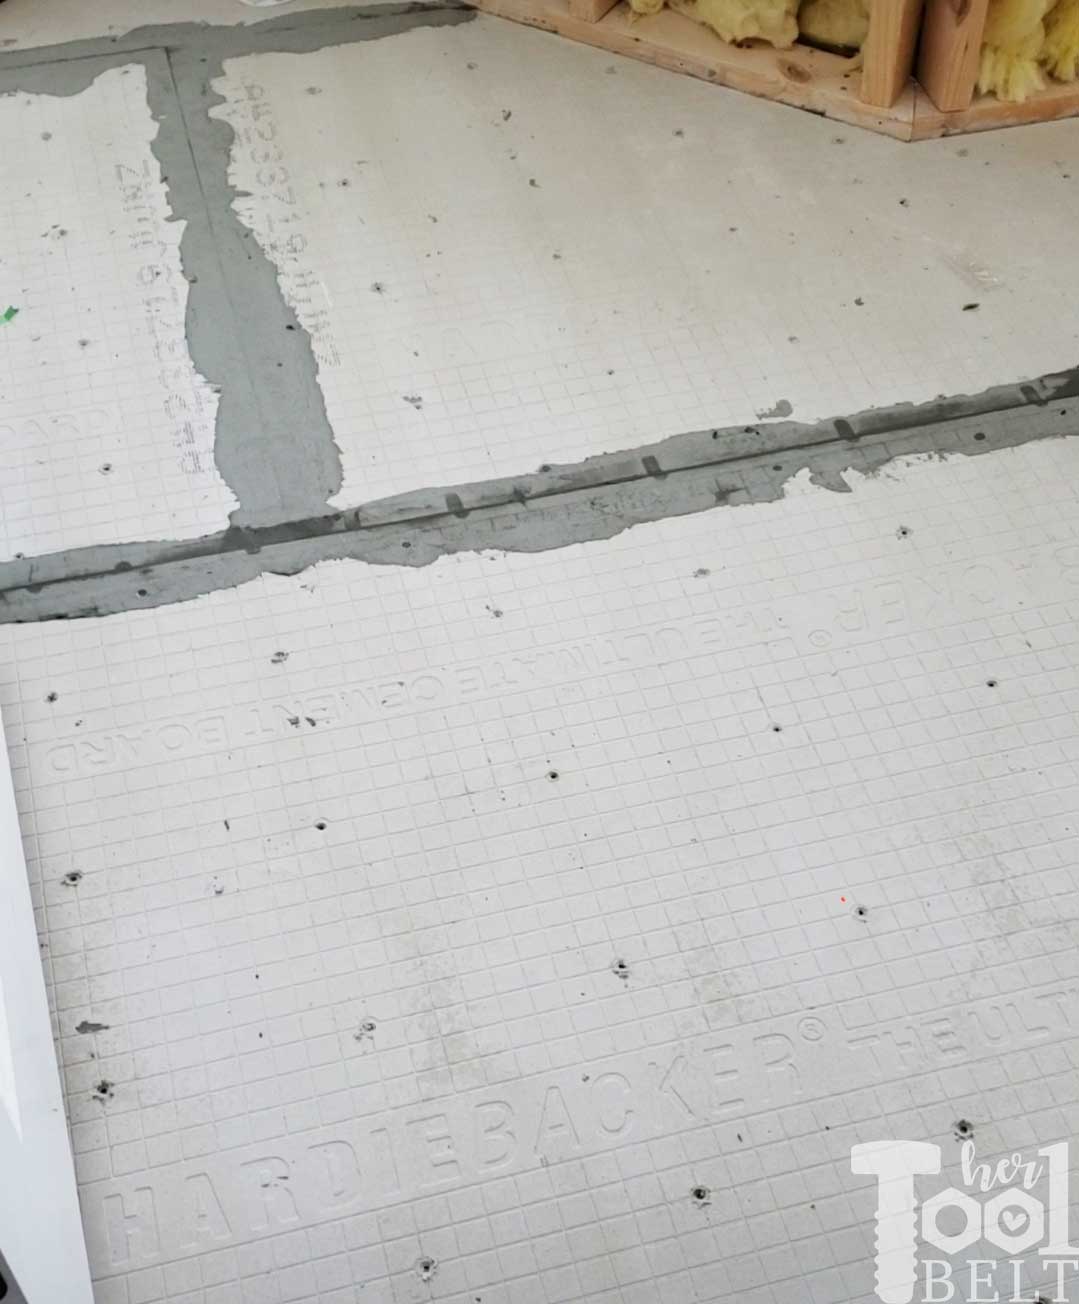
Once all the cement board was secured to the subfloor, I taped the seam with seam tape and mortar/thinset.
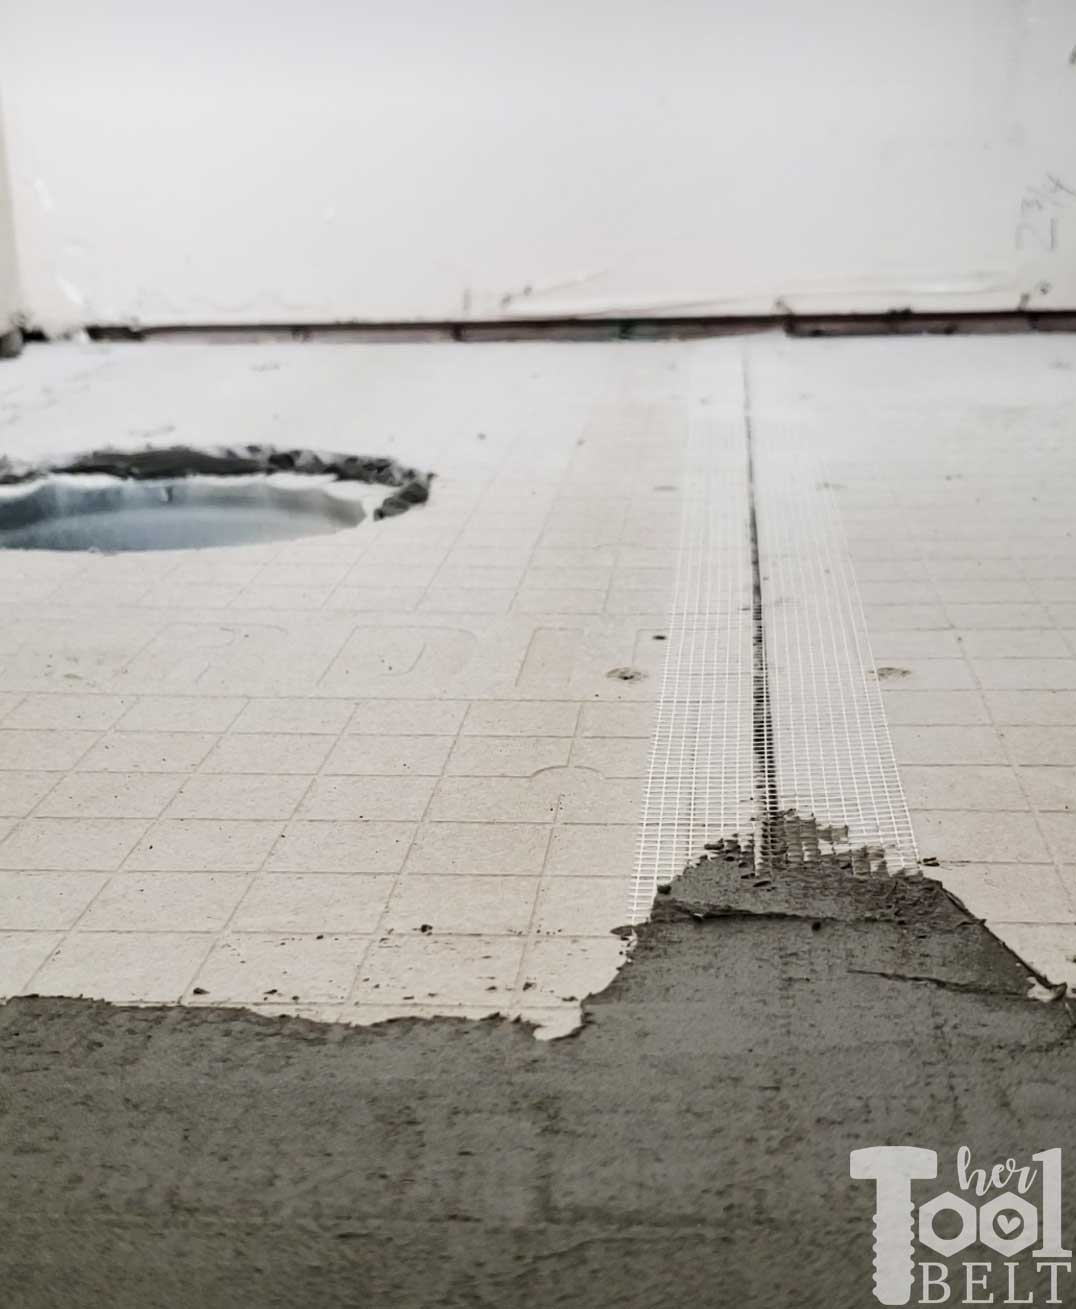
I let the cement board layer cure for 24 hrs.
Setting the Floor Tile
Materials Used
- Balancing Act
- Thinset
- Water
Tools Used
- 3/8 x 1/4 Square trowel
- Spatula
- Tile Saw
- Husky Knee Pads*
- Bucket
- 1/2″ Drill (heavy drill)
- Thinset mixing paddle
- Bosch Laser Level* or Chalk-line*
- Straight board or Level
For the floor tile I picked this amazing Balancing Act mosaic marble tile by Jeffrey Court (sold at Home Depot). I love the geometric shape of the tile.
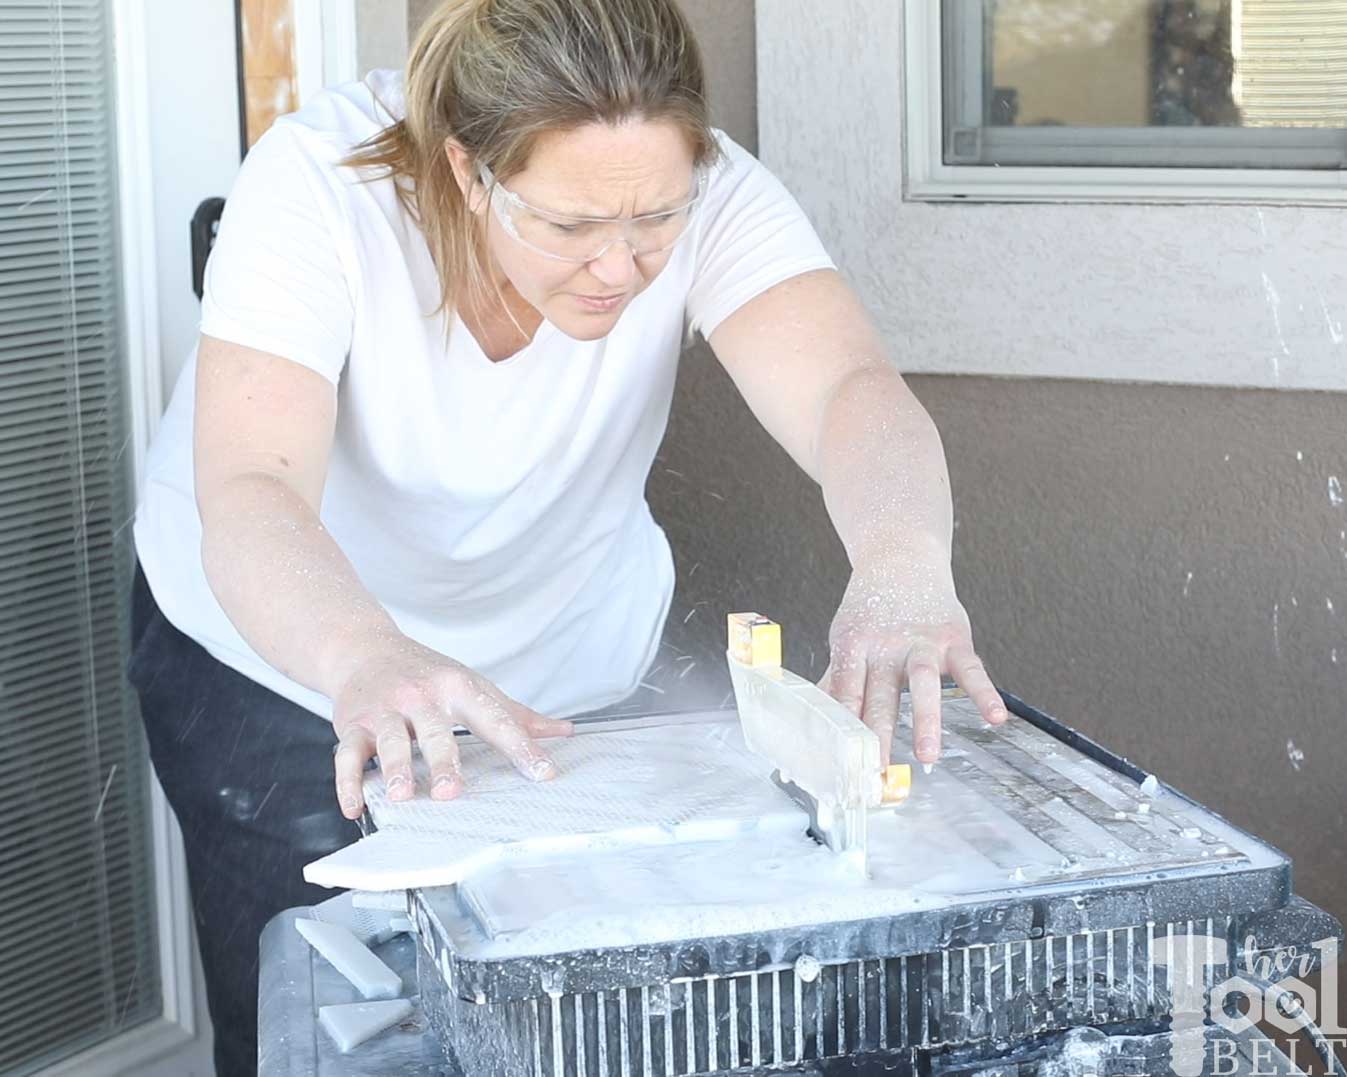
Because the shape of the bathroom is complex, I took a gamble and laid out the tile first. Then I cut all of the edge pieces to fit. My tile saw is very simple, but it is a little workhorse…that gets me wet every time. 🙂
Tip: On my type of tile saw, I get a much better cut on the front of mosaic and stone tiles by cutting them face down.
For this size of tile, I used a 1/4 x 3/8 square notch trowel. I evenly applied thinset to the cement board and pulled back on the trowel at a 45 deg angle for the final pass.
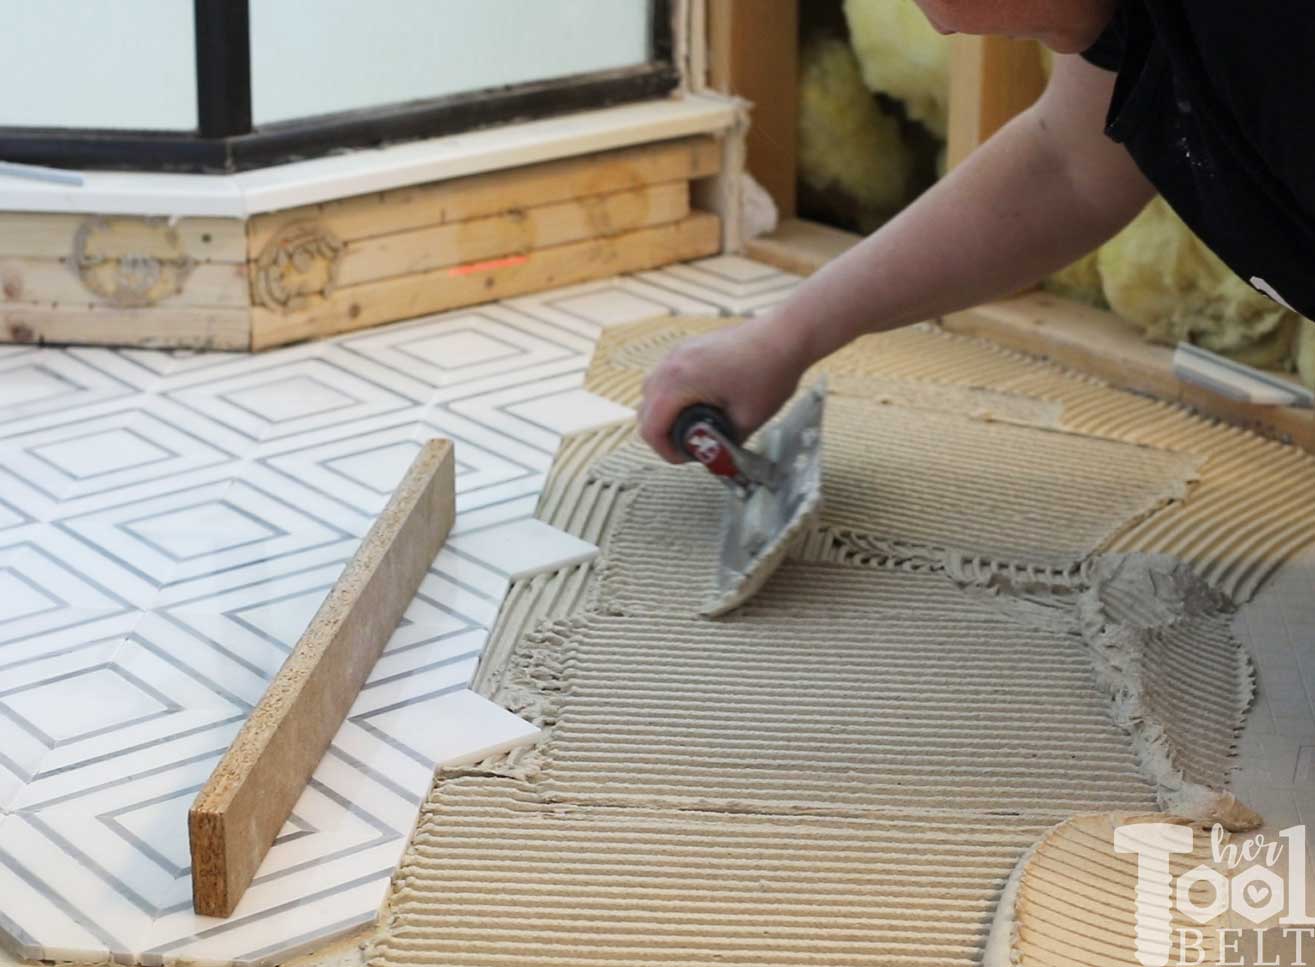
The tile was placed on the thinset and slightly jiggled.

A straight board or level are helpful to make sure you’re level between tiles.
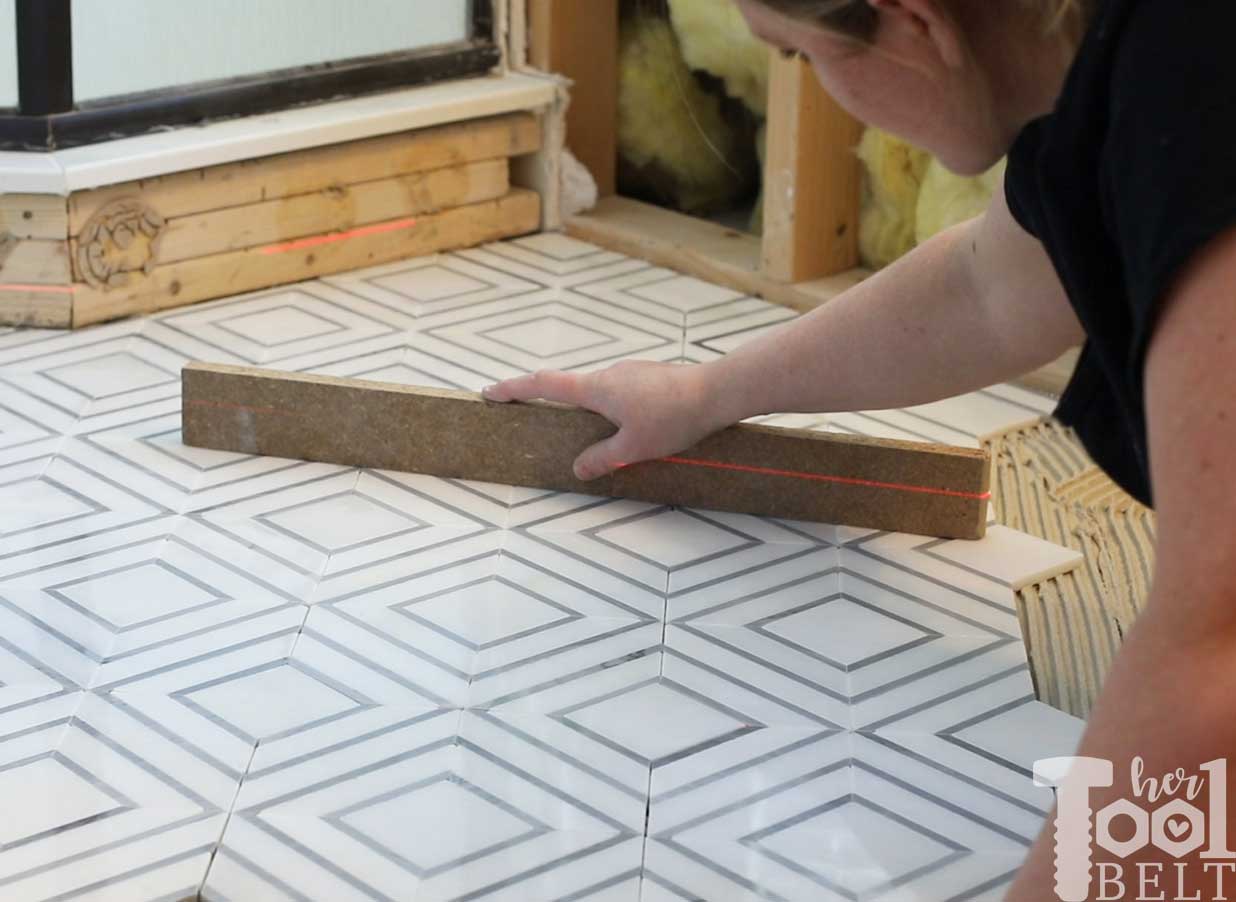
A little close up of the tile. It’s looking sooo good!
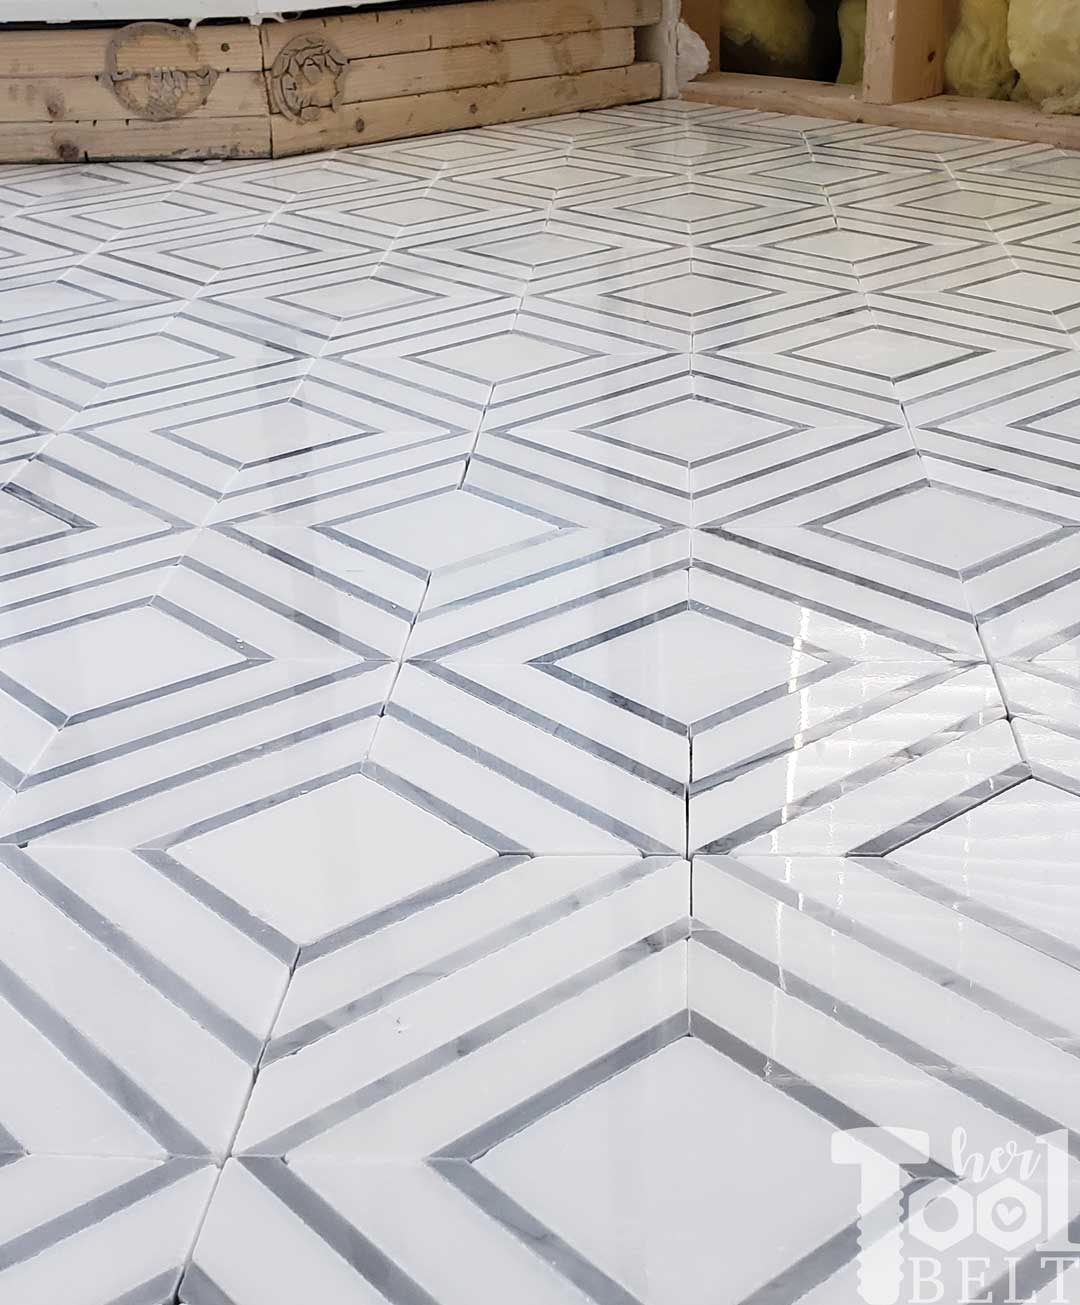
Once the tiles were all set, I allowed the thinset to cure for 24 hours (according to the bag) with out any little helpers walking on it…that may have proved difficult!
Grouting the Balancing Act Tile
Materials Used
Tools Used
- Float
- Spatula
- Sponge
- Microfiber cloth
- Husky Knee Pads*
- Bucket (if mixing your own)
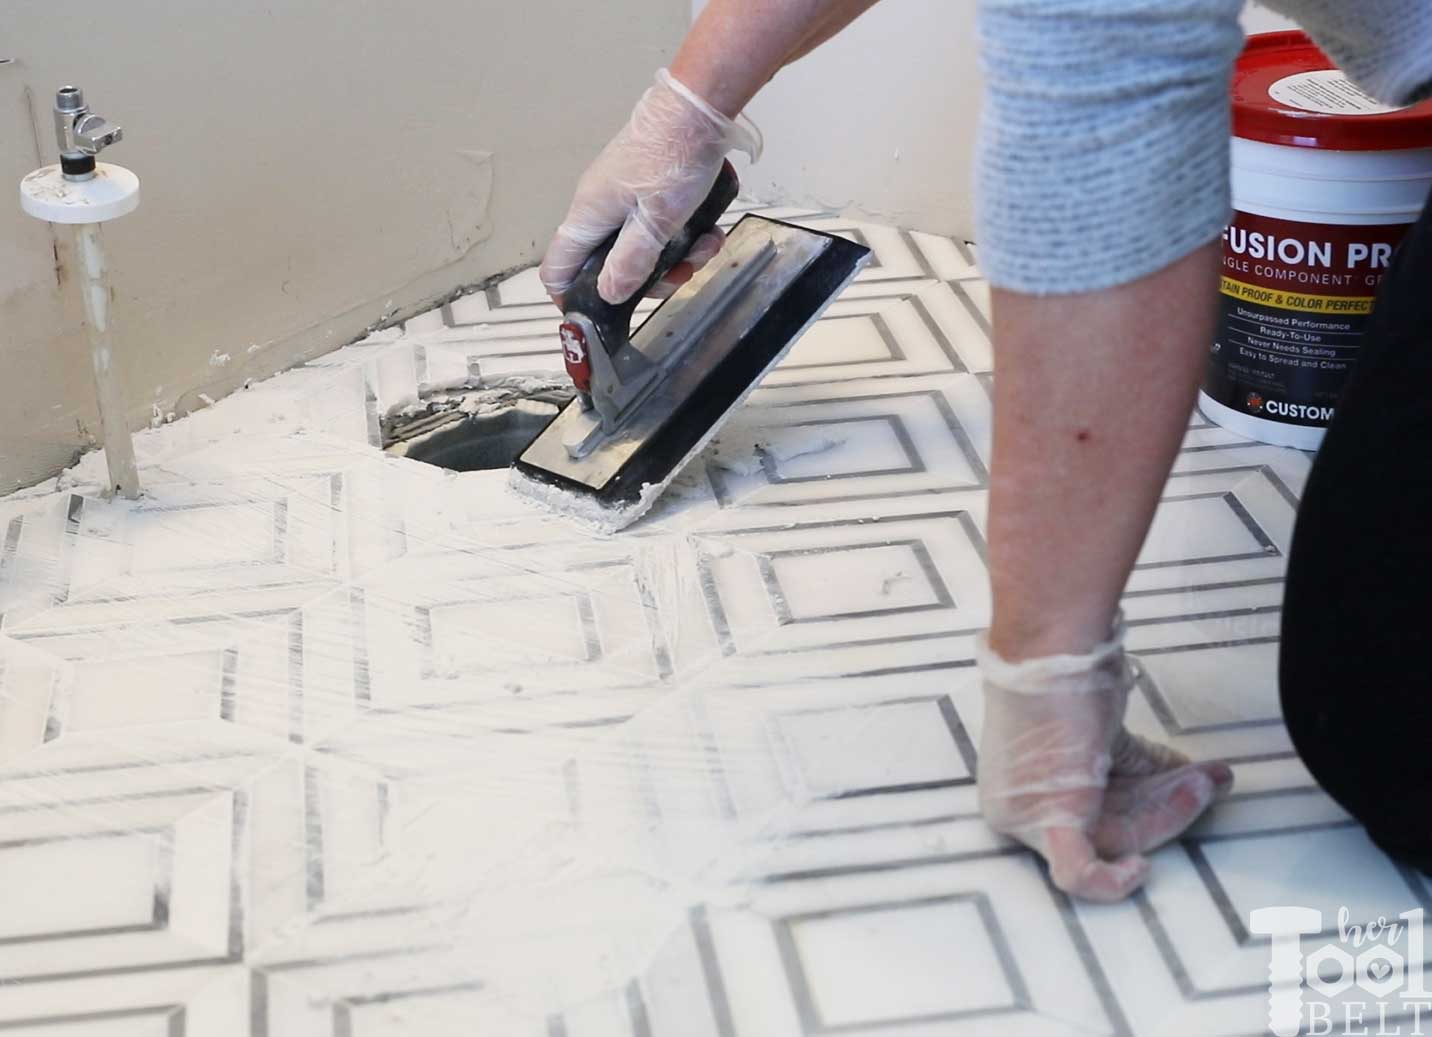
I decided to use Fusion Pro grout because it promises no sealing and no staining . Since I’m going with bright white grout, I need all the help I can get with no staining!!!
Grouting is a simple job, but takes some time.
I take my float and just put grout on the front tip and pack it into the grout lines. Then use the float to scrape off the excess grout going in the direction of the grout lines. This seemed to give me the smoothest result.
The Fusion Pro grout was a little different than the regular stuff, you only wait 1-4 minutes before you wipe off the tile with a wet sponge. It is best to work in small sections at a time. Rinse the sponge often with fresh water.
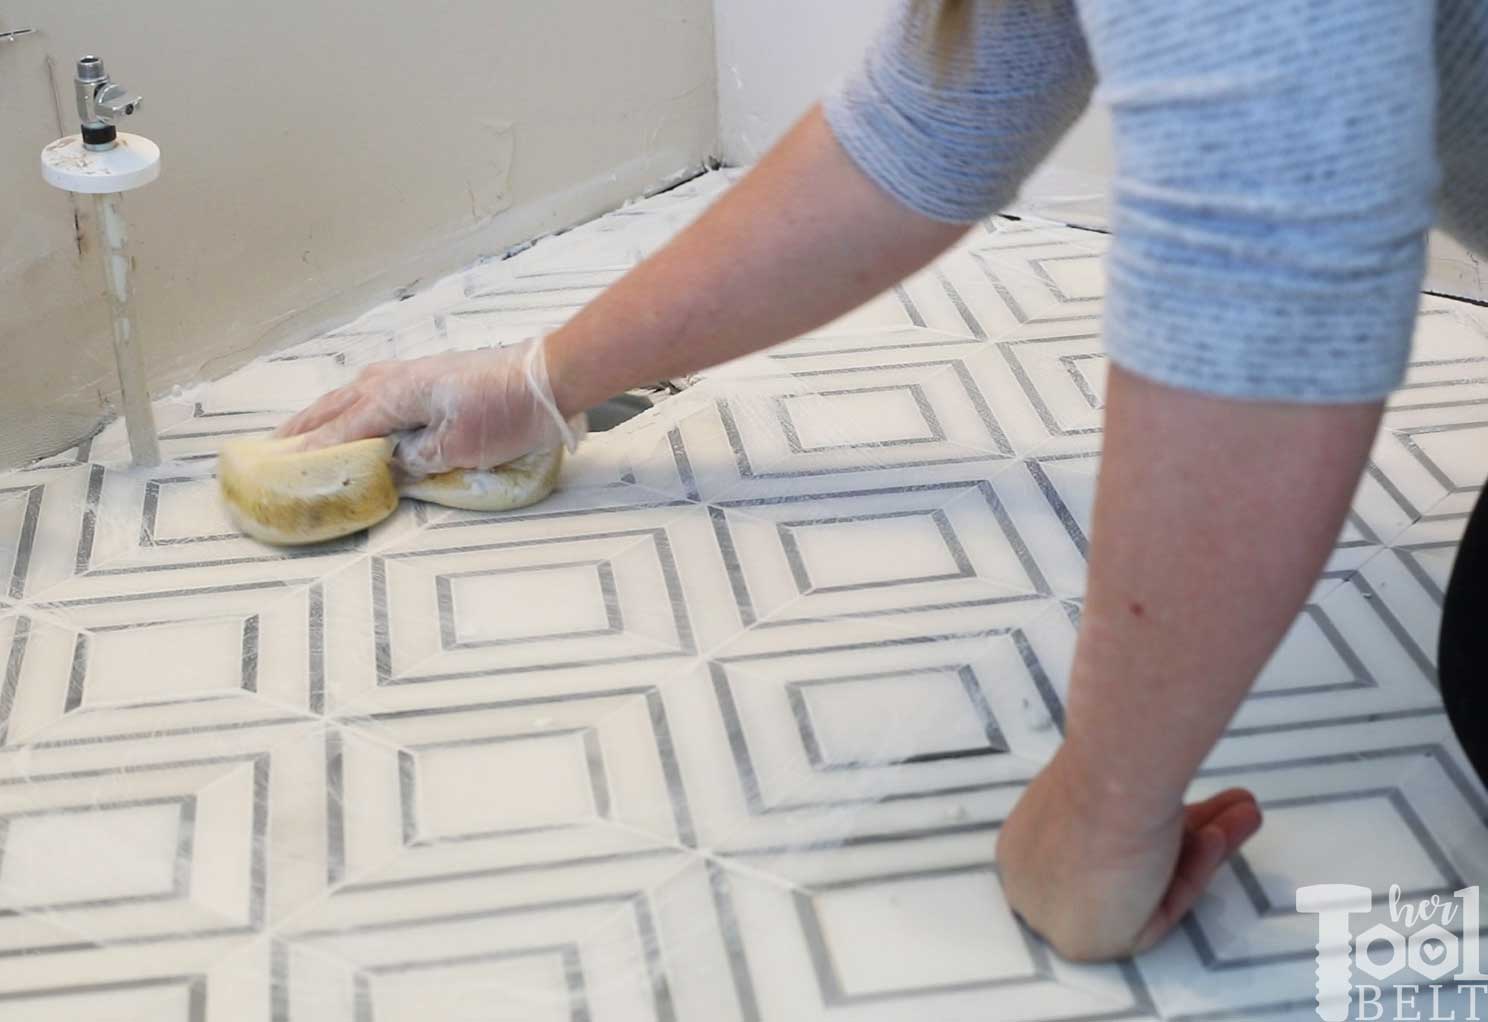
Then take a wet microfiber cloth to wipe off any residue of grout from the tiles…and move on. I used an e-cloth for windows on the final wipe and it worked fantastic.

The grout needs to dry for 24 hours. It looks pretty darn nice.
Breakdown of the Projects:
Rip up the travertineRemove the cultured marble tub surroundRemove old vanityTile the floor withBalancing Act- Add Marble Base Trim Tile and Accent Trim Tile
- Tile accent walls with Carrara Marble
- Paint the bathroom
- Build a new vanity
- Build plantation shutters
- Trim out the windows
- Build (and install 🙂 ) doors on the cabinet
- Paint cabinet
- Replace lights
- Replace or refresh fixtures
- Replace mirror
Phew, better get to work.
Looking good! You have a very aggressive “to-do” list, good luck, will be watching!
Thanks! Hopefully it all comes together. 🙂