Hi! I’d love for you to follow me on Pinterest Her Tool Belt and if you love instagram, you can keep up with me there too!
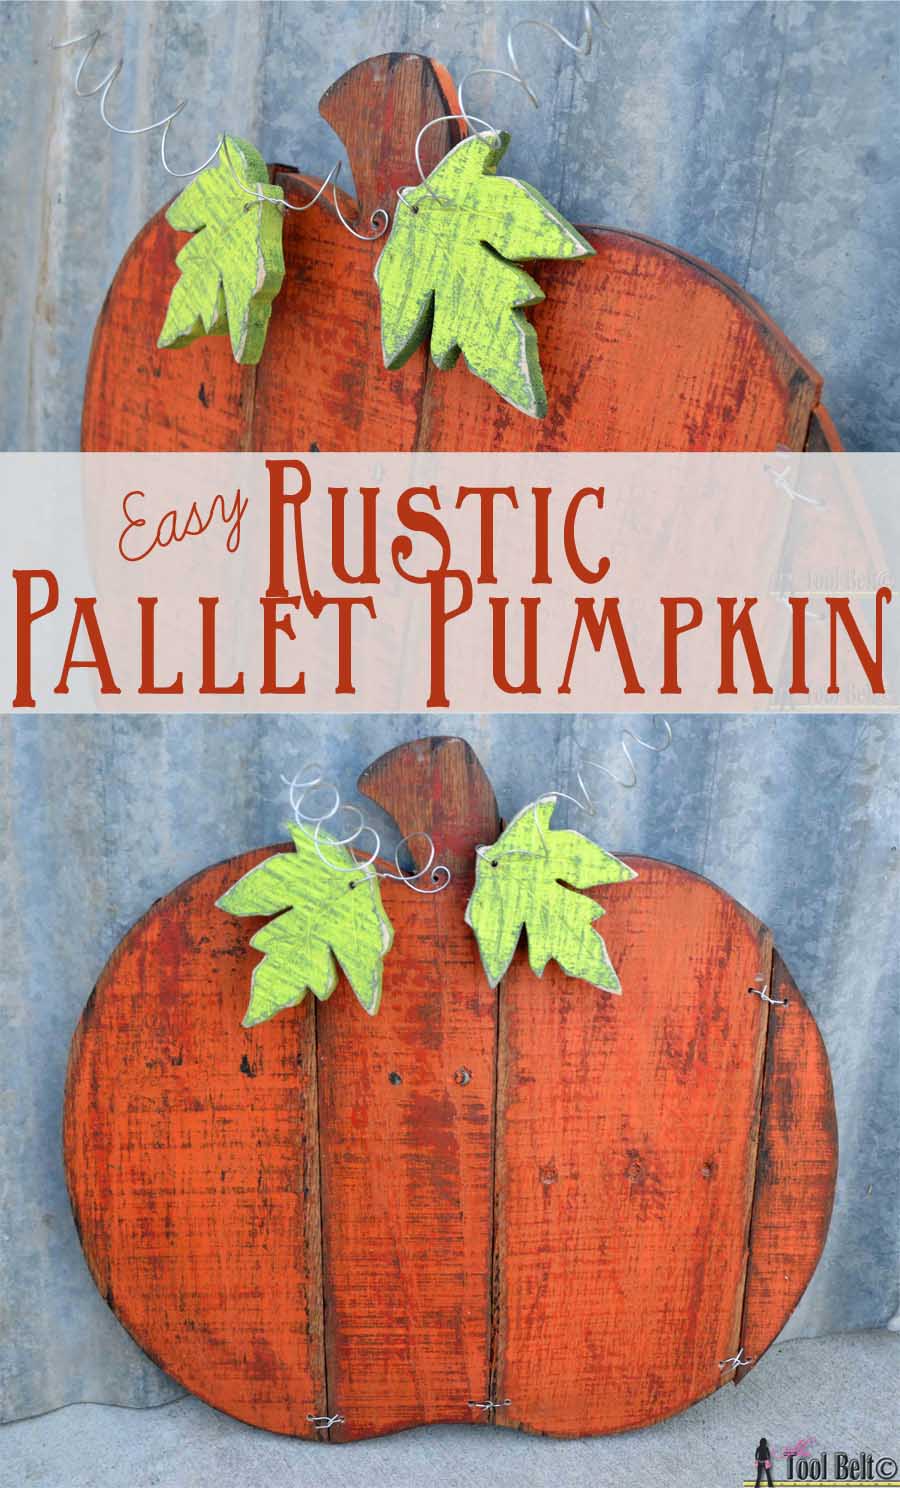
Happy Fall! Yay for pumpkin season, and pumpkin bread – Mmmm. This rustic pallet pumpkin fall craft is a fun and versatile way to add pumpkins to your holiday decor. I like using pallets for crafts, because it makes them sooo cheap 🙂 .

How to Make an easy Rustic Pallet Pumpkin
Materials
- Pallet slats, or cedar fence pickets will work great too.
- Orange, green paint
- Stain
- wire
Step 1
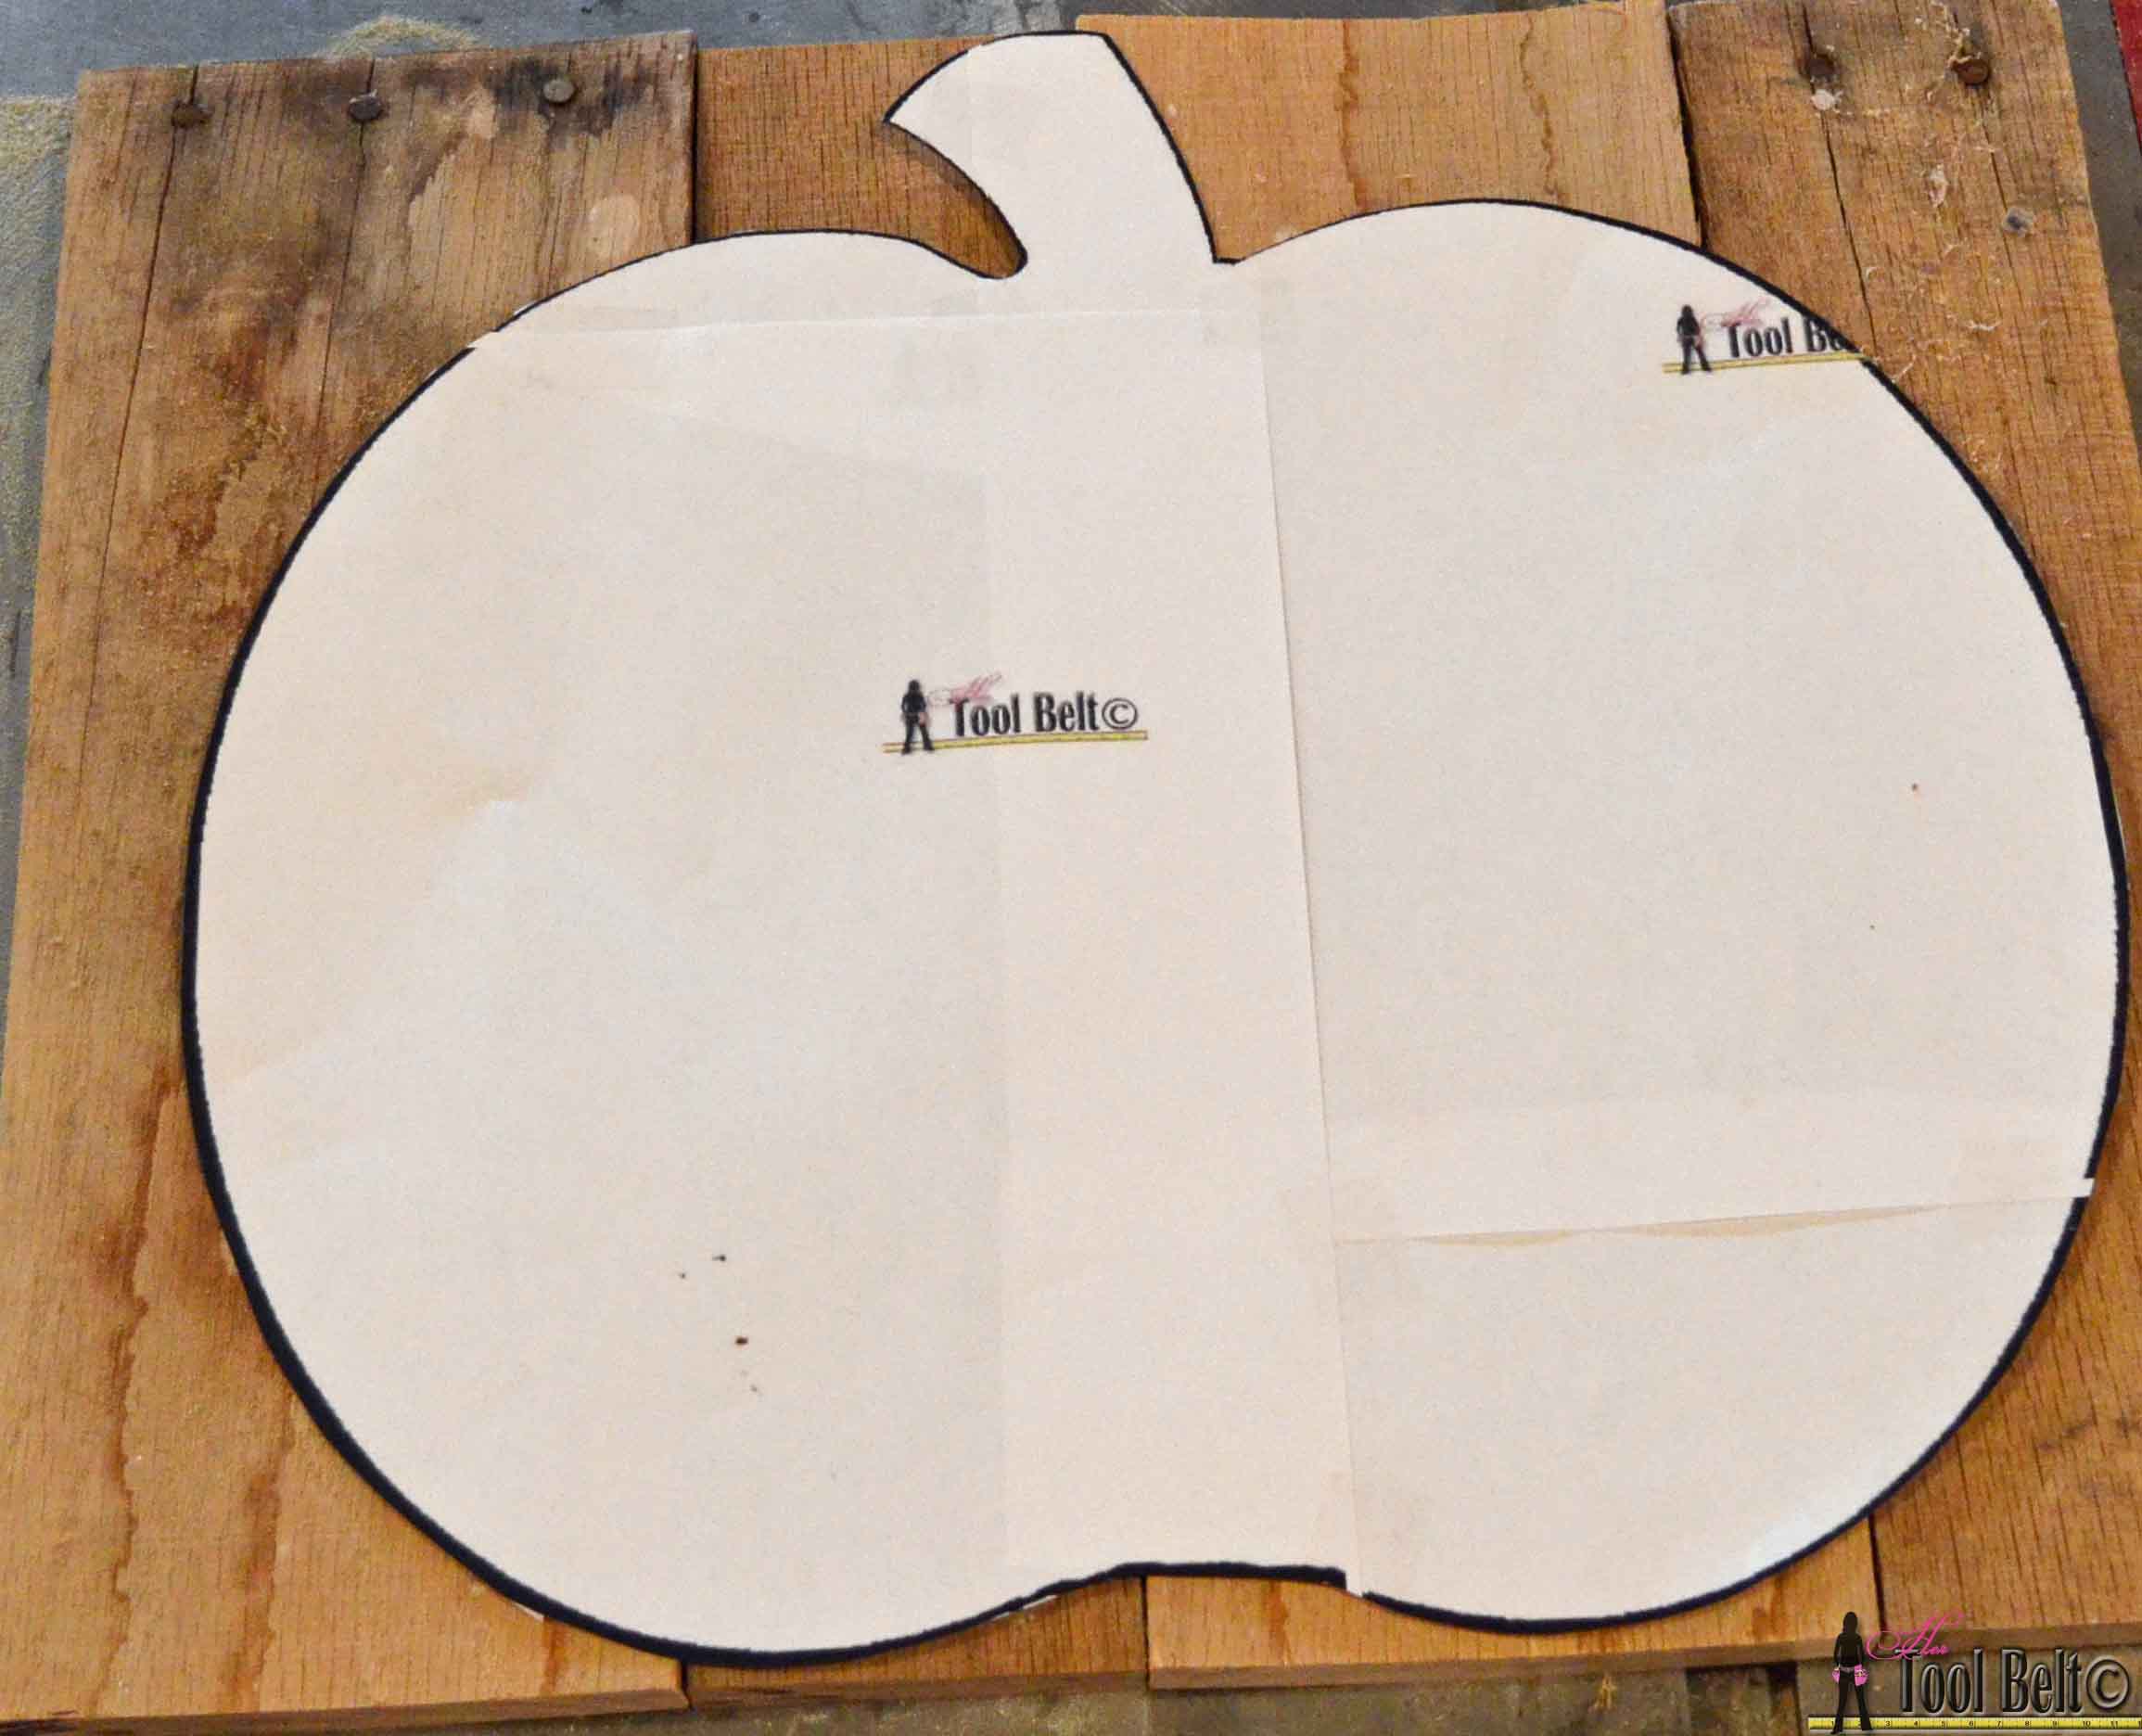
Download and print the following pattern pieces. When printing make sure the print settings are at 100%, not ‘fit to page’. –> Pumpkin Template <–. Line up the pumpkin pieces and tape the pattern together. Cut out the pumpkin pattern, and the leaf pattern.
Step 2
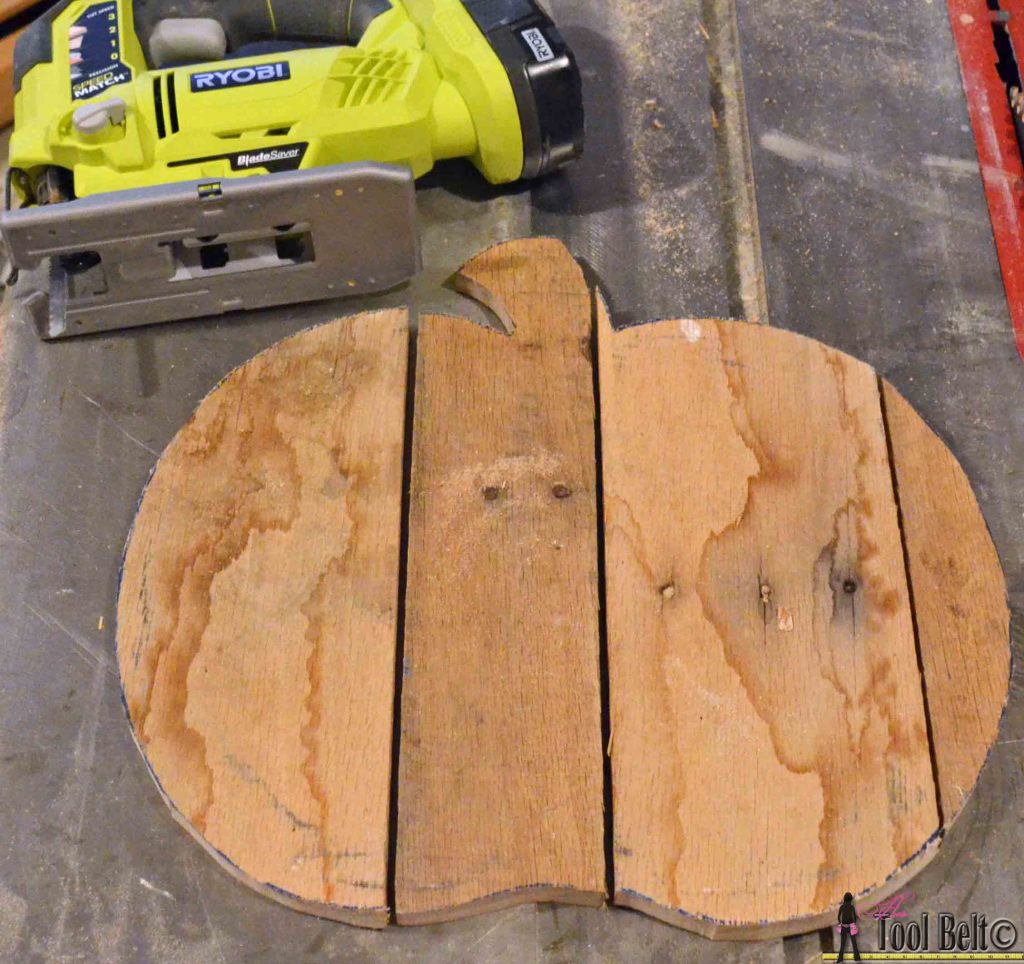
Grab a few pallet slats, reclaimed wood or new wood. When I take apart pallets, I like to keep the nail heads in the board for character. Here’s a video with tips for dismantling pallets and leaving the nail heads.
Trace the pumpkin pattern onto the wood. If you are using wood with nails, arrange the wood so you won’t be trying to cut through nails. Trace a couple of leaves too.
Use a jig saw, band saw or scroll saw to cut out the pumpkin pieces and leaves. I used a jig saw for the pumpkin and a scroll saw for the leaves.
 Step 3

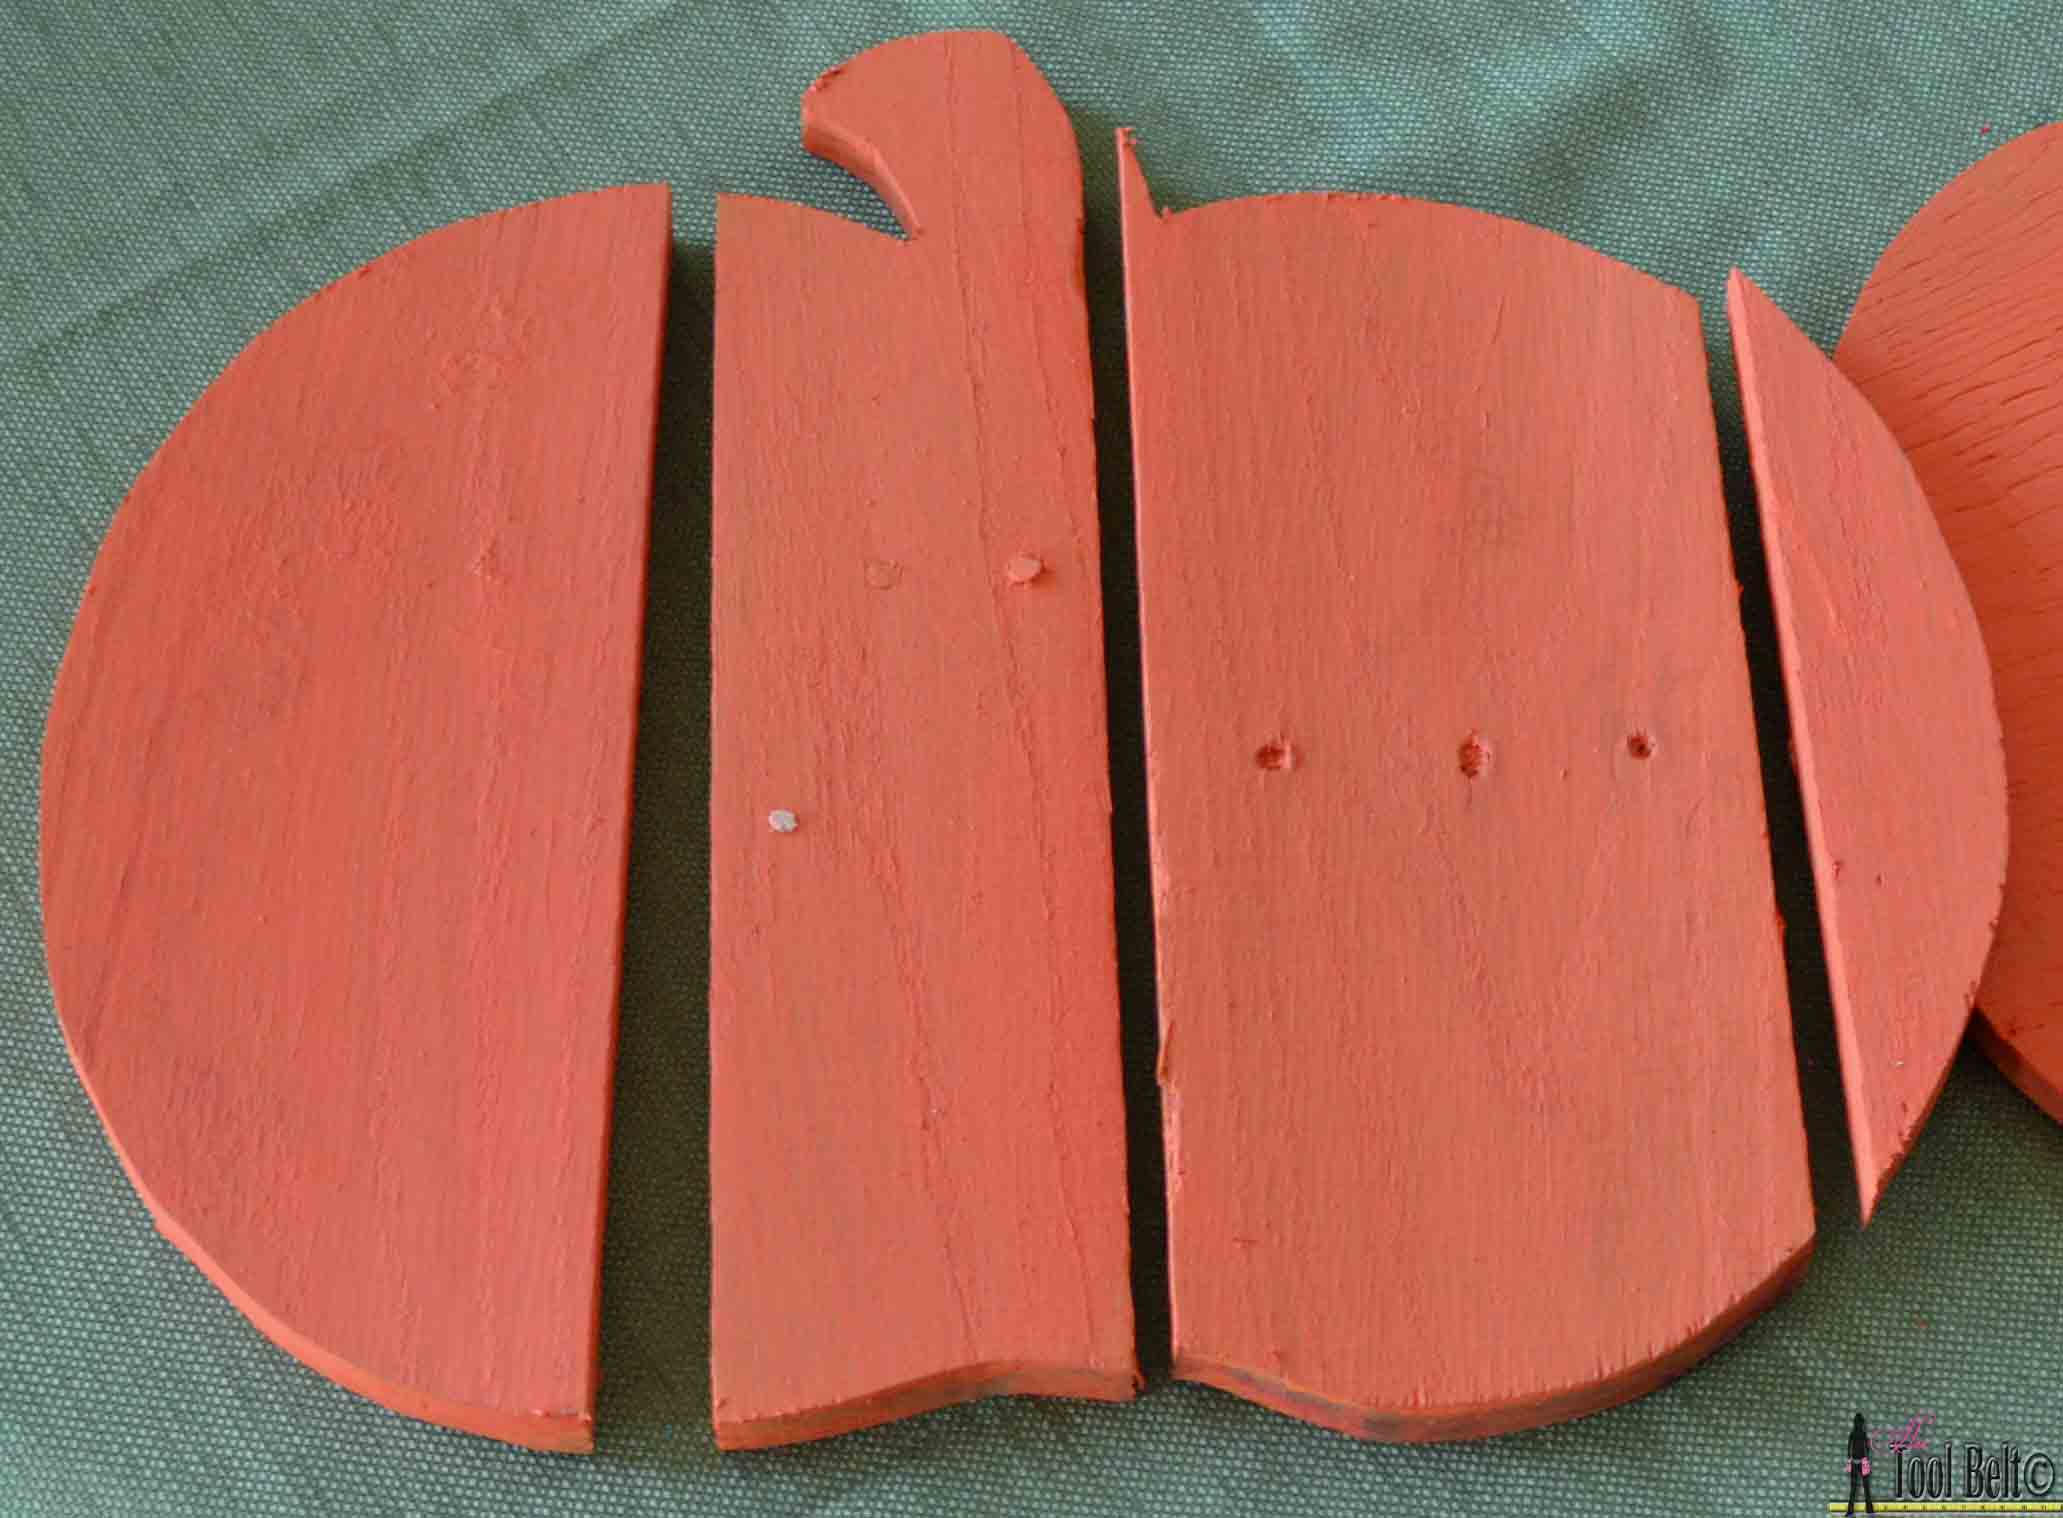
I used a fun paint layering technique that I learned here. First I spray painted the pumpkin wood slats a dark redish orange color (Rustoleum Paprika (affiliate) the pic looks pink but it’s really a dark red/orange color). After letting the paint dry, I used an orange acrylic paint to paint over the paprika.
Once the paint dried, I sanded the edges of each piece and lightly sanded the face until I achieved a rustic look with bits of the paprika color showing.
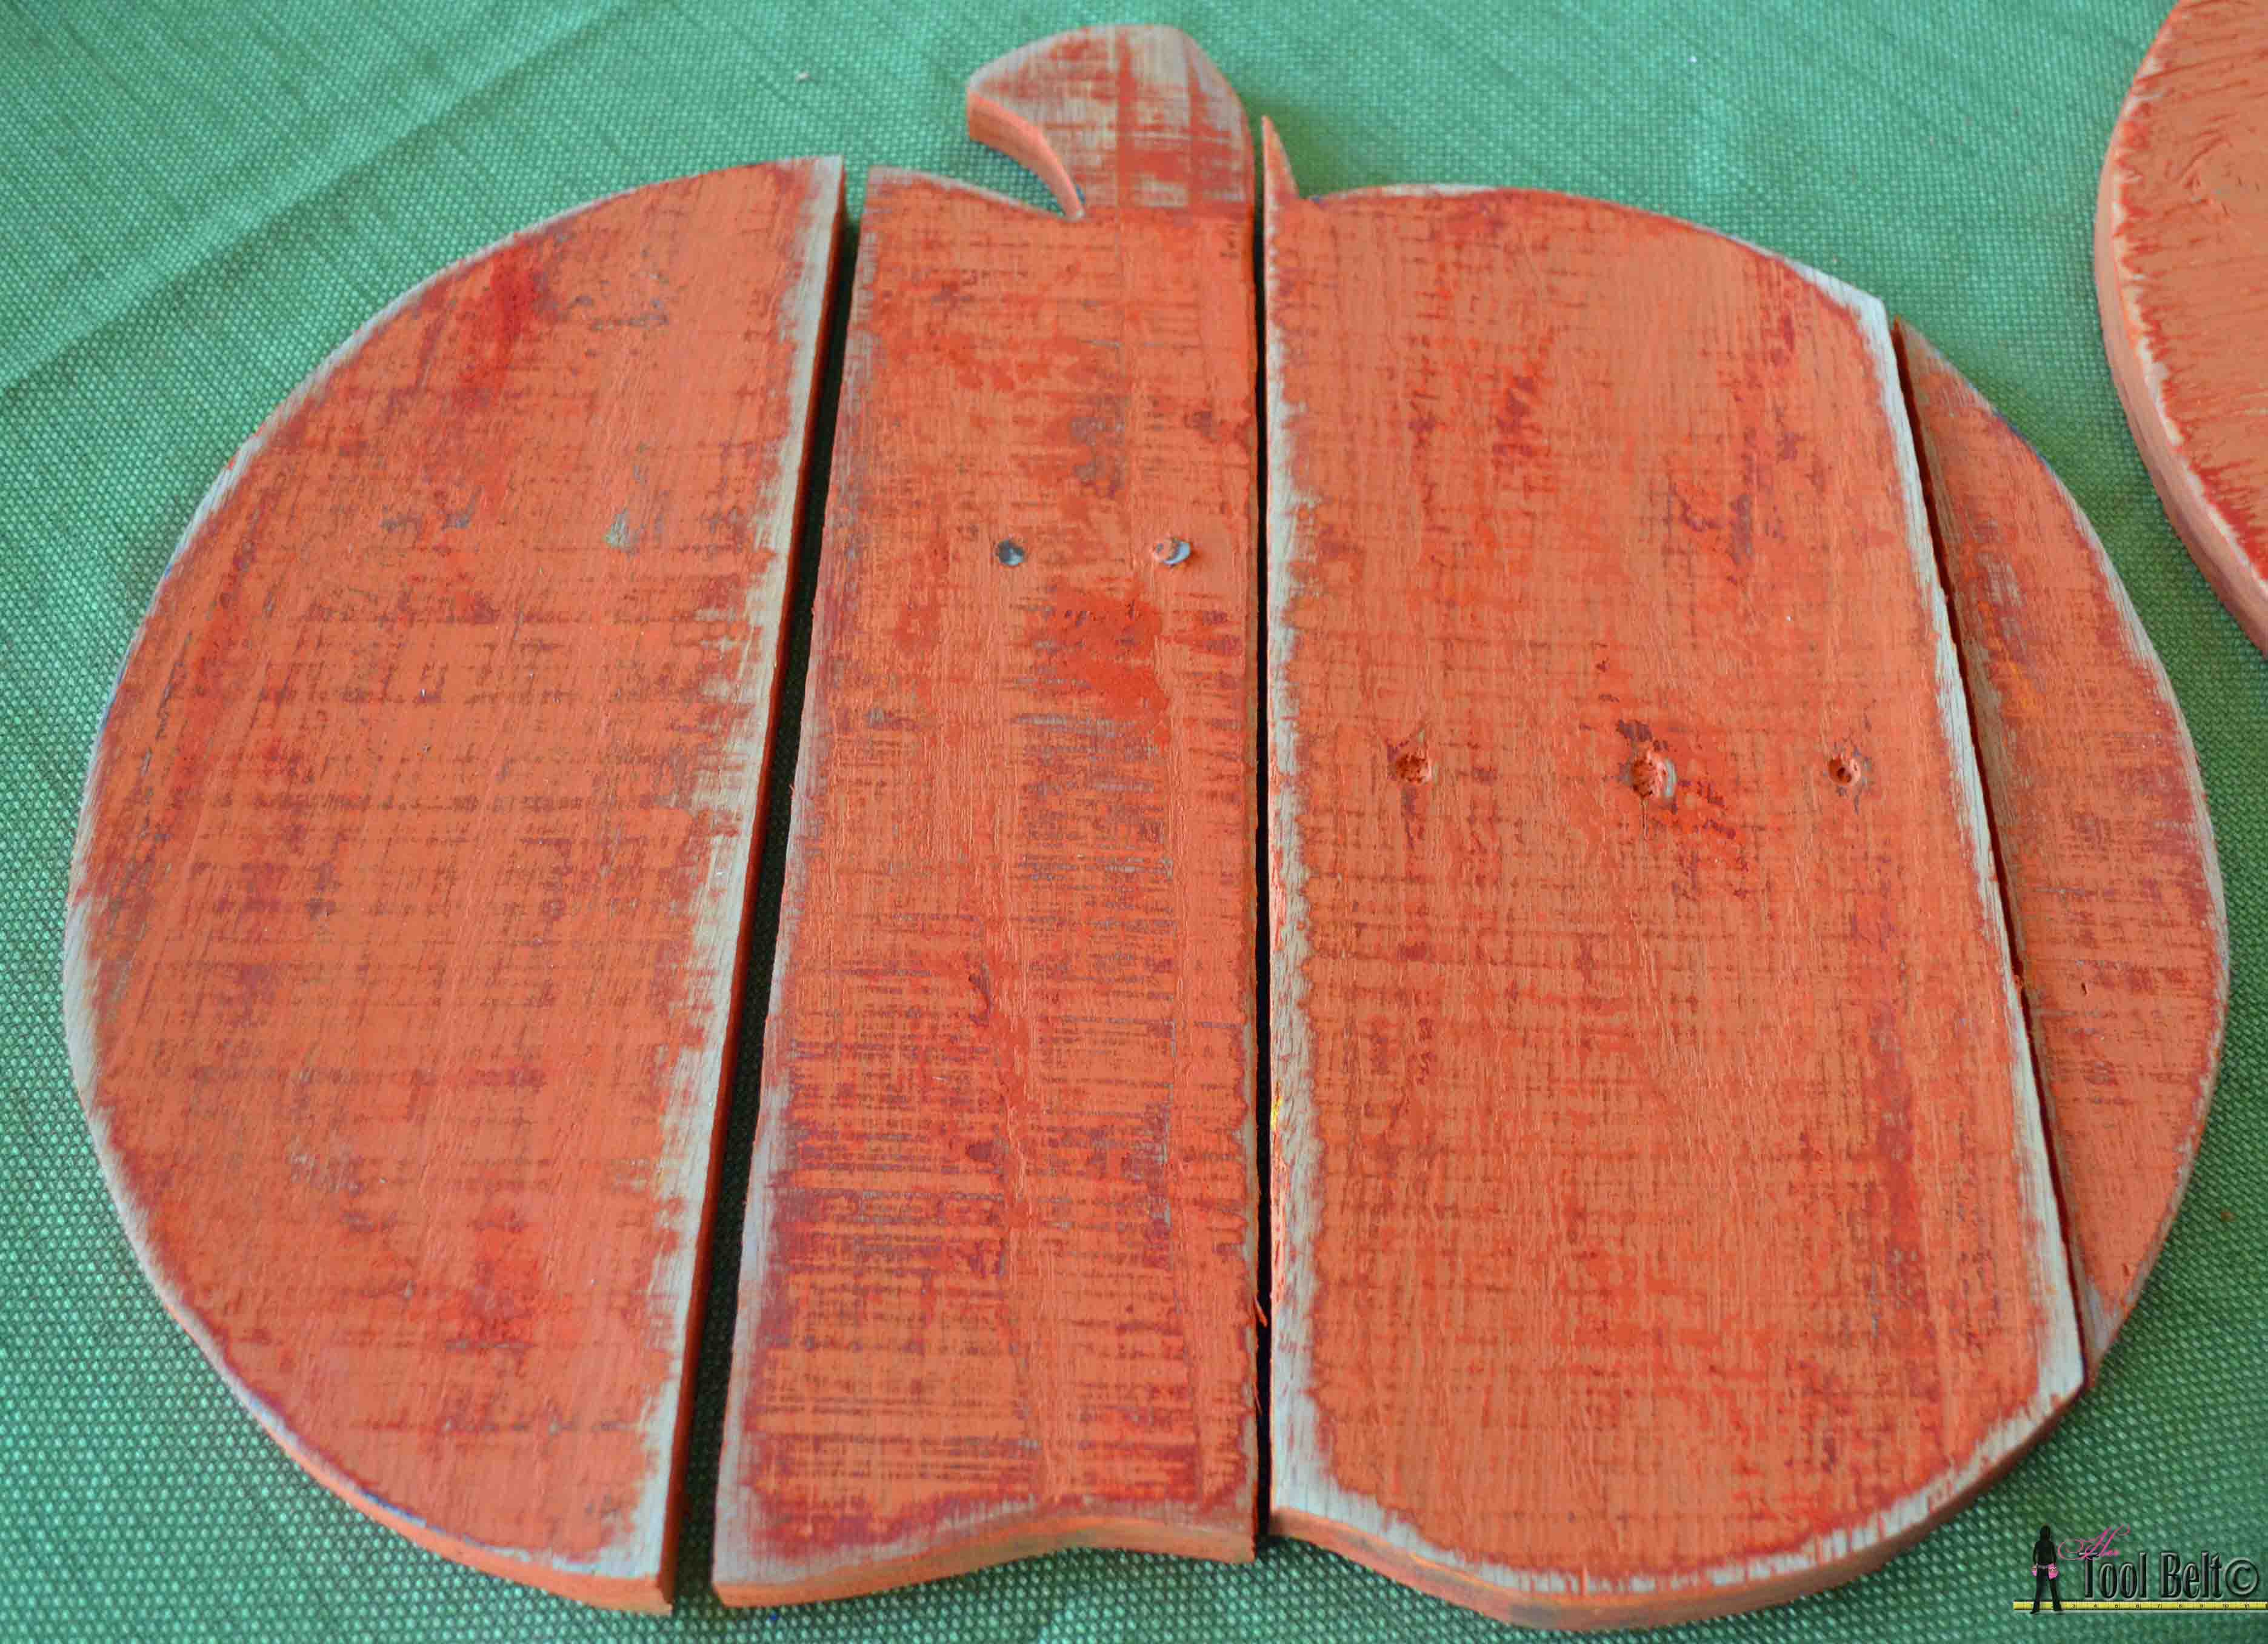
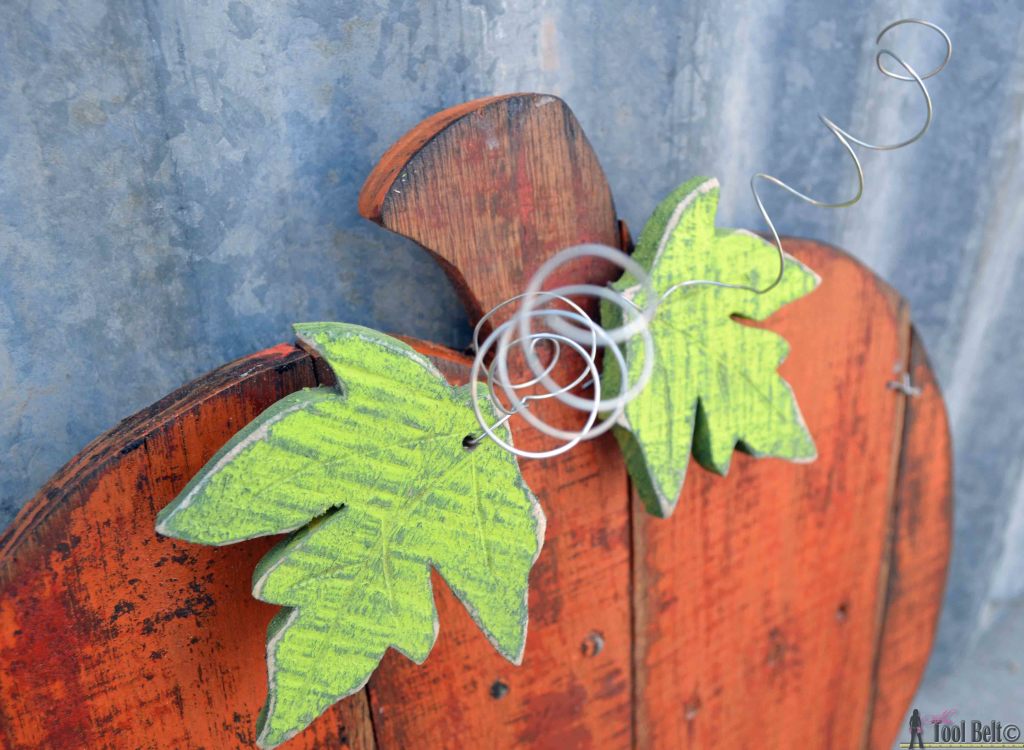
Finally, I brushed on a coat of Minwax dark walnut (affiliate). I let the stain soak in for a minute or so and wiped it off. For the leaves, I painted them a dark green and applied a second coat of lime green color. After the paint dried, I roughed up the edges and face with sand paper.
Step 4
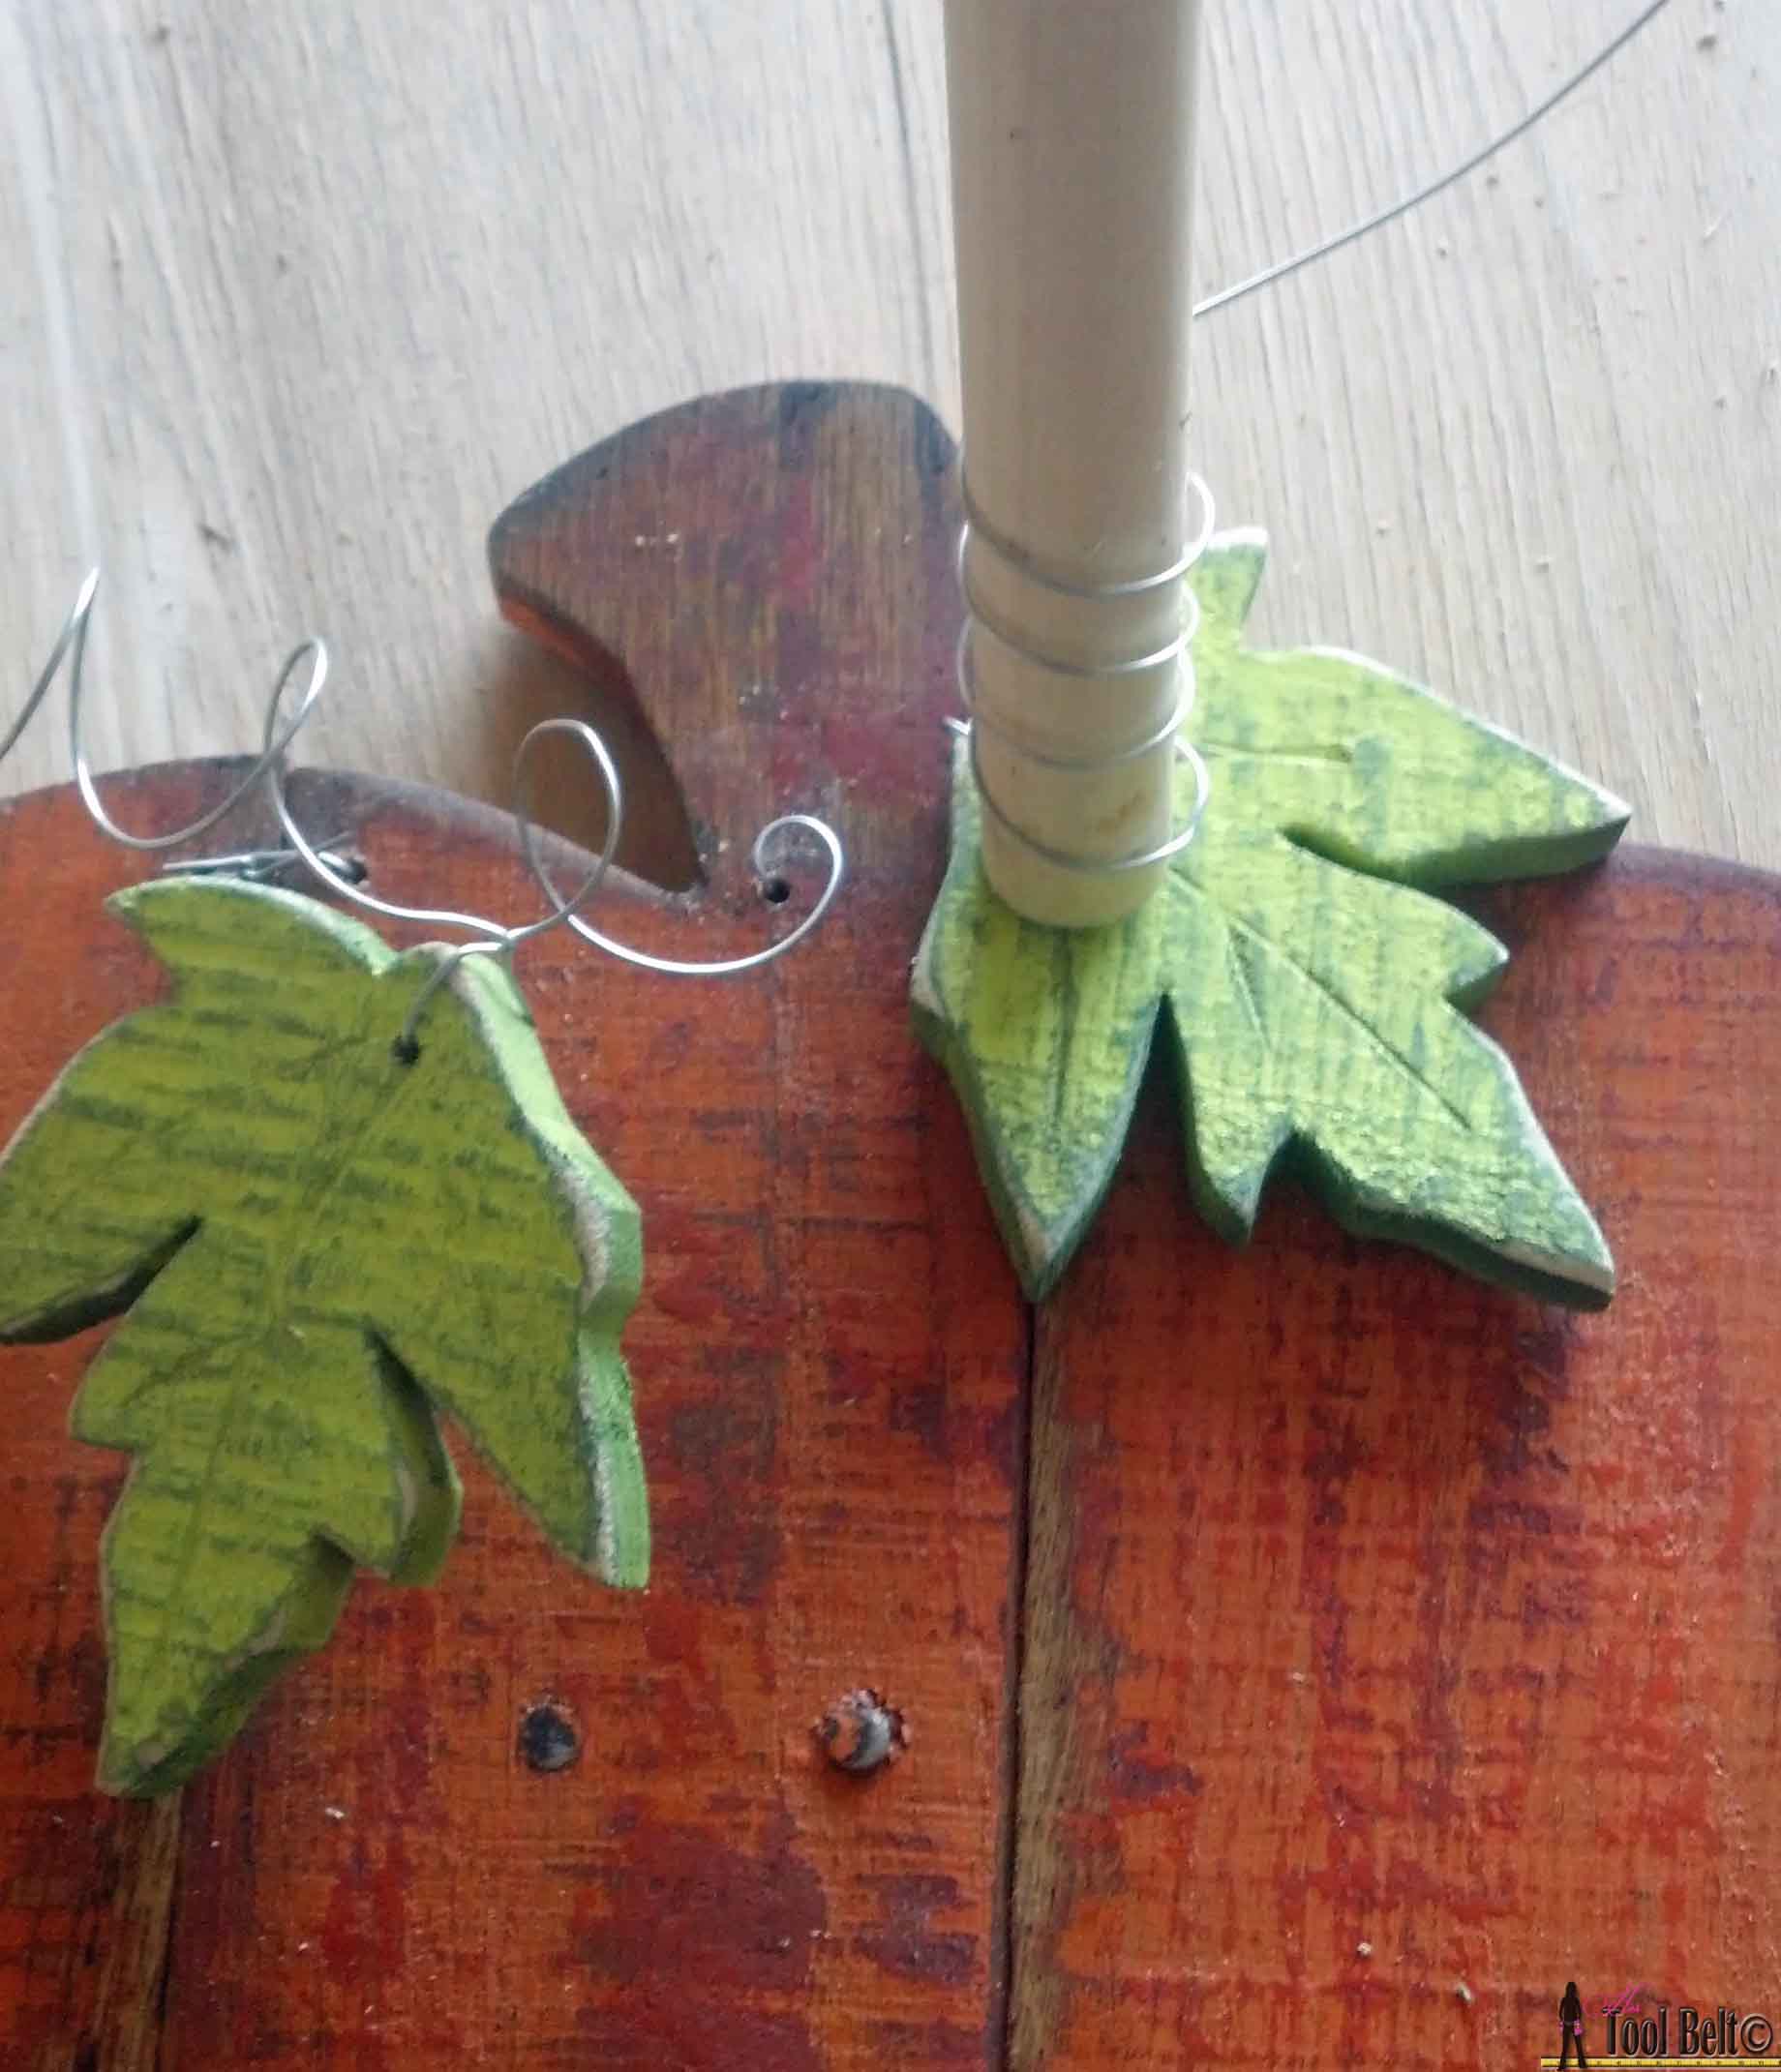
Drill holes in the slats near each other to tie together with wire. 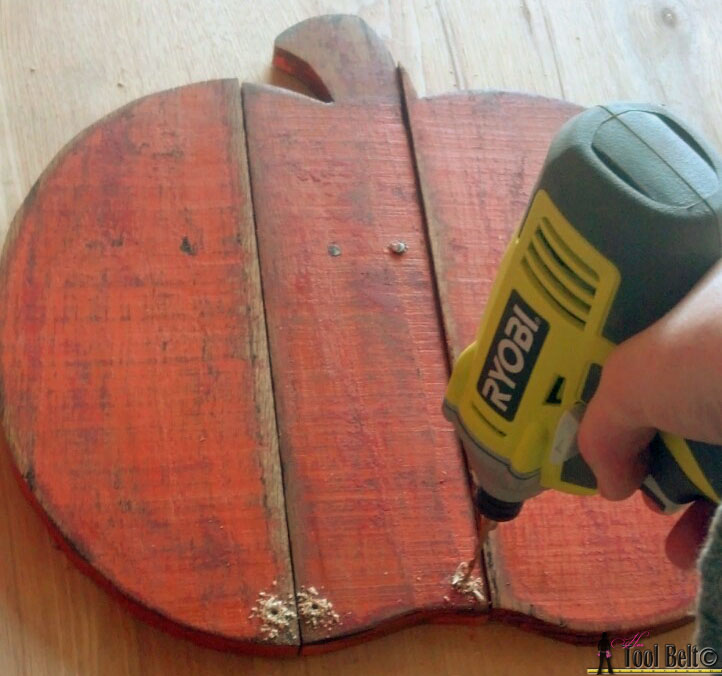
Thread wire in the holes and twist it together until tight. Drill a couple of holes at the top to attach the leaves. You can curl your wire by wrapping it around something round, like a dowel.
If you want the pumpkin to be a door hanger, drill a couple of holes near the top and run a wire or ribbon to hang your pumpkin.
Enjoy your Rustic Pallet Pumpkin! Thanks for pinning
For more Fall Craft projects check out:

Reverse Canvas Halloween Decor | Leap of Faith Crafting
Dollar Store Halloween Decor + Mantel | Remodelaholic
Trick or Treat Halloween Sign w/Cut File | Creative Ramblings
Jack-o-Lantern Halloween Candy Dish | Kailyn Williamson
Dollar Store Mrs. and Mrs. Spider | The How-To Home
Upcycled Tin Pumpkin | Sustain My Craft Habit
Large Skeleton Poster | Deeply Southern Home
Rustic Pallet Pumpkin | Hertoolbelt
Witchy Wallhanging Macrame | construction2style
Quick Dollar Store Halloween Centerpiece | Our Crafty Mom
Easy Halloween Chalkboard Art | Create and Babble
Modern Dollar Tree Pumpkin Makeover | Smiling Colors
Linking to: link parties, savvy southern style, homestories AtoZ
Amy it’s perfect and I absolutely love the little wire bits. Beautiful work.
Thanks Jaime!
This is just fantastic !
I love the green leaves you added to it – such a fabulous diy project !
So cute! I love the wire parts you added. It make it perfect!
Thank you!
Totally adorable, the wire was the perfect touch!
Thanks Mindi!
I love this so much! Just found your site through Pretty Handy Girl and am digging so many of your projects!
Thanks!!!
I love this so much! I want to make one. The one tool in my workshop I haven’t been able to master is my jigsaw! Maybe this will give me a reason to practice!
Thanks Michelle! I don’t feel like I have the jigsaw mastered either. Close enough is plenty good for this project 🙂
What kind of wire did you use? Thanks!
I think it is galvanized steel wire or hobby wire, probably 16 gauge or less. Sorry I don’t know the exact. Any wire that you can twist together will work.
Love this rustic look !
Cute! Looks so good! Pinned and tweeted. We truly appreciate you taking the time to be a part of our party. Please stop by and party with us again. The party starts Monday at 7 pm and ends on Friday at 7 pm. Happy Sunday! Lou Lou Girls
Love this and love how you included a patter for the pumpkin. So many have you draw your own pumpkin and not all of us can draw?. Thank you for sharing your inspirations with us down to the little details.
Super cute!
Thank you!
Thank you so much for your pattern. I’ve been looking for one and your pattern and directions are easy to follow. You rock!
I love it! I can’t wait to make some next season to go with the Scarecrow we just made. This year I whipped some out of 1 x 12 scrap lumber but I think these will be an even bigger hit..
Thanks for sharing!!!
Really love your pumpkin, love making them, painting them, etc. Really gets me into spirit of Fall. Nothing like pumpkins of any shape to say Fall. Get so much enjoyment decorating our front porch with whatever can think of but especially pumpkins.
Mr. Furry made me promise not to do Fall decorating til end of Sept. cause he says I get carried away every year. Could that possibly be? lol. Can’t stop me from working on projects tho.
Can’t print pattern or how-to’s as printer on the fritz, bad timing. The ink for our printer is ridiculously expensive. Cartridge makers sure have us don’t they?
Thanks again for sharing. Have great week
I did it! I made one of these rustic pumpkins. And it wasn’t hard at all. I just love it and so does everybody I show it to! Thank you for such a great tutorial.
I think I’m going to try your double x bench next. I need a bench for my front porch and I really like your double x style.
Awesome! Watch out, building is addicting 🙂