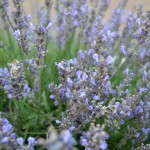
I have had a Lavender bush in my herb garden for a few years. I'm embarrassed to say that I've never done anything with it. This year the bush did really well and I thought I should at least do something with the sprigs. I've seen some super cute wreaths and ideas on pinterest. I thought a lavender orb or sphere might be really cool, very 3-D and lots of texture ...in my … [Read more...]
Easiest way to disassemble a pallet and keep the nail holes
http://youtu.be/o2L3TQkvcHA Today's Tool Time is all about disassembling a pallet...but keeping the nail holes. If you've ever tried to take apart a pallet with a hammer, you know it is a pain in the rear. Plus you probably cracked a number of your slats (that you wanted to keep.) Using a reciprocating saw (sawzall) is a simple way to cleanly disassemble a pallet, not … [Read more...]
Reciprocating Saw (Sawzall) how to’s & tips
http://youtu.be/VlnqU1-qMOE Today's Tool Time is about the Reciprocating Saw also known as the Sawzall. The reciprocating saw is great for difficult area that you need to make a cut. Wood and metal saw blades are easily interchanged, and blades come at various lengths. Cuts using the reciprocating saw are probably not the most precise or smooth, but it'll do the … [Read more...]
Tom Turkey Thanksgiving Decoration

Don't you just love this time of year? Fall is in the air, and Thanksgiving is right around the corner. Tom Turkey is here to help you celebrate. This craft is great because it is versatile to adapt to whatever scrap materials you have around. Here is the pattern and how I put it together. … [Read more...]
Halloween Witch Decoration
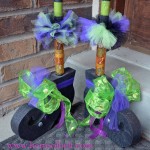
I saw this Halloween Witch idea at Swiss Days in Midway, Ut this summer. The witch was definitely my favorite Halloween decoration I saw. I wish I would’ve written down the booth name, so I could link to their witch, because it was cuter, with a lime green boa. I had fun making this witch, and I know you’ll enjoy it too. Here is a tutorial and template. … [Read more...]