
This post is sponsored by The Home Depot. I have been compensated for my time and provided with product. All ideas and opinions are my own. This post contains some affiliate links for your convenience. Click here to read my full disclosure policy. Buying a home is an exciting time in life. Finally a place to call your own, make your own and create wonderful memories in! … [Read more...]
DIY Free Pallet Porch Table
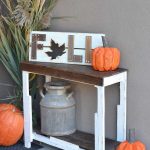
This post is sponsored by The Home Depot. I have been compensated for my time and provided with product. All ideas and opinions are my own. This post contains some affiliate links for your convenience. Click here to read my full disclosure policy. The cheapskate in me sure does love a good deal and even better FREE!!! My Dad has been doing a number of improvement projects at … [Read more...]
Overhead Garage Storage Shelf
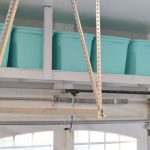
This post is sponsored by The Home Depot. I have been compensated for my time and provided with product. All ideas and opinions are my own. This post contains some affiliate links for your convenience. Click here to read my full disclosure policy. I've been working on adding storage areas in my home. There is this space right above the garage door that makes a perfect … [Read more...]
Milwaukee Tick Tracker Tool Review
This post is sponsored by The Home Depot. I have been compensated for my time and provided with product. All ideas and opinions are my own. This post contains some affiliate links for your convenience. Click here to read my full disclosure policy. Back in April I was invited to attend an event in Atlanta hosted by The Home Depot called the Prospective. At the event a group … [Read more...]
Dremel MM45 Oscillating Tool Review and Universal Cut Blades
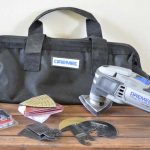
This post is sponsored by The Home Depot. I have been compensated for my time and provided with product. All ideas and opinions are my own. This post contains some affiliate links for your convenience. Click here to read my full disclosure policy. You might not have an oscillating tool high on your wish list, but with the wide range of capability you may need to rethink … [Read more...]
DIY Patriotic Wood Flag

This post is sponsored by The Home Depot. I have been compensated for my time and provided with product. All ideas and opinions are my own. This post contains some affiliate links for your convenience. Click here to read my full disclosure policy. It is creeping up to July and I wanted to add some patriotic decor to my front porch to celebrate the 4th of July. I love the … [Read more...]
DeWALT DWS780 12″ Dual Bevel Compound Miter Saw Review
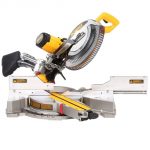
This post is sponsored by The Home Depot. I have been compensated for my time and provided with product. All ideas and opinions are my own. This post contains some affiliate links for your convenience. Click here to read my full disclosure policy. I'll be honest, I've been wanting to review one of these DeWALT miter saws ever since I was tiling my sister's house back in … [Read more...]
Getting Started in Woodworking

This post is sponsored by The Home Depot. I have been compensated for my time and provided with product. All ideas and opinions are my own. This post contains some affiliate links for your convenience. Click here to read my full disclosure policy. Woodworking has been my favorite hobby for many years. My Dad had a little shop in the basement and when I was young I used to … [Read more...]