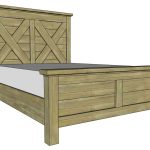
A little while ago, I built myself a X Barn door farmhouse bed - king size, which we love. The version of the king bed I made has storage underneath the bed. I received a few requests to make plans for Queen size bed without the under bed storage. If interested, here are plans for a matching nightstand - Farmhouse X Nightstand Picture of the Kingsize version: This is … [Read more...]
White Shiplap Mudroom Makeover
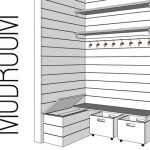
This post is a reader request for a shiplap mudroom that will better utilize the small space. The reader Marla wanted an 'L' bench with pull out shoe crates (from Jaime Costiglio) and a hinging bench top (for winter boots, etc). … [Read more...]
Window Shadow Box Shelf Plan

The Window Shadow Box Shelf and Diablo saw blade Tool Review is sponsored by The Home Depot. I have been compensated for my time and provided with product (tools). All ideas and opinions are my own. This post contains some affiliate links for your convenience. Click here to read my full disclosure policy. A few weeks ago I made my toddler a 'big girl' bed...but not too big! … [Read more...]
House Frame Toddler Bed
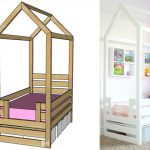
My toddler is in need of a bed upgrade! I liked the little house frame doll beds in the playhouse so much, I thought it would make a darling toddler bed. This house frame toddler bed uses a crib mattress (approx 28" x 52"), making it a perfect way to transition from a crib. My daughter is a mega roller, so full side rails are a must. On the foot board of the bed, I added slats … [Read more...]
King X Barn Door Farmhouse Bed Plans
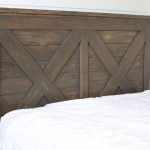
This King X barn door farmhouse bed is sponsored by The Home Depot. I have been compensated for my time and provided with product (tools). All ideas and opinions are my own. This post contains some affiliate links for your convenience. Click here to read my full disclosure policy. After having my youngest child, and being a bit older ;-), my back started to really hurt. … [Read more...]
DIY Backyard Fire Pit
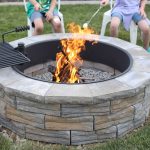
This DIY backyard fire pit post has been sponsored by Home Depot. I have been compensated for my time and provided with product(tools). All ideas and opinions are my own. This post contains some affiliate links for your convenience. Click here to read my full disclosure policy. Summer projects are in full swing around here and I have quite a list that I'd like to accomplish … [Read more...]
Connie Round Side Table Plans
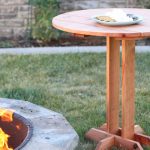
The round side table plan and Ridgid battery starter, hammer drill and jigsaw tool review is sponsored by The Home Depot. I have been compensated for my time and provided with product (tools). All ideas and opinions are my own. This post contains some affiliate links for your convenience. Click here to read my full disclosure policy. This summer I have been chipping away at … [Read more...]
Double X Console Table Plans
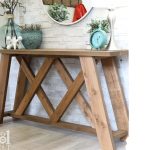
I completely renovated my entryway a few weeks ago (check it out here). This new Double X Console Table is the anchor piece to the room. It is a similar style to one of my favorite benches, just made it table-sized. :-) The lumber for this table only cost me about $38! Sweet. How to Build a Double X Console Table … [Read more...]
How to Build a Redwood Pergola with Arch Detail
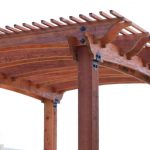
I am super excited to share with you my latest project. I have started working on creating an outdoor entertaining space and the first item crossed off the list is a redwood pergola! As a wood lover, I was truly in awe working with redwood. While cutting and sanding, the redwood looked like any other lumber. At some point the boards actually looked like douglas fir. When I … [Read more...]
Entryway Remodel – Spring Renovation Challenge – Week 6 Big Reveal

Oh my goodness, it's the Big Reveal day and I'm super excited. I am participating in a Spring Renovation Challenge hosted by Jeffrey Court Tile <-- Check out all the DIY'ers and Designers I would love your vote, click here. You can vote once/week. Thanks so much!!! Here is the new entry! Ahhh YAY … [Read more...]