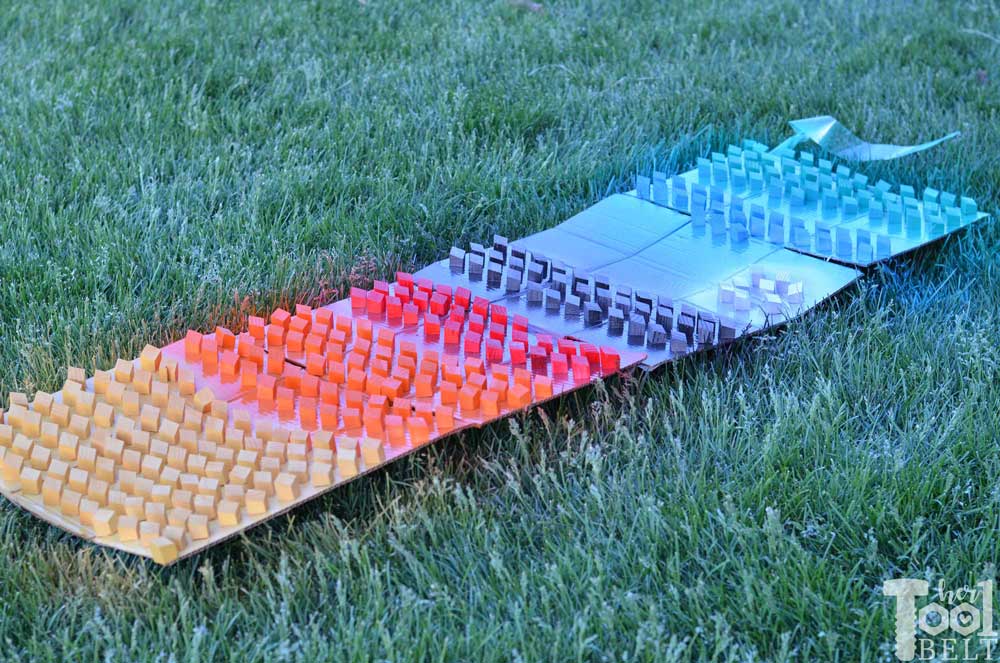
A few weeks ago I participated in a challenge to make something with a summer festival theme. Summer Festivals seem to come in all shapes and sizes. One of my favorite types of festivals are Balloon Festivals. There is something magical seeing the Hot Air Balloons light up and float in the sky. I also love seeing all the bright colors and clever designs of the balloons. For my Festival Challenge project, I thought it would be fun to make a scrap wood 3D pixel art piece of a Summer Balloon Festival. I think it turned out neat with all the texture and colors! The great thing is that you can turn any photo you want into 3D pixel art, it’s easy but a little tedious!
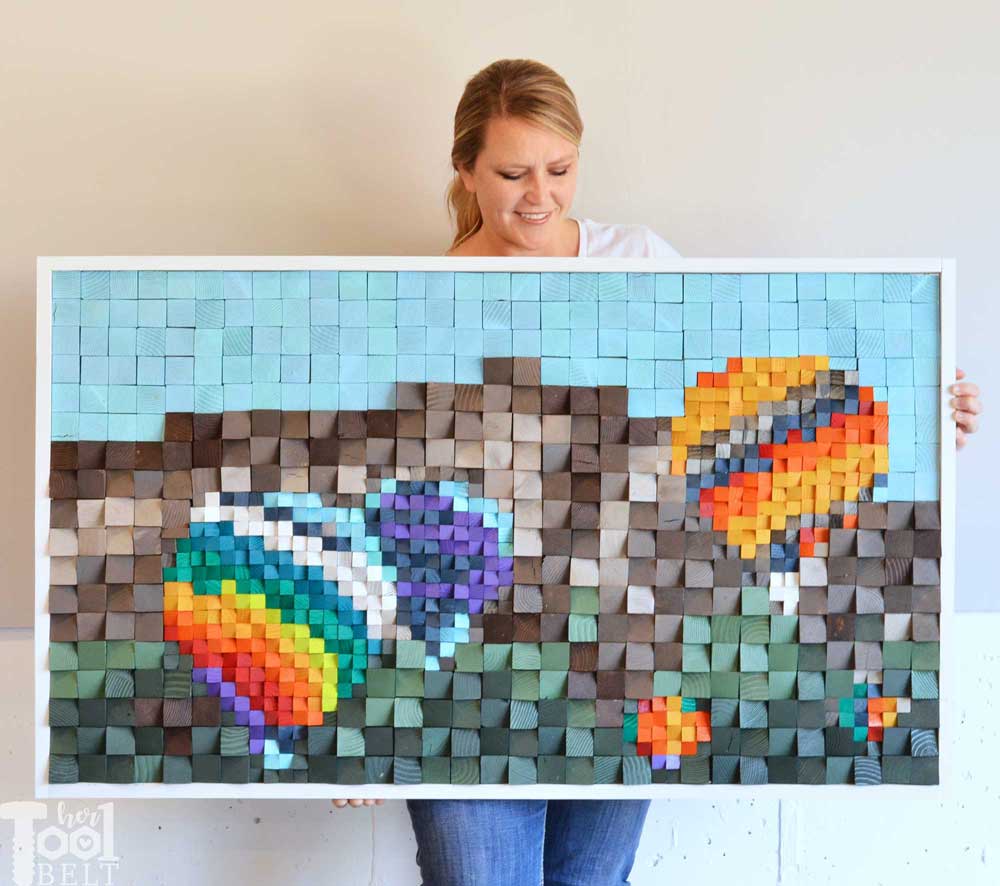
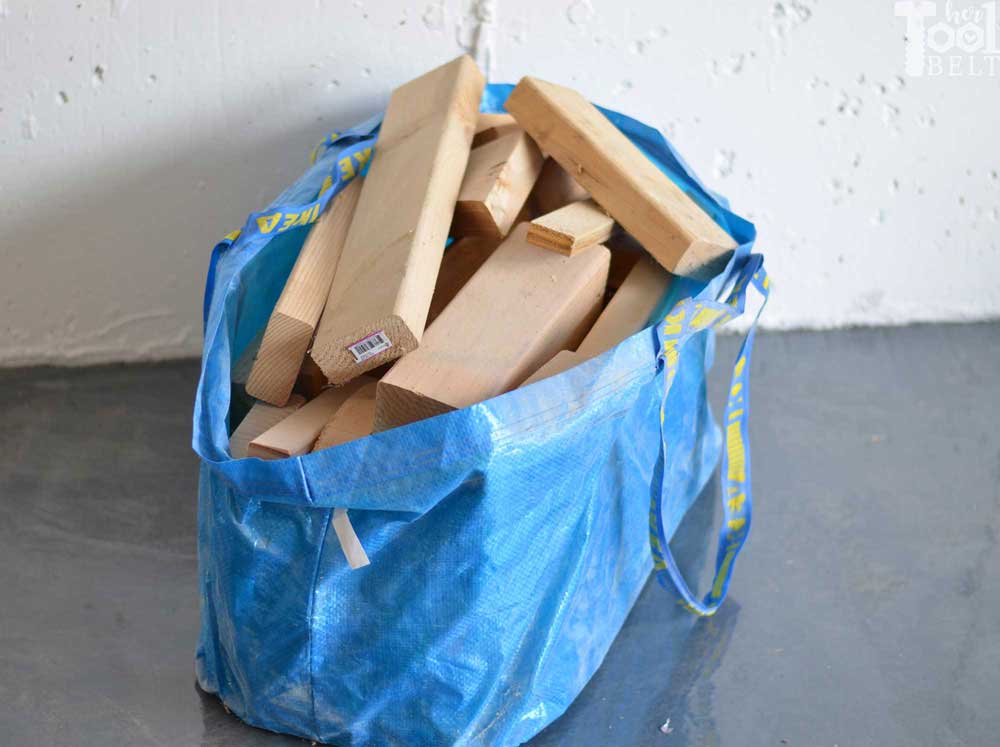
This 3D pixel art is also a great way to use up some scrap wood. My scrap pile is way bigger than I’d like to admit, I used up a bunch of small 2×4 pieces, 1×4 pieces along with some longer 1×4 pieces that were in bad shape (the frame).
Speaking of scrap wood, I’m participating in a #scrapwoodchallenge with 18 talented makers hosted by my friend Jen Woodhouse. Check out the list of cool projects at the bottom of the post!
How to Make Scrap Wood 3D Pixel Art from a Photo
I knew I wanted the background pixels to be the size of 2×2 board (1 1/2″ x 1 1/2″), so the length I was aiming for was 32 blocks x 1 1/2″ each = 48″ long.
Let’s start with the photo.
How to Pixelate a Photo with Photoshop Elements
I use Photoshop Elements to do photo editing, it’s a much cheaper option than the traditional Photoshop with not as much capability. However it’s been great for me for many years. You can get a free trial here. Usually you can get the Photoshop Elements for around $60 on sale.
I started with a picture of a mountain that I took recently.
 Then superimposed a few hot air balloons on to the mountain background.
Make sure your layers are showing in the right hand column, if they’re not showing, click on the layers button at the bottom right corner.
To Pixelate an Image
- Click on the layer you want to pixelate (I’m starting with the mountain.) You may only have 1 layer.
- Click Filter (top menu bar)
- Pixelate
- Mosaic
![]()
- Adjust the cell size until you reach the pixel size you want.
- I wanted my scrap art 48″ wide and the blocks are 1 1/2″ wide, that means I want 32 blocks across. My cell size was 108.
![]()
- Since the balloons are separate layers, I had to pixelate them one at a time. I wanted the balloons to have more detail than the mountains, so I made the pixels 1/2 the size of the mountains. Cell size of 54.
![]()
Now I printed this out and it was my template for the pixel wood art. Hot Air Balloon Template
Cutting the Scrap Wood Blocks
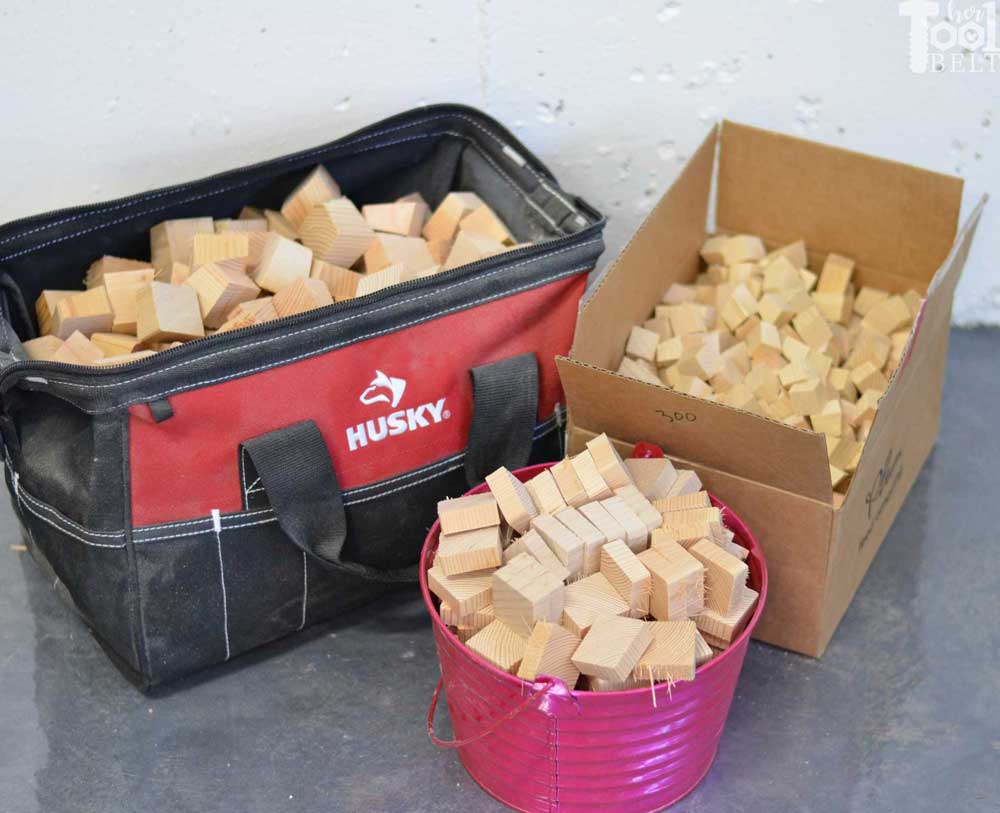
I counted up the number of 1 1/2″ x 1 1/2″ block and 3/4″ x 3/4″ blocks needed for the 3D pixel art.
- 413 – 1 1/2″ x 1 1/2″ blocks
- 572 – 3/4″ x 3/4″ blocks
Oh boy, that’s a lot of cutting! 🙂 Being a bit of a hoarder, I have a large pile of scrap wood that worked out perfect for this project, and I’m happy to make something fun with the scrap pieces.
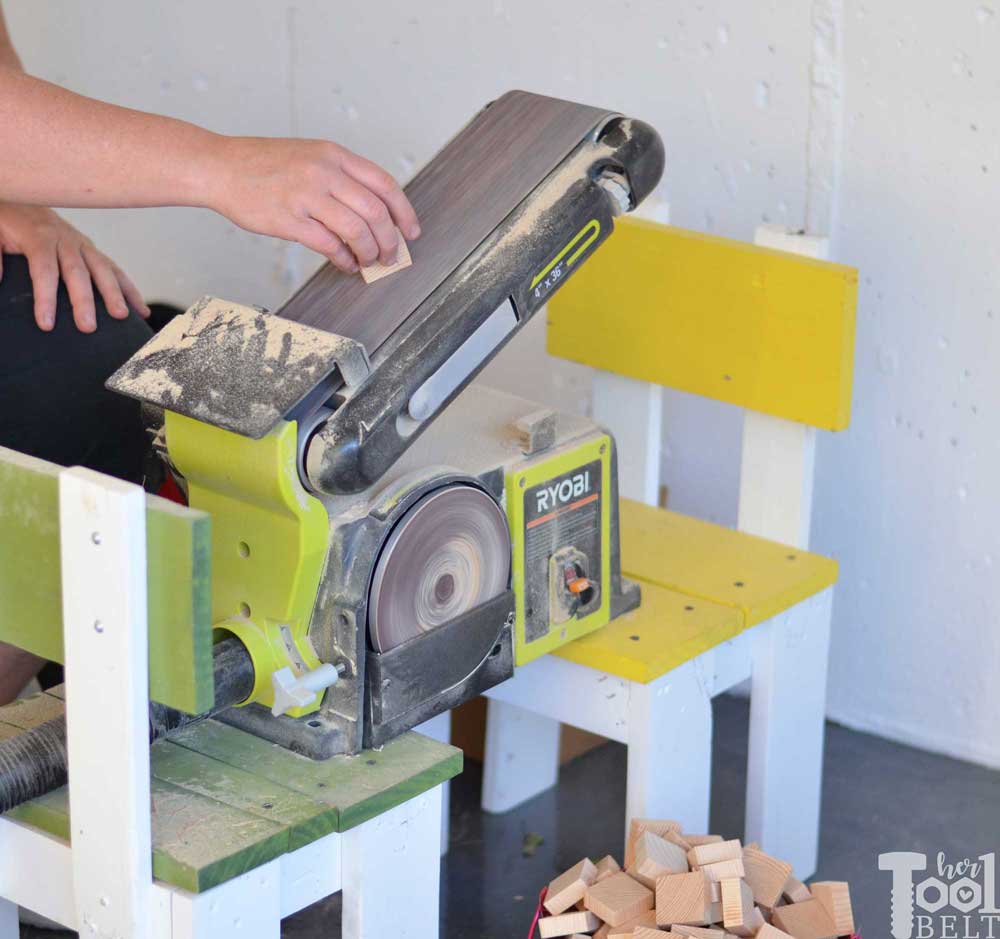
I cut the wood down to 1 ½” x 1 ½” for the scenery and ¾” x ¾” for the balloons. Then cut the pieces at a 15 deg miter and 15 deg bevel. The blocks were 1/2″ tall at the shortest corner. To make this easy, I marked the 1/2″ on one block and lined it up on the miter saw, then made a pencil line on the miter saw table and line the wood up to the mark each time. I have two miter saws, this DeWALT and a Ryobi battery saw. I left the DeWALT at 15 deg miter/15 deg bevel and had the Ryobi at a straight 90 deg cut. Then I just alternated between the saws. This was a very tedious part, but went faster than I thought. The pieces for the blue sky, I decided to leave flat and cut them 1/2″ thick.
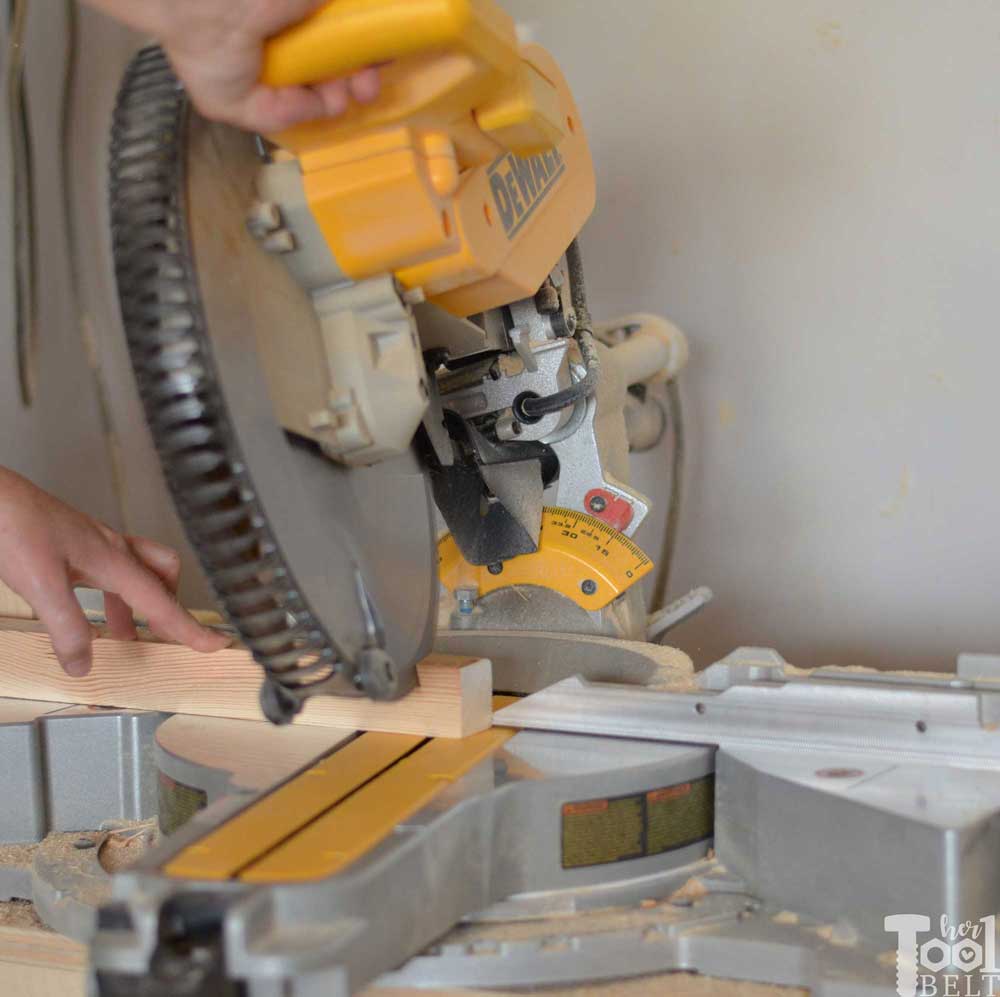
1100 cuts later, I have a nice pile of much smaller scrap wood.
I quickly sanded the wood pieces to smooth down any rough areas.
Time to Paint/Stain the Scrap Wood Blocks
I went through all of my partial cans of spray paint and stain and assigned block colors that closely matched a lot of my paint/stain. I did have to pick up a couple paint can colors that I didn’t have.
Stains:
- Varathane Kona
- Varathane Briarsmoke
- Varathane Sunbleached
- Varathane Worn Navy
Paints:
- Rust-Oleum Chalked Linen White
- Rust-Oleum Hunt Green
- Rust-Oleum Moss Green
- Rust-Oleum Apple Red
- Rust-Oleum Real Orange
- Rust-Oleum Lagoon
- Rust-Oleum Grape
- Rust-Oleum Oil Rubbed Bronze
- Rust-Oleum Key Lime
- Rust-Oleum Tuscan Sun
- Rust-Oleum Rich Jade
- Rust-Oleum Harbor Blue
- Rust-Oleum Silver Metallic
- Rust-Oleum Light Turquoise
Using my pixel template, I separated the blocks for painting and staining.
Assembling the 3D Pixel Art Mosaic
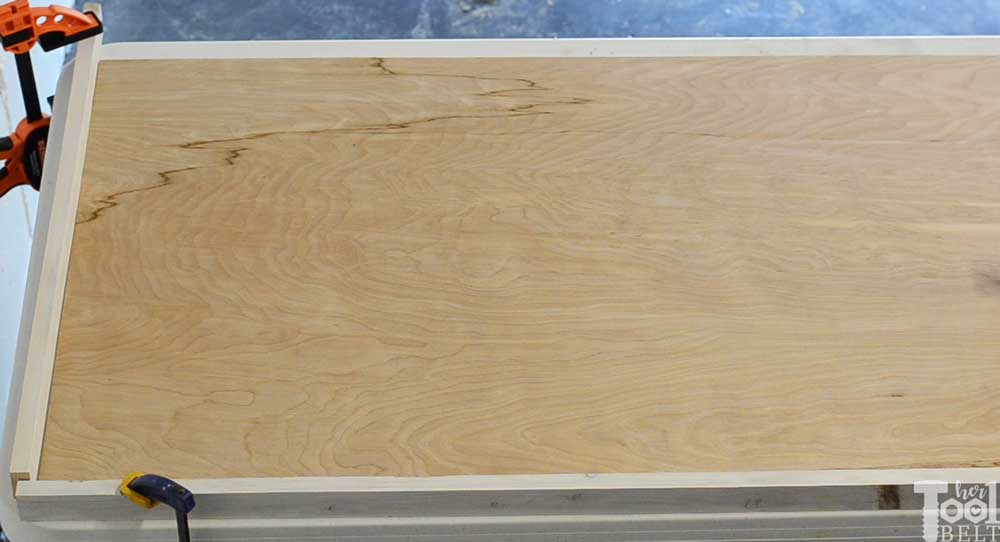
Once the paint and stain dried, I cut down a piece of ¼” plywood to 27” x 48”. I also clamped a straight board on 2 of the sides, so I’d have a 90 deg corner to start from.
I spread wood glue on the plywood and started gluing the blocks in place. I rotated the blocks in a pattern and also followed the pixel color template. To make glue up faster, I found it easiest to get a section of blocks how I wanted them, then glue them in a group. If I glued one block at a time, it would’ve taken FOREVER.
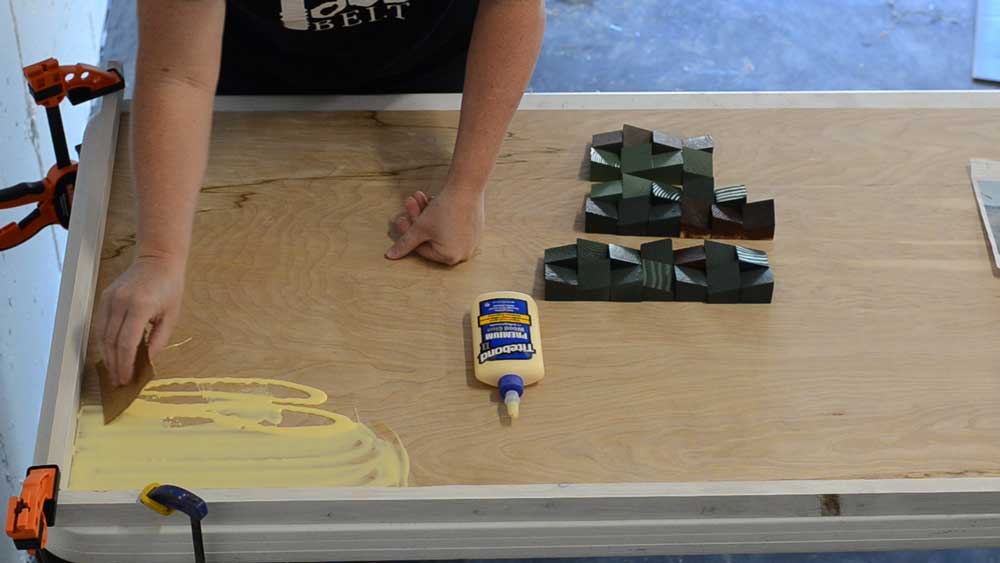
It was fun to see the photo come to shape.

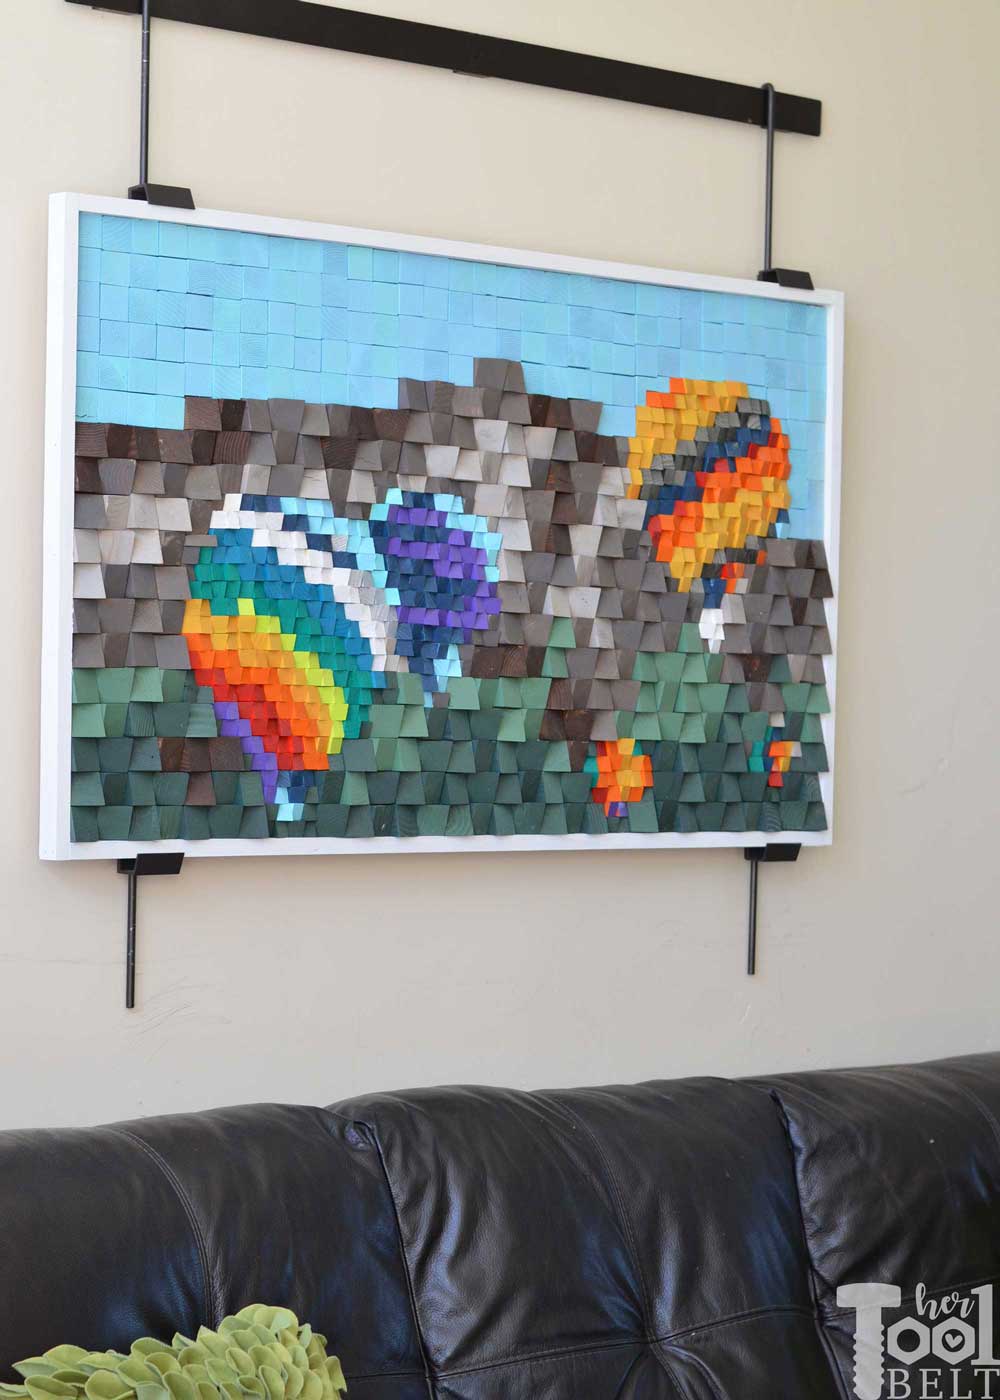
After the glue dried, I added a ¾” x 1 ½” frame around the blocks and used a brad nailer with 1 1/2″ brad nails to hold it in place.
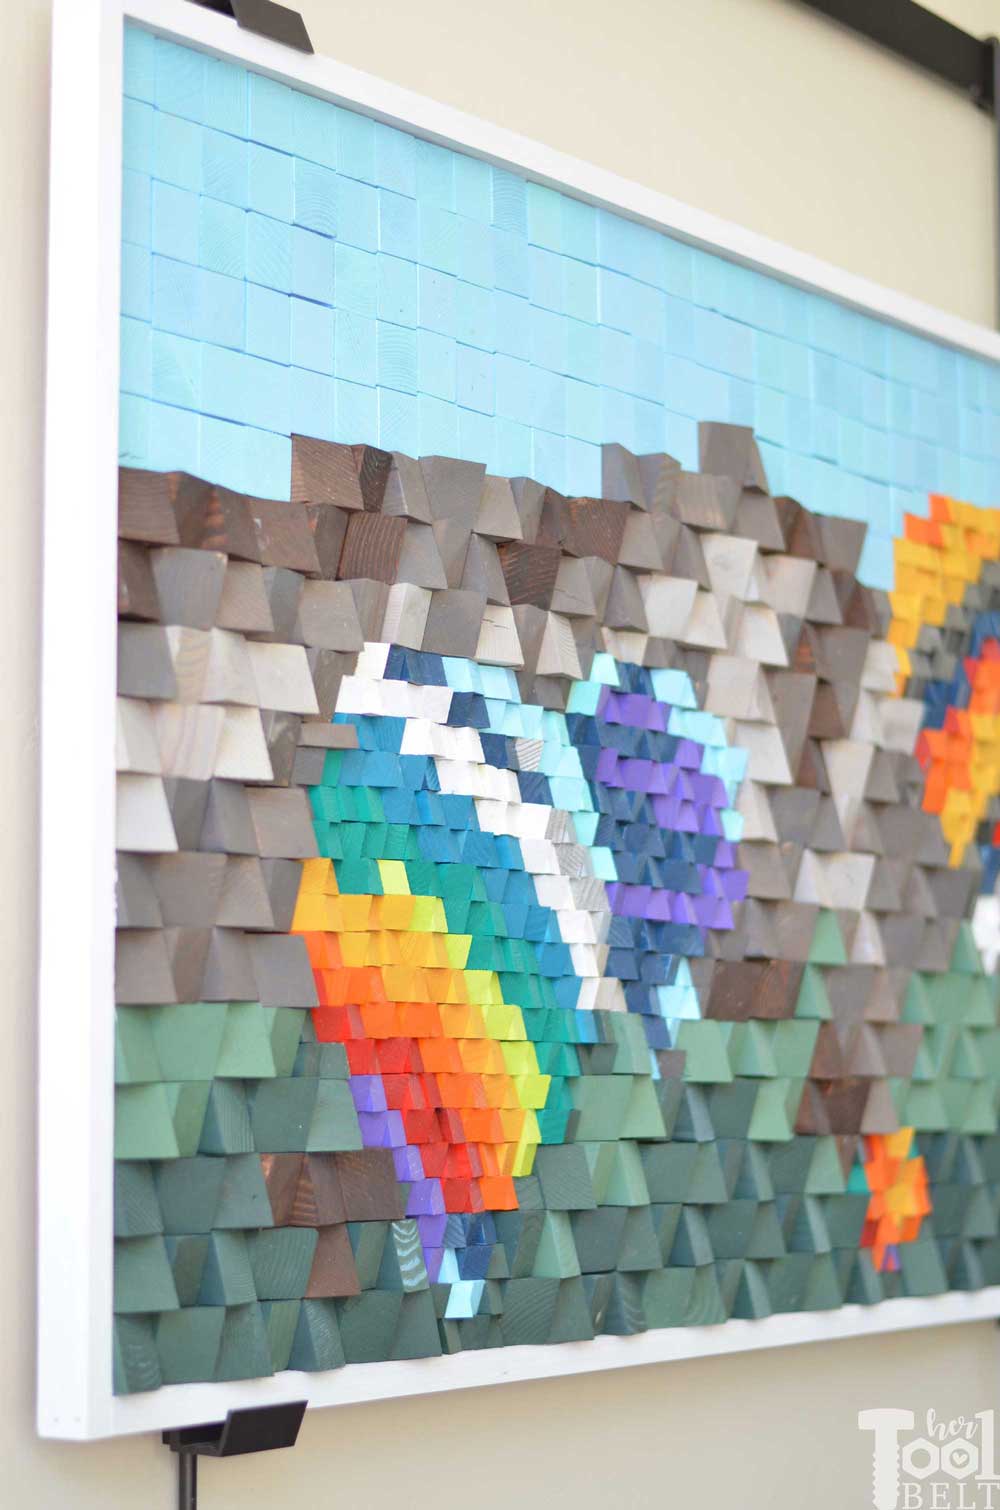
This was a fun project to work on, and it can be done with any photo or design. What design would you make a 3D wood art of?

Pin for later!
![]()
Now time for the rest of the #scrapwoodchallenge projects! So many great ideas.
Check out these other awesome Scrap Wood projects:
- The House of Wood – DIY Bunk Buddy
- 3×3 Custom – Scrap Wood Trivets
- Ugly Duckling House – Mini Garden Deck
- The Created Home – Animal Coin Banks
- Her Toolbelt – 3D Pixel Art
- The Kim Six Fix – Outdoor Drink Stakes
- DIY Huntress – Scrap Wood Coasters
- Mr. Build It & Mrs. Style It – Bent Plywood Headphone Stand
- At Charlotte’s House – Buffalo Check Tray
- Sawdust 2 Stitches – Scrap Wood Wall Decor
- Bower Power – Pallet Baseball Hat Rack
- Pneumatic Addict – Table with Epoxy Resin
- Anika’s DIY Life – DIY Spice Rack
- 100 Things 2 Do – DIY Can Crusher
- Hazel + Gold Designs – Patio Table Drink Holder
- Reality Daydream – Scrap Wood Shoe Cabinet
- House Becoming Home – Modern DIY Clock
- Chatfield Court – Wooden Garden Obelisk
You knocked it out of the park on this one!!
This is amazing!
WHAAAAA?!?! AMY YOU ARE PLAIN AMAZING.
xo – kb
You are AMAZING. That is all.
This is SO AWESOME!! AMAZING!!! I am speechless!
Beautiful!
What was the formula to figure out the pixel size? (How did you arrive at a cell size of 108?)