 To finish off the look of your kitchen, a backsplash is a must. Tile is a great backsplash, you can be very creative and the options seem endless. Tiling is not a difficult job. I’ll walk you through how I did mine. I love the look of glass tile, but was a little apprehensive about using glass mosaic alone because my granite countertop is a little busy. I also love the look of subway tile, so I ended up with a combo of the two.
First you’ll want to calculate how much tile you’ll need to purchase. Simply measure the total length of the wall you plan on placing the tile. Measure the height of the space from the countertop to the bottom of your cabinets. In feet, multiply the length and width together to get square-ft. Most tiles will be sold in packages of xx sq-ft. The travertine bricks came in a package of 1 sq-ft. Mosaics generally come in a 1 ft x 1 ft sheet, held together with a mesh. You can simply cut the mesh if you need a different size.
Materials needed:
- Tile
- Premixed mastic (tile adhesive)
- Wall trowel (saw tooth edges on 2 sides)
- 1/8” tile spacers
- Pennies
- Grout
- Rubber float
- Tile saw or a grinder with a tile blade
- Grout sealer/tile sealer
- Sponge
- Caulk
- Straight edge
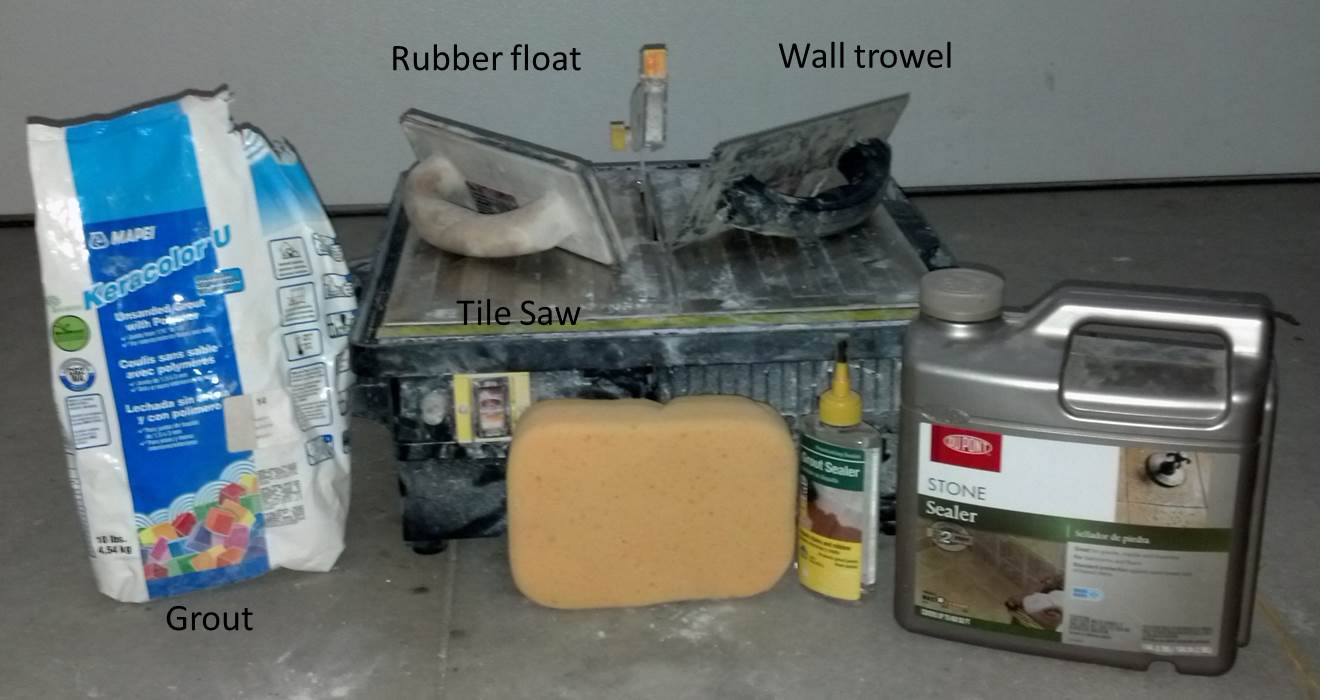 Example of some of the supplies used.
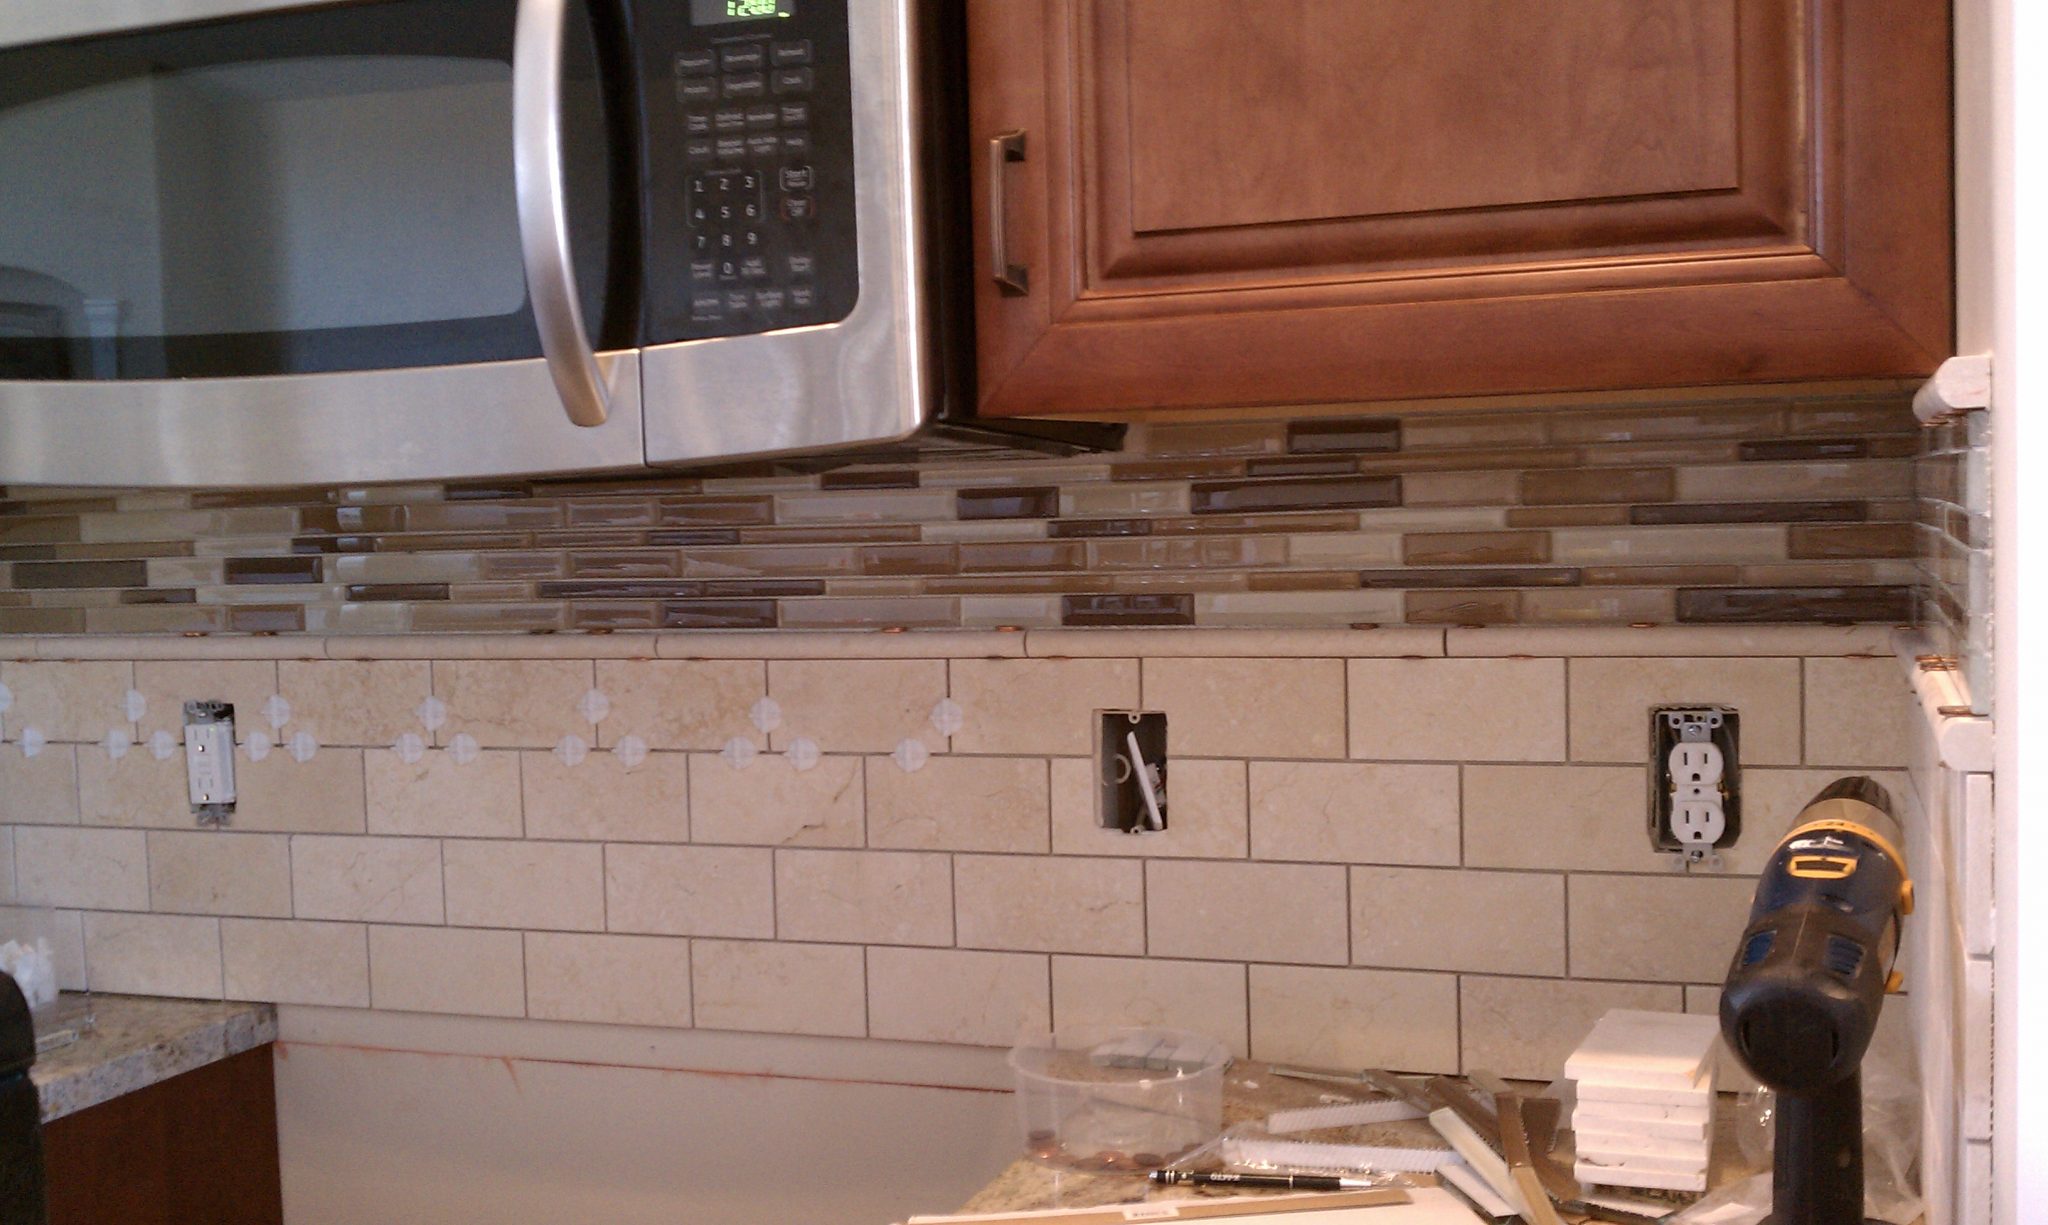
Remove all of the outlet face plates; loosen outlet screws enough that the tile will fit behind the outlet tabs; and anything else on the wall. If your tile will be spanning areas without counter space (like behind the stove) attach a board to the wall that is level with the counter, to support the tile while it is curing. Make sure the wall is clean, grease and dirt will inhibit the tile from sticking.
I used pennies for the spacing between the first row of tile and the counter. You can use whatever you have to achieve the spacing that you desire. Work in 1-2 foot sections so your mastic doesn’t dry out before you get to it. Spread a thin layer of mastic on the wall, using the saw tooth portion of the trowel, make grooves in the mastic. Butter the back of a tile with the mastic and again use the saw tooth trowel to make grooves. Start in a corner if you have one and place the tile on the wall, resting it on the penny spacers. Butter another tile and place it next to the previous tile. Use a tile spacer to keep a space between the tiles. Use a straight edge (like a board) to make sure the tiles are flat and straight with each other, we don’t want wavy tiling! Repeat the process until you reach the end of the row. For the last tile, measure the needed tile length, taking in account the grout line space. Cutting tile is fairly easy, similar to cutting wood on a table saw, except wet! I bought a cheap tile wet saw for around $80-90 at the hardware store. It has been a champ, I’ve used it to tile 2 houses, so definitely worth it. However you could use a grinder with a tile saw blade. Some ceramic tiles can be scored and snapped to cut.
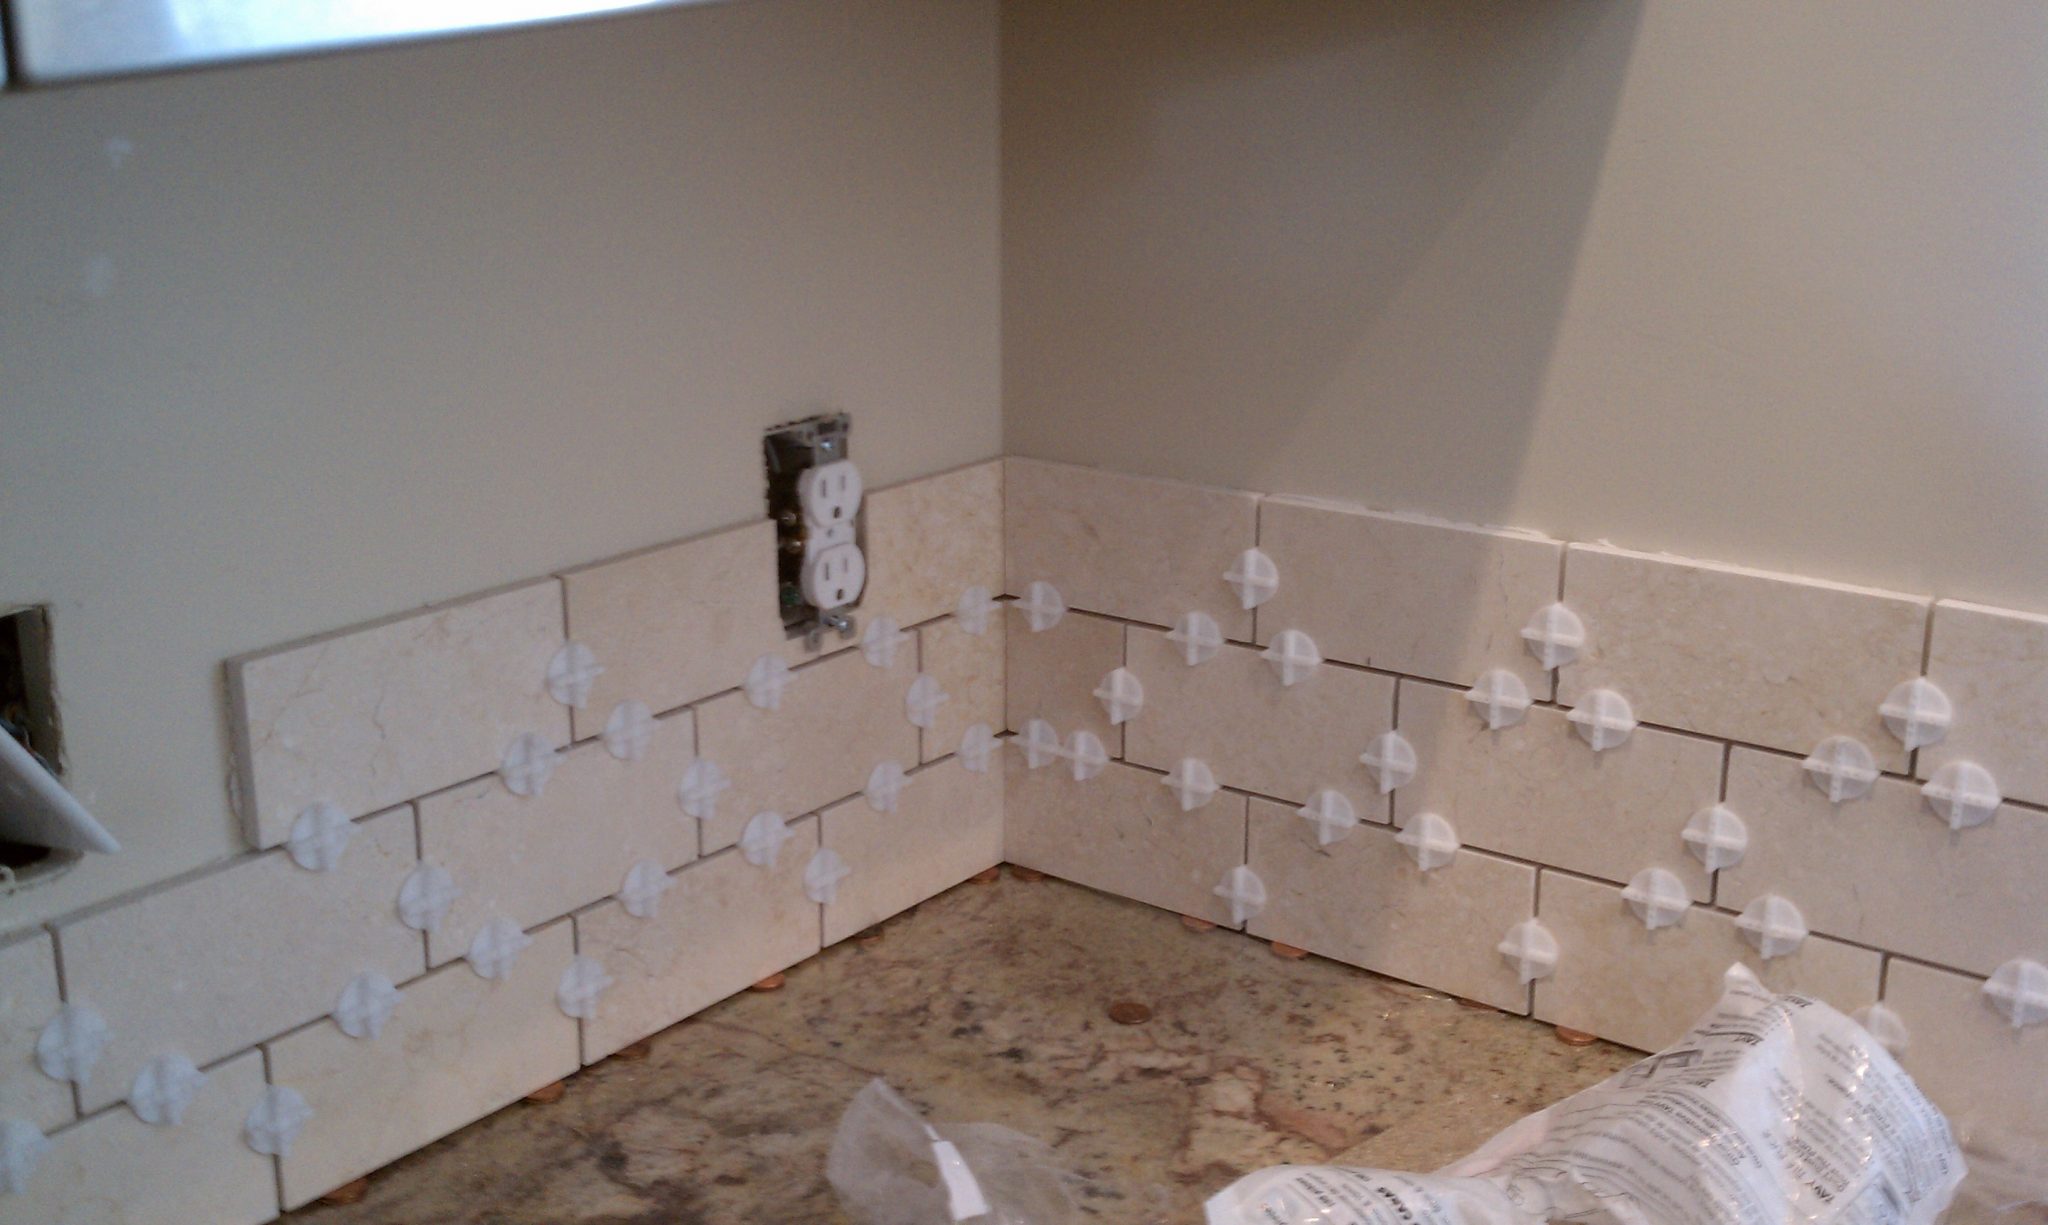
To start the second row, cut a tile in half and start in the corner again. This time use tile spacers all around the tile.
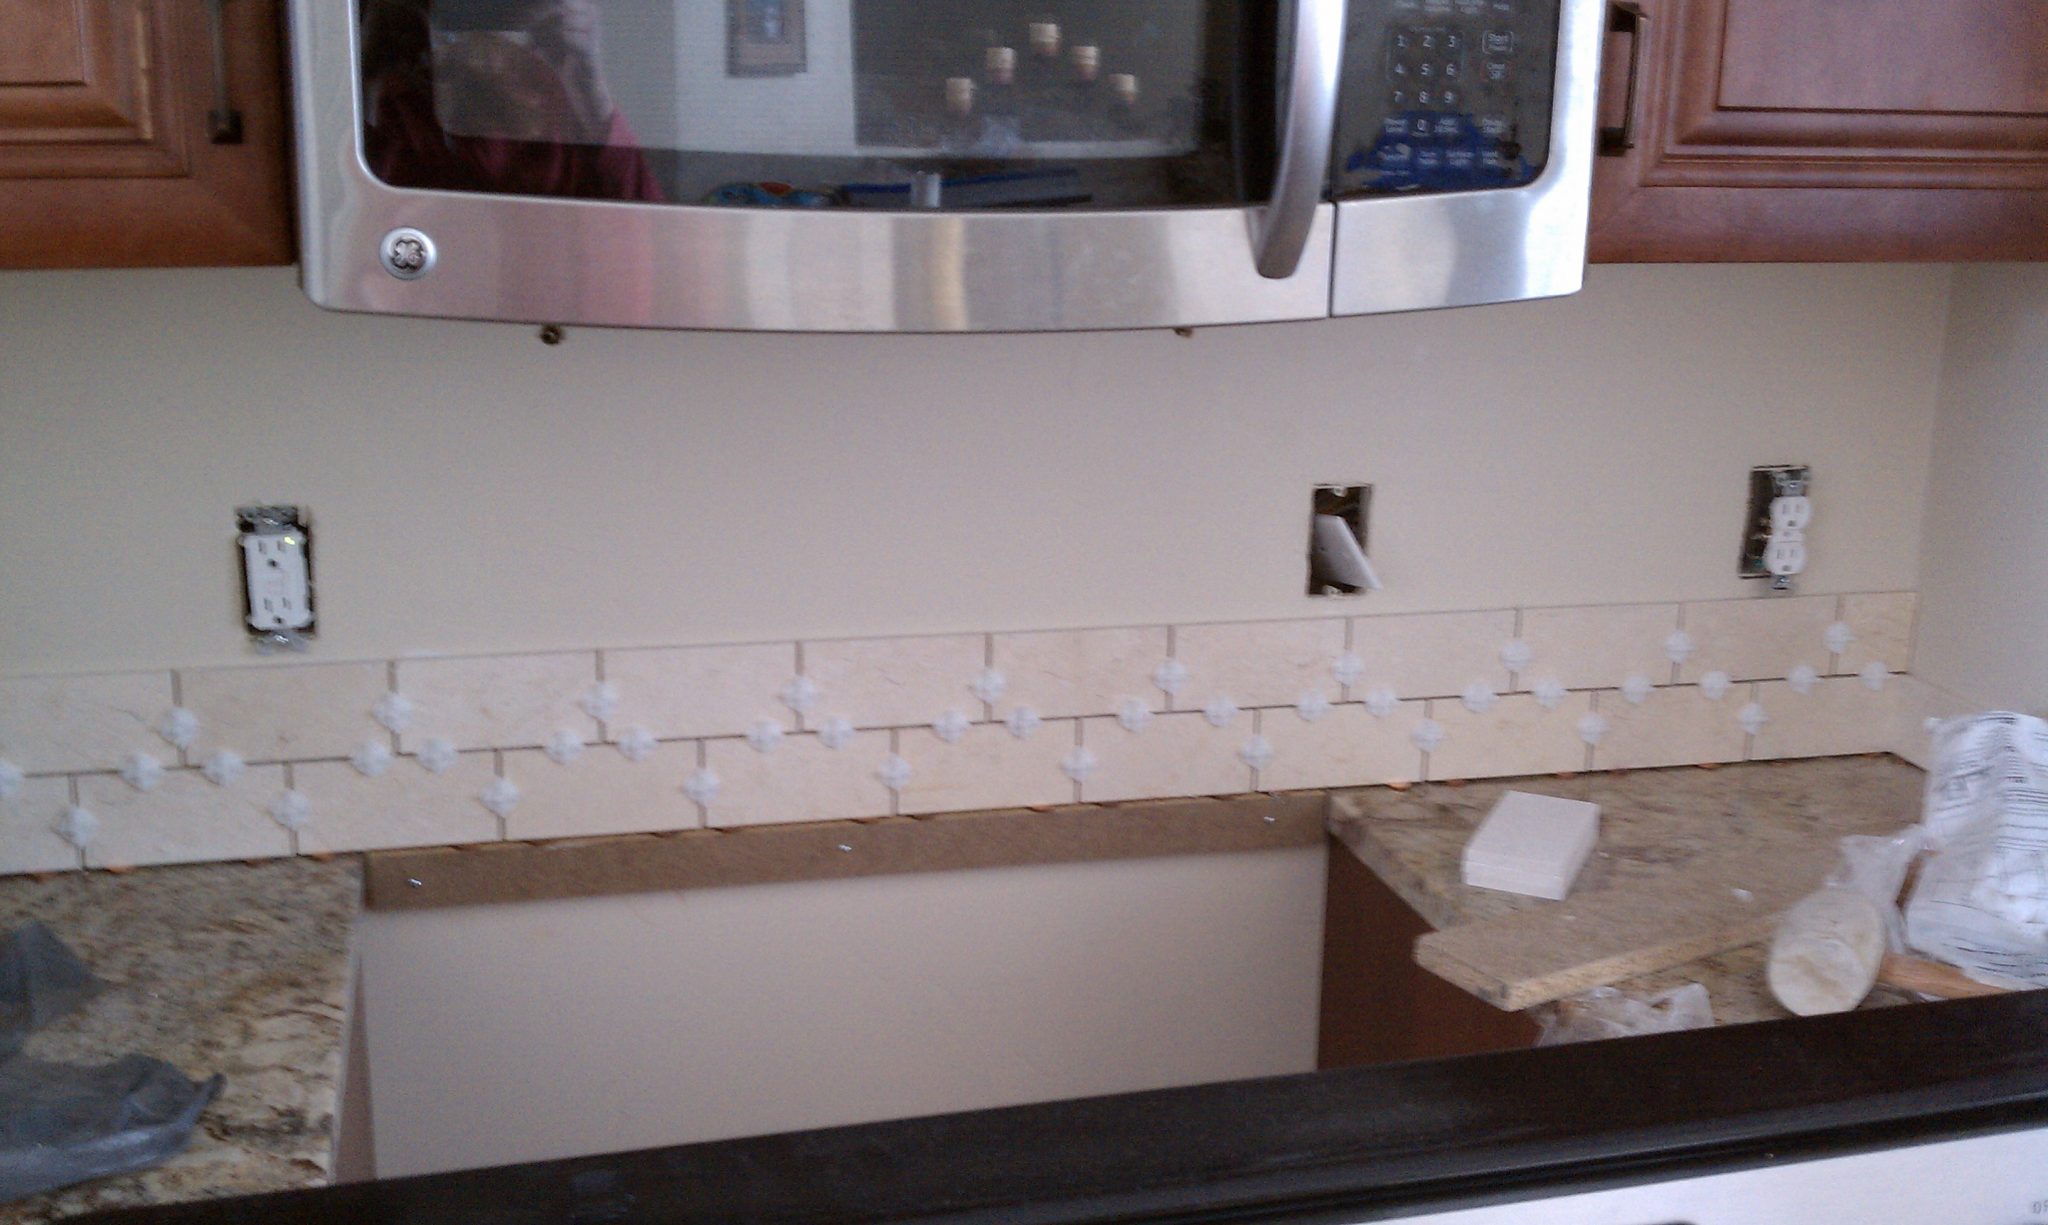
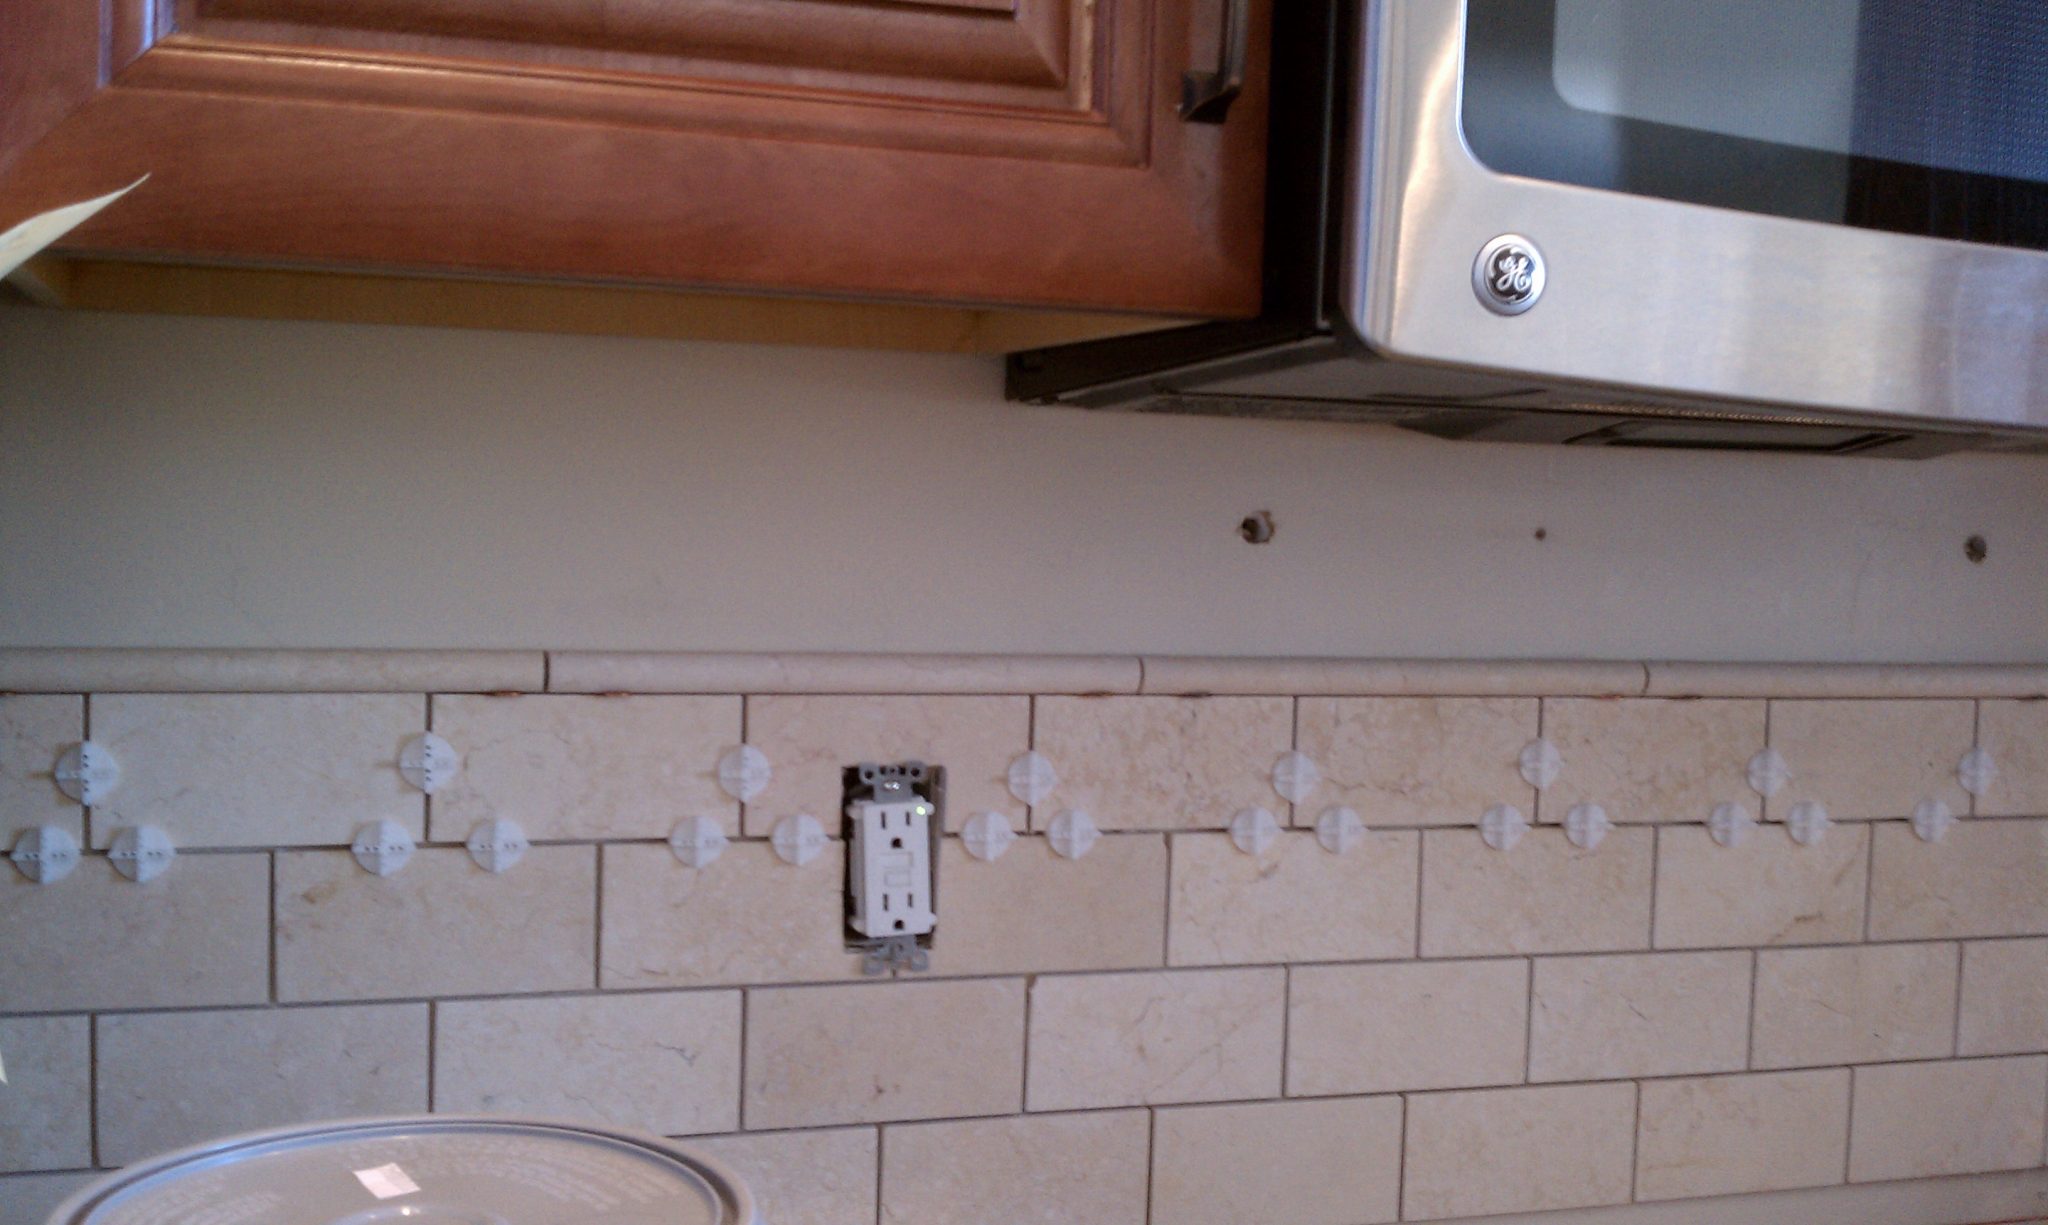
Continue the pattern, when you come to an outlet, cut the tile accordingly. I learned a little trick for cutting a U out of a tile. Approximately trace the outlet box on the tile, cut along the side lines, make additional cuts about ½”-1” wide. Knock out the inner pieces. Most of the time it’ll make a straightish break along the bottom. It doesn’t work 100% of the time, but it will work. You don’t have to cut around the outlet perfectly because the face plate will cover some of it. File bottom as necessary.

Continue laying tile on the other wall as before.
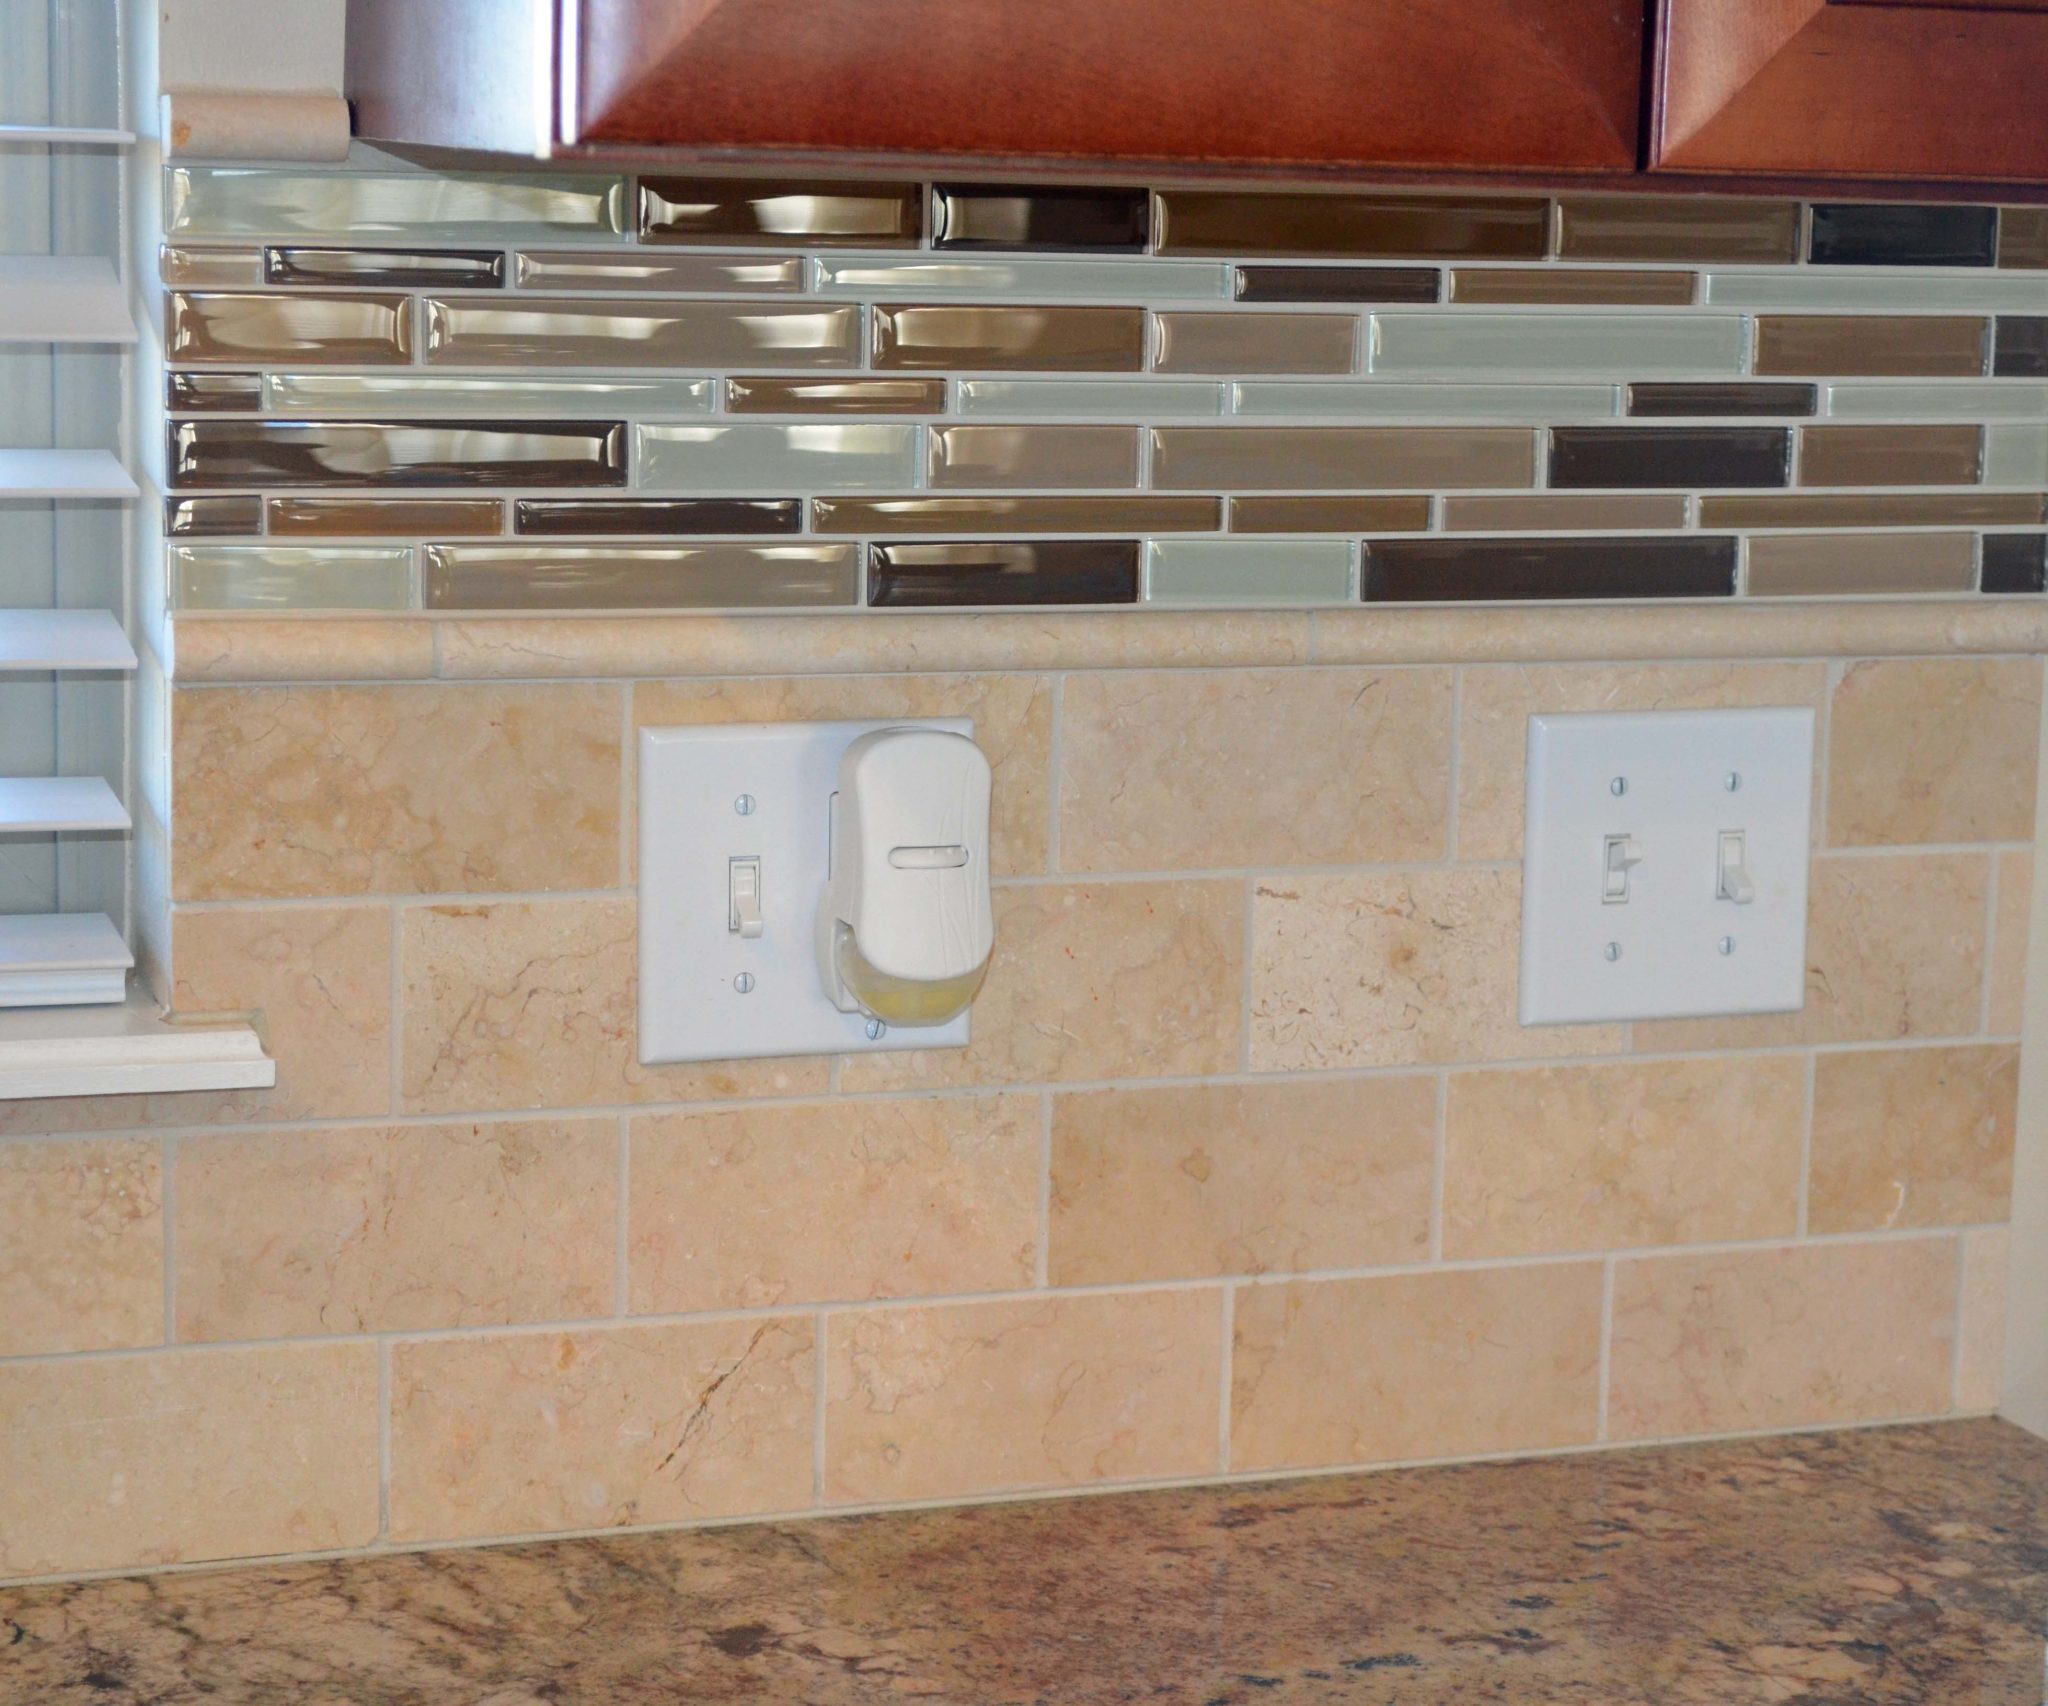
I used a travertine bull nose trim to separate between the travertine and glass mosaic.
Applying the glass mosaic is simple. Spread mastic on the wall and use the trowel to make the grooves. Lightly press the sheets of mosaic onto the mastic. When you reach the end, you can cut
the mosaic with the tile saw.
Clean up any extra mastic that might stick up above the grout. Allow the tiles to cure for 2 days. Remove all of the spacers/pennies.
Now choose your grout color. For thin grout lines like this, use unsanded grout. I used Mapei biscuit, it comes in a powder or pre-mixed, you can use either. If mixing, mix according to bag instructions. It is a consistency is similar to a thick brownie mix, not very runny. Use your rubber float and spread the grout into the lines, packing it in there. Use your float to smooth out the surface. Allow the grout to dry for 15-30 min. Use a large wet sponge and clean off all of the grout from the tile surface. You’ll have to wipe multiple times, changing your water frequently to get rid of the grout haze. Allow the grout to dry for 1 day minimum.
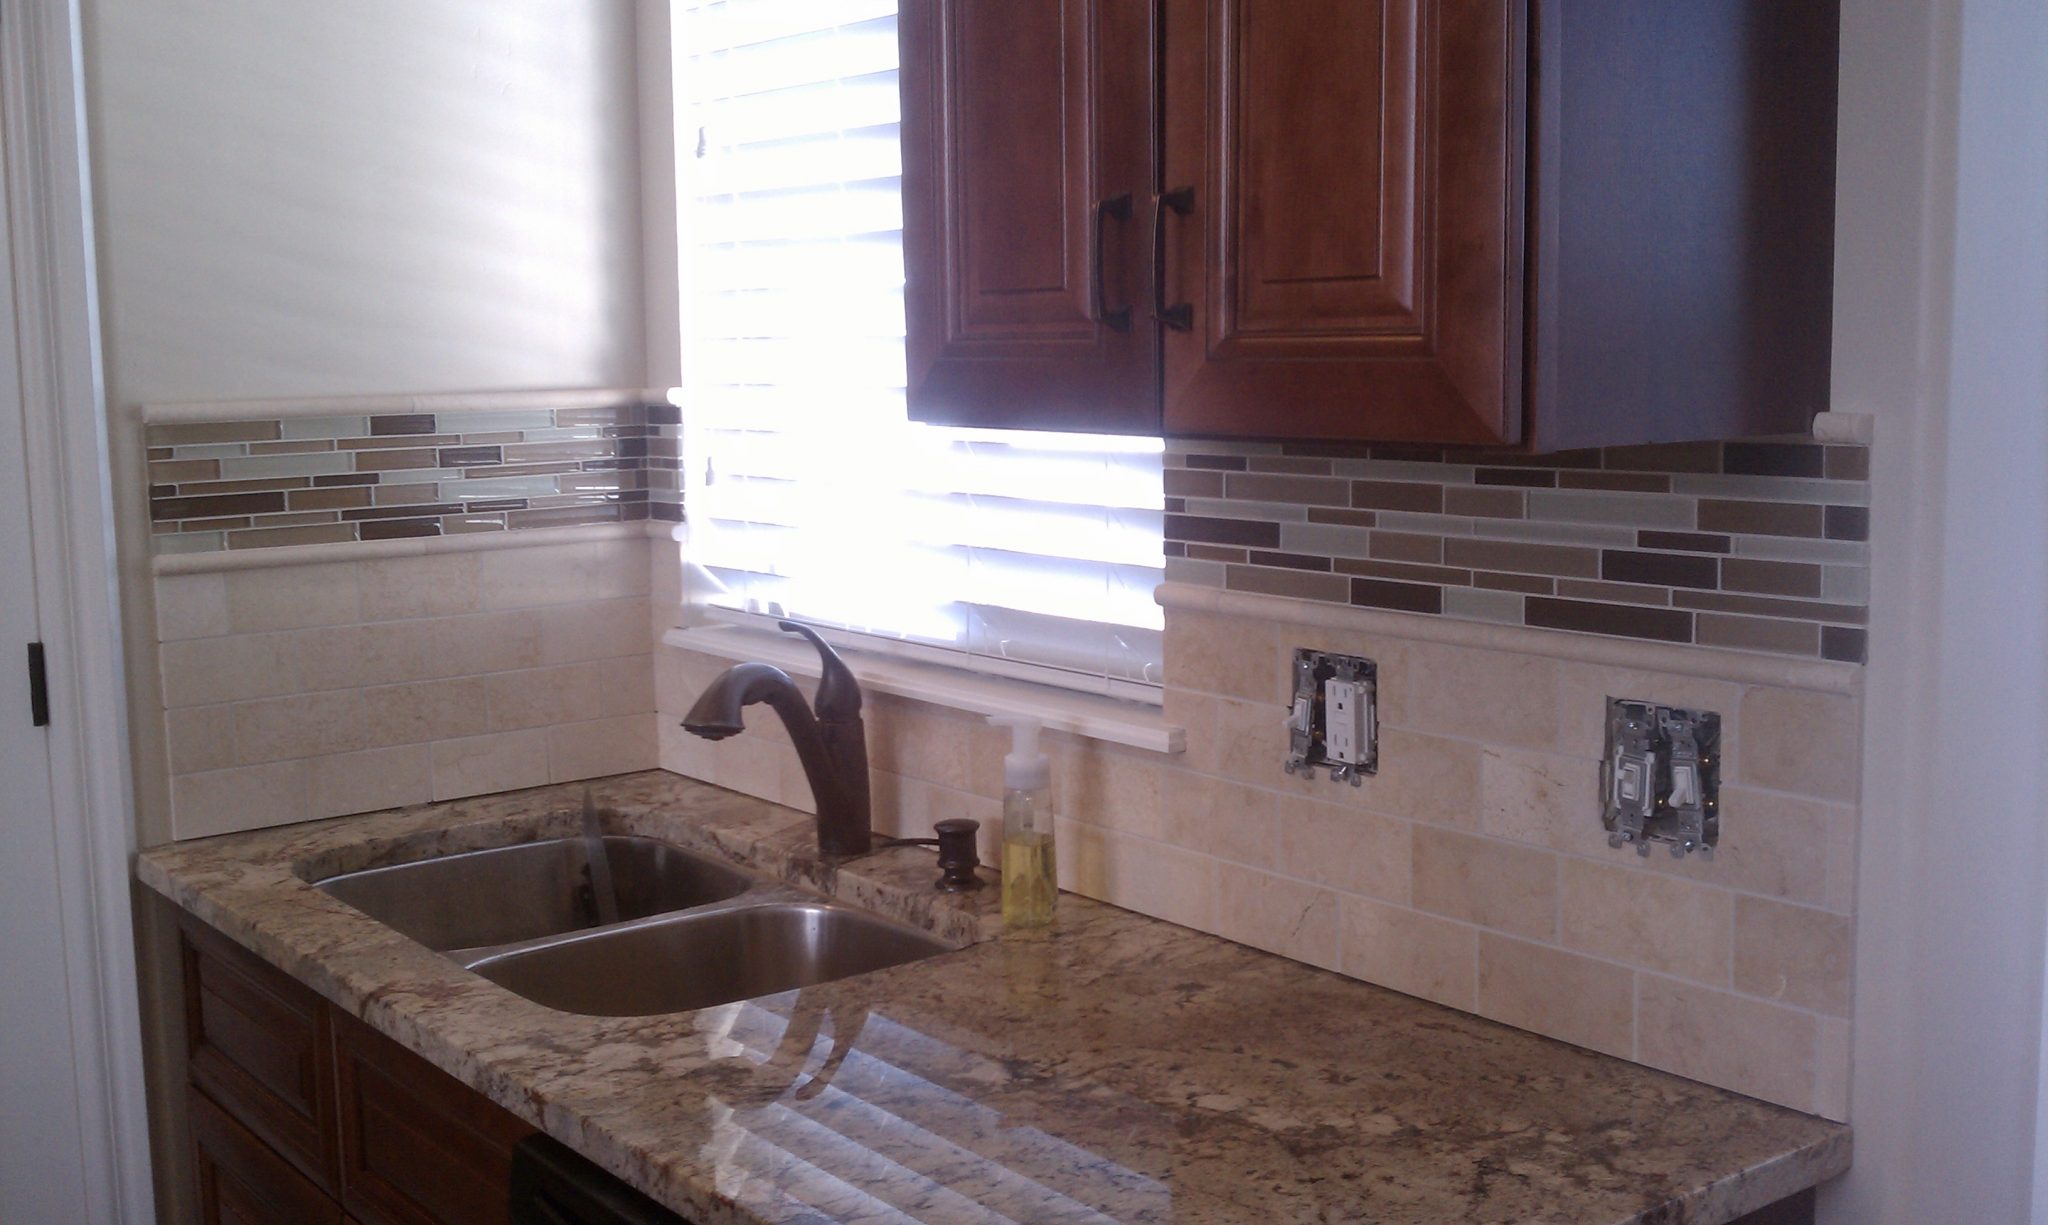
Use unsanded grout caulk, same color, and run a bead of caulk between the counter and bottom row of tile. Also run a bead on any vertical exposed surfaces and corners. Use a wet finger to get a smooth finish on the caulk, and a wet sponge to remove excess. Allow the caulking to dry.
If you use natural stone, like travertine, you’ll need to seal the tile and grout. If you use a porcelain or ceramic tile, you only need to seal the grout. Replace your outlets and outlet face plates. And there you have it, a beautiful backsplash!
Printer friendly version tile backsplash
I Must Admit That:…
[…]The information mentioned in this website are some of the best available[…]…