The Ashley Nightstand with tool review is sponsored by The Home Depot. I have been compensated for my time and provided with product. All ideas and opinions are my own. This post contains some affiliate links for your convenience. Click here to read my full disclosure policy.
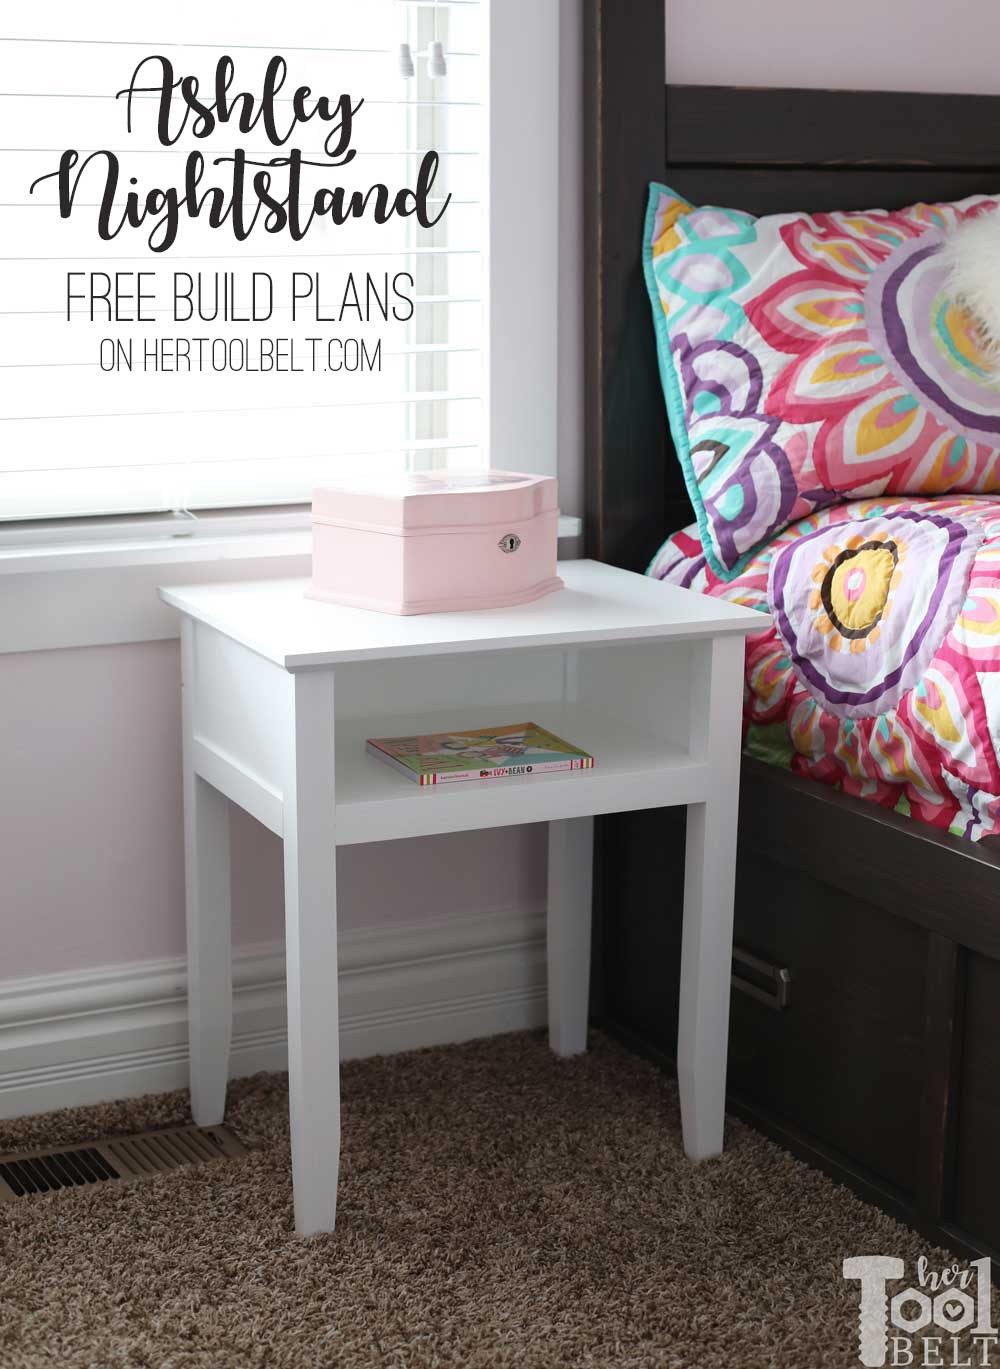
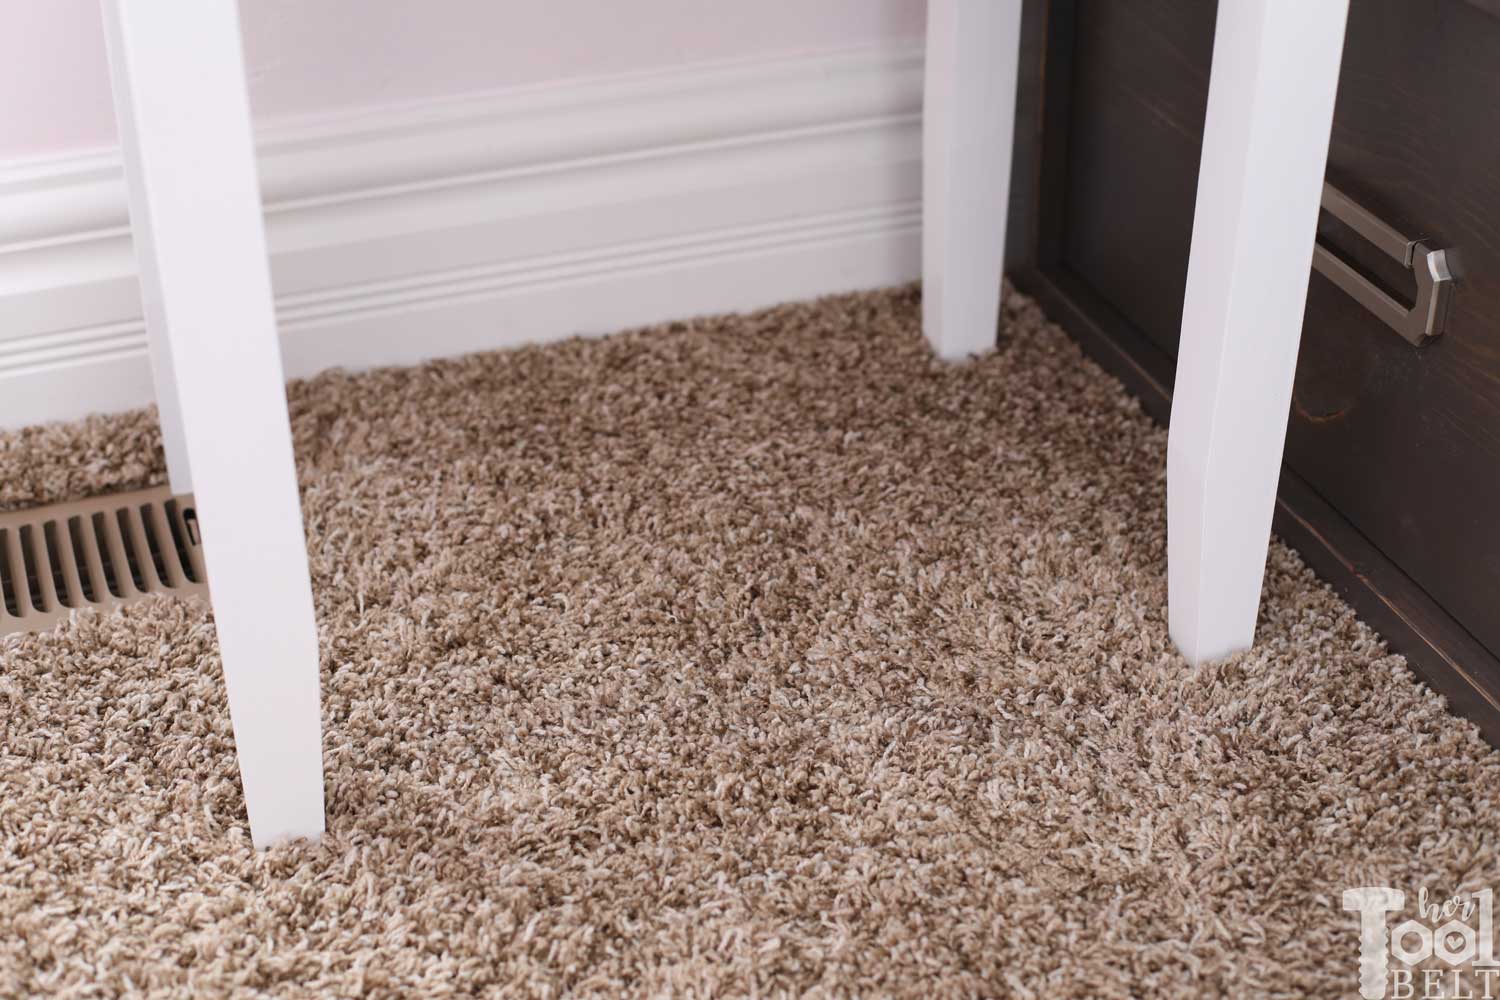
For my family Christmas party, all of the cousins (my kids, nieces and nephews) draw names for whom they give a gift to that year. My daughter, drew her tween cousin Ashley. Ashley really needed a simple nightstand to put her alarm clock on and store a book or two. One issue is that the nightstand needs to go over the only air vent in the room, so we wanted to do our best not to block the air flow. The best part of the Ashley nightstand is that I raided the scrap wood bin and the whole nightstand is scrap wood, yay for me! I had a few ends of 1×12’s that I used for the top and shelf, but I wrote up the plans using purchased 1×6’s and 2×2’s. The lumber for this cute nightstand is only about $15 (although wood prices around the country vary.)
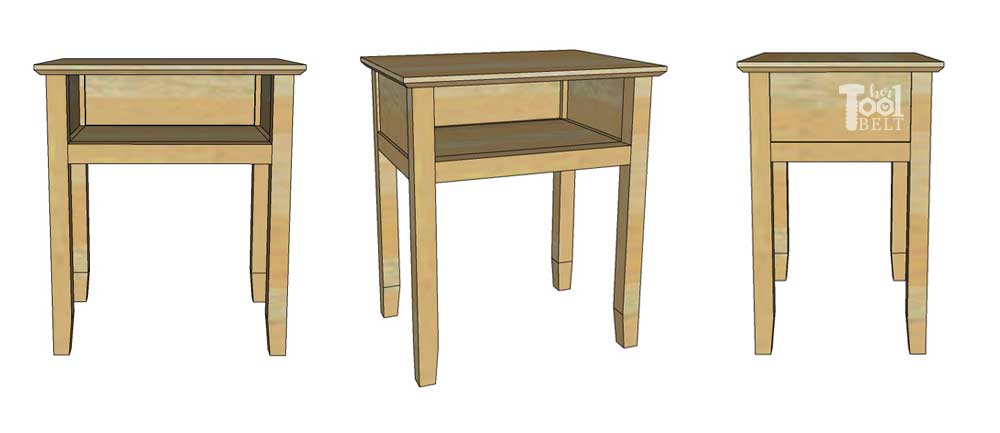 Front view // Isometric view // Side view
How to Build the Ashley Nightstand
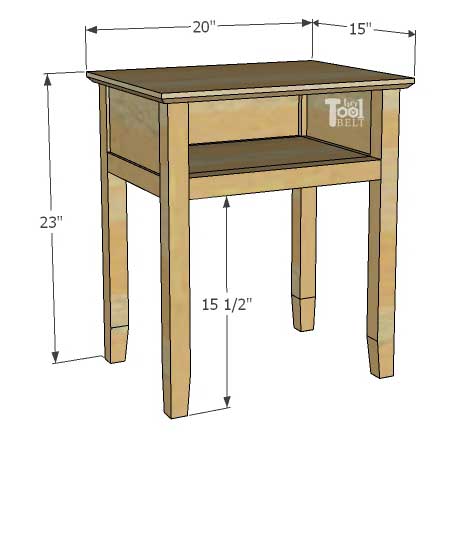
Note: Before building this nightstand, measure the height of the mattress top to the floor. That height – 3/4″ is the length you’ll want to make your legs. Ashley’s mattress top is 23″ from the floor, 23″ – 3/4″ = 22 1/4″ leg length.
Materials
- 2 – 1 x 6 x 6′ boards (actual size 3/4″ x 5 1/4″ x 6′)
- 2 – 2 x 2 x 8′ boards (actual size 1 1/2″ x 1 1/2″ x 8′)
- 16 – 2 1/2″ pocket hole screws
- 40-55 – 1 1/4″ pocket hole screws
- wood glue
- sandpaper
- wood filler/spackle
- primer/paint or stain/top coat – I used primer and Behr Ultra Pure White in semi-gloss paint
- brush
Tools Used
- Kreg pocket hole jig
- Drill/impact driver kit*
- Circular saw + fine finish blade*
- Sander* + battery
- Table saw – I used this to cut my scrap boards down to size, this probably isn’t needed
- Miter saw – alternate to circular saw
- Jig saw* – optional for tapered leg
- Tape measure
*Note – I’m reviewing these tools with this nightstand build and will share my thoughts on them throughout the build.
Cut List
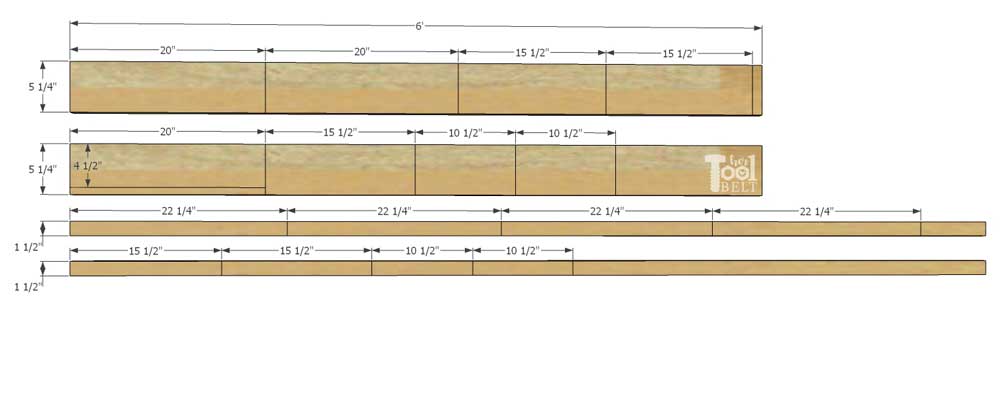
- 3 – 3/4″ x 5 1/4″ x 20″ – top (1×6)
- 3 – 3/4″ x 5 1/4″ x 15 1/2″ – bottom/back (1×6)
- 2 – 3/4″ x 5 1/4″ 10 1/2″ – sides (1×6)
- 4 – 1 1/2″ x 1 1/2″ x 22 1/4″ – legs, cut for your nightstand height (2×2)
- 2 – 1 1/2″ x 1 1/2″ x 15 1/2″ – front/back rails (2×2)
- 2 – 1 1/2″ x 1 1/2″ x 10 1/2″ x side rails (2×2)
Cut Diagram
Step 1 – Cut boards to size
Cut the boards according to the cut list. Cut the legs according to your mattress height as noted above.
The widths of 1×6’s can vary between 5 1/4″ and 5 1/2″. If your boards are 5 1/2″ wide, you can either keep them like that or trim down to 5 1/4″. The top and bottom pieces may have to be trimmed once joined together.
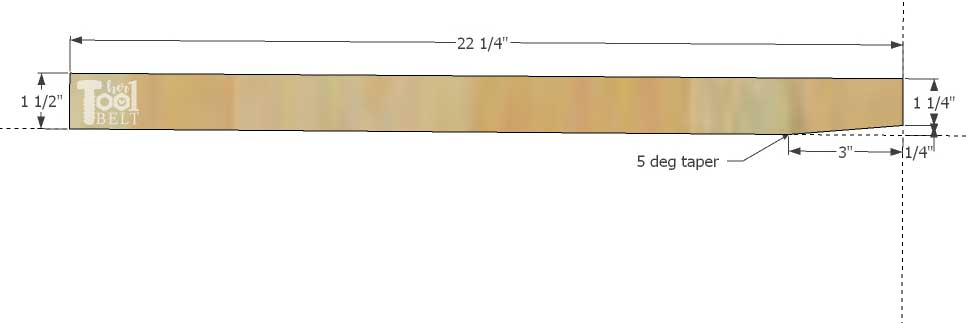
Cut the taper on the leg – optional
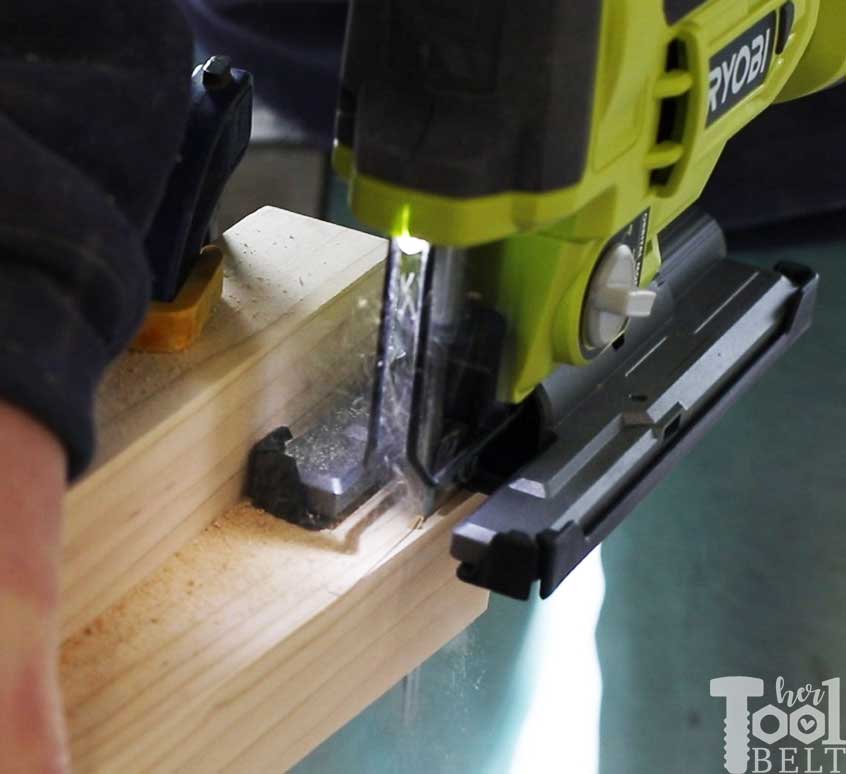
If you want the taper detail on the bottom of the leg, you can use a jig saw and straight edge or circular saw and straight edge. Mark on the bottom of the legs up 3″ and over 1/4″, this is about 5 deg. Cut along that line. Rotate the leg 90 deg and do the same cut on another side. If using a jig saw, you may need to sand the taper smooth.
 Using the Ryobi brushless jigsaw to cut the taper, one thing to beware of, the jigsaw blade will flare so it’s not the most perfect method.
*The Ryobi brushless jigsaw has more bells and whistles than their regular 18v jigsaw. The efficient brushless motor gives you more run time on your battery. This jigsaw gives you the option to bevel the head, which is cool. It also has a lock on trigger and variable speed so you have adjustment for the material you’re cutting.
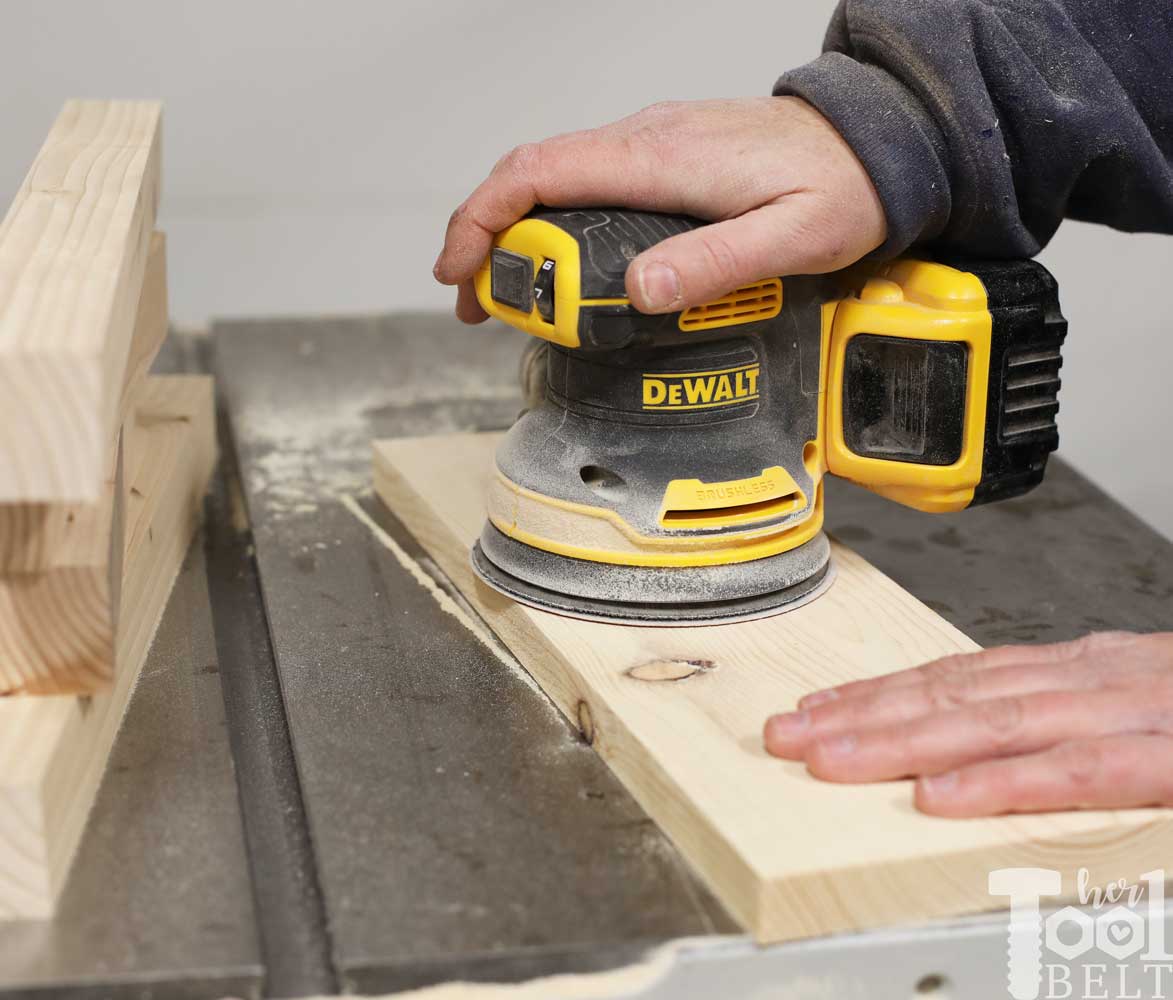
You may also want to sand all of the boards smooth before starting the nightstand assembly. *I’ve gone cordless on my random orbit sander and I LOVE it. I have been using the corded DeWALT variable speed sander for a few years and this new cordless sander feels very similar. One thing that catches me off guard is that it actually stops spinning as soon as you switch it off.
Step 2 – Build the nightstand base
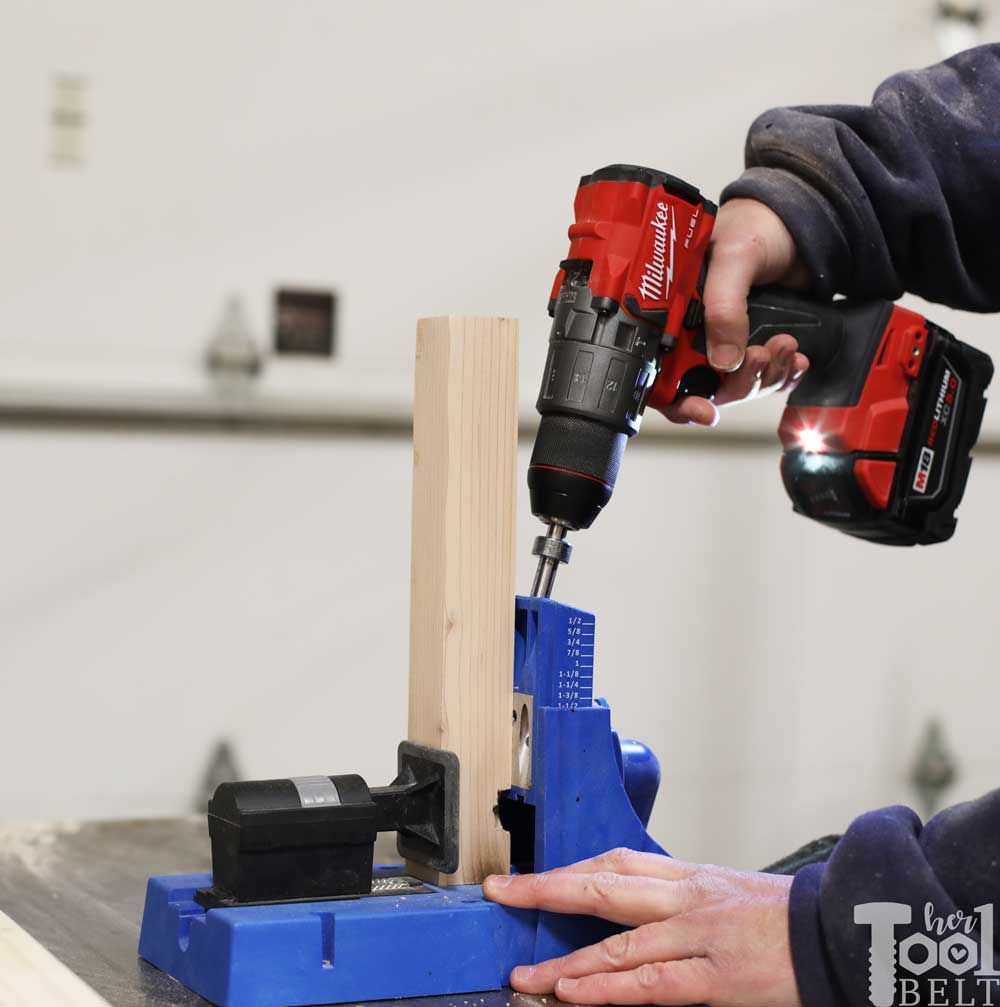
In the side pieces (3/4″x5 1/4″x10 1/2″) and back piece (3/4″x5 1/4″x15 1/2″), drill pocket holes for 3/4″ material. Drill 2 or 3 pocket holes in each side.
In the 2 side rail and 2 front/back rail pieces, drill pocket holes for 1 1/2″ material in each end.
*I’m using the Milwaukee hammer drill/impact driver combo, and it is a solid set! The hammer drill is as compact as a regular drill with tons of power. When doing pocket holes I like to keep the drill bit in the drill and the square bit in the impact driver. This helps me work faster and I like how the impact driver drives the pocket hole screws into the wood.
Assemble
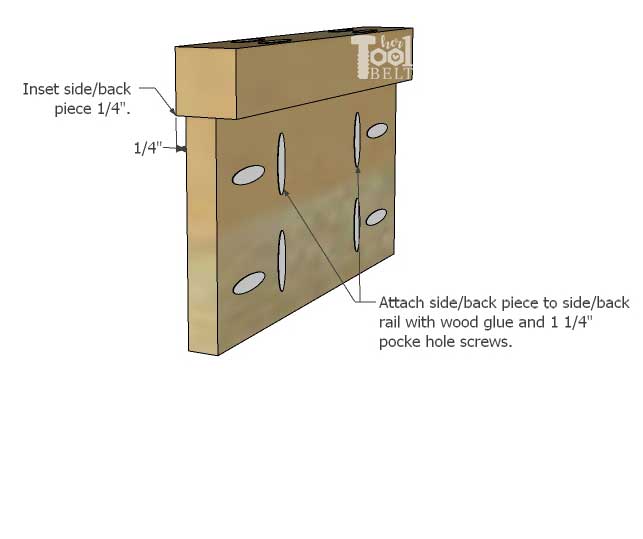
Inset a side piece 1/4″ on a side rail piece (1 1/2″x1 1/2″x10 1/2″), secure the side piece with wood glue and 1 1/4″ pocket hole screws. Repeat this process for the other side and back.
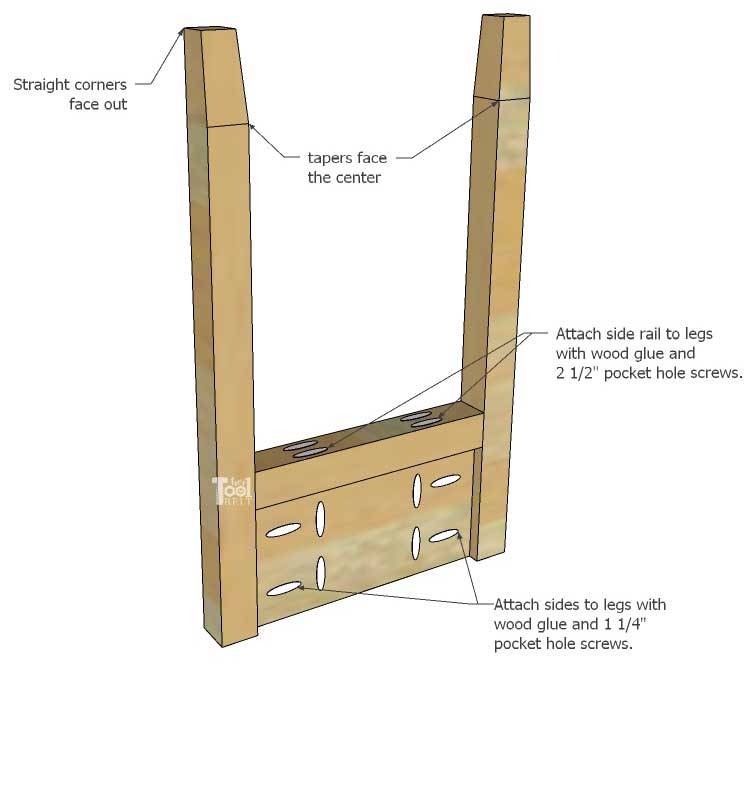
 Attach a leg to each end of the sides. The tapered corner should face the center of the nightstand, the straight edge should face out. Make the side flush with the top of the legs and secure the sides to the legs with wood glue and 1 1/4″ pocket hole screws in the side pieces and 2 1/2″ pocket hole screws in the rail pieces.
 Secure the back piece/rail to the side pieces with wood glue and 1 1/4″ pocket hole screws thru the back and 2 1/2″ pocket hole screws thru the rail. The back top should be flush with the top of the legs.
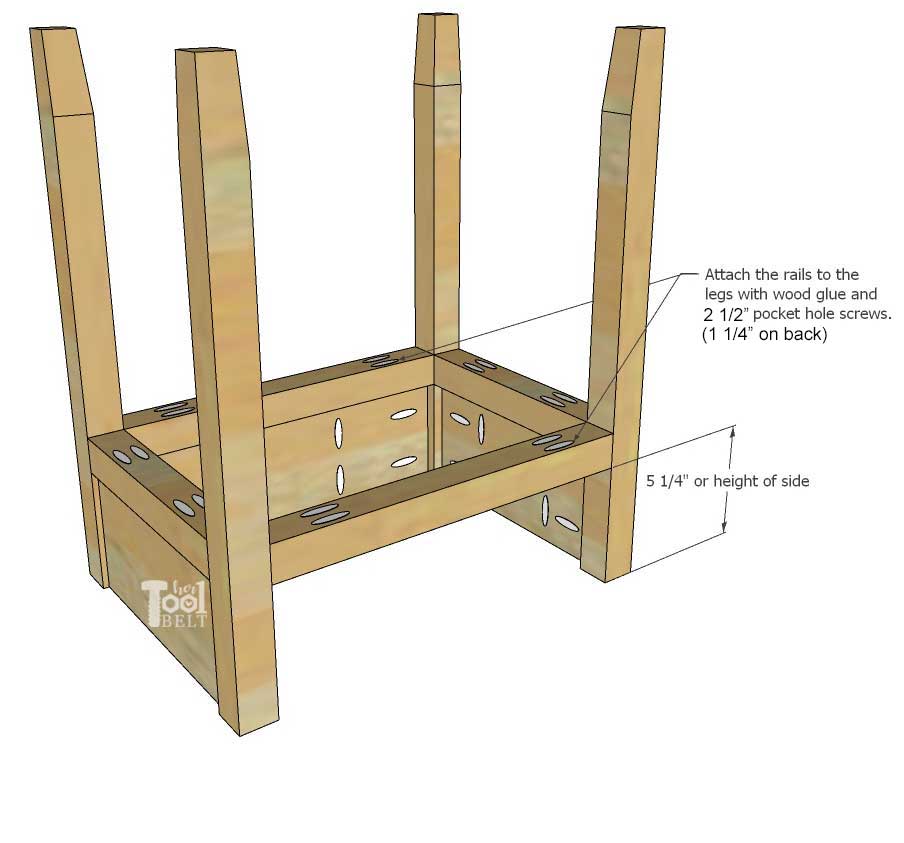
Secure the front rail to the legs with wood glue and 2 1/2″ pocket hole screws. The front rail should be 5 1/4″ down from the leg tops (or whatever your side pieces height is.)
 Note: The top gets attached before the bottom (shelf), otherwise I wouldn’t have been able access the pocket holes in the nightstand.
Step 3 – Join the top boards and bottom shelf boards
Top
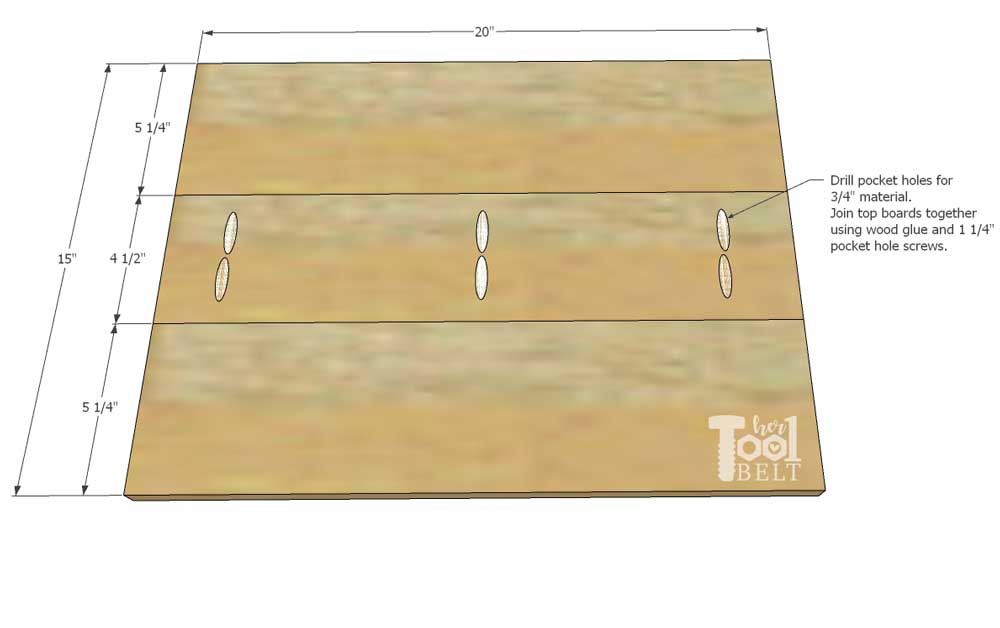
On the top assembly, you can either join the boards together, then trim it to size (15″ x 20″) or trim the boards to size then join them together. Whatever your preference.
Drill pocket holes for 3/4″ material in the middle top board. Use wood glue and 1 1/4″ pocket hole screws to join the front and back boards to the middle board.
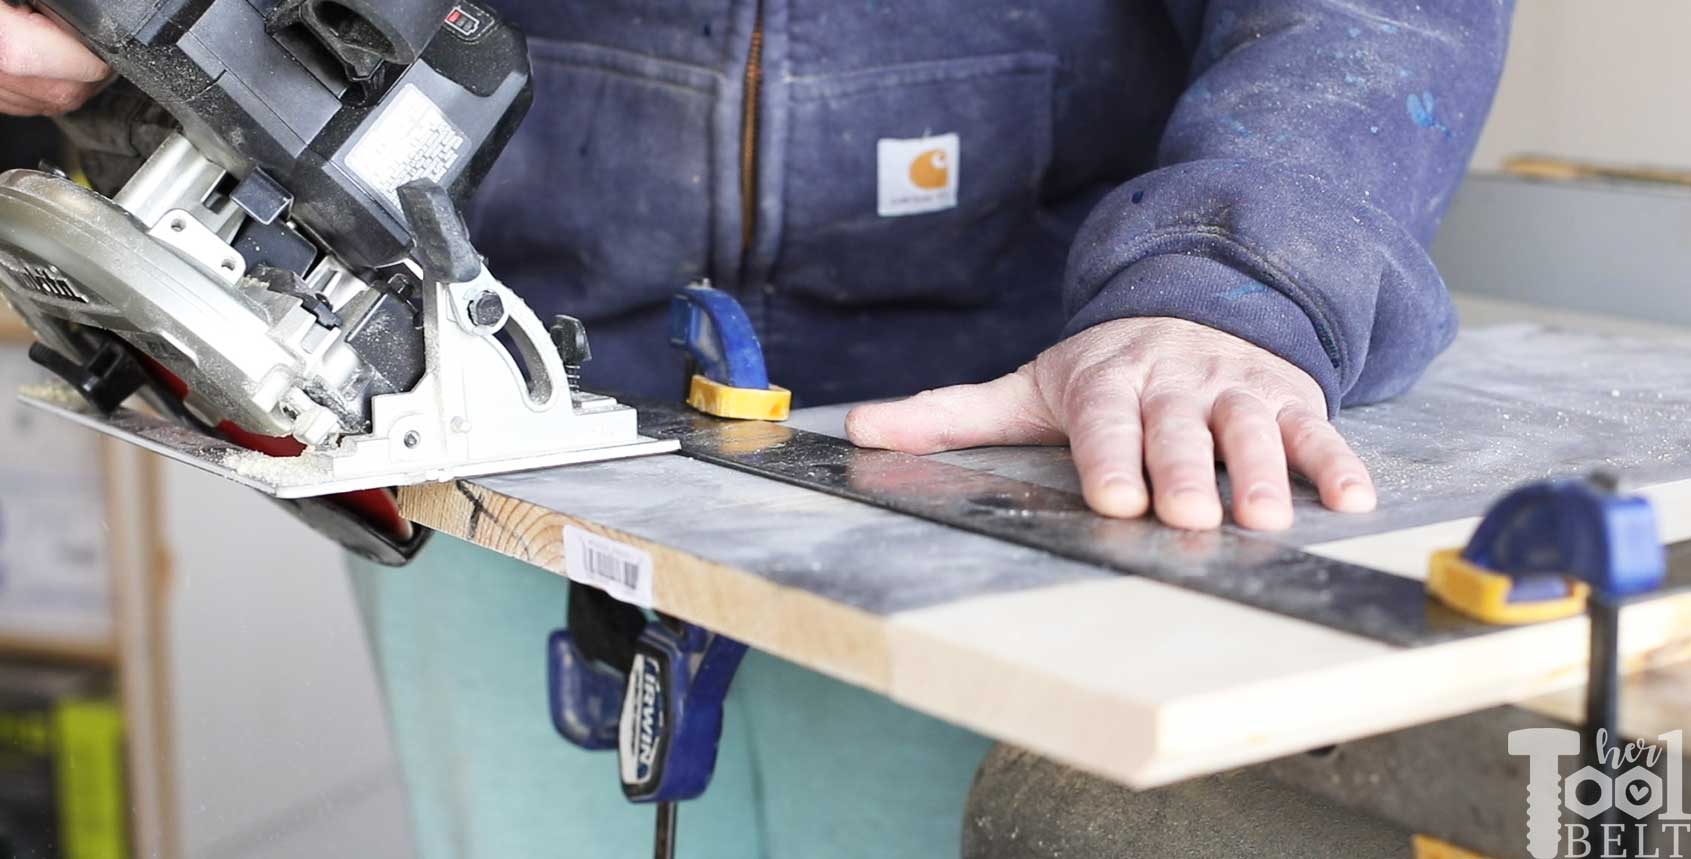
 Once the glue dried, I added a 45 deg chamfer to the underside of the top. This is optional, but I love the look. I used a 6 1/2″ circular saw and the Diablo 6 1/2″ Ultra finish blade. For this Makita 6 1/2″ saw, I set the angle at 45 deg and put a straight edge 3/4″ closer to the edge than I would have for a straight cut, this gave me a perfect chamfer and no router was needed! The Diablo blade made such a clean cut.
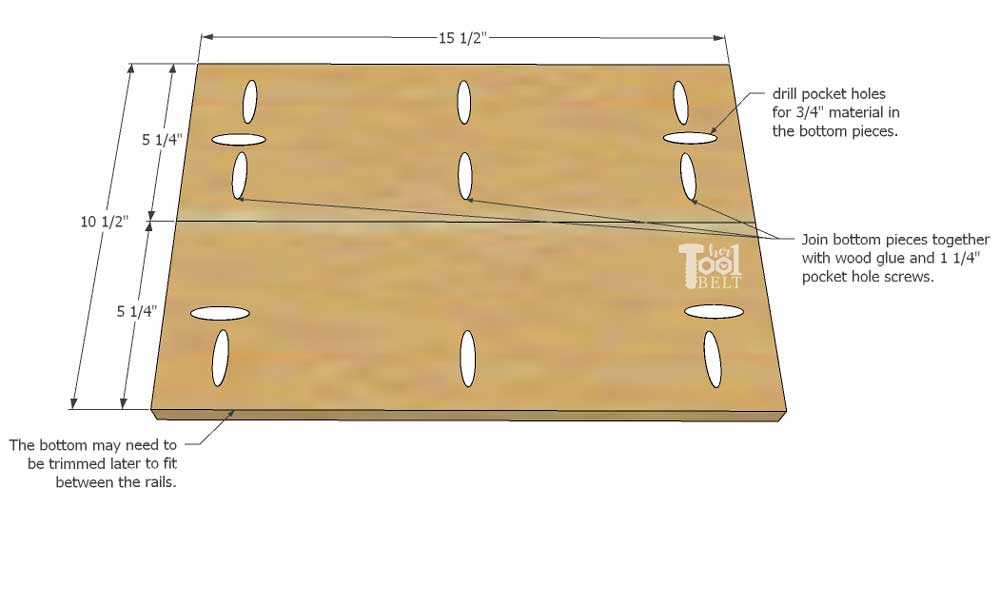
Bottom
Drill pocket holes in 4 sides of one of the bottom boards, and 3 sides of the other. Use wood glue and 1 1/4″ pocket hole screws to join the bottom boards together.
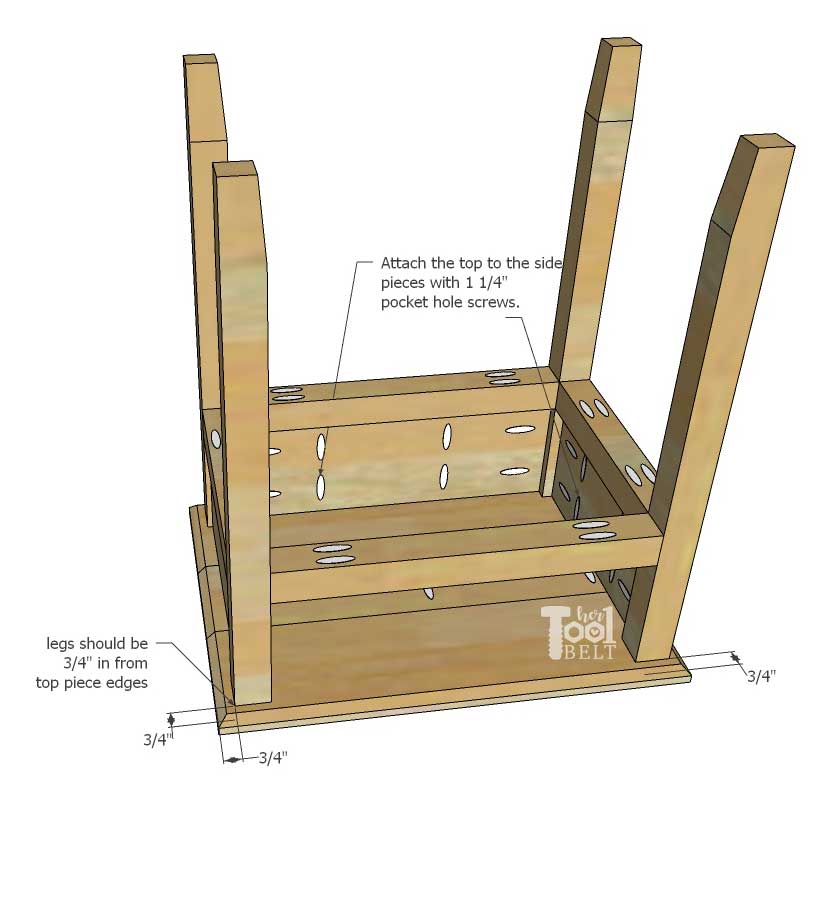
Step 4 – Attach top and bottom
Turn the top and base upside down and center the base on the top. The legs should be about 3/4″ from the top sides. Attach the top to the sides/back with 1 1/4″ pocket hole screws.
 Fit the bottom/shelf into the rails, it may need to be trimmed to fit. Make the bottom/shelf flush with the tops of the rails. Secure with wood glue (optional) and 1 1/4″ pocket hole screws.

Step 5 – Finish
Fill any showing pocket holes with wood filler or if painting, spackle. Let the filler dry. Sand the nightstand smooth, start with 80 grit sandpaper and work your way up to 220 grit. If painting, apply 1-2 coats of primer to the nightstand, let dry and lightly sand between coats. Apply your favorite color of paint.
If staining, apply stain and let dry. Apply a top coat as desired.
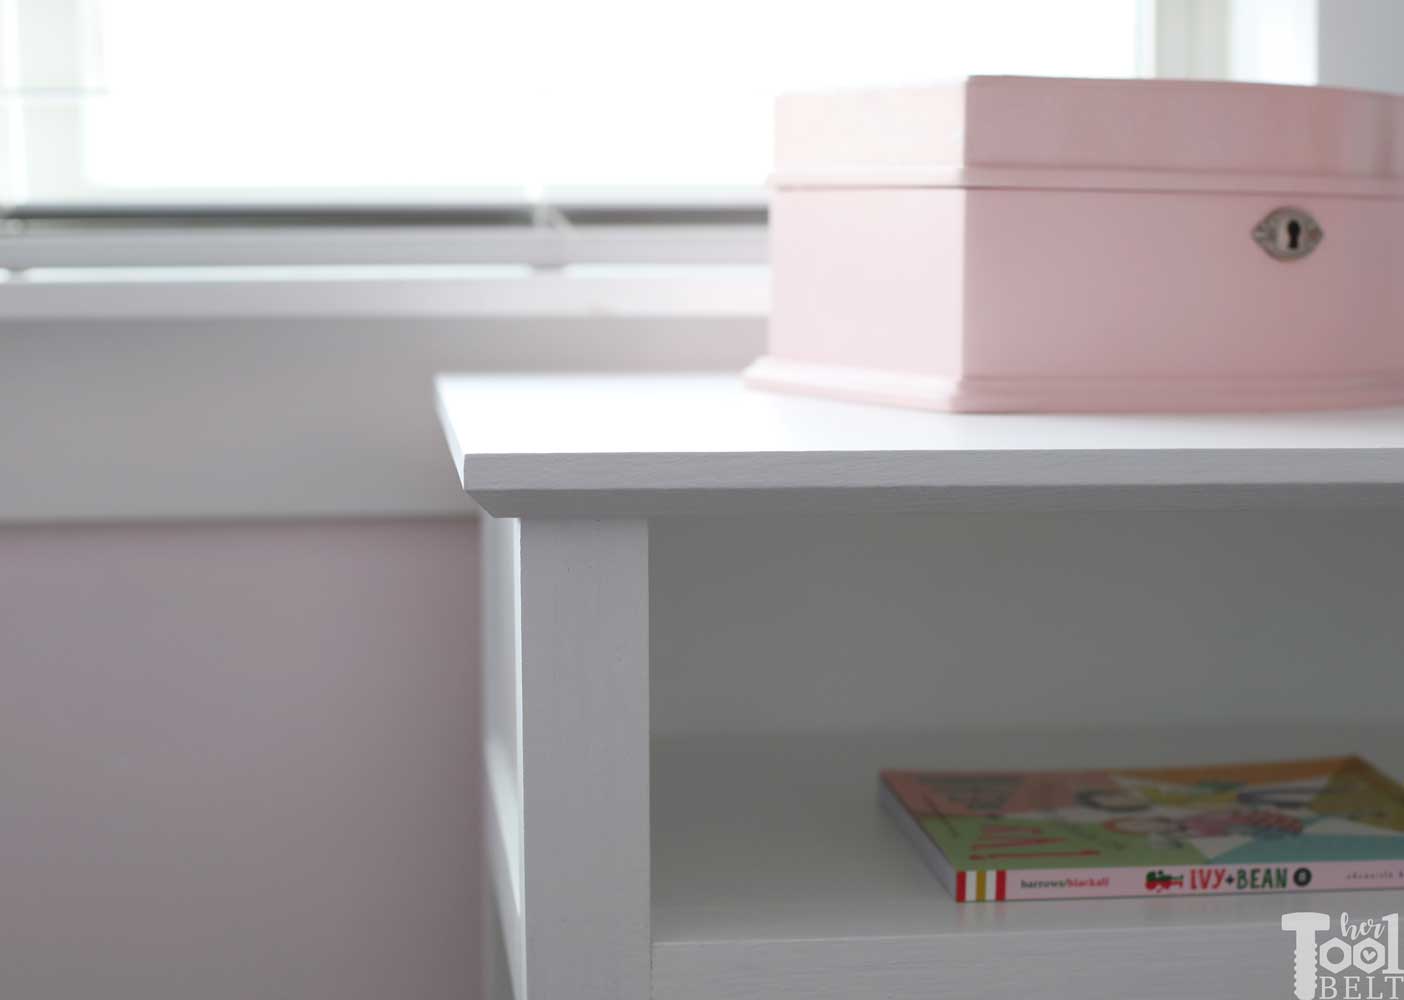
I love the extra details of the chamfer.
The simple tapered legs add a nice detail too.
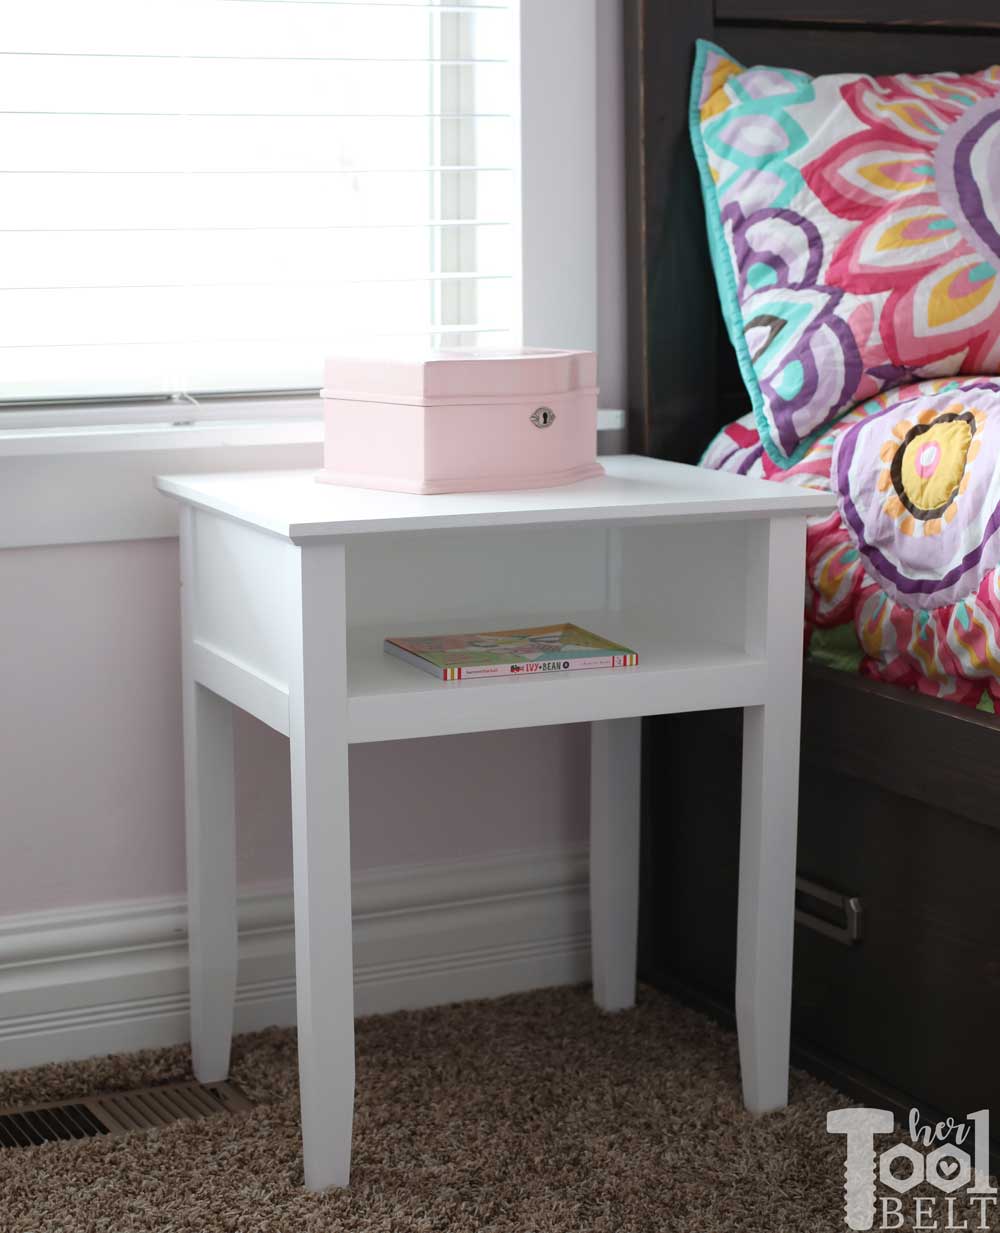
Front view
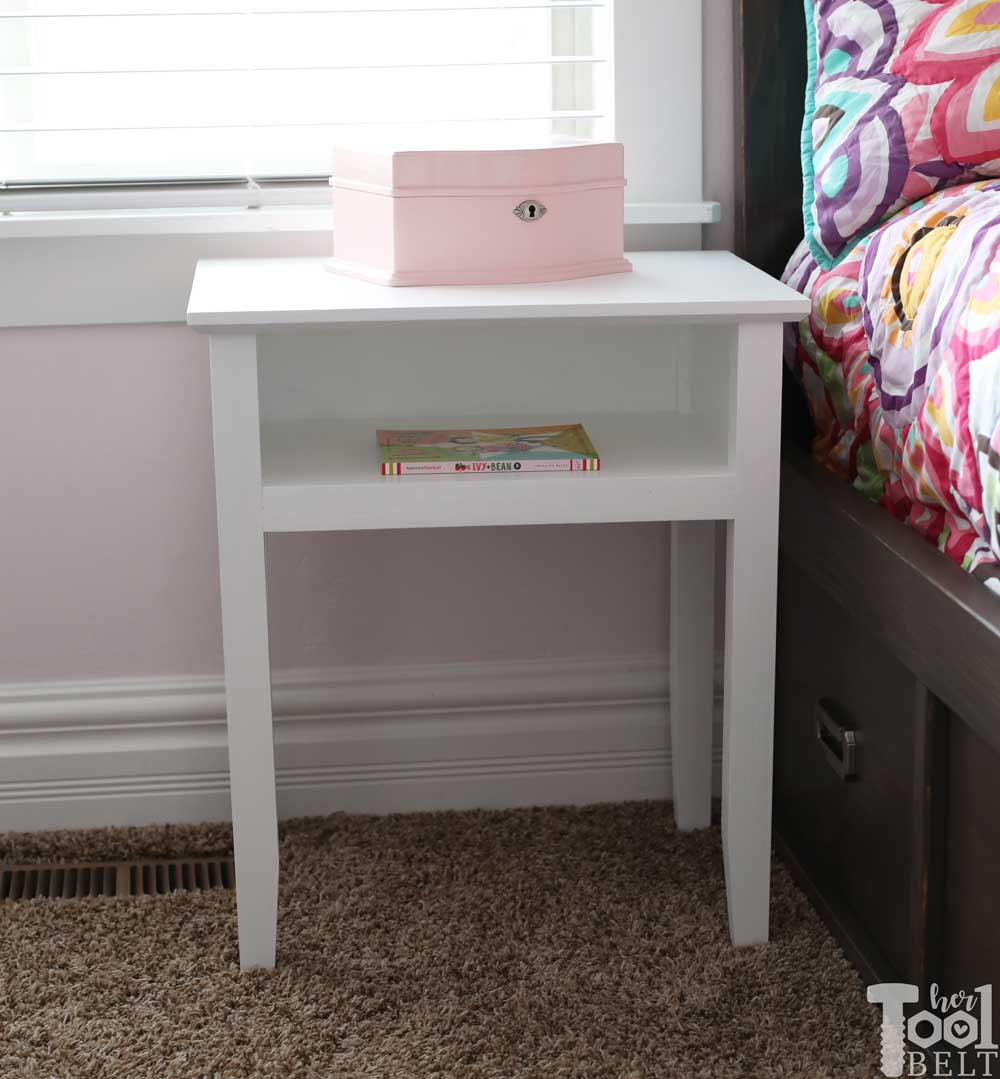
Finished in Behr ultra pure white semi-gloss
“I acknowledge that The Home Depot is partnering with me to participate in the Tool Review Program. As a part of the Program, I am receiving compensation in the form of products and services, for the purpose of promoting The Home Depot. All expressed opinions and experiences are my own words. My post complies with the Word Of Mouth Marketing Association (WOMMA) Ethics Code and applicable Federal Trade Commission guidelines.”
I built your design using pallet wood and it turned out great. Let me know if you want a pic to share for others to inspire slightly different build types.
Hi Will,
I’d love to share your version. Email me at amy@hertoolbelt.com