Lemonade stands have made quite the comeback in the last few years, they’re not just for kids anymore! They make a fun drink station at weddings and parties. While I was building the Party Station last month, I couldn’t help but think that it would make a great base to a lemonade stand with a few extra perks.
The party station has:
- Tons of storage (drawers and a huge upper compartment)
- On wheels – big bonus
- Lots of counter space
- Made from cedar so very durable for outdoor use
- It’s cute, great design from Woodworker’s Journal (they have an easy and advanced version)
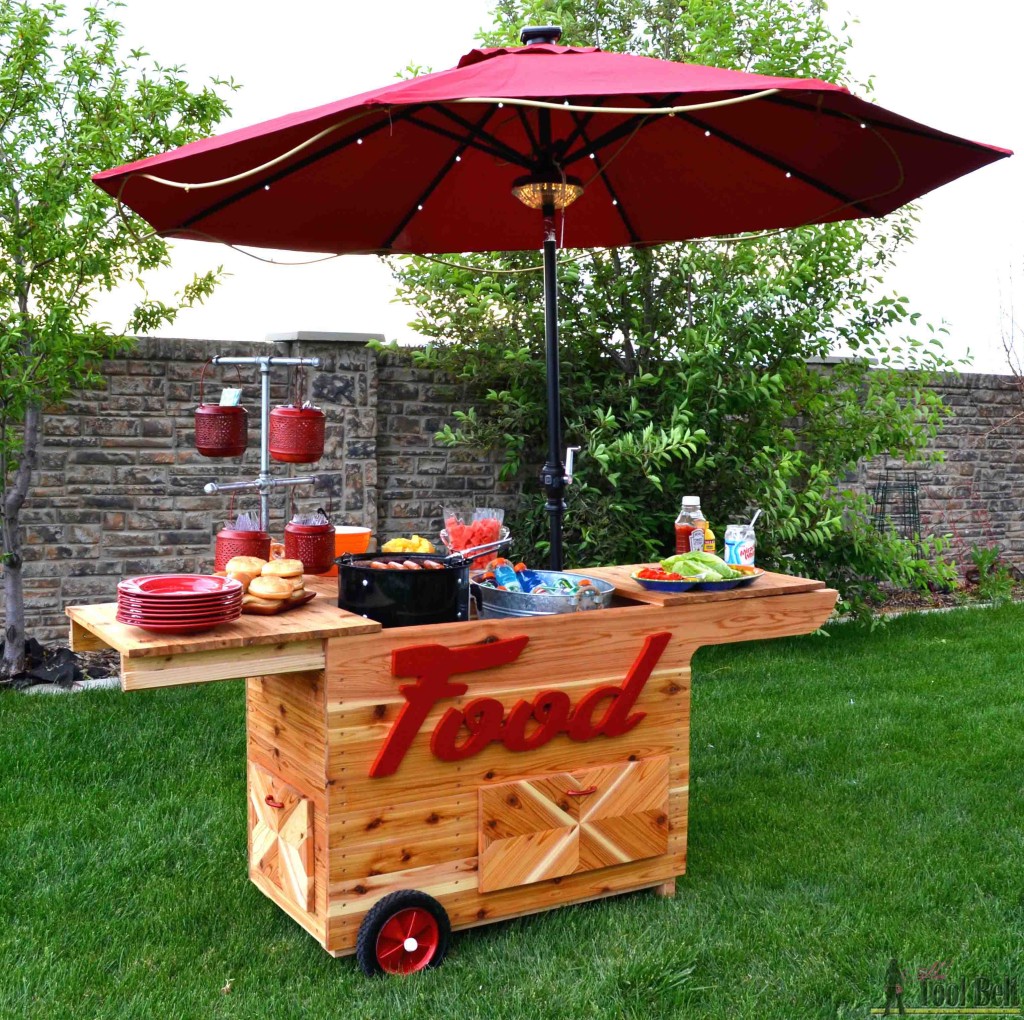
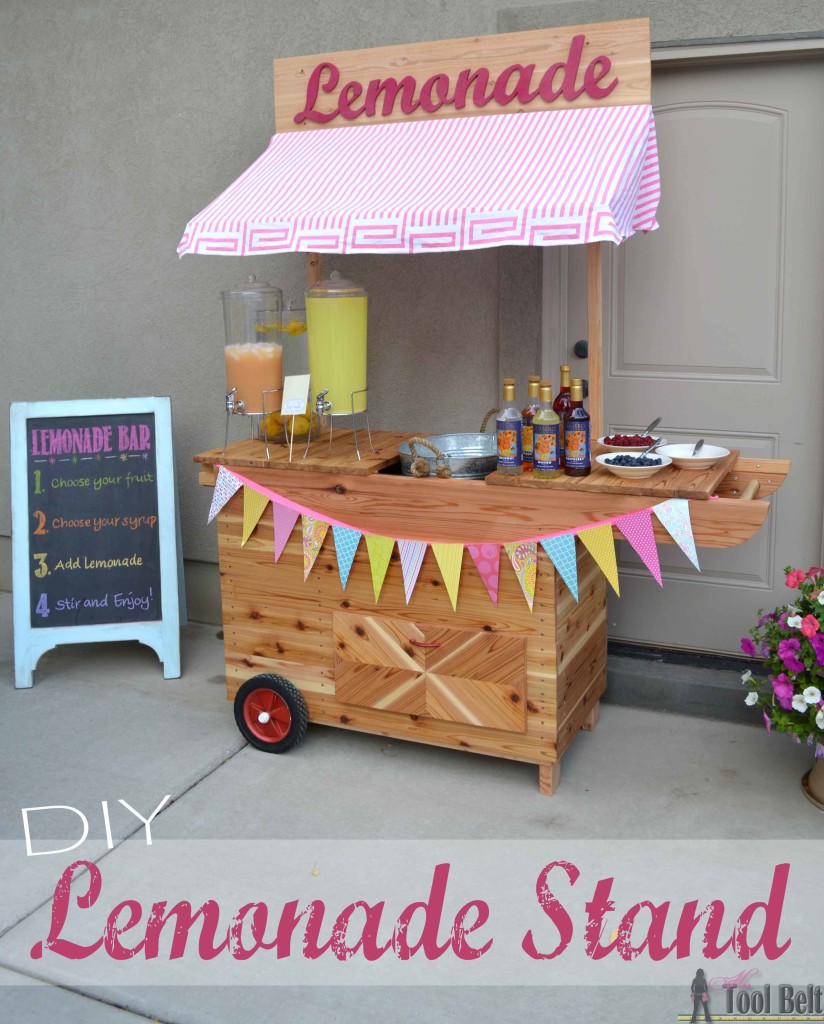
Once the party station is built, converting it to a lemonade stand is really simple. The removable sign and canopy are attached with a couple of 2x2s. 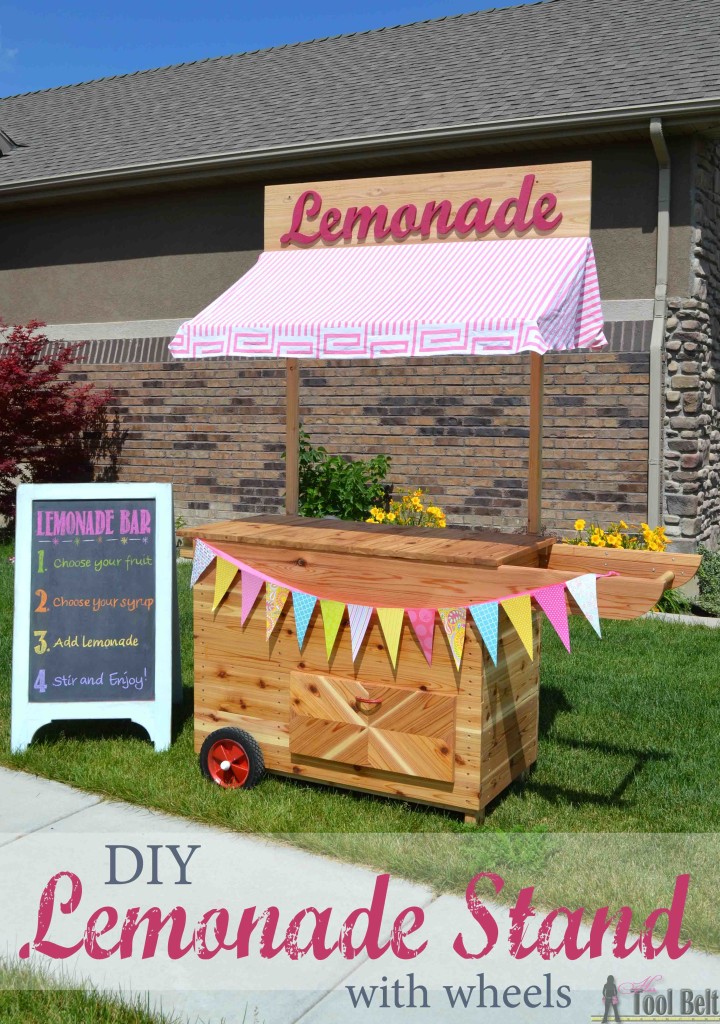
How to Build a DIY Lemonade Stand
Materials
- Party station, see my upgrades here (or any other base you choose)
- 2 – Cedar fence pickets (1/2″ x 5 1/2″ x 6′)
- 3 – 2″ x 2″ x 8′ boards
- 2 – 1″ x 2″ x 8′ boards
- 1/2″ plywood or equivalent (for lemonade word art)
- 1 1/2″, 2 1/2″ and 3″ screws (I prefer self tapping)
- 1″ pocket screws
- brad nails
- wood glue
- sandpaper
- paint
- fabric (I used an old sheet)
Step 1
Cut the cedar fence pickets to 52″ long. I like to trim the edges that I’m joining with the table saw so they’re straight, it’s not totally necessary. Drill pocket holes along one edge and join the two cedar boards together. Once the glue dried, I sanded the cedar pickets.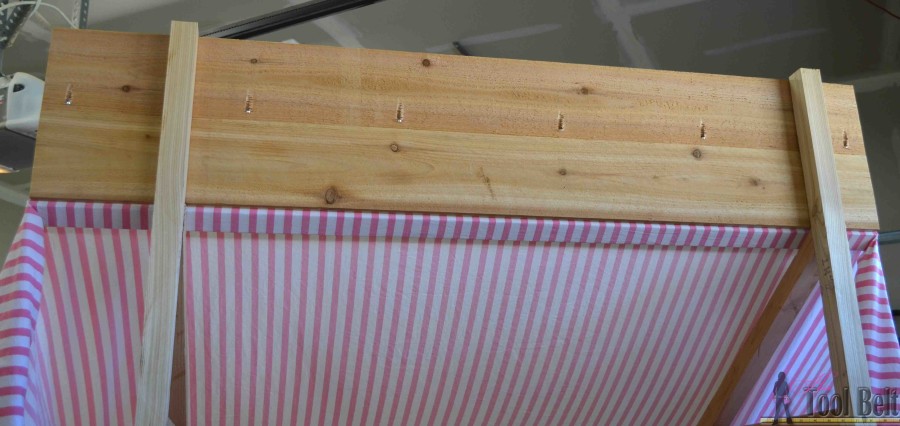
For the ‘Lemonade’ sign, I cut out the letters from 1/2″ plywood scrap pieces. If you don’t want to cut out the letters, you can always just paint it. Here is a pattern of the Lemonade template that I used, the font is Marcelle Script. Le m on ad de Download the patterns and print making sure your setting is on 100%. Trace the letters on the wood and cut out using a band saw, scroll saw or jig saw. I used a band saw to cut all of the easy parts because it’s faster, then used the scroll saw to cut out the inside and small diameter parts. I lightly sanded, primed the letters, then painted them with Rust-oleum Magenta and finished with Rust-oleum pink glitter spray paint.
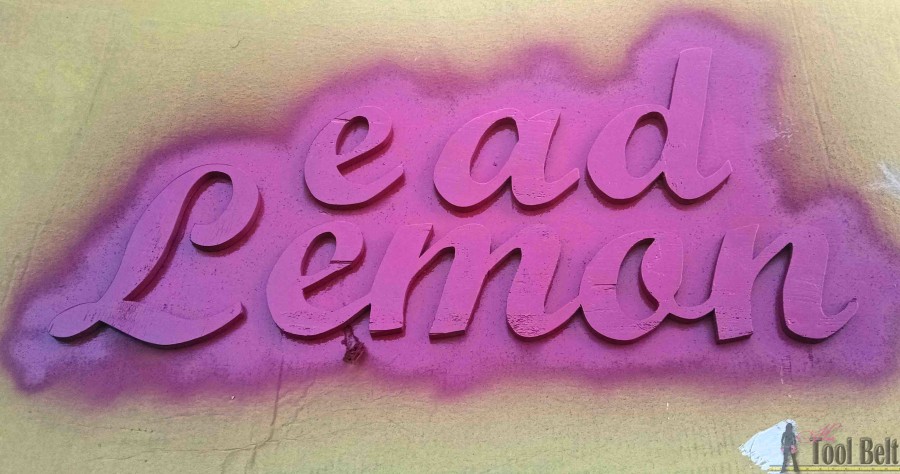 After the paint is dry, glue and attach to the cedar sign with 3/4″ brad nails.
Step 2
Cut 2 of the 2 x 2s to 84″ long. We need to make notches in the vertical supports, because the party cart has a sliding tops that stick out past the side about 1/4″. Measure 31″ from the bottom and make a notch 1 3/4″ long and about 3/8″ deep (or enough that your party station top will still slide.) 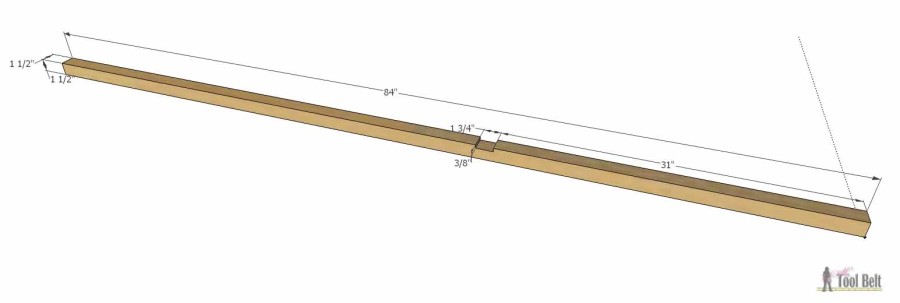
Attach the sign to the vertical supports with 1 1/2″ screws, making it flush with the top. 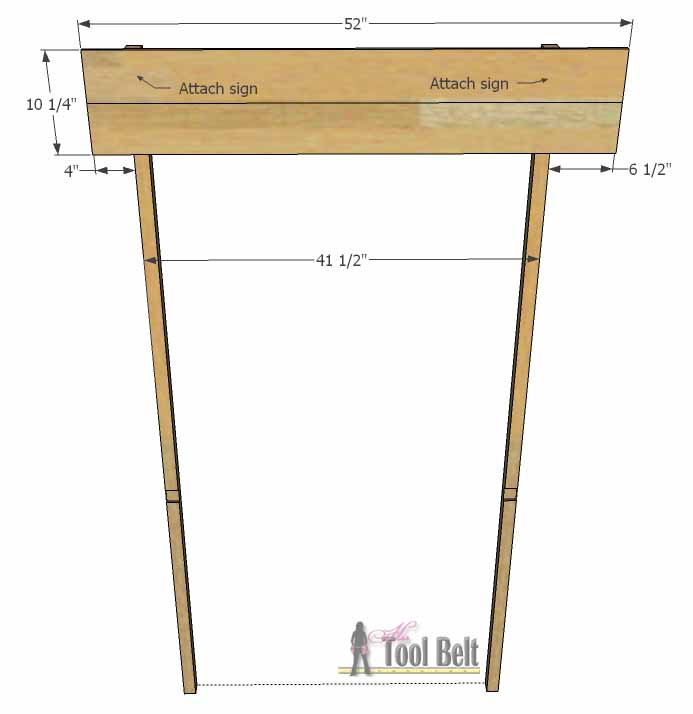
Step 3
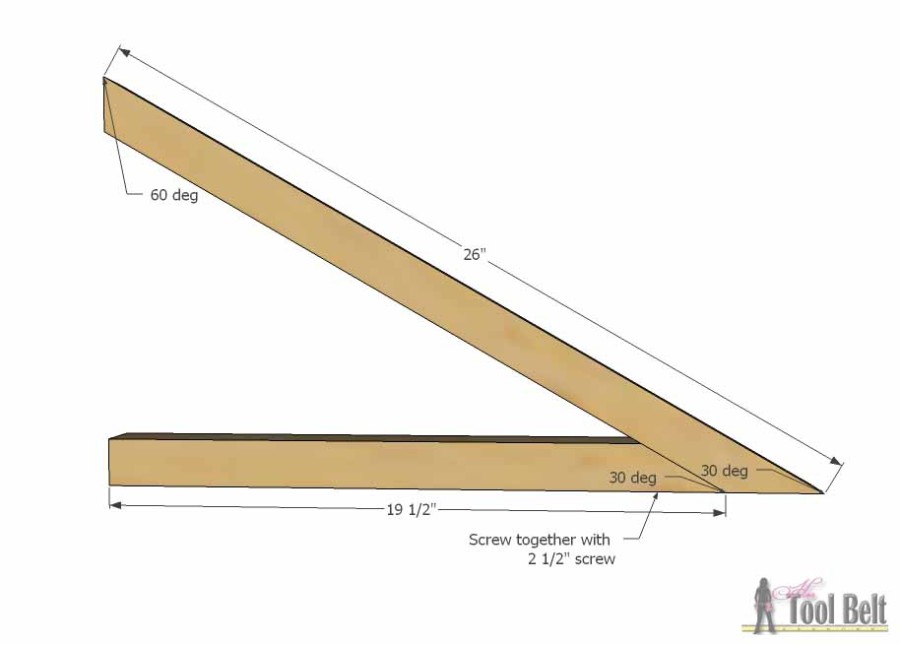
Cut 2 pieces of 2 x 2 to 19 1/2″ with a 30 deg miter on one end. Cut 2 pieces of 2×2 to 26″ long with a 60 deg miter on one end and 30 deg on the other. To cut the 30 deg, I used the miter gauge on my table saw. Another option is to measure and mark the angle and make the cut with a circular saw. Attach the pieces together with 2 1/2″ screws as indicated.
 Use 2 1/2″ screws and attach the canopy frame just below the sign.
 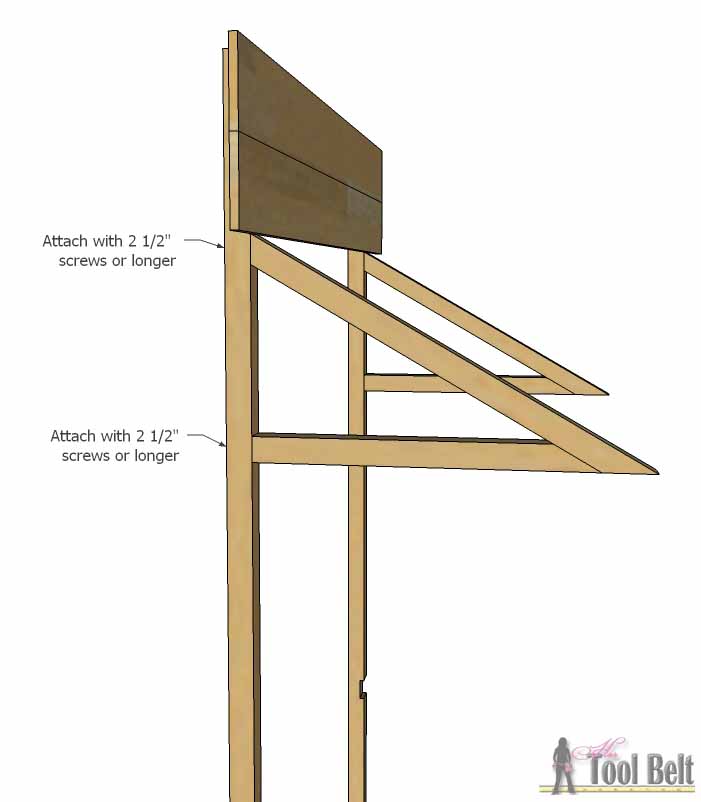 Attach the sign/canopy frame to the backside of the party cart with 3″ screws, you’ll probably want to pre-drill the holes to reduce splitting the wood. Place the vertical supports so the screws will go into the party station frame.
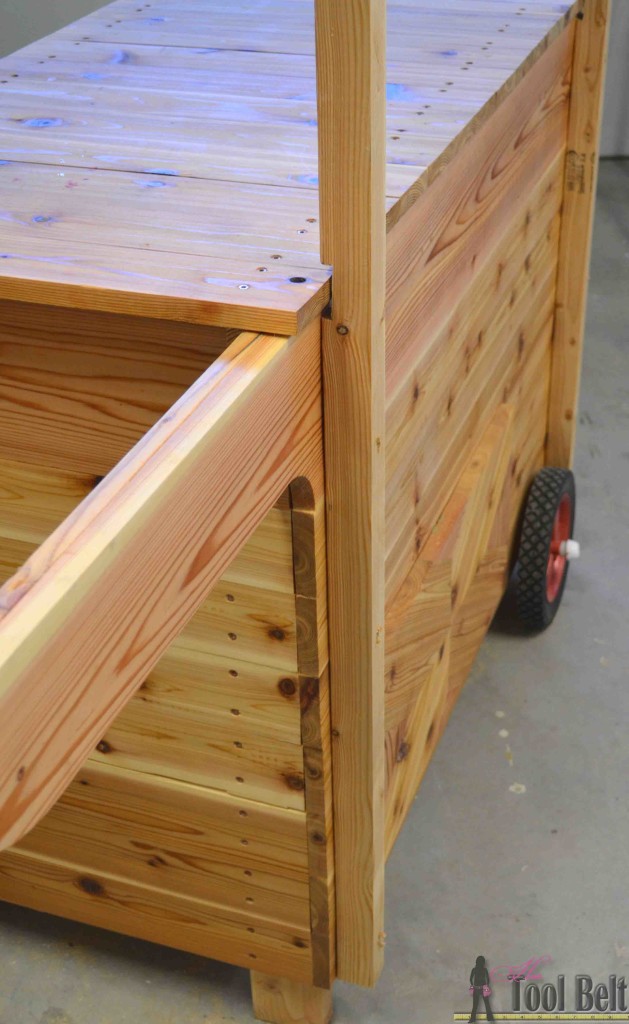
Step 4
Cut the 1″ x 2″ boards to 52″. Mount one of the 1×2’s to the lower edge of the canopy frame with brad nails or screws. 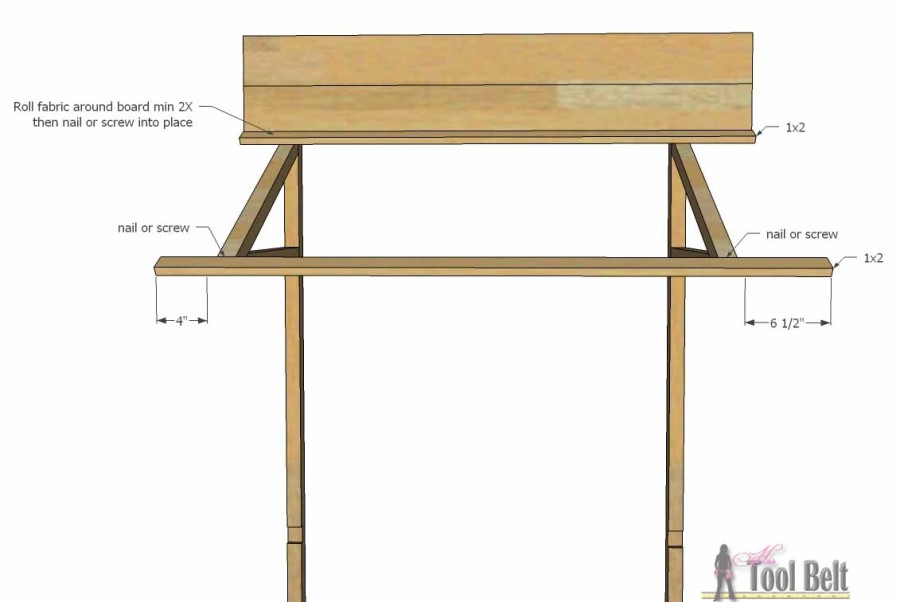
I was shopping around for fabric to make the canopy/awning when my friend told me that she had a pink and white stripe sheet that she didn’t want anymore – Perfect! The sheet even had a fun geometric design on the end, otherwise I was contemplating making a scalloped edge. (Which probably would have been very difficult for someone that doesn’t sew 🙂 ). To mount the canopy, I cut the sheet giving myself plenty of room to mess up work with. I stapled the cut edge of the sheet to a 1″ x 2″ x 52″ and wrapped it around the board a few times. Then I temporarily mounted it to the canopy frame to mark the hem lines. I marked and pinned the hem and bribed my sewing friend to sew it for me. The canopy turned out so cute, thanks Jenny.
Use brad nails to attach upper canopy piece. To keep the fabric tight, I used white thumb tacks along the lower 1×2. This will help keep the fabric in place in the wind.
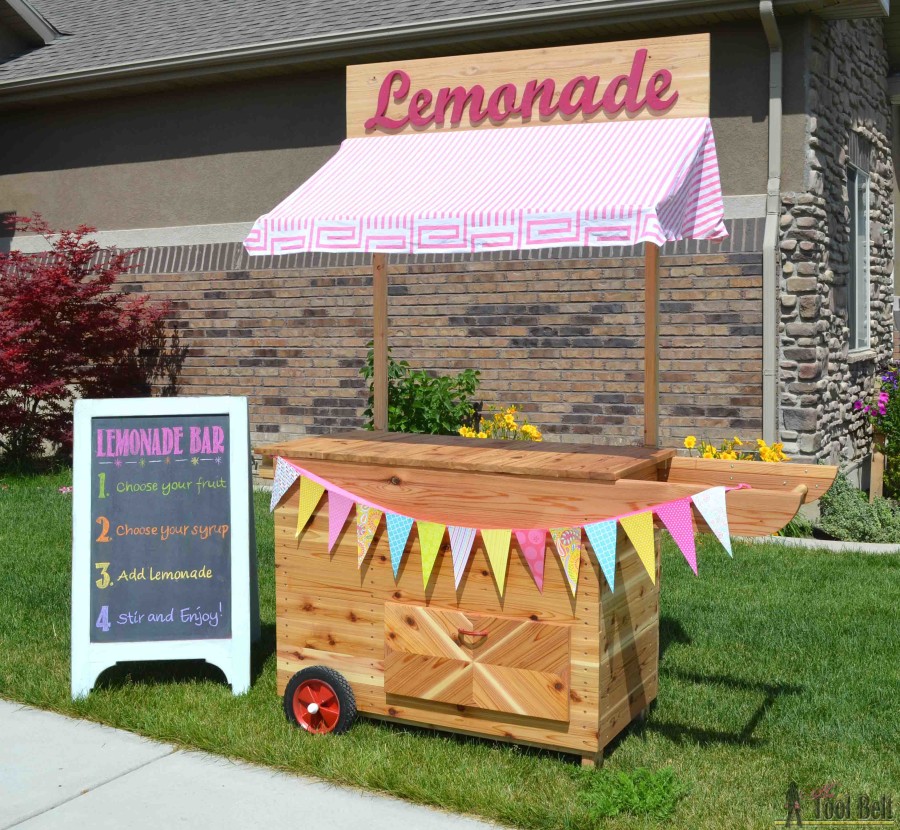 My friend Wendy was nice enough make me a pendant banner. She cut scrapbook paper into triangles and stapled them to ribbon, it adds the perfect touch! Now it’s ready to sell tons of lemonade and cookies.
We recently had a party with the neighborhood ladies and used it for a flavored lemonade bar (inspired by this one). 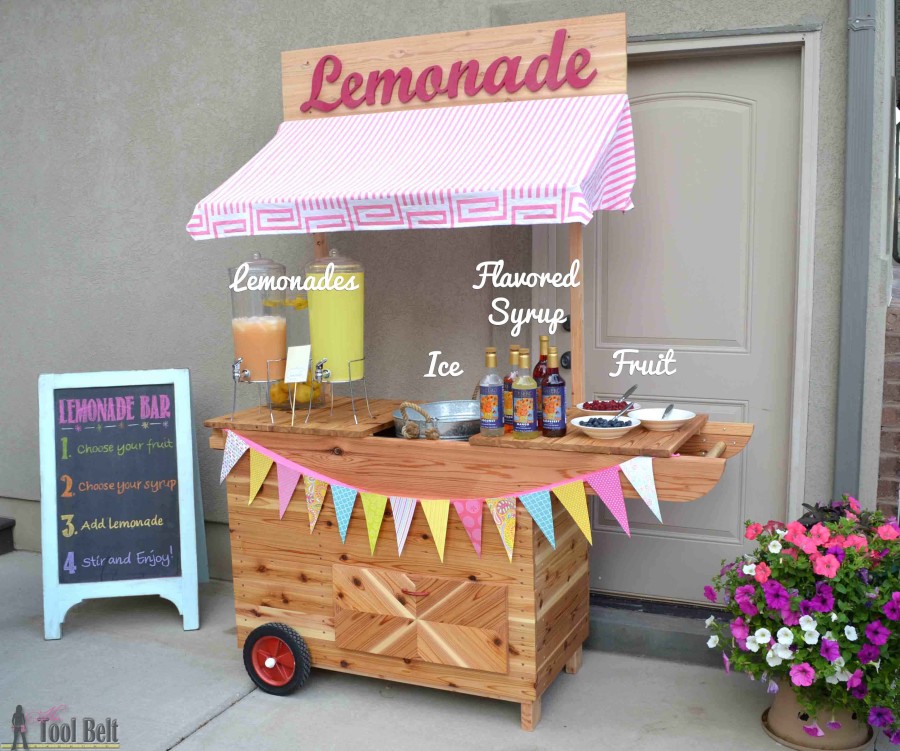 It was really fun to try different flavored lemonade concoctions. Surprisingly the coconut syrup was a favorite lemonade add in. I enjoyed raspberries, peach syrup and lemonade…delicious.
Thanks for pinning!
Linked to Favorite Link Parties, Remodelaholic, SavvySouthenStyle, homestoriesAtoZ
Hi Amy,,,loved seeing this stand in person…so cute and well built. How about sharing plans for the darling wooden planters that were on the tables? I have three old doors I wanted Neil to make a mud room bench I saw on pinterest…every made anything like that???
Thanks Tammy! I will be sharing the plans for the centerpieces soon. I’ve seen pins for door benches, that will be darling.
Amy this is the cutest thing EVER! You are kicking some serious trash girl!! Pinned!
Thanks Mindi! It’s amazing what happens when you have a hard deadline 🙂
This is the most amazing Lemonade Stand I have ever seen! Completely impressed with your mad skills!
Thanks!
This is the cutest ever! I love both versions. You did such an amazing job. Love it!
Love this project – would also make a cute little farmer’s market.stand
Great tutorial too!
Carole
Amy
Your cart is so awesome! I would have loved one of these when I was a kid! All of these awesome kid ideas make me so excited when our little one is old enough to enjoy them! I have recently started a new link party with Refresh Living and Vintage Refined and we would love to have you stop by and link with us! The party gets started every Tuesday night at 7pm CST.
I hope to see you there!
Cat
This is seriously SO flipping cute! I love this grown-up take on the lemonade stand – I remember spending so many summers trying to sell a cup for 25 cents. This lemonade stand takes the cake!
Thanks Erica!
Hi Amy,
Thanks for linking up with us. This is such a cute idea, and I agree, totally not just for kids!
Love this lemonade stand! Great ideal!
This is amazing! Is there any way you can make one of these for my family? If so what would be the price? I am not the most crafty person.
Where are materials from, because I need to make a lemonade stand like that
How can we get the plans to build this cool lemonade stand
Hi Susan,
This base of the lemonade stand is from the party station plans available here https://www.ryobitools.com/nation/projects/4266
Yes I love the idea in all but what about the bottom you only did the Fram
Hi Sadie,
The bottom is the party station from Ryobi Nation. https://www.ryobitools.com/nation/projects/4266