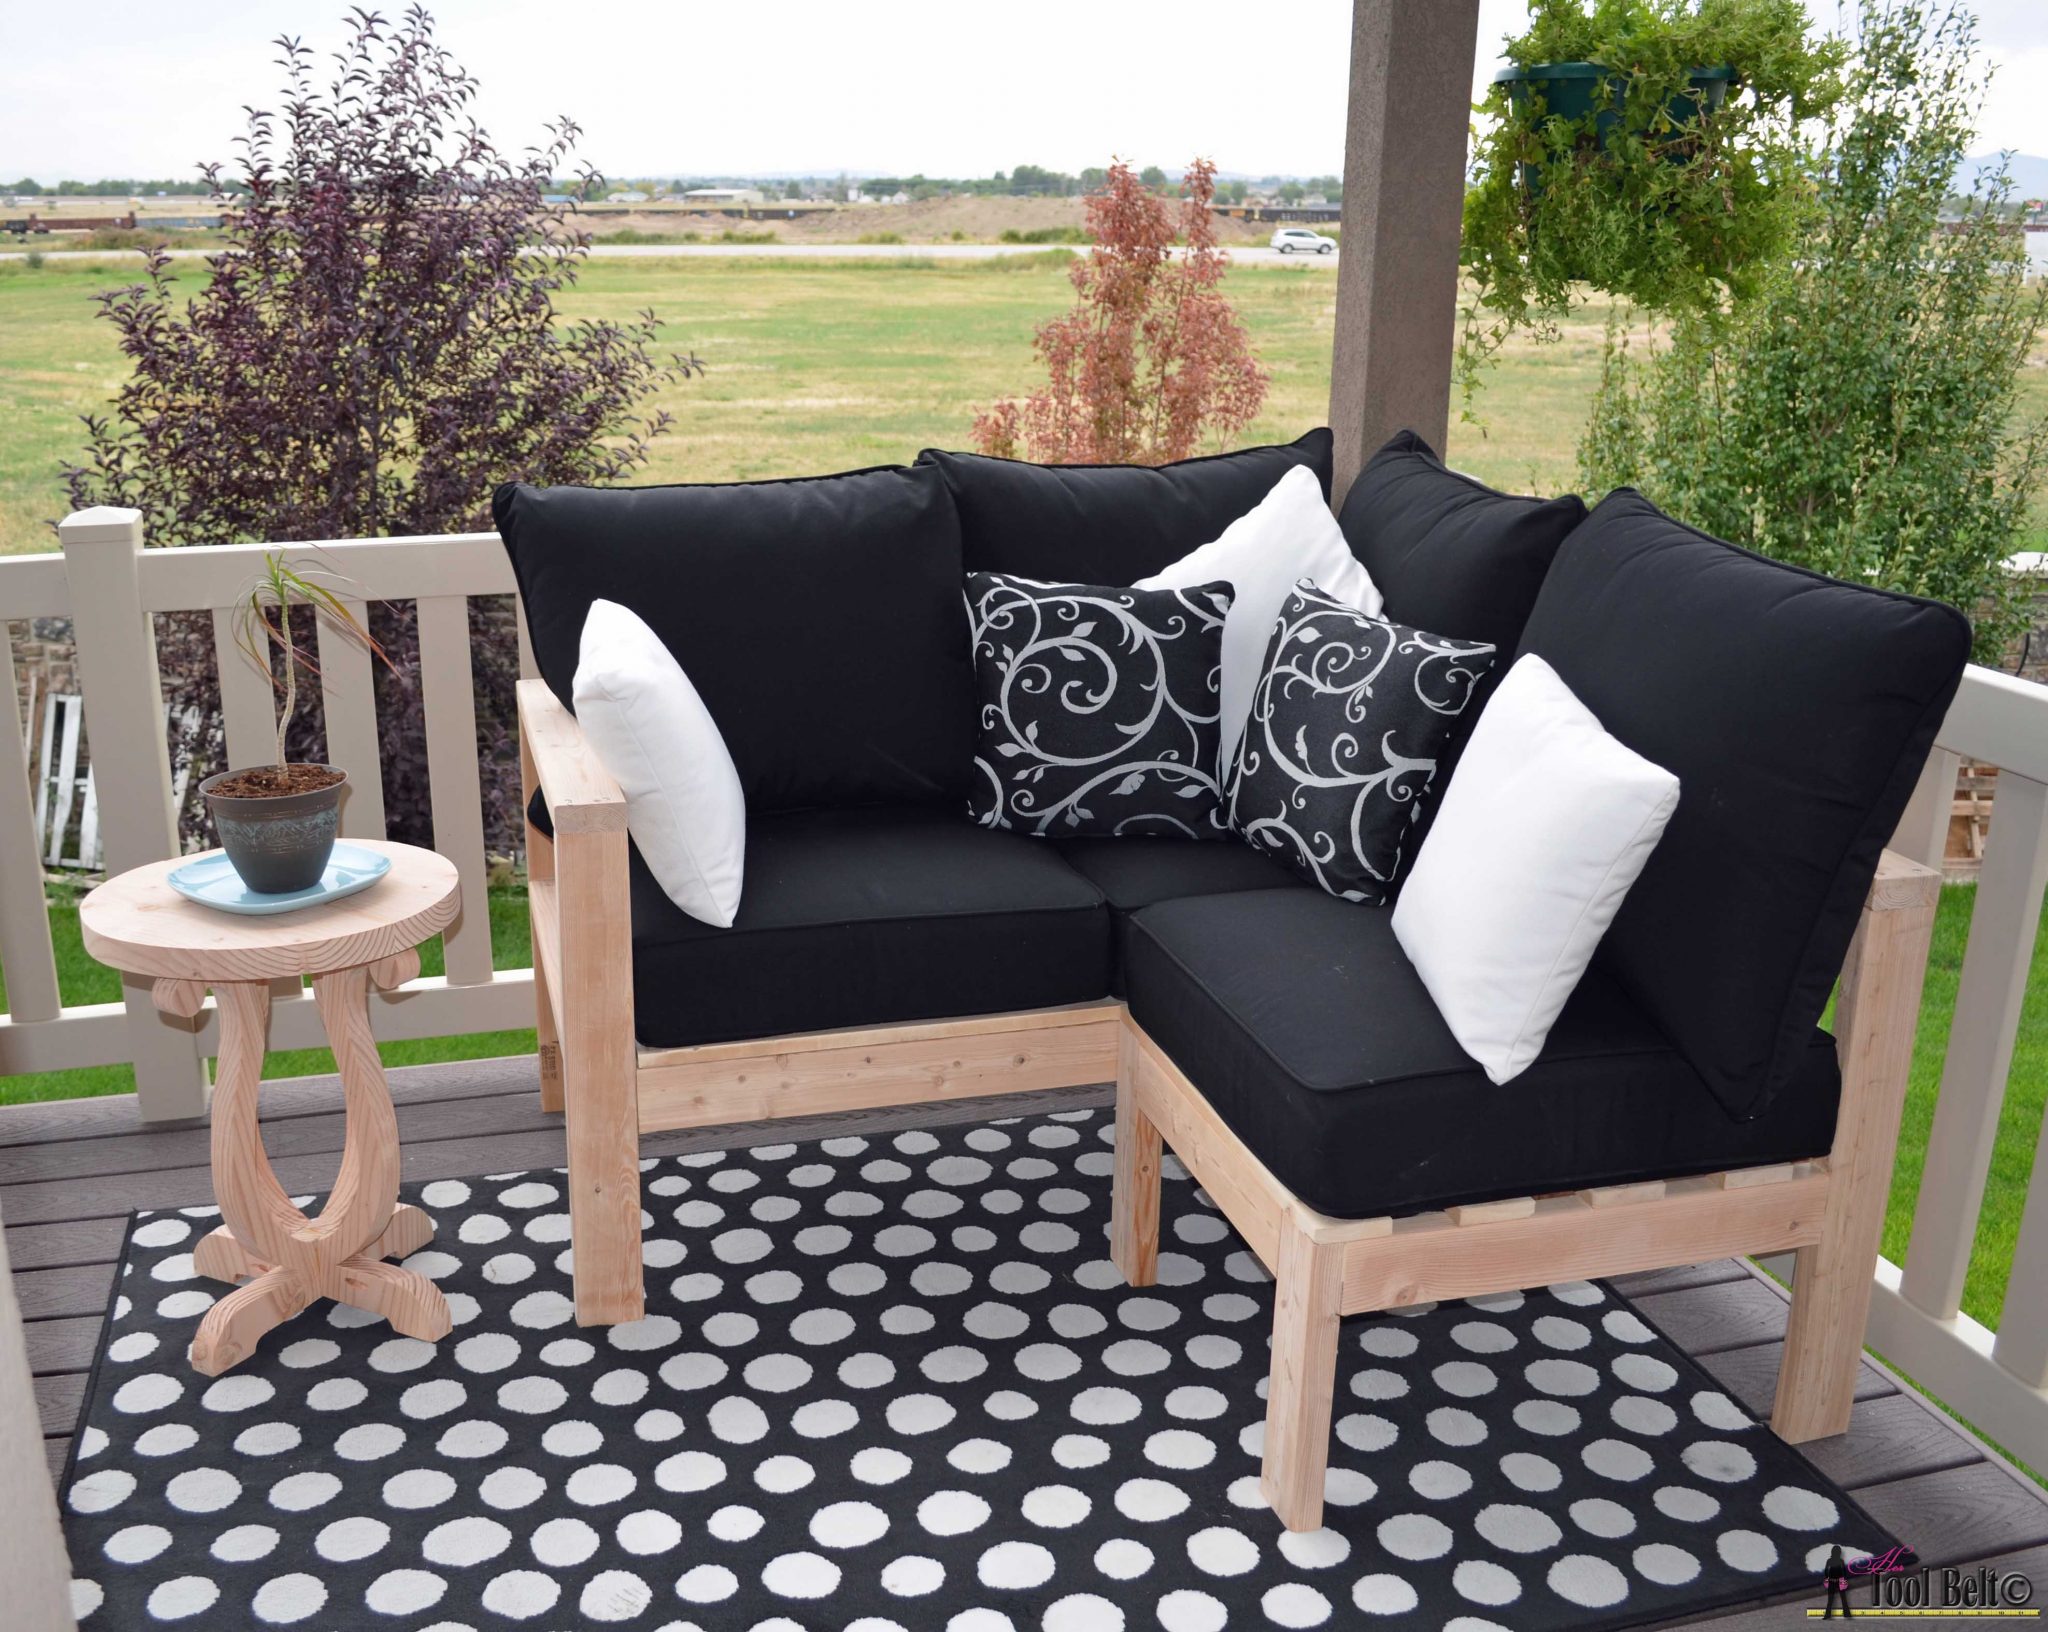
I have been wanting to add outdoor seating to my deck. My deck is long and narrow, standard outdoor furniture sets won’t fit as intended. So ‘outdoor seating’ has been on my to build list for a while. I went to a DIY conference called Haven during the summer. The great folks at Ryobi challenged the attendees to build one of four projects, for a contest. You know I’m a sucker for contests, just the kick in the pants I need to get it done. One of the projects is an outdoor sofa designed by Ana White.
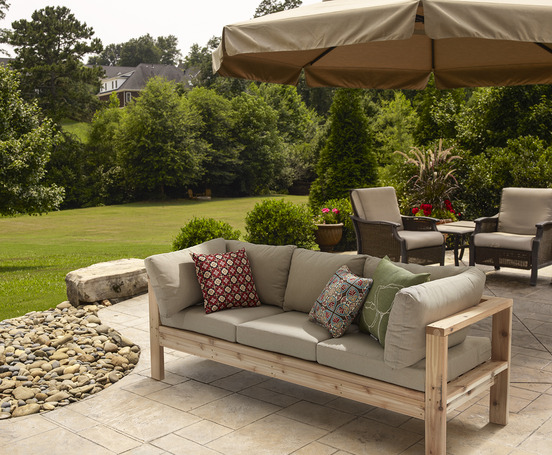
First off I started shopping for cushions. I did not want to build something and the cushions not fit, right! I watched prices for a few weeks and in August, the cushions started to go on clearance. YAY. I grabbed a few sets of Sunbrella cushions at Lowe’s for about $22 per set, normally $98. The black ones were 75% off + 10% off coupon. *score* The seat cushions measure 25″ x 25″ so they will work with Ana’s plans.
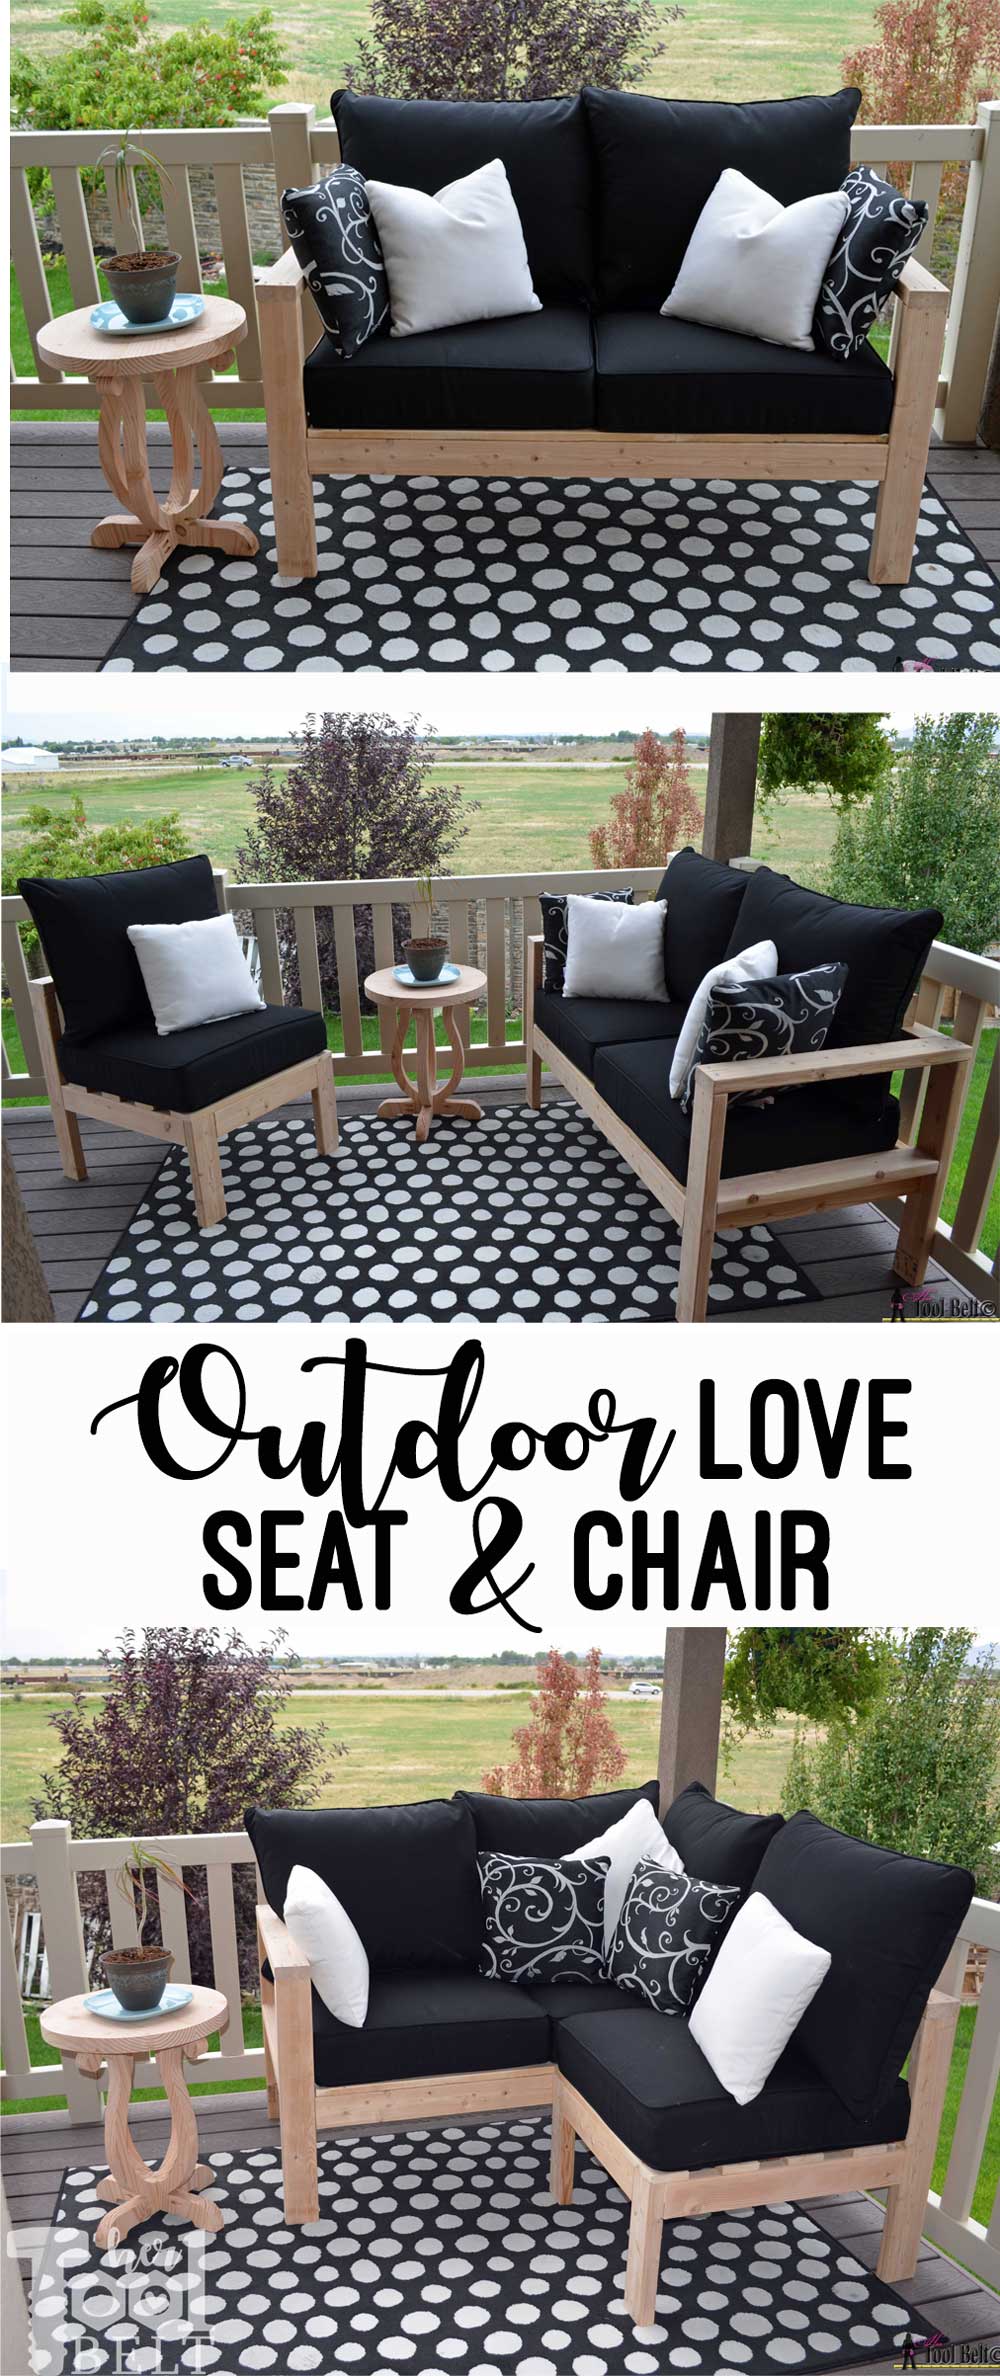
Since my space was limited, I wanted my outdoor seating to be a couch with a chaise for relaxing. I also wanted the chaise part to kick out and become conversational seating. The full 3 cushion sofa wouldn’t fit in the area that I wanted the seating, so I shrunk it to a love seat. I pretty much followed Ana’s plans with a few adjustments. You can download Ana’s plans from the Ryobi Nation site, but you have to have a free account.
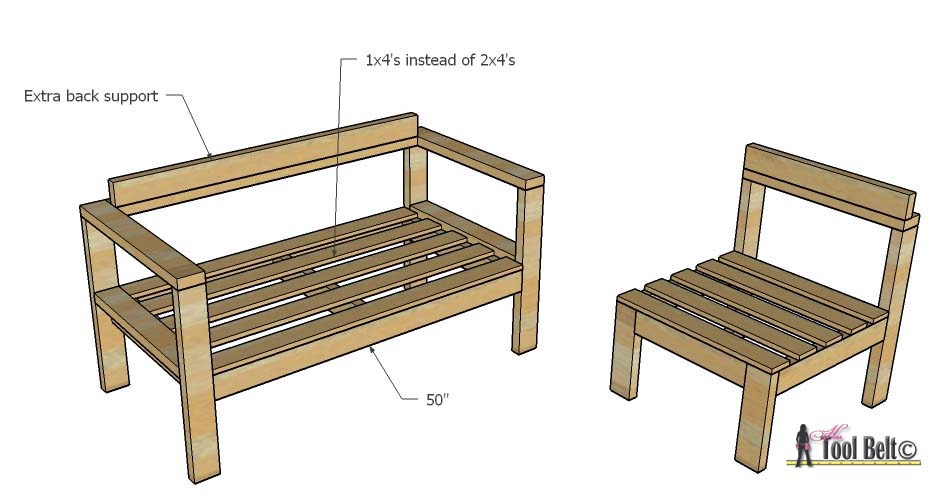
I built the love seat from regular pine 2×4’s instead of cedar. I shortened the long seat 2×4 to 50″. Seat part of the sofa. I glued each joint and used pocket holes to hide the screws.
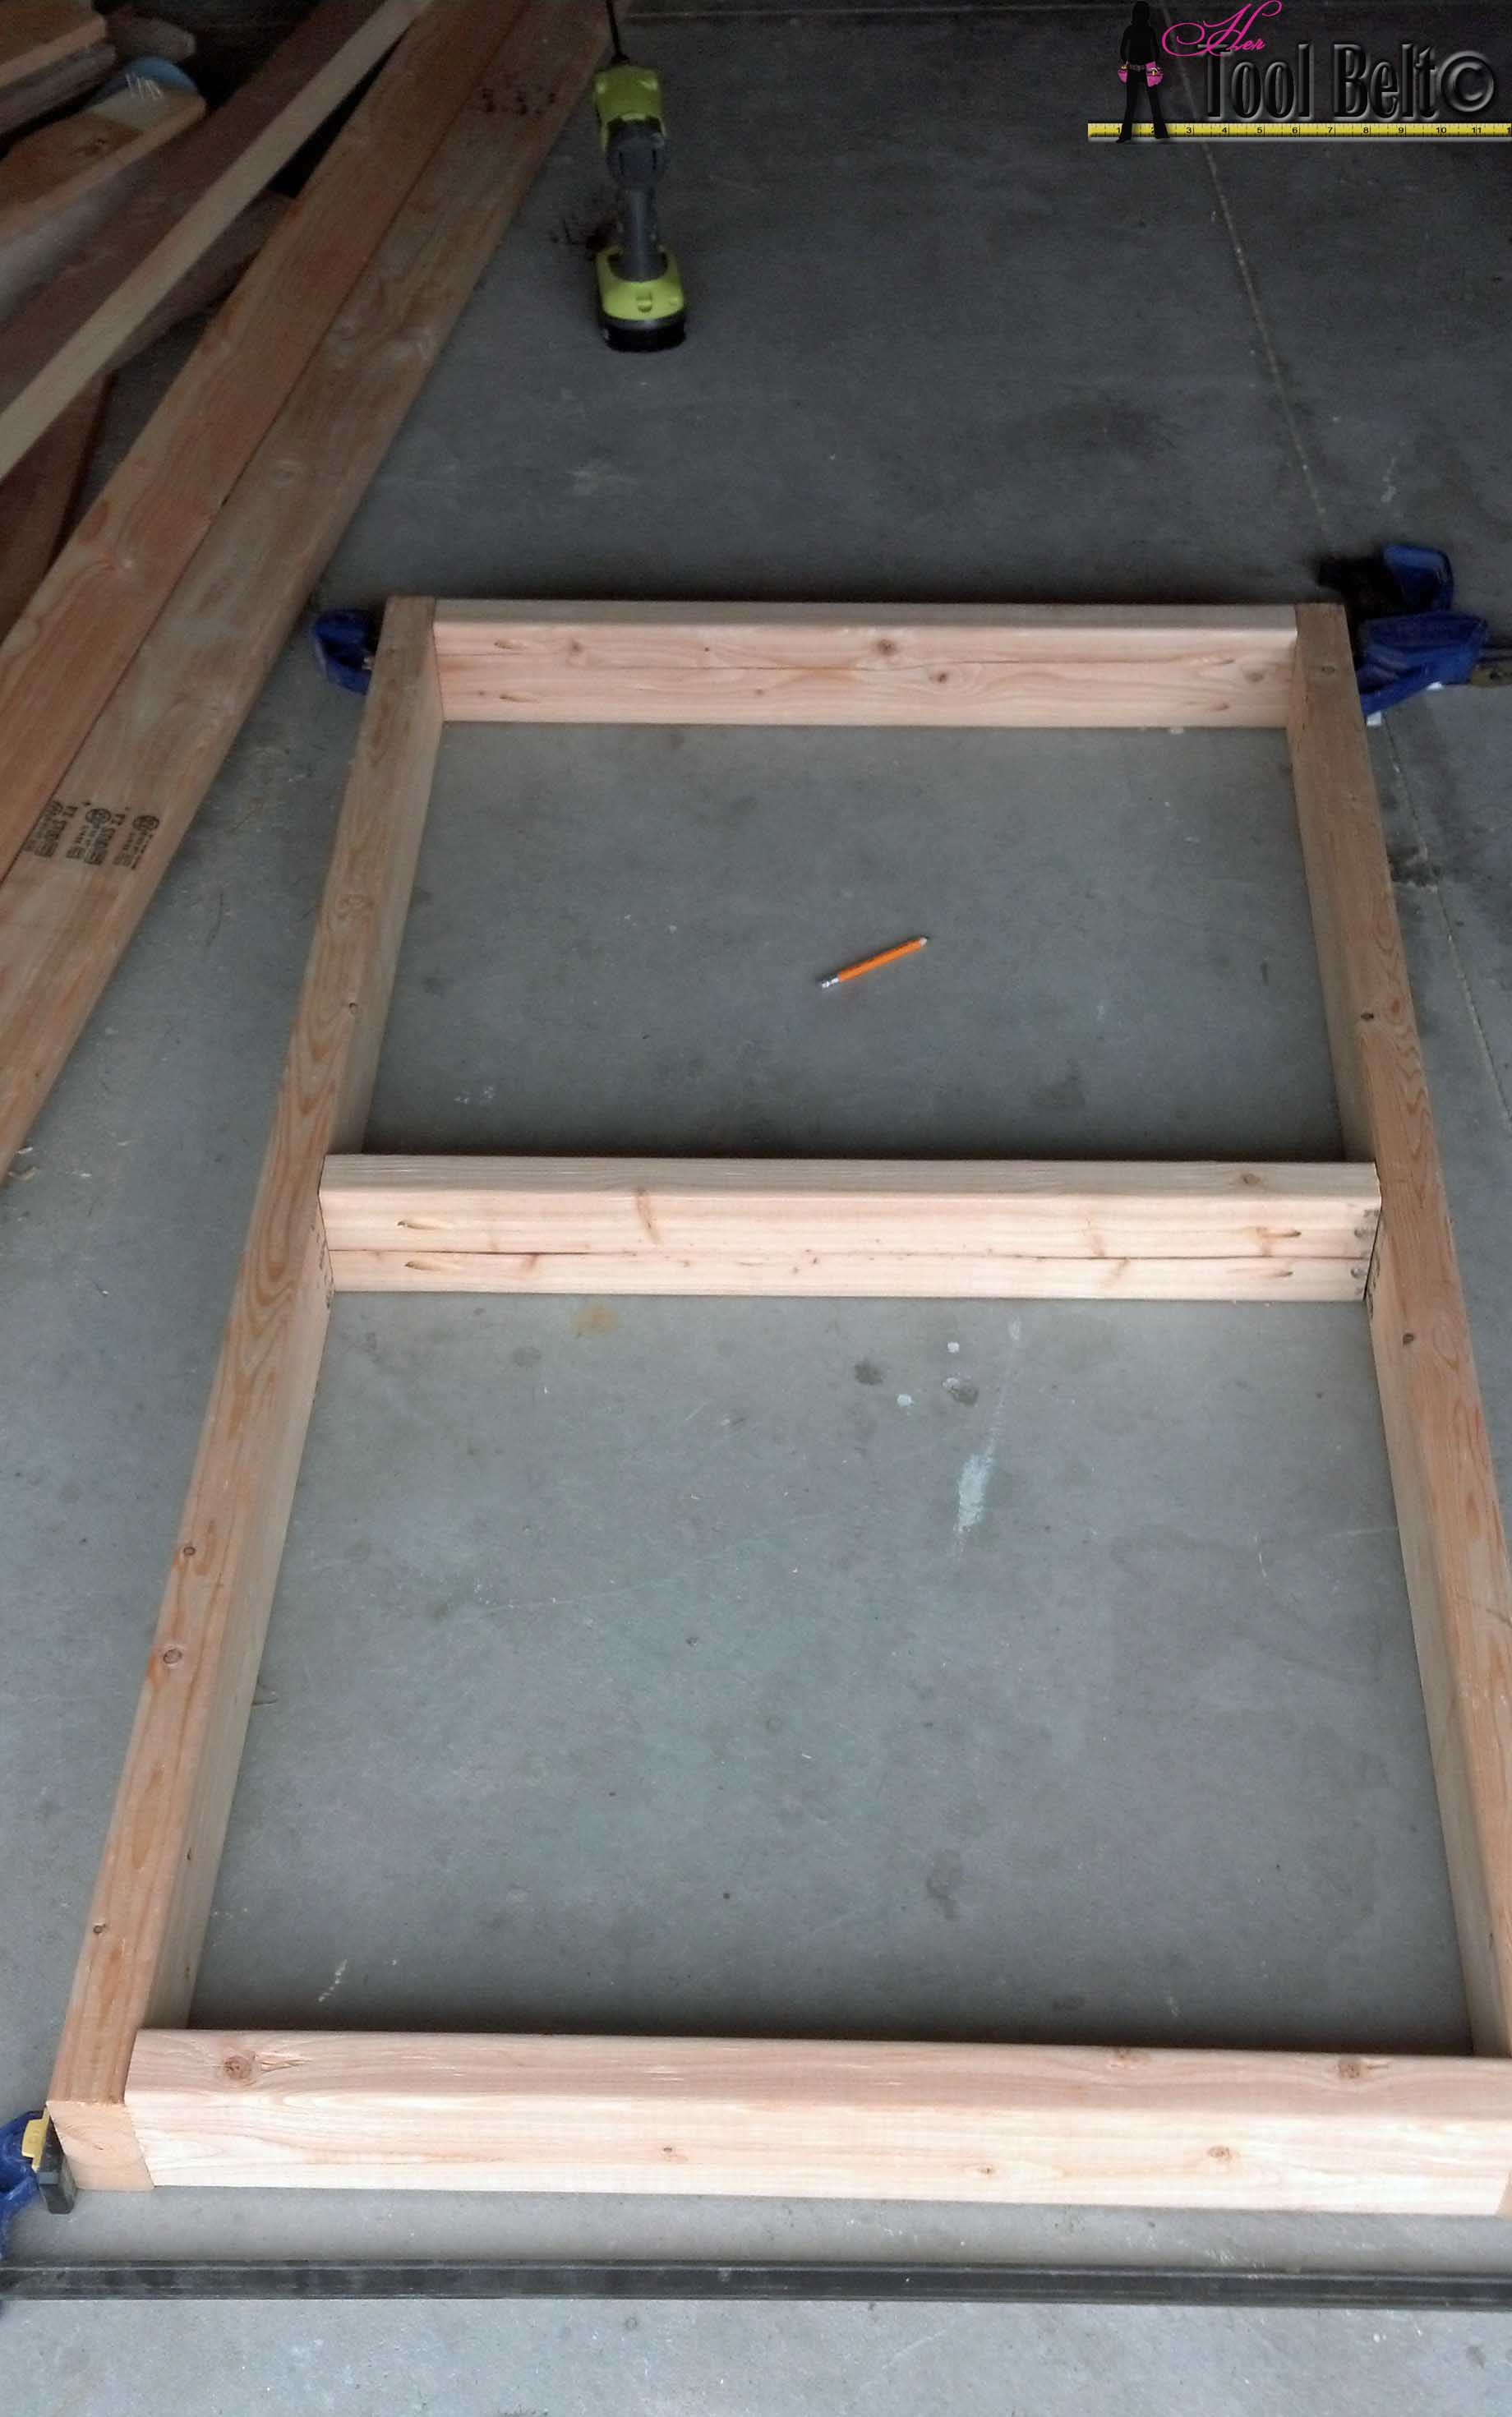
The sides/arms went together slick too. I screwed through the arms to attach to the sides.
When I sat on the sofa at Haven, it was really really stiff, I decided to switch the seat slats to 1×4’s hoping they’d flex a little more than 2×4’s. Also my seat cushions may have been a little thicker than Ana’s, so I needed to add another board to raise the back support. After all of the glue dried, I lightly sanded the love seat and sealed it with Thompson’s Water Seal. Building the love seat was really easy, you can do it!
How to build the chair/chaise
Chair Cut List
Cut the following lengths from 2 x 4’s
- 2 – 25 1/2″
- 2 – 25″
- 2 – 23 1/2″
- 1 – 22″
- 1 – 18″
- 2 – 12 1/2″
Cut the following lengths from 1 x 4’s (furring strips)
- 4 – 25″
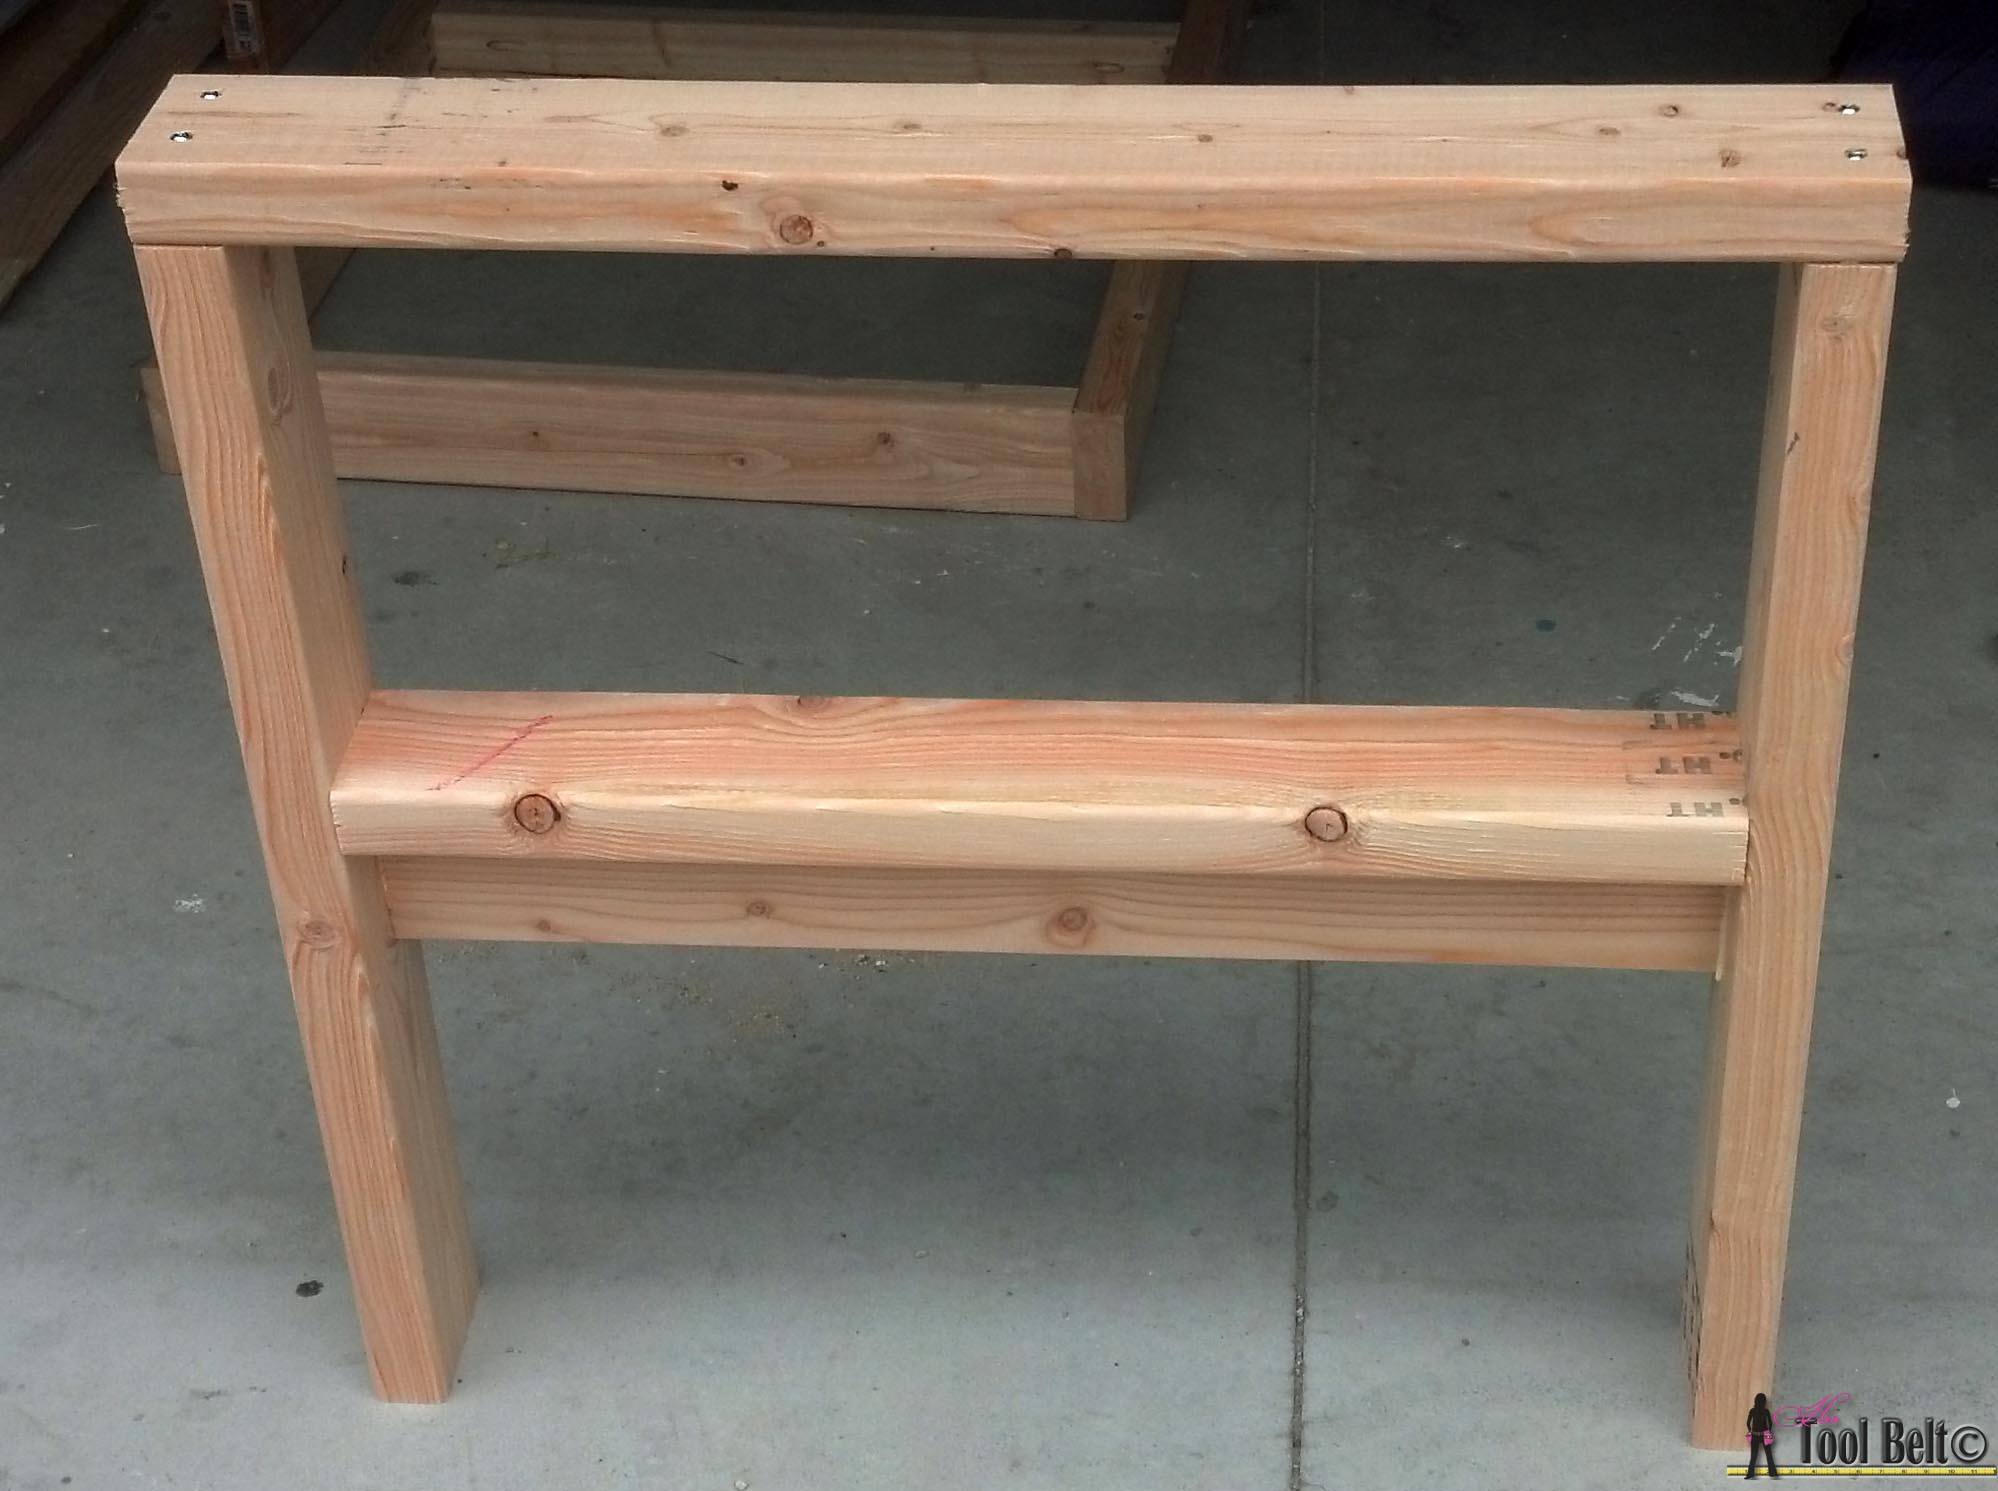
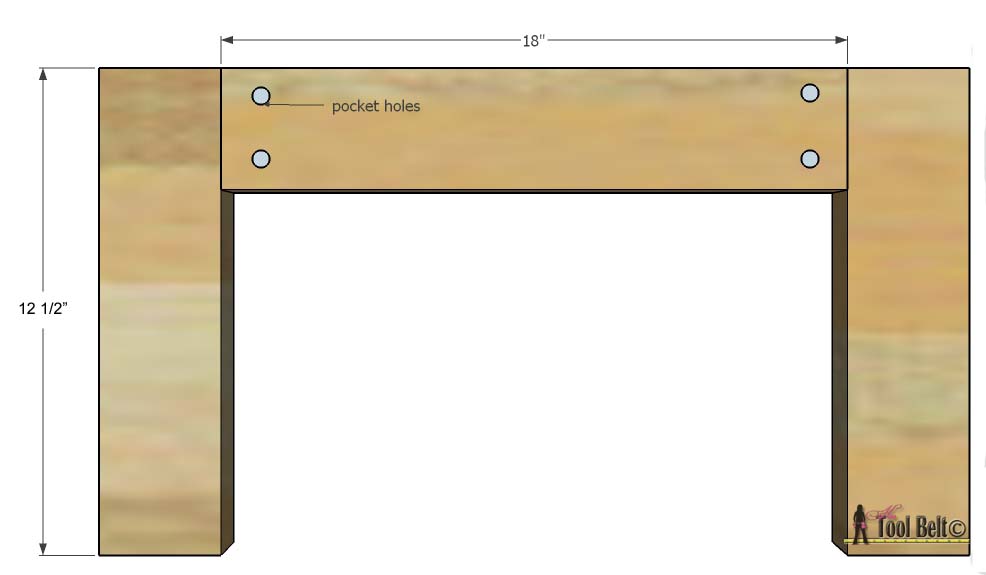
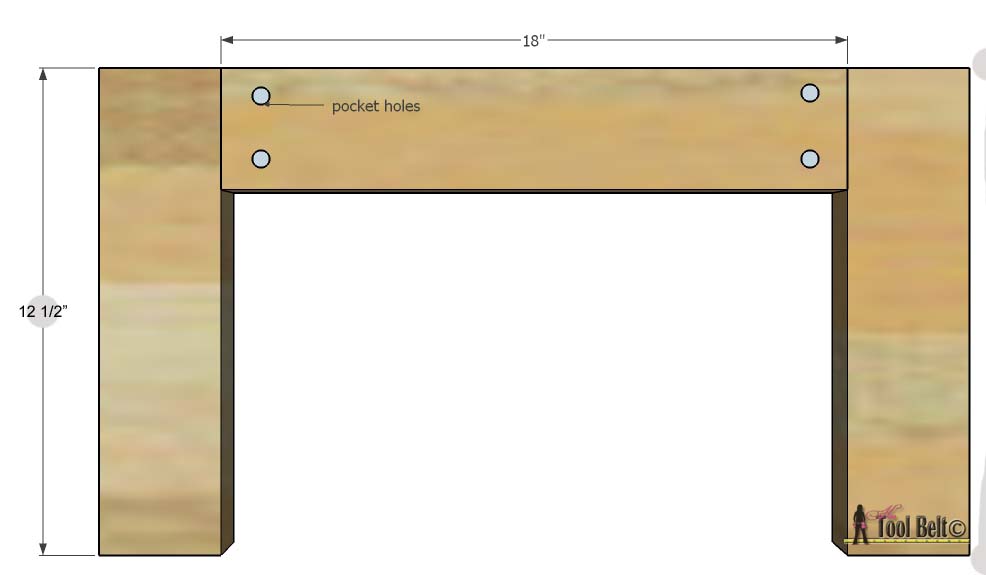
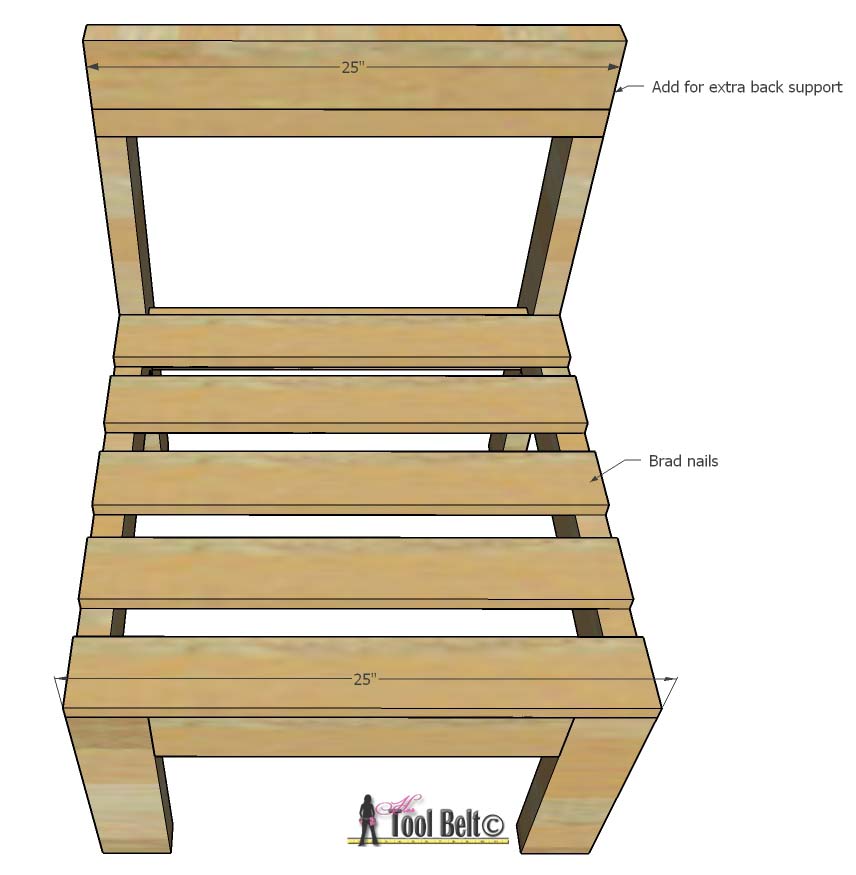
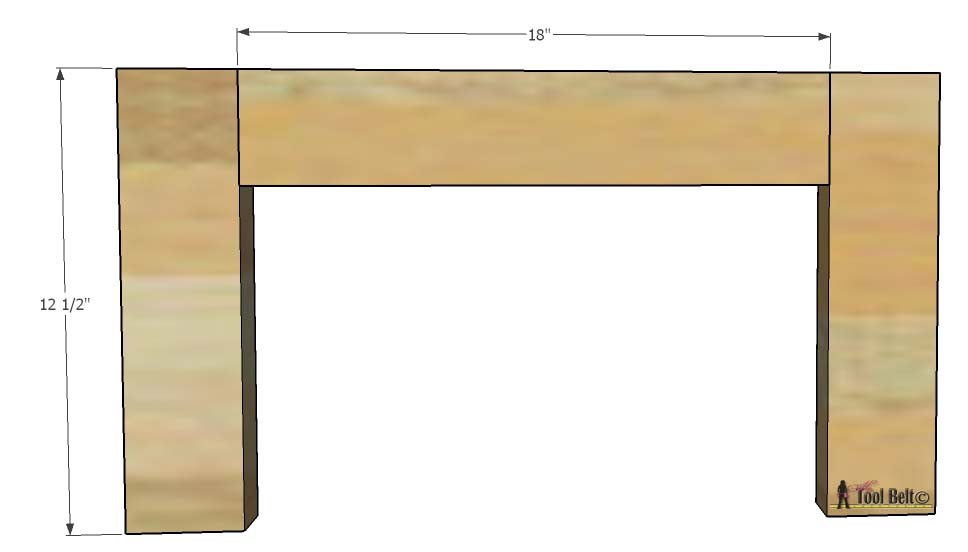
Step 1
Join the two 12 1/2″ legs with the 18″ piece. I used pocket holes and 2 1/2″ self tapping screws (Kreg or Deck screws are self tapping) and wood glue.
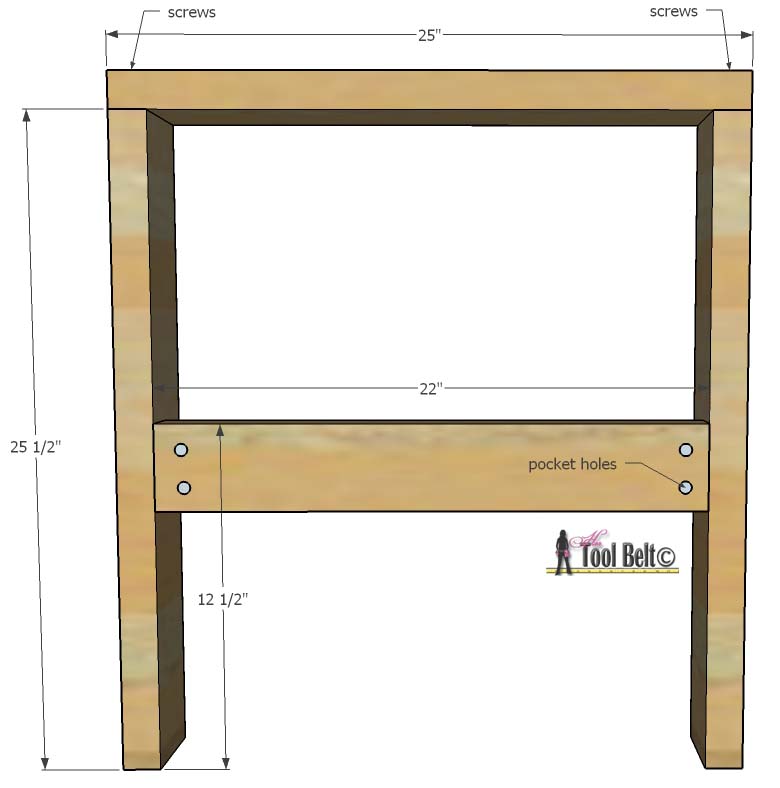
Step 2
Next assemble the back legs. Join the 22″ piece with glue and 2 1/2″ pocket screws to the two 25 1/2″ pieces at 12 1/2″ from the bottom. Attach a 25″ piece to the top of the 25 1/2″ legs.
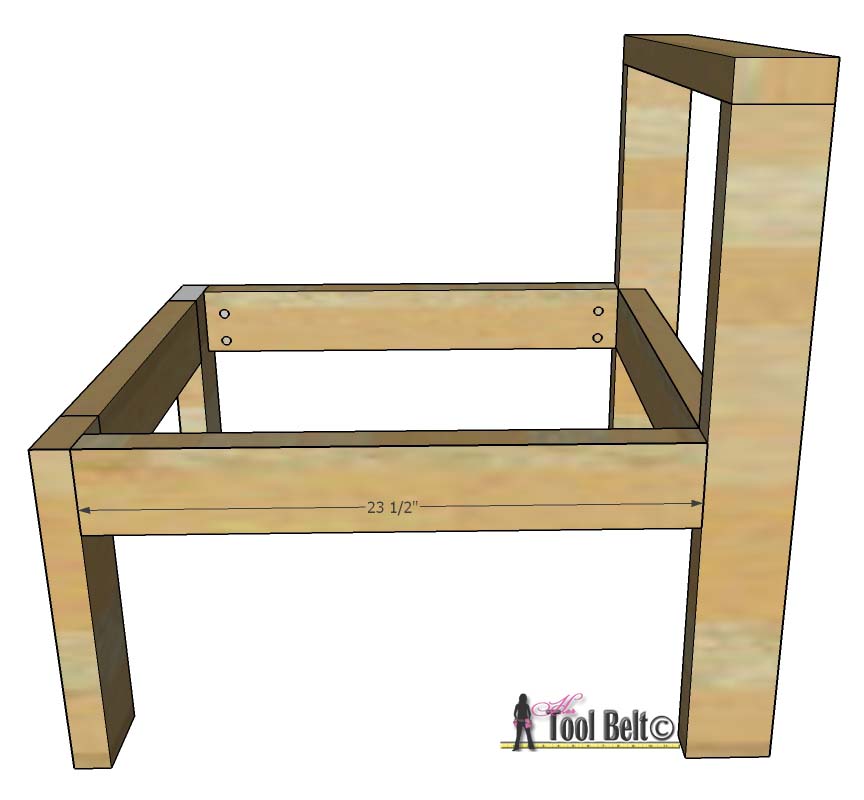
 Step 3
Attach the 2 – 23 1/2″ pieces between the front and back legs. Secure with glue and 2 1/2″ pocket screws.
Step 4
Attach the 1 x 4’s to the top of the seat. The picture shows 5 – 1 x 4’s but 4 are good enough. I used wood glue and 2″ brad nails. If you need extra back support add a 25″ board to the top with 2 1/2″ screws.
 After all of the glue dries, lightly sand and seal it with Thompson’s WaterSeal. If you want stained wood, Thompson’s also has all in one waterproofing stain in an aerosol can or by the gallon. Easy peasy right!!! The wood only cost about $24, so a very economical option.
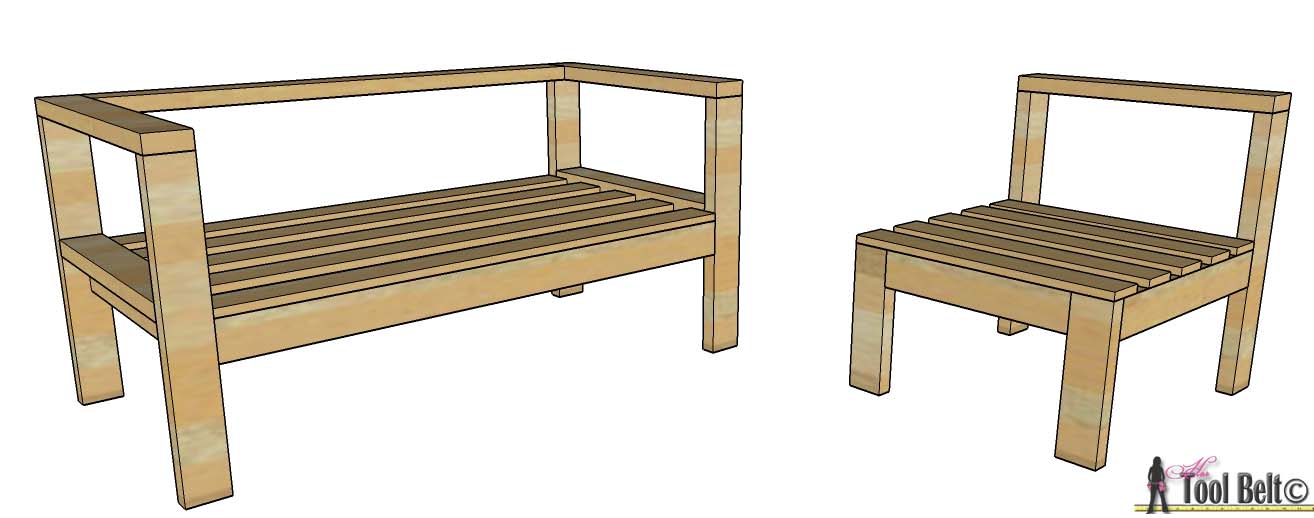
I have loved having seating…it is so nice. I also love this little side table. You can grab the pattern here. It’s made from a 2 x 10 and only costs about $12 to build!
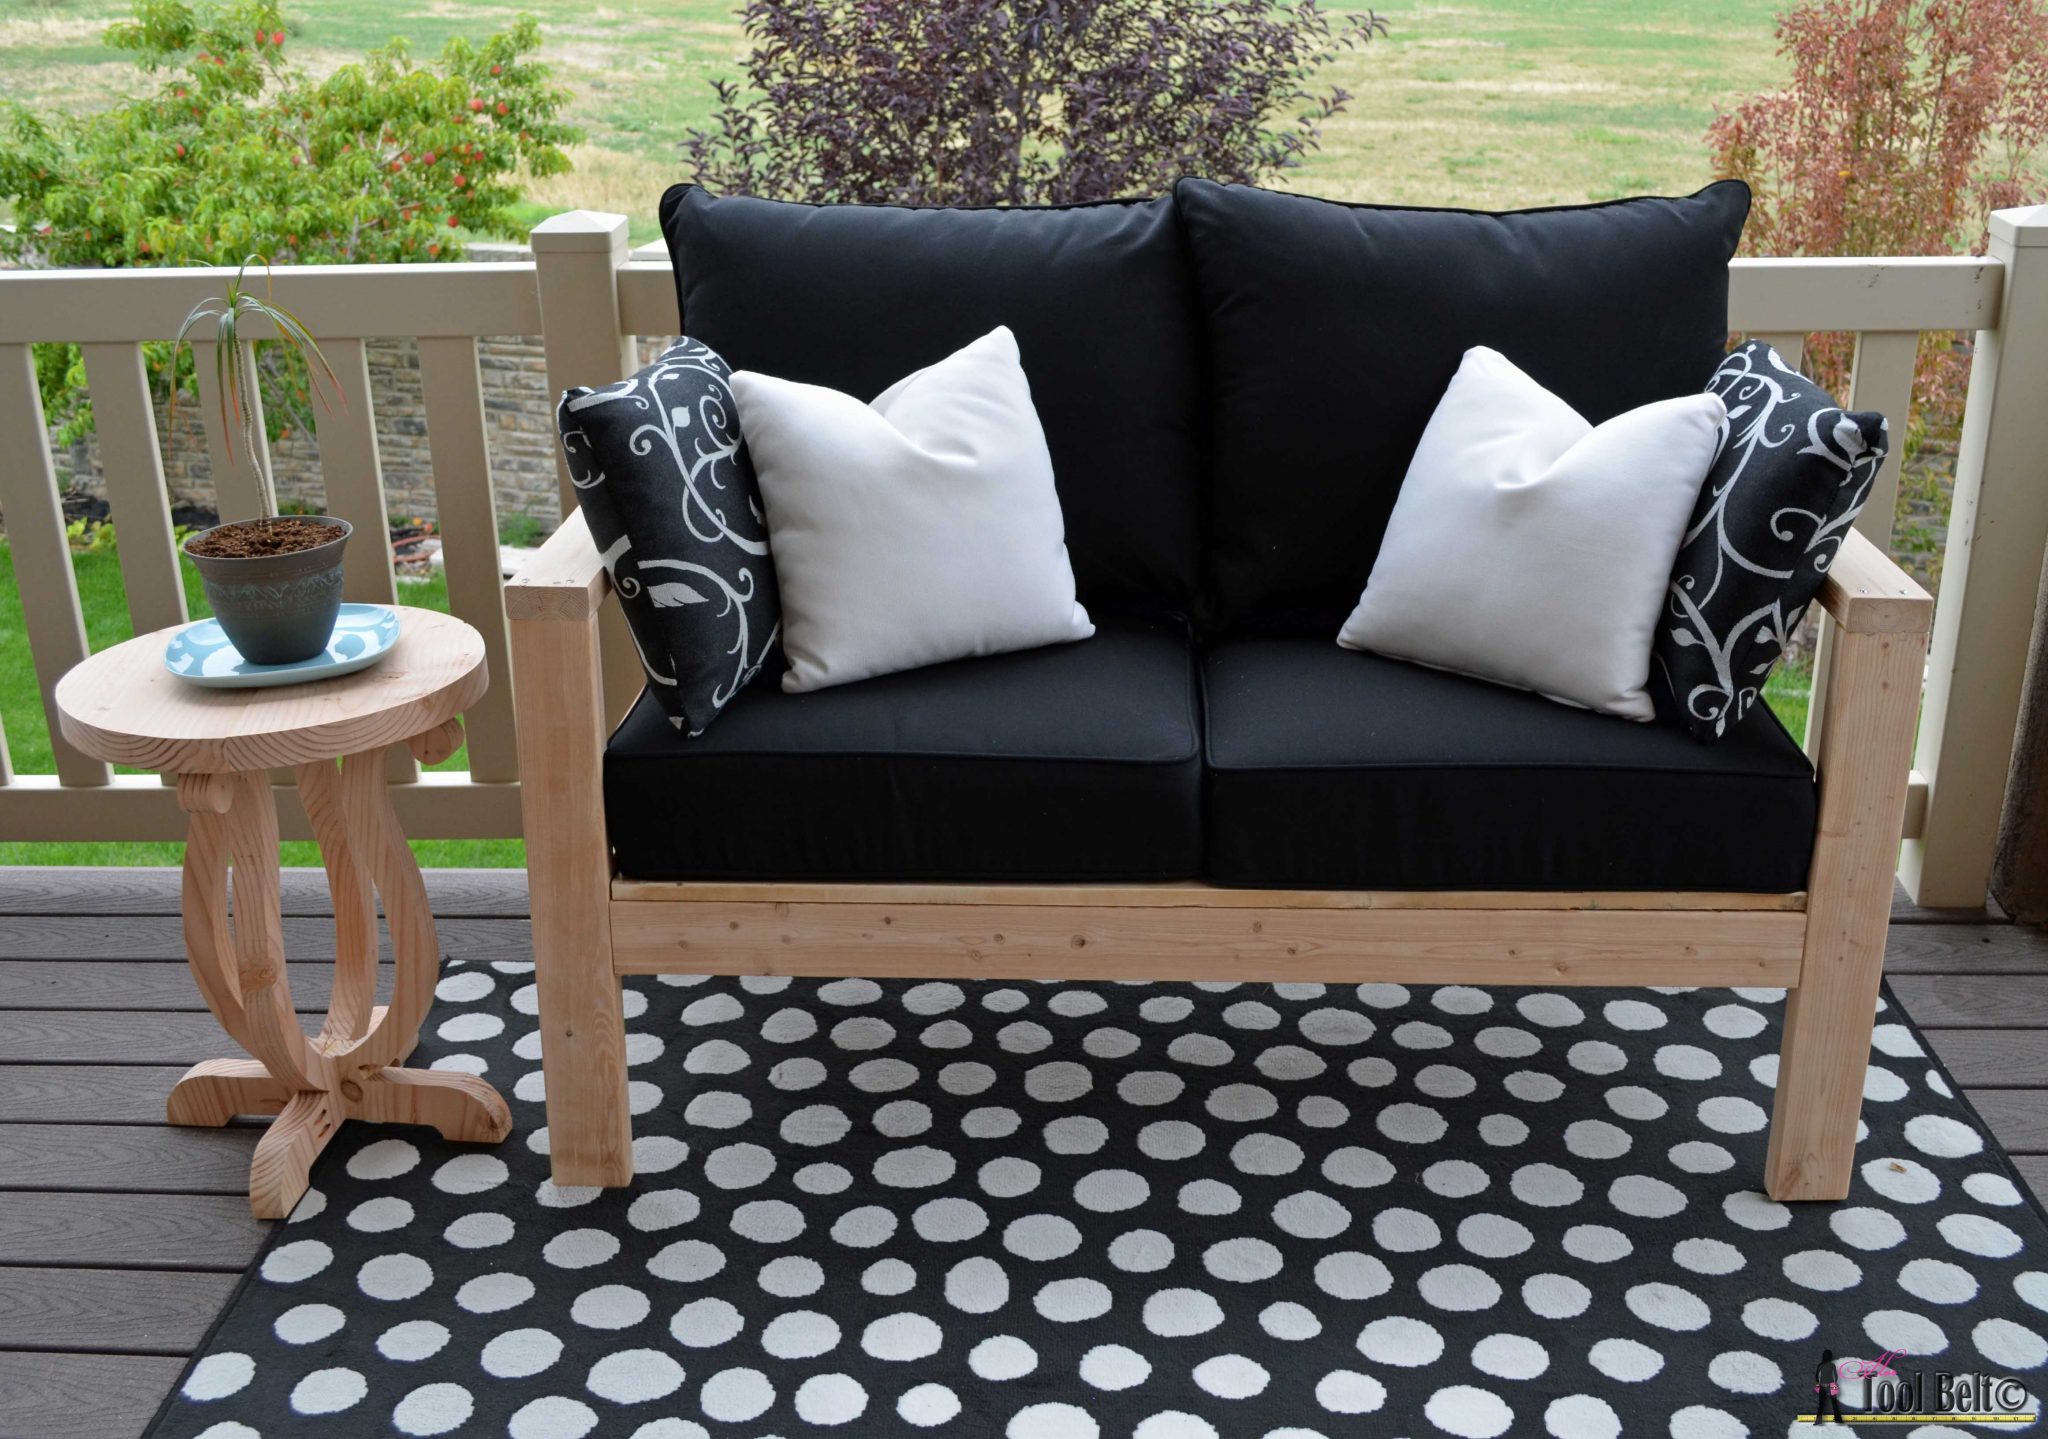
Outdoor seating in chaise relax mode.
Easily scoot out the chair for conversational seating.

Linked to my Favorite Link Parties, Remodelaholic, Savvy Southern Style
Pictures never come through if there are pics when I click on your post.
So nice. You are very handy with the tools!
those look amazing! and i love that rug. enjoy!
b
Thank you, the rug is an IKEA special 😉
Love! You are so talented! I’m hopping over to vote! Good luck.
Thanks so much Leslie!
This is just amazing! Thanks so much for linking to Twirl and Take a Bow! xo
Thank you Robin!
You hit it out of the park again! Love! Pinning and would love to have you link up with us at The DIY’ers! http://biggerthanthethreeofus.com/the-diyers-16/
Thanks Ashley!
I love Sunbrella products! You got a great prices on those cushions. I like your thinking of finding the cushions first! So glad you shared Pinning this. My hubs is good with wood, he could do this! He enjoys making things from scratch too.
I would love for you to come and link this up with us at Home Matters Linky party! http://wp.me/p4fJXd-ZM
Thank you Shirley, your husband will have this whipped out in a couple of hours!
This is FABULOUS! Would love to have you join us and link this up at the first Pretty Preppy Party this week (now thru next Thurs). Your awesome outdoor project links up to 5 blogs! http://being-bianca.com/2014/09/18/introducing-pretty-preppy-party/
Love it! We need outdoor furniture and I would love to make some. I have never used any of the big power tools so I am scared to tackle a project like this but I am pinning it and hopefully someday (like this spring) I will get enough courage to try it. Thank you. Oh I love how detailed you are. You make it seem easy to do.
You can do it!
Voted!! I love this project. Sharing on my FB page!
Thanks Kim!!!
Darling!! I want to make this fir my back patio! Thanks for sharing!
Amy this is awesome girl! You have some made furniture making skills. They turned out great! Pinning!
Thanks!
This is FANTASTIC! Beautiful! Pinning! Thanks for sharing with us at Your Designs This Time.
Emily & Erin
elizabethjoandesigns.com
WOW! That is fantastic and really beautiful! Thanks for linking up at the #homematters linky party! We hope to see you again this coming Wednesday!
These are gorgeous! I’m looking for some end-of-the-season patio furniture right now and if I came across anything like this I would snatch it up. Thanks for linking up to The DIY’ers!
I LIKE IT
Would it be that much more complicated to turn this into a three seater? Love the simplicity of the design but would love a couch for 3.
Hi Jen, here are the plans for the 3 seat version https://www.ryobitools.com/nation/projects/2651
Thank you! I wanted a simple chair without arms that could be built with just the spare wood scraps in my garage and yours was perfect! I loved your article, you made it so easy for me and I built the chair in about an hour and a half! And the next one will be perfect, I’m 100% certain! (I’m new to building things, especially by myself)