
Replacing an old outdated light fixture can really give new ‘light’ to a space. My garage light fixtures never really did a great job at putting off much useful light, and then they began to rust. Luckily I saw these cute LED fixtures at Costco for $39.99 (I also saw them at Home Depot for $59.99 with a $20 mail in
rebate). Replacing light fixture is fairly easy and shouldn’t take much time.
First, TURN THE POWER OFF, although it doesn’t hurt THAT bad to get shocked but I don’t suggest it! Ideally, turn the power off at the breaker box.
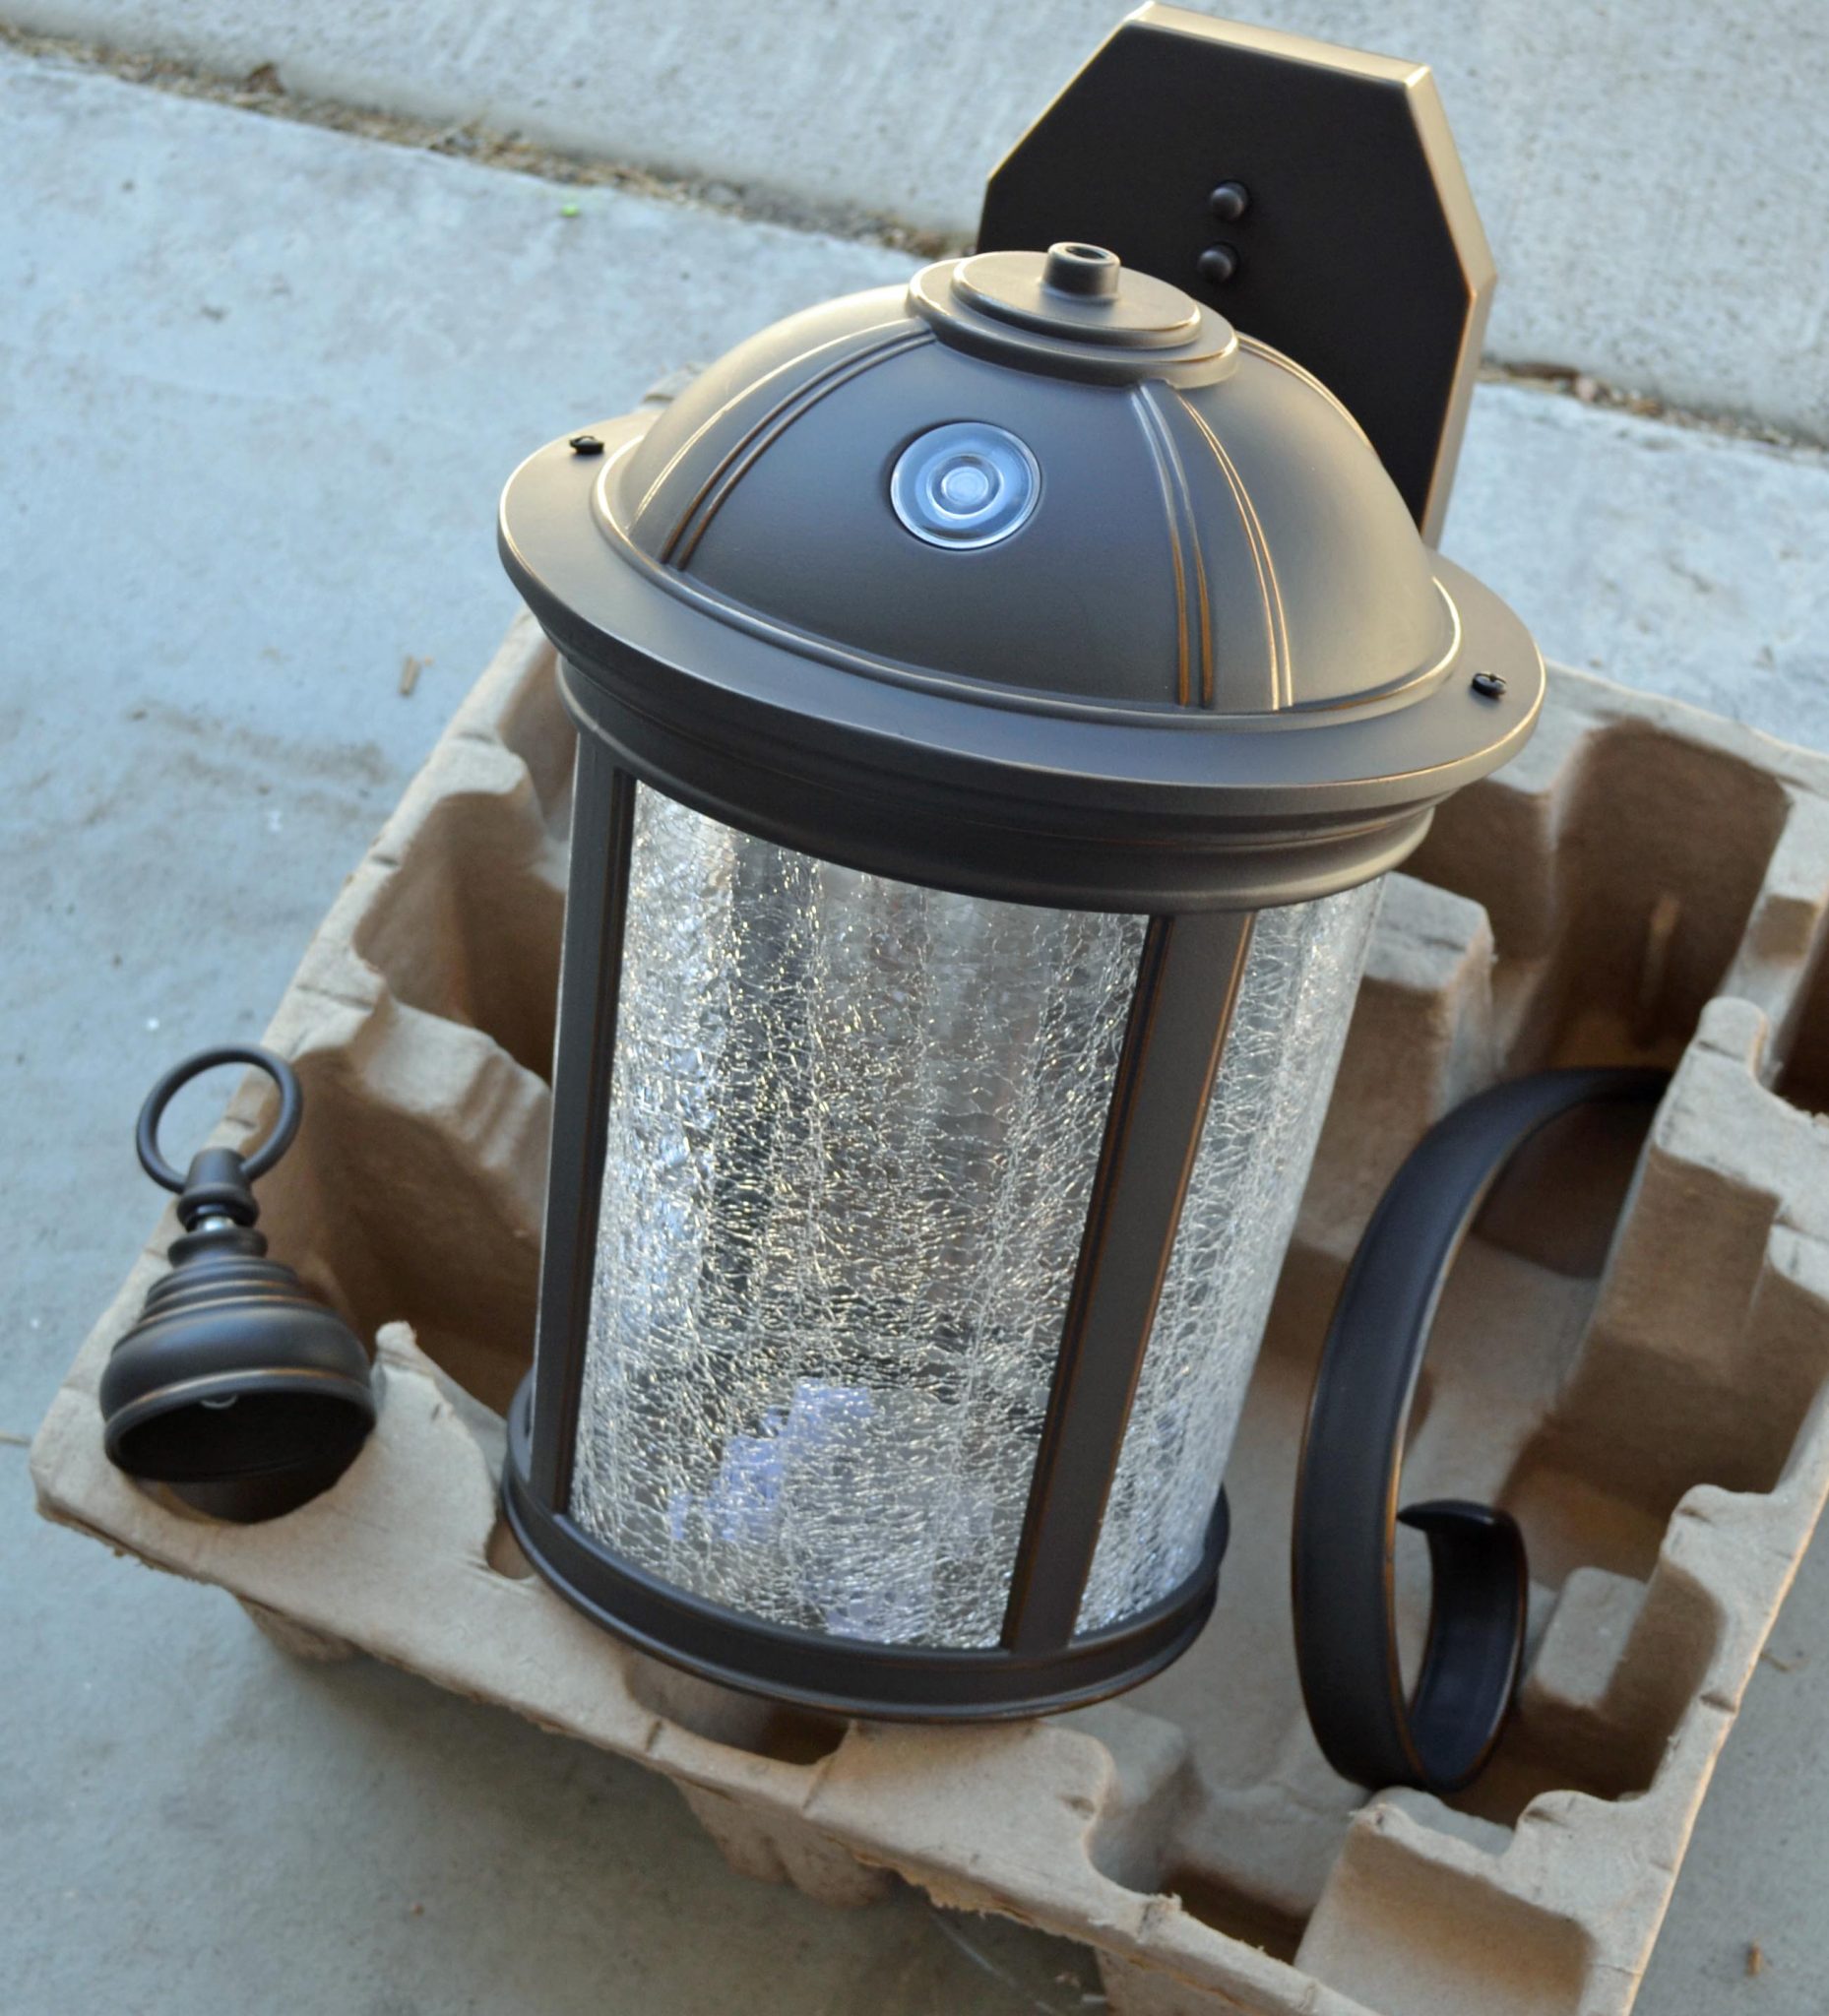 Unwrap your new light fixture; if it needs assembly do so per the instructions.
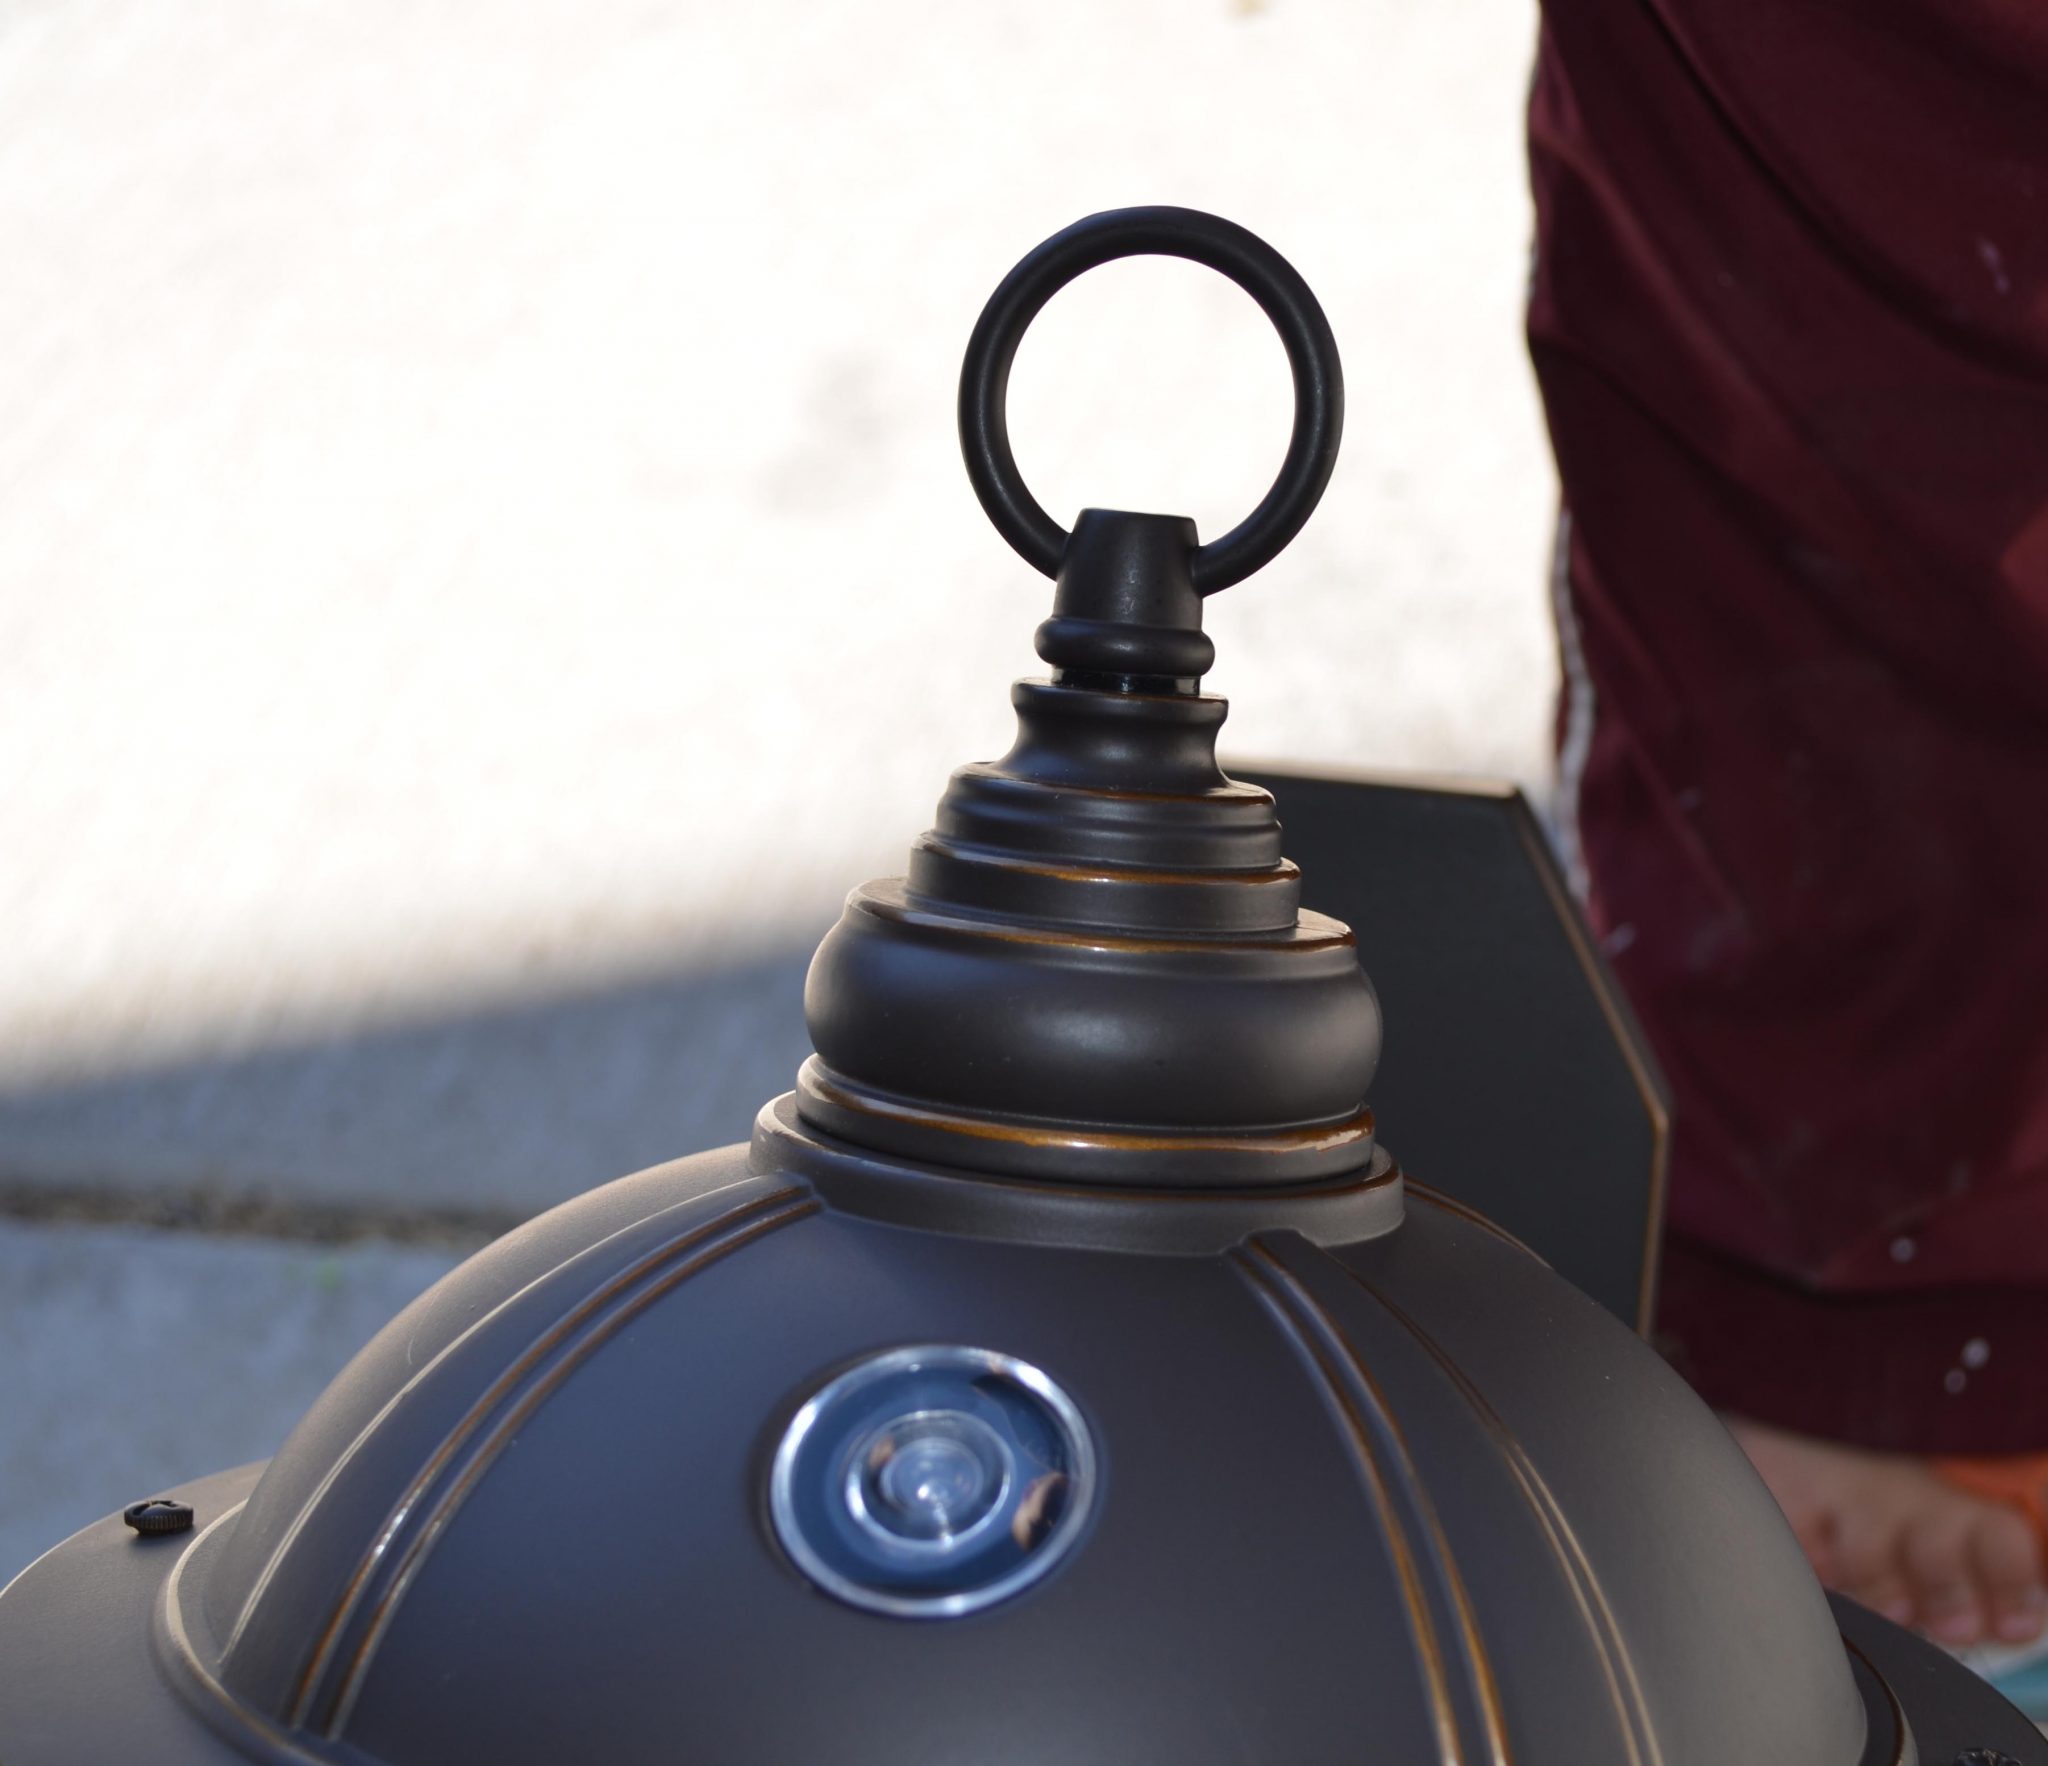 This light needed the finial and optional arm installed. Check and see if your fixture comes with any special mounting hardware. A lot of fixtures use universal mounting bars, so sometimes you can use what your previous fixture used. This fixture has its own hardware with a specific bolt spacing to mount it.
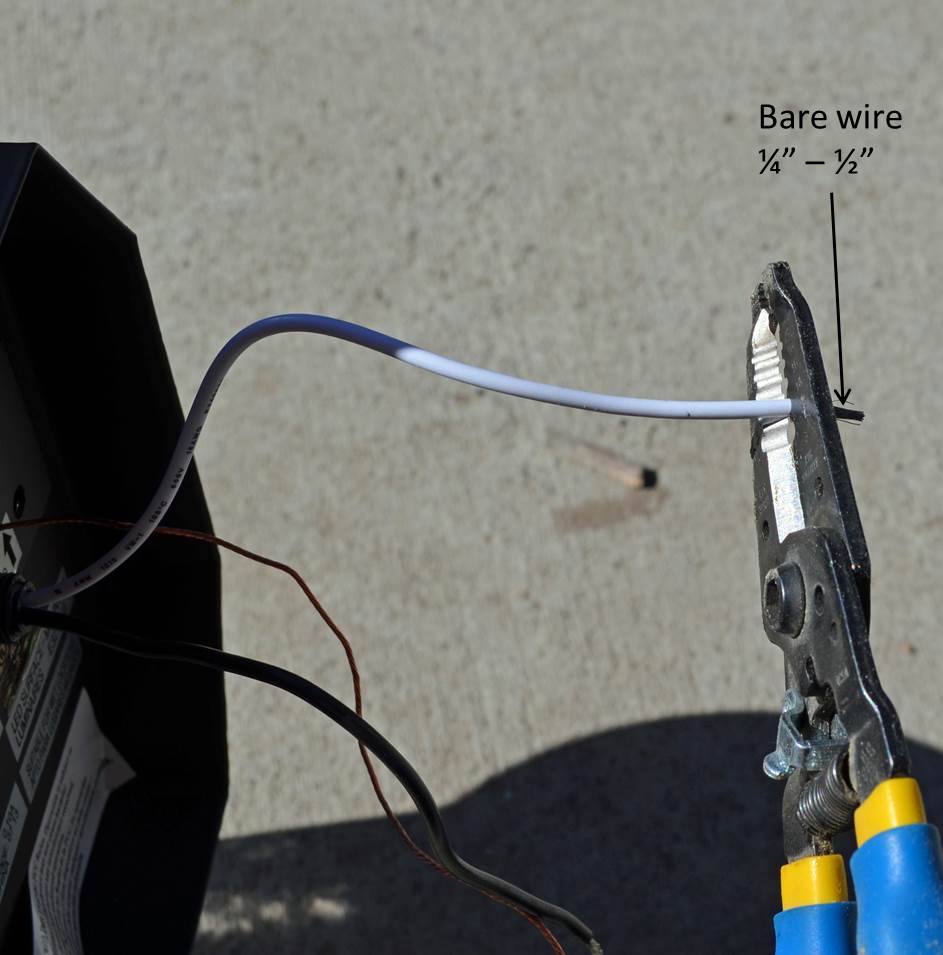 Check the wires on the new fixture, they should have a stripped (bare end) ¼” – ½” long. If not, using wire strippers trim off ¼” – ½” of wire insulation on each wire. Take care not to break off any of the little wires when trimming. (If you don’t have a wire stripper, you can carefully remove the wire insulation with a utility knife.)
 Next remove the old fixture. Typically the
fixtures will be mounted by a couple of small bolts with acorn nuts.
Pull the fixture away from the wall (mounting surface). The only thing that is guaranteed behind the fixture is wires, the rest, well, you never know!!!
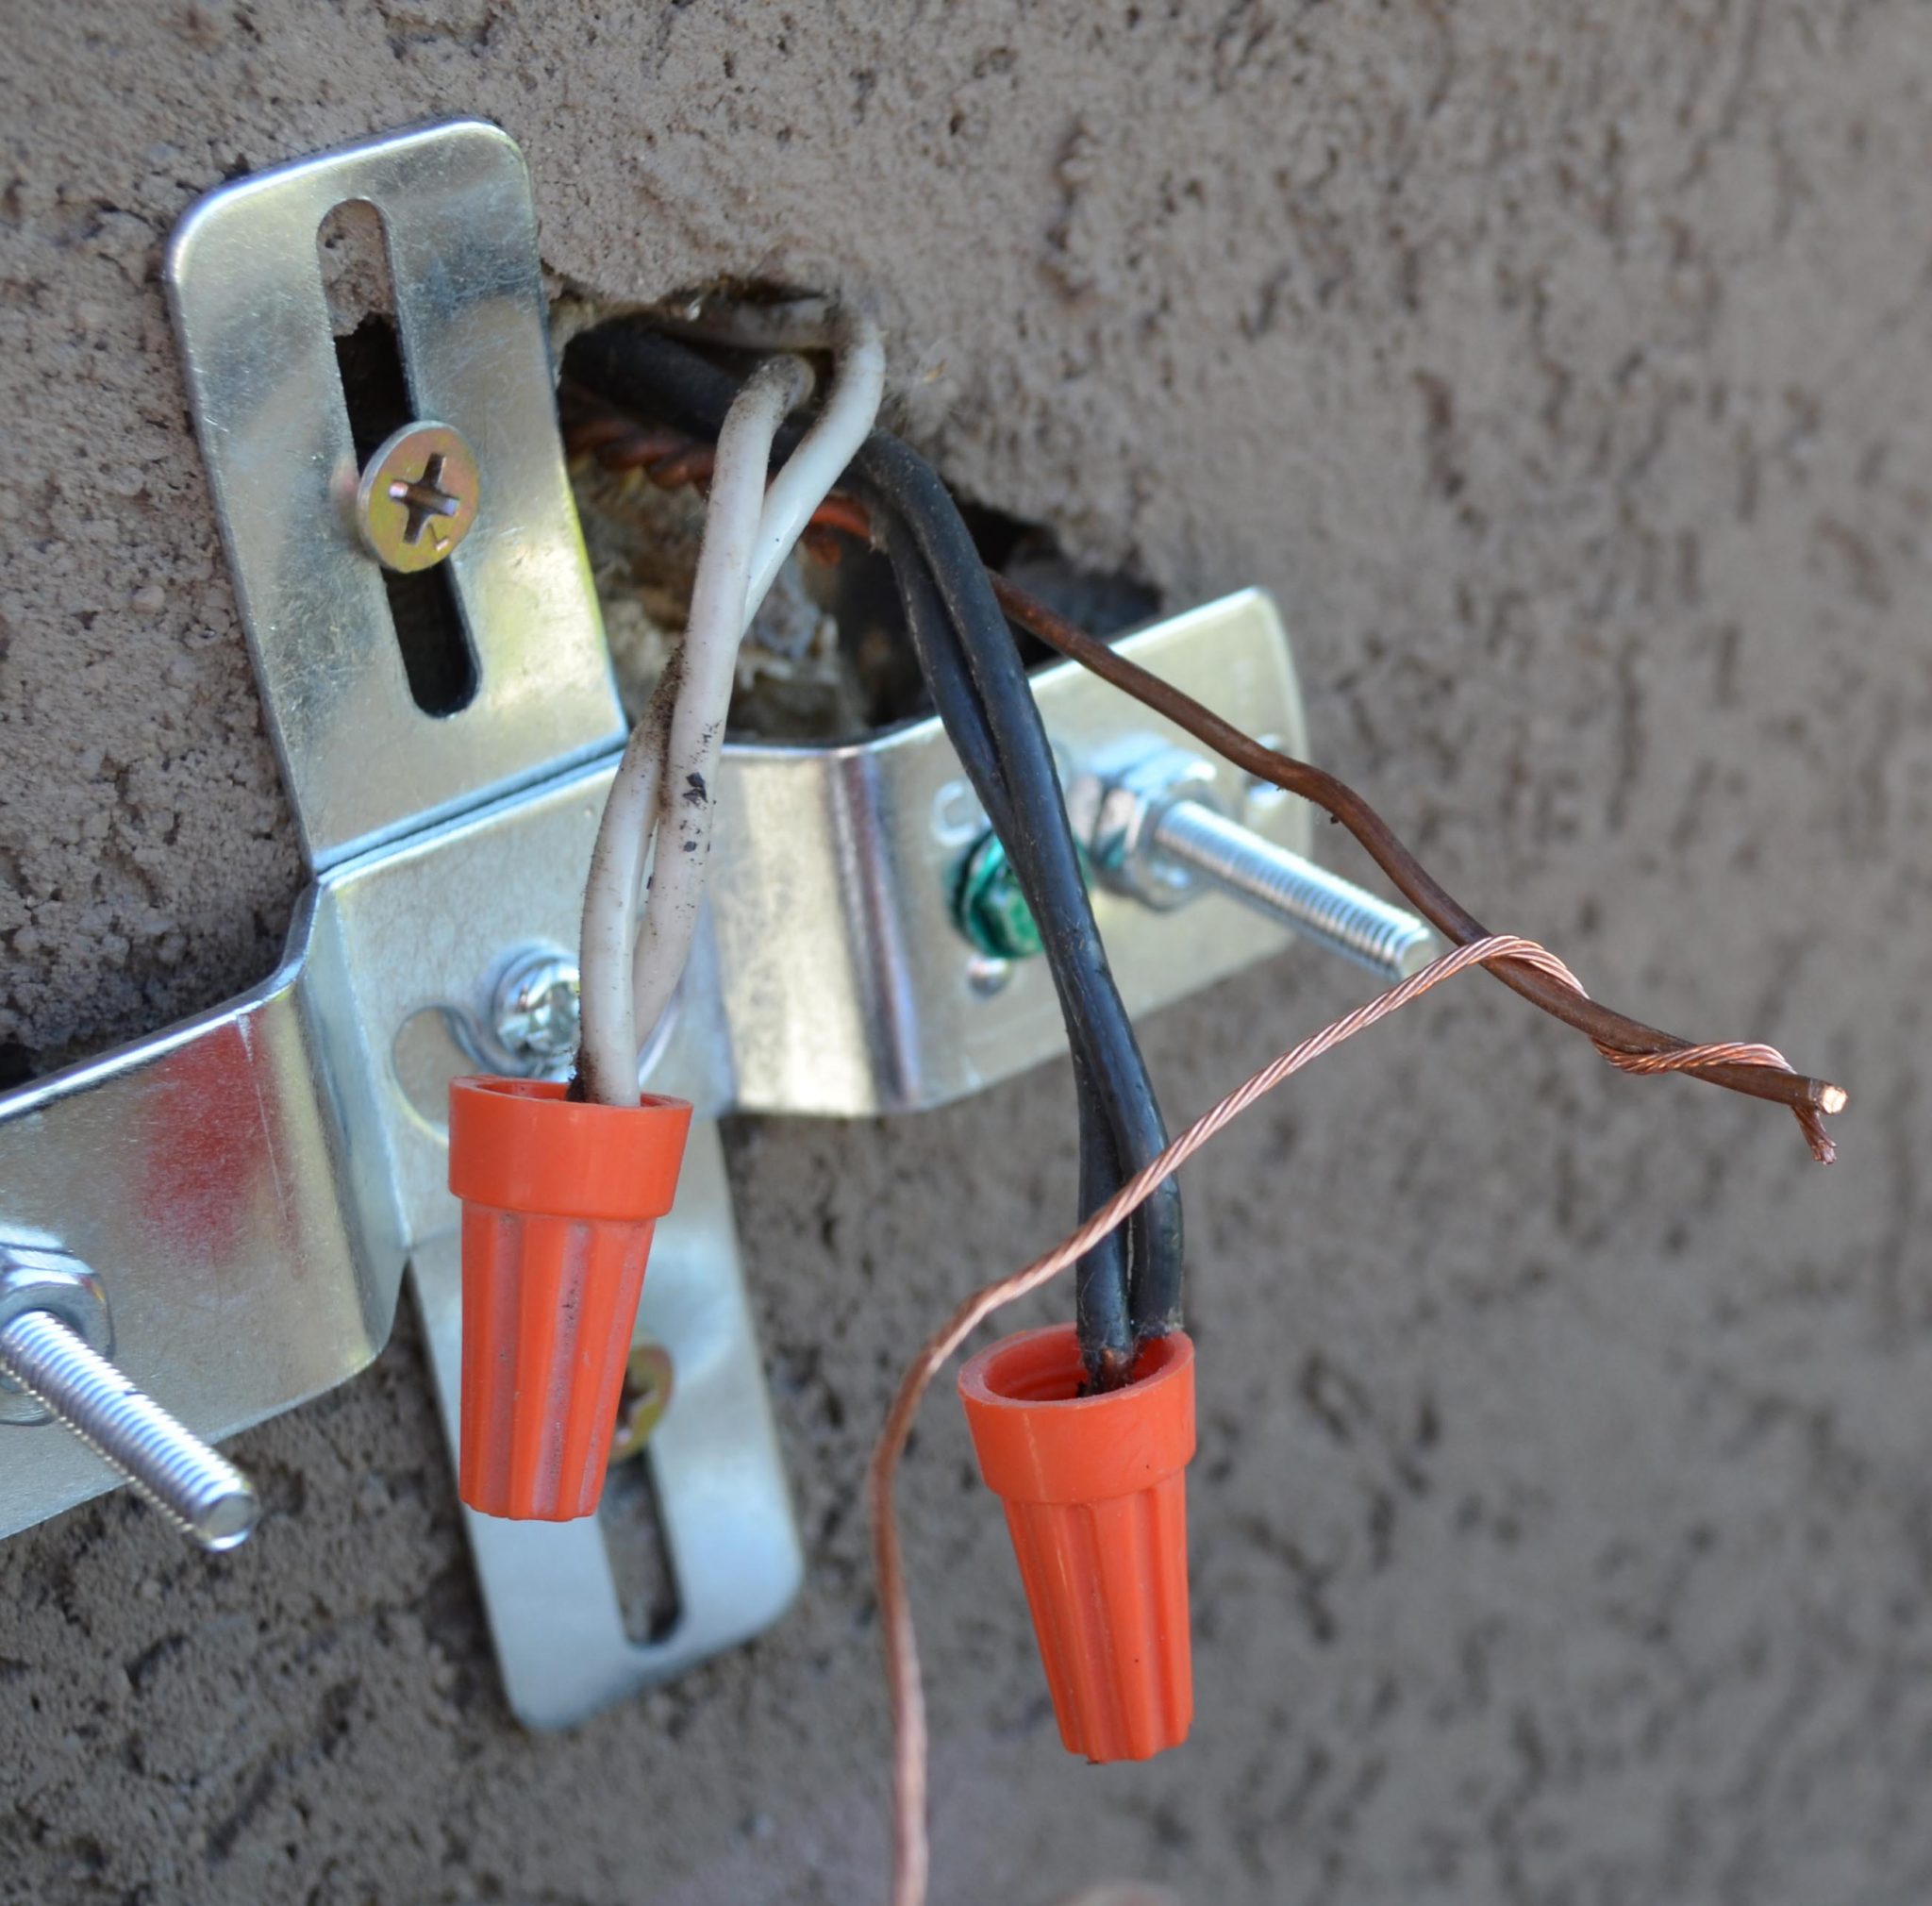
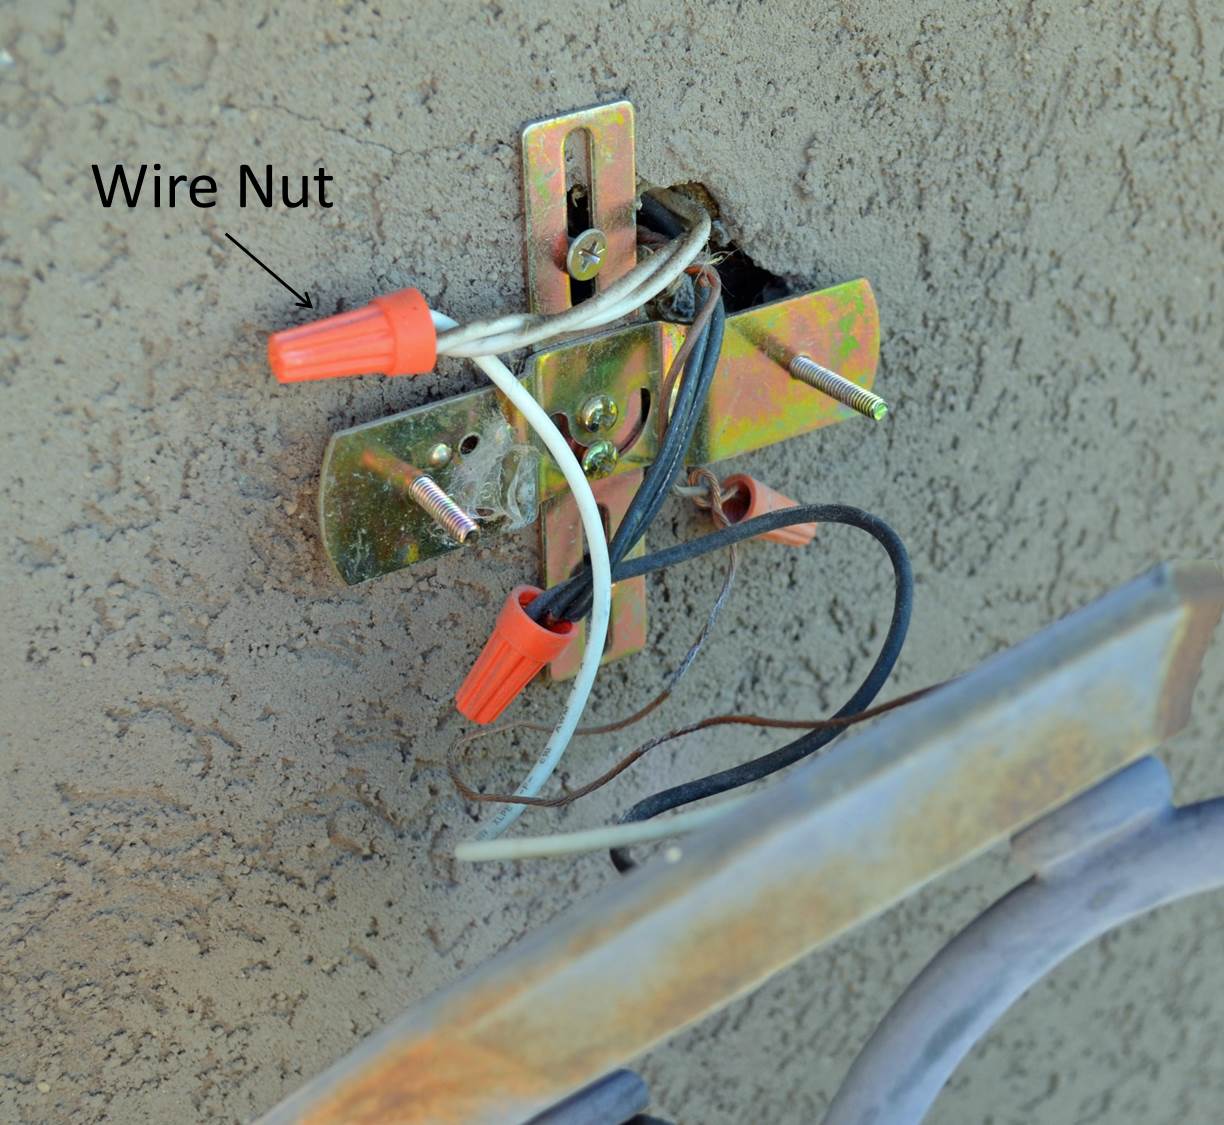 Usually you will see an outlet box that the hardware is attached too. However mine was stucco’d over, so you’ll have to imagine it is there 🙂 Disconnect the fixture by removing a wire nut (lefty loosey) and remove the wire that belongs to the fixture, replace the wire nut (just so you don’t lose it.) Do this for each wire. The black wire (or sometimes red) are the ‘hot’ wires. If your power is not off, the black will shock you. The white wire is neutral, and the bare copper or sometimes green wire is ground. Sometimes the ground wire will be connected with a wire nut to another ground wire, other times it will be connected to a ground screw on the hardware.
 Replace wire nuts as you go.
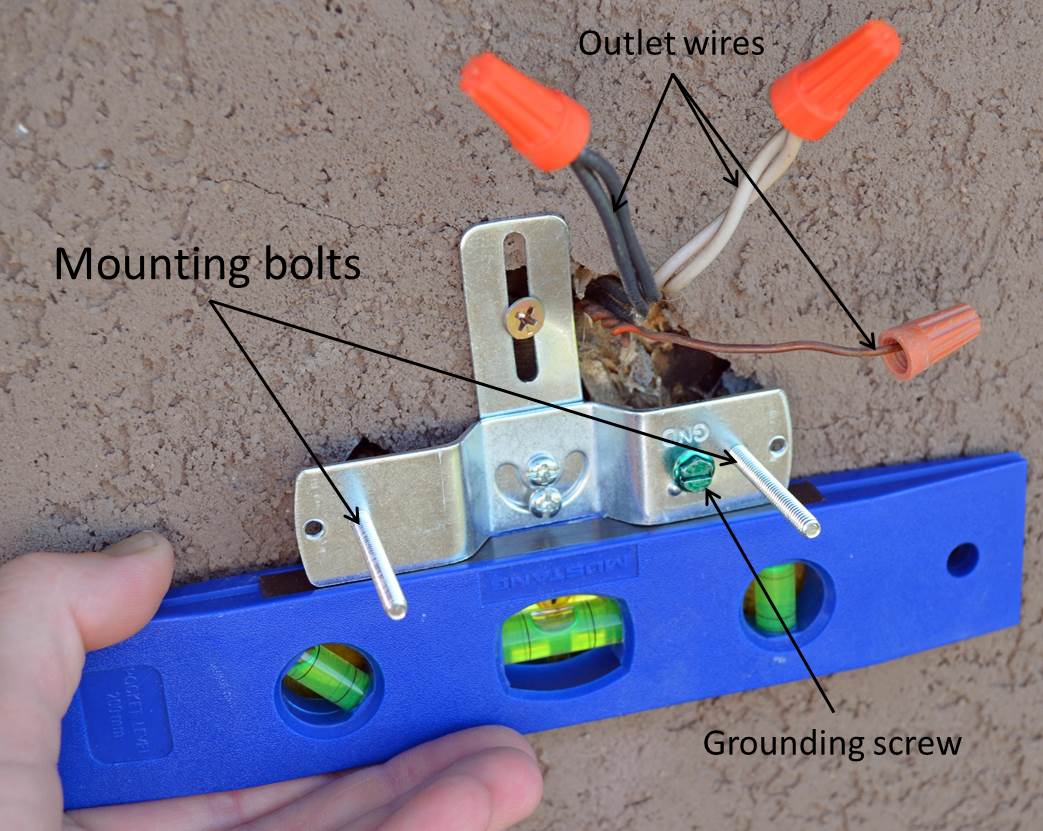 If needed, change the mounting hardware to the hardware that came with the fixture. Level the hardware as needed and tighten down all of the screws.
If your hardware has adjustable mounting bolts, dry fit the fixture to make sure they are at the correct length.
 This next part is much easier if there is a helper available. Have the helper hold fixture close enough that outlet wires and the fixture wires can be mated.
One color at a time, twist the fixture wire to the corresponding color outlet wire and replace the wire nut. Twist the wire nut (righty tighty) onto the wires until it is snug. Slightly tug on each wire to make sure they
are secure in the wire nut. Repeat for each color. Never mix black and white, or you’ll blow a fuze/trip a breaker when you turn the power back on. If there isn’t a ground wire to mate to, make a loop and wrap it around the green ground screw, tighten the screw down. Make sure there aren’t any bare spots on the black wire, if so cover with black electrical tape, or trim and re-strip the wire. Tuck the wire bundles into the outlet box.
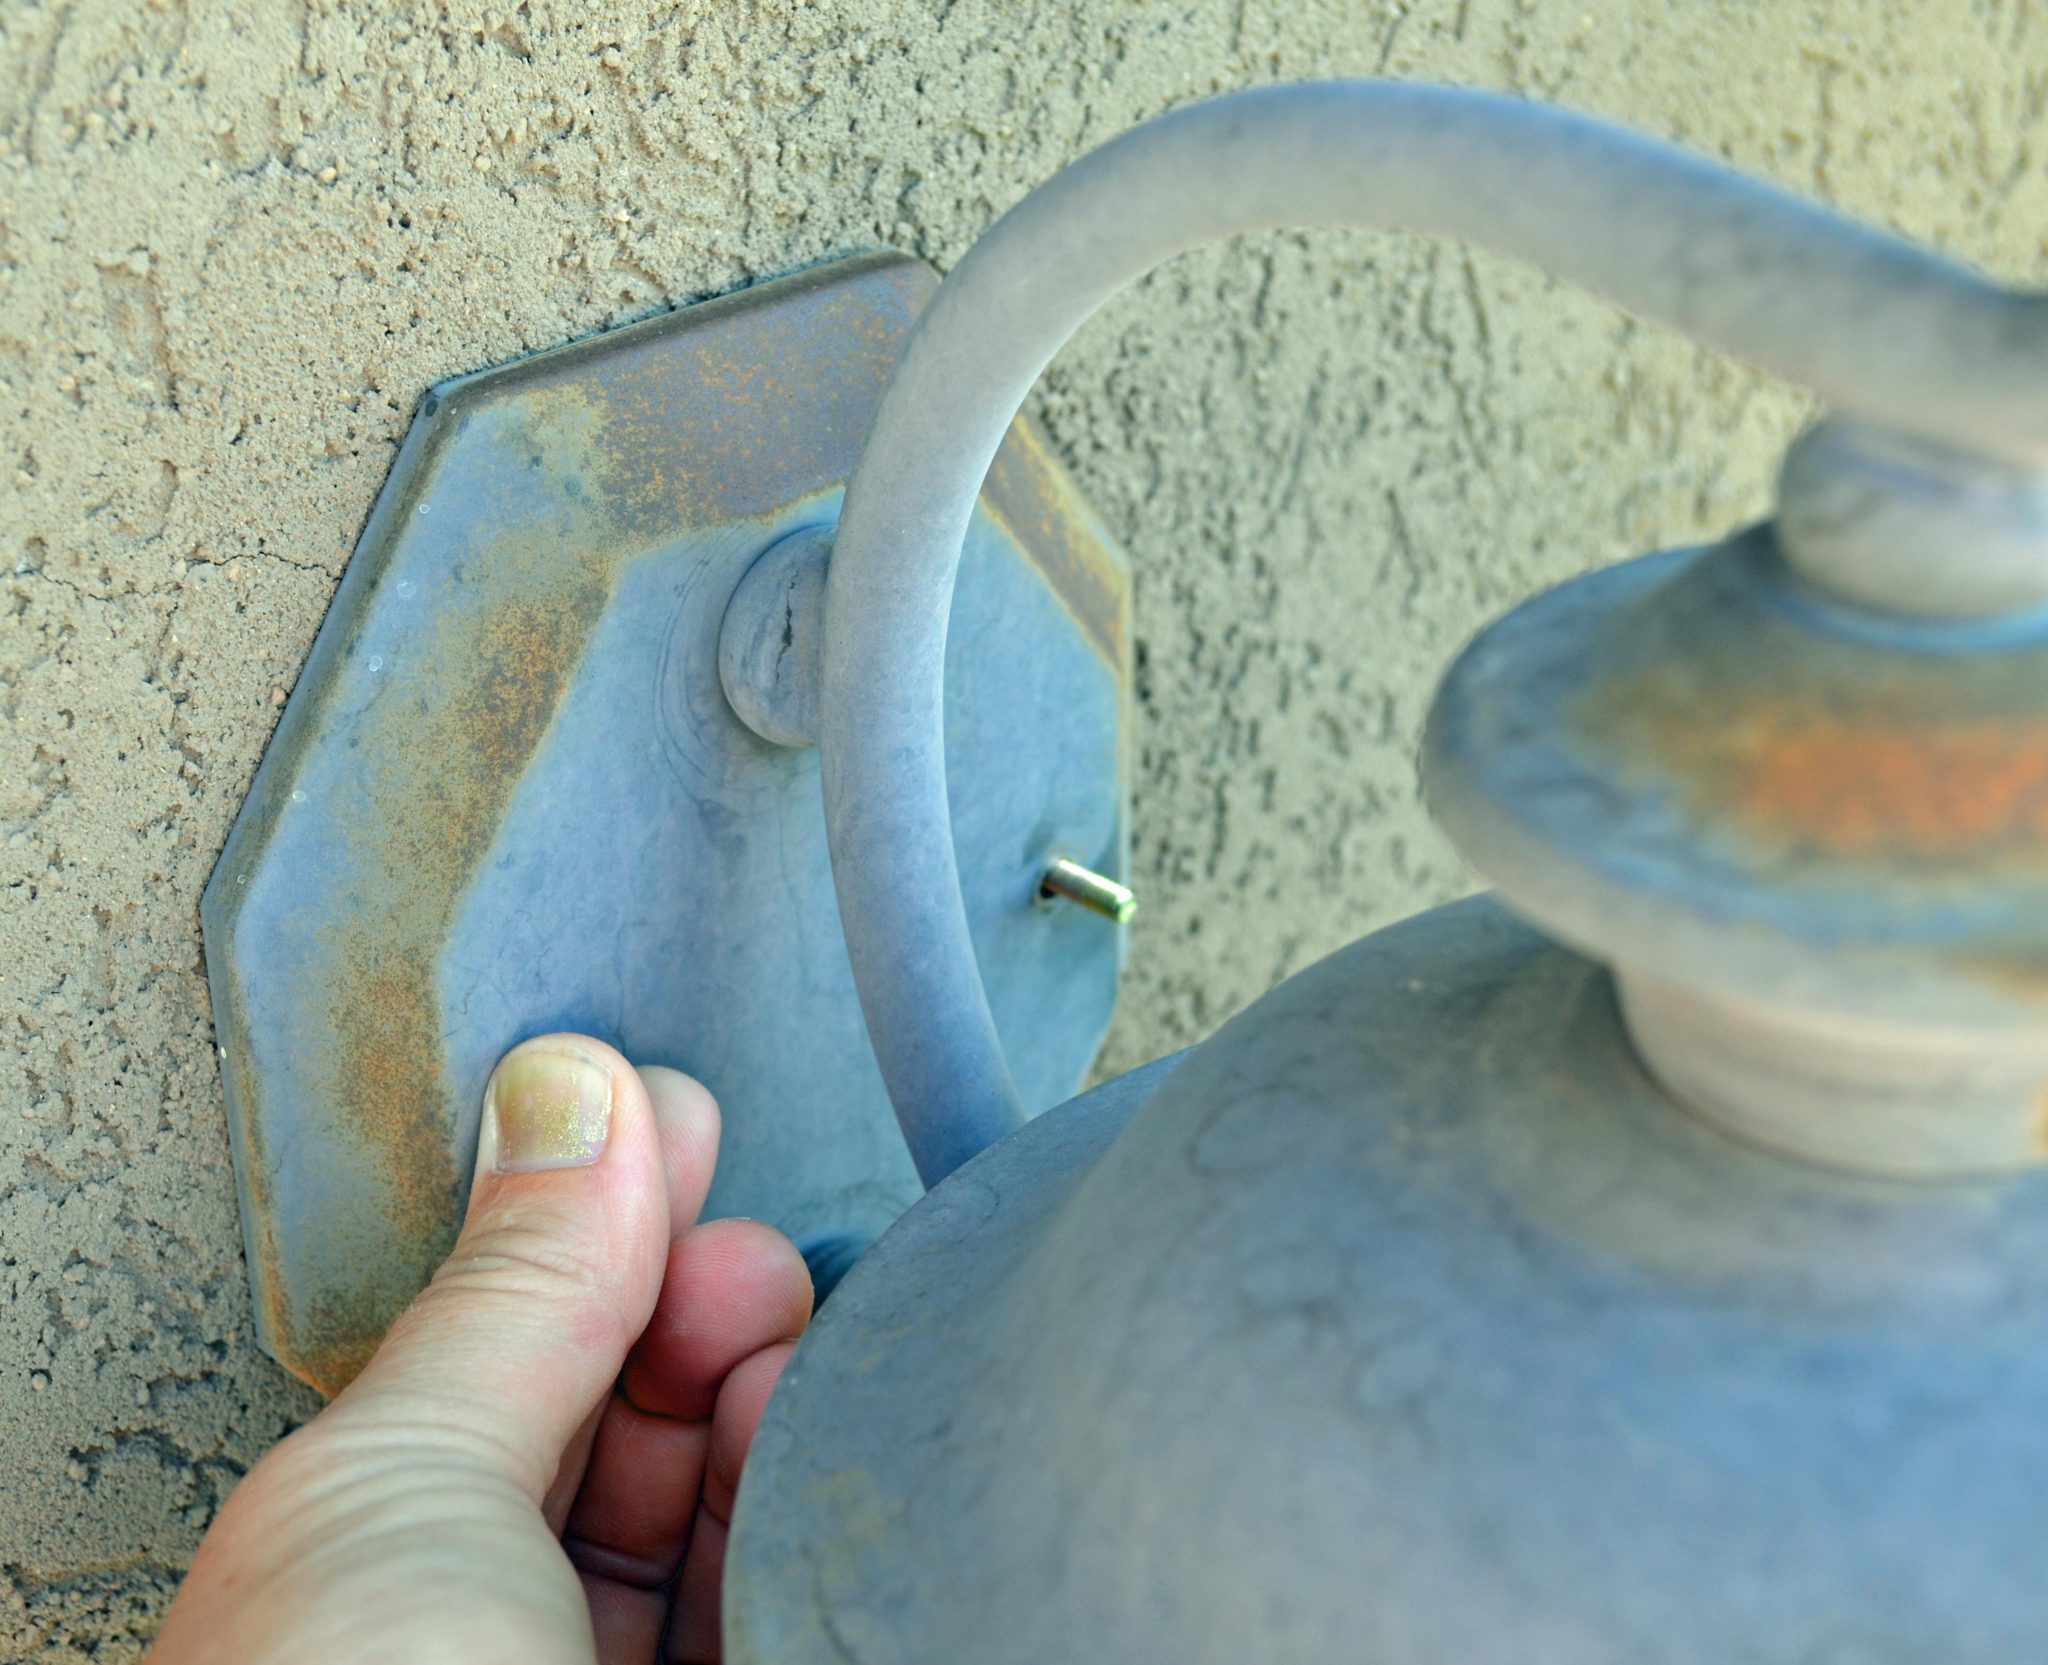
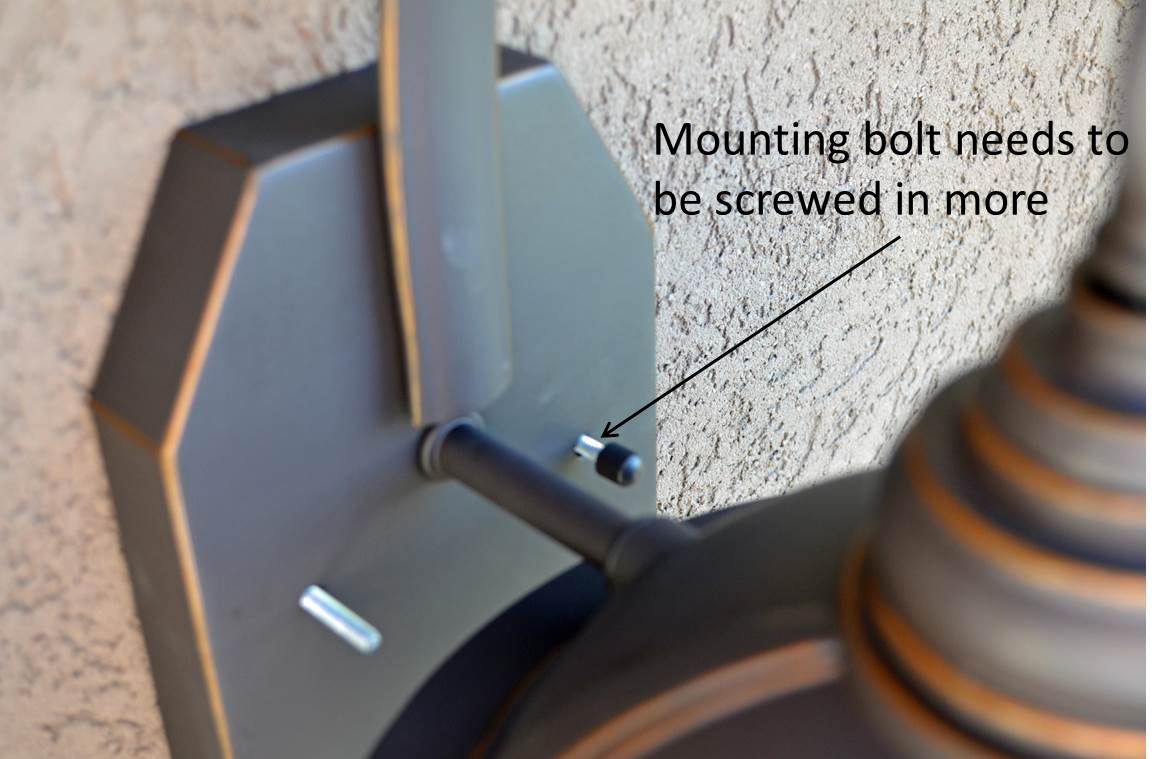
Place the light fixture onto the mounting bolts, and tighten down. Turn the power on and test the lights.
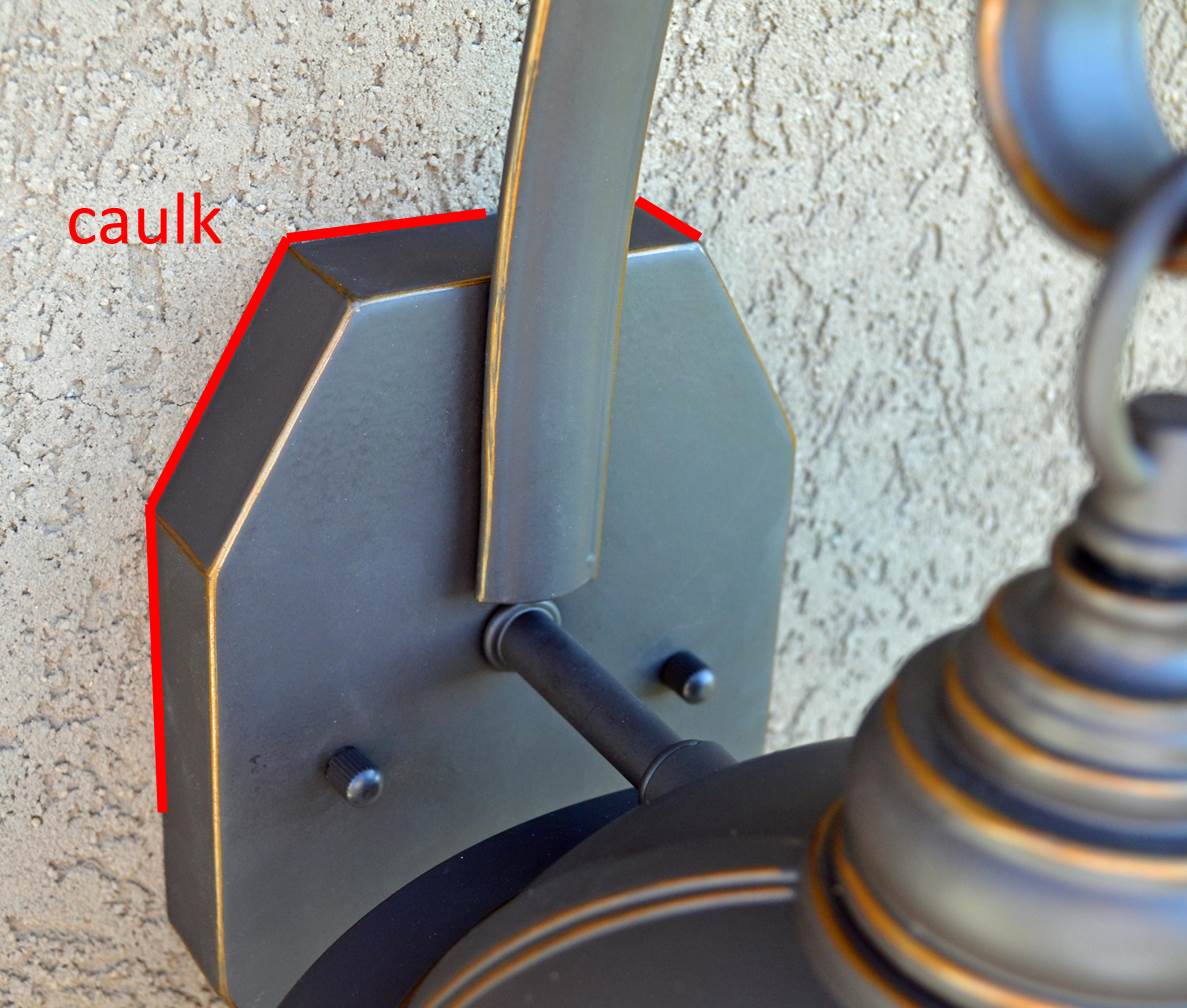
Pick a caulk that is similar in color as your house. Caulk along the upper 2/3rd of the fixture plate to wall. Leave the bottom 1/3rd
free in case some moisture needs to drain.
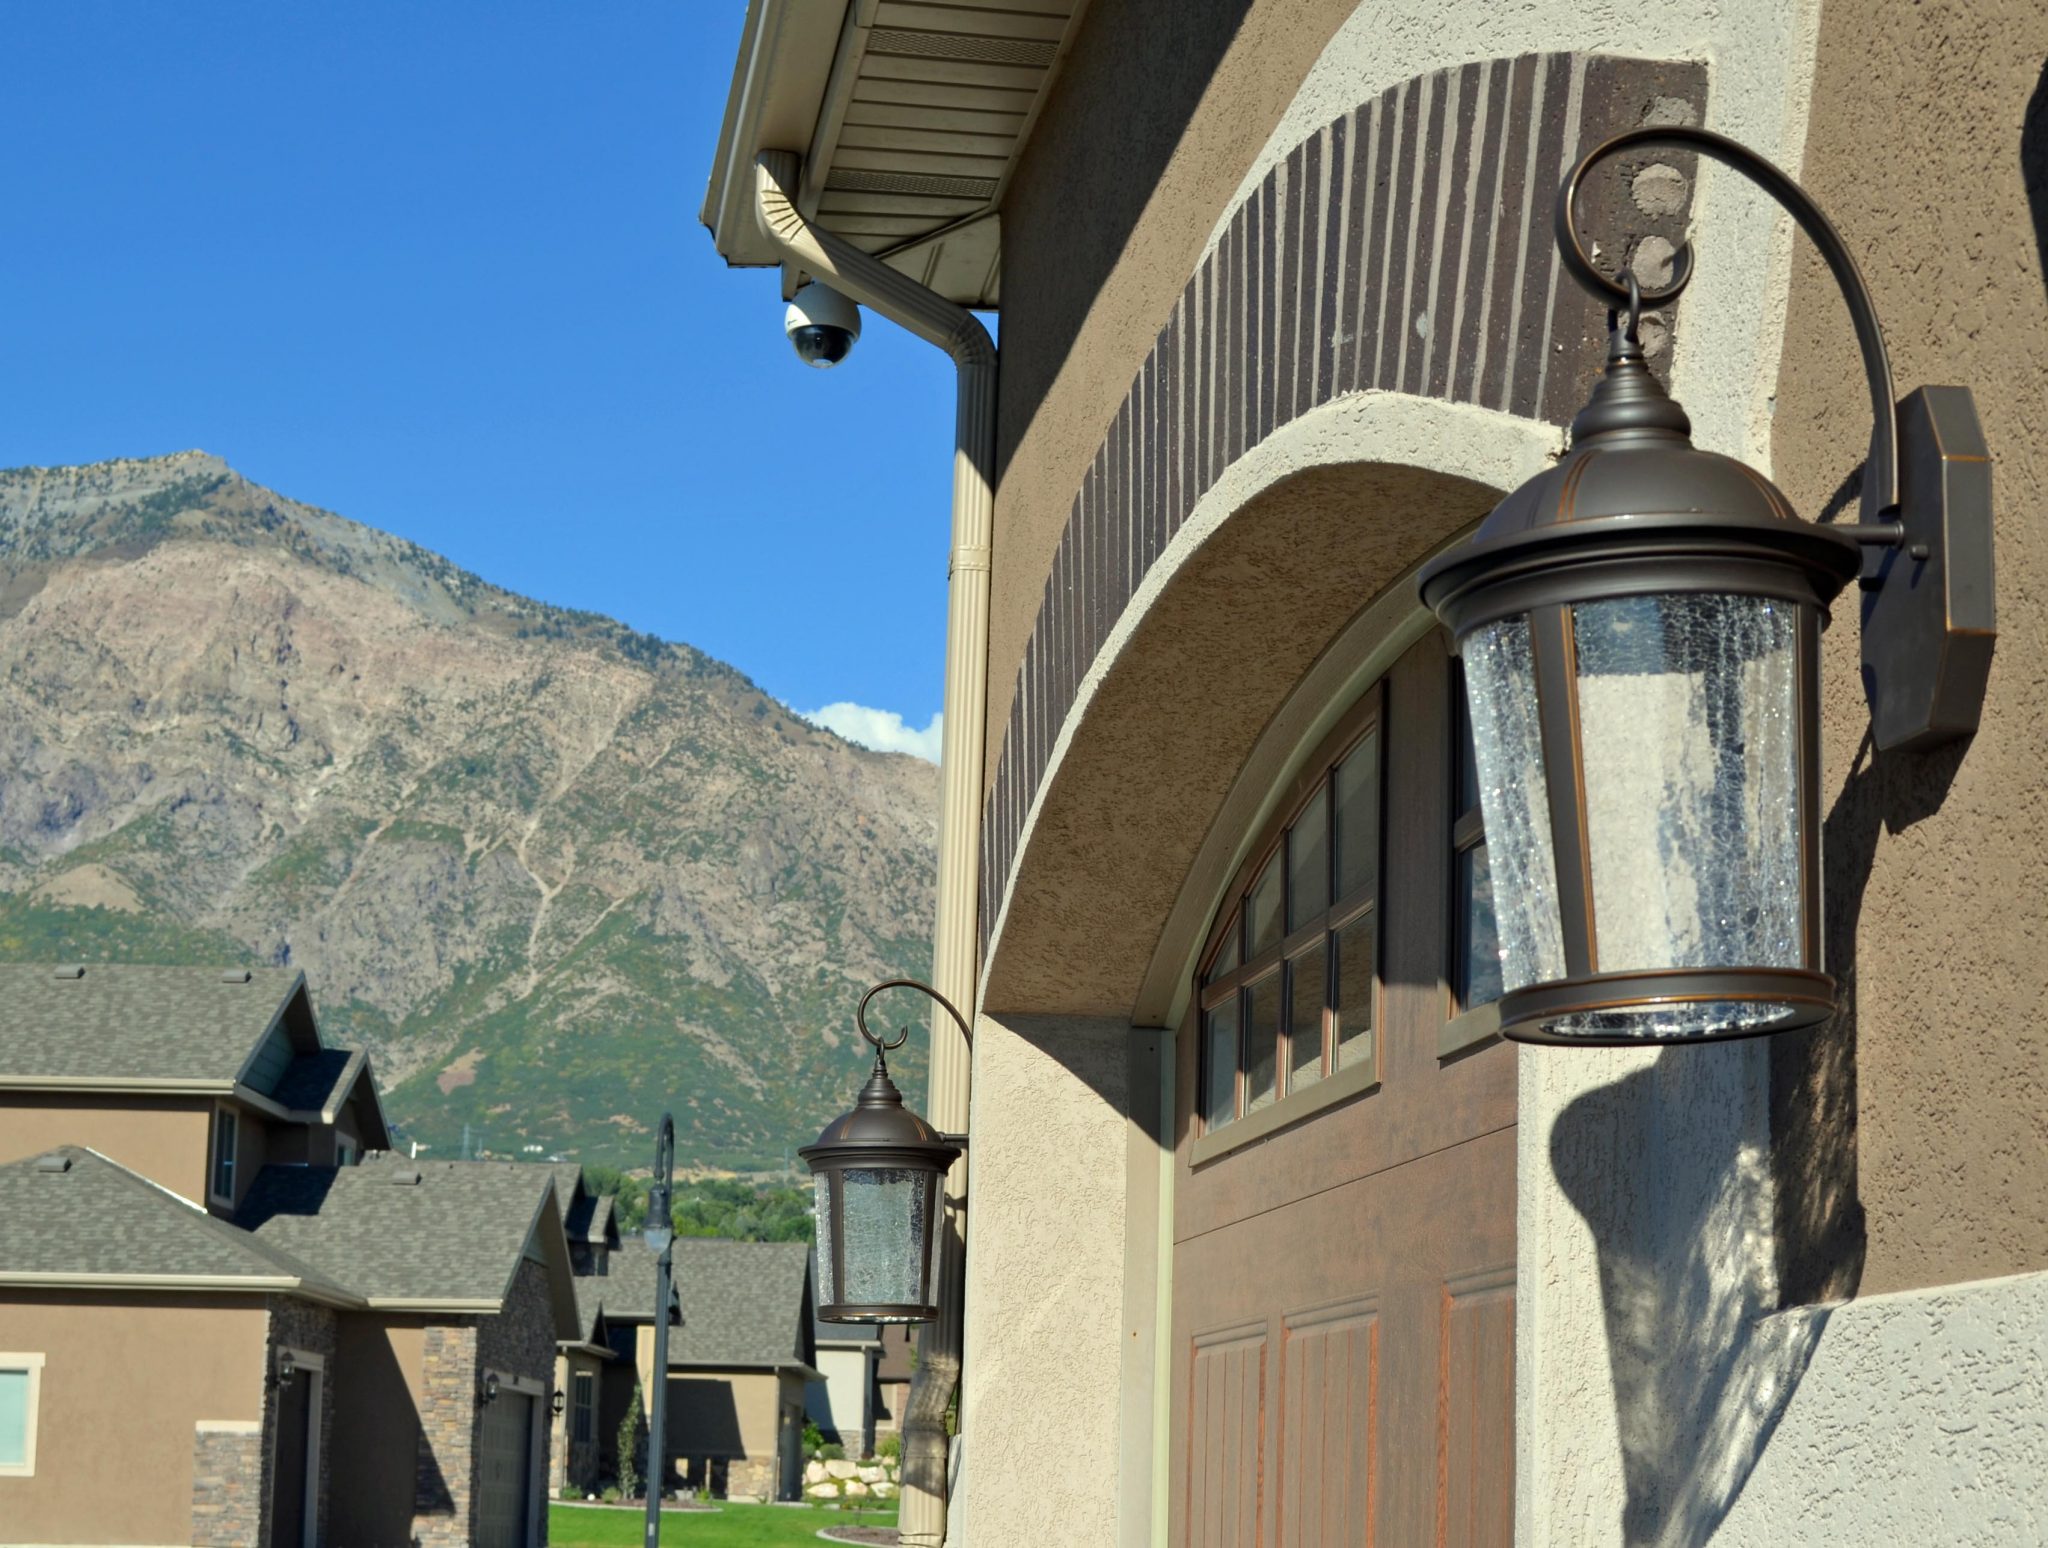
Now you’re done, Enjoy!
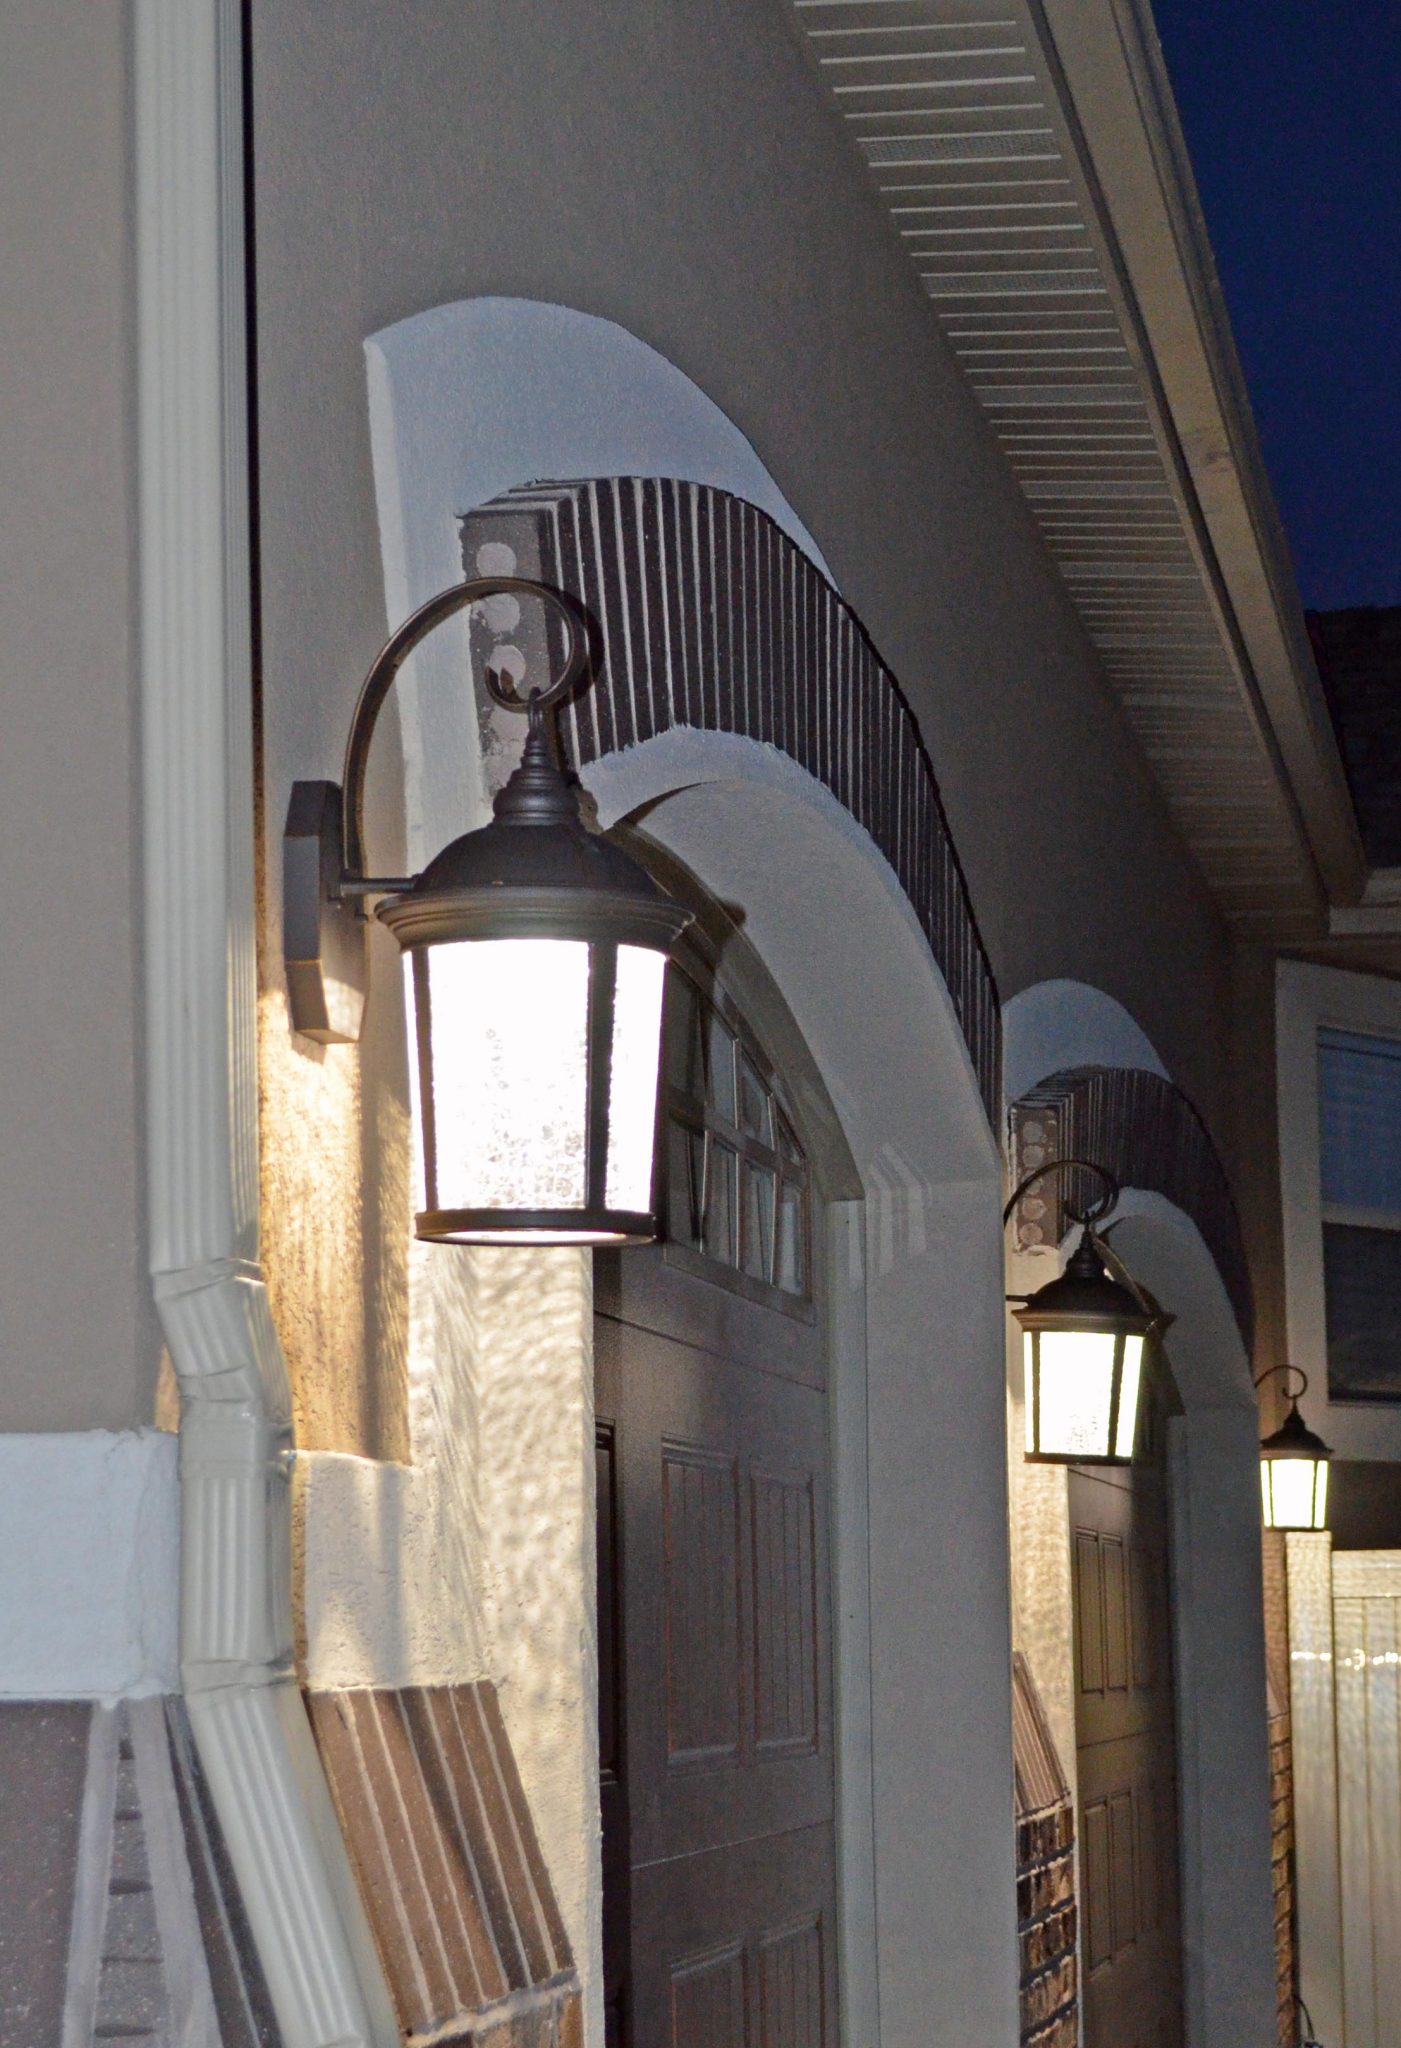 Yay, they work!
Great instruction thanks. I am replaceing mine this weekend. Any hints or tips on removing the old clear silicone sealant/caulk? Thanks,
Hi Lydia,
You’ve probably already tackled your lights by now. But I find a utility knife is pretty useful to remove old silicone.