• Home
  • Project Gallery
  • About me
    • Disclosure
    • Disclaimer
  • Blog

Her Tool Belt

DIY furniture plans, crafts, and home improvement tutorials to empower you!

  • Free Woodworking Plans
    • Bathroom Furniture
    • Bedroom Furniture
    • Entry
    • Family Room Furniture
    • Garage
    • Kitchen furniture
    • Laundry Room
    • Mudroom Furniture
    • Organization
    • Outdoor Furniture
  • Home Decor
    • Upcycle
  • Crafts
    • Holiday
  • Home Improvement
    • Cleaning
    • Fix IT
    • Paint
    • Tile
  • Tool Reviews
  • Tool Time Videos

Shoe Shelf Bench with Pocket Holes

January 15, 2015 by Amy 1 Comment

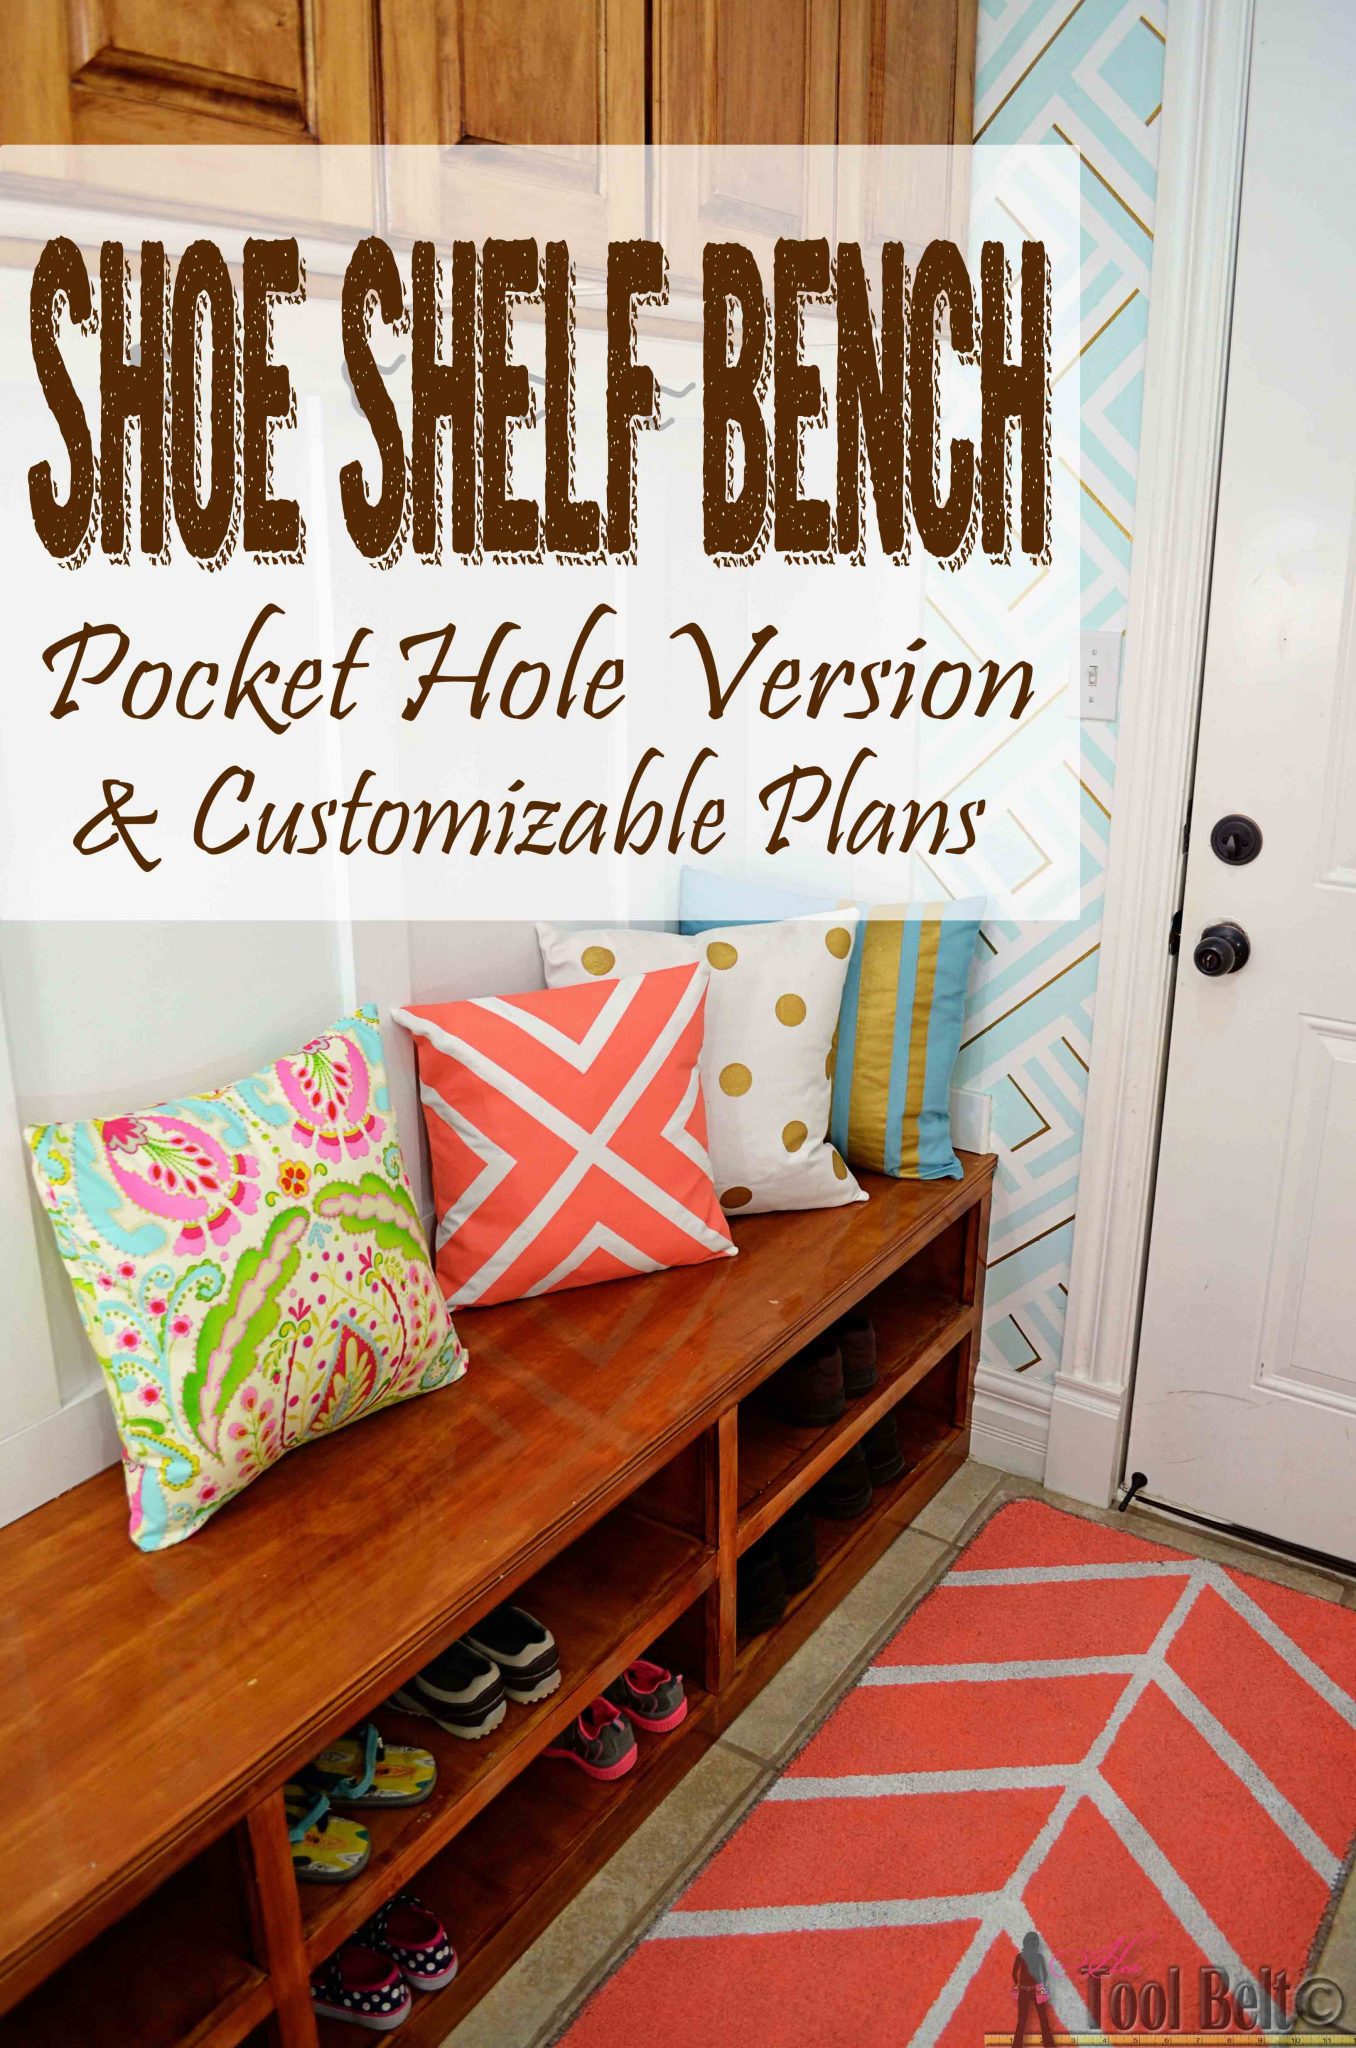
This plan is for a great bench that also doubles as shoe storage.  The original plan used dados, this version uses pocket holes* for the joinery instead.  Obviously everyone will have a different size of bench to fit their need, so I created the plans with a customizable spreadsheet.  Enter in the desired bench length, height, and depth along with how many columns you want and it’ll spit out the numbers for the plan.  The amount of wood and plywood you need depends on your bench size.  * denotes affiliate link
Organize those shoes with a shoe shelf bench, easily build it with pocket holes and these customizable woodworking plans.

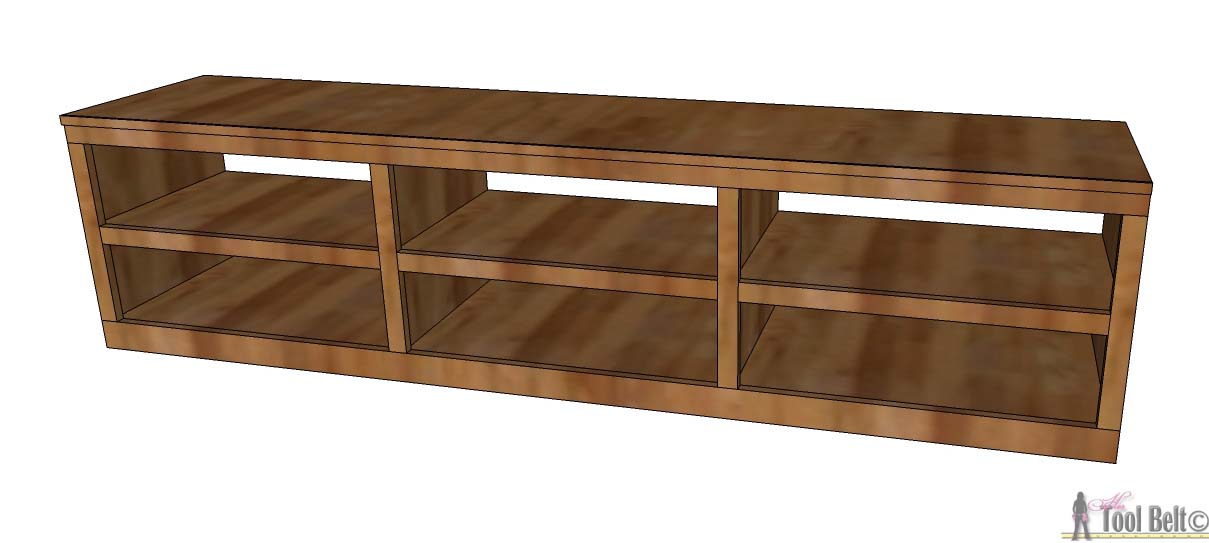
How to Build a Shoe Shelf Bench using Pocket Holes

Materials Needed

  • 3/4″ plywood
  • 1/2″ plywood (optional – you can use 1/2″ or 3/4″ for the shelves)
  • solid wood boards that are 3/4″ thick
  • 3/4″ wide molding
  • wood glue
  • sand paper
  • 3/4″ or longer brad nails
  • 1 1/4″ pocket hole screws*
  • 1″ pocket hole screws* (if using 1/2″ plywood shelves)
  • wood filler
  • wood conditioner/stain
  • paint/primer
  • top coat (polyurethane or polycrylic)
  • brushes
  • 3″ cabinet screws or self tapping screws

This plan uses Kreg pocket holes*, if you would rather use dados see this plan.

I used maple hardwood for the solid wood and birch plywood for this bench because I was planning on staining it.  When I am going to stain a project, I usually like to use better wood like alder, maple, oak, cherry, etc.  Pine is cheap, but doesn’t take stain very evenly.  If you’re going to paint the bench, it doesn’t really matter so go as cheap as you want.

Step 1

Download the customizable shoe-shelf bench with pocket holes spreadsheet.  This file is an Excel spreadsheet, when you download and open it, it may ask you at the top to enable editing – click enable editing.  In the top green cells – fill in your bench length, height – mine is 20″, depth – mine is 17 1/4″, and the number of columns or vertical sections – mine is 3.  If you have trouble with the spreadsheet, leave me a comment with your dimensions and email and I’ll send you your dimensions.

Organize those shoes with a shoe shelf bench, easily build it with pocket holes and these customizable woodworking plans.

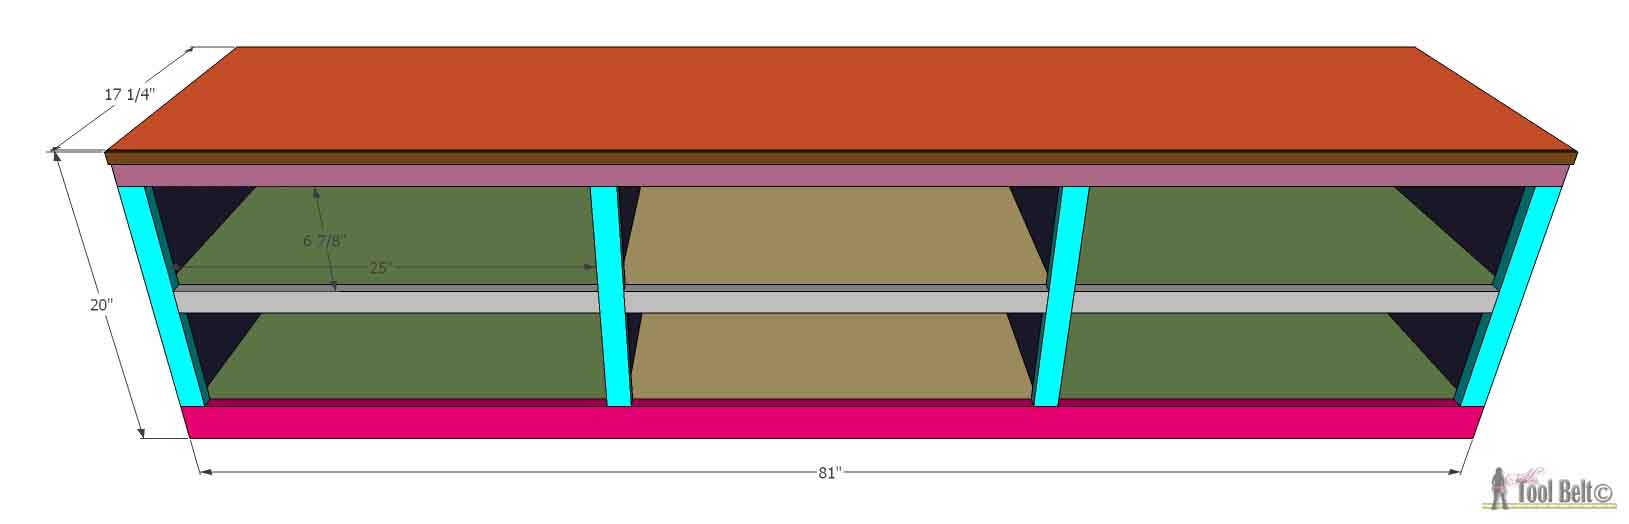
Example spreadsheet – These are my dimensions

Organize those shoes with a shoe shelf bench, easily build it with pocket holes and these customizable woodworking plans.

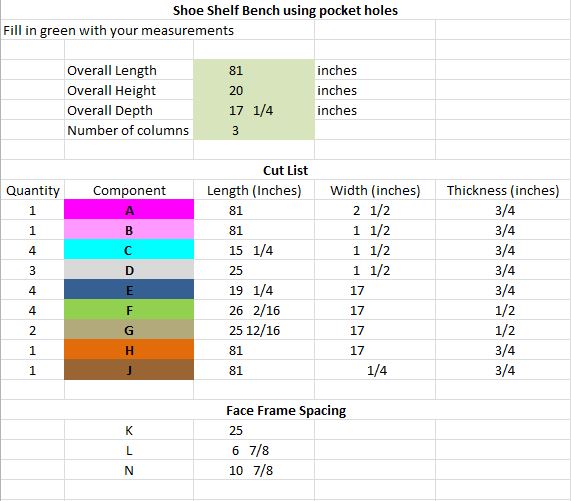
Bench components by color and letter.
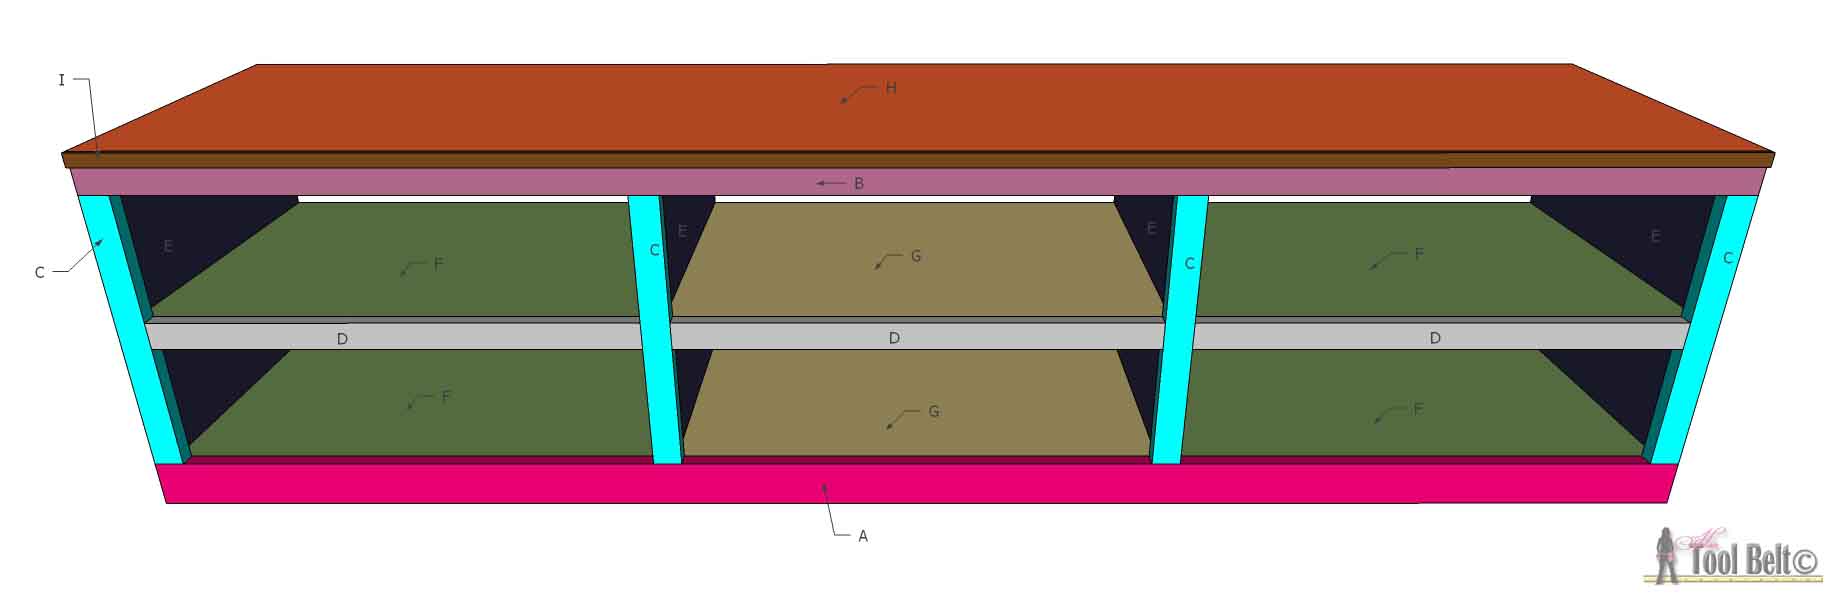
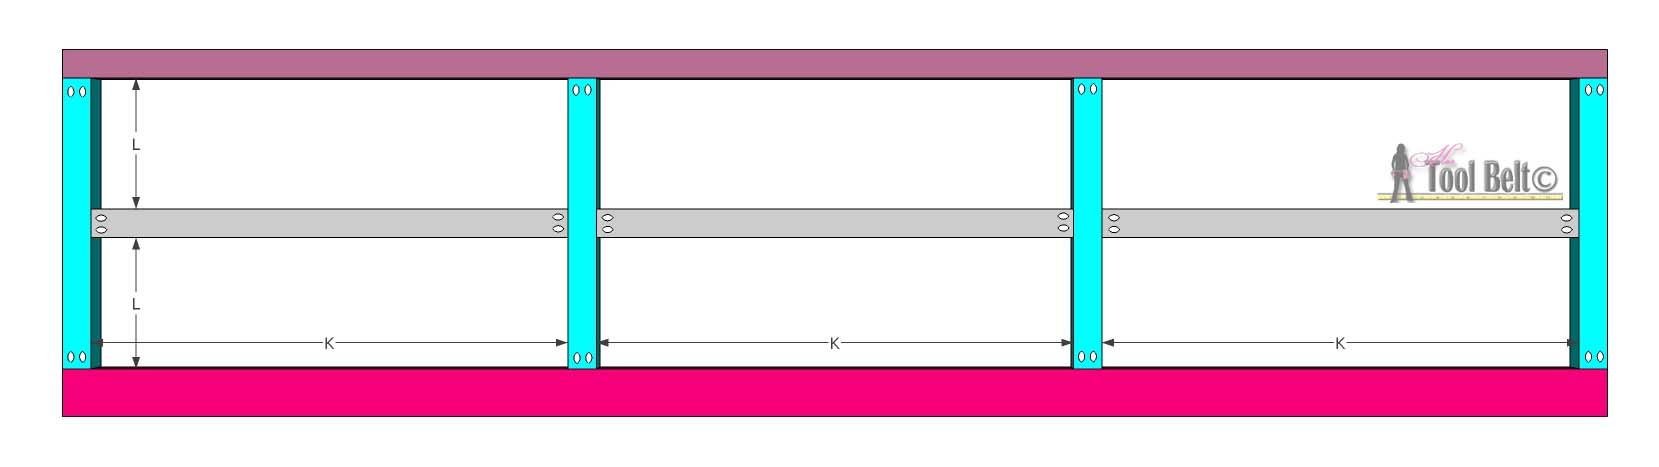
Organize those shoes with a shoe shelf bench, easily build it with pocket holes and these customizable woodworking plans.

 Step 2

Cut pieces A, B, C and D for the face frame.  Drill pocket holes in both ends of the C and D pieces, as shown.  Reference K and L measurements from the spreadsheet.  Use wood glue and 1 1/4″ pocket hole screws to assemble your face frame together.  Allow the glue to dry, remove excess glue.  Add 3 or so pocket holes along the top of B to attach the top later.

Organize those shoes with a shoe shelf bench, easily build it with pocket holes and these customizable woodworking plans.

Step 3

Cut the pieces for E and H from 3/4″ plywood, F and G from 3/4″ or 1/2″ plywood.  In the E panels, drill about 3 pocket holes along a 19 1/4″ side, and 1 near the back corner to attach the top.  Use wood glue and 1 1/4″ pocket hole screws to attach the sides (E) to the face frame, making the sides flush with the edge of the face frame.  Attach the top (H) to the top of the face frame and sides with glue and screws.

Organize those shoes with a shoe shelf bench, easily build it with pocket holes and these customizable woodworking plans.

Step 4

In the F and G shelf pieces, drill pocket holes to attach to the face frame (about 3) and to the side panels (2 or 3 on each side).  Use wood glue and screws (1 1/4″ or 1″ depending on plywood thickness) to attach the upper shelves (F & G) to the face frame and sides, adding in the other side dividers (E) as you go.  Make the shelves flush with the face frame opening.

Organize those shoes with a shoe shelf bench, easily build it with pocket holes and these customizable woodworking plans.
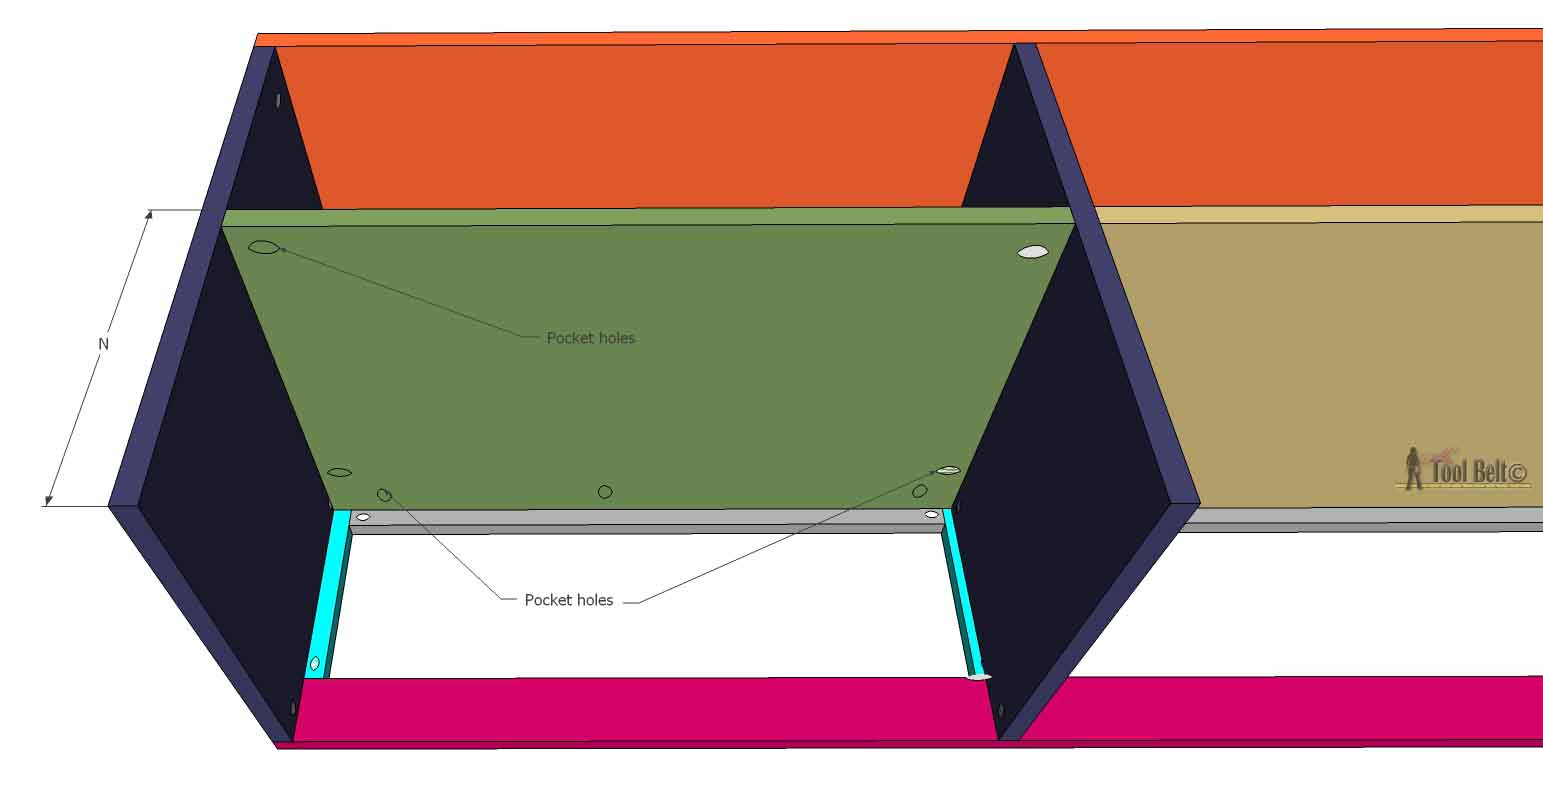
After installing the upper shelves, install the lower shelves.  Make the shelf flush with the face frame opening.
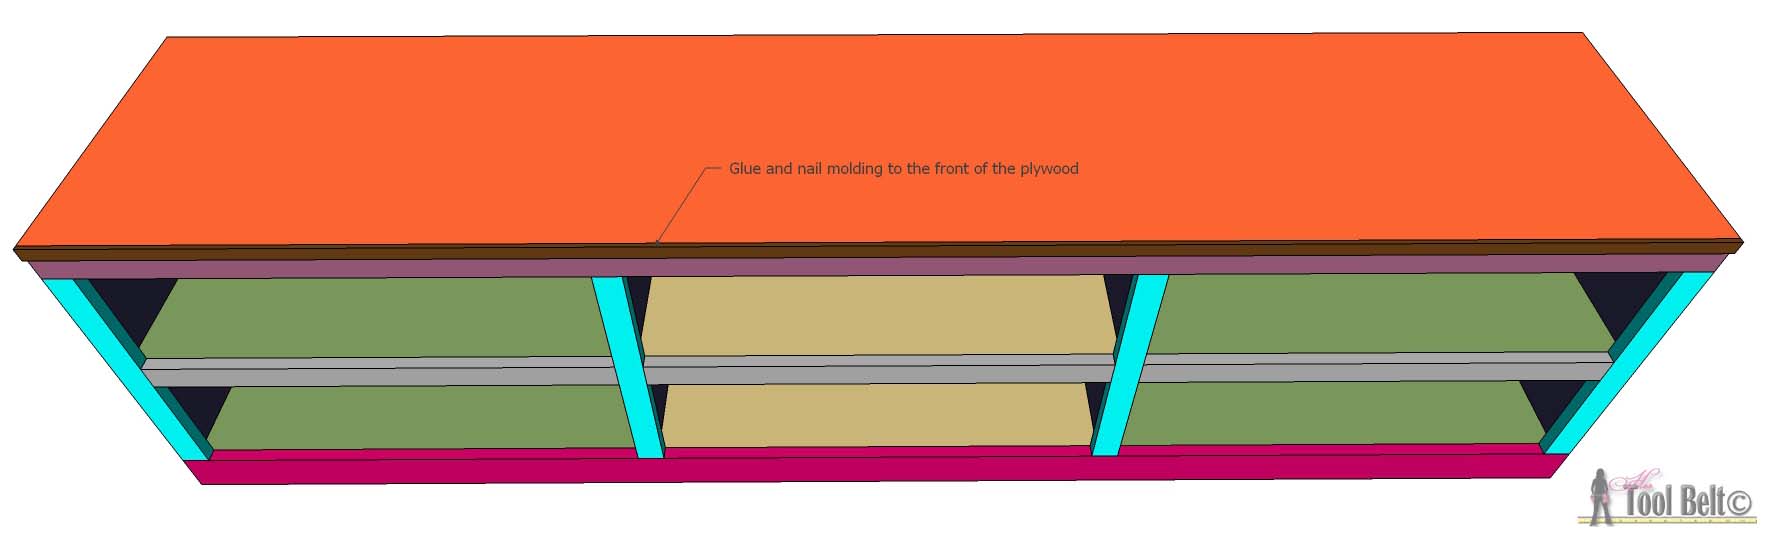
Organize those shoes with a shoe shelf bench, easily build it with pocket holes and these customizable woodworking plans.

Step 5

To cover up the top piece plywood edge, I like to route a cute edge on a 3/4″ thick board, cut off the routing about 1/4″ thick.  Glue and nail the molding into place.  If the sides of your bench will be seen, add molding to the sides too.  You can easily purchase molding to cover up the plywood edge too.

Organize those shoes with a shoe shelf bench, easily build it with pocket holes and these customizable woodworking plans.

 Step 6

Fill any cracks, blemishes or nail holes with wood filler and allow to fully dry.  Sand your bench, finishing with 120-150 grit paper.  If staining, apply wood conditioner according to the directions.  This helps even out the stain penetration.  I stained my bench with General Finishes Gel Nutmeg, it gave it a nice honey color.  I applied 1-2 coats of polyurethane for the top coat.   If painting, apply a paint primer and allow to dry.  Paint the bench your favorite color.  I would suggest giving the bench a top coat, polycrylic works great.

Step 7

If you want to mount your bench to the wall, locate the studs.  I mounted mine through the 2 outside E pieces.  Mark the approximate location of the studs on the bench in a few locations and pre-drill a hole through E.  Use 2 1/2″ – 3″ cabinet screws or self tapping screws, secure the bench to the wall.

If you want a printable pdf, you can download the blueprints below.

Shoe Shelf Bench using Pocket Holes blueprints

I hope you enjoy your Shoe Shelf Bench as much as we have.  Need pillows to decorate your bench, check out my Painted Pillows.  On the opposite wall from the bench is my Gallery Command Center.

Organize those shoes with a shoe shelf bench, easily build it with pocket holes and these customizable woodworking plans.

Organize those shoes with a shoe shelf bench, easily build it with pocket holes and these customizable woodworking plans.

Related

Filed Under: Built From Scratch, Free Woodworking Plans, Mudroom Furniture, Organization Tagged With: bench, mudroom, woodworking

Attention: Any do-it-yourself project involves risk of some sort. Your tools, materials, and skills will vary, as will the conditions at your work site. Hertoolbelt LLC will not assume any responsibility or liability for damages or losses sustained or incurred in the course of your project or in the use of the item you create. Always follow the manufacturer's operating instructions in the use of tools, check and follow your local building codes, and observe all commonly accepted safety precautions.

Comments

  1. Pauline Henderson says

    January 15, 2015 at 4:10 pm

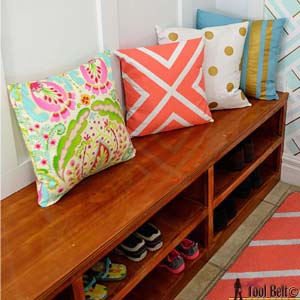
    It turned out great. Can’t wait to work on something together 🙂

    Reply

Leave a Reply Cancel reply

Your email address will not be published. Required fields are marked *

This site uses Akismet to reduce spam. Learn how your comment data is processed.

Search Her Tool Belt

Follow Me!

  • Bloglovin
  • Email
  • Facebook
  • Google+
  • Instagram
  • Pinterest
  • RSS
  • Twitter
  • YouTube

Top Posts & Pages

Custom Drill Storage and Charge Station - Easy
Cordless Drill Storage - Charging Station
Wood Bunny Easter Basket
Pallet Planter Box For Cascading Flowers
$5 Blanket Ladder
Wood DIY LOVE Marquee Letters
How to Build a Redwood Pergola with Arch Detail
Kid's Step Stool

Check out more projects

Copyright

Thank you for wanting to share my work! No need for my permission to pin my work or to feature 1 or 2 pictures with full watermarks intact that link back to the original project. Please do NOT copy tutorials.

Disclosure & Privacy Policy

Disclaimer

Copyright © 2023 · Magazine Pro Theme on Genesis Framework · WordPress · Log in

This website uses cookies to improve your experience. We'll assume you're ok with this, but you can opt-out if you wish.Accept Read More
Privacy & Cookies Policy

Privacy Overview

This website uses cookies to improve your experience while you navigate through the website. Out of these, the cookies that are categorized as necessary are stored on your browser as they are essential for the working of basic functionalities of the website. We also use third-party cookies that help us analyze and understand how you use this website. These cookies will be stored in your browser only with your consent. You also have the option to opt-out of these cookies. But opting out of some of these cookies may affect your browsing experience.
Necessary
Always Enabled
Necessary cookies are absolutely essential for the website to function properly. This category only includes cookies that ensures basic functionalities and security features of the website. These cookies do not store any personal information.
Non-necessary
Any cookies that may not be particularly necessary for the website to function and is used specifically to collect user personal data via analytics, ads, other embedded contents are termed as non-necessary cookies. It is mandatory to procure user consent prior to running these cookies on your website.
SAVE & ACCEPT