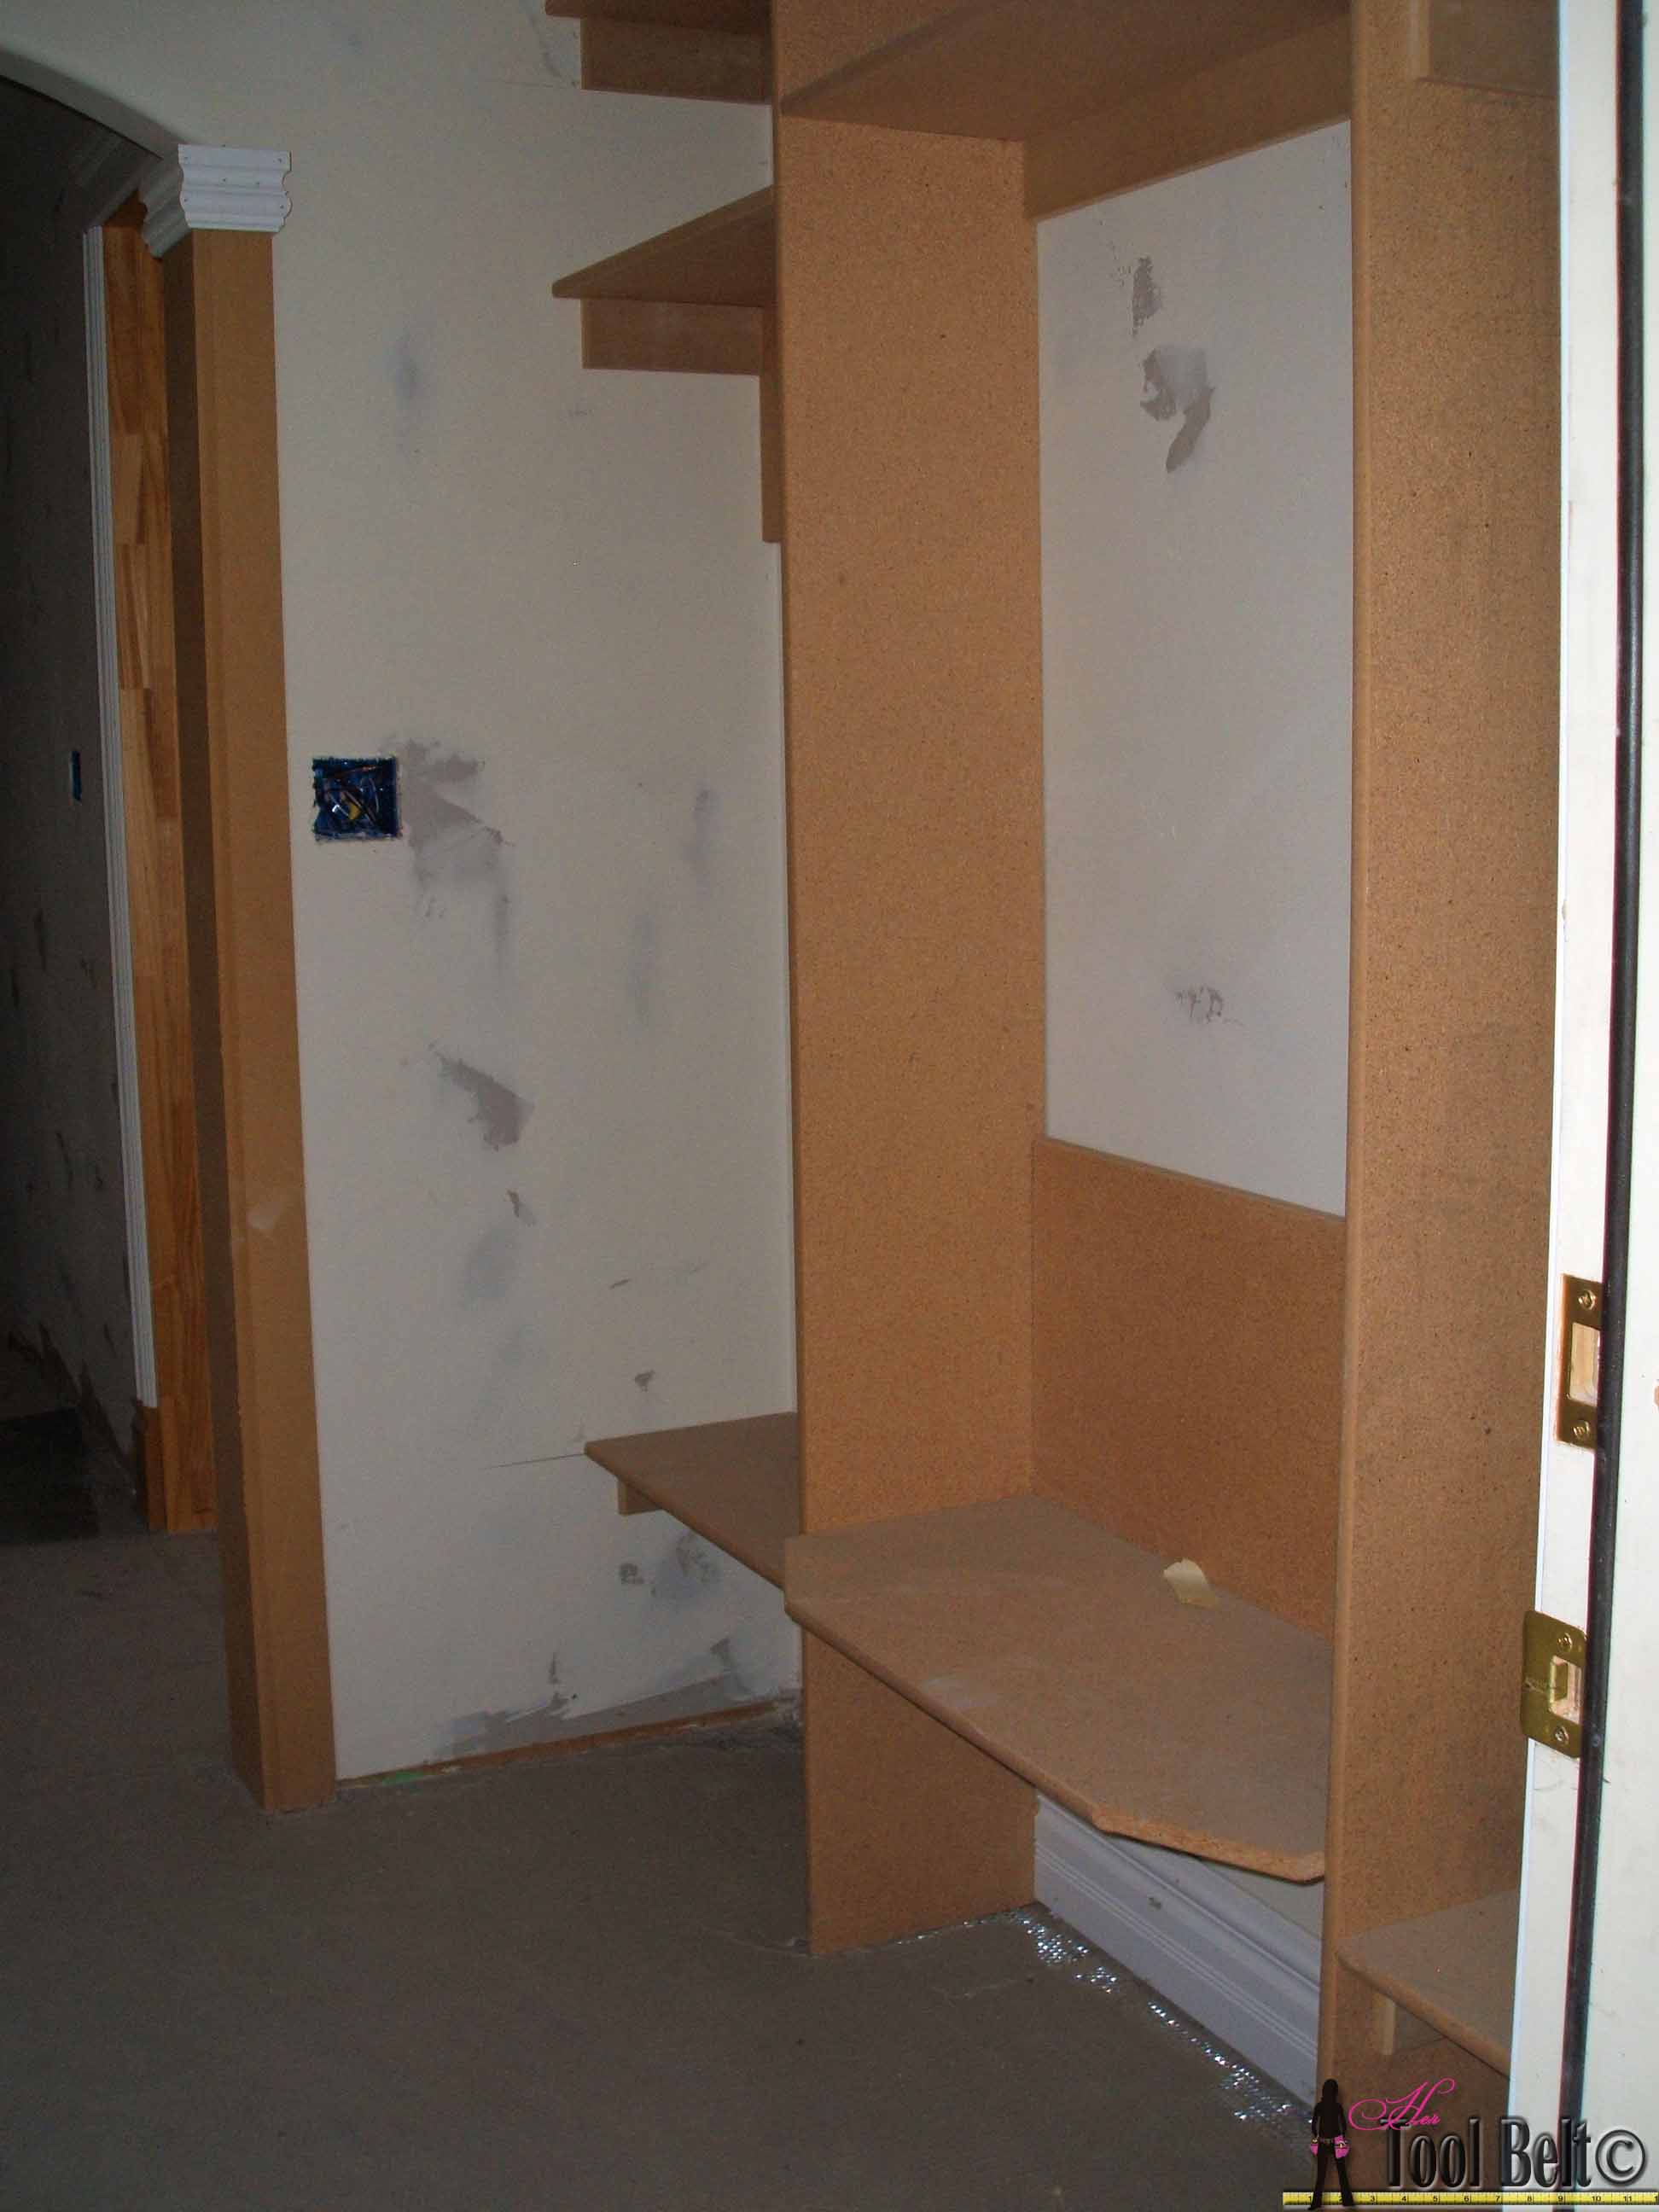
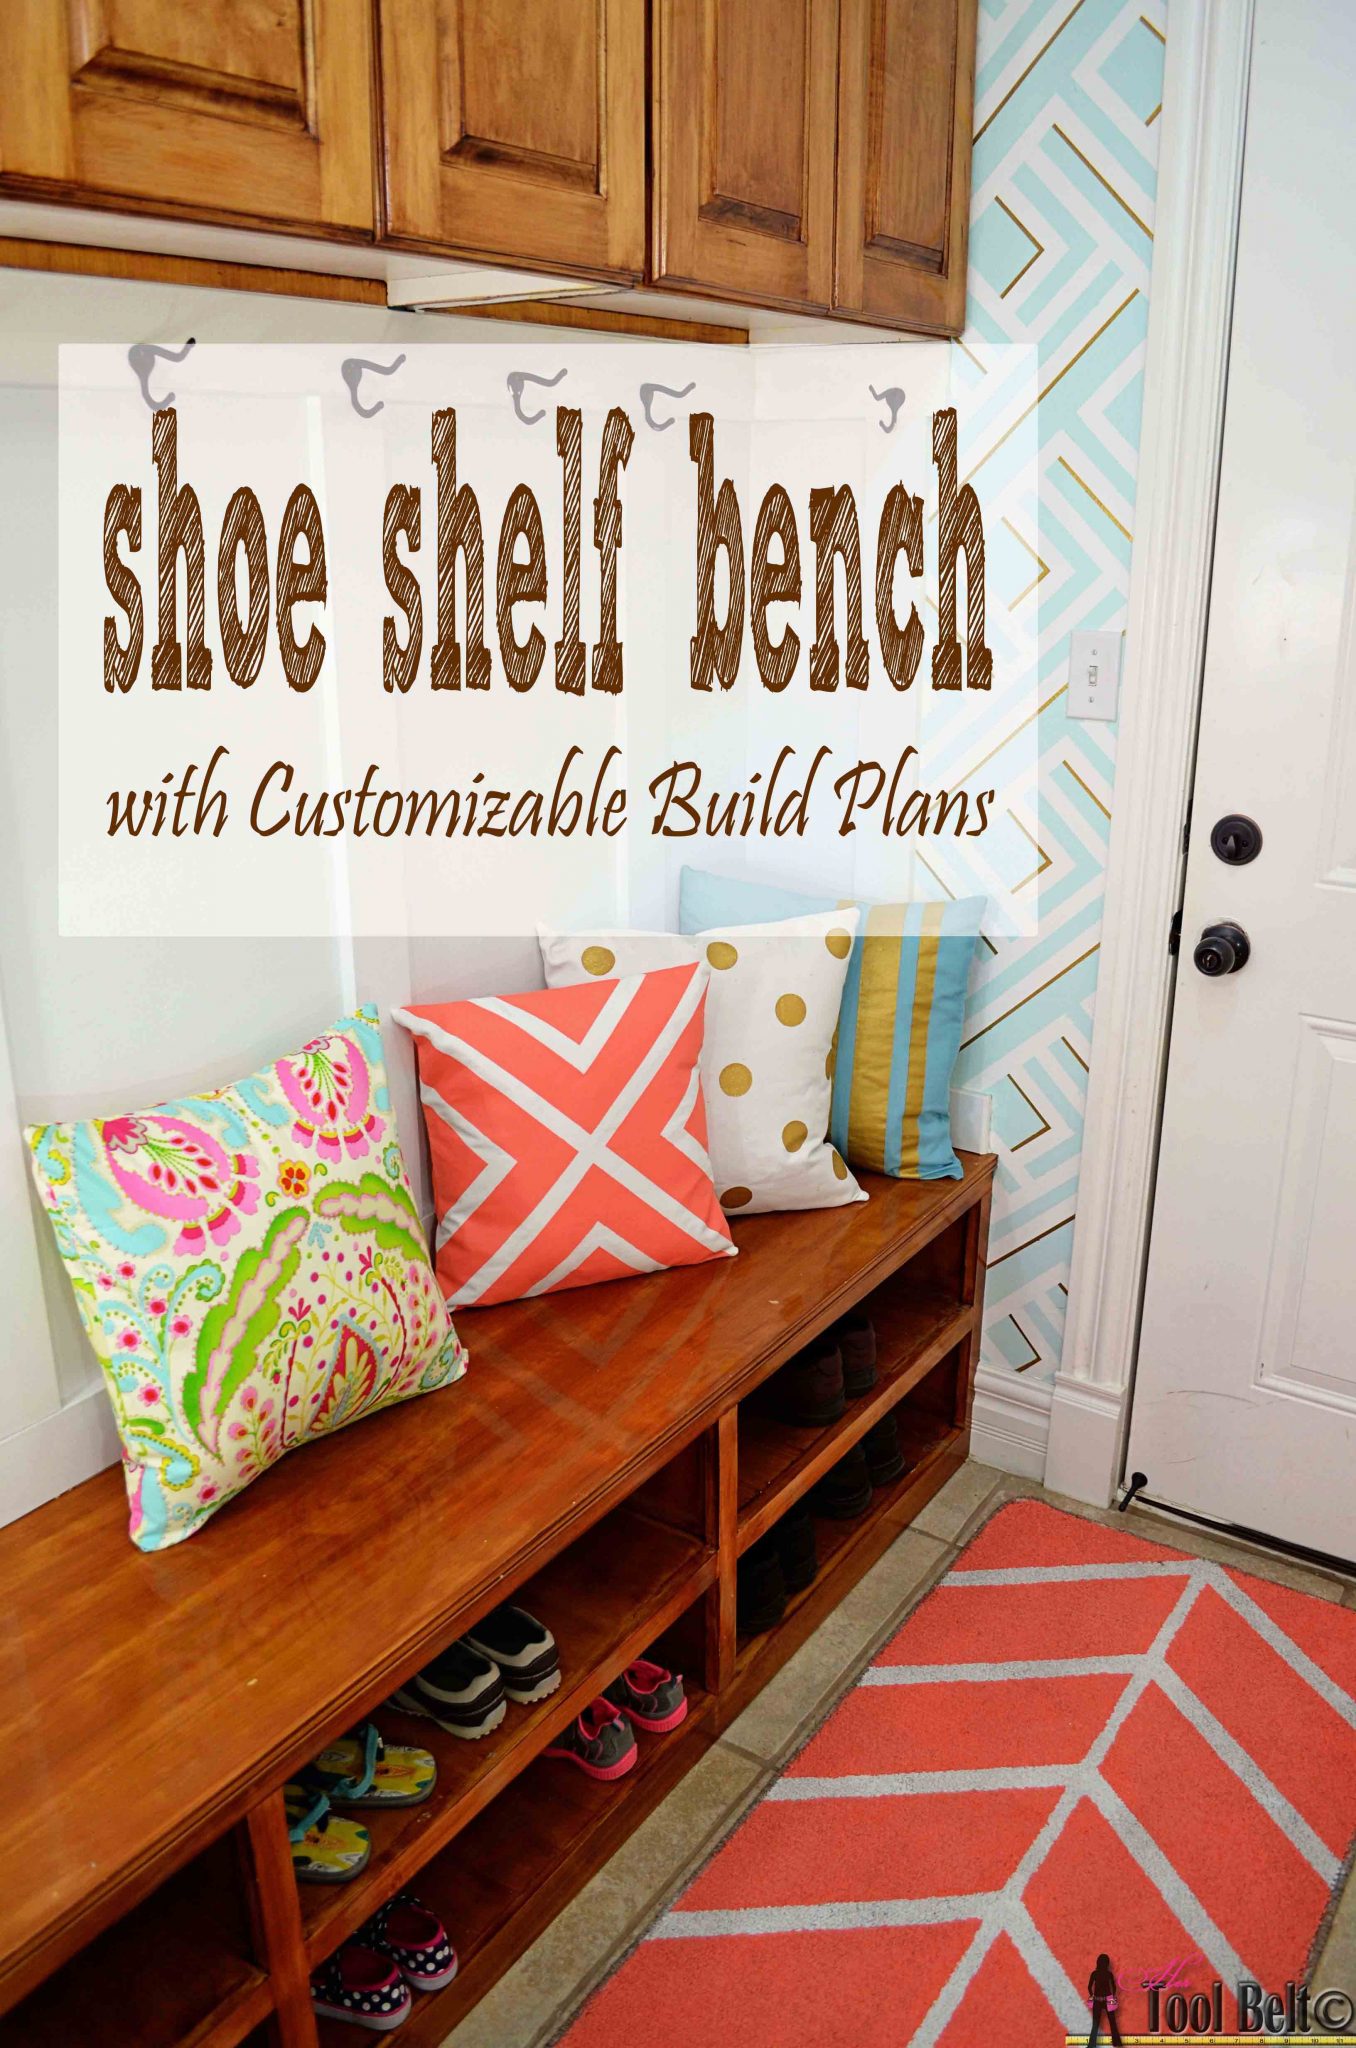
During that big housing crisis, we were looking to get into a better neighborhood. We were super lucky and sold our old house and found an unfinished house. The main priorities were to finish what needed to be done to move in, and all of the perks would have to come later. One room layout that never worked for our family was the bench and hangers in the mudroom. I know the ‘locker’ look is super popular, but it doesn’t work for us. (This picture is what the mudroom looked like when we bought the house, I couldn’t find a picture of it all painted.)
I really want a great place to put shoes that we wear frequently. I love the basket look, however there is no way my family will take the time to pull out a basket and place their shoes in it and put it back. Just not happening here. I figured there is a pretty good chance that they will kick their shoes into a ‘shoe shelf’. So that’s what I went with – a shoe shelf bench.
How to Build a Shoe Shelf Bench
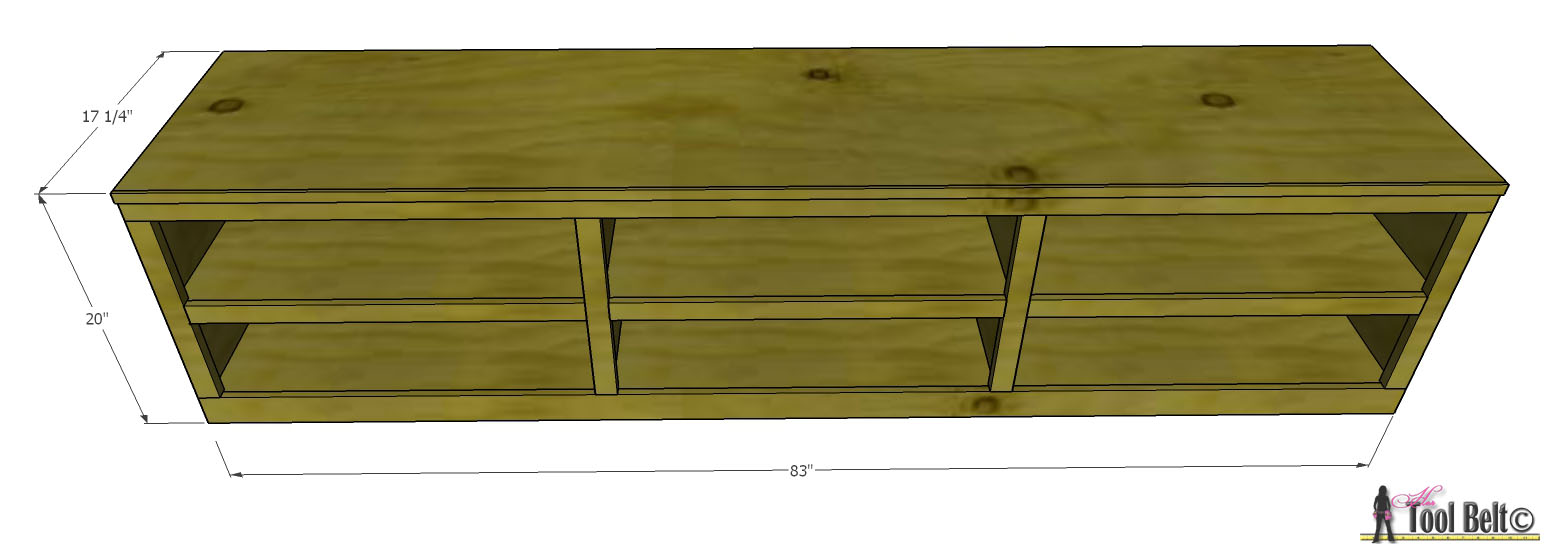
Obviously everyone will have a different size of bench to fit their need, so I created the plans with a customizable spreadsheet. Enter in the desired bench length, height, and depth along with how many columns you want and it’ll spit out the numbers for the plan. The amount of wood and plywood you need depends on your bench size.
Materials Needed
- 3/4″ plywood
- 1/2″ plywood
- solid wood boards that are 3/4″ thick
- wood glue
- sand paper
- 1 1/2″ brad nails
- dowels or biscuits for biscuit joints
- 1 1/4″ pocket screws
- wood filler
- wood conditioner/stain
- paint/primer
- top coat (polyurethane or polycrylic)
- brushes
- 3″ cabinet screws or self tapping screws
This plan uses dados and biscuits to make the joints. If you prefer using Kreg Pocket Holes, see this plan.
I used maple hardwood for the solid wood and birch plywood for this bench because I was planning on staining it. When I am going to stain a project, I usually like to use better wood like alder, maple, oak, cherry, etc. Pine is cheap, but doesn’t take stain very evenly. If you’re going to paint the bench, the doesn’t really matter so go as cheap as you want.
Step 1
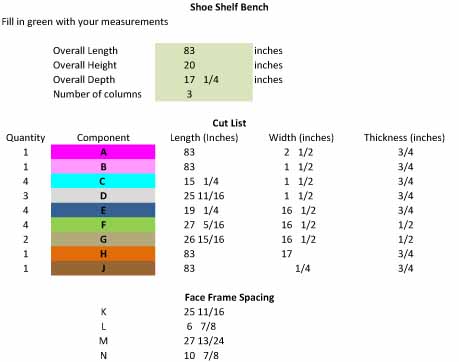
Download the customizable shoe-shelf bench plan spreadsheet. This file is a Excel spreadsheet, when you download and open it, it may ask you at the top to enable editing – click enable editing. In the top green cells – fill in your bench length, height – mine is 20″, depth – mine is 17 1/4″, and the number of columns or vertical sections – mine is 3. If you have trouble with the spreadsheet, leave me a comment with your dimensions and email and I’ll send you your dimensions.
(Note: I would make the depth of your bench around 16″- 16 1/4″, you’ll get better use out of your plywood and have less scrap.)
Example spreadsheet – These are my dimensions
Step 2
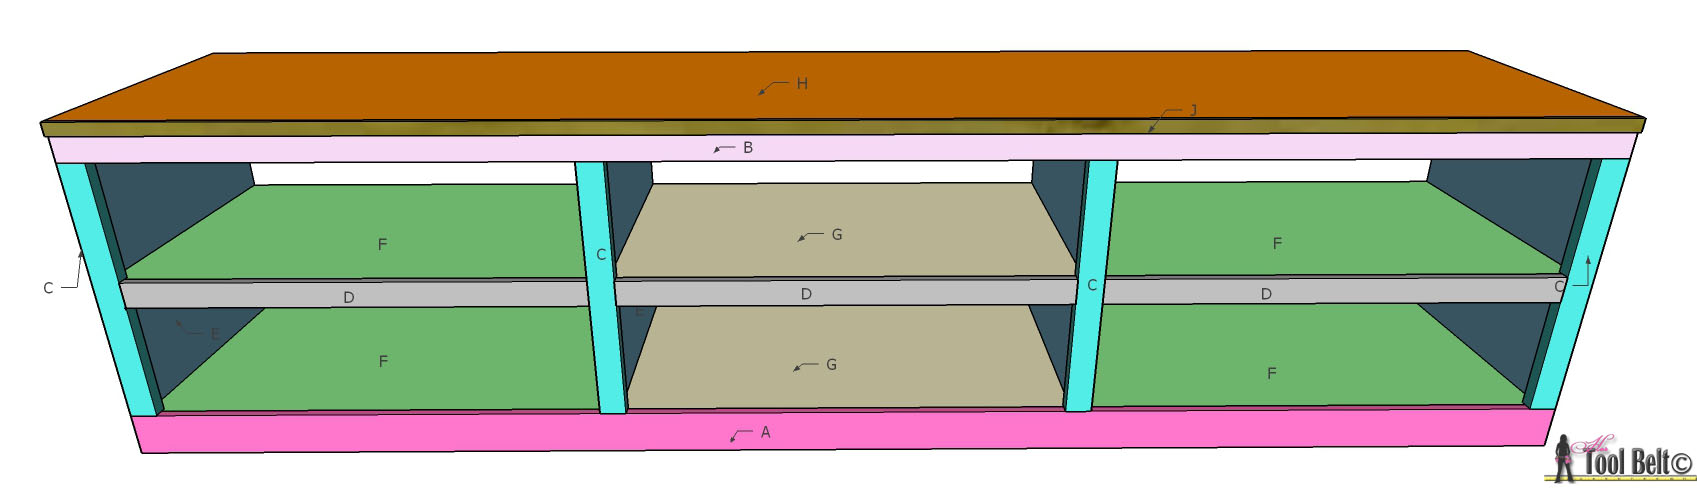
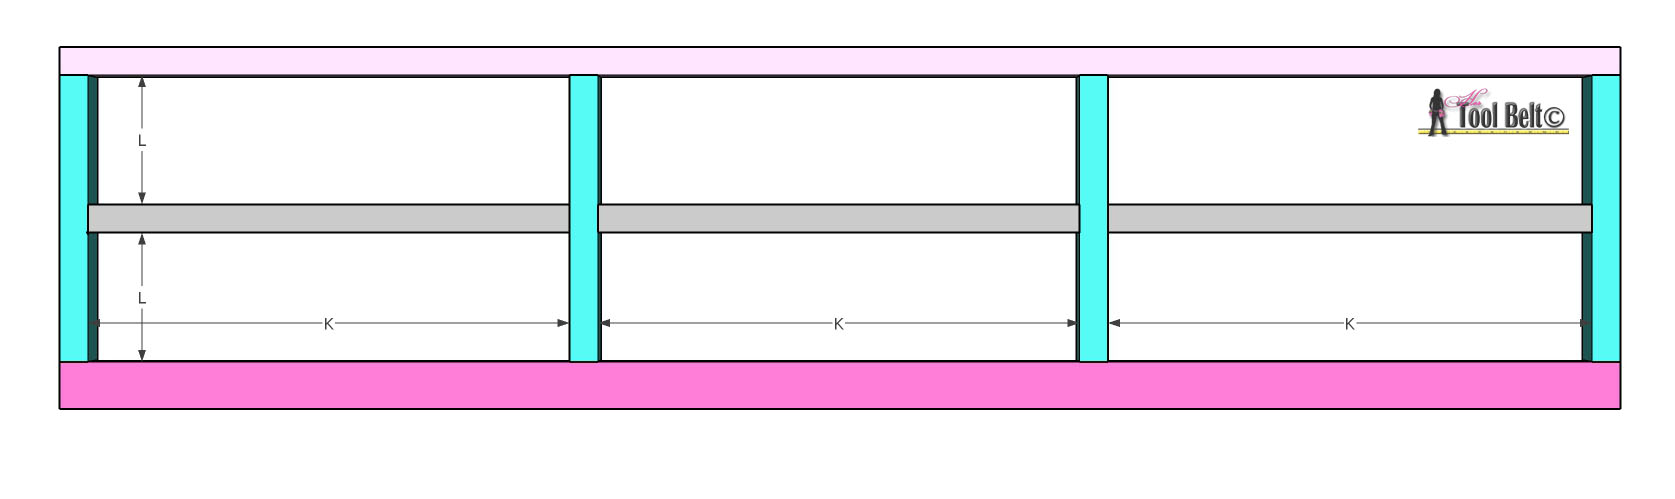
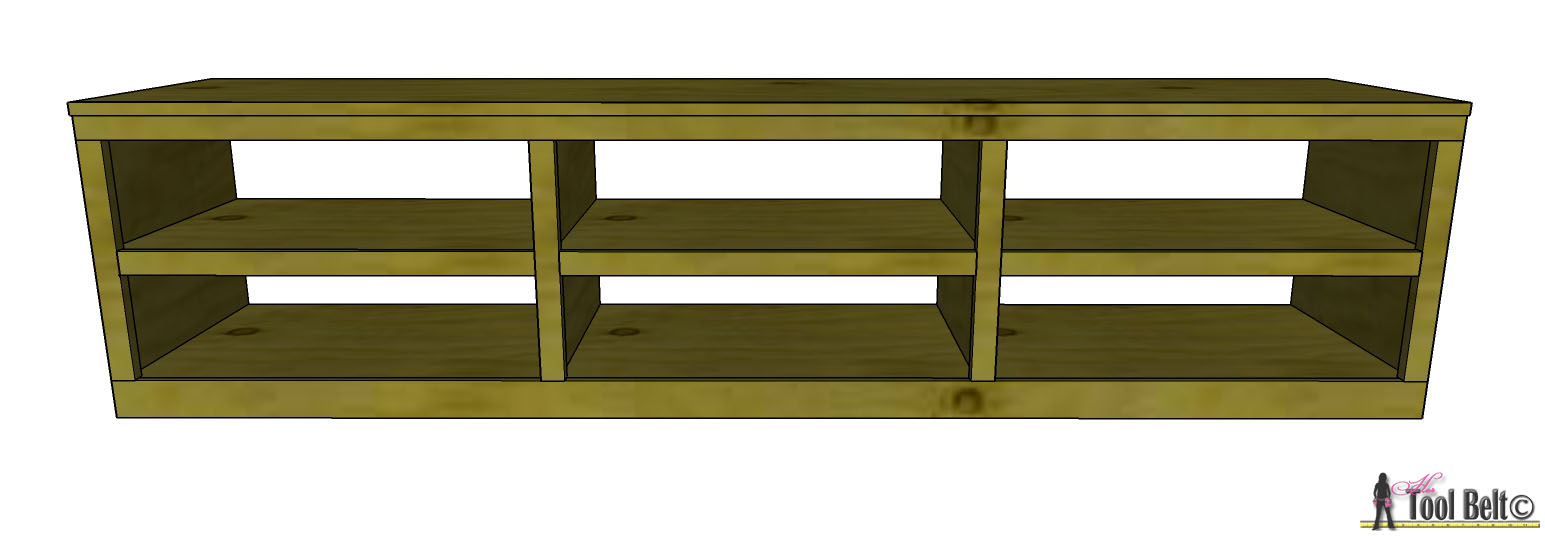
Cut pieces A, B, C and D for the face frame. Make the joints with a biscuit cutter or dowels method. Reference K and L measurements from the spreadsheet. Use wood glue and clamps to assemble your face frame together. Allow the glue to fully dry. Remove excess glue.
Step 3
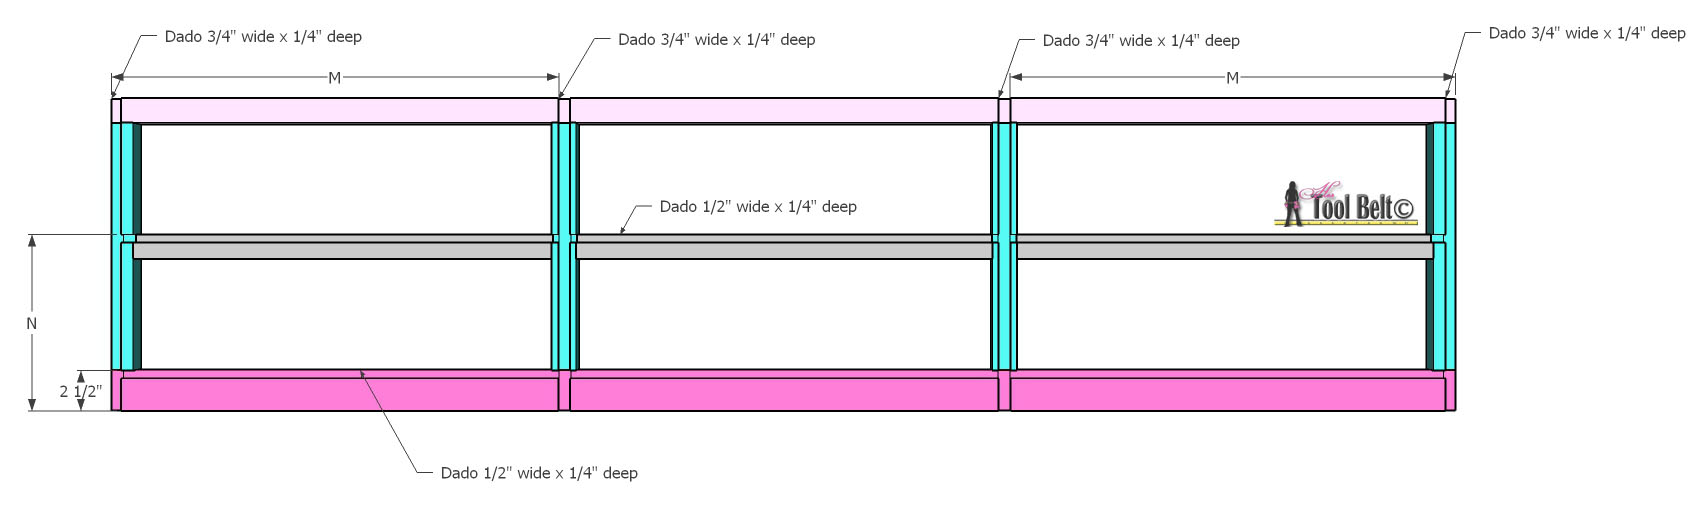
Cut the pieces for E and H from 3/4″ plywood, F and G from 1/2″ plywood.
Step 4
Once the glue is dry, we have some 3/4″ and 1/2″ dados to cut. Set up a 3/4″ dado, 1/4″ high/deep. Cut the 4 vertical dados, reference dimension M on the spreadsheet. Make sure the 3/4″ plywood will fit in your dado slot. Set up a 1/2″ dado also 1/4″ high/deep. Cut the 2 horizontal dados, ref N on spreadsheet. Make sure 1/2″ plywood will fit in your slot.
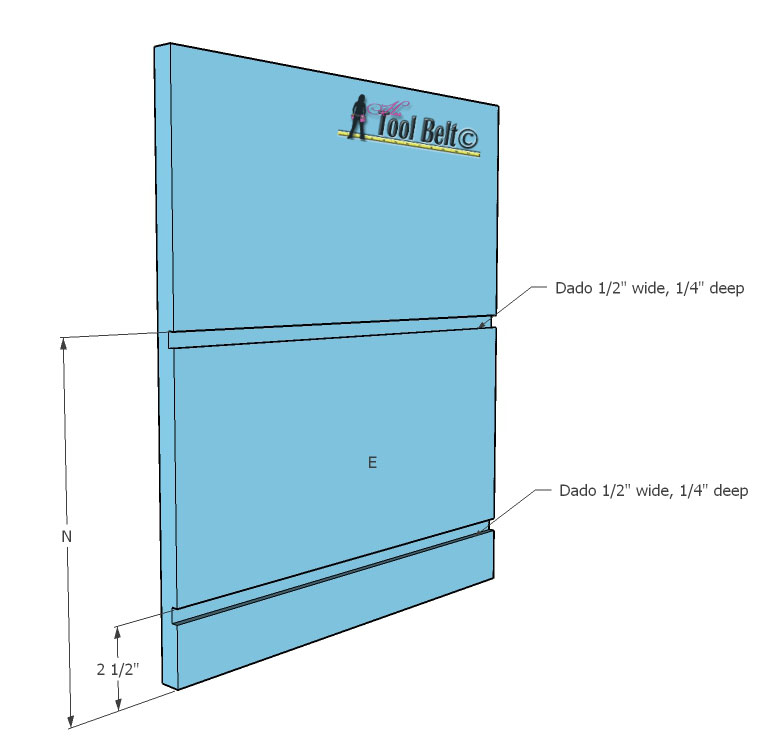
While the 1/2″ dado is set up, cut the following dados in the E pieces. On the 2 outside pieces of E, make the following dado cuts
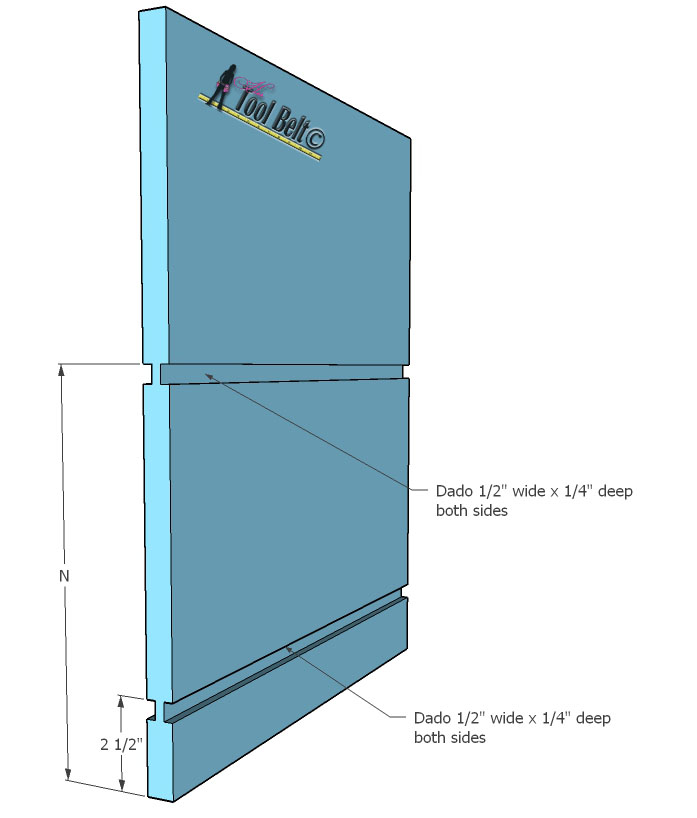
If you have center partitions (2 or more columns) then make the following dado cuts on both sides of the rest of the E pieces.
Step 5
Assembly – it’s important to dryfit the bench together first and make any adjustments before you start gluing. I find it easiest to place the face frame – face down on the workbench or ground and build it up like that. Normally I don’t place the top on until last, but the upper shelf makes it hard to screw it into place. Add pocket holes to the dividers and back of the face frame to attach the top. Once you dryfit and are confident it will go together well. Apply glue to all of the dado joints and assemble together and clamp into place. Use brad nails to assist assembly.
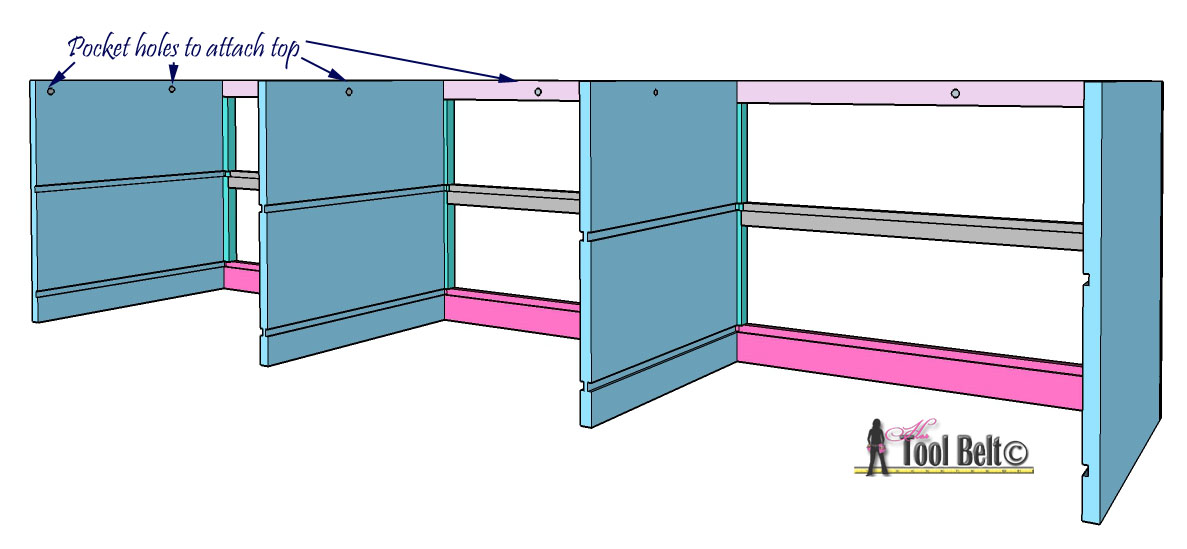 Before you glue the upper shelves, install the top plywood with 1 1/4″ pocket screws.
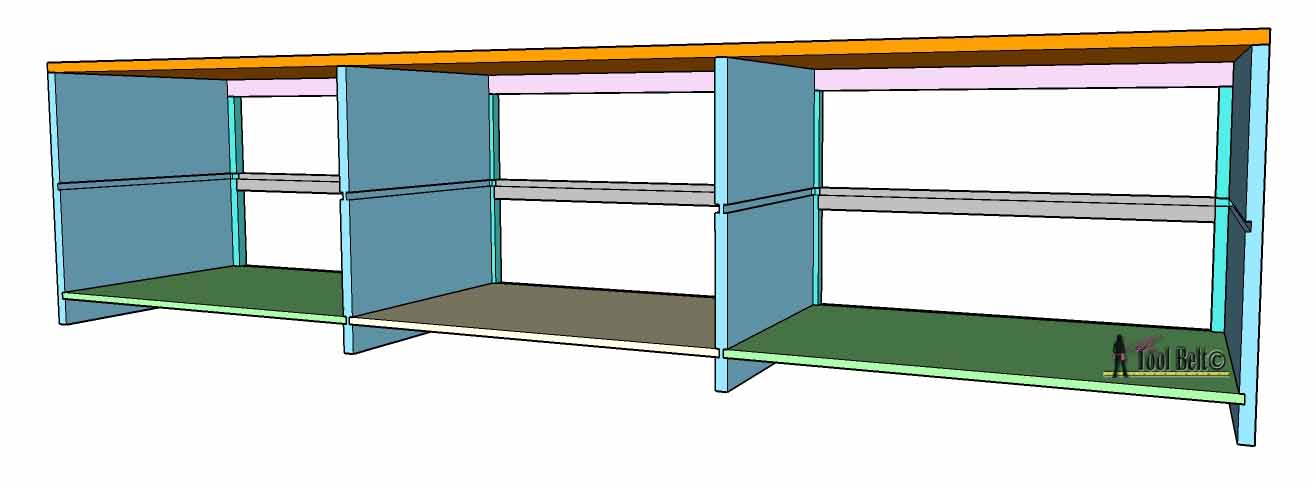
Finish gluing and assembling the bench together, clamp together and allow the glue to fully dry. Remove excess glue.
 Step 6
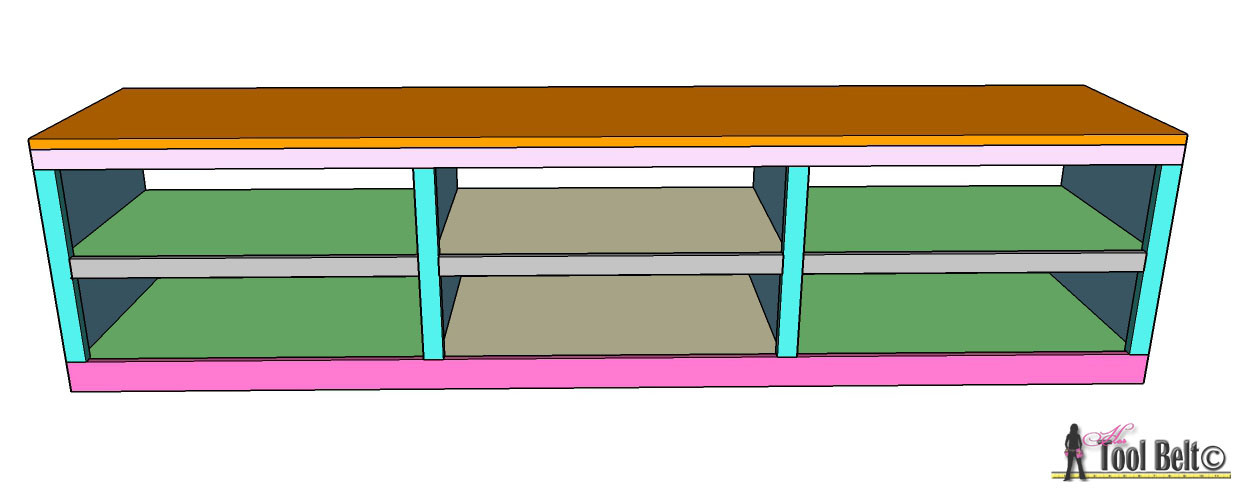
To cover up the top piece plywood edge, I like to route a cute edge on a 3/4″ thick board, cut off the routing about 1/4″ thick. Glue and nail the molding into place. If the sides of your bench will be seen, add molding to the sides too. You can easily purchase molding to cover up the plywood edge too.
 Step 7

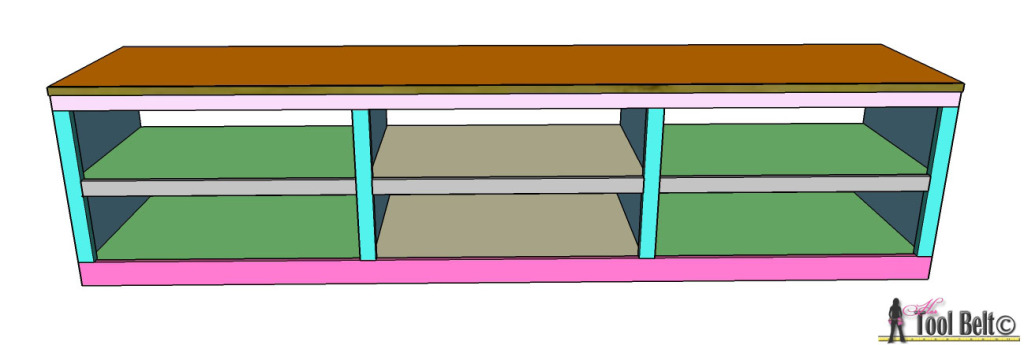
Fill any cracks, blemishes or nail holes with wood filler and allow to fully dry. Sand your bench, finishing with 120-150 grit paper. If staining, apply wood conditioner according to the directions. This helps even out the stain penetration. I stained my bench with General Finishes Gel Nutmeg, it gave it a nice honey color. I applied 1-2 coats of polyurethane for the top coat. If painting, apply a paint primer and allow to dry. Paint the bench your favorite color. I would suggest giving the bench a top coat, polycrylic works great.
Step 8
If you want to mount your bench to the wall, locate the studs. I mounted mine through the 2 outside E pieces. Mark the approximate location of the studs on the bench in a few locations and pre-drill a hole through E. Use 2 1/2″ – 3″ cabinet screws or self tapping screws, secure the bench to the wall.
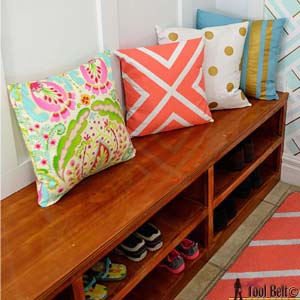
I hope you enjoy your Shoe Shelf Bench as much as we have. Need pillows to decorate your bench, check out my Painted Pillows. On the opposite wall from the bench is my Gallery Command Center.
Linked up to: My Favorite Link Parties, Remodelaholic, Savvy Southern Style, Sand & Sisal, Homestories AtoZ
Oh my goodness! I wish we had space for this in our back entry! Fabulous job on the tutorial!
I would love for you to share this post at my Show Me Saturday party this weekend! We go live Saturdays at 7:00 am EST. My readers would love this!
~ Ashley
Thanks Ashley, will do.
Wow this is a great bench! So practical and pretty too!! Thanks for linking up!
Great tutorial! I love how it turned out. Simply beautiful. Thanks for linking up to Show Me Saturday! Hope to see you there next week.
I’d love to see the plans using pocket holes! Thanks
I’ll get them up in the next day or two. Thanks for visiting.
Here is the plan for the bench with pocket holes, enjoy! https://www.hertoolbelt.com/shoe-shelf-bench-pocket-holes/
Hi, curious if you would share the sketch up plans. New to sketch up and I want to build the project but would rather make my adjustment before hand.
Thank you
Sent you an email.
Hello! I love this tutorial but I’m not so handy (yet anyway). Do you think I’d be able to execute this without having very much experience? Also, I’d really like a bench that has doors and a back on it because I want a more streamlined look for my bedroom. If that a fairly easy modification? Please help!
Hi Constance,
This version using pocket holes will be a little easier for beginners, same bench https://www.hertoolbelt.com/shoe-shelf-bench-pocket-holes/ Also you can easily add a back and doors to this bench, no problem. If you have a specific inspiration bench that you’d like plans for, You can submit your inspiration pic/link and the specific dimensions that you want to the reader request. I pick one each month and create plans for that project. https://www.hertoolbelt.com/reader-requests/ Happy Building!
Hi there! Love this idea – this is EXACTLY what my family needs! I too love the idea/look of baskets, but there’s no way my 4 kids will take the time to neatly place shoes in a basket!
Just curious what your total cost for this project was. Thanks!
I’m also curious what this project roughly costs. I’m looking to paint, so it sounds like I can get away with a cheaper wood. I love this design and am saving it for our future house. Thanks so much for sharing the instructions.
Thanks Lindsay. A paint grade version of a bench my size would be about $80. I would also change the depth from 17 1/4″ to 16 1/4″, then you’ll get better use out of your plywood.