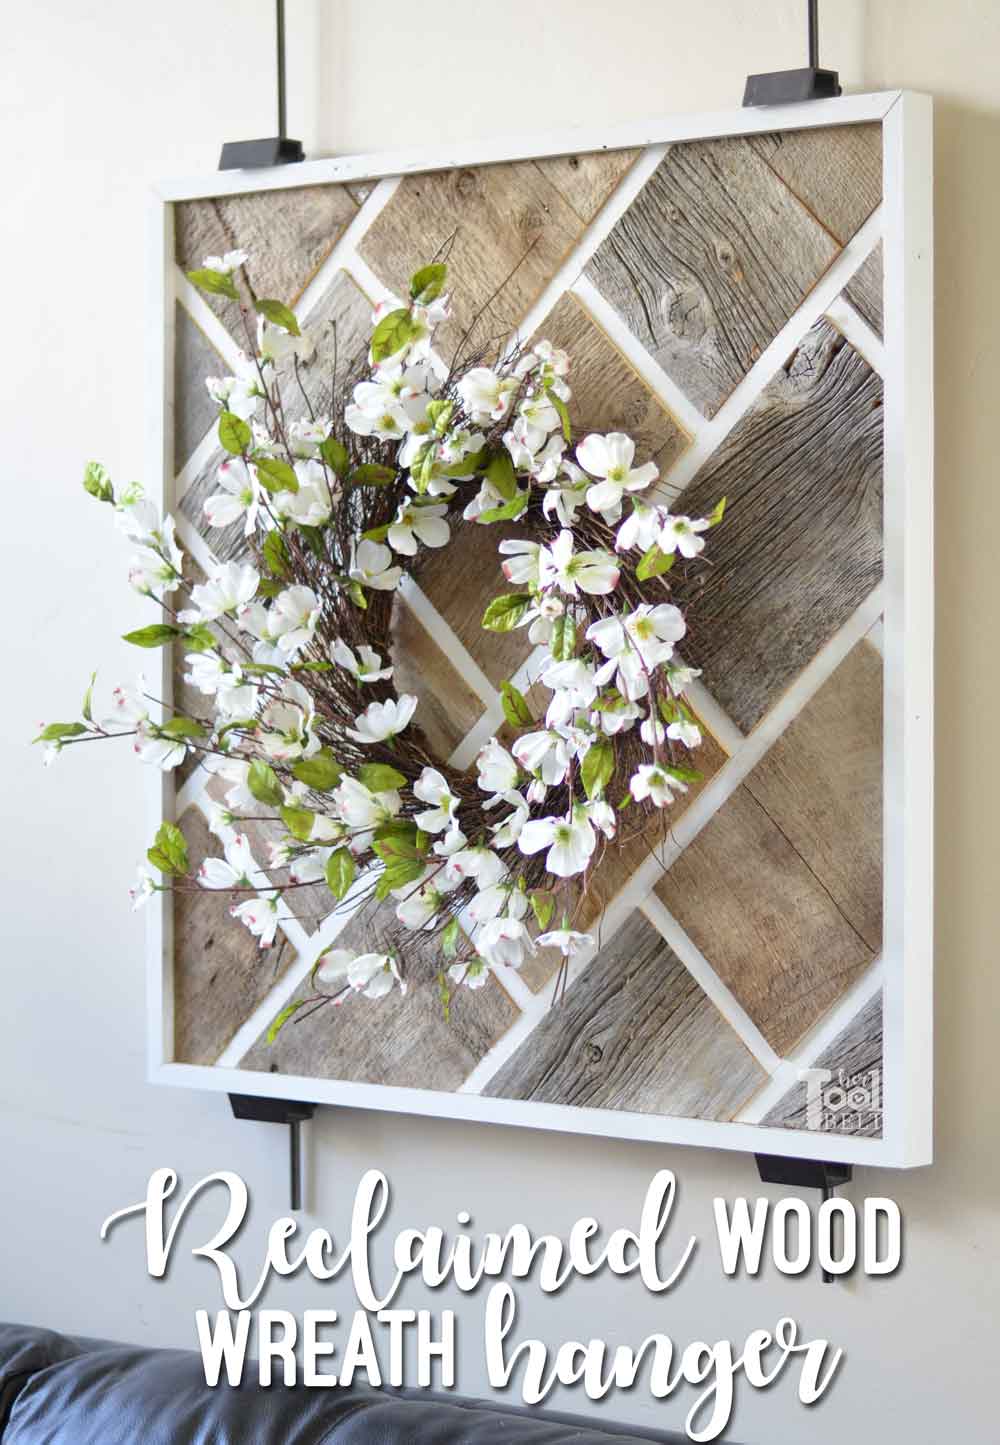
Today I’m participating in a fun Wood Wall Art challenge/blog hop hosted by Bethany over at Reality Daydream. I have been wanting to make a board to hang wreaths on, and this challenge was the perfect time to get that done. My inspiration for this brick reclaimed wood wall art comes from this cool barnwood wall. I raided my stash of reclaimed wood from Remo’s barn, I love all of the natural character that barnwood gives to a project.
Links to all of the awesome wood wall art projects are at the bottom of this post! Be sure to check them out.
How to Make a Reclaimed Wood Wall Art for Wreaths
This post contains some affiliate links for your convenience. Click here to read my full disclosure policy.
Materials for Reclaimed Wood Wall Art
- Reclaimed Wood or Barnwood 7″ wide
- 2 – 1″ x 2″ x 8′ boards – frame
- 1 – 1″ x 4″ x 8′ board – ripped down to 3/4″ x 3/4″ for ‘mortar’
- 30″ x 30″ piece of 1/4″ plywood, hardboard or 1/2″ plywood (I used a scrap piece of bead board) – back
- Gorilla Glue, I ran out of gorilla glue and had to use wood glue for the frame.
- 2″ brad nails
- White paint and a brush
- nail/screw to hang the wreath
Tools Used for the Reclaimed Wood Wall Art
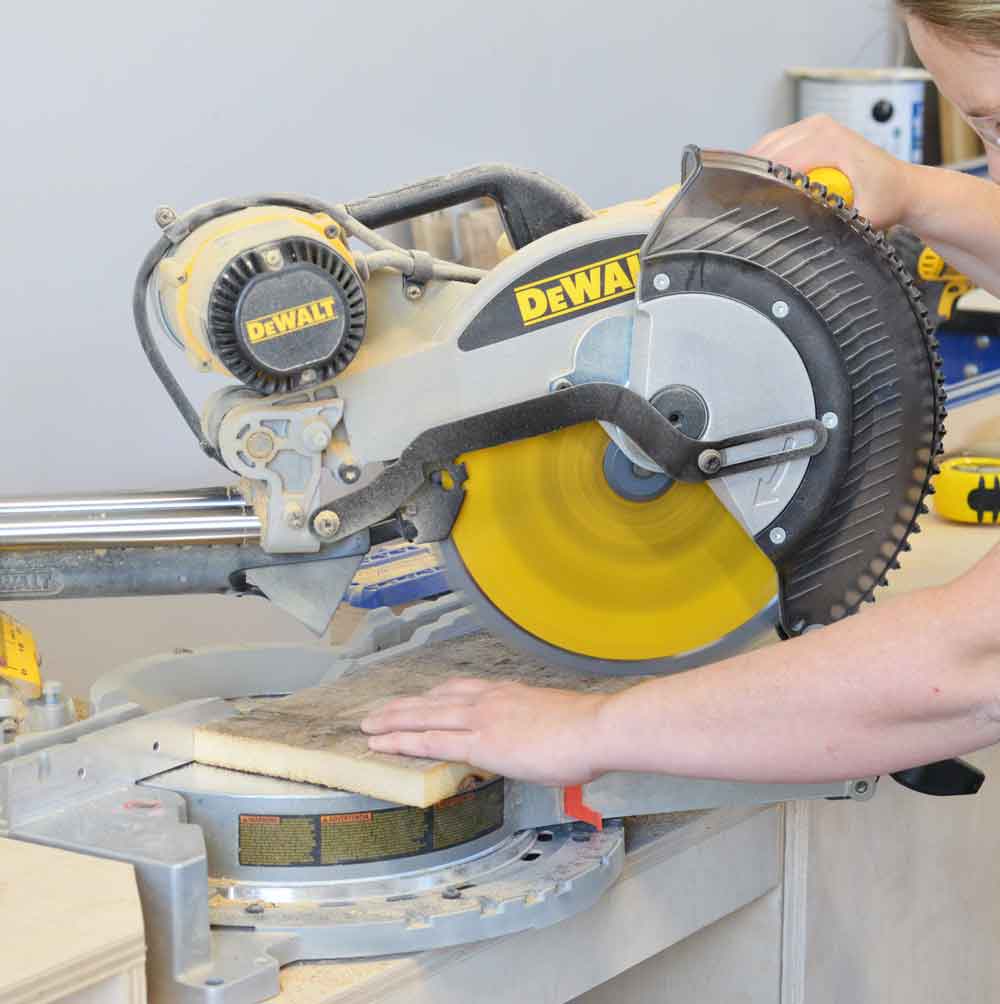
- Table Saw
- Miter Saw
- Brad Nailer
- Tape Measure
- Circular Saw and Accu Cut
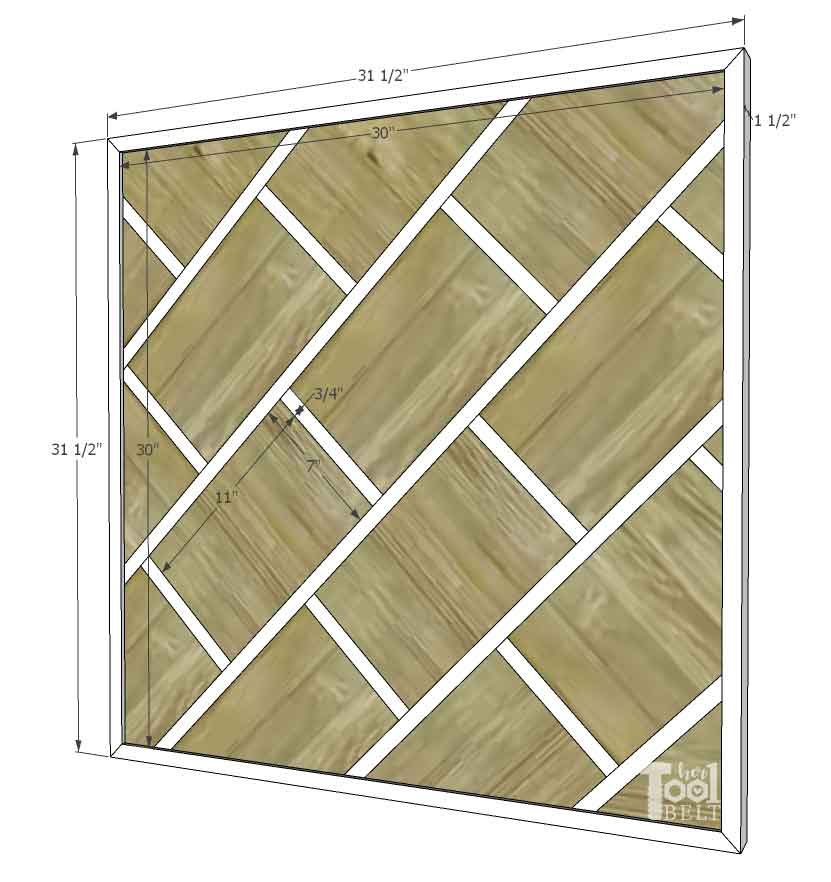
Cut List
- Most of this project will be cut to fit.
- 1 – 30″ x 30″ piece of plywood or hardboard to glue the wood to.
- Rip the 1×4 into 3/4″ x 3/4″ strips
- 10 – 3/4″ x 3/4″ x 7″ pieces
- 1 – 3/4″ x 3/4″ x 8 7/8″ with 45 miter on each end
- 1 – 3/4″ x 3/4″ x 24 3/8″ with 45 miter on each end
- 1 – 3/4″ x 3/4″ x 39 7/8″ with 45 miter on each end
- 1 – 3/4″ x 3/4″ x 31″ with 45 miter on each end
- 1 – 3/4″ x 3/4″ x 15 1/2″ with 45 miter on each end
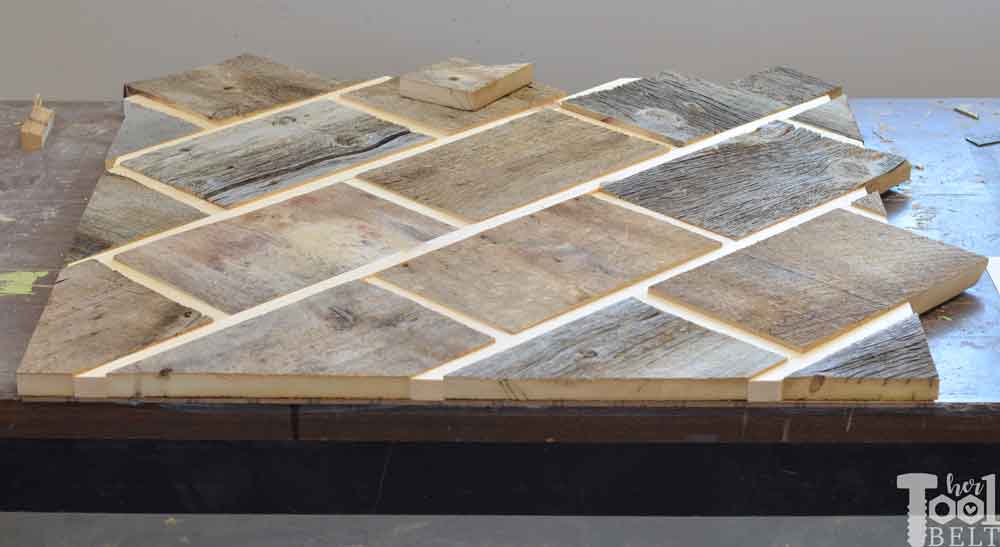
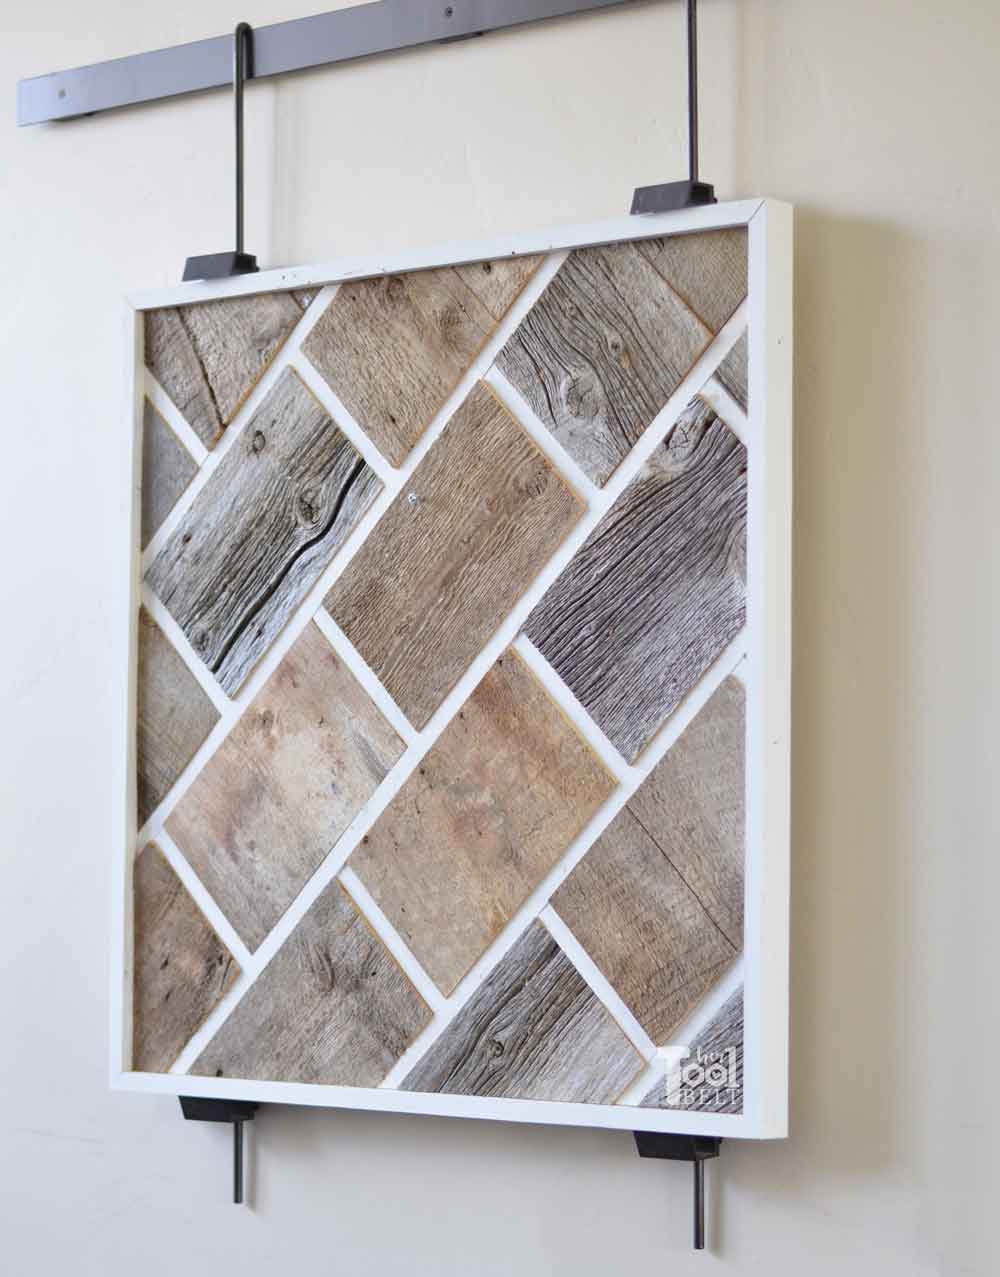
- Cut the reclaimed wood/barnwood into 7″ x 11″ ‘bricks’. I rotate the grain direction on the ‘bricks’, some are landscape and some are portrait. It’s not necessary, just adds interest.
- 4 – 3/4″ x 1 1/2″ x 31 1/2″ pieces with 45 deg angles on each end for the frame, may want to cut to fit.
Starting to lay out the Reclaimed Wood Wall Art Pattern
I wanted to have at least one side straight, so I could use that as my reference to get the rest of the project straight and square.
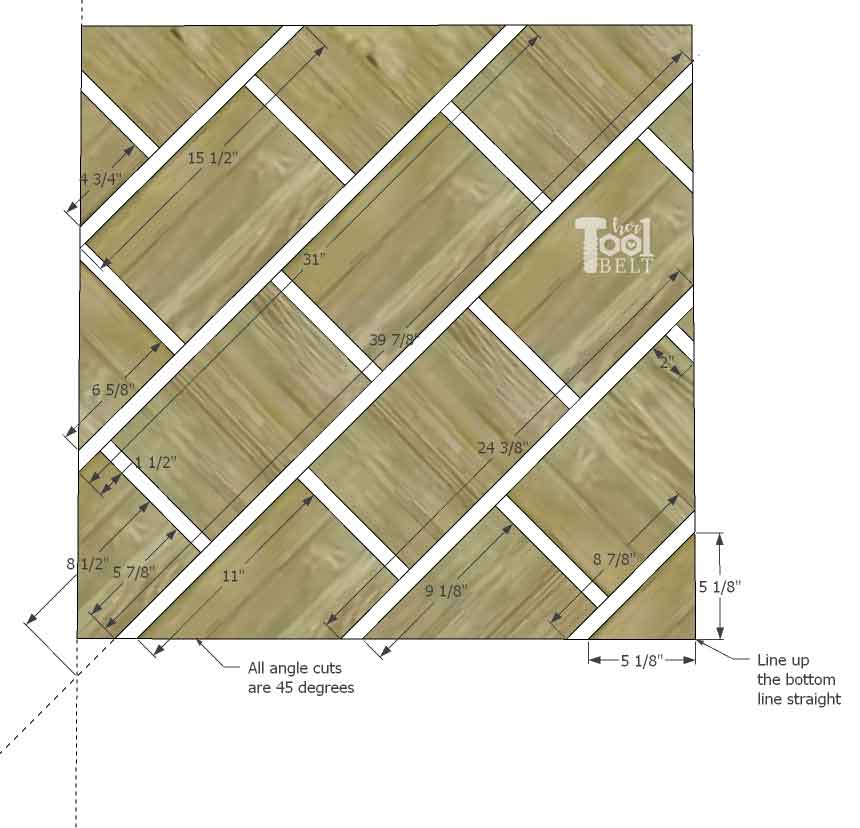
First I cut out the 30″ x 30″ back board. Then I cut out about 12 or more – 7″ x 11″ reclaimed wood ‘bricks’, then cut the bricks for the bottom line at a 45 deg angle according to the above diagram.
I lined up the bottom line of wood pieces, and roughly cut the rest to fit over the 30″ x 30″ back board. I’ll use the table saw or circular saw to clean up the edges later. After I had all of the wood roughly in the pattern, I painted the 3/4″ x 3/4″ mortar pieces white (just on the top side).
Glue Up
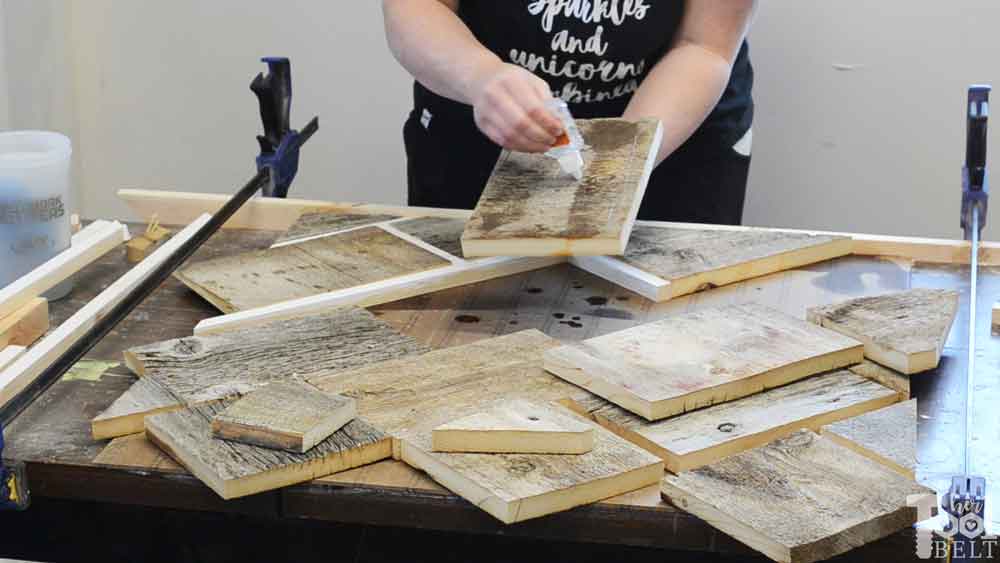
To keep the bottom line straight, I clamped a scrap board to the table to create a fence to line up the wood pieces against.
Typical wood glue doesn’t stick that well to barn wood, so I used gorilla glue. My spray bottle was no where to be found, so I used a damp sponge to lightly moisten the wood in preparation for the gorilla glue (it needs water to activate). Apply glue to all of the pieces of wood and put the puzzle together! 🙂 Then let the glue cure for a few hours.
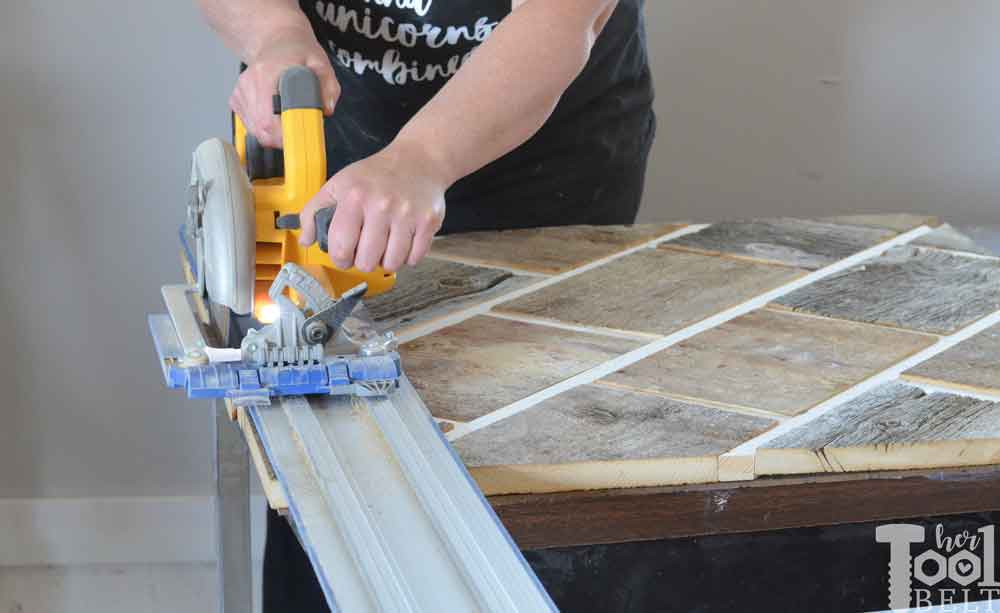
Squaring Up
After the glue dried, I used the circular saw and accu-cut to cut off any excess wood along the 3 sides. A straight edge with the circular saw will work great too.
Framing the Reclaimed Wood Wall Art
The 4 frame pieces should be about 3/4″ x 1 1/2″ x 31 1/2″ with 45 deg miter cuts on each end. The frame pieces may need to be trimmed to fit after squaring up wood art. Apply glue to the frame pieces.
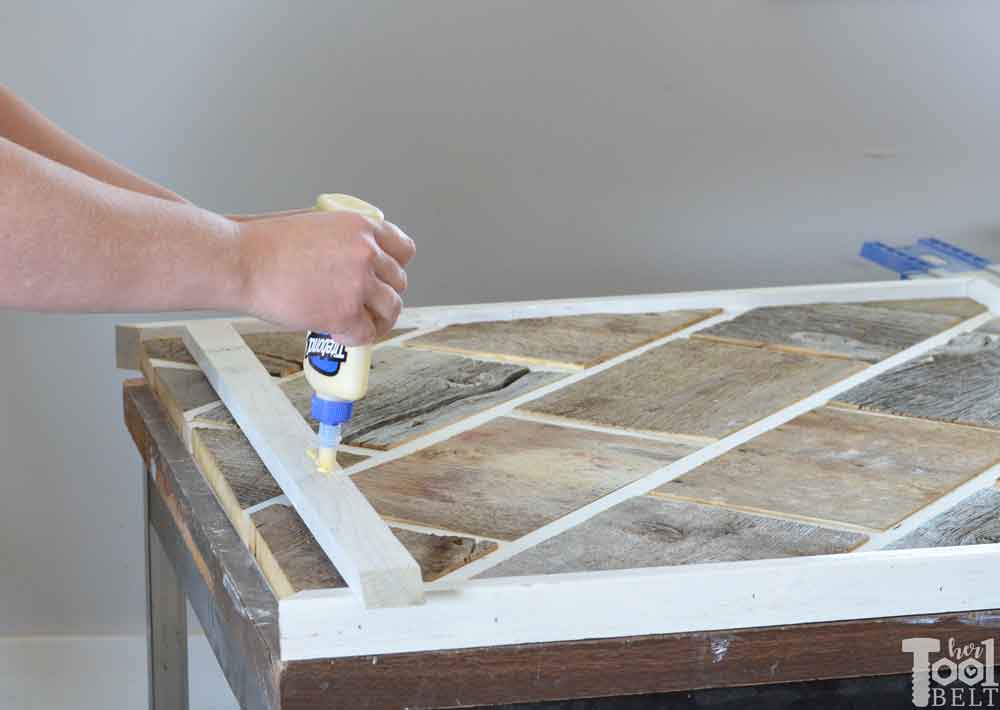
Use a brad nailer with 1 1/2″ – 2″ brad nails to secure the frame pieces to the reclaimed wood.
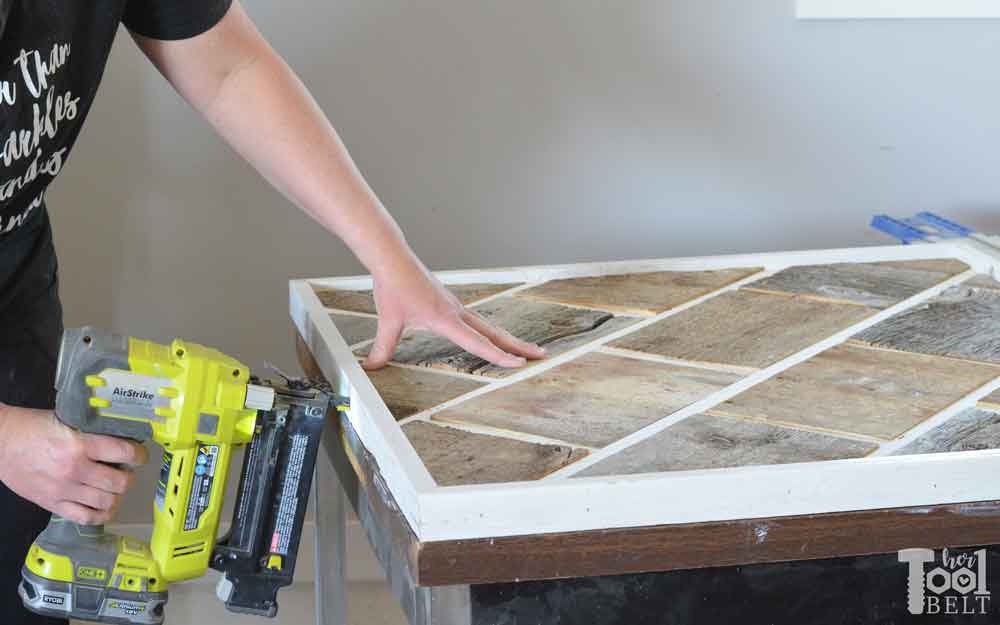
Touch up the frame and mortar pieces with white paint as needed and let everything dry.
Here’s the reclaimed wood wall art without anything on it.
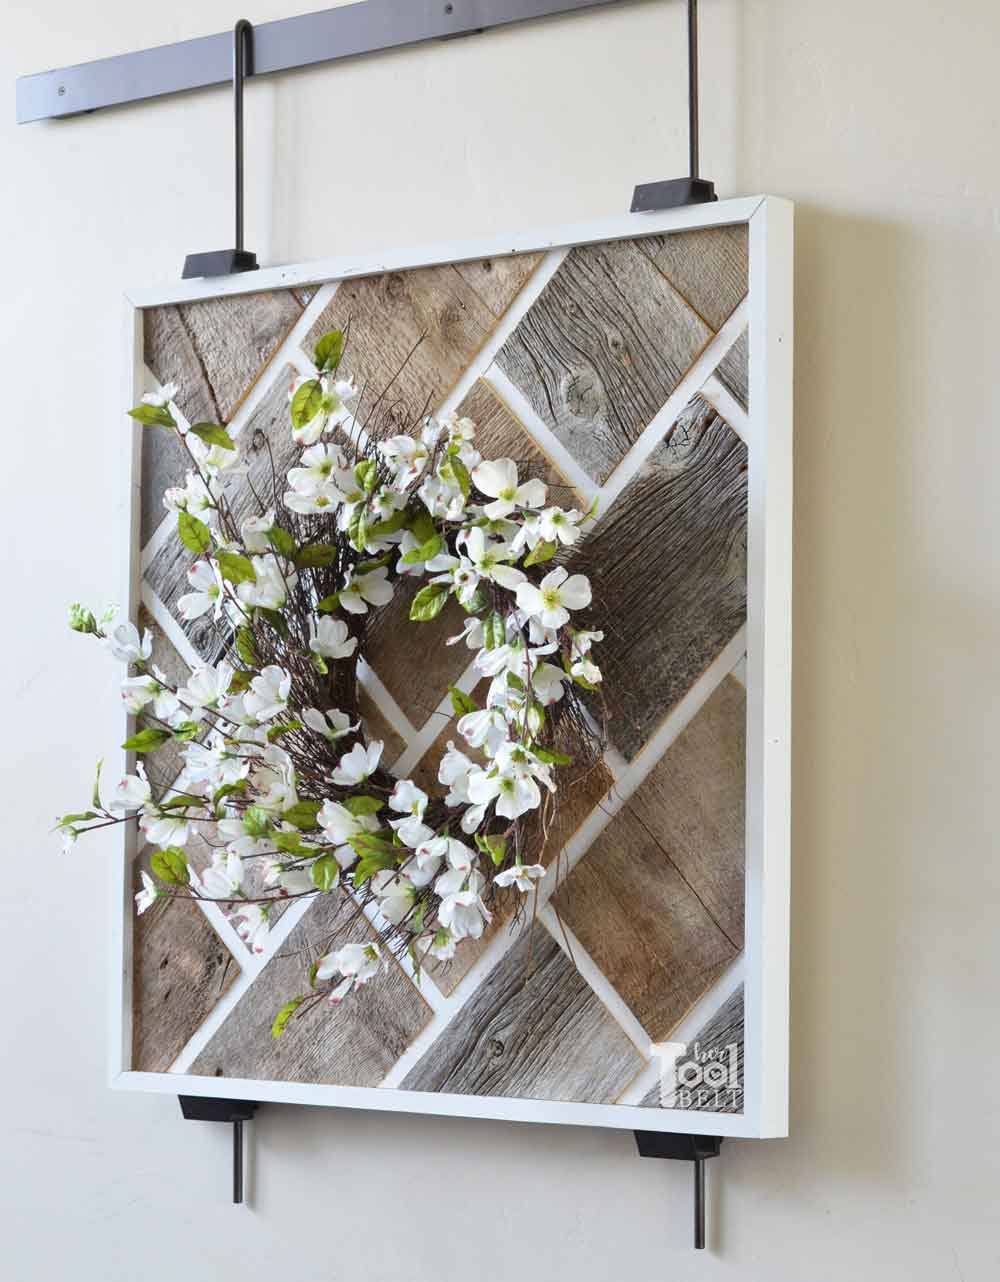
I think it looks cute with a fun spring wreath on it. What do you think? Do I need a bigger wreath?
Check out all of the other awesome Wall Art Challenge projects!
1) Reality Daydream / 2) 100 Things 2 Do / 3) House Becoming Home / 4) Anika’s DIY Life /
5) My Repurposed Life / 6) 3×3 Custom / 7) One Project Closer / 8) Merrypad /
9) Chatfield Court / 10) Create & Babble / 11) Hazel & Gold / 12) Jen Woodhouse /
13) Sawdust 2 Stitches / 14) Wood Work Life / 15) Remodelaholic / 16) Evan & Katelyn /
17) Jaime Costigio / 18) Pneumatic Addict / 19) Bower Power / 20) Lazy Guy DIY /
21) My Love 2 Create / 22) Addicted 2 DIY / 23) Her ToolBelt / 24) Shades of Blue /
25) Ugly Duckling House / 26) The DIY Village / 27) DIY Huntress / 28) Mr Fix It DIY
Do you have a favorite? I think I love them all!
Happy Building!
Girl! Those rugged boards with the POP of white boarder is everything! Love it with the spring wreath too! <3
Thank you!
It looks amazing, Amy! I love that you can leave it as is or hang a pretty wreath on it.
Thanks Katie!
ohhh, Amy–the “mortar” idea is brilliant! The white looks fabulous against the rustic barn wood. Your project is pretty just as a stand alone piece even without a wreath.
What is it hanging on (from)?
pinned!
gail
Thanks Gail! It’s hanging on a Pottery Barn Studio Wall Easel that I got years ago.
This turned out so cool! I was wondering how you got that white mortar in the middle and this is just genius!
This is so pretty Amy! I love how you used narrow boards for the “mortar”! And by the way, that wreath is perfect on it.
I am SO trying this out. Thanks for the step-by-step guide. And here’s to me hoping I won’t mess it up with your article guidance. Wish me luck!