This snowman kit post is sponsored by The Home Depot. I have been compensated for my time and provided with product. All ideas and opinions are my own. This post contains some affiliate links for your convenience. Click here to read my full disclosure policy.
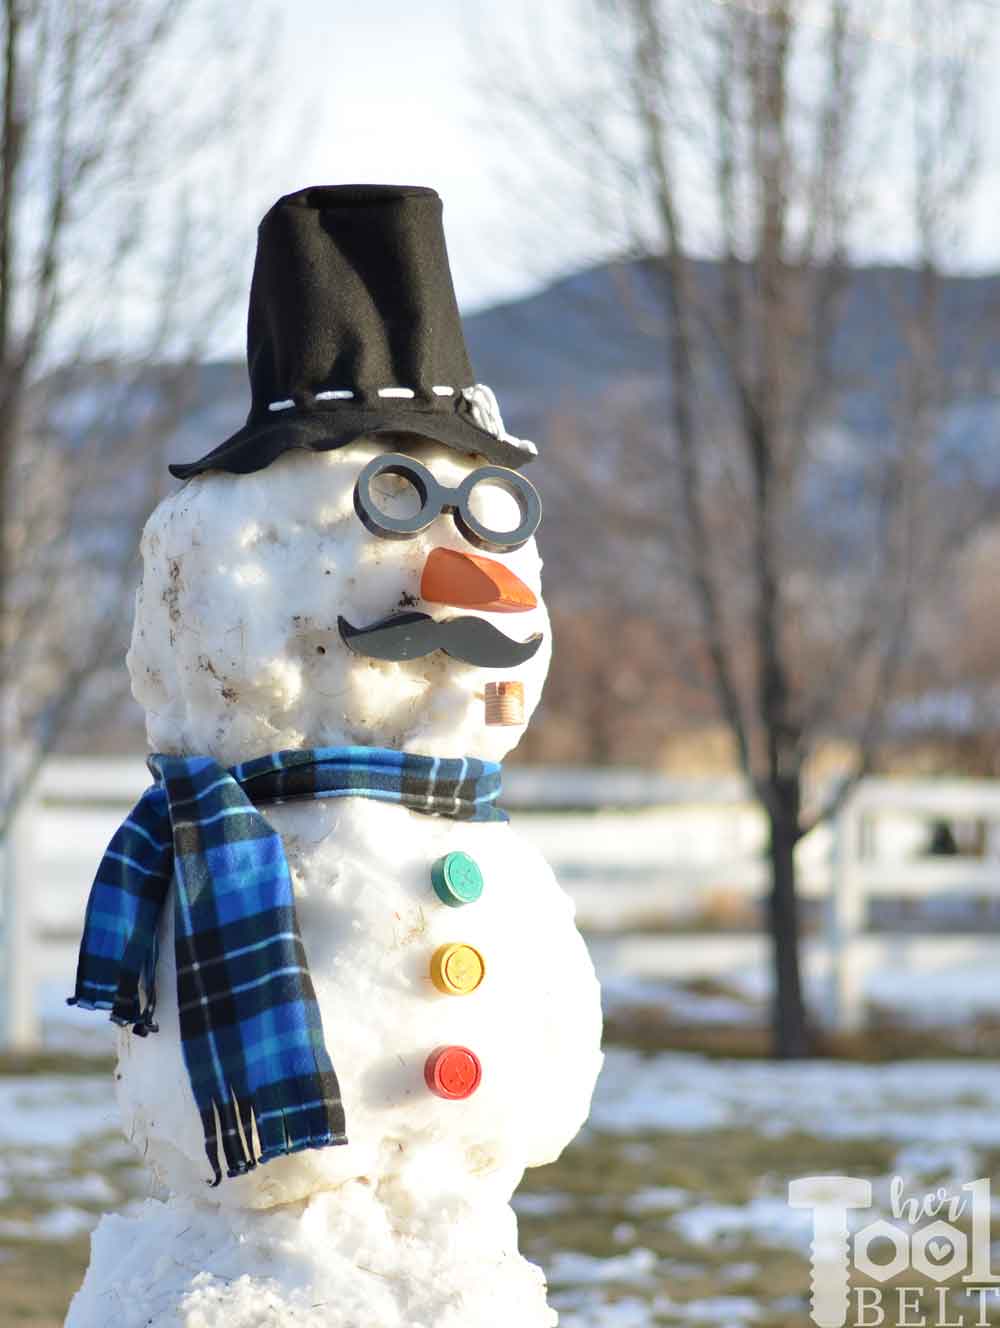
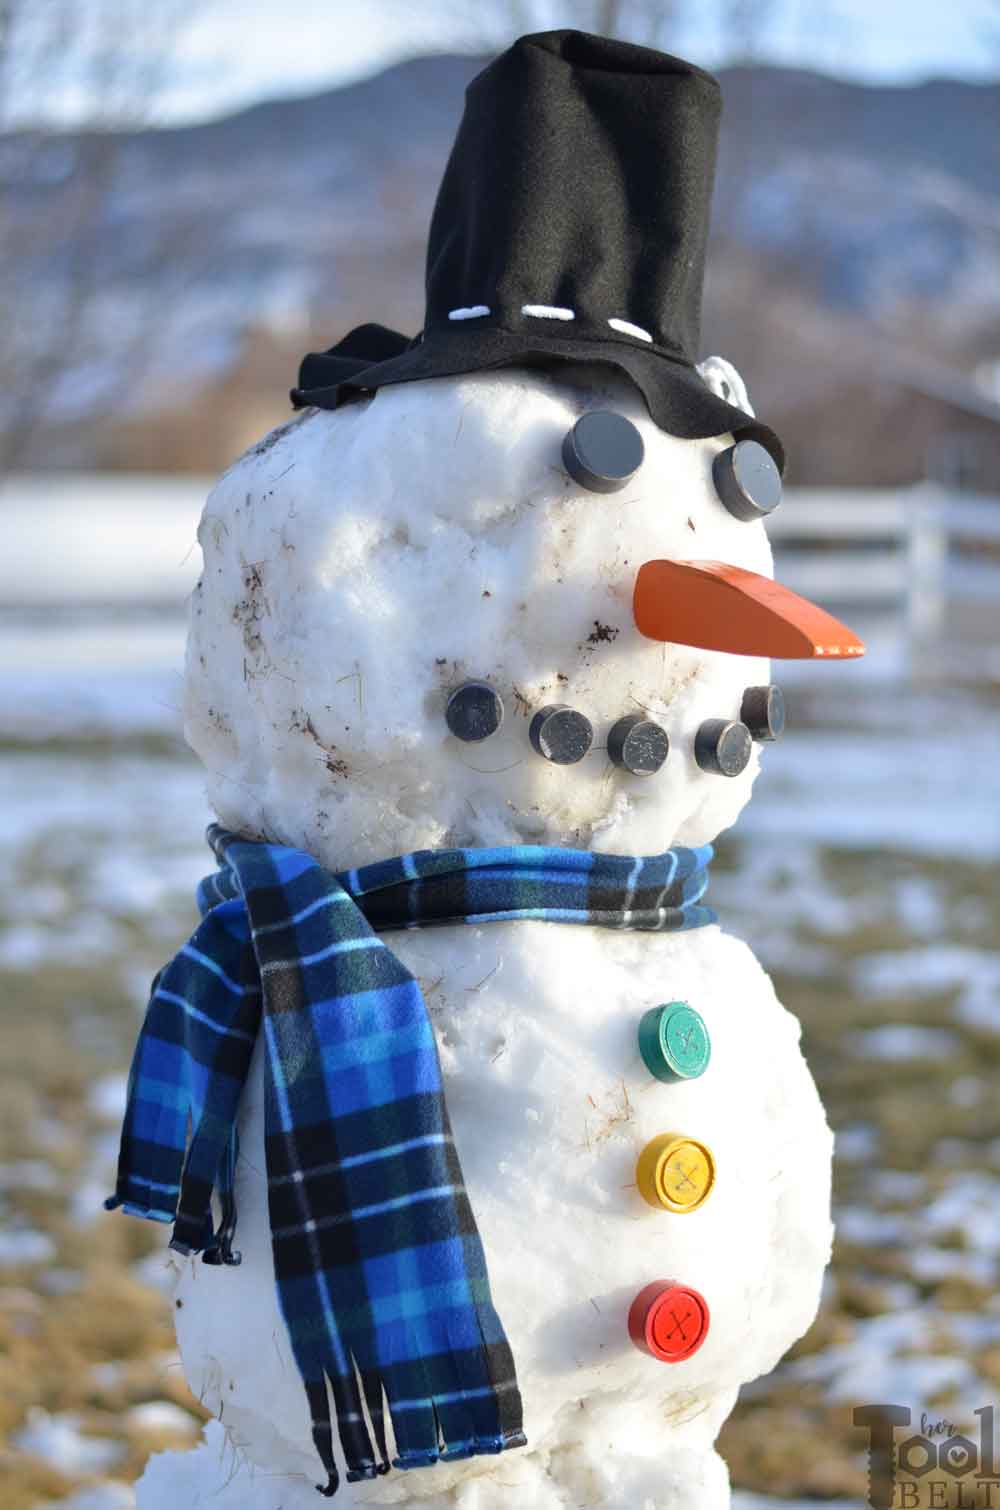
The snowflakes are falling softly on the ground. You grab your hat, coat and mittens and head outside to test the snow. Scooping up a handful of snow, you pat it in your hands… and it’s PERFECT! The snow packs into a nice ball, just right for a snowman, it’s not that powdery stuff that falls out of your hands. You start rolling the first ball, and the second, then the head. Time to adorn your new snowman. You run inside and realize you are freshly out of carrots and coal 🙁 . What now? Poor Frosty (or Olaf). This is me every-time the kids want to build a snowman. I decided it’s finally time to have a snowman kit on hand, because you never know when you’ll get that perfect snowstorm.

The fun thing about DIY’ing projects, is that you can customize. I thought it would be fun to have some glasses, mustache and corn-cob-pipe for optional accessories.
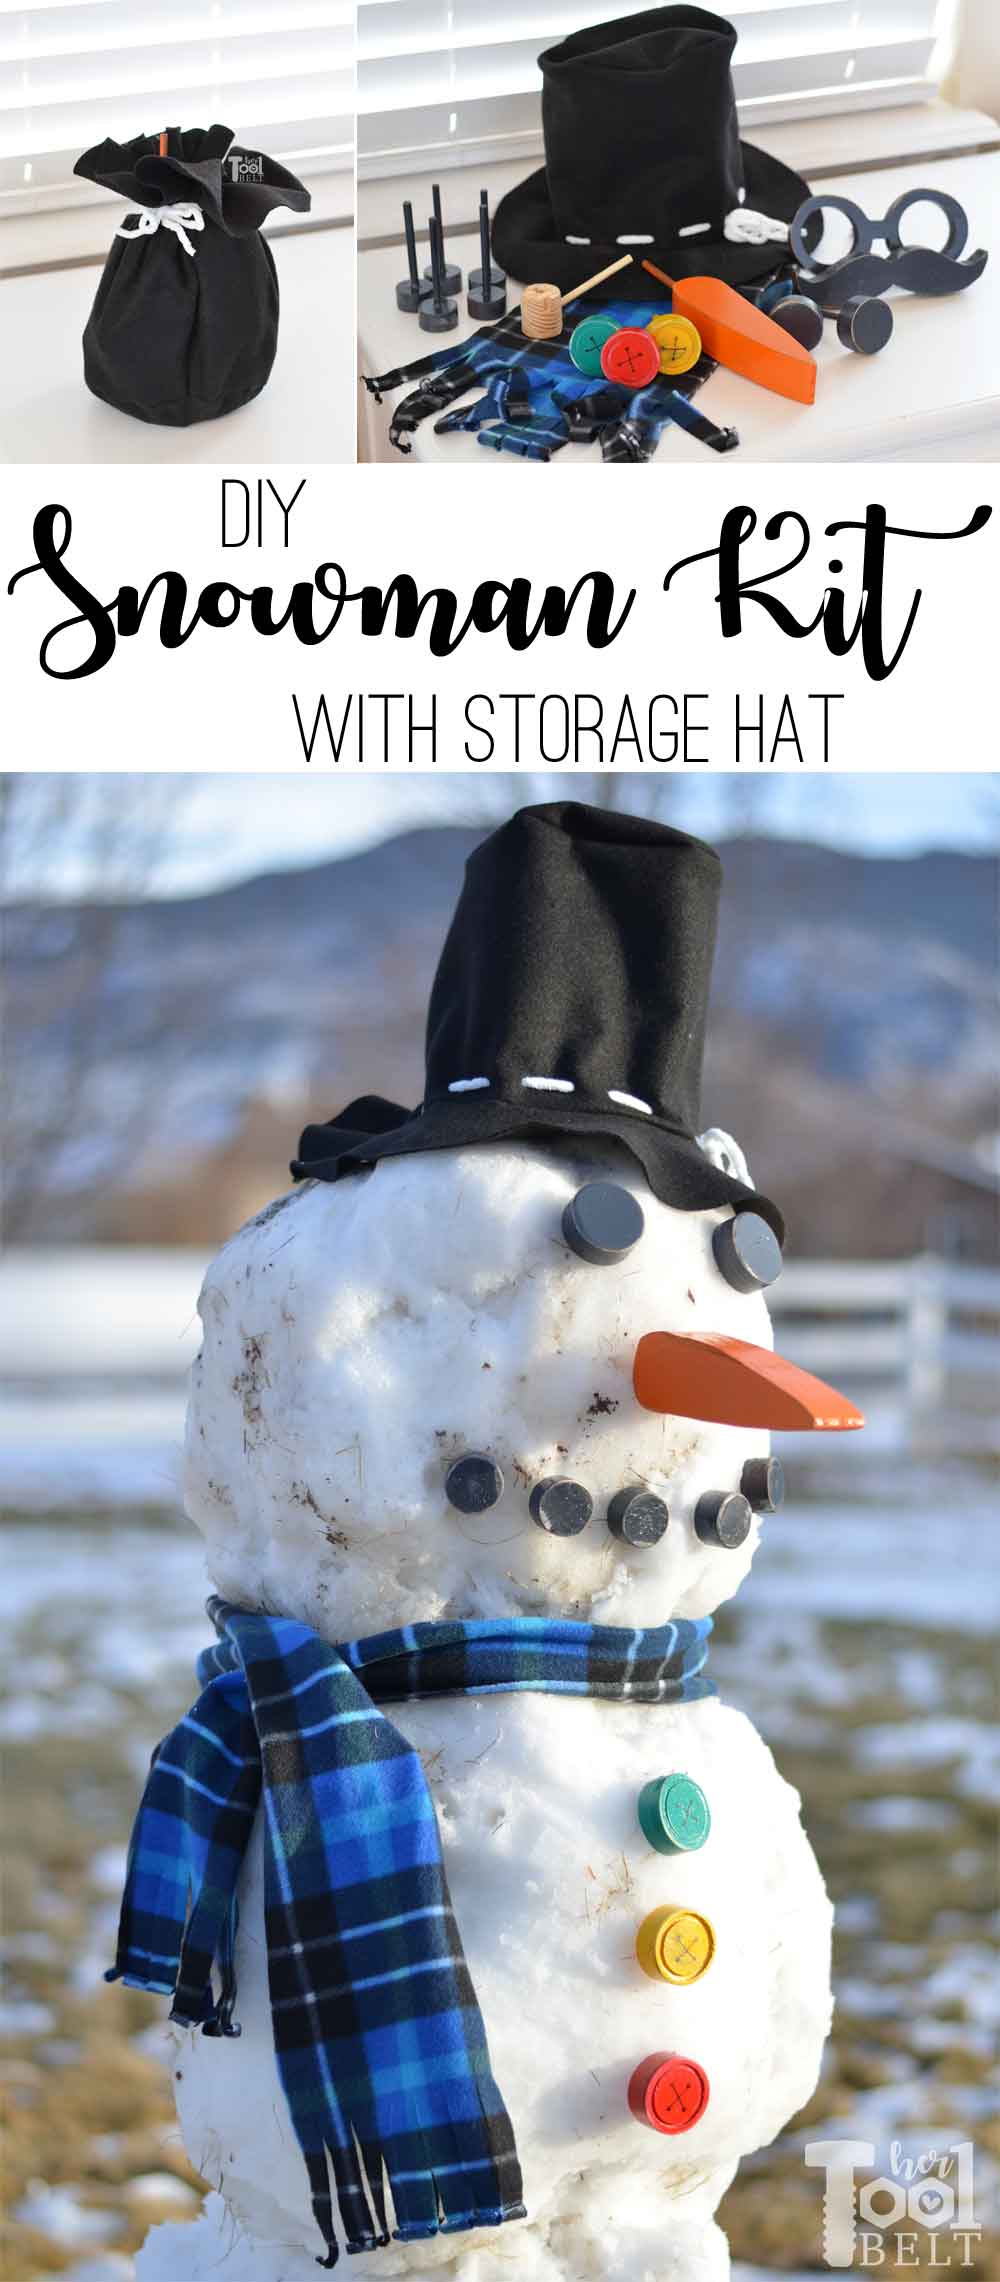
How to Make a DIY Snowman Kit
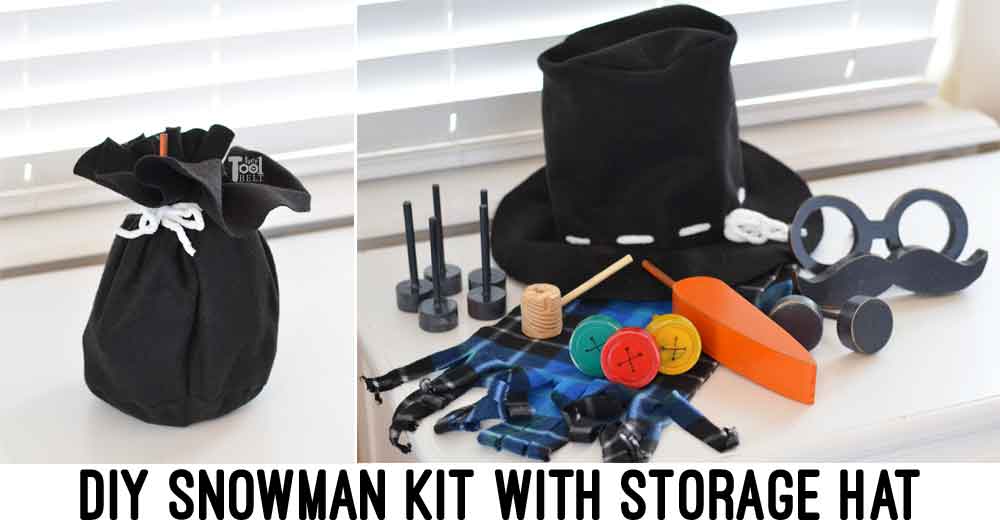
I didn’t want to have to store a bulky hat with this DIY snow man kit, so I made the hat also act as the storage bag.
Materials
- scrap 1x material (3/4″ thick) (or a 1×4 will work)
- scrap 2x material (1 1/2″ thick) (or a 2×4 will work)
- 1 – 1/4″ dowel (1 dowel will do a basic kit (eyes, nose, mouth, and buttons) if you do the optional accessories you’ll need 2 dowels)
- wood glue
- sandpaper
- paint (I used Rustoleum primer, Gray, Orange, Red, Yellow, Green)
- 1/4 yard of fleece for the scarf
- XX yard of black felt for the hat
- thread or hot glue for the hat
- 1 yard of string/yarn for the hat
- Free Pattern for hat, carrot nose, glasses, and mustache.
Tools Used
- Diablo Hole Saw Set
- Drill
- Sander or hand sand with sandpaper
- Band saw, jig saw or Scroll Saw(for nose, glasses and mustache)
- Sewing machine or hot glue gun
- Scissors
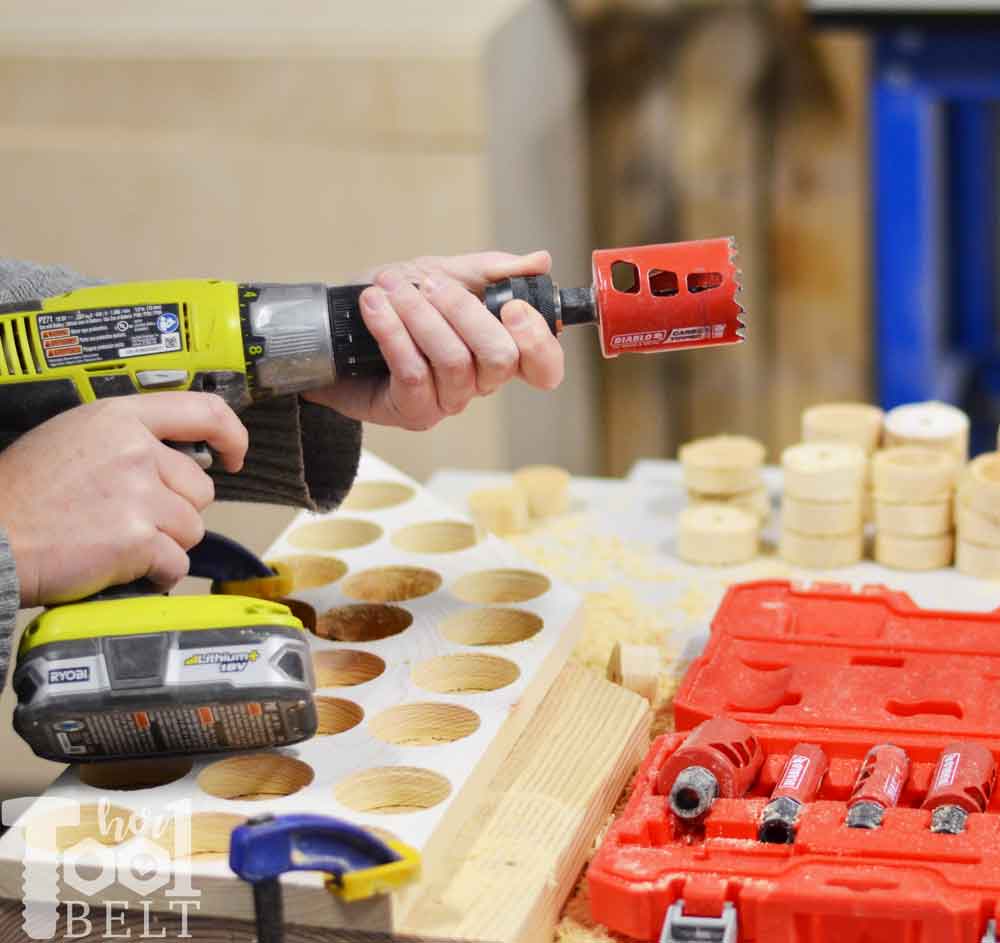
To cut all of the circles for this snowman kit I used a hole saw kit. A hole saw is an essential tool to have around for installing door knobs and dead bolts in doors. They are also useful for times you need larger diameter holes than standard drill bits can provide. Besides using hole saws for their normal uses, I’ve used them to make my pallet planter box for cascading flowers.

This DIY snowman kit is a great project to use up scrap wood and you’ll need a hole saw set. I used the 2″ and 1 3/4″ saw cups.
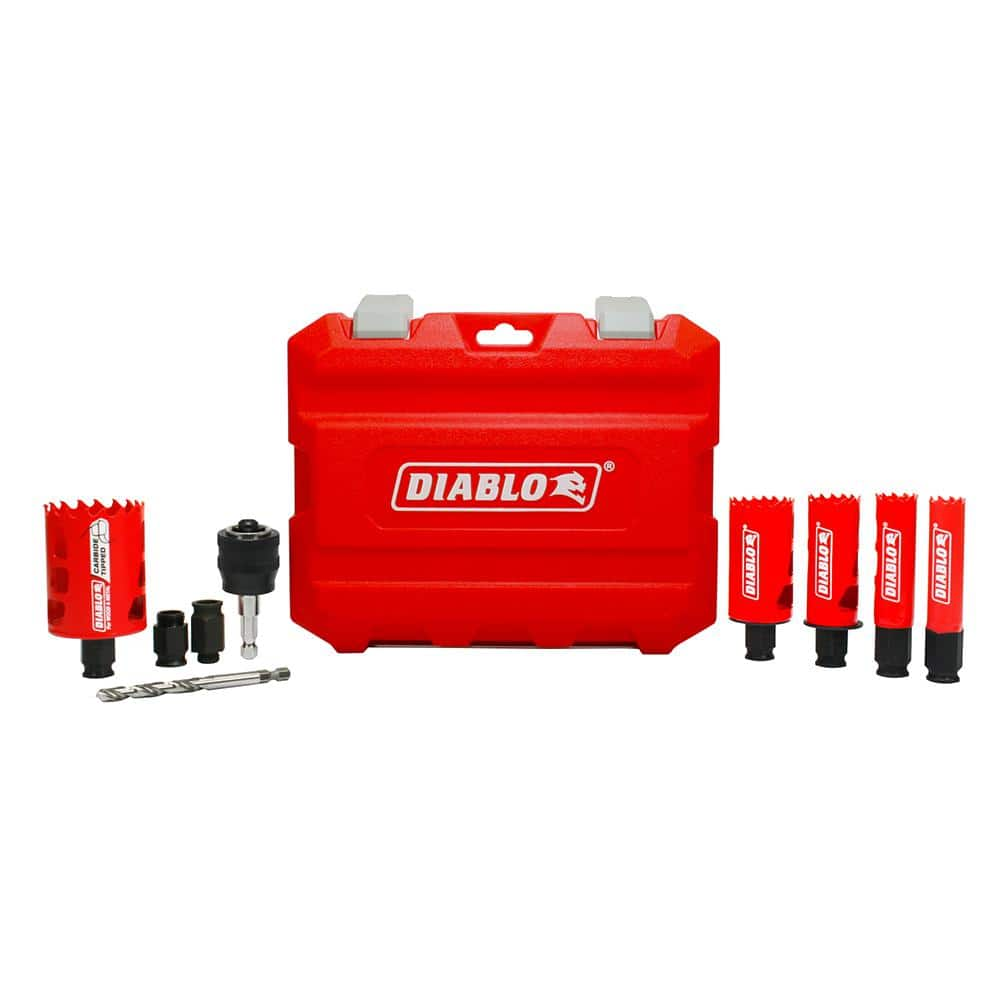
I’ve had 4 different sets of hole saws, and this Diablo set is by far my favorite. The saw teeth are carbide, so it’ll cut thru wood, plastic and metal. The very best feature about the Diablo set is the snap-lock mandrel. To change the saw cup size, all you have to do is pull back on the mandrel sleeve and the saw cup pops off, slide the new one on and it snaps into place. If you’ve used a traditional hole saw before, you’ll understand how cool this feature is!

Snowman Kit Cut List
- 2 Eyes – 2″ circles from 3/4″ material
- 3 Buttons – 2″ circles from 3/4″ material with 1 3/4″ detail
- 5 Mouth – 1 3/4″ circles from 3/4″ material
- 1 Carrot – from 1 1/2″ material
- 1/4″ dowel cut into 4″ pieces
- glasses cut from 3/4″ material – optional
- mustache cut from 3/4″ material – optional
- pipe – 1 3/4″ circle cut from 1 1/2″ material
- scarf – cut from fleece about 6-8″ wide and about 60″ long
- hat
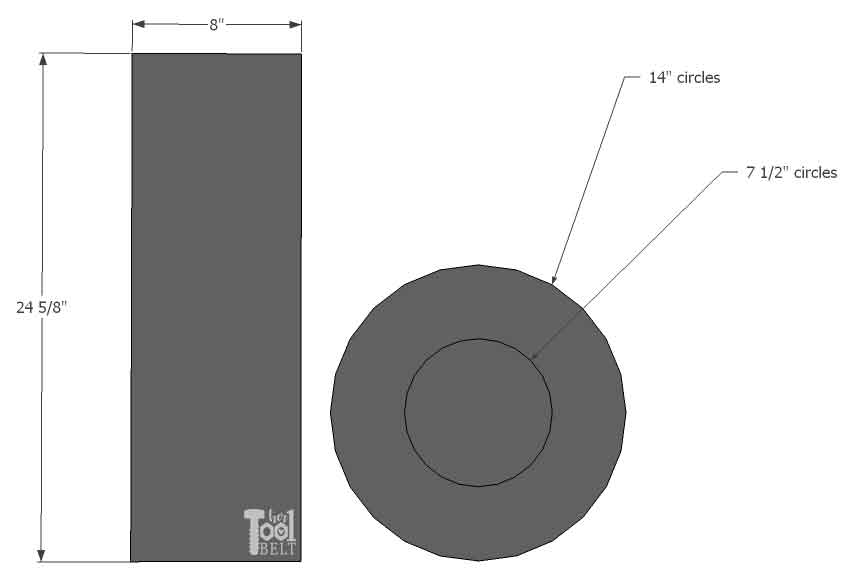
- felt 8″ x 24 5/8″
- felt 14″ circle with 7 1/2″ inner circle cut out (see pattern)
Step 1
Make the circles for the eyes, buttons and mouth.
Buttons – I wanted a little detail in the buttons. First I put the 1 3/4″ hole saw in the drill and scratched the 3/4″ wood surface making a shallow circle.
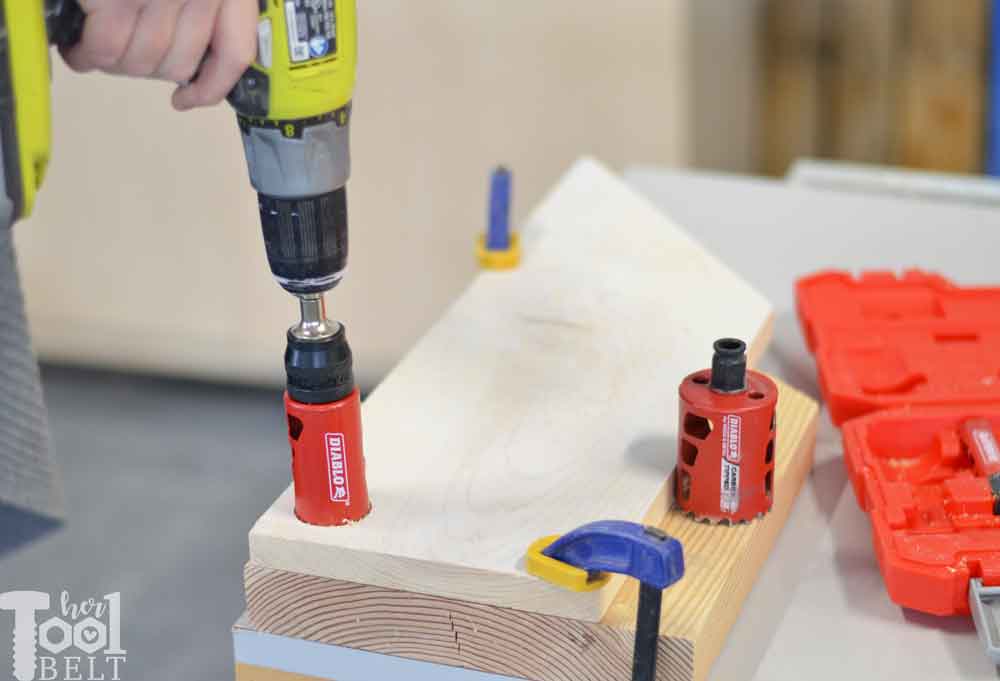
Shallow 1 3/4″ circle
Then I popped on the 2″ hole saw using the same center hole made by the drill bit and cut out 3 buttons.
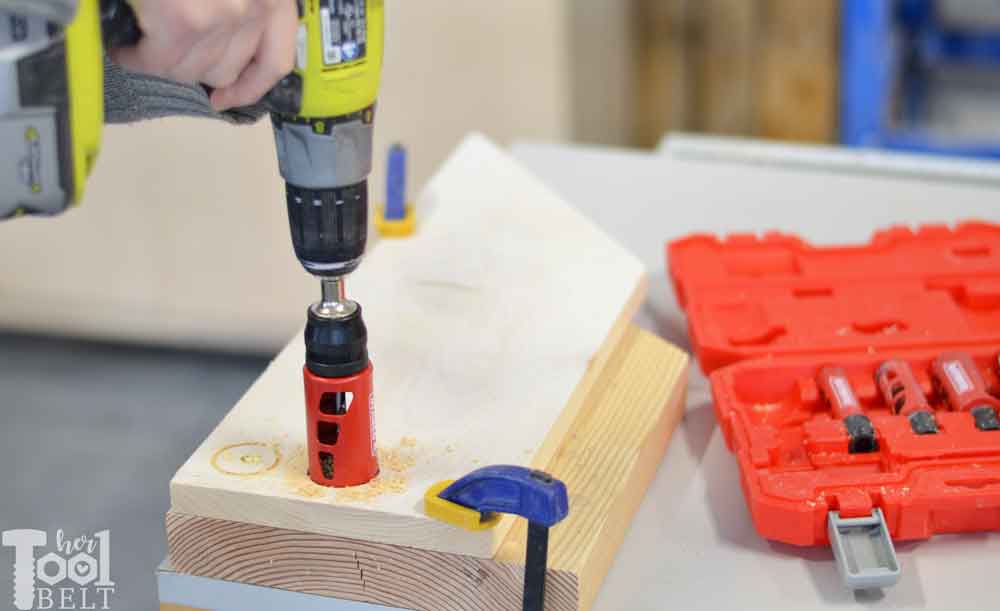
Eyes – Using the 2″ hole saw cut out 2 eyes from 3/4″ material.
Mouth – Using the 1 3/4″ hole saw cut out 5 mouth circles from 3/4″ material.
Pipe (optional) – Using the 1 3/4″ hole saw cut out a circle from 1 1/2″ material. Take the hole saw off of the drill bit and use the drill bit to drill a hole on the side of the pipe at an angle and about 1/2″ deep.
Sand all of the circle pieces as necessary.
Step 2
Print out pattern (make sure your printer settings are at 100% and not ‘fit to page’.) Align pattern using guide lines and tape together the pattern, then cut out each piece.
Nose – Trace nose on 2x material (1 1/2″ thick). Use a band saw, scroll saw or jig saw to cut it nose. Sand the nose as needed. Use the hole saw drill bit and drill a hole in the end of the carrot about 1/2″-1″ deep.
Glasses (optional) – cut out the glasses paper pattern, but don’t cut out the inside of the glasses. Trace the outside of the glasses on 3/4″ material (or thinner). Put the 2″ hole saw on the drill bit and use the cross-hairs in the glasses pattern to cut out the inner glasses circles. Cut out the rest of the glasses with a band saw, scroll saw or jig saw. Use the hole saw drill bit and drill a hole in the backside of the glasses bridge that is about 1/2″ deep.
Mustache (optional) – cut out the mustache paper pattern and trace onto 3/4″ material. Use a band saw, scroll saw or jig saw to cut out the mustache. Use the hole saw drill bit and drill a hole in the backside center of the mustache about 1/2″ deep.
Sand all of the pieces as necessary.
Step 3
Cut the 1/4″ dowel into about 4″ pieces. When gluing the circle pieces that have a thru hole, you’ll want to place them on plastic or something that won’t stick with wood glue. Dip the dowel pieces into about 1/2″ of wood glue and place a dowel in each circle, nose, or accessory. Let the wood glue fully dry.
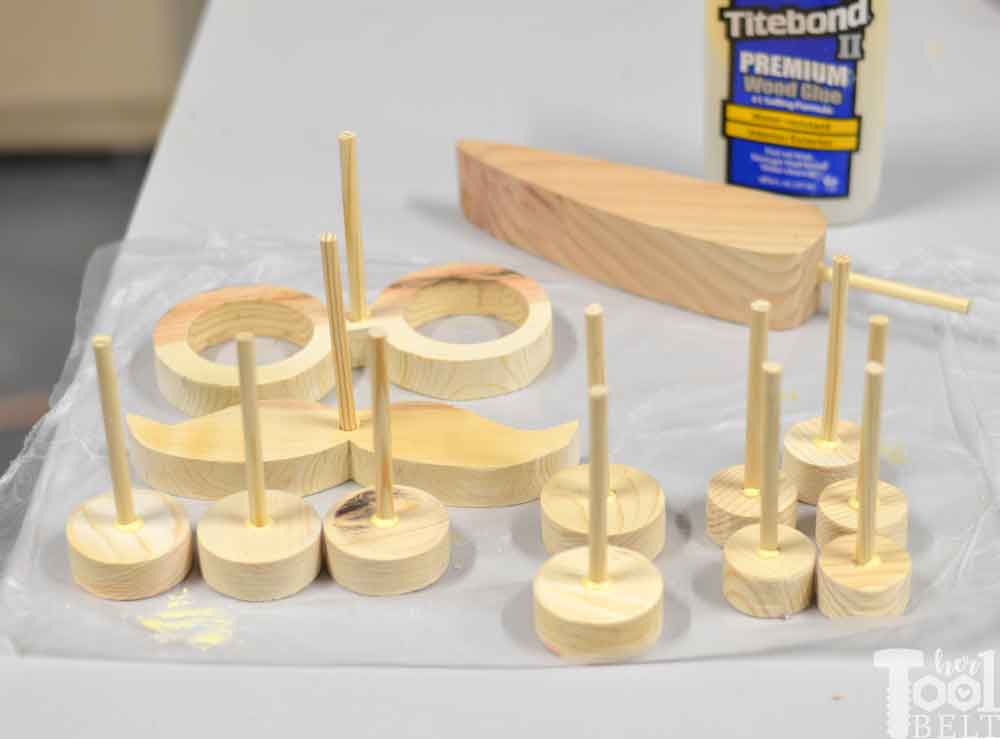
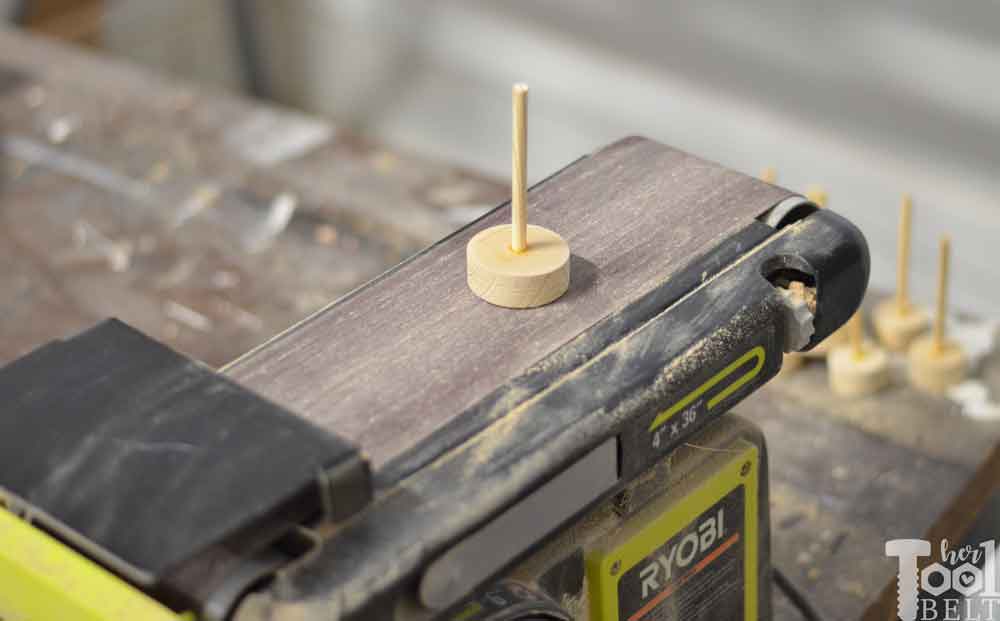
Once the glue has fully dried, sand all of the pieces smooth. (Sanding by hand will work too, I was making a bunch of kits as gifts, so the bench sander was a lifesaver.)
Prime and paint each of the wood pieces as necessary. These are the colors I used to paint my pieces:
- Eyes, Mouth, Glasses, Mustache – Rustoleum Deep Slate
- Buttons – Rustoleum Apple Red, Golden Sunset, Rich Jade
- Nose – Rustoluem Real Orange
After the paint fully dried, I used sandpaper to rough up the edges, only for looks.
Step 4
Time to tackle the material, a territory that I’m not particularly good at 🙂
Scarf – The scarf is super easy, cut some fleece in a 6″ to 8″ wide strip and as long as the material width (mine is about 60″). Cut 1/2″ fringes about 3″ long on the ends of the scarf.
Hat – There are better ways to make the black felt hat, but I wanted mine to have a draw string to store the snowman kit pieces and I didn’t want to waste felt cutting different sized circles for a proper hat. The felt I bought is 74″ wide and you’ll need about 1/2 yard, but can get a few hats out of it.
Cut a pieces of felt that is 8″ x 24 5/8″ and a circle that is 14″ in diameter, and cut out the center about 7 1/2″ diameter.
If you are making a bunch of kits like me, I bought 3 1/4 yards of felt and could get about 20 hats out of it.
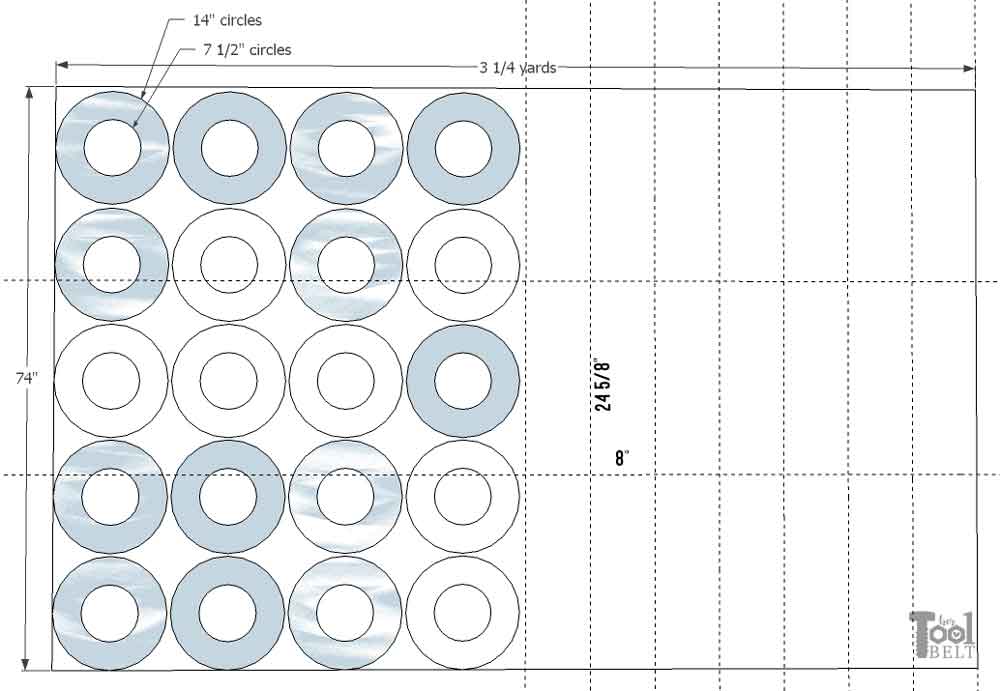
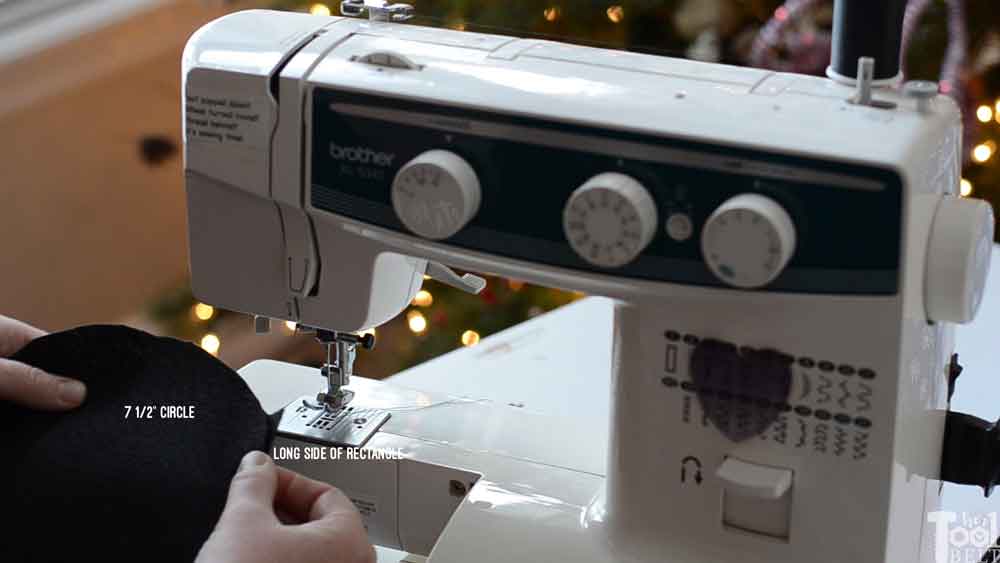
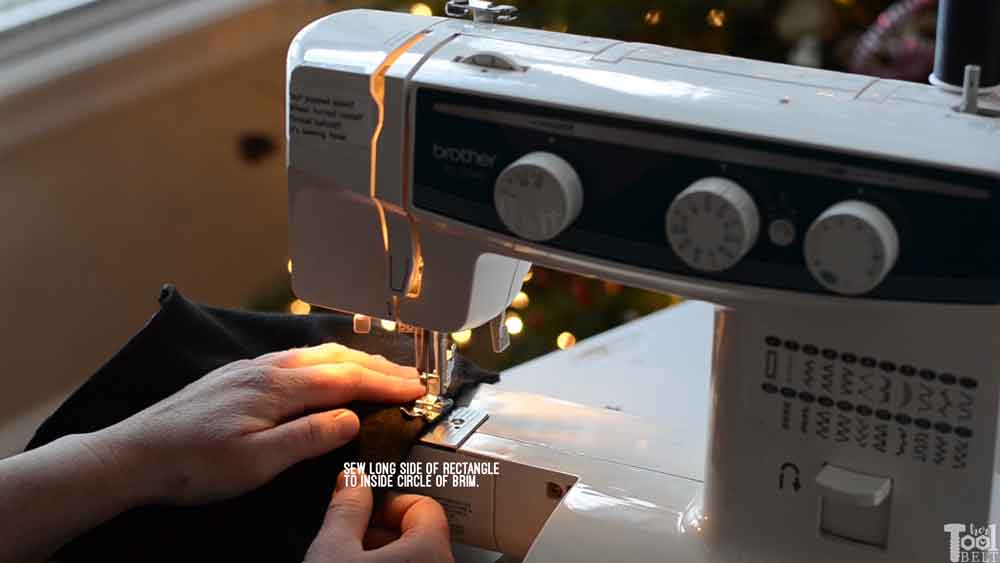
You can use either a sewing machine or hot glue to assemble the hats. Attach one of the 24 5/8″ felt sides to the the small 7 1/2″ circle circumference, you will have extra of the rectangle.
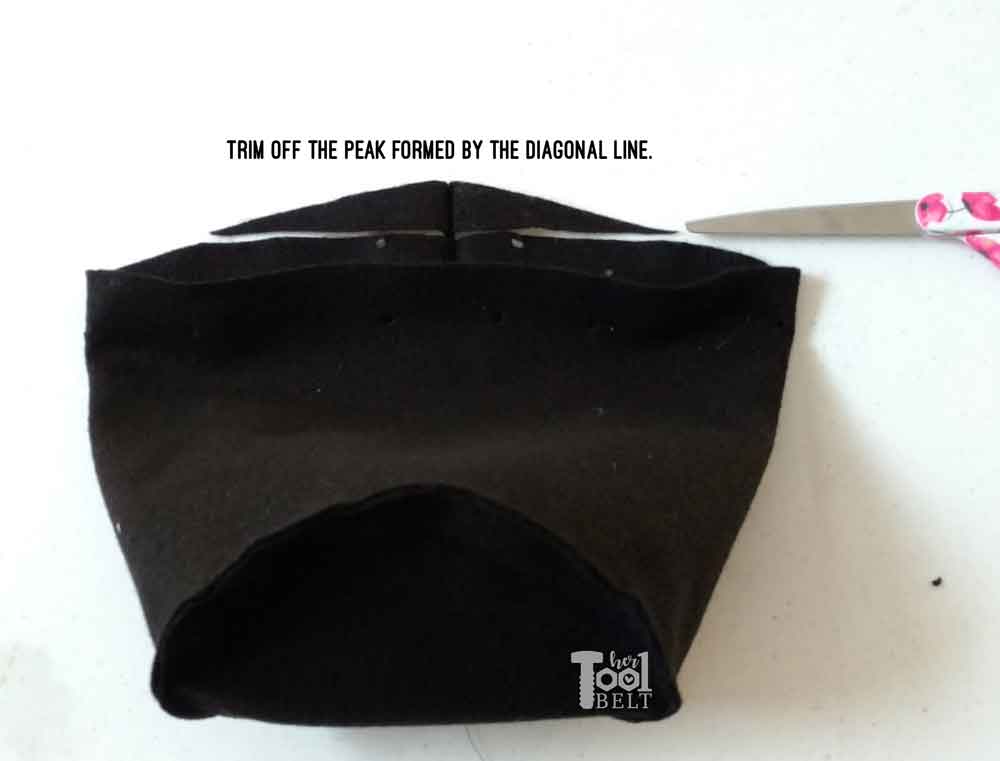
Match the unsewn rectangle corners together and sew on a slight diagonal to where the rectangle meets at the small circle side, cut off the excess felt.
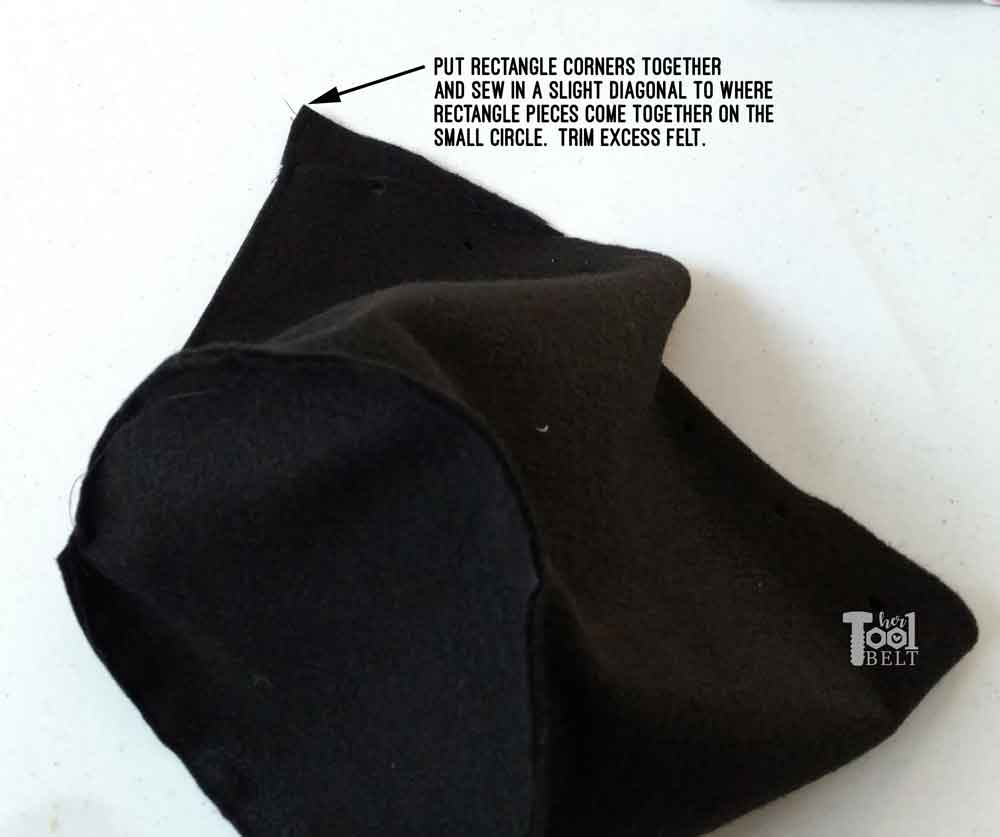
There will probably be a peak where the diagonal line came together, you can trim that off.
With the hat still inside out, place the brim inside the hat, large part down.
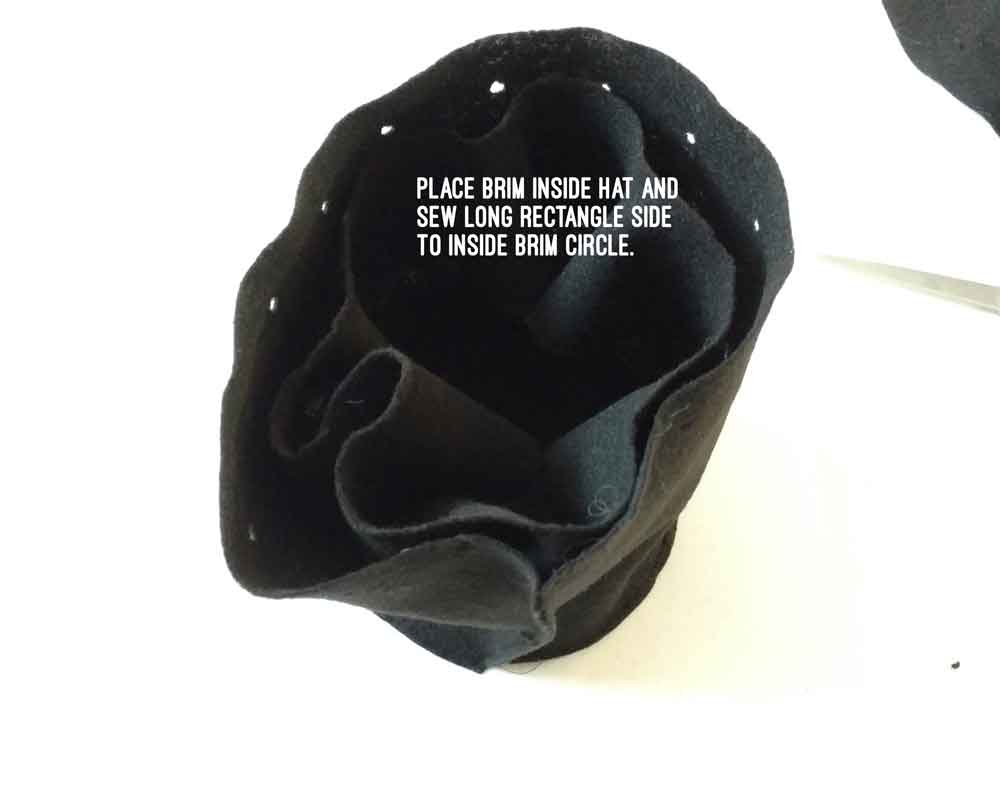
Attach the other long rectangle side to the inner circle of the hat brim.
Cut little slits in the felt just above the brim about every 1″-1 1/2″ to thread in the yarn or string. Thread the yarn or string through the slits and tie a bow.
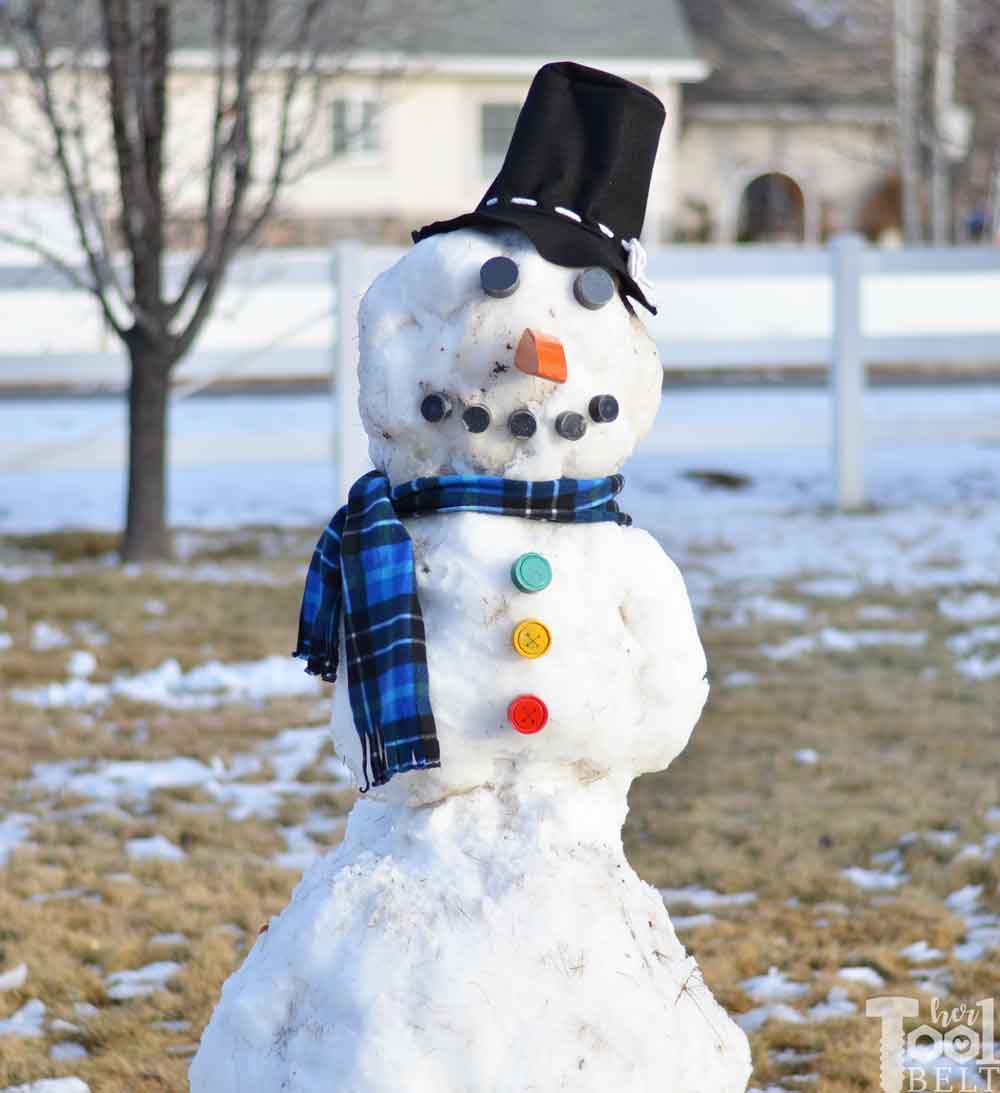
Bring on the snow!
Thanks for pinning!
“I acknowledge that The Home Depot is partnering with me to participate in the Tool Review Program. As a part of the Program, I am receiving compensation in the form of products and services, for the purpose of promoting The Home Depot. All expressed opinions and experiences are my own words. My post complies with the Word Of Mouth Marketing Association (WOMMA) Ethics Code and applicable Federal Trade Commission guidelines.”
Leave a Reply