• Home
  • Project Gallery
  • About me
    • Disclosure
    • Disclaimer
  • Blog

Her Tool Belt

DIY furniture plans, crafts, and home improvement tutorials to empower you!

  • Free Woodworking Plans
    • Bathroom Furniture
    • Bedroom Furniture
    • Entry
    • Family Room Furniture
    • Garage
    • Kitchen furniture
    • Laundry Room
    • Mudroom Furniture
    • Organization
    • Outdoor Furniture
  • Home Decor
    • Upcycle
  • Crafts
    • Holiday
  • Home Improvement
    • Cleaning
    • Fix IT
    • Paint
    • Tile
  • Tool Reviews
  • Tool Time Videos

Rustic Arrow

September 16, 2015 by Amy 15 Comments

Hi!  I’d love for you to follow me on Pinterest Her Tool Belt  and if you love instagram, you can keep up with me there too!

My friend Mindi My Love 2 Create put out a challenge to come up with a project that uses materials that are repurposed, and I had just the building supplies to accomplish that challenge!  It is an easy way to add a little farmhouse style.

Build an easy industrial and rustic arrow with these free plans. #repurposeitchallenge

A few years ago when this old and unsafe hay barn needed to come down, I begged my Dad to let me dismantle it to use for projects.

Remo's old barn

One of my favorite projects that I have used the hay barn for is my son’s barn wood bed.  Not long after I built the bed, my son decided that he really really wanted me to paint his walls and do a Star Wars room.   I was not about to give up the barn wood bed, so I’ve been trying to add elements that are kind of rustic and industrial to hopefully tie the two together.  Arrows have been quite the decorating rage for a couple of years.  It’s an easy item to make rustic and industrial.  This arrow can be made with the center open like a shadow box, or fill it with corrugated tin, wire mesh, wood slats, material, or anything you want.

Build an easy industrial and rustic arrow with reclaimed wood and old corrugated tin with these free plans.

How to Build a Rustic Arrow

Materials

  • 1 – 1″ x 3″ x 70″ (actual 3/4″ x 2 1/2″)
  • 1 1/4″ brad nails
  • wood glue
  • corrugated tin – optional

Build an easy industrial and rustic arrow with reclaimed wood and old corrugated tin with these free plans.

Cut List

  • 2 – 18 3/4″ long
  • 1 – 5 1/2″ long
  • 2 – 3″ long with a 40 deg miter on one the end
  • 2 – 9 1/8″ with a 40 deg miter on one end and 50 deg miter on the other.

Step 1

Add wood glue to the flat end of the 3″ piece, nail to the 18 3/4″ piece, flush with the end.  Repeat for other 18 3/4″ and 3″ pieces.

Build an easy industrial and rustic arrow with reclaimed wood and old corrugated tin with these free plans.

Step 2

Add wood glue to the ends of the 5 1/2″ pieces and glue between the other end of the 18 3/4″ pieces.  Secure with nails.

Build an easy industrial and rustic arrow with reclaimed wood and old corrugated tin with these free plans.

Step 3

Glue and nail the 9 1/8″ pieces together, and onto the 3″ pieces.

Build an easy industrial and rustic arrow with reclaimed wood and old corrugated tin with these free plans.

Build an easy industrial and rustic arrow with reclaimed wood and old corrugated tin with these free plans.

Let the glue dry.  Here’s the look of the open arrow.

Build an easy industrial and rustic arrow with reclaimed wood and old corrugated tin with these free plans. I decided to see what it would look like with old corrugated tin in the middle.  I traced the inside of the arrow onto the tin.

Build an easy industrial and rustic arrow with reclaimed wood and old corrugated tin with these free plans.I attempted to cut the tin with tin snips.  My snips are shaped a little funny, so I gave up and used an angle grinder with a cut off wheel…much faster and louder :-).  I had to trim the tin some, but got it to fit.
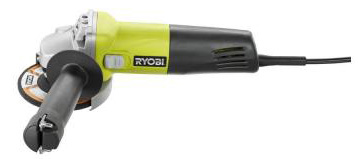
  ryobi- grinder

Build an easy industrial and rustic arrow with reclaimed wood and old corrugated tin with these free plans.
What’s your preference, tin or no tin?  Pin it!Build an easy industrial and rustic arrow with these free plans to add farmhouse style.

Make sure to check out the other projects on the Build It Blog hop – Repurpose it challenge #repurposeitchallenge

Mindi – My Love To Create

Mindi

Jaime – That’s My Letter

Jaime

Kathy – Crafty Chica

Kathy

Corey – Sawdust 2 Stitches

Corey-

Gail – My Repurposed Life

Gail-

Kim – The Kim Six Fix

Kim

Donna – Funky Junk Interiors

Donna

linked to: link parties, remodelaholic, savvy southern style, homestoriesAtoZ

Related

Filed Under: Free Woodworking Plans, Home Decor, Upcycle Tagged With: farmhouse, repurpose, rustic

Attention: Any do-it-yourself project involves risk of some sort. Your tools, materials, and skills will vary, as will the conditions at your work site. Hertoolbelt LLC will not assume any responsibility or liability for damages or losses sustained or incurred in the course of your project or in the use of the item you create. Always follow the manufacturer's operating instructions in the use of tools, check and follow your local building codes, and observe all commonly accepted safety precautions.

Comments

  1. Jaime Costiglio says

    September 16, 2015 at 6:26 am

    Amy it’s perfect and fits great above the bed (which I’ve been in love with since the day you posted it!). Nice work with the angle grinder, that is one tool I have never used.

    Reply
  2. Mindi says

    September 16, 2015 at 8:12 am

    I LOVE it Amy, and I vote tin all the way! So glad you told me how you cut it too, because I have some old tin that I plan to use soon, now I just need an angle grinder! Ha ha! Thanks so much for participating in the challenge! 🙂

    Reply
  3. Funky Junk Interiors says

    September 16, 2015 at 10:05 am

    I am totally an arrow, reclaimed wood AND metal fanatic. How did you know you tailor made a new project for ME? 😀

    Amy, this is so cool! And looks perfectly in your son’s bedroom! I think I need a gigantic one for a magnetic board! Whoo hoo!!

    Awesome project!

    Reply
  4. Kathy Cano-Murillo says

    September 16, 2015 at 10:49 am

    Wonderful tutorial, love the pattern and it came out so perfect! LOVE!

    Reply
  5. Kim (TheKimSixFix) says

    September 16, 2015 at 1:04 pm

    It is the perfect industrial/rustic mix! I love it above the bed. ( and I have a confession.. I once tried to build and arrow box like that I wasn’t bright enough to get the angles right.. so I applaud your mad math skills!)

    <3 K-

    Reply
    • Amy says

      September 16, 2015 at 9:23 pm

      While I have had my fair share of math classes, I have a confession too – Sketch up. SU makes it easy to draw things out and mess with the angles until it ‘looks’ right and you can measure what they are. 🙂 Or you can use some trigonometry, either way!

      Reply
  6. gail says

    September 16, 2015 at 5:32 pm

    I too (like Kim) struggle with angles, so I’m happy to have this tutorial Amy!

    I love the arrow both ways, but I have to say WITH the tin.

    beautiful job,
    pinning!
    gail

    Reply
    • Amy says

      September 16, 2015 at 9:20 pm

      Thanks Gail, sketch-up is really handy for planning out my angles.

      Reply
  7. Corey says

    September 16, 2015 at 5:41 pm

    Amy, another stellar job. I love combining metal and wood. Makes me want to use that corrugated metal in the house SOMEWHERE!

    Reply
  8. Cynthia Banessa says

    September 19, 2015 at 12:46 pm

    thank you for sharing!!! Love it!!!

    Reply

Trackbacks

  1. Dresser Re-purposed says:
    September 16, 2015 at 4:01 am

    […] from Her Tool Belt– Rustic Arrow / Mindi with  My Love 2 Create – Succulent Planter  /Donna from Funky Junk Interiors– […]

    Reply
  2. Dressing Table Repurposed Desk - My Repurposed Life™ says:
    September 16, 2015 at 8:19 am

    […] Rustic Arrow from Her Tool Belt […]

    Reply
  3. Reclaimed wood cutting board Apple Farm trayFunky Junk Interiors says:
    September 16, 2015 at 9:31 am

    […] Her Tool Belt […]

    Reply
  4. Build It Blog Hop: DIY Jewelry Holder | Crafty Chica says:
    September 16, 2015 at 10:27 am

    […] HerToolBelt: Rustic Arrow […]

    Reply
  5. Best of the Weekend | Hello Little Home says:
    September 25, 2015 at 6:01 pm

    […] Rustic Arrow from Her Tool Belt […]

    Reply

Leave a Reply Cancel reply

Your email address will not be published. Required fields are marked *

This site uses Akismet to reduce spam. Learn how your comment data is processed.

Search Her Tool Belt

Follow Me!

  • Bloglovin
  • Email
  • Facebook
  • Google+
  • Instagram
  • Pinterest
  • RSS
  • Twitter
  • YouTube

Top Posts & Pages

Custom Drill Storage and Charge Station - Easy
$5 Blanket Ladder
Cordless Drill Storage - Charging Station
Pallet Planter Box For Cascading Flowers
King X Barn Door Farmhouse Bed Plans
Double X Console Table Plans
12 Brilliant Tool Organization Ideas
2x4 Console Table

Check out more projects

Copyright

Thank you for wanting to share my work! No need for my permission to pin my work or to feature 1 or 2 pictures with full watermarks intact that link back to the original project. Please do NOT copy tutorials.

Disclosure & Privacy Policy

Disclaimer

Copyright © 2021 · Magazine Pro Theme on Genesis Framework · WordPress · Log in

This website uses cookies to improve your experience. We'll assume you're ok with this, but you can opt-out if you wish.Accept Read More
Privacy & Cookies Policy
Necessary Always Enabled