• Home
  • Project Gallery
  • About me
    • Disclosure
    • Disclaimer
  • Blog

Her Tool Belt

DIY furniture plans, crafts, and home improvement tutorials to empower you!

  • Free Woodworking Plans
    • Bathroom Furniture
    • Bedroom Furniture
    • Entry
    • Family Room Furniture
    • Garage
    • Kitchen furniture
    • Laundry Room
    • Mudroom Furniture
    • Organization
    • Outdoor Furniture
  • Home Decor
    • Upcycle
  • Crafts
    • Holiday
  • Home Improvement
    • Cleaning
    • Fix IT
    • Paint
    • Tile
  • Tool Reviews
  • Tool Time Videos

Rustic Christmas Tree

November 17, 2014 by Amy 32 Comments

Hi, I’m excited to be part of this 18 Easy Build Christmas Projects using Ryobi tools blog hop!  I sure do love my Ryobi tools, they make up a majority of my tools.  I thought it would be fun to make a rustic Christmas Tree decoration this year.  This is a fairly easy project, a bunch of cuts at the  same angles create the chevron tree shape.

An easy way to add natural elements into your Christmas decor, build a rustic Christmas Tree from pallets or barn wood.

How to Build a Rustic Christmas Tree

This post contains some affiliate links for your convenience. Click here to read my full disclosure policy.

You’ll need:

  • barn wood or pallet slats
  • 1 x 4 x 8′ (actual 3/4″ x 3 1/2″)
  • wood glue
  • brad nails, length depends on the thickness of your wood.
  • 2″ brad nails

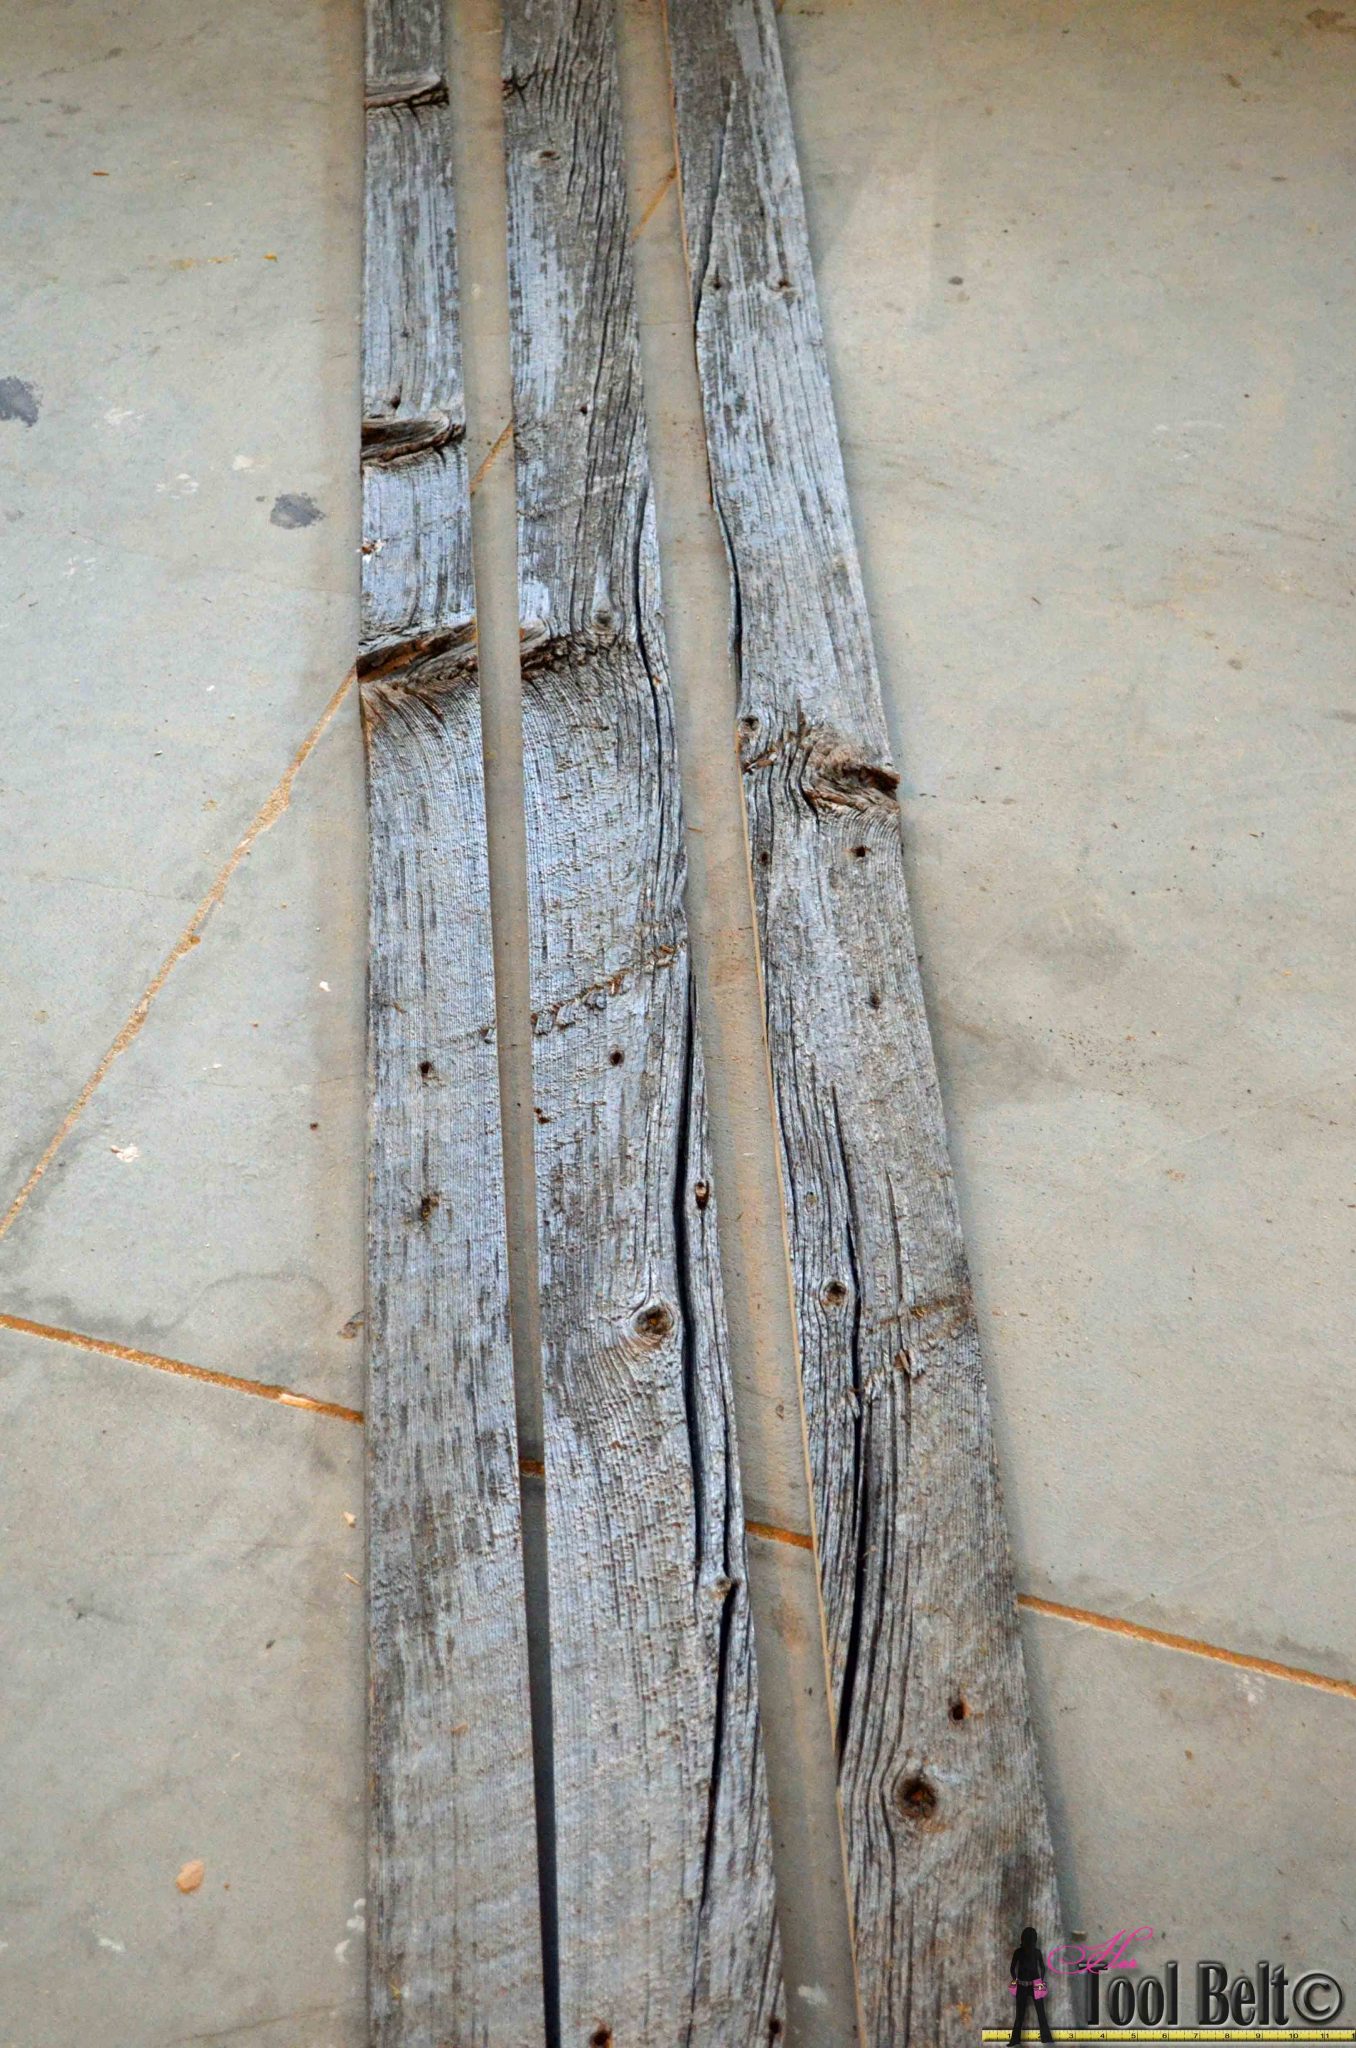
You can easily build this tree out of old barn wood or weathered pallets will work great too.  I used barn wood from the same barn that I made my son’s cool bed from.

An easy way to add natural elements into your Christmas decor, build a rustic Christmas Tree from pallets or barn wood.

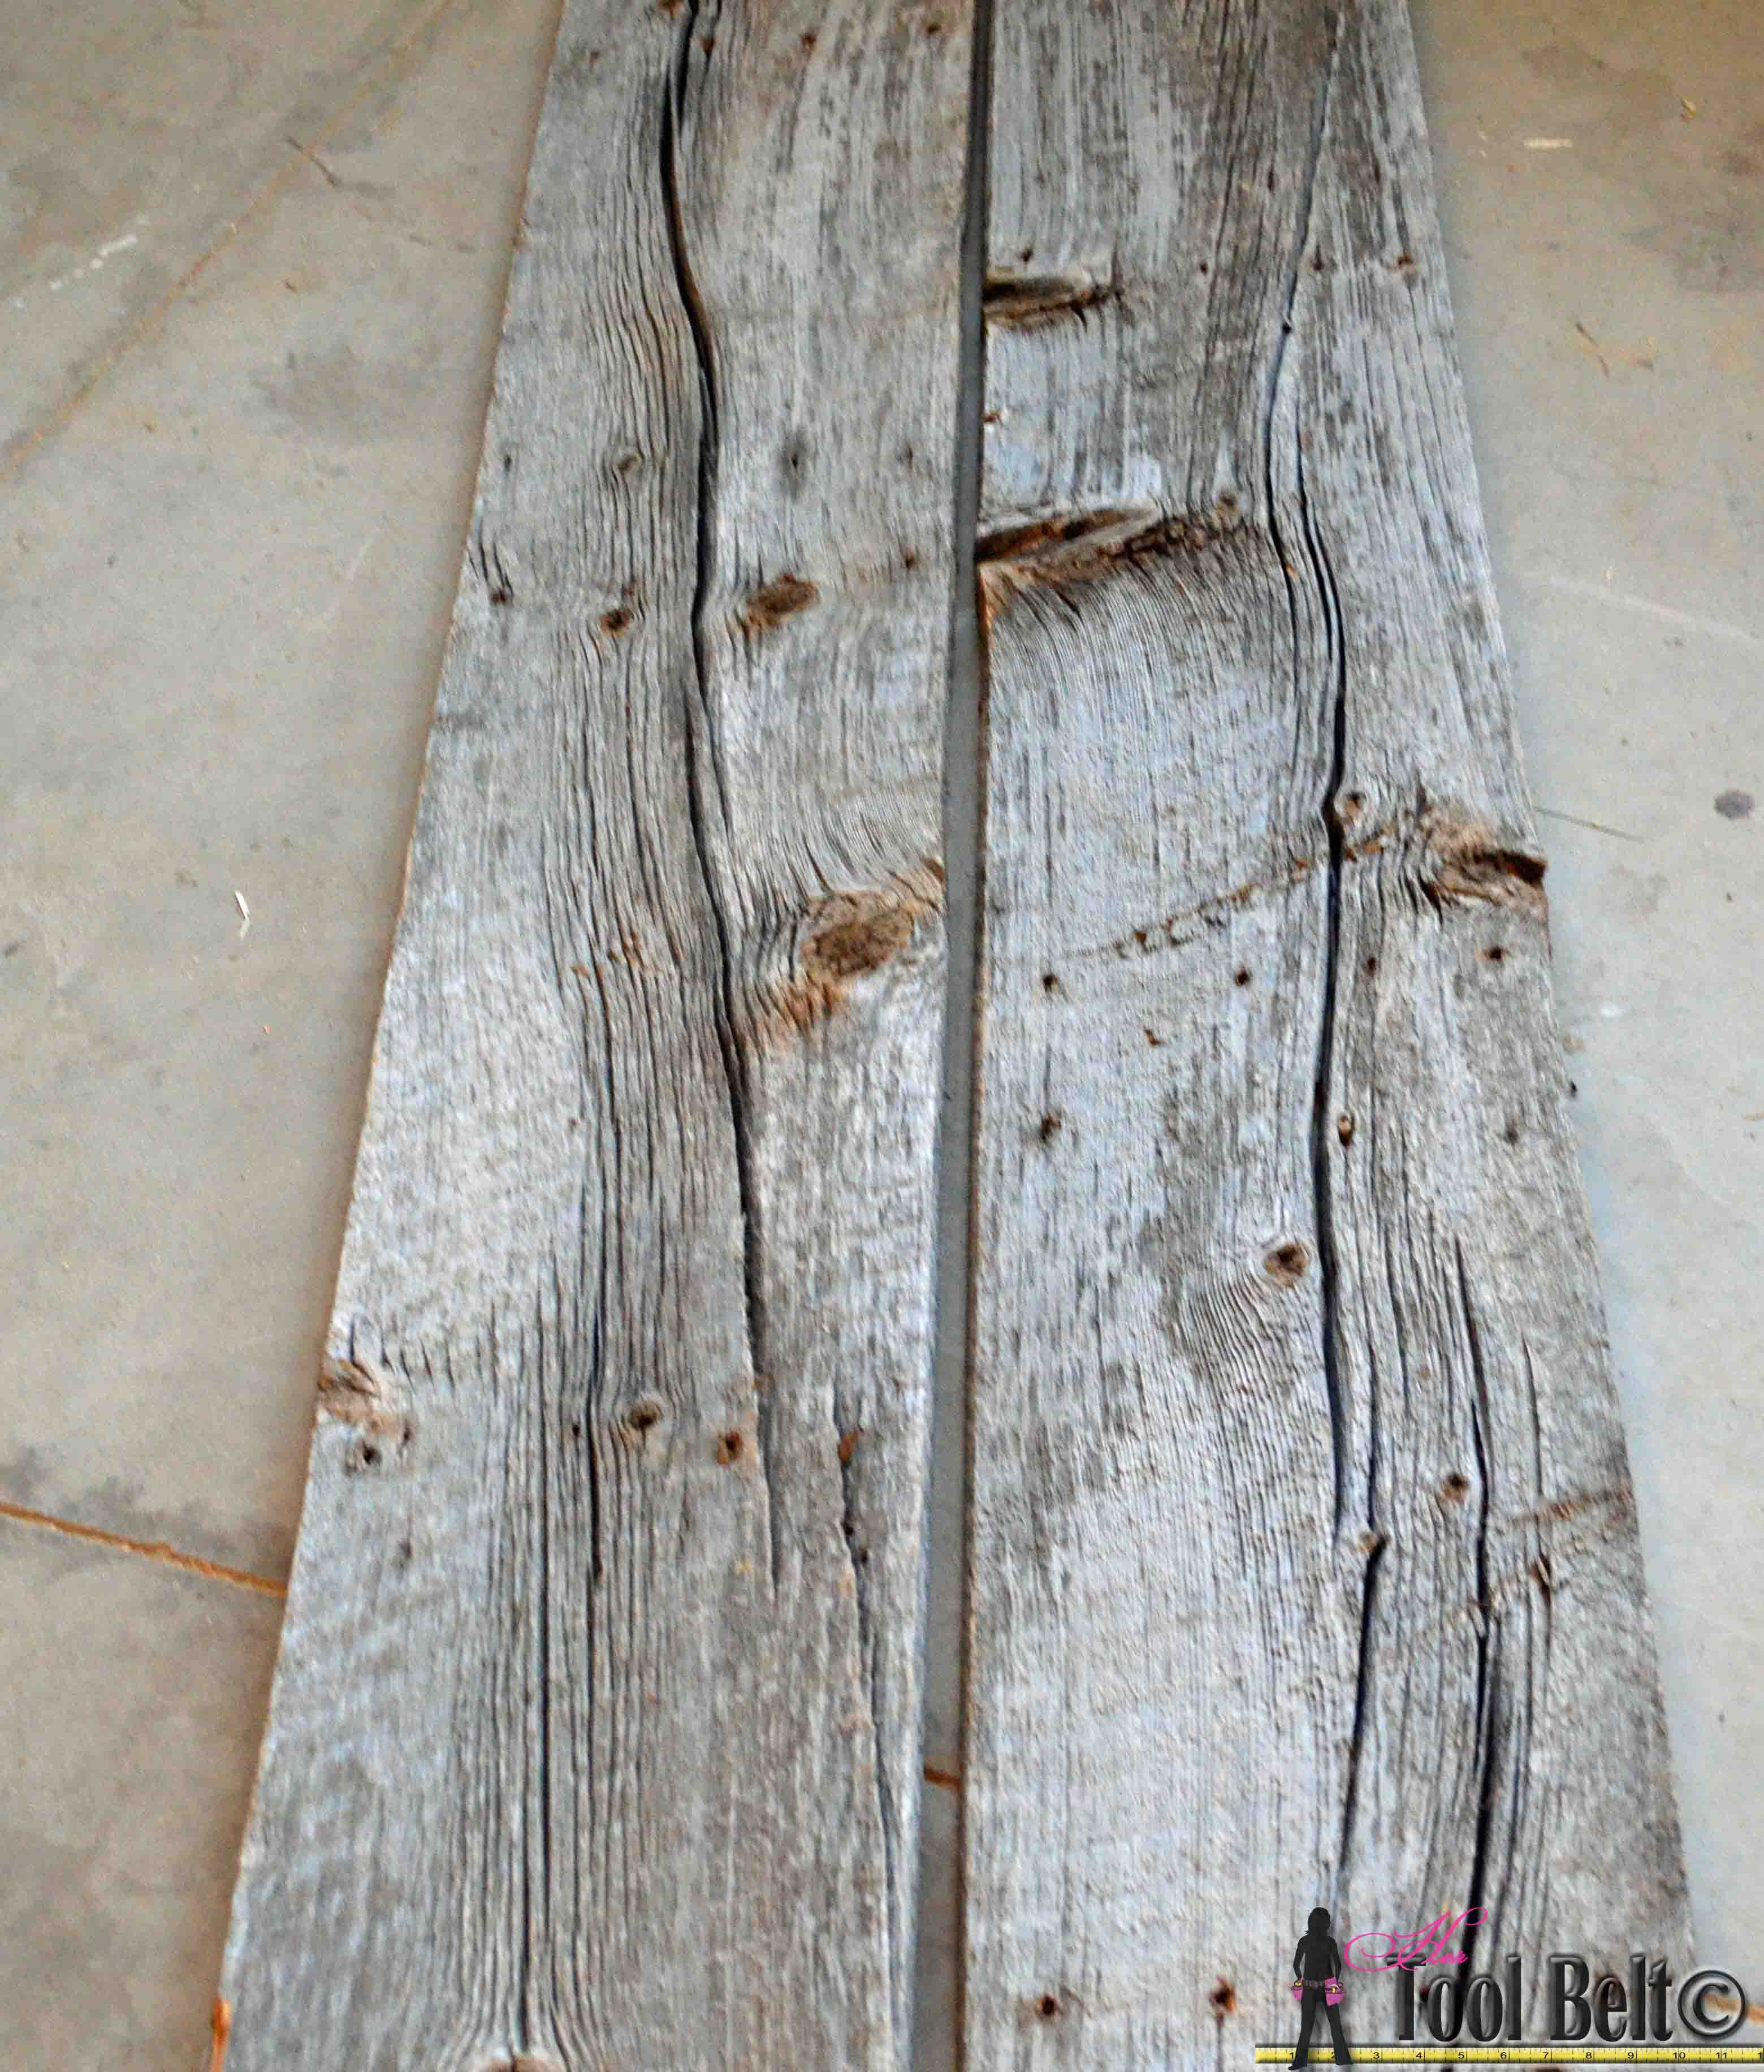
I ripped the boards into 4″ boards and 3″ boards, if you use pallet slats, you probably won’t have to rip the boards.

An easy way to add natural elements into your Christmas decor, build a rustic Christmas Tree from pallets or barn wood.

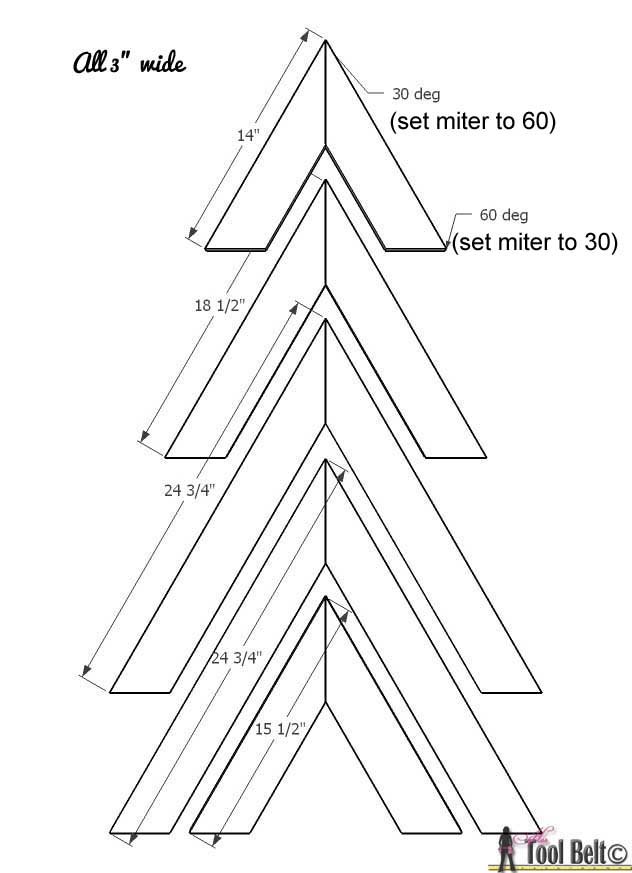
Now it’s time to make the miter cuts.  For the 1st layer of wood, the pieces are all 4″ wide.  Make 2 of each cut.

rustic christmas tree-1st layer dimensions 4in corrected

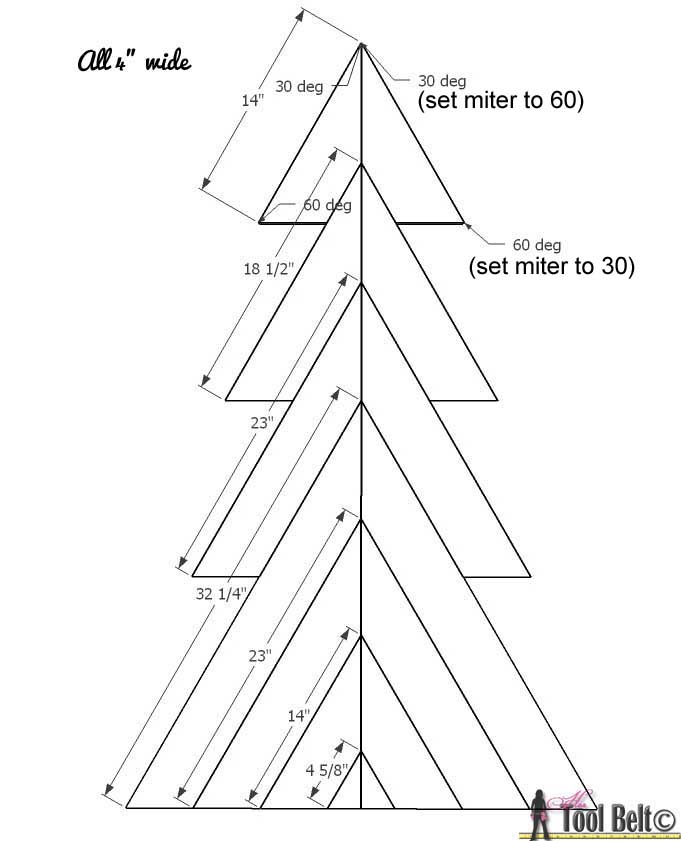
I used my Ryobi sliding compound miter saw to make the 60 deg angles (set at 30 deg).  An easy way to add natural elements into your Christmas decor, build a rustic Christmas Tree from pallets or barn wood.
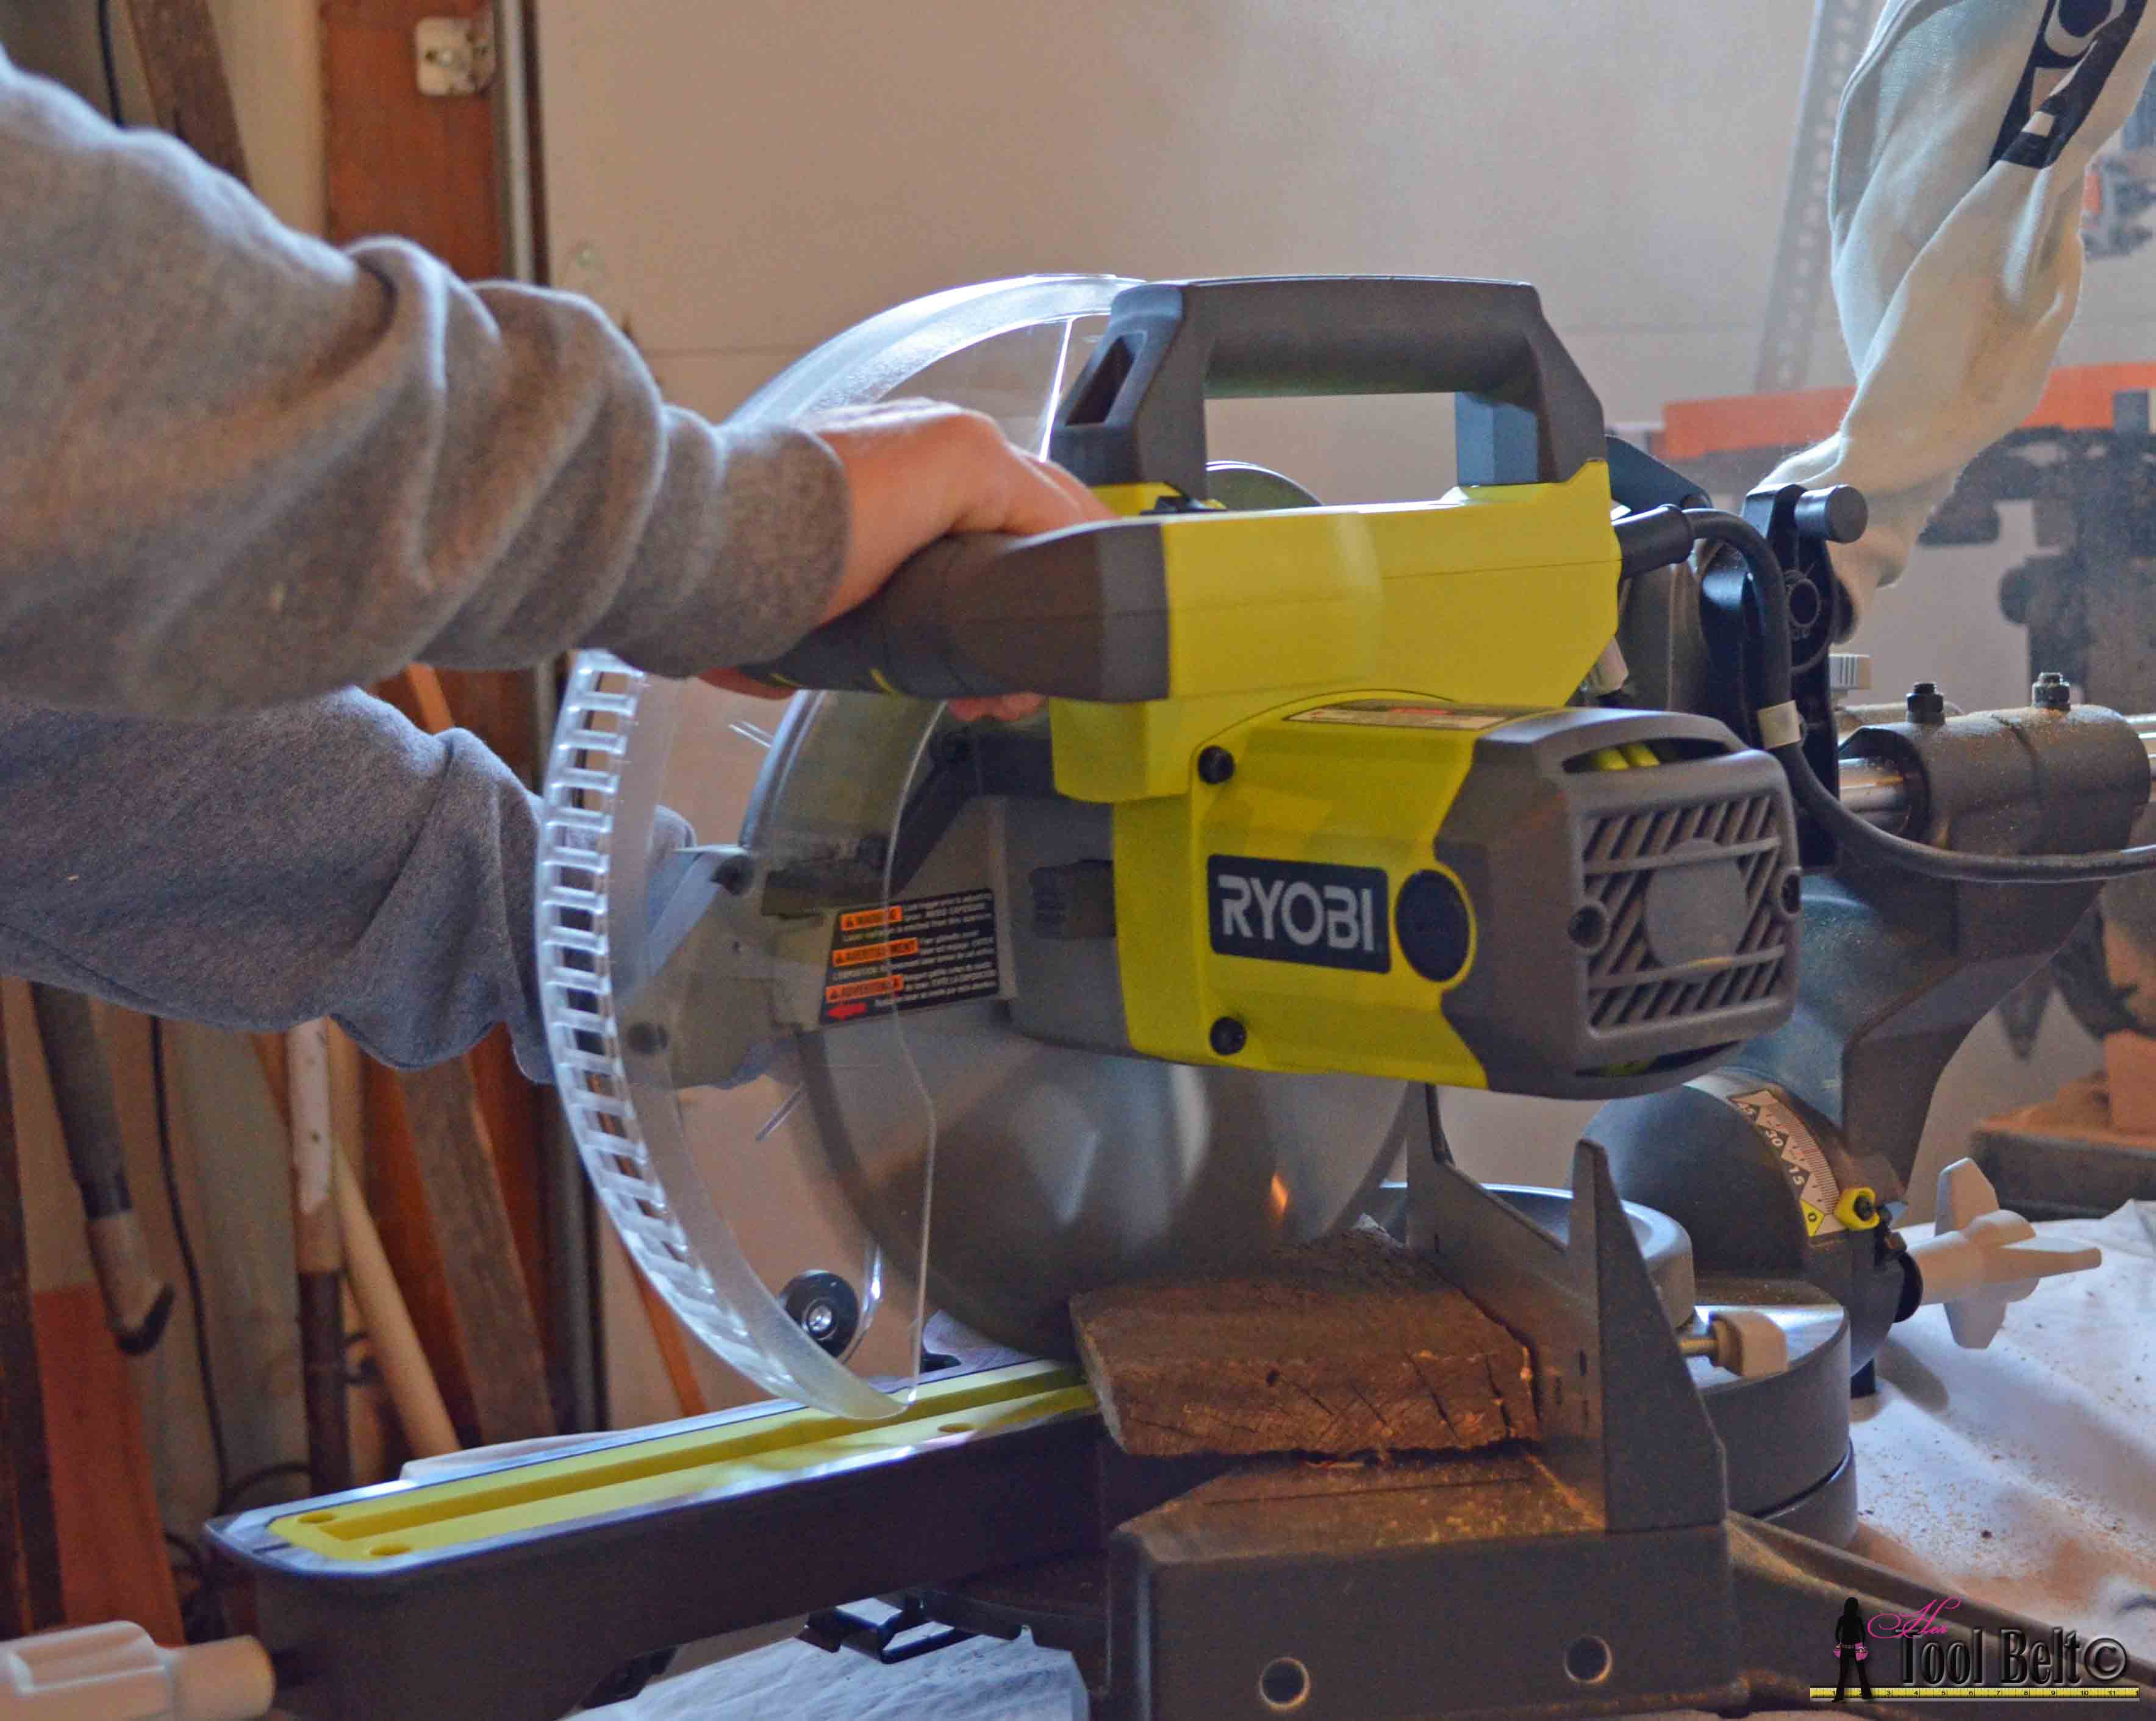
I used the table saw to make the 30 deg angles, it was a little easier that way, having each saw set up at an angle.  30 deg cuts

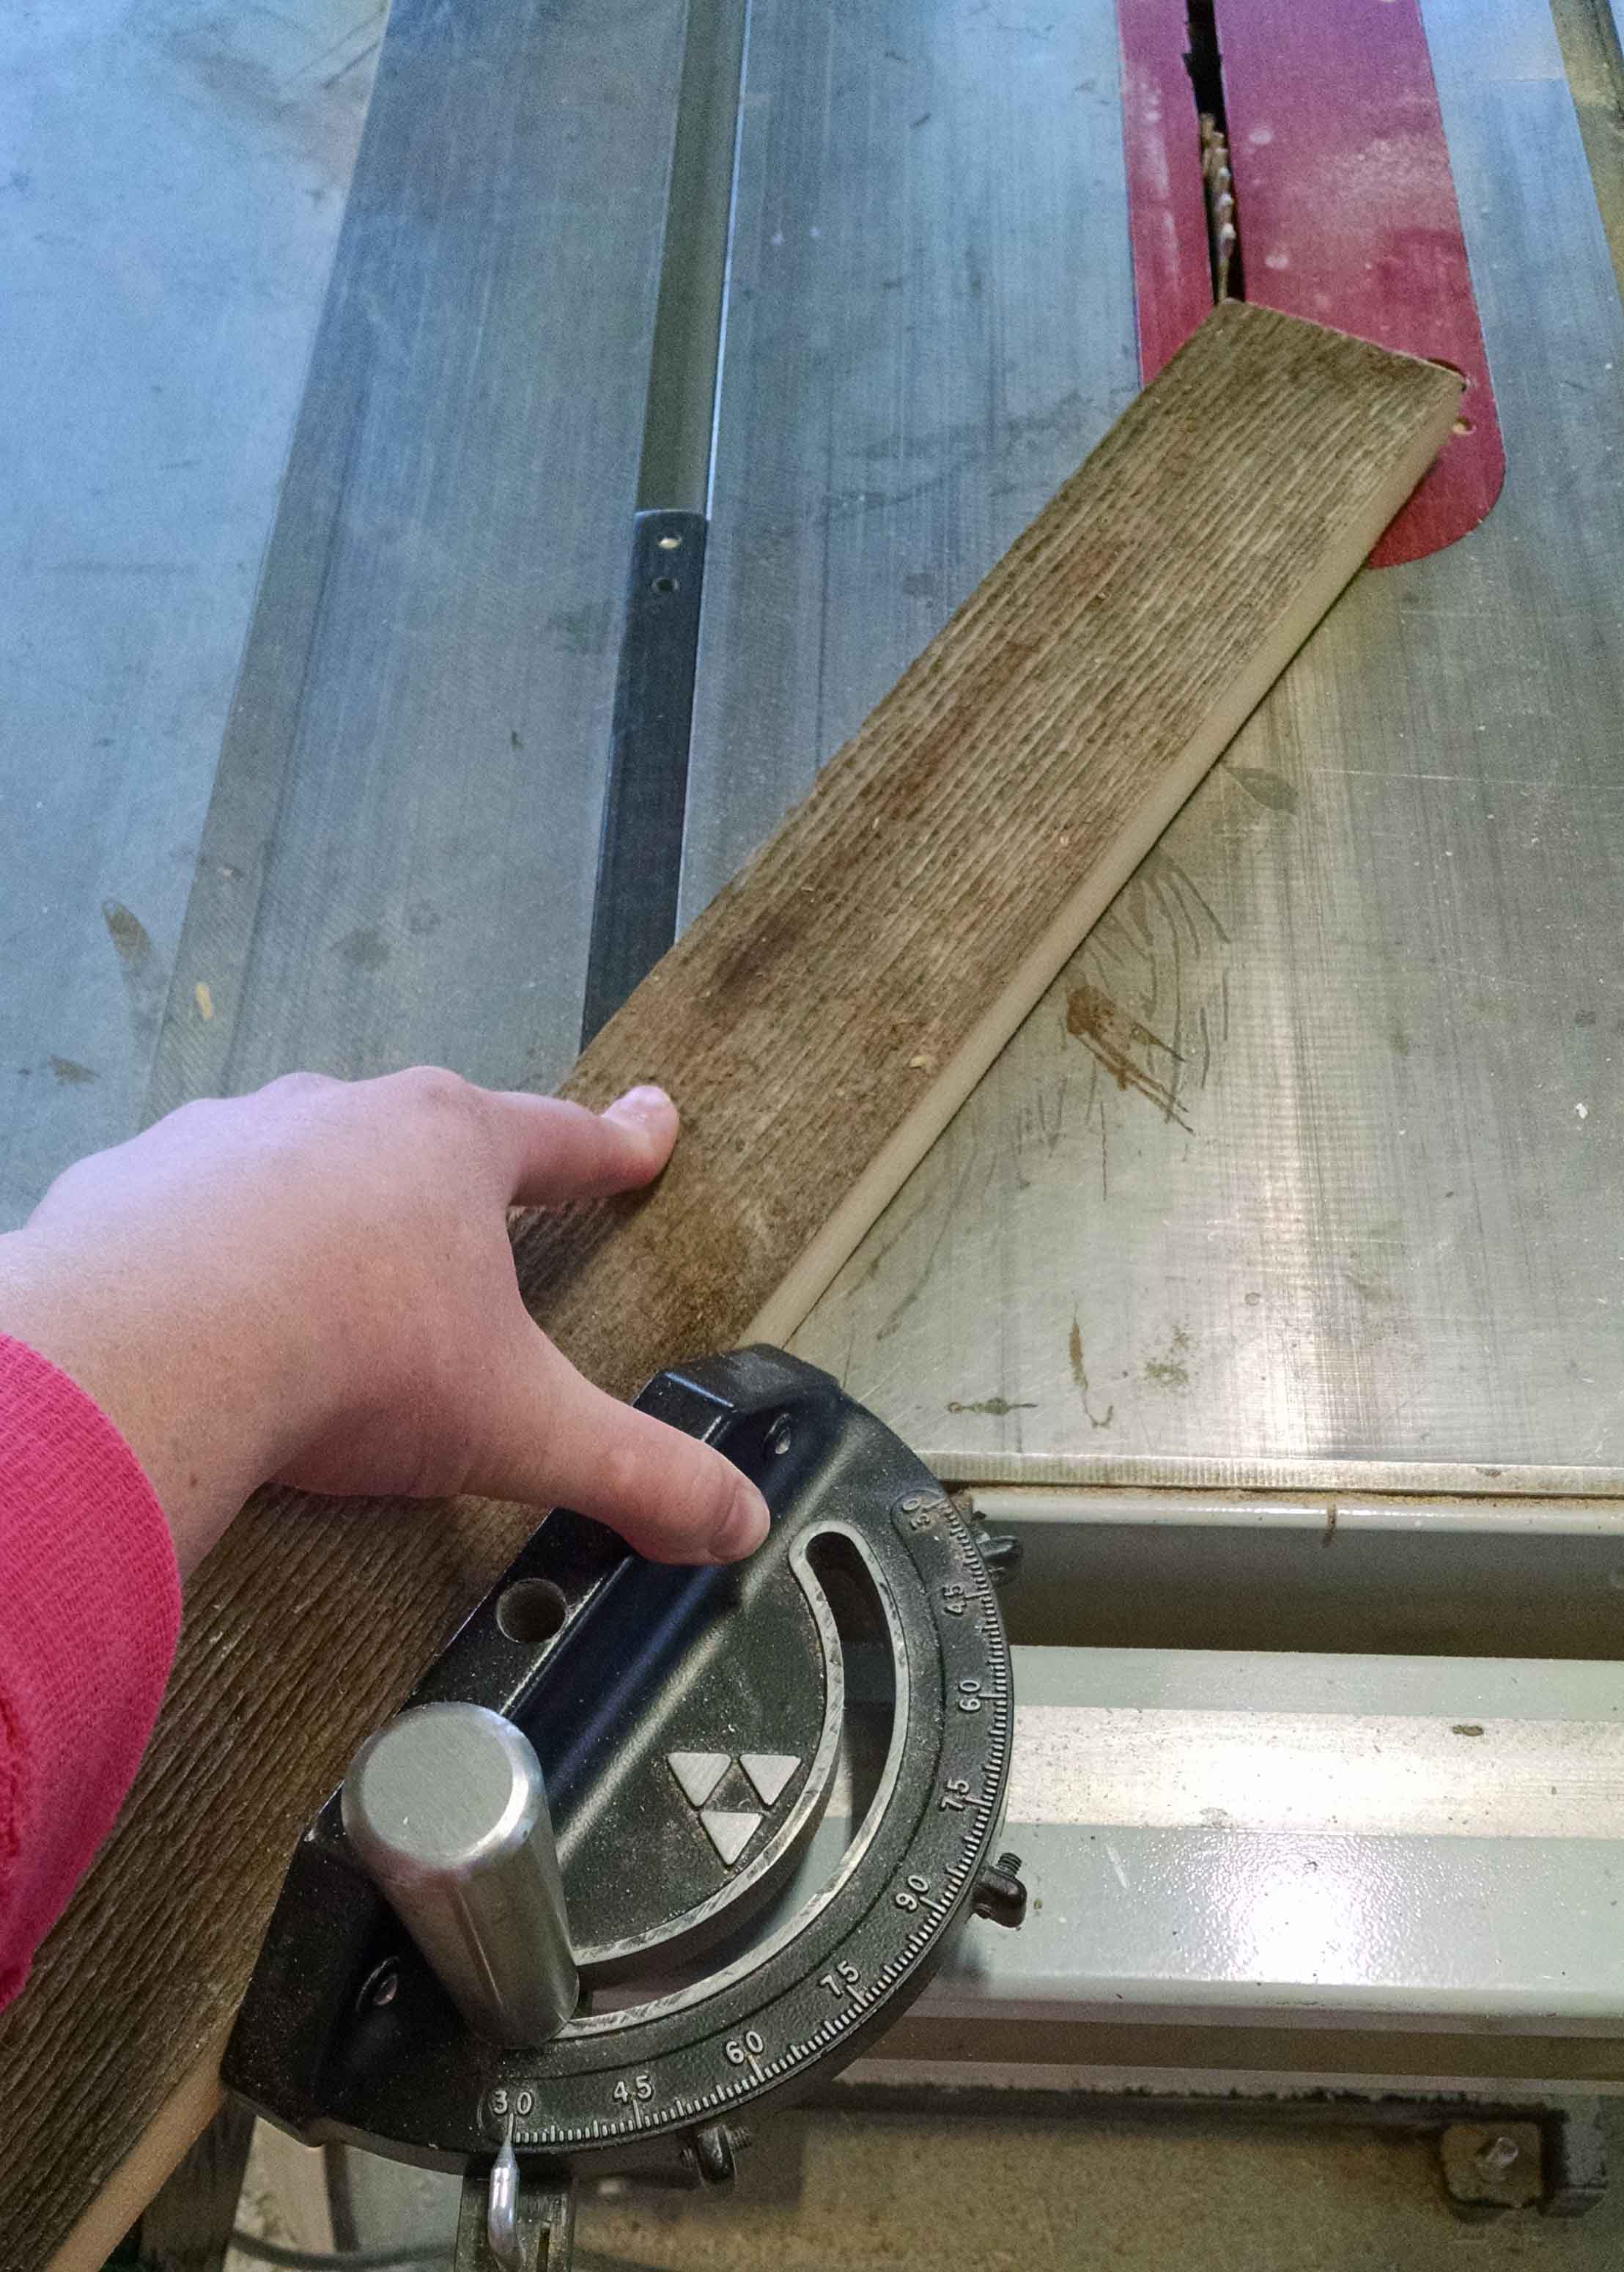
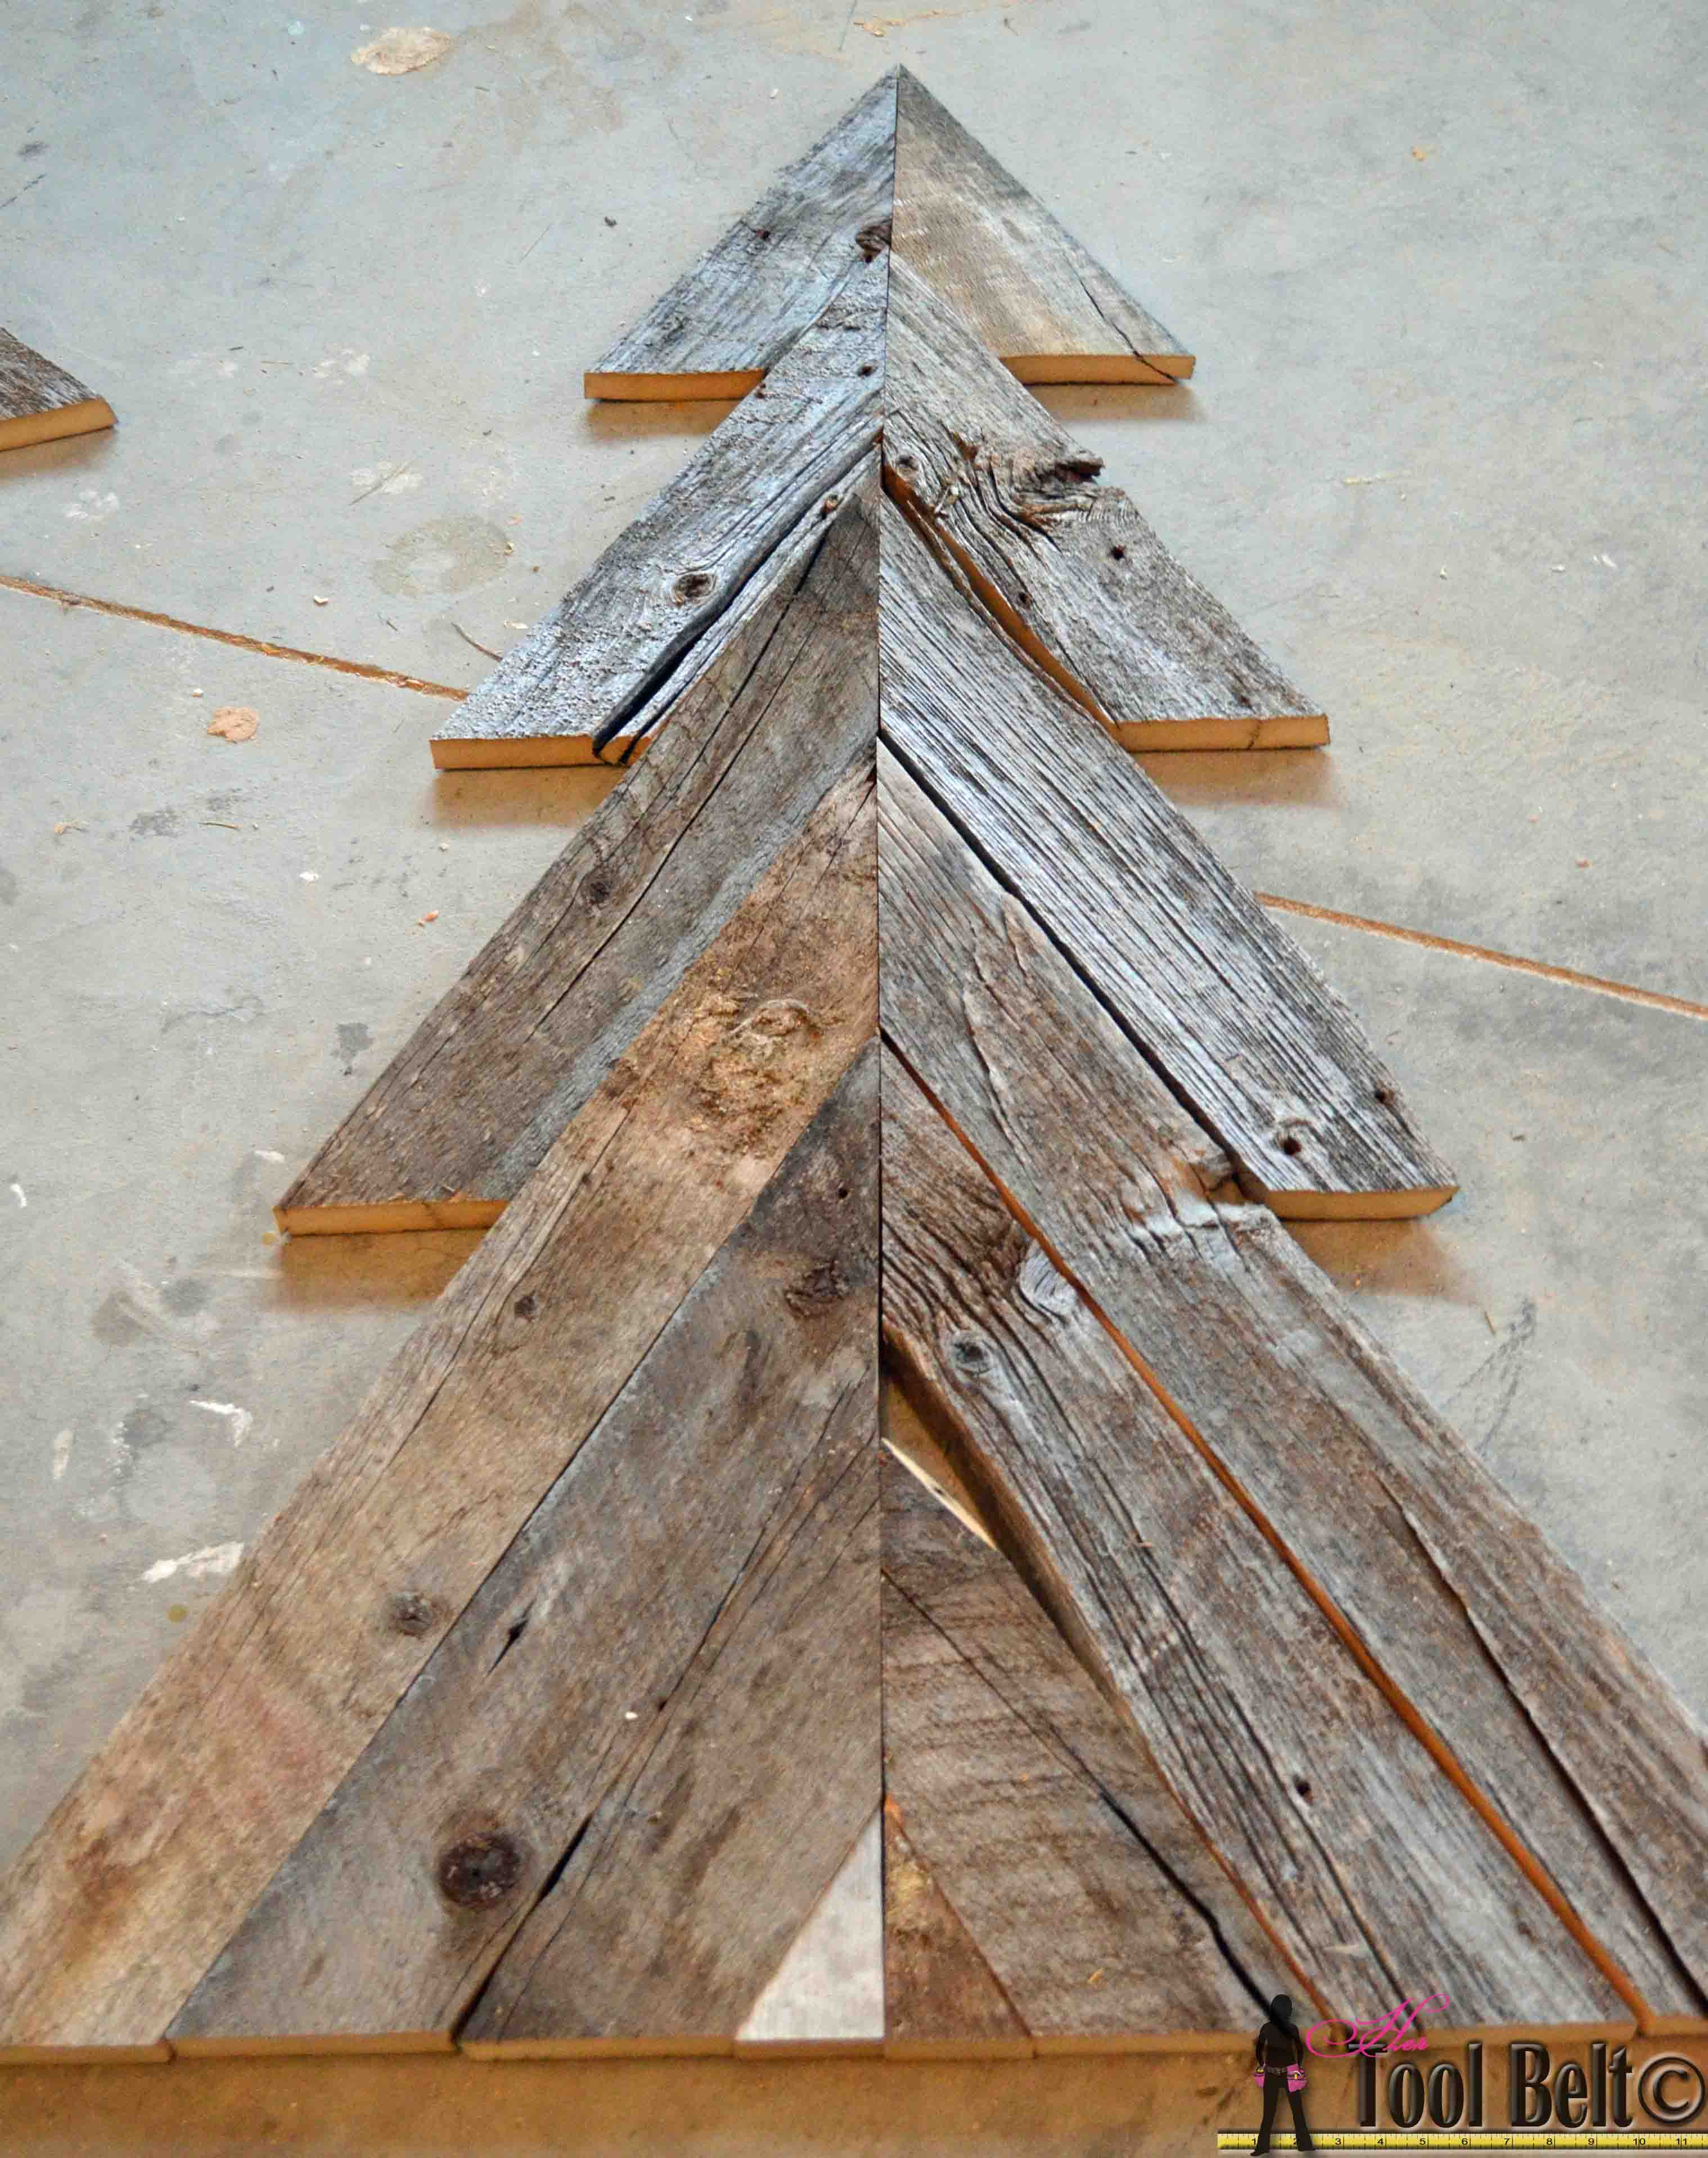
The first layer of the rustic christmas tree, dryfit together.

An easy way to add natural elements into your Christmas decor, build a rustic Christmas Tree from pallets or barn wood.

Next, use the 3″ wide boards and cut the pieces for the second layer.

rustic christmas tree- top layer dimension 3 inch corrected

Dryfit the 3″ boards.  I spaced my board ‘V’ about 2″ apart.

An easy way to add natural elements into your Christmas decor, build a rustic Christmas Tree from pallets or barn wood.


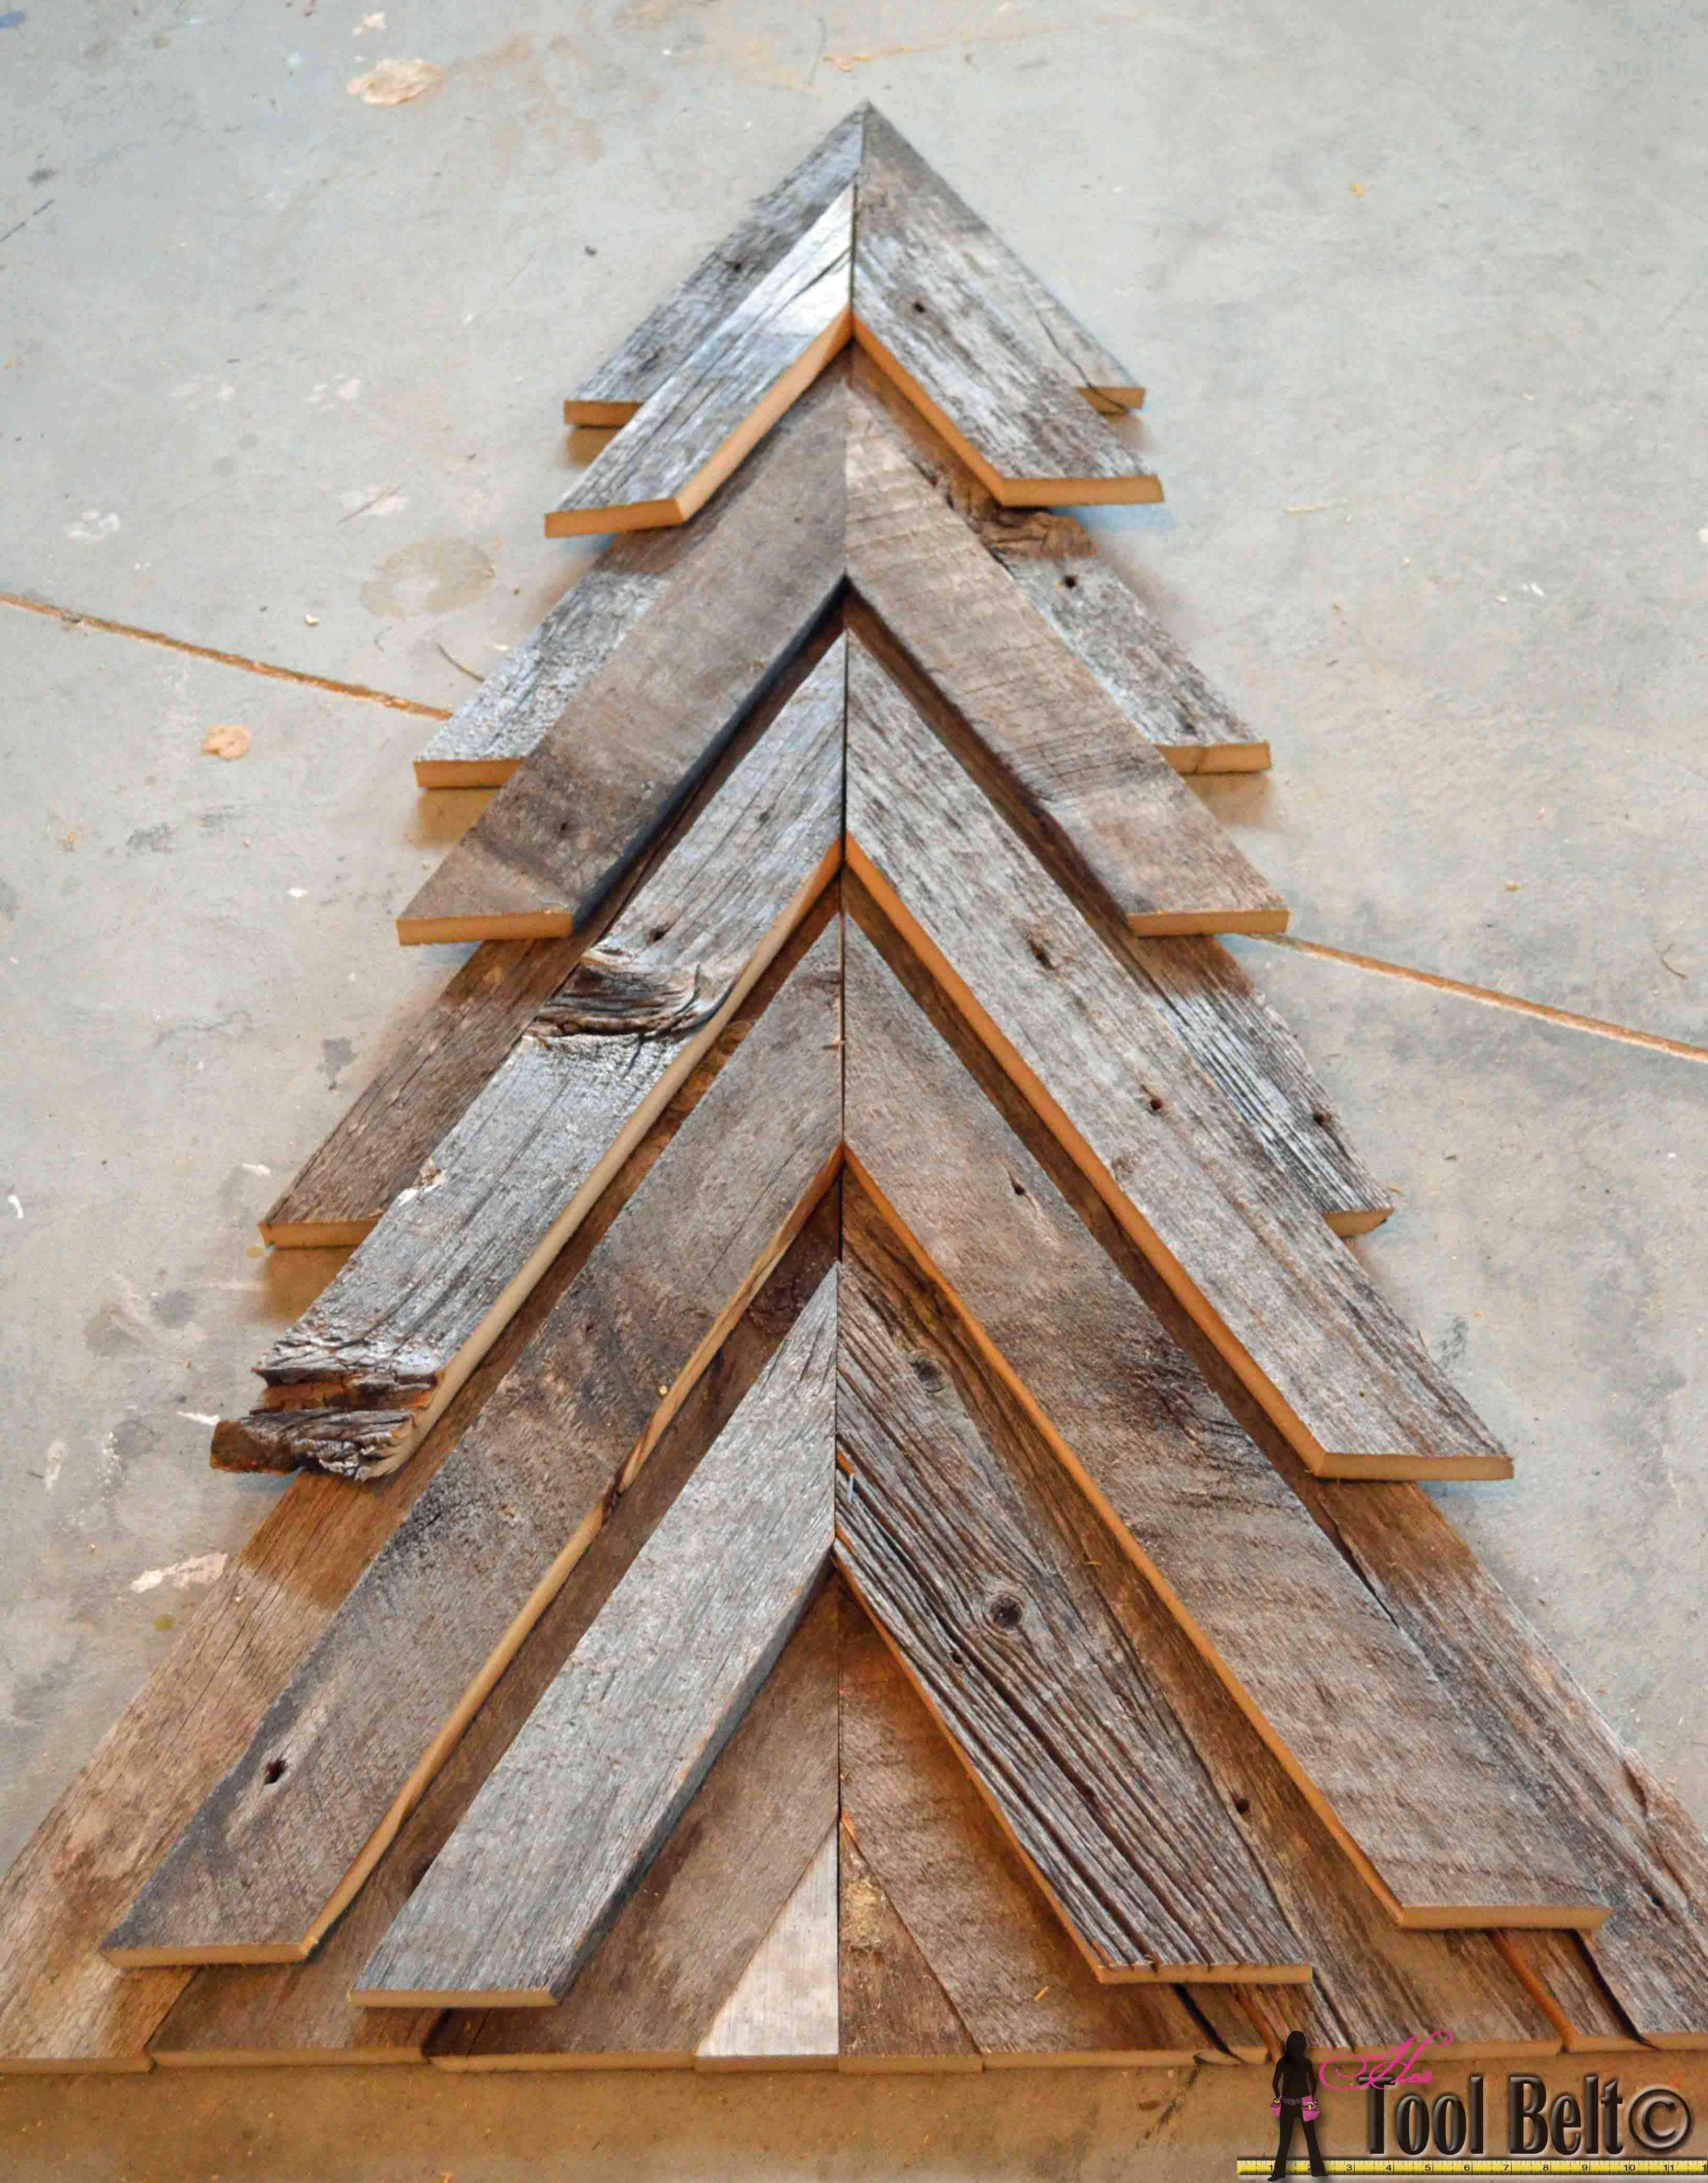
Cut a 1″ x 4″ furring strip, or any other scrap wood to about 50″.  I made a point at the top to match the angles of the tree.  Apply plenty of wood glue.  Place the 1st layer (4″ boards) onto the furring strip meeting at the center, nail in place with 1 1/4″ brad nails or screws.

An easy way to add natural elements into your Christmas decor, build a rustic Christmas Tree from pallets or barn wood.

Once you’re finished with the first layer, glue and nail the second layer boards into place using 2″ nails.  Allow the glue to dry, and that’s it!

This Rustic Christmas Tree is a fun decoration by itself, add hooks to hang ornaments, advent counters, or drill holes for lights.  I plan on adding lights, but I haven’t found the perfect ones yet.

Have a Merry Christmas!

An easy way to add natural elements into your Christmas decor, build a rustic Christmas Tree from pallets or barn wood.


Hop on over to the other awesome Projects on this Christmas Hop.

18 easy build Christmas projects

DIY Vintage Sled Pattern– Fynes Designs

Wood gift tag– Being Spiffy

Rustic scrap wood Christmas tree– Dukes and Duchesses

Snowflake String Art– DIY on the Cheap

Silhouette Stand Nativity– My Day Lights

Instagram stocking holders– Frenchie Wraps

Wooden sign– Poofy Cheeks

Repurposed Gift Carry All- Let’s Go Junking

Rustic Christmas Tree Decoration-Her Tool Belt

PB Inspired Wall Art– Create and Babble

Woodland Reindeer Ornaments-Whats UR Home Story

Advent calendar– Carissa Miss

DIY Stackable Slatted Fruit Crates– Pink When

Joy wood slice sign– Dandelion Patina

Gold Reindeer Décor– Simply Designing

Wooden Christmas Tree Display– Lauras Crafty Life

Pallet Wood Christmas Tree– Roubinek Reality

Christmas countdown chalkboard– Dogs Don’t Eat Pizza

Caddy with Herb Infused Oils– 365 Days of Crafts


Linked to My Favorite Link Parties, remodelaholic, savvysouthernstyle. homestoriesAtoZ

Related

Filed Under: Crafts, Free Woodworking Plans, Holiday Tagged With: barn wood, Christmas, christmas tree, rustic, ryobi

Attention: Any do-it-yourself project involves risk of some sort. Your tools, materials, and skills will vary, as will the conditions at your work site. Hertoolbelt LLC will not assume any responsibility or liability for damages or losses sustained or incurred in the course of your project or in the use of the item you create. Always follow the manufacturer's operating instructions in the use of tools, check and follow your local building codes, and observe all commonly accepted safety precautions.

Comments

  1. Virginia Fynes says

    November 17, 2014 at 8:00 am

    This is the funnest project!! I’m totally taking notes how to write a decent DIY tutorial, you rock! Love the tree, I must make one too!

    Reply
  2. Jill @ BeingSpiffy says

    November 17, 2014 at 3:39 pm

    I love projects like this that look difficult, but really aren’t!

    Reply
  3. Erin @ DIY on the Cheap says

    November 17, 2014 at 6:59 pm

    I love this! Might have to make one for our house. 🙂 Great job!

    Reply
  4. lindsay @ frenchie says

    November 17, 2014 at 7:54 pm

    I really love the dimensions of this! I’m going to give it a try!

    Reply
  5. Tracey @Let's Go Junking says

    November 19, 2014 at 11:20 am

    I’ve got the pallets and my Ryobi tools and I’m going to make this! Thanks for the great tutorial and the dimensions.

    Reply
  6. Christie says

    December 1, 2014 at 8:54 pm

    I adore this rustic Christmas tree! It looks so perfect for the upcoming holiday. Great job!

    Reply
    • Amy says

      December 1, 2014 at 9:00 pm

      Thanks!

      Reply
  7. Lisa@2PerfectionDecor says

    December 1, 2014 at 9:44 pm

    Fabulous tutorial!! Can’t wait to try!!

    Reply
  8. Carissa says

    December 2, 2014 at 1:01 pm

    beautiful! Gotta love Ryobi AND Christmas! I love your projects;)

    Reply
    • Amy says

      December 2, 2014 at 8:24 pm

      Thanks Carissa 🙂

      Reply
  9. Emily, Our house now a home says

    December 9, 2014 at 12:28 pm

    Beautiful! I love that you kept the wood original and rustic looking.

    Reply
    • Amy says

      December 9, 2014 at 3:46 pm

      Thanks!

      Reply
  10. Megan @ Our Pinteresting Family says

    December 12, 2014 at 11:04 am

    Love this tree! Great job. 🙂

    Reply
  11. Krista @ the happy housie says

    December 15, 2014 at 7:30 pm

    Love it!! Such a cool piece- featuring you at WIW this week – thanks for sharing it with us!

    Reply
    • Amy says

      December 15, 2014 at 8:39 pm

      Thanks!!!

      Reply
  12. Heather says

    December 16, 2014 at 8:19 am

    So impressive! Just love that it’s handmade! Thanks for linking up. I’m featuring you on Friday!

    Reply
  13. Michelle from Weekend Craft says

    December 17, 2014 at 5:40 am

    Brilliant as always Amy! Just had to feature this on Creative Spark Link Party this week. Hope you stop by today to link up and enter our giveaway! http://bit.ly/1GNpmUs

    Reply
    • Amy says

      December 17, 2014 at 8:26 am

      Thanks Michelle!

      Reply
  14. Matt says

    April 1, 2015 at 12:31 pm

    Hello! I made one of these with just a chop saw, and it was a bit difficult!! Now that I have a table saw to do the 30 degree angle cuts, I have a question 🙂 How do you hold the wood at 30 degrees on the table saw? Did you just use the miter bar, or did you rig up /build a cool miter box? I’d love to see it if you did, or hear how you made the cuts 🙂 Thanks for posting this. I found it via Pinterest last year and made my wife one. She loved it, and now her and her friends “need” more. 😉
    Matt

    Reply
    • Amy says

      April 1, 2015 at 12:56 pm

      Hi Matt,
      Oh I totally understand the ‘need’ more issue 🙂
      No cool miter box, although I do have one from Rockler but rarely use it. The miter gauge bar that came with my table saw rotates from 90 deg to 30 deg (opposite from a miter saw that starts at 0). I rotate it to 30 and hold the wood tight against it. (I’ll add a pic in the post.) But honestly if your miter doesn’t go to 30, some people sent me pics where they modified it to 40 instead and the trees still look great, just not as steep. Another idea, but will take longer. Mark a line for 30 deg and use a circular saw to follow the line.

      Reply
      • Matt says

        April 4, 2015 at 2:48 pm

        Thank you. Building another today!
        Matt

        Reply
  15. Jamie says

    November 10, 2015 at 11:44 am

    These are so fun to make! The first one I made I used the 45 degree angle. I didn’t know how to do a 60 degree cut with my saw. I watched a few YouTube videos and now onto my second tree! So I’ll have a short fat tree and tall and skinny! I love them!!

    Reply
    • Amy says

      November 10, 2015 at 11:55 am

      Oh that will look great, variation is a good thing! I’d love to see a pic when you’re done hertoolbelt at gmail dot com

      Reply
  16. Matthew says

    November 14, 2015 at 12:29 pm

    I really like the design of the Christmas tree. It looks simple but easy. I am making one and I wanted to know where start nailing the tree sections to the furring strip?

    Reply
    • Amy says

      November 14, 2015 at 12:43 pm

      Hi Matthew, I started at the bottom of the furring strip and nailed the small triangles first and worked my way up the tree.

      Reply
  17. Amanda says

    November 21, 2015 at 12:15 pm

    Just wondering, what is the final height of the tree in the tutorial?

    Reply
    • Amy says

      November 21, 2015 at 5:31 pm

      It’s about 52″.

      Reply
  18. Creatively Living says

    November 6, 2016 at 7:58 pm

    This turned out really cute !

    Reply
    • Amy says

      November 12, 2016 at 9:06 pm

      Thank you

      Reply
  19. Jared says

    November 17, 2016 at 9:02 pm

    I made a quick video building your plan, Thought you might like to see it.
    https://youtu.be/b2UCsAvaDR8

    Reply
  20. Carmen says

    November 20, 2016 at 11:55 am

    That’s more or less the missing bit of the puzzle!
    Done well guys.

    Reply
  21. Ralph Dodd says

    March 17, 2021 at 6:41 pm

    I love this idea. I could spend the entire year just making these and getting ready for the holidays all year long. Our home has rustic decor and this would fit in nicely. Thank you for sharing.
    -Ralph Roofing Durham

    Reply

Leave a Reply Cancel reply

Your email address will not be published. Required fields are marked *

This site uses Akismet to reduce spam. Learn how your comment data is processed.

Search Her Tool Belt

Follow Me!

  • Bloglovin
  • Email
  • Facebook
  • Google+
  • Instagram
  • Pinterest
  • RSS
  • Twitter
  • YouTube

Top Posts & Pages

Custom Drill Storage and Charge Station - Easy
Pallet Planter Box For Cascading Flowers
Wood Bunny Easter Basket
Cordless Drill Storage - Charging Station
How to Build a Redwood Pergola with Arch Detail
Convertible Picnic Table and Bench
Double X Console Table Plans
Wood DIY LOVE Marquee Letters

Check out more projects

Copyright

Thank you for wanting to share my work! No need for my permission to pin my work or to feature 1 or 2 pictures with full watermarks intact that link back to the original project. Please do NOT copy tutorials.

Disclosure & Privacy Policy

Disclaimer

Copyright © 2023 · Magazine Pro Theme on Genesis Framework · WordPress · Log in

This website uses cookies to improve your experience. We'll assume you're ok with this, but you can opt-out if you wish.Accept Read More
Privacy & Cookies Policy

Privacy Overview

This website uses cookies to improve your experience while you navigate through the website. Out of these, the cookies that are categorized as necessary are stored on your browser as they are essential for the working of basic functionalities of the website. We also use third-party cookies that help us analyze and understand how you use this website. These cookies will be stored in your browser only with your consent. You also have the option to opt-out of these cookies. But opting out of some of these cookies may affect your browsing experience.
Necessary
Always Enabled
Necessary cookies are absolutely essential for the website to function properly. This category only includes cookies that ensures basic functionalities and security features of the website. These cookies do not store any personal information.
Non-necessary
Any cookies that may not be particularly necessary for the website to function and is used specifically to collect user personal data via analytics, ads, other embedded contents are termed as non-necessary cookies. It is mandatory to procure user consent prior to running these cookies on your website.
SAVE & ACCEPT