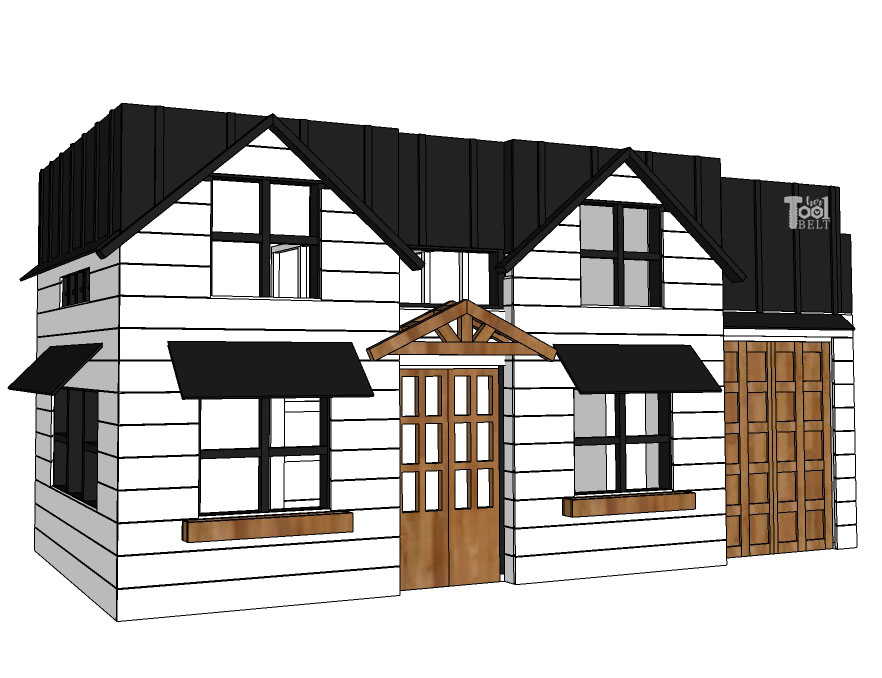
The basement playhouse is nearly complete. Time to add the cedar doors and accent pieces. This post will cover building the cedar doors and cedar flower boxes.
You can check out the tutorials for the whole playhouse build:
- Part 1 – Basement Playhouse Build – Framing
- Part 2 – Basement Playhouse Build – Shiplap & Sheetrock
- Part 3 – Basement Playhouse Build – Trimming all the things
- Part 4 – Basement Playhouse Build – Cedar Doors & Accents
- Basement Playhouse Reveal!
- House Frame Doll Bed
- House Frame Doll Bunk Bed
This post contains some affiliate links for your convenience. Click here to read my full disclosure policy.
Materials Used
- 16 – 5/8″ x 5 1/2″ x 6′ Cedar Pickets (preferably flat top over dog ear)
- 2 – 5/8″ x 3 1/2″ x 6′ Cedar Pickets (preferably flat top over dog ear)
- 2″ brad nails
- 1 1/4″ brad nails
- 1″ or 3/4″ brad nails
- wood glue
- 8 – concealed hinges (I used full overlay frameless)
Cedar Planter Boxes
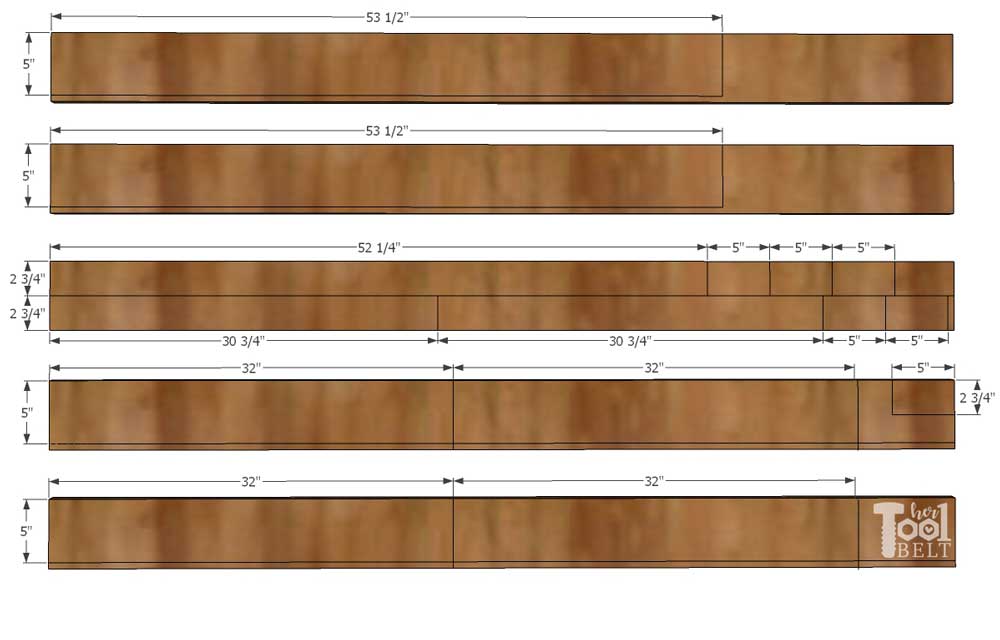
Cedar Planter Boxes Cut List
- 2 – 5/8″ x 5″ x 53 1/2″ Side planter box front/back
- 1 – 5/8″ x 2 3/4″ x 52 1/4″ Side planter box bottom
- 6 – 5/8″ x 2 3/4″ x 5″ Planter box ends
- 2 – 5/8″ x 2 3/4″ x 30 3/4″ Front planter box bottom
- 4 – 5/8″ x 5″ x 32″ Front planter box front/back
Cedar Planter Boxes Cut Diagram
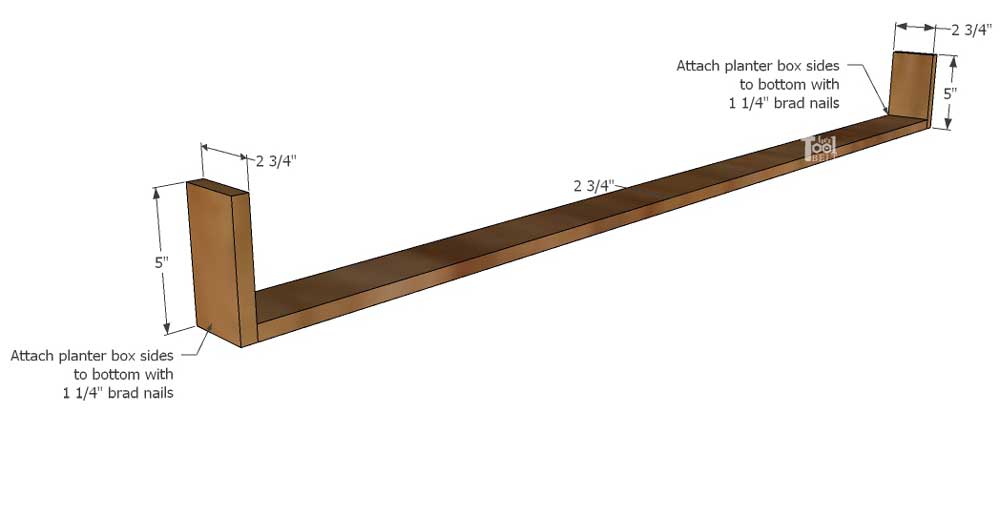
Cedar Planter Box Assembly
Attach planter box sides to each end of the planter box bottoms. Secure with brad nails.
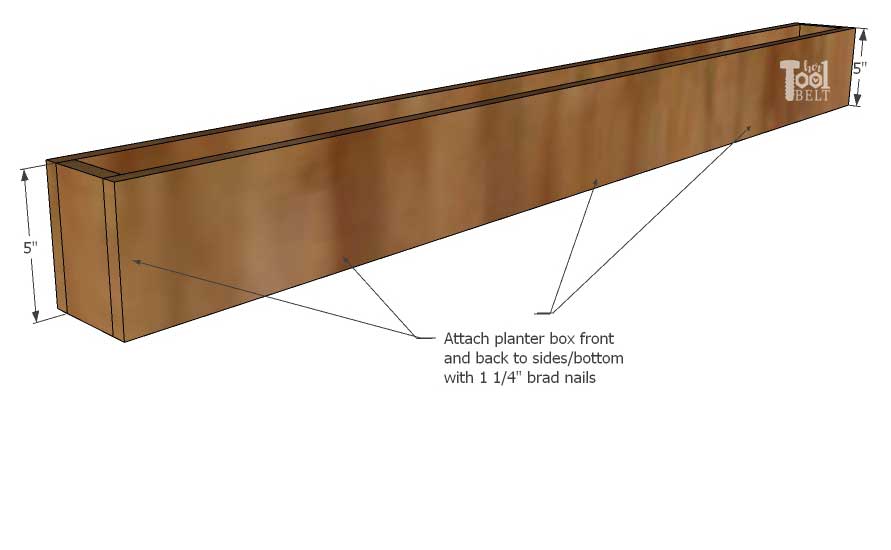
Attach a planter box front to the sides and bottom with 1 1/4″ brad nails. Repeat for the back side.
Center the planter box under a window and secure to the playhouse with 2″ brad nails.
Cedar Front Doors
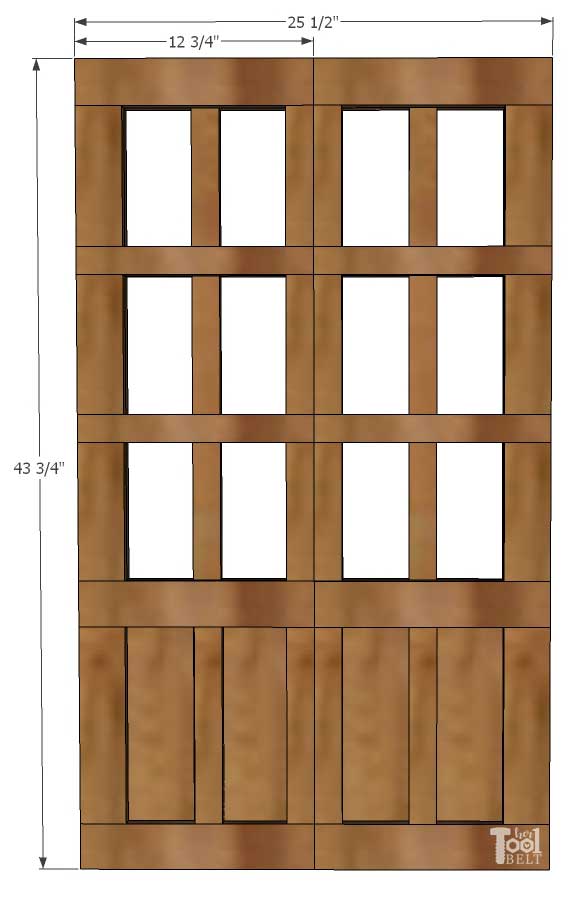
Cedar Front Door Cut List
- 4 – 5/8″ x 3 5/8″ x 15 3/4″
- 4 – 5/8″ x 3 5/8″ x 2 1/2″
- 4 – 5/8″ x 1 1/2″ x 43 3/4″
- 4 – 5/8″ x 1 1/2″ x 12 3/4″
- 2 – 5/8″ x 2 1/2″ x 43 3/4″
- 6 – 5/8″ x 2 1/2″ x 12 3/4″
- 2 – 5/8″ x 2 1/2″ x 10 3/4″
- 6 – 5/8″ x 2 1/2″ x 7 1/2″
- 8 – 5/8″ x 1 1/2″ x 3 5/8″ (Use scraps from the planter boxes)
- 4 – 5/8″ x 1 1/2″ x 10 3/4″
- 6 – 5/8″ x 1 1/2″ x 7 1/2″
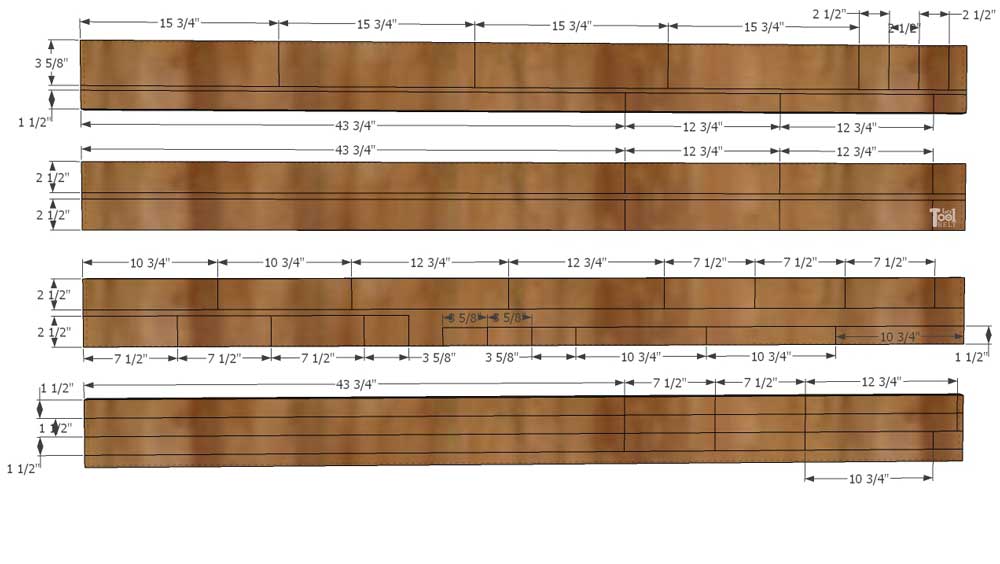
Cedar Front Door Cut Diagram
Cedar Front Door Assembly
Layout the bottom layer of the front doors as shown in the diagram.
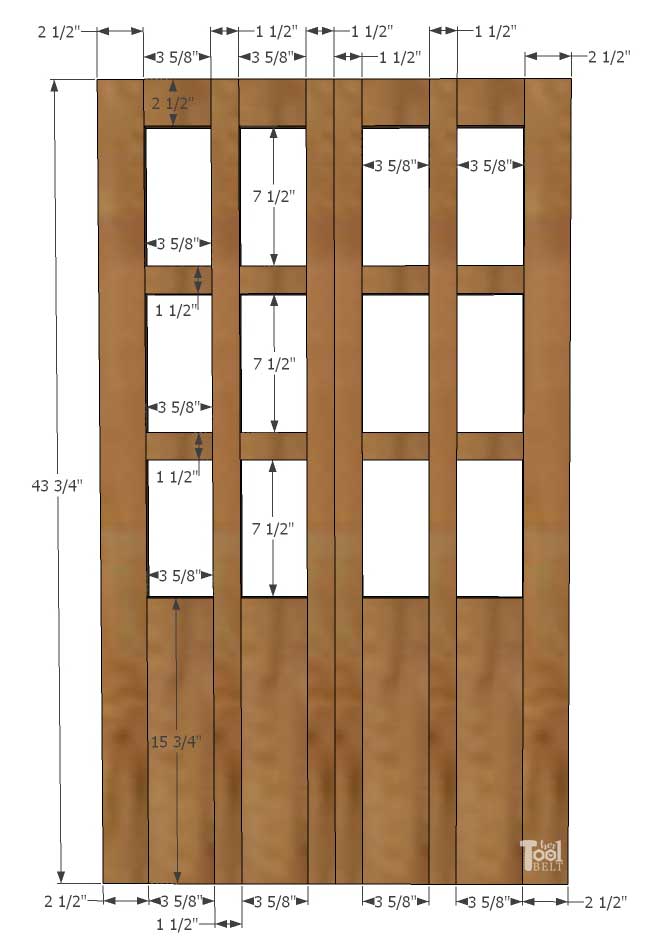
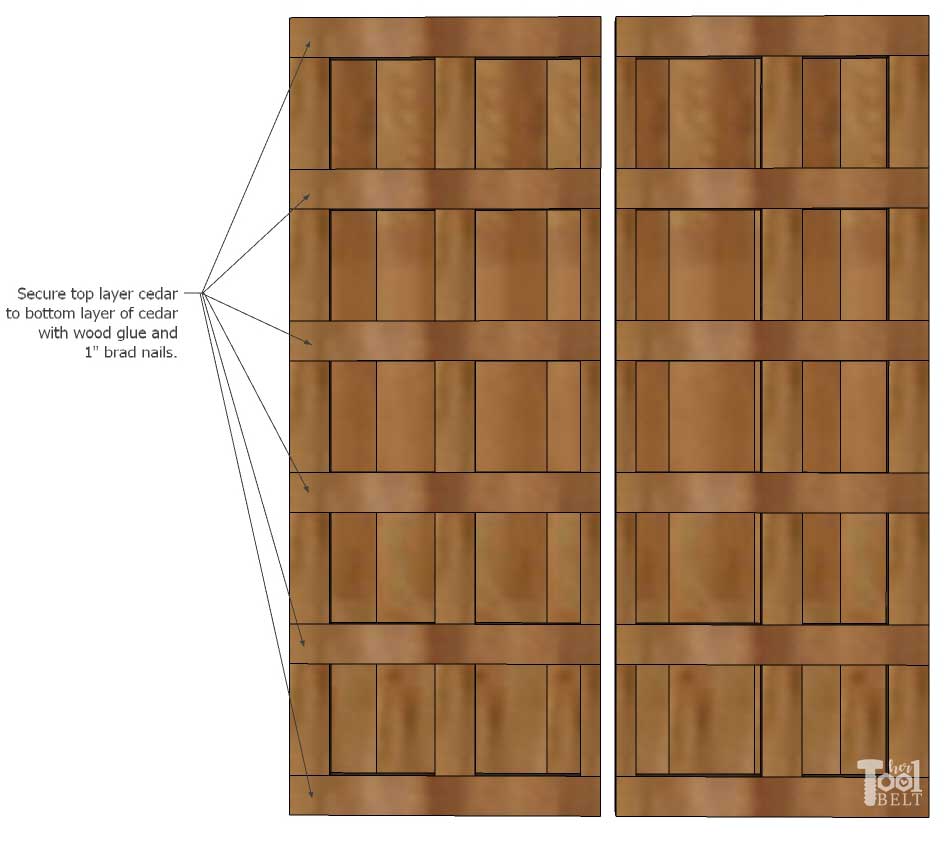
Lay the top layer of the front door over the bottom layer. Top layer as shown below.
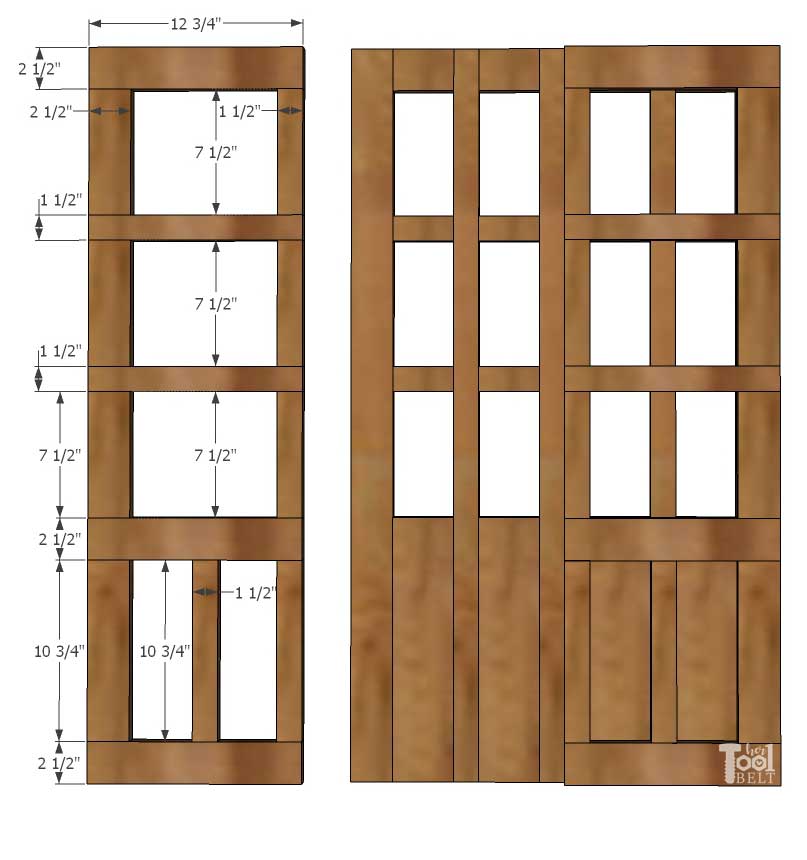
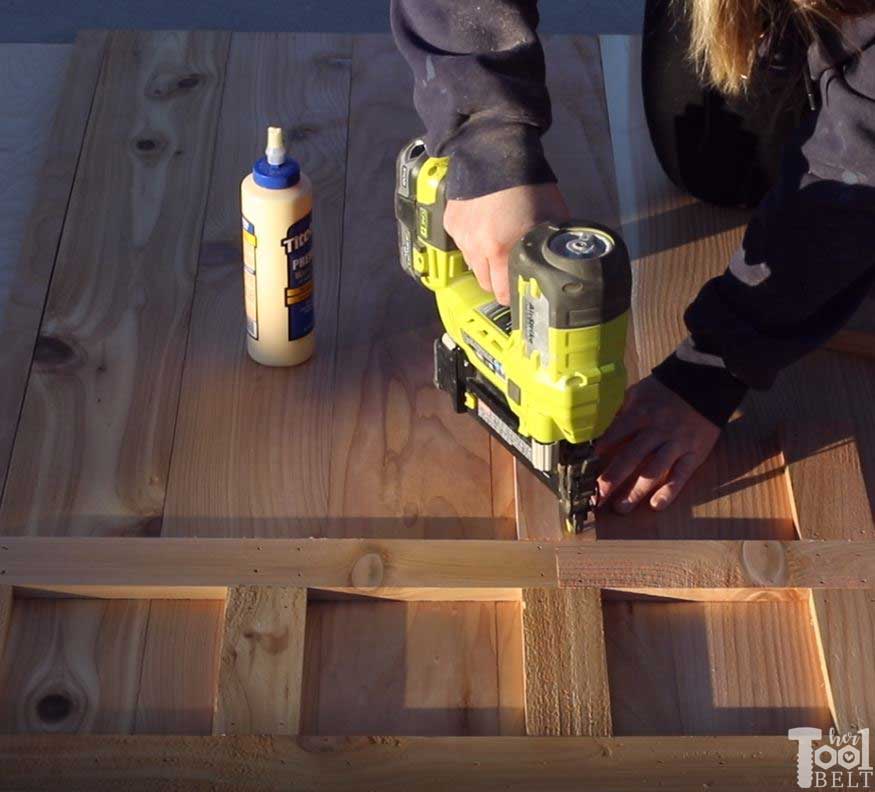
Square everything up. Use 1″ or 3/4″ brad nails and glue to secure the top layer to the bottom layer. The doors are mirror image.
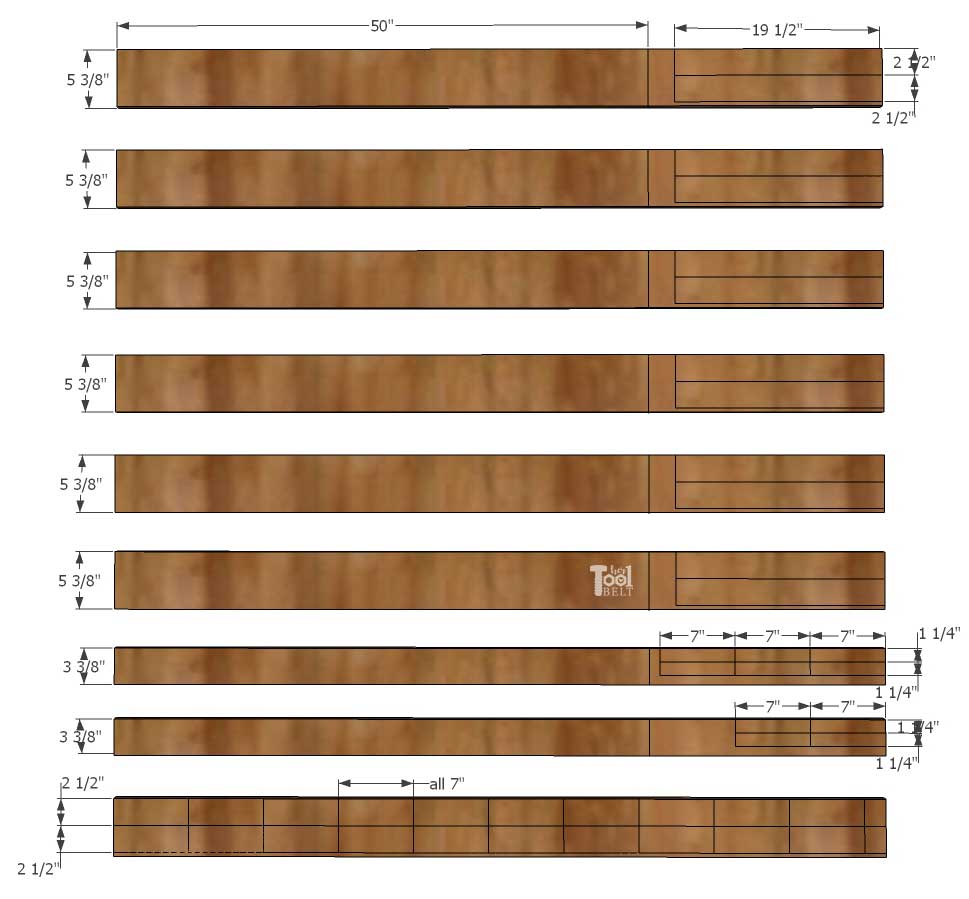
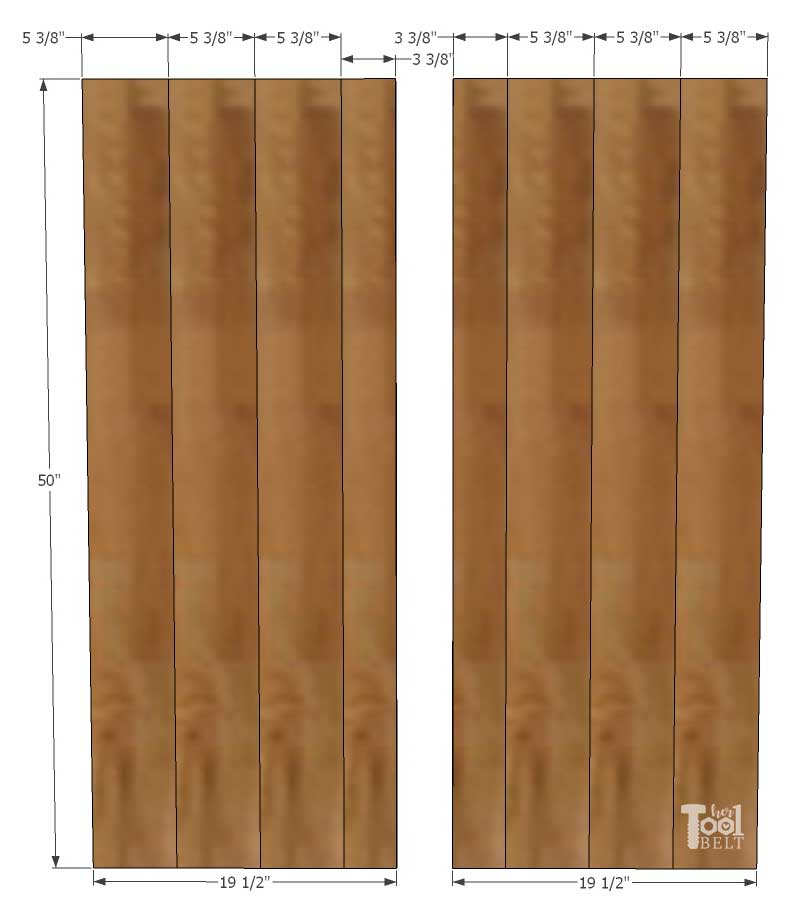
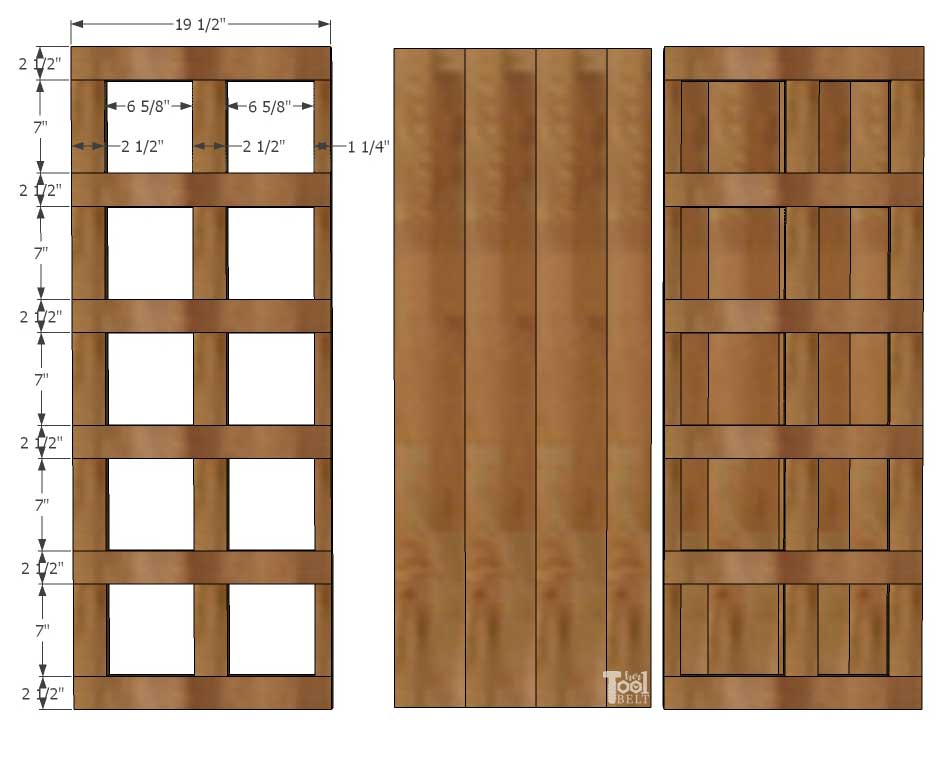
Cedar Garage Door
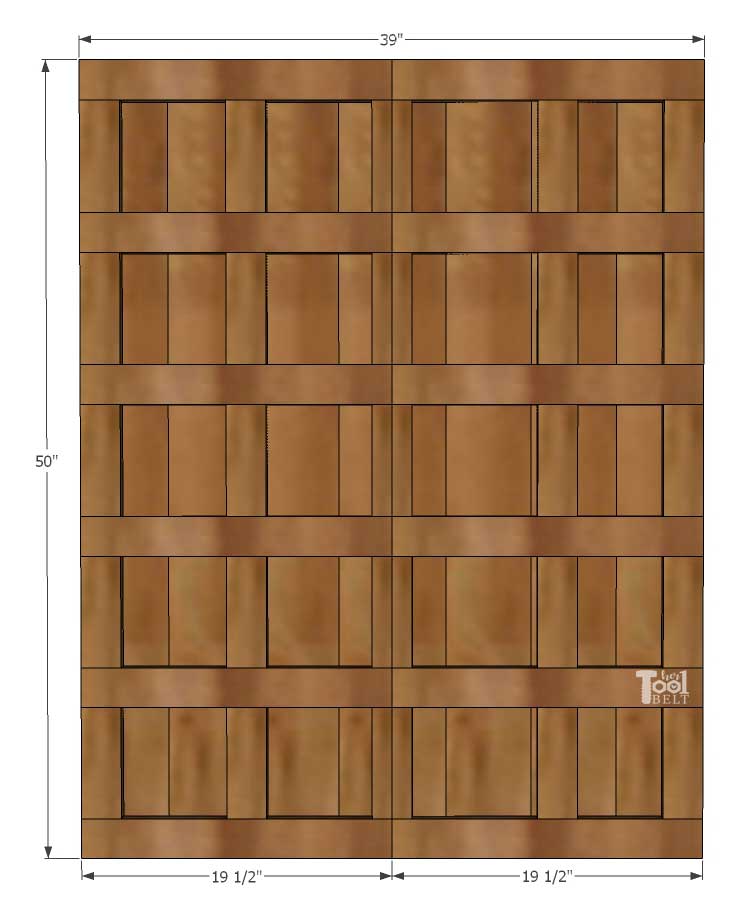
Cedar Garage Door Cut List
- 6 – 5/8″ x 5 3/8″ x 50″
- 2 – 5/8″ x 3 3/8″ x 50″
- 12 – 5/8″ x 2 1/2″ x 19 1/2″
- 20 – 5/8″ x 2 1/2″ x 7″
- 10 – 5/8″ x 1 1/4″ x 7″
Cedar Garage Door Cut Diagram
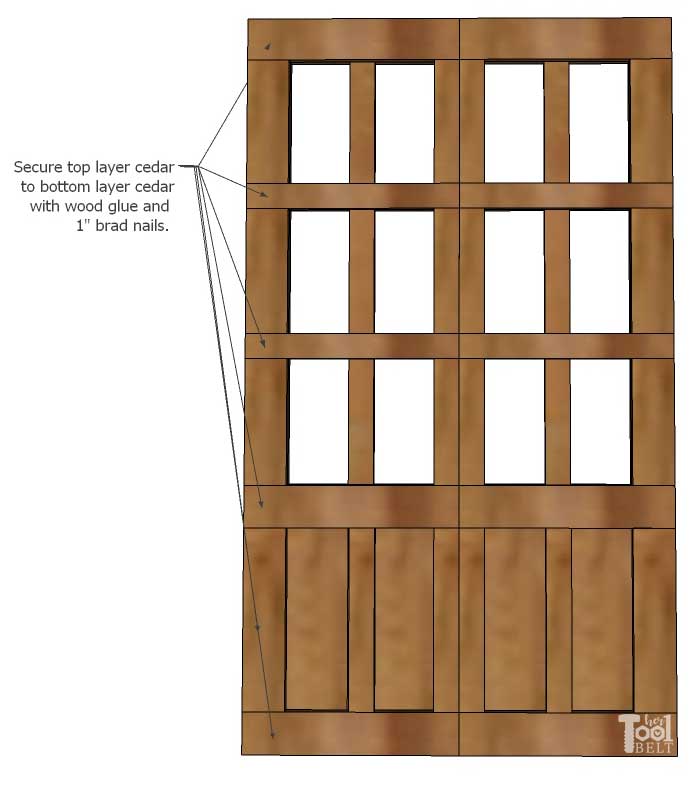
Cedar Garage Door Assembly
Layout the bottom layer of the garage doors as shown in the diagram.
Lay the top layer of the garage door over the bottom layer. Top layer as shown below.
Square everything up. Use 1″ or 3/4″ brad nails and glue to secure the top layer to the bottom layer. The doors are mirror image.
Attach Doors to Frame
I like using euro concealed hinges because they are adjustable and they’ll stay open or close. The doors are sized for 3/4″ overlap over the frame (full overlay).
I installed 2 euro hinges on each door about 4″ from the top and bottom of the doors.
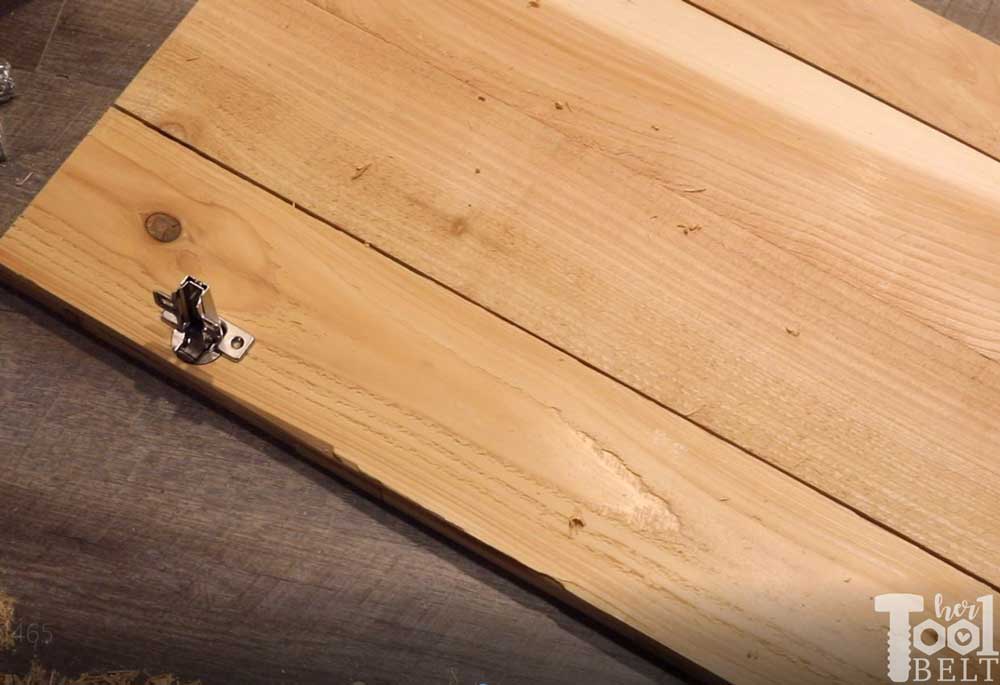
Then attached the hinges to the door frame and adjusted as necessary.

Leave a Reply